Claim Applet
Purpose and Overview
The Claim Applet is a powerful tool designed to streamline the entire expense management process. It moves beyond simple reimbursement by integrating entitlement tracking, fund management, and complex approval workflows.
Key Features Overview
Who Benefits from This Applet?
Employees & Claimants:
- Easy submission of claims with attachments
- Real-time status tracking
- Quick approvals and reimbursements
- Personal entitlement visibility
Managers & Approvers:
- Simple approval workflow
- Clear visibility into claim details
- Automated notifications
- Compliance enforcement
Finance & HR Teams:
- Automated validation against entitlements
- Reduced processing time
- Complete audit trail
- Accurate reimbursement calculation
Executive Leadership:
- Better control over expense spending
- Reduced fraud risk
- Improved employee satisfaction
- Data-driven expense analysis
What Problems Does This Solve?
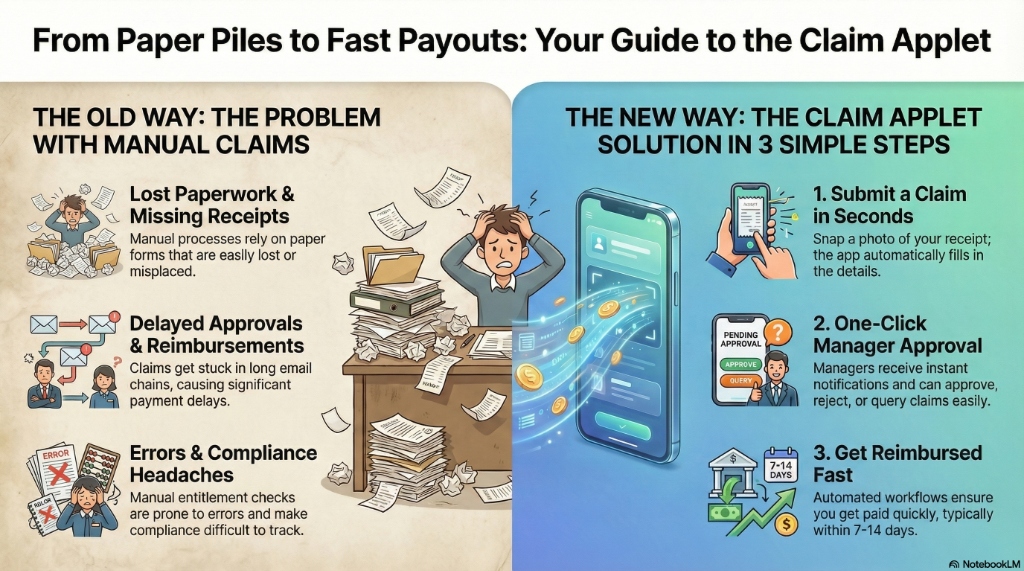
The Manual Claim Process Problem:
Traditional claim management relies on paper forms and email chains. Common issues include:
- Lost paperwork and missing receipts
- Delayed approvals and reimbursements
- Manual entitlement checks leading to errors
- Difficult compliance tracking
- No centralized reporting
The Claim Applet Solution:
- Digital submission - Submit claims anytime, anywhere with mobile support
- Automated workflows - Intelligent routing and notifications
- Entitlement validation - Automatic checks against limits and policies
- Complete traceability - Full audit history for every claim
- Flexible reporting - Analyze expenses by department, type, or employee
- Integration ready - Connects with payroll and accounting systems
Key Features Overview
Key Concepts
Understanding the Claim Framework
Every claim system must address three fundamental aspects. The Claim Applet provides structured handling:
| Aspect | Component | Practical Example |
|---|---|---|
| Who is claiming? | Employee/Claimant | Sales Representative, Department Manager |
| What is being claimed? | Claim Item & Category | Travel Expenses, Medical Reimbursement |
| How is it processed? | Approval Workflow & Entitlements | Multi-level approval, Monthly limits |
Claim Hierarchy Structure
Think of the claim process as a structured flow:
Organization
│
├── Employees (Claimants) ──→ WHO is claiming?
│   │
│   └── Entitlements ──→ WHAT can they claim?
│       │
│       └── Claim Items ──→ SPECIFIC expense types
│           │
│           └── Categories ──→ Classification for reporting
│
└── Approval Workflow ──→ HOW claims are processed
    │
    └── Cut-Off Periods ──→ WHEN claims can be submitted
Flow Through the Hierarchy:
- Organization: Company-wide policies
- Employee: Individual entitlements
- Claim Item: Specific expense (e.g., Mileage)
- Category: Grouping (e.g., Travel)
- Approval: Routing to approvers
- Cut-Off: Submission deadlines
This structure enables:
- Precise control over claims
- Flexible reporting by any dimension
- Clear accountability for approvals
- Period-based processing for finance
The “Golden Triangle” of Claims
To effectively manage the system, it is crucial to understand how Claim Items, Claim Accounts, and Claim Entitlements work together.
| Component | Analogy | Definition | Example |
|---|---|---|---|
| Claim Account | The “Fund” or “Wallet” | A bucket of money designated for a specific purpose. | Medical Fund |
| Claim Entitlement | The “Limit” | The rule defining how much of that fund an employee gets. | RM 1,000 per year |
| Claim Item | The “Expense” | The actual item selected when making a claim. It draws from the Account. | GP Visit, Dental Care |
How they link:
- You create a Claim Account (e.g., Medical Fund).
- You create a Claim Entitlement linked to that Account (e.g., RM 1000 limit).
- You create Claim Items (e.g., Dental) and link them to the Claim Account.
- When an employee claims “Dental”, the system checks the “Medical Fund” balance defined by the “Entitlement”.
Quick Start Guide
Get up and running quickly with these essential workflows.
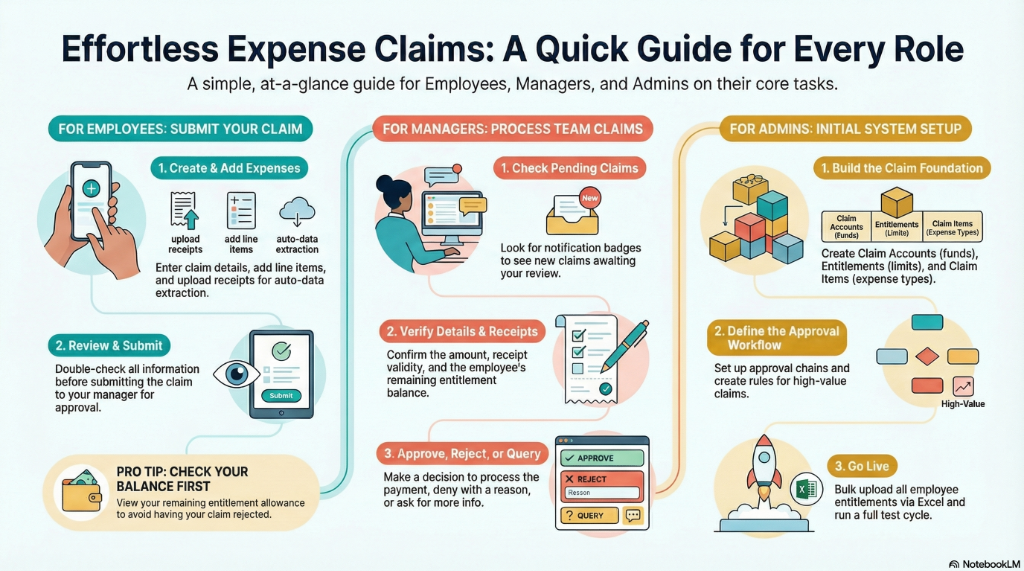
For Employees: Submit Your First Claim
Goal: Submit a claim and get reimbursed in 5 simple steps.
- Navigate: Go to My Claims from the sidebar
- Create Header: Click "+" → Enter claim title (e.g., “Oct Medical”) → Select your Branch → Create
- Add Expenses:
- Click “Add Line”
- Select Claim Item (e.g., “GP Visit”)
- Enter Amount (e.g., RM 150)
- Add Description (“Visit to Dr. Ahmad”)
- Upload Receipt (system auto-extracts data with OCR)
- Review: Check all details are correct
- Submit: Click Submit → Claim goes to your manager
What happens next? You’ll get email notifications when approved/rejected. Payment typically within 7-14 days.
Pro Tip: Enable “Display Entitlement Balance” to see your remaining allowance before claiming.
For Managers: Approve Your First Claim
Goal: Review and approve employee claims in 3 steps.
- Check Pending: Go to Pending Approvals (you’ll see a notification badge)
- Review Details:
- Click on the claim to open
- Check: Amount, receipts, employee entitlement balance
- Verify receipts match the claim details
- Decide:
- Approve: Click ✓ Approve → Employee gets paid
- Reject: Click ✗ Reject → Add reason → Employee notified
- Query: Click Query → Ask for more info
Going on Leave? Set up delegation: Settings > Claim Approval Delegation Period → Select someone to approve on your behalf.
For Admins: Initial System Setup
Goal: Get the claim system ready for employees in 6 steps.
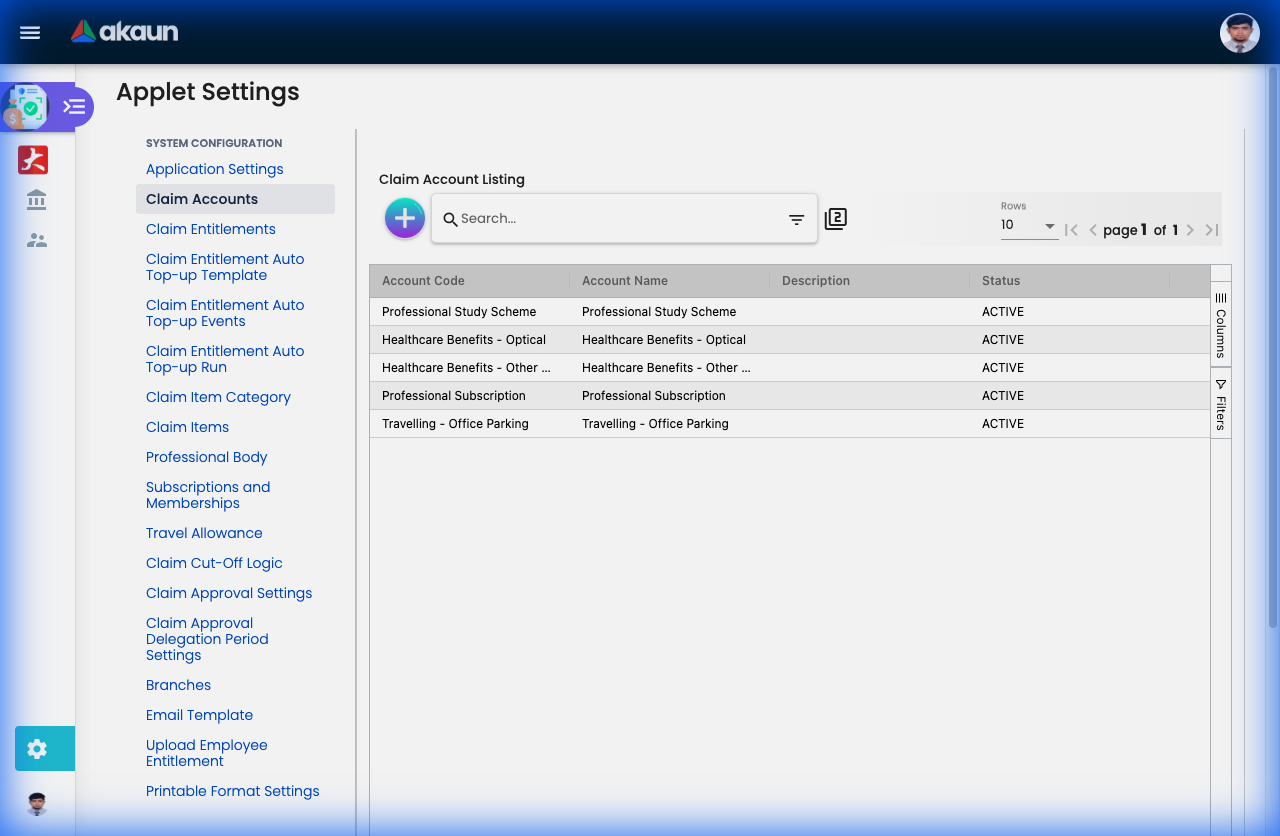
Step 1: Create Claim Accounts (Settings > Claim Accounts)
- Create funds like “Medical Fund”, “Transport Fund”
- Set currency and enable balance display
Step 2: Create Entitlements (Settings > Claim Entitlements)
- Link to Claim Accounts (e.g., Medical Fund → RM 1,500/year)
- Set recurring top-ups (Monthly/Yearly)
Step 3: Create Claim Items (Settings > Claim Items)
- Define expense types (GP Visit, Taxi, Parking)
- Link each item to a Claim Account
- Enable required fields (OCR, receipts, etc.)
Step 4: Set Up Approvals (Settings > Claim Approval Settings)
- Define approval chains (Manager → HOD → Finance)
- Set conditions (claims > RM 1000 need extra approval)
Step 5: Upload Employee Entitlements (Settings > Upload Employee Entitlement)
- Bulk import all employee allowances via Excel
Step 6: Test
- Create a test claim as an employee
- Approve it as a manager
- Verify the full flow works
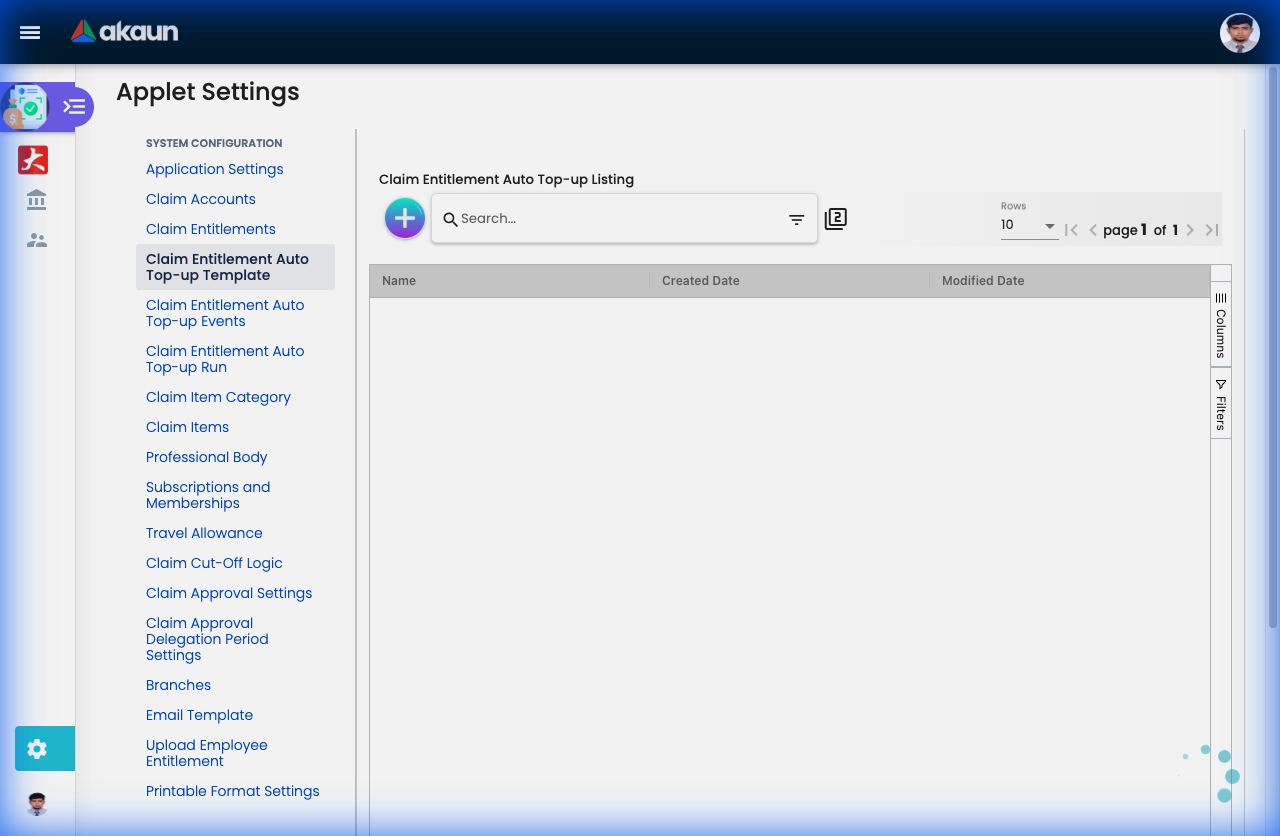
Ongoing: Set up Auto Top-up for automatic monthly/yearly renewals.
New to the system? Start with the basics:
- Employees should explore My Claims and submit a test claim
- Managers should check Pending Approvals to practice the workflow
- Admins should review Configuration & Settings below for detailed setup guides
Entitlement Tracking
Monitor your claim limits and balances in real-time.
What is Entitlement Tracking?
Entitlement Tracking shows employees and managers how much of their allocated allowances they’ve used and what remains. Think of it as your “claim wallet balance.”
For Employees:
- See your remaining balance before claiming (e.g., “You have RM 800 left in Medical Fund”)
- Avoid rejected claims due to insufficient balance
- Plan your expenses throughout the year
For Managers:
- Monitor team spending against budgets
- Identify employees who haven’t used their entitlements
- Track utilization rates by department
For Finance/HR:
- Real-time visibility into budget consumption
- Forecast year-end accruals
- Identify trends (underutilization vs overutilization)
How to Check Your Entitlement Balance
Employees:
- Go to My Claims or Dashboard
- Look for “My Entitlements” widget/section
- See all your allowances with:
- Total Allocated: Your yearly/monthly limit (e.g., RM 1,500)
- Used: How much you’ve claimed (e.g., RM 700)
- Remaining: What’s left (e.g., RM 800)
- Valid Until: Expiry date (e.g., Dec 31, 2024)
Visual Example:
Medical & Wellness Fund
━━━━━━━━━━━━━━━━━━━━━━━━━━━━━━━━━━━━━━━
Allocated: RM 1,500     Used: RM 700 (47%)     Remaining: RM 800
Valid: Jan 1 - Dec 31, 2024

[████████░░░░░░░░░░░] 47% utilized
Key Features
Real-Time Updates:
- Balance updates immediately after claim approval
- No manual calculation needed
Multi-Currency Support:
- View balances in MYR, USD, SGD, or other currencies
- Auto-conversion for reporting
Breakdown by Category:
- Medical Fund: RM 800 remaining
- Transport Fund: RM 150 remaining
- Training Fund: RM 2,500 remaining
Renewal Tracking:
- See when your entitlement renews (Monthly, Yearly)
- Know if unused balance carries forward or expires
Common Scenarios
Scenario 1: Planning a Medical Procedure
Employee checks: "I have RM 800 left in Medical Fund"
Dental procedure costs: RM 600
Decision: Proceed—still have RM 200 buffer for emergencies
Scenario 2: Avoiding Rejection
Employee wants to claim RM 300 for parking
Checks balance: Only RM 150 remaining in Transport Fund
Decision: Split claim—RM 150 now, wait for next month's renewal for the rest
Scenario 3: Year-End Planning
November check: RM 500 unused in Training Fund
Action: Enroll in a course before Dec 31 to use the balance
(Otherwise, it expires and resets on Jan 1)
Tips for Employees
✓ Check Before You Claim: Always verify your balance to avoid rejected claims
✓ Monitor Expiry Dates: Don’t let allowances go to waste
✓ Plan Big Expenses: For large amounts, check if your entitlement renews soon
✓ Contact HR: If your balance seems incorrect, report it immediately
For Claimants (Employees)
This section is your personal guide to submitting and tracking your expense claims.
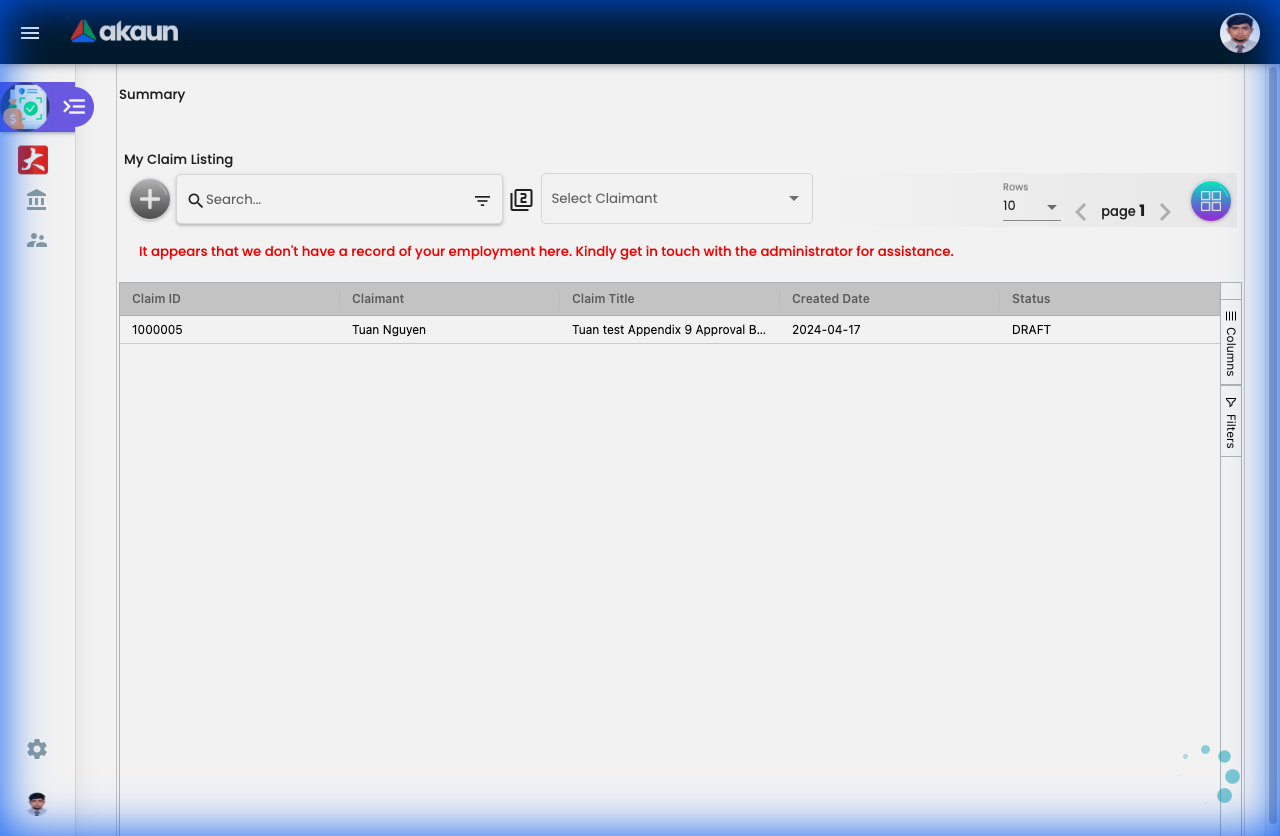
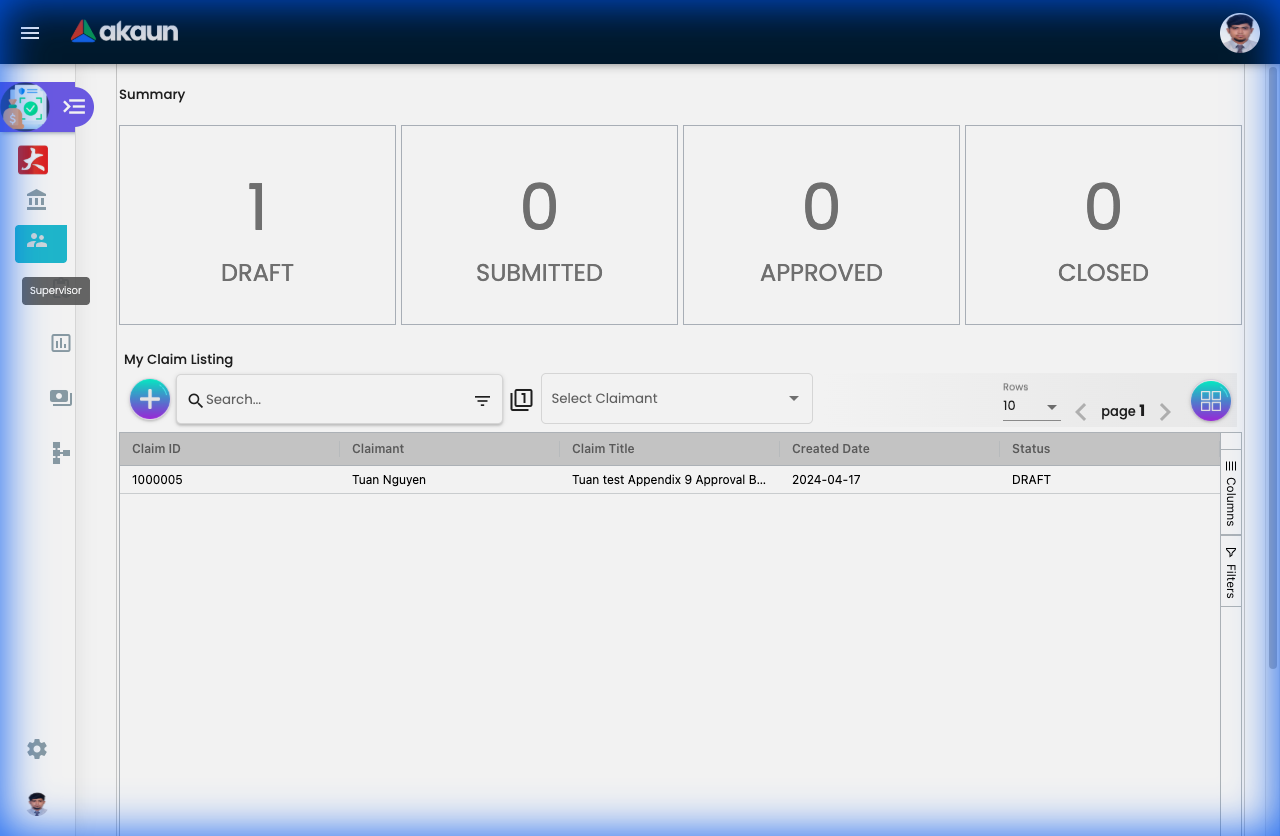
My Claim - Your Personal Expense Hub
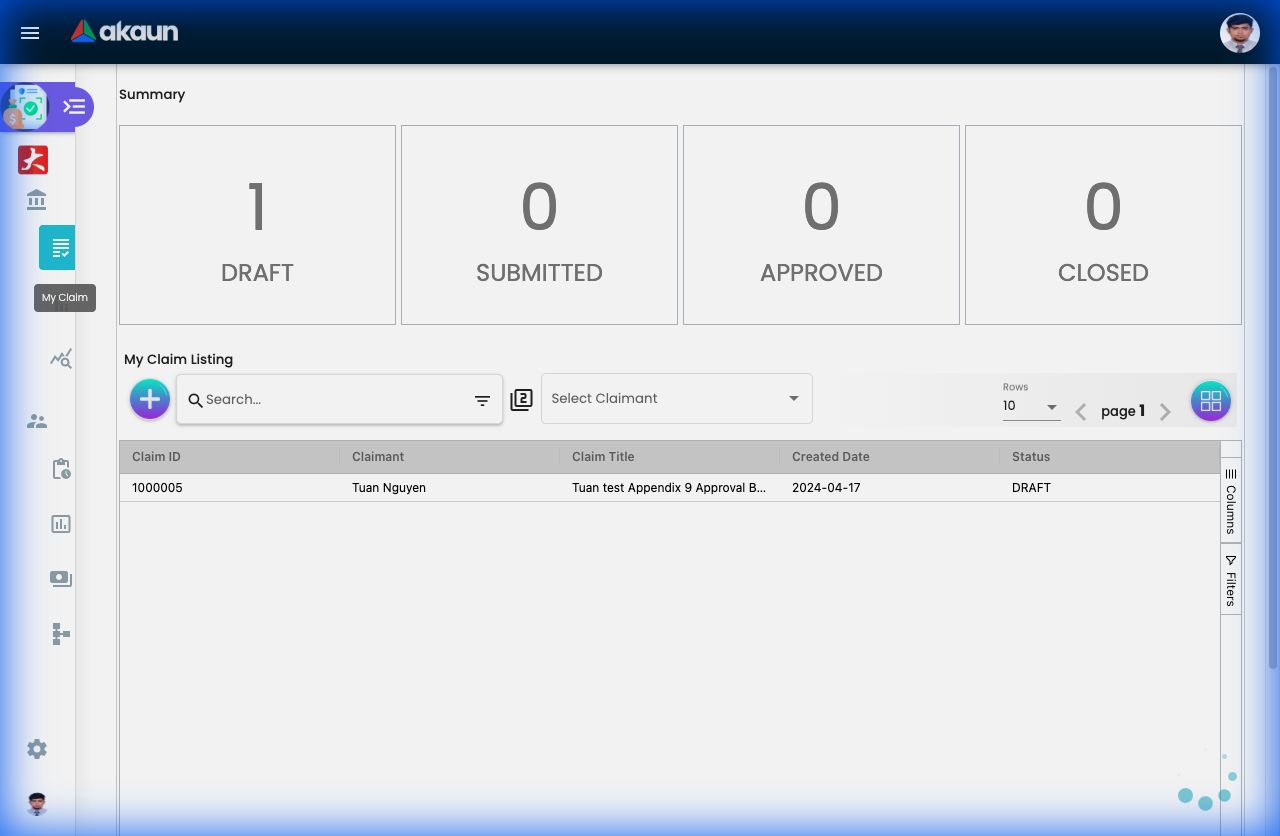
What is My Claim?
This is YOUR workspace—where you create, submit, and track all your expense claims. Think of it as your personal expense diary that automatically gets processed for reimbursement.
What You Can Do:
- ✓ Submit new expense claims
- ✓ Edit draft claims before submitting
- ✓ Track claim status (Submitted → Approved → Paid)
- ✓ View payment history
- ✓ Check rejection reasons
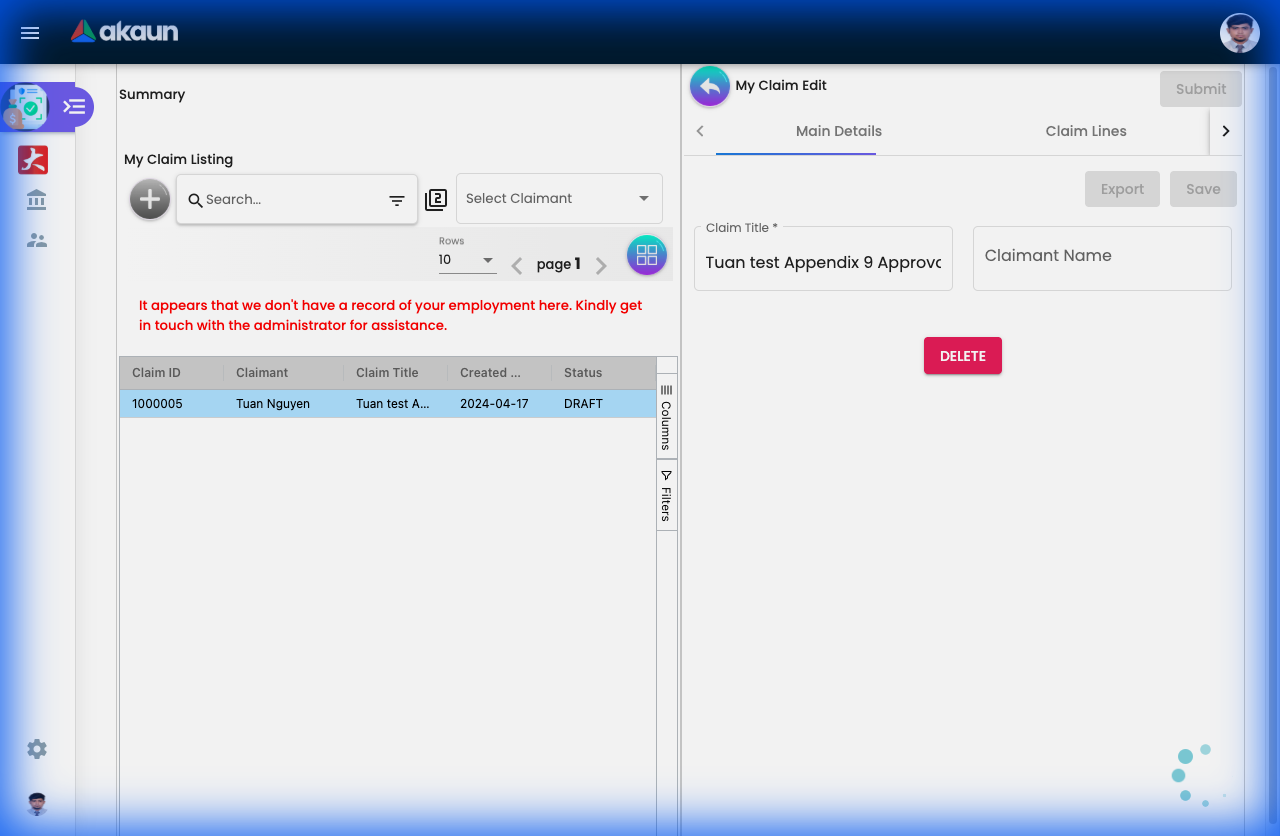
How to Submit a Claim (The Complete Journey)
Step 1: Create the Claim Header
- Click “My Claims” from the sidebar
- Click "+" (Add New)
- Fill in:
- Claim Title: “December 2024 - Medical” (helps you find it later)
- Branch: Your office location
- Month: Claim period
- Click “Create”
Step 2: Add Your Expenses
- Click “Add Line”
- For each expense, enter:
- Date: When you spent the money
- Claim Item: Select type (GP Visit, Taxi, Parking, etc.)
- Amount: How much you paid
- Description: Brief note (“Visit to Dr. Ahmad for flu”)
- Receipt: Upload photo/PDF
Pro Tip with OCR:
- Upload a clear receipt photo
- System auto-extracts: Date, Amount, Vendor name
- Verify and adjust if needed
- Saves you typing!
Step 3: Review & Submit
- Double-check all amounts and receipts
- Check your entitlement balance (avoid rejection!)
- Click “Submit”
- Done! You’ll get an email notification
What Happens Next?
You Submit → Manager Approves → Finance Processes → You Get Paid (7-14 days)
          ↓
    Email at each step
Claim Statuses Explained:
| Status | What It Means | What You Should Do |
|---|---|---|
| Draft | Not yet submitted | Finish and submit before month-end |
| Submitted | Waiting for manager | Nothing—wait for approval |
| Queried | Manager needs more info | Check email, provide details |
| Approved | Manager said YES | Wait for payment |
| Rejected | Manager said NO | Read reason, fix and resubmit |
| Paid | Money in your account | Check bank statement |
Common Scenarios:
Scenario 1: Monthly Medical Claim
January Activities:
- Jan 5: GP visit - RM 80
- Jan 12: Pharmacy - RM 45
- Jan 20: Dental cleaning - RM 150

End of Month:
1. Create claim: "Jan 2024 - Medical"
2. Add 3 lines (1 per visit)
3. Upload 3 receipts
4. Submit → Approved → Paid RM 275
Scenario 2: Business Trip
Trip to KL for training (3 days):
- Flight RM 350
- Hotel (2 nights) RM 400
- Taxi (airport) RM 80
- Meals RM 120

Create claim: "KL Training Trip - Oct 2024"
Add 4 expense lines
Total: RM 950 reimbursed
Scenario 3: Rejected Claim (How to Fix)
Submitted: Lunch claim RM 200
Status: Rejected
Reason: "Receipt not clear, missing tax invoice"

What to do:
1. Go to My Claims
2. Find rejected claim
3. Click "Edit"
4. Upload clearer receipt with tax details
5. Resubmit → Approved!
Tips for Faster Approvals:
✓ Clear Receipts: Ensure date, amount, vendor name are visible
✓ Accurate Descriptions: “Team lunch with client XYZ” vs just “Lunch”
✓ Check Balance First: Don’t claim RM 500 if you only have RM 300 left
✓ Submit Early: Don’t wait until month-end (managers get swamped)
✓ Group Logically: Cluster related expenses in one claim
❌ Common Mistakes:
- Submitting without receipts
- Claiming same expense twice
- Wrong claim item selected (Medical for Parking)
- Expired receipts (check cut-off dates!)
Line Report - Detailed Expense Tracking
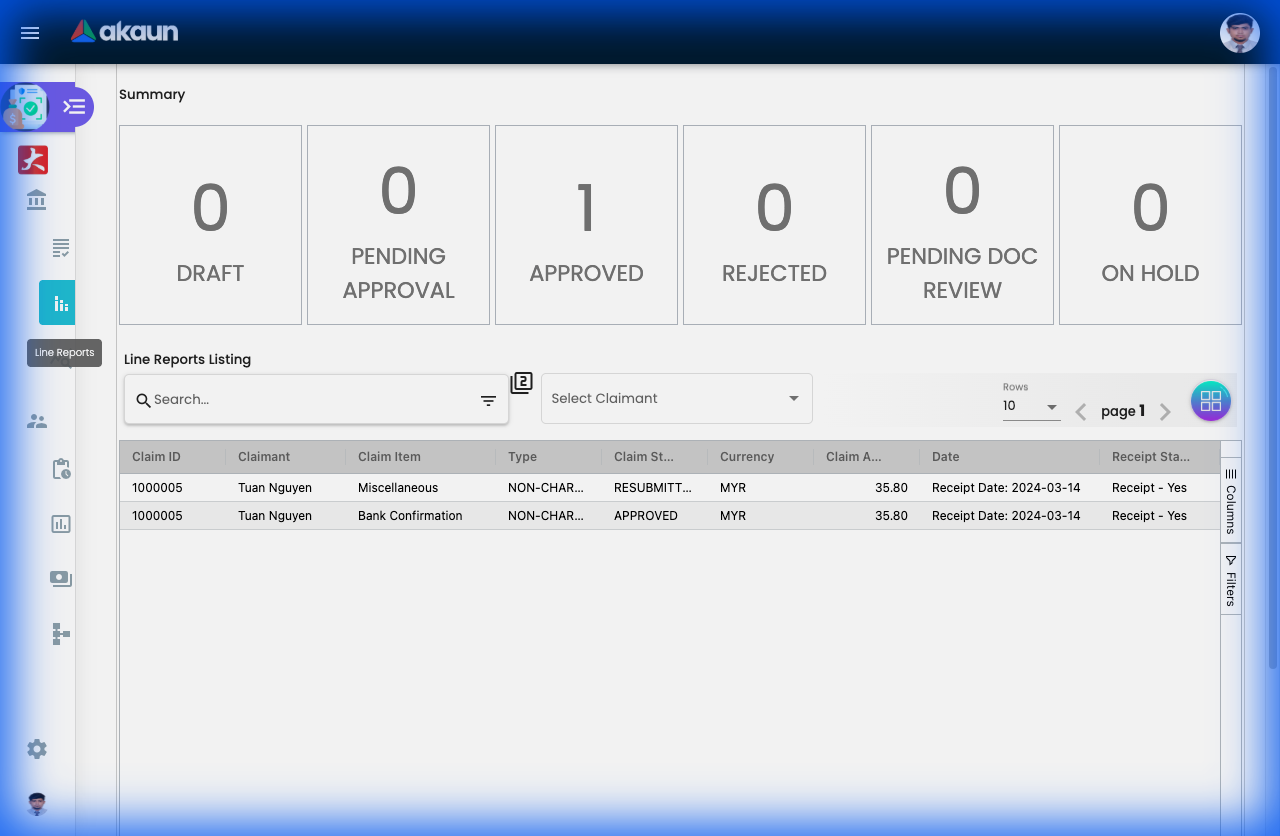
What is Line Report?
While “My Claim” shows your full claims, Line Report shows every individual expense you’ve claimed—line by line. It’s like having an itemized expense history.
Why Is This Useful?
For You (Employee):
- Track spending patterns (“How much did I spend on parking this year?”)
- Find specific expenses quickly
- Prepare for tax submissions
- Verify all claims were processed
How to Use It:
Basic View:
- Go to “Line Report” (or “My Expenses”)
- See a list of ALL your expense lines
- Each row = 1 expense (not a full claim)
Example View:
Date       | Item      | Amount | Status   | Claim
-----------|-----------|---------|- ---------|--------
Dec 5, 2024| GP Visit  | RM 80   | Paid     | Dec Medical
Dec 12     | Pharmacy  | RM 45   | Paid     | Dec Medical
Dec 15     | Taxi      | RM 25   | Approved | Dec Transport
Dec 20     | Parking   | RM 15   | Submitted| Dec Transport
Powerful Filtering:
Find All Taxi Expenses:
- Filter by: Item = “Taxi”
- Date Range: Jan - Dec 2024
- Result: See total taxi spending (RM 1,200 for the year!)
Find Specific Receipt:
- Filter by: Date = “Oct 15, 2024”
- Item = “Medical”
- Find that GP receipt you need for tax
Monthly Summary:
- Filter by: Month = “November 2024”
- View: All expenses for that month
- Export to Excel for records
Real-World Use Cases:
Use Case 1: Year-End Tax Preparation
Task: Need all medical expenses for tax relief

Steps:
1. Open Line Report
2. Filter: Item Category = "Medical"
3. Date Range: Jan 1 - Dec 31, 2024
4. Export to Excel
5. Submit to tax consultant

Result: Complete medical claim history in 2 minutes!
Use Case 2: Budget Planning
Question: "How much do I spend on parking monthly?"

Steps:
1. Line Report
2. Filter: Item = "Parking"
3. Group by: Month
4. See trend: Jan RM 180, Feb RM 200, Mar RM 190

Insight: Average RM 190/month → Adjust personal budget
Use Case 3: Finding a Lost Claim
Problem: "I claimed a dental visit in September but can't find it"

Steps:
1. Line Report
2. Filter: Item = "Dental", Month = "September"
3. Found: Sept 15 - Dr. Lee Dental - RM 250
4. Click to see full claim details
Tips:
✓ Export Regularly: Download Excel monthly for your records
✓ Use Filters: Don’t scroll—filter to find what you need
✓ Check Paid Items: Verify everything marked “Paid” actually hit your bank
✓ Year-End Review: Check totals against entitlement (did you use all your RM 1,500 medical?)
Engagement Reports - Project Claims
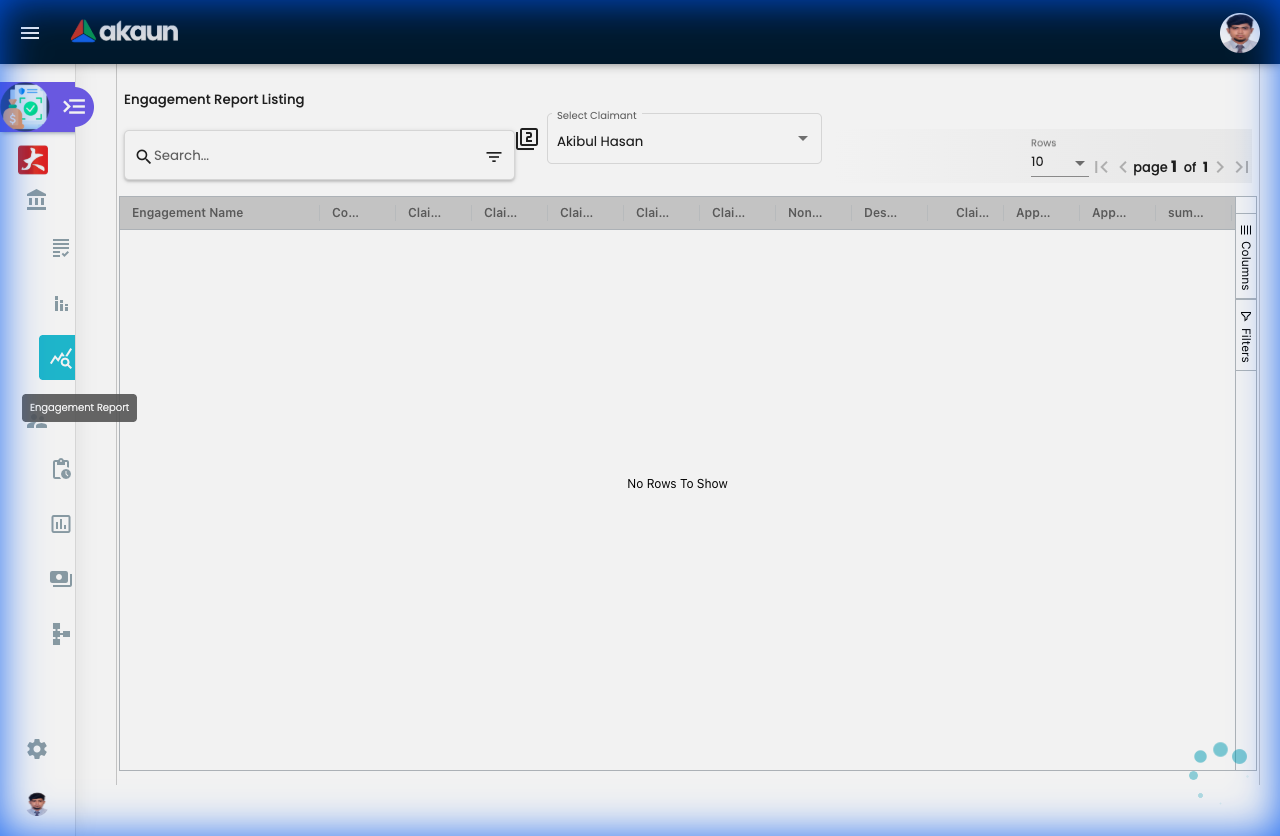
Submit expenses tied to specific client projects or engagements.
What are Engagement Reports?
Engagement Reports (also called Project Claims) are used when expenses need to be:
- Billable to clients - Pass costs directly to the client
- Tracked by project - Allocate expenses to specific engagements for profitability analysis
- Approved by project stakeholders - Route to project managers instead of regular line managers
Common in: Consulting firms, law firms, agencies, professional services
How It Works:
Standard Claim Flow:
Employee → Line Manager → Paid
(Just checking if expense is legitimate)
Engagement Report Flow:
Employee → Project Manager → Engagement Partner → Finance → Paid
(Checking: Is this project-related? Is it within budget? Can we bill the client?)
When to Use Engagement Reports:
✓ Client Travel: Flew to client site for meetings
✓ Client Entertainment: Dinner with client stakeholders
✓ Project-Specific Purchases: Materials bought for a specific client project
✓ External Consultants: Subcontractor fees for client work
✓ Project Accommodation: Hotel stay during client project delivery
❌ Don’t Use For:
- Regular office expenses (use standard claims)
- Personal development training (unless client-specific)
- General office supplies
How to Submit an Engagement Report:
Step 1: Create the Claim
- Go to Engagement Reports (or My Claims)
- Click "+ Add"
- Select Engagement/Project from dropdown (e.g., “ABC Corp - ERP Implementation”)
Step 2: Add Expense Lines
- Click “Add Line”
- Enter expense details:
- Date: When expense occurred
- Claim Item: Type (Travel, Meals, Accommodation)
- Amount: Cost
- Description: “Flight to KL for client workshop”
- Upload Receipt
Step 3: Mark as Billable (If Applicable)
- Check “Billable to Client” checkbox
- This flags the expense for invoicing
Step 4: Submit
- Click Submit → Routes to Project Manager
Billable vs Non-Billable:
| Type | Description | Example | Who Pays? |
|---|---|---|---|
| Billable | Client reimbursed | Flight to client site for project work | Client (invoiced) |
| Non-Billable | Company absorbs | Team lunch during project (goodwill) | Company |
Finance Tip: Correctly marking billable items ensures accurate client invoicing and project profitability tracking.
Approval Flow:
Level 1: Project Manager
- Validates: “Is this expense legitimate for this project?”
- Checks: “Is it within the project budget?”
Level 2: Engagement Partner (High-Value)
- Reviews: “Should we bill the client or absorb it?”
- Approves: Strategic client relationship decisions
Level 3: Finance
- Verifies: Coding to correct project account
- Processes: Payment to employee + client invoice generation
Real-World Example:
Scenario: Consultant Claims Travel to Client Site
Employee: Sarah (Management Consultant)
Project: ABC Corp - Digital Transformation
Expenses:
  - Flight KL → Singapore: RM 350 (Billable)
  - Hotel (3 nights): RM 900 (Billable)
  - Client dinner: RM 250 (Non-billable - relationship building)

Sarah submits Engagement Report:
  1. Selects Project: "ABC Corp - Digital Transformation"
  2. Adds 3 line items
  3. Marks flight + hotel as "Billable"
  4. Marks dinner as "Non-billable"

Approval Flow:
  → Project Manager (reviews budget)
  → Engagement Partner (approves billable amounts)
  → Finance (pays Sarah RM 1,500, invoices client RM 1,250)
Benefits of Engagement Reports:
For Consultants/Employees:
- ✓ Clear project expense tracking
- ✓ Fast reimbursement (client-funded)
- ✓ Proper documentation for audits
For Project Managers:
- ✓ Budget control per project
- ✓ Visibility into project costs
- ✓ Early warning if overspending
For Finance:
- ✓ Automated client invoicing
- ✓ Project profitability tracking
- ✓ Accurate cost allocation
For Clients:
- ✓ Transparency in billed expenses
- ✓ Itemized invoices with receipts
- ✓ Only pay for agreed-upon expenses
Common Questions:
Q: What if I forget to mark an expense as billable?
A: Contact your Project Manager immediately. If already approved, Finance may need to adjust the client invoice.
Q: Can I claim personal expenses on an engagement report?
A: No. Only project-related expenses. Personal items should use standard claims.
Q: What if the client disputes a billable expense?
A: The Engagement Partner will review and may reclassify it as non-billable (company absorbs).
Q: How long until I get reimbursed?
A: Typically 7-14 days after final approval. Billable expenses may take longer if tied to client payment terms.
Q: Can I see all my project expenses for the year?
A: Yes—use Engagement Reports view with filters by Project and Date Range.
For Supervisors (Managers)
This section helps you manage team claims efficiently and maintain proper oversight.
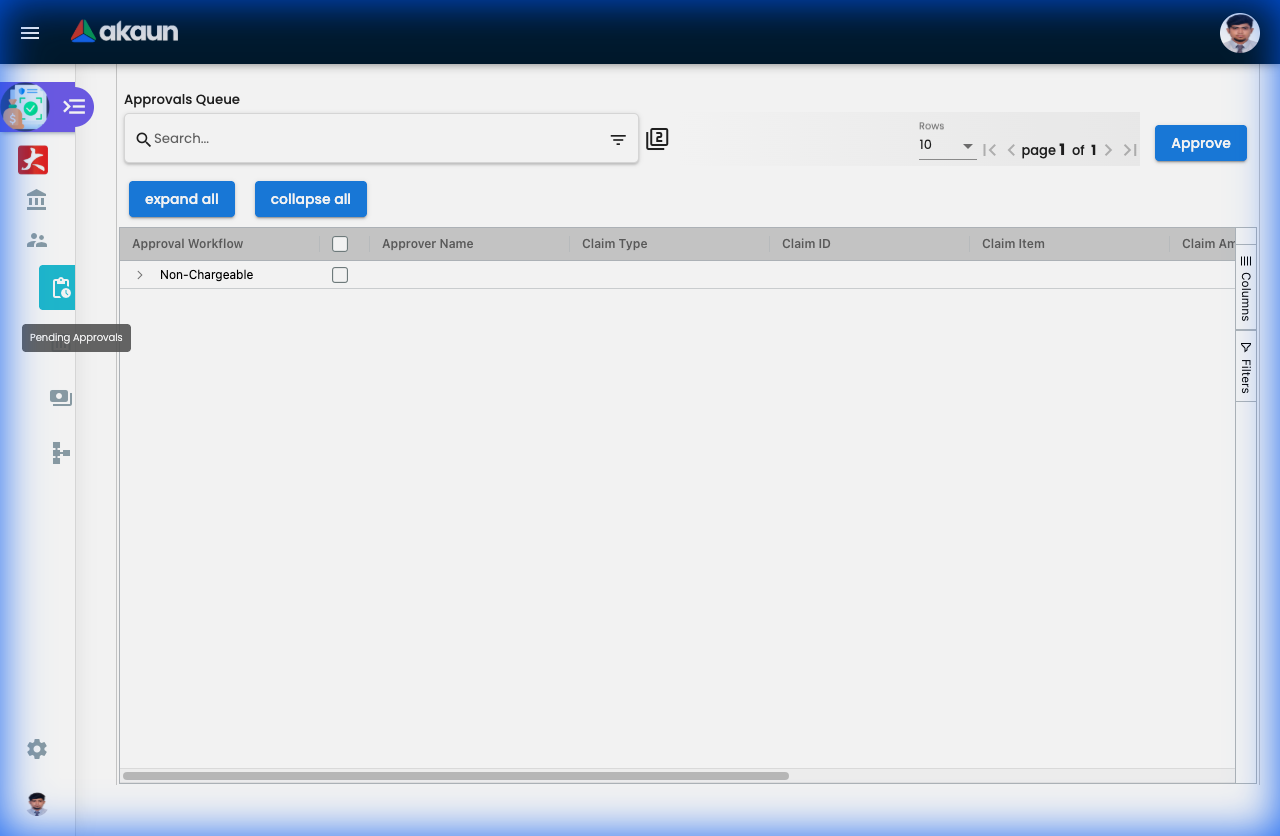
Pending Approvals - Your Action Centre
What is Pending Approvals?
This is YOUR task list—all claims waiting for your decision. Think of it as your approval inbox.
Why This Matters:
For You (Manager):
- Clear queue of what needs your attention
- Quick approve/reject without digging through emails
- Protect yourself (proper authorization trail)
- Control team budget
For Your Team:
- Fast approvals = Happy employees
- Delayed approvals = Frustrated employees
- Clear feedback on rejections
How to Approve Claims (Step-by-Step):
Step 1: Open Your Queue
- Click “Pending Approvals” from sidebar
- See list of all claims waiting for you
- Notice: Red badge number = items pending
Step 2: Review Each Claim Click on a claim to see:
- Employee Name: Who’s claiming
- Amount: How much they’re requesting
- Claim Items: What they bought
- Receipts: Attached documents
- Entitlement Balance: Do they have enough allowance left?
Key Things to Check:
- ✓ Receipts are clear and complete
- ✓ Amounts match receipts
- ✓ Expense is work-related (not personal)
- ✓ Within company policy (e.g., meals < RM 100)
- ✓ Employee has entitlement balance
- ✓ Not a duplicate claim
Step 3: Make Your Decision
Option A: Approve ✓
- Click “Approve” button
- Claim moves to Finance for payment
- Employee gets notification
Option B: Reject ✗
- Click “Reject” button
- IMPORTANT: Type rejection reason
- Good: “Receipt missing vendor name—please resubmit with tax invoice”
- Bad: “Rejected” (employee doesn’t know why!)
- Employee gets email with your reason
- They can fix and resubmit
Option C: Query ?
- Click “Query” button
- Ask for clarification: “Was this meal with client or internal team?”
- Employee responds
- Claim comes back to you for final decision
Quick Approval Tips:
Fast-Track (Bulk Approve):
- Select multiple small, routine claims (< RM 50)
- Verify receipts look ok
- Click “Approve All”
- Done in seconds!
Careful Review (High-Value):
- Claims > RM 500: Take your time
- Check receipts carefully
- Verify business purpose
- Confirm with employee if unclear
Common Approval Scenarios:
Scenario 1: Routine Medical Claim
Employee: Sarah
Claim: RM 80 - GP Visit
Receipt: ✓ Clear, shows date, amount, clinic name
Entitlement Balance: RM 1,200 remaining (plenty)
Your Decision: Approve ✓ (30 seconds)
Scenario 2: Questionable Meal Claim
Employee: John
Claim: RM 350 - Team Dinner
Receipt: ✓ Clear
Issue: Policy limit is RM 200 for team meals

Your Action:
1. Click Query
2. Message: "Team dinners capped at RM 200. Was this a client dinner?"
3. John responds: "Yes, with ABC Corp client"
4. You approve: "Client dinner approved" ✓
Scenario 3: Missing Receipt
Employee: Mary
Claim: RM 120 - Taxi
Receipt: ✗ Missing

Your Action:
1. Reject
2. Reason: "Receipt required for all claims > RM 50. Please resubmit with e-hailing receipt"
3. Mary uploads receipt
4. You approve on resubmission
Scenario 4: Exceeded Entitlement
Employee: Ahmad
Claim: RM 600 - Medical
Balance Remaining: RM 300 (insufficient!)

Your Action:
1. Reject
2. Reason: "Your medical balance is RM 300. Please reduce claim to available balance or contact HR for top-up approval"
Best Practices for Managers:
✓ Daily Check-In: Review approvals daily (10 mins) rather than weekly
✓ Set Expectations: Team knows you approve every afternoon
✓ Be Consistent: Same rules for everyone (no favouritism)
✓ Clear Rejections: Always explain WHY—helps employees learn
✓ Use Delegation: Going on leave? Delegate approvals to your deputy
Delegation Setup:
Going on holiday Dec 20-31?
1. Go to: Settings > Claim Approval Delegation
2. Delegatee: Select your deputy
3. Period: Dec 20 - Dec 31
4. Save

Result: All your pending approvals auto-route to your deputy
Employee experience: No delay!
Staff Reports - Team Oversight Dashboard
What is Staff Reports?
This shows ALL claims from your team members—past, present, pending, paid. It’s your team expense control centre.
What You Can See:
- Every claim submitted by your team
- Who’s claiming what
- Team spending patterns
- Budget utilization
- Spending trends
Why Use This?
Budget Monitoring:
- “My team has claimed RM 50,000 this quarter—are we on track?”
- “Who’s using their allowances? Who isn’t?”
Trend Analysis:
- “Taxi claims doubled this month—why?”
- “Medical claims always spike in December (year-end rush)”
Audit Prep:
- “Show me all claims > RM 1,000 this year”
- “Who claimed what on Project ABC?”
How to Use Staff Reports:
View All Team Claims:
- Click “Staff Reports”
- See complete list of subordinate claims
- Filter by:
- Employee name
- Date range
- Status (Approved, Rejected, Pending)
- Amount range
- Claim item type
Example View:
Employee   | Claim        | Amount    | Status   | Date
-----------|--------------|-----------|----------|----------
Sarah Tan  | Medical      | RM 350    | Paid     | Dec 15
John Lee   | Travel       | RM 1,200  | Approved | Dec 18
Mary Wong  | Parking      | RM 80     | Submitted | Dec 20
Ahmad Ali  | Meals        | RM 150    | Rejected | Dec 22
Powerful Filters & Exports:
Monthly Team Summary:
Filter:
- Date Range: Nov 1-30, 2024
- All employees
- Status: Paid

Export to Excel
Result: Complete monthly expense report for finance
High-Value Claims Audit:
Filter:
- Amount: > RM 500
- Date: Last 6 months
- Status: All

Review: Are high claims properly justified?
Individual Employee Check:
Filter:
- Employee: Sarah Tan
- Year: 2024
- All statuses

See: Total claimed RM 8,500 / Entitlement RM 10,000
Insight: Sarah has RM 1,500 unused (remind her!)
Real-World Management Scenarios:
Scenario 1: Monthly Budget Review
Task: Prepare team expense report for director

Steps:
1. Staff Reports
2. Filter: This month, Status = Paid
3. Group by: Claim Item Category
4. Export to Excel
5. Add totals:
   - Medical: RM 5,000
   - Transport: RM 3,000
   - Meals: RM 2,000
   Total: RM 10,000 / RM 12,000 budget

Report to Director: "Under budget, 83% utilized"
Scenario 2: Unusual Spending Alert
Notice: Taxi claims doubled this month

Steps:
1. Staff Reports
2. Filter: Item = Taxi, This month
3. Drill down: All from 3 employees (salespeople)
4. Check: New client visits increased

Action: Expected—approve. Update next month's budget.
Scenario 3: Year-End Entitlement Check
December Task: Ensure team uses entitlements

Steps:
1. Staff Reports
2. View each employee's utilization %
3. Find: 5 employees have unused medical (RM 500+ each)
4. Action: Send reminder email:
   "You have RM 500 medical remaining—expires Dec 31!"

Result: Employees claim remaining balance, satisfaction up
Manager Tips:
✓ Weekly 15-Min Review: Check team spending patterns
✓ Spot Check Receipts: Randomly verify receipts for quality control
✓ Trend Analysis: Compare month-to-month to catch anomalies
✓ Support Your Team: Proactively remind about unused entitlements
✓ Budget Forecasting: Use past data to plan next year’s budgets
Non-Reimbursable Report - Company-Paid Tracking
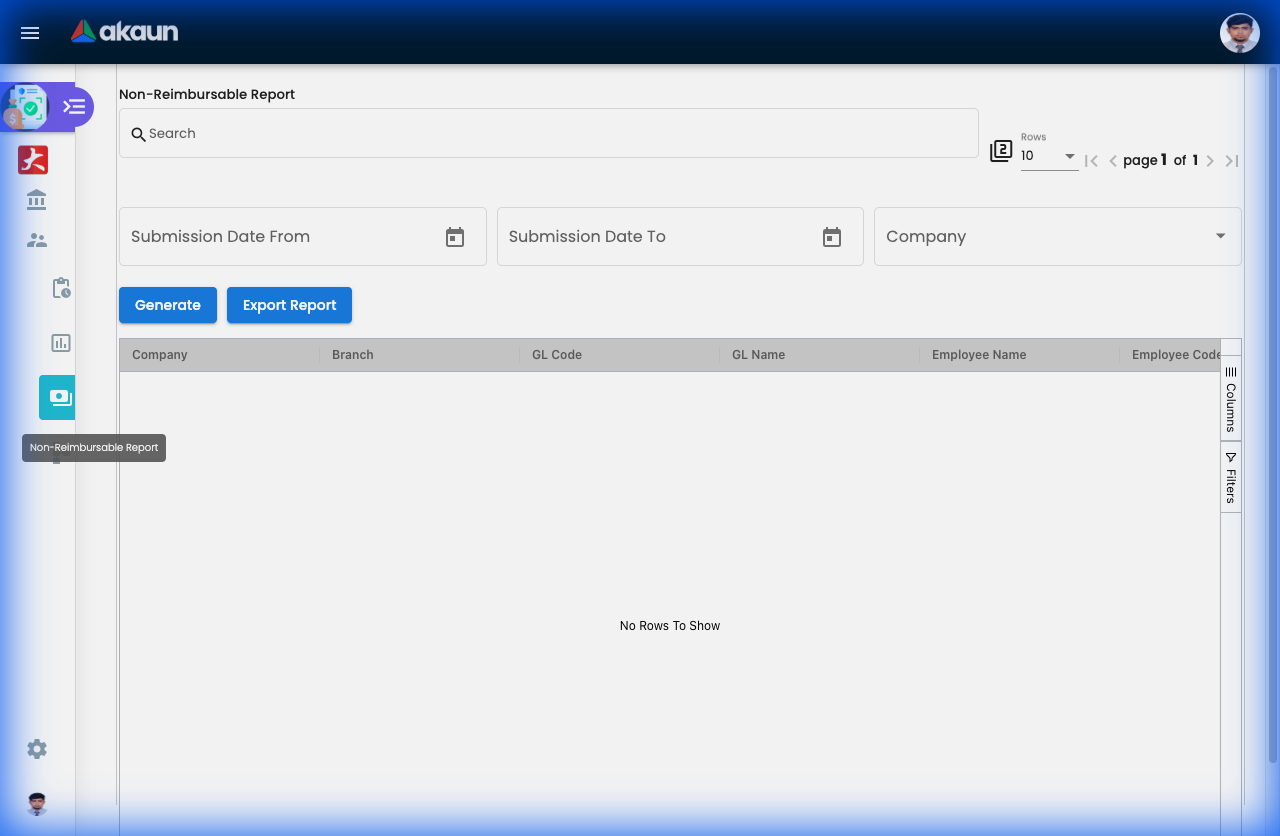
What is Non-Reimbursable Report?
These are expenses the company pays DIRECTLY—no money goes to employees. Think: corporate credit cards, company car allowances, direct vendor billing.
Why Track These If No Payment Needed?
- Tax Reporting: Benefits-in-kind need to be reported
- Budget Control: Company still spends money—needs tracking
- Audit Compliance: Must show what was spent and why
- Fair Allocation: Ensure costs go to right department/project
Common Non-Reimbursable Items:
| Item | How It Works | Example |
|---|---|---|
| Corporate Card | Employee swipes company card | Client dinner charged directly |
| Company Car | Fuel/maintenance billed to company | RM 500 monthly fuel |
| Direct Billing | Vendor invoices company | Hotel books conference room |
| Allowances | Fixed monthly amount (no cash) | RM 300 phone allowance |
| Subscriptions | Professional memberships | ACCA fees paid by company |
What You See in This Report:
Employee View:
Date       | Item             | Amount  | Purpose
-----------|------------------|---------|------------------
Dec 5      | Corporate Card   | RM 350  | Client lunch
Dec 10     | Company Car Fuel | RM 200  | Monthly allocation
Dec 15     | Phone Allowance  | RM 300  | Monthly credit
Manager View (Staff Reports):
Employee  | Non-Reimb Items | Monthly Total
----------|-----------------|---------------
Sarah     | Corp Card (3x)  | RM 850
John      | Car Fuel        | RM 400
Mary      | Phone           | RM 300
Real-World Use Cases:
Use Case 1: Year-End Tax for Employee
Tax Season: Need benefits-in-kind value

Steps:
1. Non-Reimbursable Report
2. Filter: My items, Full year
3. Export: Excel

Submit to Tax Agent:
- Phone allowance: RM 300 × 12 = RM 3,600
- Company car: RM 500 × 12 = RM 6,000
Total BIK: RM 9,600 (taxable)
Use Case 2: Department Budget (Manager)
Question: "What did company spend on our team's corporate cards?"

Steps:
1. Non-Reimbursable Report
2. Filter: Team members, Item = Corporate Card
3. See: Total RM 12,000 this quarter
4. Budget tracking: Within RM 15,000 limit ✓
Use Case 3: Audit Compliance
Auditor Request: "Show all company-paid expenses for Project XYZ"

Steps:
1. Non-Reimbursable Report
2. Filter: Project = XYZ, All employees
3. Export with receipts
4. Submit to auditor

Proves: Proper authorization and documentation
Manager Oversight:
What to Monitor:
- ✓ Corporate card usage (is it reasonable?)
- ✓ Patterns (are allowances being used properly?)
- ✓ Policy compliance (within limits?)
Red Flags:
- Corporate card for personal expenses
- Duplicate entries (same expense claimed twice)
- Over-limit spending without approval
Professional Study Scheme Report - Education Tracking
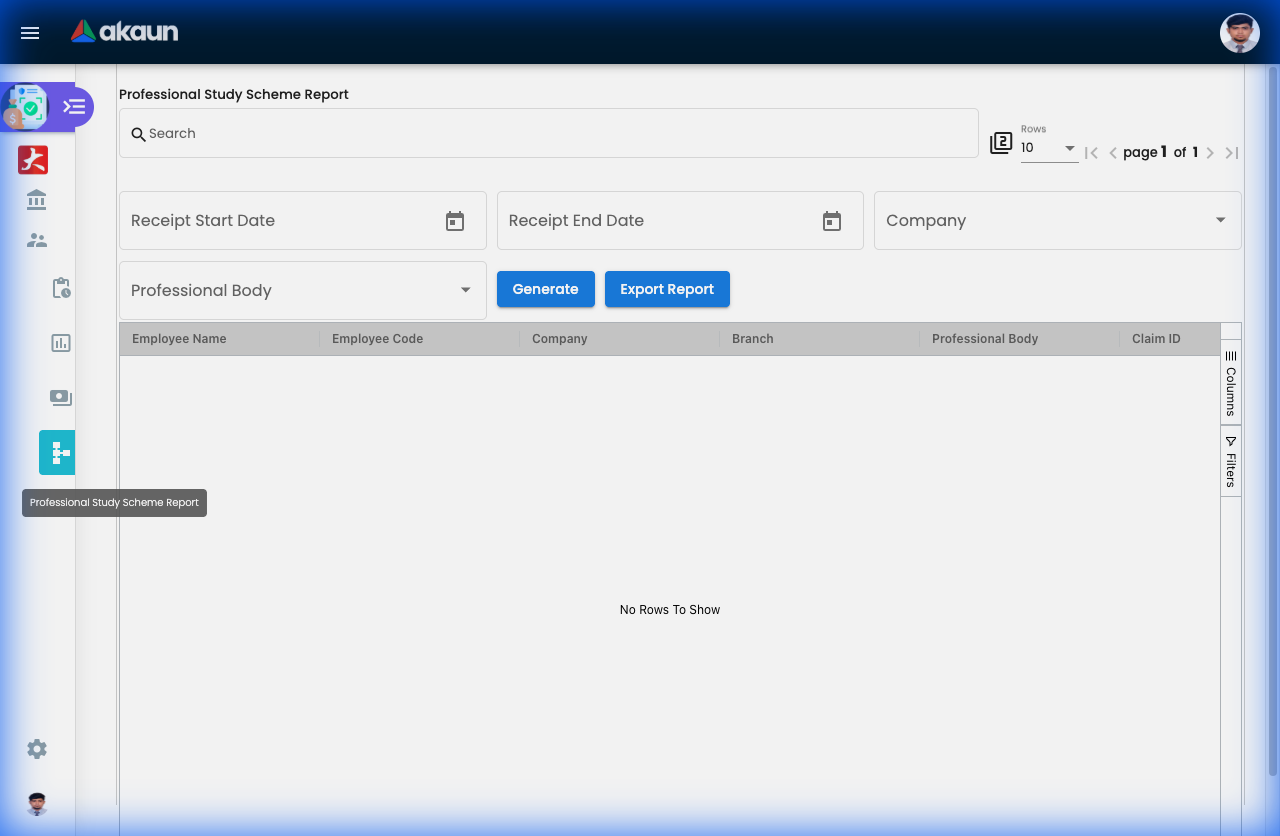
What is Professional Study Scheme?
Special tracking for educational and professional development expenses—courses, certifications, tuition, professional memberships.
Why Separate from Regular Claims?
- Different Budget: Usually HR/L&D budget, not operating expenses
- Special Approval: May need HR + Manager approval
- Payback Clauses: Some have “stay 2 years or pay back” conditions
- Tax Treatment: Education expenses have special tax rules
- ROI Tracking: Company wants to know if training works
What’s Covered:
Eligible Expenses:
- ✓ Degree/Diploma tuition (MBA, MSc)
- ✓ Professional certifications (ACCA, CPA, PMP, CISSP)
- ✓ Skills courses (Excel, Leadership, Coding)
- ✓ Conference fees (professional development)
- ✓ Study materials (textbooks, exam fees)
- ✓ Professional body memberships (annual fees)
Not Covered:
- ✗ Hobbies (yoga, cooking classes)
- ✗ Personal interest courses unrelated to work
- ✗ Courses taken on personal time without approval
How to Submit Professional Study Claims:
Step 1: Get Approval FIRST
BEFORE enrolling:
1. Discuss with Manager
2. Submit course details to HR
3. Get written approval (email/form)
4. Sign payback agreement (if applicable)

THEN enroll in course
Step 2: Submit Claim After Payment
- Go to “Professional Study Claims”
- Click "+ Add"
- Enter:
- Course Name: “ACCA Level 1 - Financial Accounting”
- Provider: University/Institution
- Amount: RM 3,500
- Approval Reference: HR approval email/number
- Receipt: Tuition invoice
- Submit
Step 3: Approval Flow
Employee → Manager → HR/L&D → Finance → Payment
         (Work relevance?) (Budget?) (Process) (Reimburse)
Real-World Scenarios:
Scenario 1: ACCA Professional Certification
Employee: Sarah (Accountant)
Course: ACCA Level 1
Cost: RM 3,500
Company Policy: Reimburse 100% if pass, 50% if fail

Process:
1. Sarah gets HR approval
2. Completes course
3. Submits claim with:
   - Tuition receipt
   - **Passing certificate** (proof of completion)
4. HR verifies pass
5. Full RM 3,500 reimbursed

Payback clause: If Sarah leaves within 2 years, refund RM 3,500
Scenario 2: MBA Sponsorship
Employee: John (Manager)
Program: Executive MBA
Cost: RM 80,000 (over 2 years)
Company Policy: Sponsor 70%, John pays 30%

Setup:
- Company pays: RM 56,000 directly to university
- John pays: RM 24,000 personally
- Non-reimbursable tracking: Company's RM 56K
- Payback: If leaves in 3 years, refund proportionally

Claim Submission:
- Per semester: RM 14,000 (company portion)
- Total 4 claims over 2 years
Scenario 3: Annual Professional Membership
Employee: Mary (Engineer)
Membership: Board of Engineers Malaysia (BEM)
Cost: RM 350/year
Policy: Company pays for job-required memberships

Process:
1. Submit annual renewal invoice
2. Manager approves (job requires PEng license)
3. Finance pays vendor directly OR reimburses Mary
4. Tracked in Professional Study report for tax
Manager’s View (Staff Reports):
What You See:
Employee | Course              | Amount    | Status    | ROI Notes
---------|---------------------|-----------|-----------|------------
Sarah    | ACCA L1             | RM 3,500  | Completed | Passed ✓
John     | MBA Semester 1      | RM 14,000 | In Progress| 2 years remaining
Mary     | BEM Membership      | RM 350    | Paid      | Annual renewal
Ahmad    | Leadership Course   | RM 1,200  | Completed | Promoted after!
ROI Tracking:
- Sarah (ACCA): Now qualified accountant ✓
- John (MBA): In progress
- Ahmad (Leadership): Got promoted 6 months later → Great ROI!
HR/Manager Approval Guidelines:
Approve When:
- ✓ Job-related/career progression
- ✓ Benefits company (upskills employee)
- ✓ Within budget
- ✓ Employee committed (signs payback if needed)
Reject/Defer When:
- ✗ Not work-related
- ✗ Budget exhausted
- ✗ Employee planning to leave soon (red flag)
- ✗ Just completed similar course recently
Tips for Employees:
✓ Plan Ahead: Get approval BEFORE paying
✓ Read Policy: Know pass/fail reimbursement rules
✓ Keep Proof: Certificates, transcripts, receipts
✓ Understand Payback: If you leave, you may owe money
Tips for Managers:
✓ Support Development: Encourage team learning
✓ Track ROI: Did training improve performance?
✓ Fair Distribution: Ensure all team members get opportunities
✓ Budget Wisely: Plan annual training budget per employee
Configuration & Settings
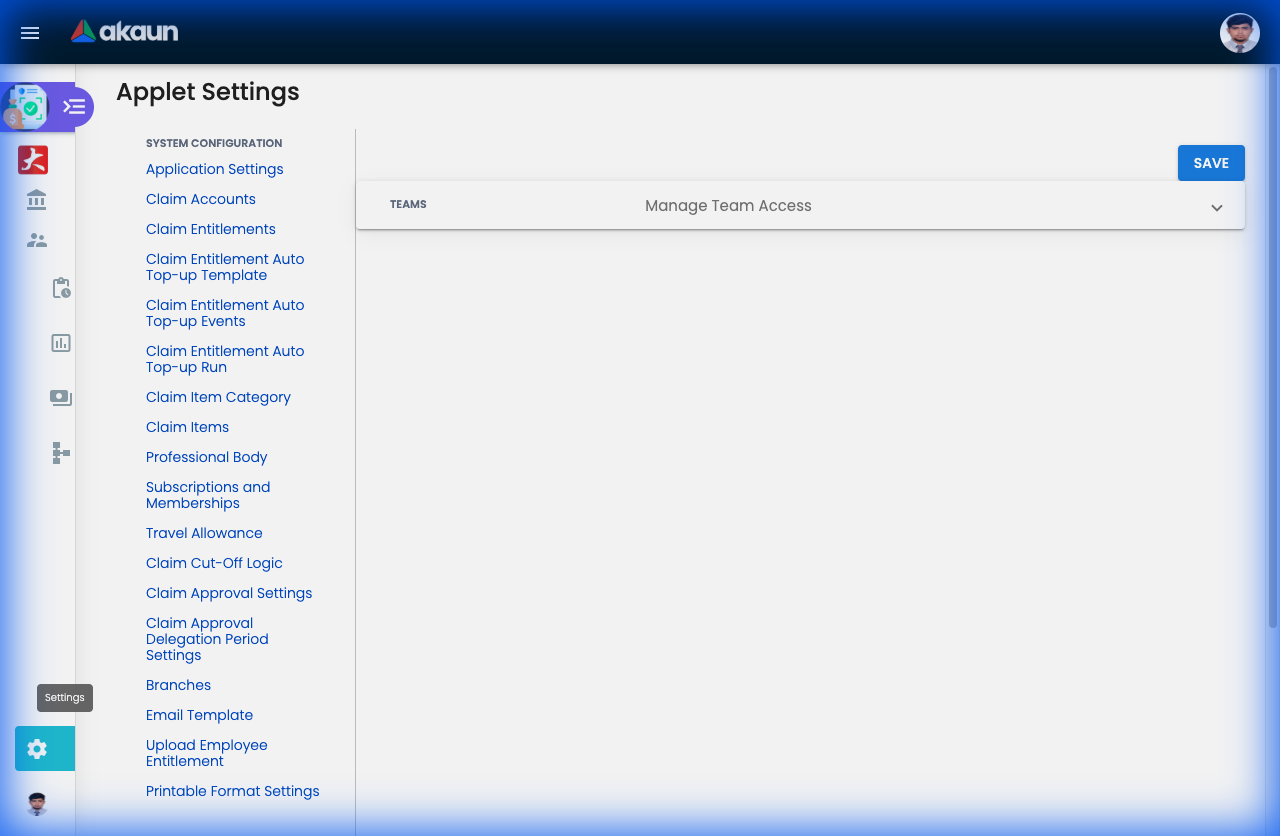
Claim Items (Settings > Claim Items)
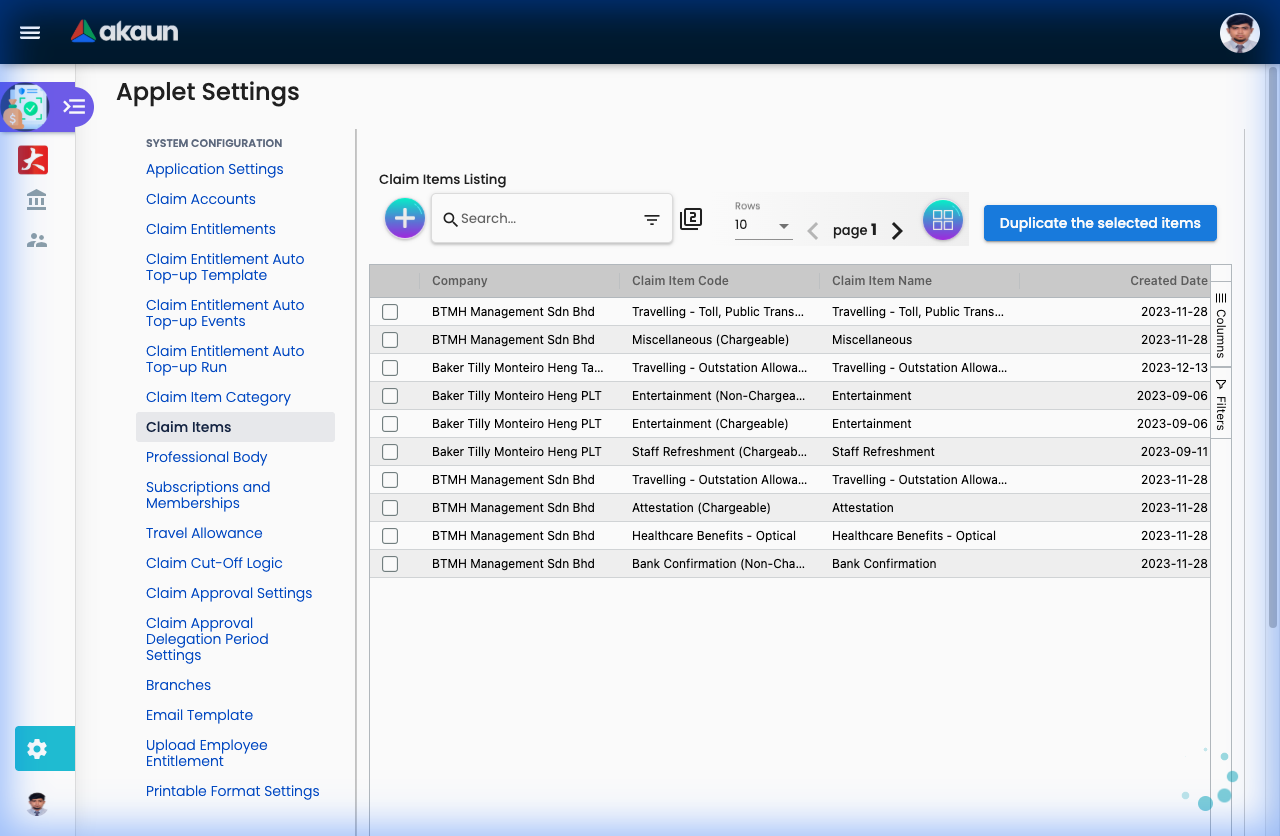
The Claim Items menu defines what employees can claim. Think of this as building your organization’s “expense menu”. Each item represents a specific type of expense (e.g., Taxi, Meals, Medical).
Creating a Claim Item - Field-by-Field Guide:
| Field | Purpose | Why It Matters | Example |
|---|---|---|---|
| Approval Workflow | Determines the approval path | Different items need different approvals. “Claim Account” = standard budget check. “Engagement PIC” = project-billable with client billing. | Medical claims → Claim Account; Client meals → Engagement PIC |
| Approval Setting | Defines WHO approves | Links to your org chart. Determines if it goes to Manager, HOD, or Finance. | “Manager Only” vs “Manager → Finance Director” |
| Payment Processing Option | How reimbursement is paid | “Reimbursable” = paid to employee. “Non-Reimbursable” = tracking only. | Parking fees = Reimbursable; Company credit card purchases = Non-Reimbursable |
| Claim Item Name | Display name for employees | What users see when selecting expenses. Keep it clear and intuitive. | “GP Visit”, “Taxi Fare”, “Client Entertainment” |
| Claim Item Code | Unique identifier | Used for reporting and integrations. Often matches your accounting system codes. | MED-001, TRV-TAXI, ENT-MEAL |
| Claim Category | Grouping for reports | Helps organize expenses. All medical items under “Medical”, all transport under “Travel”. | Medical, Travel, Entertainment |
| Claimable Period (Days) | How far back can you claim? | Controls how long after an expense occurs it can be claimed. | 30 days = expenses must be claimed within a month |
| Threshold | Maximum amount per claim | Prevents excessive single claims. Applies when workflow requires it. | RM 500 per taxi claim |
| UOM (Unit) | Measurement unit | “Amount” for money. “Km” for mileage. “Days” for allowances. | Taxi = Amount; Mileage = Km |
Advanced Configuration (Checkboxes):
- Required Supporting Document (Normal): Forces users to upload a receipt/invoice.
- Required Supporting Document (OCR): Receipt must be uploaded AND system will auto-extract data.
- Required Vendor, Receipt Date & Number: Enforces detailed receipt info (good for audit trails).
- Required Follow-up Programme: For entertainment claims—who attended, what was discussed.
- Required Subscription/Membership Type: For professional membership fees.
- Required Travel Allowance: Links to the Travel Allowance module for per-diem calculations.
- Required Professional Body: For claims related to certifications (ACCA, CPA, etc.).
- Required Internal Employees Only: Restricts this item to claims involving only company staff.
- Required Location Tracking: Captures GPS coordinates (useful for field claims).
- Mileage Claim: Switches to distance-based calculation instead of fixed amount.
- Custom Validity Date by HR: Allows HR to set unique expiry dates per employee.
Financial Mapping (For Accounting Integration):
| Field | Purpose | Example |
|---|---|---|
| Expense Company | Which legal entity pays | “ABC Sdn Bhd” vs “XYZ Holdings” |
| Expense Financial Item | Accounting sub-category | “Staff Welfare - Medical” |
| Expense GL Code | General Ledger account | 6100-Medical Expenses |
For Engagement-Based Claims Only:
If you selected “Engagement PIC” workflow, you’ll see additional billing fields:
| Field | Purpose |
|---|---|
| Billing Company | Which client/project entity to bill |
| Billing Financial Item | How this appears on client invoice |
| Billing GL Code | Revenue account for billing |
| Billing Markup Ratio | Profit margin (e.g., 1.2 = 20% markup) |
Real-World Example:
Creating a “Client Meal” expense item:
- Workflow: Engagement PIC (billable to client)
- Approval: Manager → Finance Director
- Category: Entertainment
- Required OCR Receipt: ✓ (Yes)
- Required Follow-up: ✓ (Must enter attendees/purpose)
- Expense GL: 6200-Entertainment
- Billing GL: 4500-Billable Expenses
- Markup: 1.0 (No markup, cost pass-through)
Item Categories (Settings > Claim Item Category)
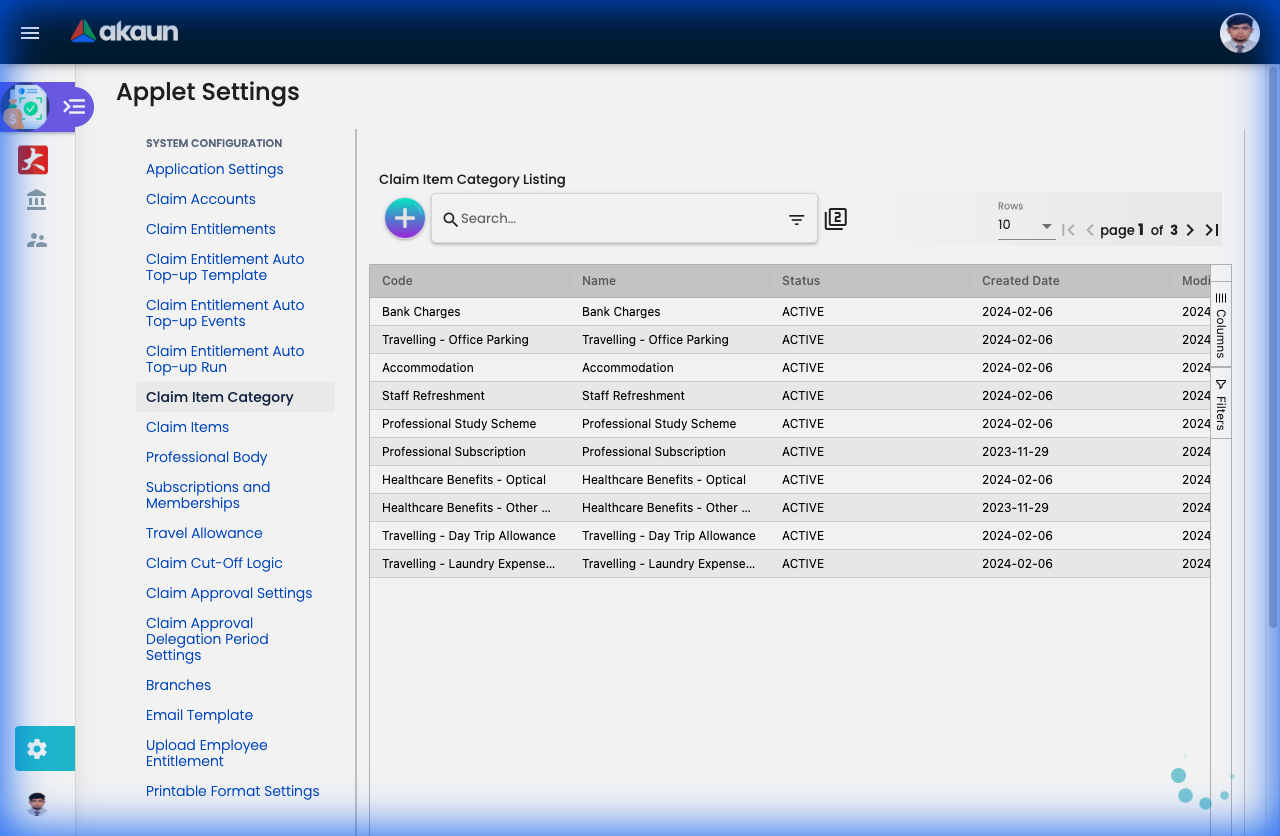
Categories organize your claim items into logical groups for reporting and analysis. Instead of viewing 50 individual expense types, you can analyze spending by category.
Creating a Category - Field Guide:
| Field | Purpose | Why It Matters | Example |
|---|---|---|---|
| Category Name | Display name for the group | Used in reports and dashboards. Keep it broad enough to group multiple items. | “Medical & Wellness”, “Travel & Transport” |
| Category Code | Unique identifier | Short code for integrations and exports. Usually alphanumeric. | MED, TRV, ENT |
| Description | What belongs in this category | Helps other admins understand what items fit here. | “All medical-related expenses including GP visits, dental, optical” |
Best Practices:
- Keep it simple: 5-10 categories are usually enough (Medical, Travel, Entertainment, Training, Equipment)
- Align with finance: Match your accounting department’s expense categories
- Think reporting: Categories appear in charts and summaries—make them meaningful
Real-World Example:
Creating a “Professional Development” category:
- Name: Professional Development
- Code: PROF-DEV
- Description: Training courses, certifications, conferences, and professional subscriptions
- Items to assign: Course Fees, Conference Registration, ACCA Membership, Books & Materials
Travel Allowance (Settings > Travel Allowance)
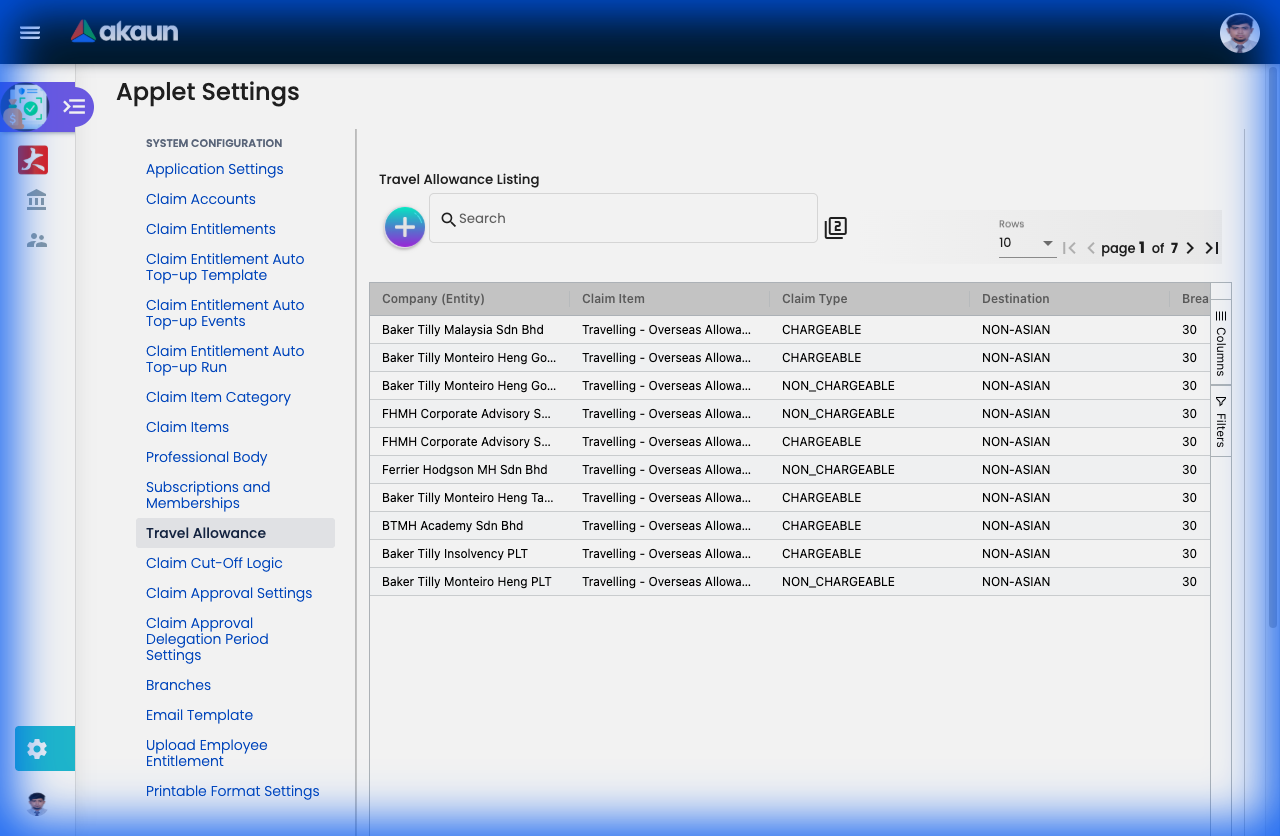
The Travel Allowance feature automates per-diem (daily allowance) calculations for business travel. Instead of employees manually calculating meal allowances, the system applies pre-defined rates based on travel destination.
What Problem Does This Solve?
Before automation:
- Employees calculate their own meal allowances (error-prone)
- Different managers apply different rates (inconsistency)
- Finance manually verifies calculations (time-consuming)
- Per-diem rates aren’t updated systematically
With Travel Allowance:
- ✓ Standardized rates across the organization
- ✓ Auto-calculation when employees claim travel
- ✓ Different rates for different destinations (domestic vs international)
- ✓ Easy updates when government rates change
Creating a Travel Allowance Rate - Field-by-Field Guide:
| Field | Purpose | Why It Matters | Example |
|---|---|---|---|
| Destination | Geographic zone | Different locations have different cost-of-living. Rates reflect reality. | Malaysia, Singapore, Asian, Non-Asian |
| Claim Item | Which expense type uses this rate | Links the allowance to a specific claim item (e.g., “Travel - Per Diem”) | “Domestic Travel Allowance” |
| Approval Workflow | How claims are approved | Standard vs Engagement-based approval | Claim Account (standard travel) |
| Breakfast | Morning meal allowance | Amount paid for breakfast on travel days | RM 15 (Malaysia), RM 25 (Singapore) |
| Lunch | Midday meal allowance | Amount paid for lunch | RM 20 (Malaysia), RM 35 (Singapore) |
| Dinner | Evening meal allowance | Amount paid for dinner | RM 25 (Malaysia), RM 40 (Singapore) |
| Inconvenience | Hardship/displacement allowance | Compensates for being away from home | RM 30 (overnight stays) |
| Total Amount | Sum of all allowances | Auto-calculated or manually set total per day | RM 90/day (Malaysia) |
| Description | Admin notes | Internal reference for policy or rate source | “Rates updated Jan 2024 per Finance Circular 01/2024” |
Understanding the Destination Zones:
The system provides 4 pre-defined zones:
| Destination | Typical Use | Example Rates |
|---|---|---|
| Malaysia | Domestic travel within Malaysia | Lower cost-of-living rates |
| Singapore | Travel to Singapore | Higher rates due to higher costs |
| Asian | Travel to other Asian countries | Medium rates (Thailand, Indonesia, etc.) |
| Non-Asian | International travel outside Asia | Highest rates (Europe, USA, Australia) |
How It Works - Employee Perspective:
When an employee claims travel:
- Selects a Claim Item that has “Required Travel Allowance” enabled
- System asks: “What was your destination?”
- System asks: “Travel date and duration?”
- System auto-calculates: “3 days in Singapore = 3 × (Breakfast + Lunch + Dinner + Inconvenience)”
- Employee just confirms—no manual math needed
Example Calculation:
Travel: 3 days in Singapore for client meetings
Rates: Breakfast RM25, Lunch RM35, Dinner RM40, Inconvenience RM30

Day 1 (Full day): RM25 + RM35 + RM40 + RM30 = RM130
Day 2 (Full day): RM25 + RM35 + RM40 + RM30 = RM130
Day 3 (Half day, return afternoon): RM25 + RM35 = RM60

Total Travel Allowance: RM 320
Real-World Setup Examples:
Example 1: Standard Domestic Travel Policy
| Zone | Breakfast | Lunch | Dinner | Inconvenience | Total/Day |
|---|---|---|---|---|---|
| Malaysia | RM 15 | RM 20 | RM 25 | RM 20 | RM 80 |
- Claim Item: “Domestic Travel Per-Diem”
- Policy: Employees traveling within Malaysia for client visits or training
- Approval: Manager only
Example 2: International Travel Policy
| Zone | Breakfast | Lunch | Dinner | Inconvenience | Total/Day |
|---|---|---|---|---|---|
| Singapore | RM 25 | RM 35 | RM 40 | RM 30 | RM 130 |
| Asian | RM 30 | RM 40 | RM 50 | RM 40 | RM 160 |
| Non-Asian | USD 20 | USD 30 | USD 40 | USD 30 | USD 120 |
- Claim Item: “International Travel Per-Diem”
- Policy: Employees on overseas assignments
- Approval: Manager → Finance Director (higher value needs oversight)
Example 3: Field Force (No Meal Provision)
| Zone | Breakfast | Lunch | Dinner | Inconvenience | Total/Day |
|---|---|---|---|---|---|
| Malaysia | RM 10 | RM 15 | RM 20 | RM 0 | RM 45 |
- Claim Item: “Field Work Allowance”
- Policy: Sales reps visiting multiple sites, no overnight stay
- Note: Lower rates because they return home nightly (no inconvenience)
Step-by-Step Setup:
First, create the Claim Item (if not exists):
- Go to
Settings > Claim Items - Create “Travel Per-Diem”
- Check “Required Travel Allowance” ✓
- Go to
Then, set the rates:
- Go to
Settings > Travel Allowance - Click “+ Add”
- Select Destination: Malaysia
- Select Claim Item: “Travel Per-Diem”
- Enter meal amounts
- Save
- Go to
Repeat for each destination:
- Create separate entries for Singapore, Asian, Non-Asian
- Each can have different rates
Best Practices:
- Review Annually: Cost-of-living changes—update rates yearly
- Align with Government: Many companies follow civil service rates as a benchmark
- Document Policy: Add references in Description field (“Based on MOF Circular…”)
- Test Before Launch: Have 1-2 employees test the calculation logic
- Special Cases: Consider separate rates for:
- Sales team (frequent travelers)
- Executives (may have higher allowances)
- Field force (different pattern)
Common Questions:
Q: What if the employee gets free meals from the hotel? A: Policy decision. Some companies deduct breakfast if hotel includes it. Set this as a claim submission rule.
Q: Can rates differ by employee grade? A: Yes—create multiple Claim Items: “Manager Travel Allowance” vs “Staff Travel Allowance”, each with different rates.
Q: What about half-day travel? A: When claiming, employees can specify partial days. System can prorate (e.g., only Breakfast + Lunch if returning by afternoon).
Q: How do I handle multi-currency travel? A: For Non-Asian destinations, you can set rates in USD/EUR. System converts at claim submission using current exchange rates.
Professional Bodies & Subscriptions
Professional Body (Settings > Professional Body)
Maintains a master list of recognized professional organizations your company will reimburse.
| Field | Purpose | Example |
|---|---|---|
| Body Name | Official name of the organization | Association of Chartered Certified Accountants (ACCA) |
| Body Code | Short reference code | ACCA, CPA, CIMA |
| Description | Type of certification/purpose | Accounting professional qualification |
Subscriptions & Memberships (Settings > Subscriptions and Memberships)
Defines specific membership types and their reimbursement rules.
| Field | Purpose | Why It Matters | Example |
|---|---|---|---|
| Professional Body | Links to the body | Associates this subscription with an approved organization | ACCA |
| Subscription Type | Membership level/tier | Different levels may have different fees | Student, Affiliate, Member, Fellow |
| Annual Fee | Standard cost | Auto-populates when employees claim. Prevents over-claiming. | RM 500 |
| Claimable Amount | How much company pays | May be partial (e.g., 50%) or full reimbursement | RM 500 (100%) or RM 250 (50%) |
| Valid Period | Membership duration | Usually annual, helps track renewals | 12 months |
How It Works Together:
- Admin creates “ACCA” in Professional Bodies
- Admin creates subscription types: “ACCA Student (RM 300)”, “ACCA Member (RM 500)”
- When employee claims, they select their membership type
- System auto-fills the amount and validates against policy
Common Use Case:
An accounting firm wants to support professional development:
- Reimburses 100% of ACCA, CPA, CIMA memberships
- Reimburses 50% of optional certifications (CFE, CIA)
- Tracks renewal dates to remind employees
Cut-Off Logics (Settings > Claim Cut Off Logics)
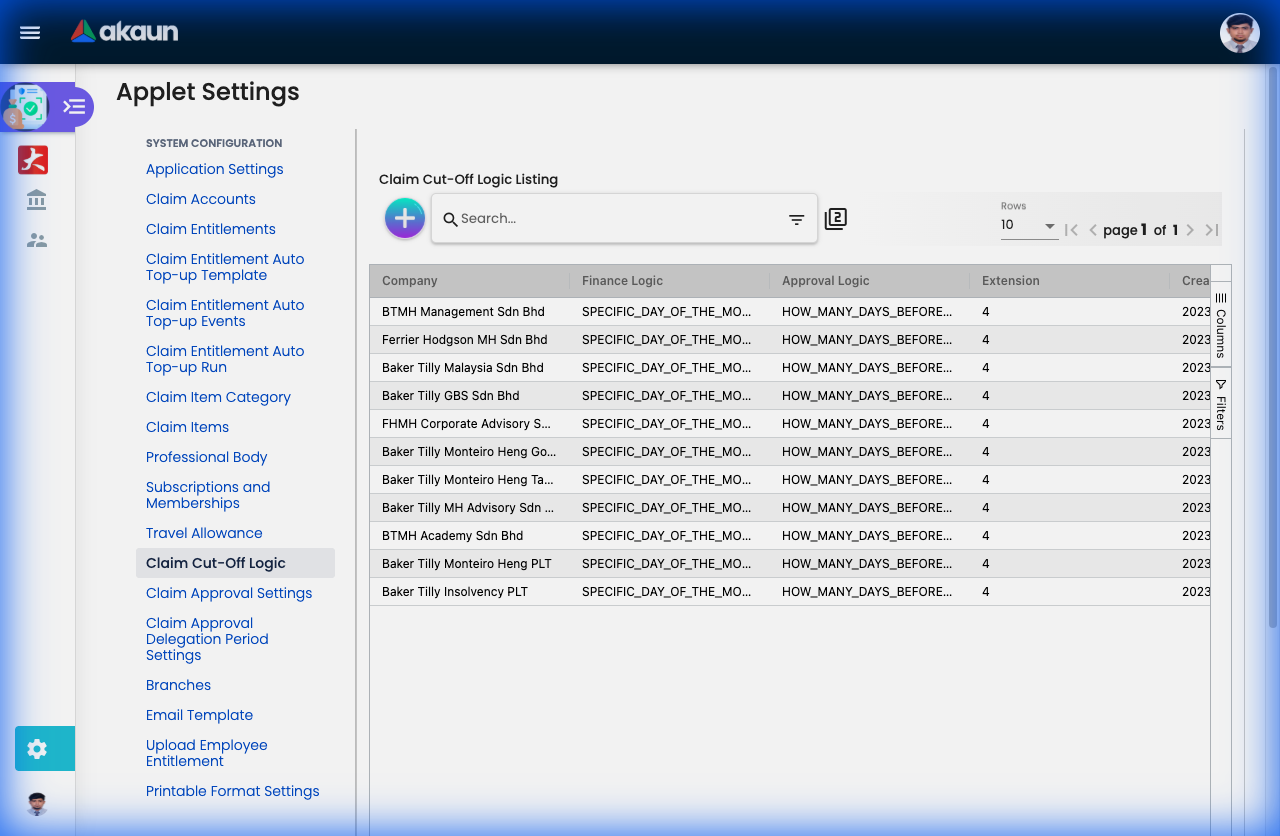
Cut-off dates align claim submissions with your payroll or accounting cycles. They prevent last-minute claims from disrupting closed financial periods.
Creating a Cut-Off Rule - Field Guide:
| Field | Purpose | Why It Matters | Example |
|---|---|---|---|
| Cut-Off Name | Descriptive label for this rule | Helps identify different cycles (monthly payroll vs quarterly close) | “Monthly Payroll Cut-Off” |
| Cut-Off Day | Day of the month when submissions close | Claims after this date roll to next period | 25 (submissions close on the 25th) |
| Processing Month | Which month this affects | Current month or next month processing | Current Month |
| Grace Period (Days) | Extra days allowed after cut-off | Gives flexibility for urgent/forgotten claims | 3 days (can submit until 28th) |
| Applied To | Which claim types follow this rule | Medical, Travel, All Claims | All Claims |
How Cut-Offs Work:
Scenario: Cut-off on 25th, Grace period: 3 days, Today: November 27th

✓ Claim submitted on Nov 20th → Processed in November payroll
✓ Claim submitted on Nov 26th → Grace period, processed in November payroll
✗ Claim submitted on Nov 29th → Too late, processed in December payroll
Best Practices:
- Align with payroll: If payroll closes on the 25th, set cut-off on 23rd-24th to allow processing time
- Communicate clearly: Employees need to know the deadlines
- Be consistent: Same cut-off for all months avoids confusion
- Grace period: 2-3 days handles edge cases without being too lenient
Common Configurations:
Monthly Payroll Cycle:
- Cut-off: 23rd
- Grace: 2 days
- Result: Claims by 25th included in current month’s pay
Quarterly Accounting Close:
- Cut-off: Last day of quarter
- Grace: 5 days
- Result: Aligns with financial reporting periods
Branches (Settings > Branches)
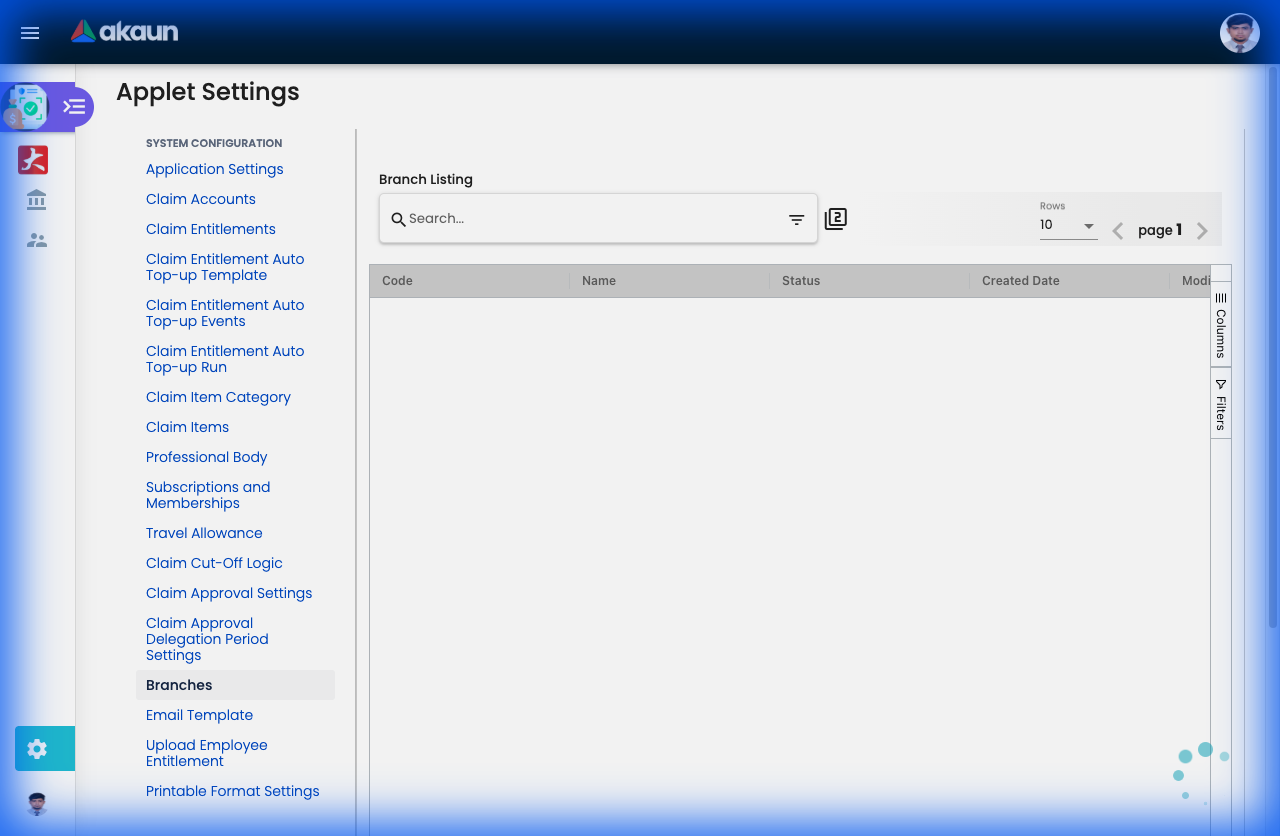
Branches represent your organization’s physical locations or cost centers. They enable expense tracking by location and proper budget allocation.
Creating a Branch - Field Guide:
| Field | Purpose | Why It Matters | Example |
|---|---|---|---|
| Branch Name | Location or department name | What employees see when selecting their base | “Kuala Lumpur HQ”, “Penang Office”, “Singapore Branch” |
| Branch Code | Unique identifier | Used in accounting exports and GL codes | KL-HQ, PNG-01, SG-01 |
| Cost Center Code | Links to accounting system | Ensures expenses hit the right department budget | 1000-HQ, 2000-Northern, 3000-International |
| Address | Physical location | Useful for compliance, tax reporting, location-based policies | “Menara ABC, Jalan Ampang, KL” |
| Manager | Branch head/approver | Defaults claims from this branch to this manager | John Tan (HOD - Northern Region) |
| Active Status | Enable/disable branch | Deactivate closed locations without deleting historical data | Active / Inactive |
Why Branches Matter:
- Budget Tracking: “How much did the Penang office spend on travel this quarter?”
- Approval Routing: Claims auto-route to the branch manager
- Tax Compliance: Different locations may have different tax rules
- Cost Allocation: Multi-location businesses need to track expenses by site
Real-World Setup:
A retail chain with 5 locations:
| Branch | Code | Cost Center | Use Case |
|---|---|---|---|
| KL Flagship Store | KL-FS | 1001 | Staff claims route to Store Manager |
| Penang Outlet | PNG-01 | 2001 | Separate budget tracking for Northern region |
| Online Operations | ONLINE | 3001 | E-commerce team, virtual location |
| Warehouse & Logistics | WH-KL | 4001 | Different approval flow (Ops Manager) |
| Corporate Office | HQ | 1000 | Management and admin staff |
Best Practice:
- Match branch codes to your accounting system’s cost center structure
- Keep branch names consistent (all “Office” or all “Branch”, not mixed)
- Assign managers to automate approval routing
Email Templates (Settings > Email Template)
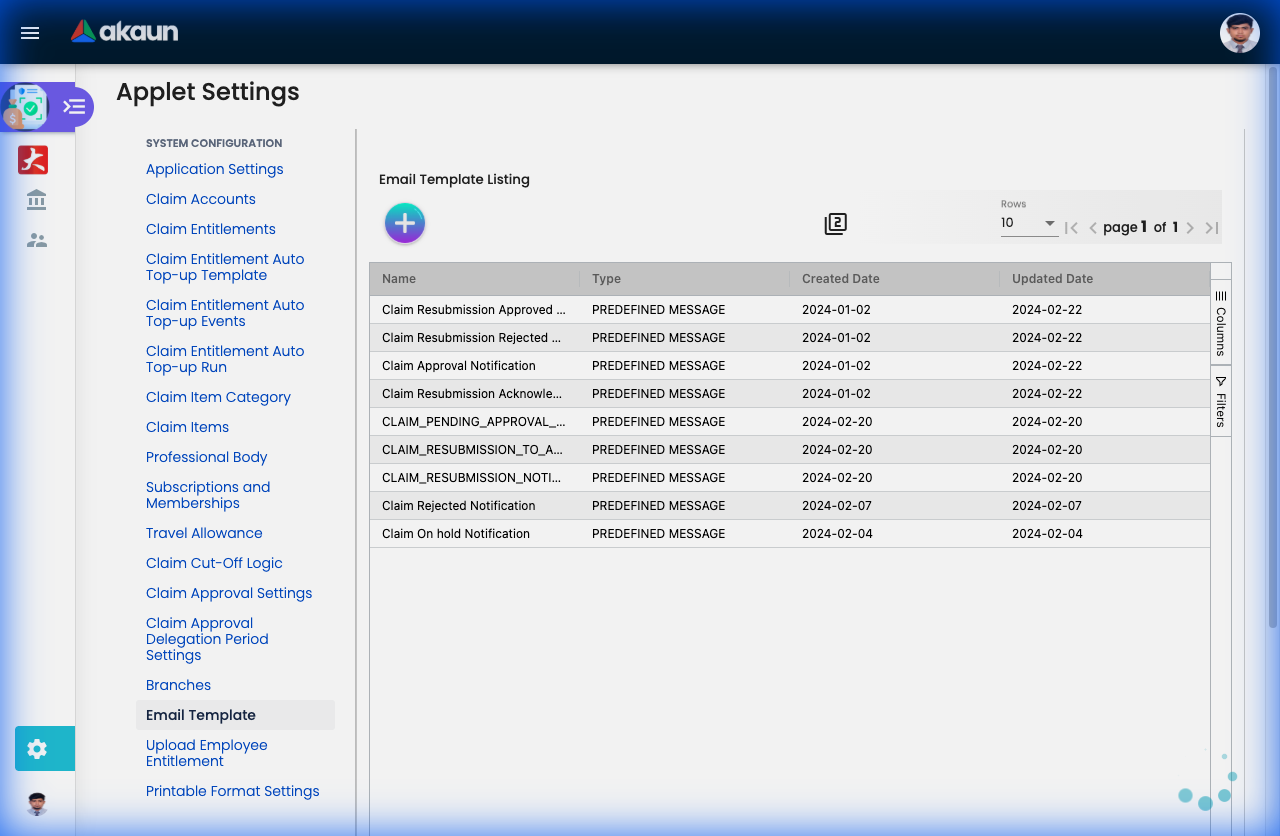
Email templates control the automated notifications sent when claims change status. Customize the messaging to match your company’s tone and include relevant information.
Template Types & When They’re Sent:
| Template | Triggered When | Recipient | Purpose |
|---|---|---|---|
| Claim Submitted | Employee submits a claim | Employee + Approver | Confirmation & notification |
| Claim Approved | Approver clicks “Approve” | Employee | Good news! |
| Claim Rejected | Approver clicks “Reject” | Employee | Explain why + next steps |
| Claim Queried | Approver requests info | Employee | Ask for clarification |
| Payment Processed | Finance marks as paid | Employee | “Money’s on the way” |
| Approaching Cut-Off | X days before cut-off | All employees | Reminder to submit pending claims |
Customizing Templates - Available Fields:
You can insert dynamic placeholders that auto-populate:
{{employee_name}} - Claimant's name
{{claim_id}} - Claim reference number
{{claim_amount}} - Total amount
{{submission_date}} - When it was submitted
{{approver_name}} - Who needs to approve
{{rejection_reason}} - Comments from approver
{{payment_date}} - Expected payment date
{{claim_link}} - Direct link to view claim
Example Template - Claim Approved:
Subject: ✓ Your Claim {{claim_id}} Has Been Approved

Dear {{employee_name}},

Good news! Your claim for RM {{claim_amount}} has been approved by {{approver_name}}.

**Claim Details:**
- Reference: {{claim_id}}
- Amount: RM {{claim_amount}}
- Approved on: {{approval_date}}
- Expected payment: {{payment_date}}

You can view your claim here: {{claim_link}}

If you have questions, contact finance@yourcompany.com

Best regards,
Finance Team
Best Practices:
- Be Clear: Use plain language, avoid jargon
- Include Actions: What should the recipient do next?
- Add Links: Direct link to the claim saves time
- Set Expectations: When will they get paid? What happens next?
- Match Tone: Formal for approvals, encouraging for rejections
Pro Tip - Rejection Template: A good rejection email explains the reason AND guides employees on how to fix it:
Your claim was rejected for: {{rejection_reason}}

Next steps:
1. Review the feedback above
2. If you have questions, contact your manager
3. Make corrections and re-submit
4. Need help? Check our Claims Policy: [link]
File Import (Settings > Upload Employee Entitlement)
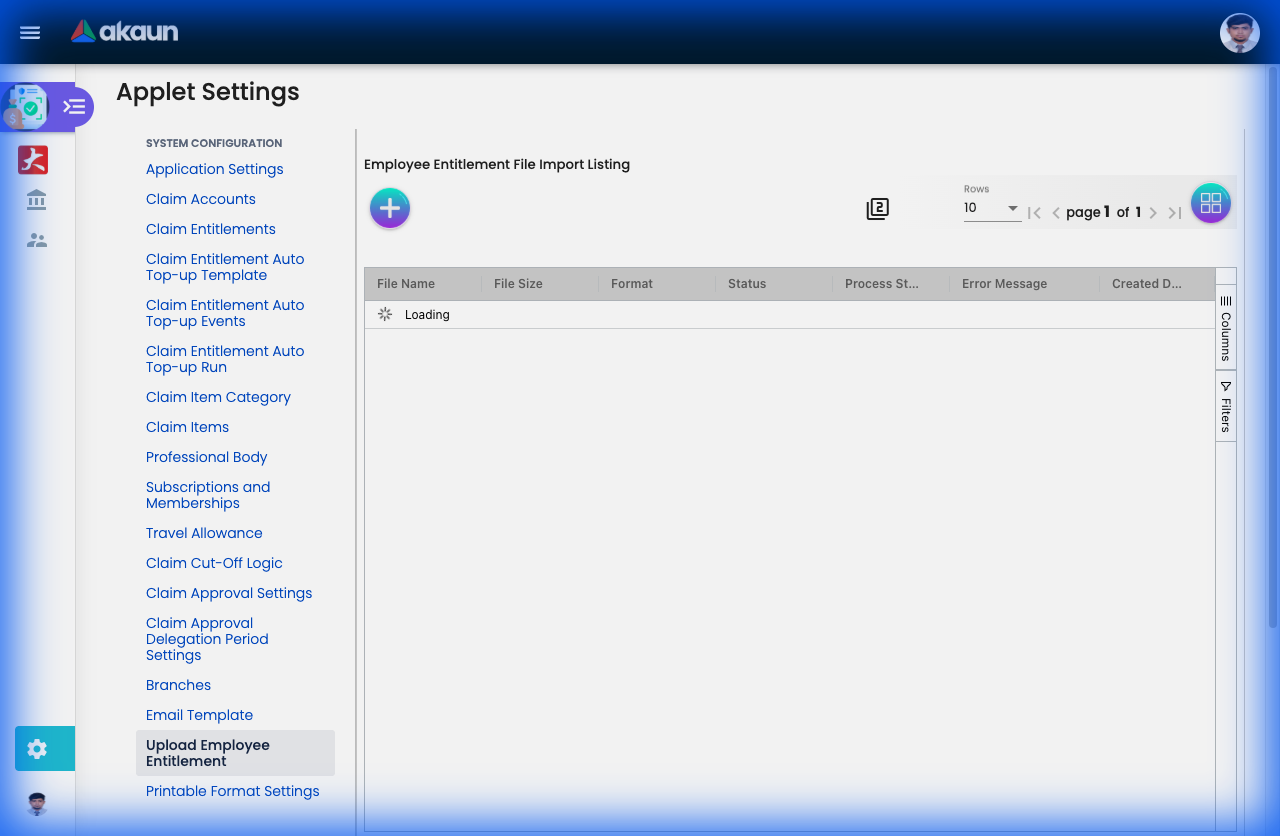
Bulk import allows you to set entitlements for hundreds or thousands of employees at once, instead of creating them one-by-one.
When to Use File Import:
✓ Initial Setup: Setting up entitlements for all existing employees
✓ Annual Renewal: Resetting everyone’s allowances at year-start
✓ Mass Updates: Changing limits for a whole department
✓ New Joiners: Onboarding 50+ employees from an acquisition
Required File Format (Excel/CSV):
| Column | Data Type | Required | Example | Notes |
|---|---|---|---|---|
| Employee ID | Text/Number | Yes | EMP001 | Must match your employee master data |
| Employee Name | Text | Yes | John Tan | For validation |
| Claim Account | Code | Yes | MED-FUND | Account to apply entitlement to |
| Entitlement Amount | Number | Yes | 1000 | Credit amount (e.g., RM 1000) |
| Effective Date | Date | Yes | 2024-01-01 | When this entitlement starts |
| Expiry Date | Date | No | 2024-12-31 | When it expires (blank = never) |
| Recurring | Yes/No | No | Yes | Auto-renew? |
| Recurrence Rule | Text | No | Monthly | Daily, Weekly, Monthly, Yearly |
Sample Excel File:
Employee ID | Name        | Claim Account | Amount | Effective Date | Expiry Date | Recurring
------------|-------------|---------------|--------|----------------|-------------|----------
EMP001      | John Tan    | MED-FUND      | 1500   | 2024-01-01    | 2024-12-31  | Yes
EMP002      | Mary Lim    | MED-FUND      | 2000   | 2024-01-01    | 2024-12-31  | Yes
EMP003      | Ali Rahman  | MED-FUND      | 1500   | 2024-01-01    | 2024-12-31  | Yes
EMP001      | John Tan    | TRAVEL-FUND   | 500    | 2024-01-01    | 2024-12-31  | No
Step-by-Step Process:
- Download Template: System provides a pre-formatted Excel template
- Fill in Data: Add employee IDs and entitlement amounts
- Validate: System checks for errors before importing
- Review: Preview shows what will be created/updated
- Import: Confirm to apply changes
- Verify: Check a few employees to confirm accuracy
Common Errors & Solutions:
| Error | Cause | Solution |
|---|---|---|
| “Employee not found” | Wrong Employee ID | Check spelling, ensure ID exists in system |
| “Invalid Claim Account” | Account code doesn’t exist | Create the account first, or fix the code |
| “Duplicate entry” | Same employee+account twice | Remove duplicate rows |
| “Invalid date format” | Wrong date format | Use YYYY-MM-DD format |
| “Amount must be positive” | Negative number | Check your formulas |
Real-World Example:
Scenario: Setting annual medical allowances for all staff
- HR exports employee list (500 employees)
- Finance adds entitlement amounts:
- Executives: RM 3000
- Managers: RM 2000
- Staff: RM 1500
- Set effective date: 2024-01-01
- Set expiry: 2024-12-31
- Recurring: Yes (auto-renew yearly)
- Upload file → 500 entitlements created in seconds
Pro Tips:
- Test First: Import 5-10 employees as a test batch
- Backup: Export current entitlements before mass updates
- Error Log: System provides detailed error report for failed rows
- Partial Import: Valid rows import even if some rows have errors
Claim Approval Settings (Settings > Claim Approval Settings)
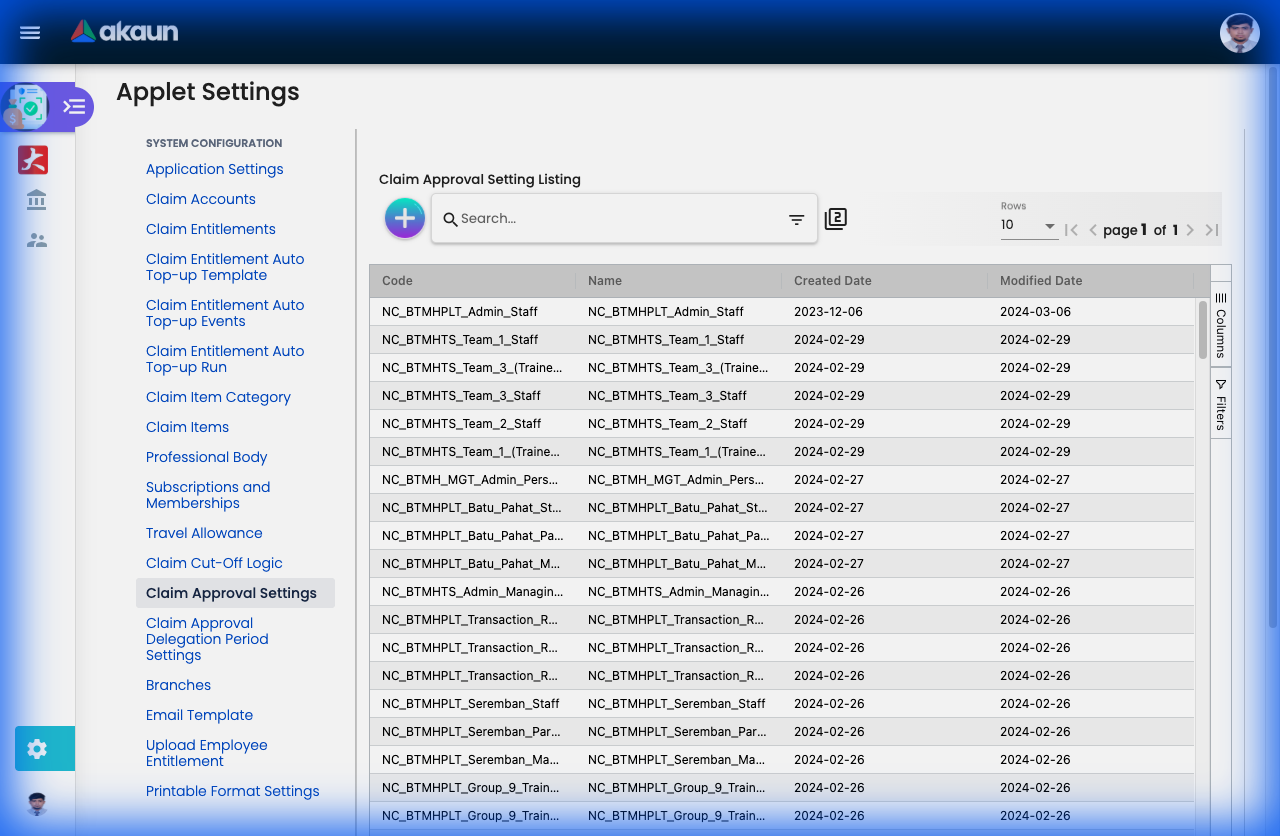
What are Approval Settings?
Approval Settings define the “approval chain”—who needs to approve claims, in what order, and under what conditions. This is one of the most powerful features for maintaining control and compliance.
Why You Need Structured Approvals:
- Compliance: Ensures proper authorization hierarchy
- Budget Control: Higher amounts get more scrutiny
- Segregation of Duties: Prevents self-approval fraud
- Flexibility: Different workflows for different claim types
Creating an Approval Setting - Field-by-Field Guide:
Basic Configuration:
| Field | Purpose | Example |
|---|---|---|
| Name | Approval workflow name | “Standard Travel Approval”, “High-Value Claims” |
| Code | Unique identifier | STD-TRVL, HIGH-VAL |
| Approval Workflow | Type of workflow logic | Claim Account, Engagement PIC, Employee Org Chart |
| Default Approver | Final fallback approver | CFO (for top-level approvals) |
| Branch | Which location/department | KL Office, Singapore Branch |
Approval Workflow Types:
Claim Account:
- Standard hierarchy-based approval
- Follows organizational reporting structure
- Example: Employee → Manager → Department Head
Engagement PIC:
- Project-based approval
- Goes to project manager or client engagement leader
- Example: Consultant → Project Manager → Partner
Employee Org Chart:
- Strictly follows org chart reporting lines
- Escalates up the management chain
- Example: Staff → Supervisor → Manager → Director
Defining Approval Levels:
Each approval setting can have up to 5 levels. Each level defines:
| Level Field | Purpose | Example |
|---|---|---|
| Approval Type | How approvers are selected | Direct Manager, Specific Role, Any from List |
| No of Approvers | How many people must approve at this level | 1 (manager only) or 2 (any 2 from finance team) |
| Engagement Role | For project claims, which role approves | Project Manager, Engagement Partner |
Approval Types Explained:
- Direct Manager: System automatically routes to employee’s line manager
- Specific Employee: Always goes to a named person (e.g., “Finance Director”)
- Role-Based: Anyone with a specific role can approve (e.g., “Any Department Head”)
- Quorum: Requires X out of Y approvers (e.g., “2 out of 3 directors”)
Real-World Approval Scenarios:
Example 1: Simple 2-Level Approval
Name: Standard Claims
Workflow: Employee Org Chart

Level 1: Direct Manager (1 approver needed)
Level 2: Department Head (1 approver needed)

Flow: Employee → Manager → Dept Head → Approved
Example 2: Amount-Based Escalation
Name: High-Value Claims (>RM 5,000)
Workflow: Claim Account

Level 1: Direct Manager
Level 2: Department Head
Level 3: Finance Director
Level 4: CFO (for amounts > RM 20,000)

Note: Levels 3-4 triggered by amount thresholds
Example 3: Project/Engagement Approval
Name: Client Billable Expenses
Workflow: Engagement PIC

Level 1: Project Manager (validates project budget)
Level 2: Engagement Partner (client relationship owner)
Level 3: Finance (billing verification)

Flow ensures client costs are properly authorized
Example 4: Committee Approval (Quorum)
Name: Training & Development
Workflow: Claim Account

Level 1: Direct Manager
Level 2: HR Committee (2 out of 3 must approve)
  - HR Director
  - Training Manager
  - Finance Controller

Use case: Expensive training courses need consensus
Best Practices:
- Keep It Simple: 2-3 levels are usually sufficient. Too many levels = frustration and delays
- Test First: Create a test approval setting and run sample claims through it
- Document Clearly: Use the Description field to explain when this workflow applies
- Set Fallbacks: Always define a Default Approver for edge cases
- Monitor Performance: Track average approval time—if >3 days, simplify the workflow
Common Mistakes to Avoid:
❌ Circular Approvals: Employee A approves for B, B approves for A
✓ Solution: Use org chart hierarchy strictly
❌ No Fallback: Manager on leave = claim stuck
✓ Solution: Set up delegation or default approvers
❌ Too Many Levels: 5-level approval for RM 50 parking claim
✓ Solution: Simple claims = simple approvals (1-2 levels max)
Claim Approval Delegation Period (Settings > Claim Approval Delegation Period)
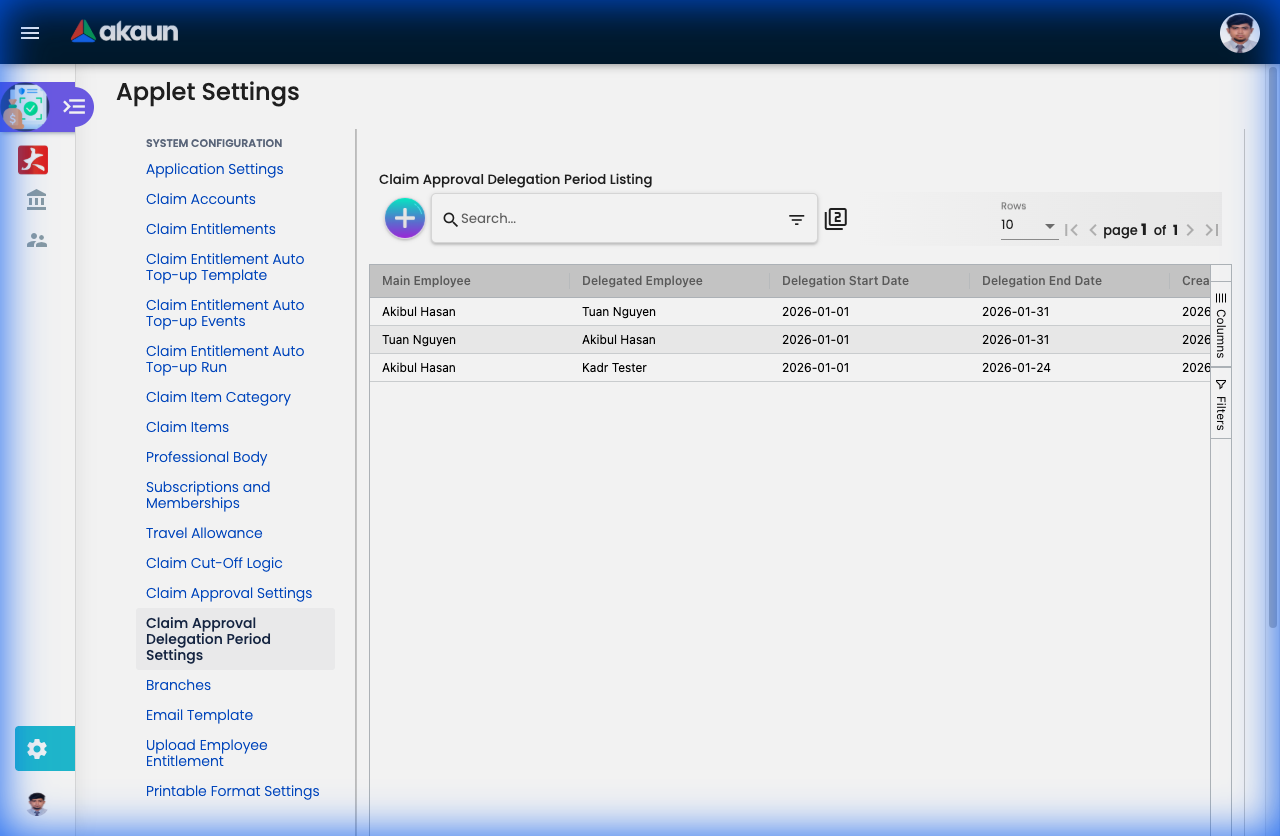
When managers go on leave, claims shouldn’t get stuck. The Delegation feature temporarily transfers approval rights to another person.
Creating a Delegation:
| Field | Purpose | Example |
|---|---|---|
| Delegator | Who is delegating (going on leave) | John Tan (Manager) |
| Delegatee | Who will approve instead | Mary Lim (Acting Manager) |
| Start Date | When delegation begins | Dec 20, 2024 |
| End Date | When delegation ends | Jan 5, 2025 |
| Claim Types | Which claims to delegate | All, or specific types only |
How It Works:
Scenario: John Tan on vacation Dec 20 - Jan 5

Setup:
- Delegator: John Tan
- Delegatee: Mary Lim
- Period: Dec 20 - Jan 5

Result during period:
- All claims normally routed to John → auto-routed to Mary
- Mary sees them in her "Pending Approvals"
- After Jan 5 → reverts to John automatically
Use Cases:
- Annual Leave: Manager on 2-week vacation
- Medical Leave: Unexpected absence
- Business Travel: Manager overseas with limited access
- Sabbatical: Extended leave (3-6 months)
Pro Tips:
- Set up delegation BEFORE leaving (not during)
- Delegatee should have similar authority level
- For critical periods (year-end close), set up dual delegatees
- System sends notification to both delegator and delegatee when active
Printable Format Settings (Settings > Printable Format Settings)
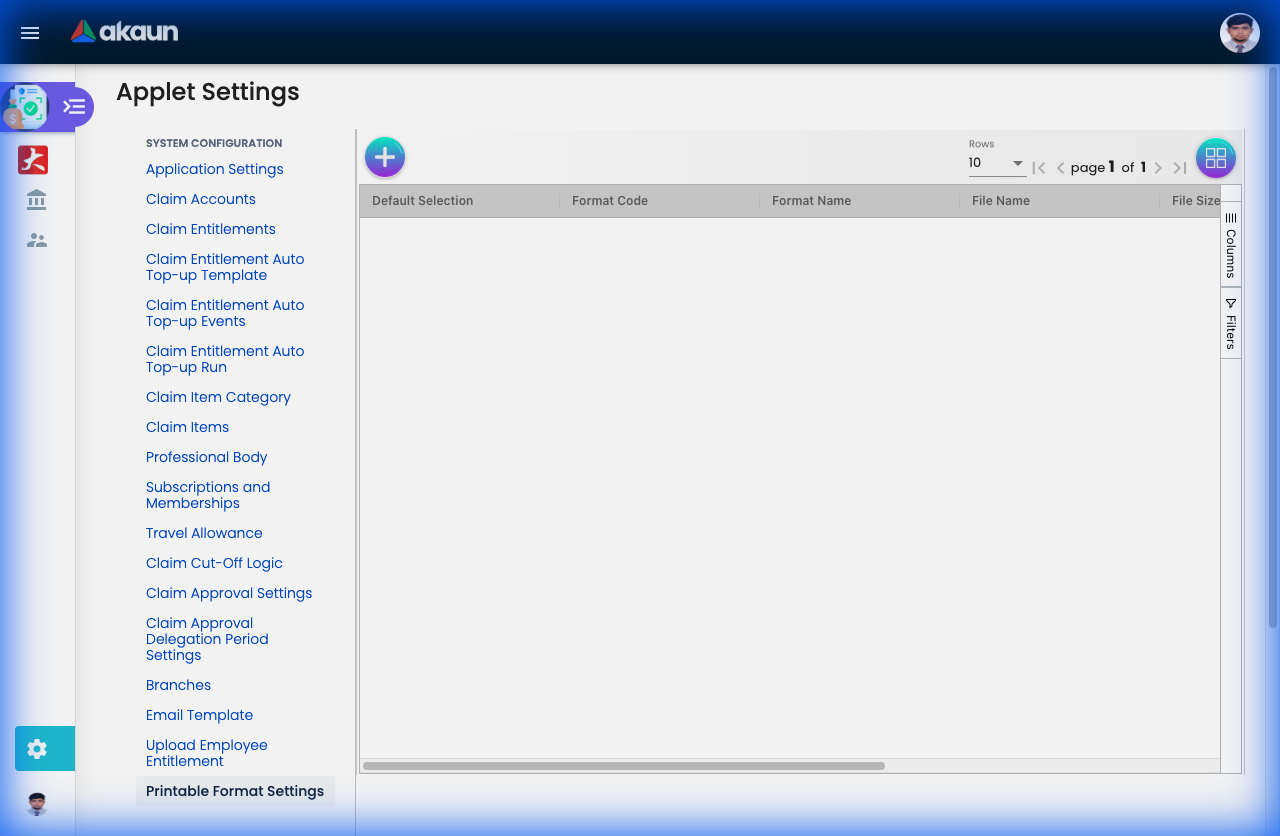
Customize how claims appear when printed or exported to PDF. This is essential for formal documentation, audits, and record-keeping.
What Can You Customize?
| Setting | Purpose | Example |
|---|---|---|
| Company Logo | Branding on printed claims | Upload company letterhead logo |
| Header Text | Top of page content | “ABC Sdn Bhd - Employee Claim Form” |
| Footer Text | Bottom of page content | “Finance Department |
| Show Approval Trail | Display who approved and when | Yes (shows full audit trail) |
| Show Attachments | Include receipt thumbnails | Yes (embeds receipt images) |
| Page Size | Paper format | A4, Letter |
| Orientation | Layout direction | Portrait, Landscape |
Why Customization Matters:
Before Customization:
- Generic printouts lacking company branding
- Missing approval signatures/dates
- Receipts not attached (have to print separately)
- Doesn’t meet audit/compliance requirements
After Customization:
- ✓ Professional branded documents
- ✓ Complete approval trail visible
- ✓ Receipts embedded for easy verification
- ✓ Audit-ready format
Real-World Formats:
Format 1: Internal Processing (Simple)
- Company logo: Top left
- Header: “Employee Expense Claim”
- Shows: Claim ID, Employee, Date, Amount, Status
- Footer: Page numbers only
- Use case: Day-to-day processing
Format 2: External Audit (Detailed)
- Company logo + registration details
- Header: “Official Claim Record”
- Shows: Full approval trail with timestamps
- Shows: All receipts embedded
- Footer: Authorized signature line + company seal
- Use case: Annual audits, tax submissions
Format 3: Client Billing (Project)
- Client logo (for billable expenses)
- Header: “Reimbursable Project Expenses - [Client Name]”
- Shows: Only billable items
- Shows: Client PO/reference numbers
- Footer: Invoice payment terms
- Use case: Passing costs to clients
Setup Steps:
- Upload Assets: Logo (PNG/JPG, max 200KB)
- Configure Text: Header/Footer via rich text editor
- Select Fields: Choose which data fields to display
- Preview: Generate sample printout
- Test: Print a real claim to verify formatting
- Deploy: Set as default or create multiple formats
Best Practices:
- Test on Actual Printer: Screen preview ≠ printed output
- Check Double-Sided: Ensure logo doesn’t bleed through
- Audit Compliance: Verify format meets regulatory requirements
- Multiple Templates: Different formats for different purposes
- Version Control: Note format version in footer (“v2.1 - Updated Jan 2024”)
Reporting & Audit
Reports
- My Claims: Personal dashboard.
- Pending Approvals: Manager dashboard.
- Staff Reports: Team oversight.
- Printable Formats: Customize how printed claims look (
Settings > Printable Format Settings).
Audit Trail (Settings > Applet Log)
A “black box” recording every system action.
- Who: User ID.
- What: Action (Create, Edit, Approve).
- When: Timestamp.
- Data: Before and After values.
Personalization
Favorite Claims
Save frequent claims (e.g., “Monthly Internet Bill”) as a template for 1-click submission.
Default Settings
Set your default Branch, Cost Center, and Payment Mode to speed up data entry.
FAQ
Q: Why can’t I see a specific Claim Item? A: It might be linked to a Claim Account you don’t have an entitlement for, or it’s restricted by your Branch/Grade.
Q: How do I check my remaining Medical balance? A: If enabled by Admin, it appears on your Dashboard or when selecting a Medical claim item.
Q: What happens if I submit after the Cut-Off date? A: The system may block it or automatically assign it to the following month’s processing cycle.