Customer Consignment Applet
Purpose and Overview
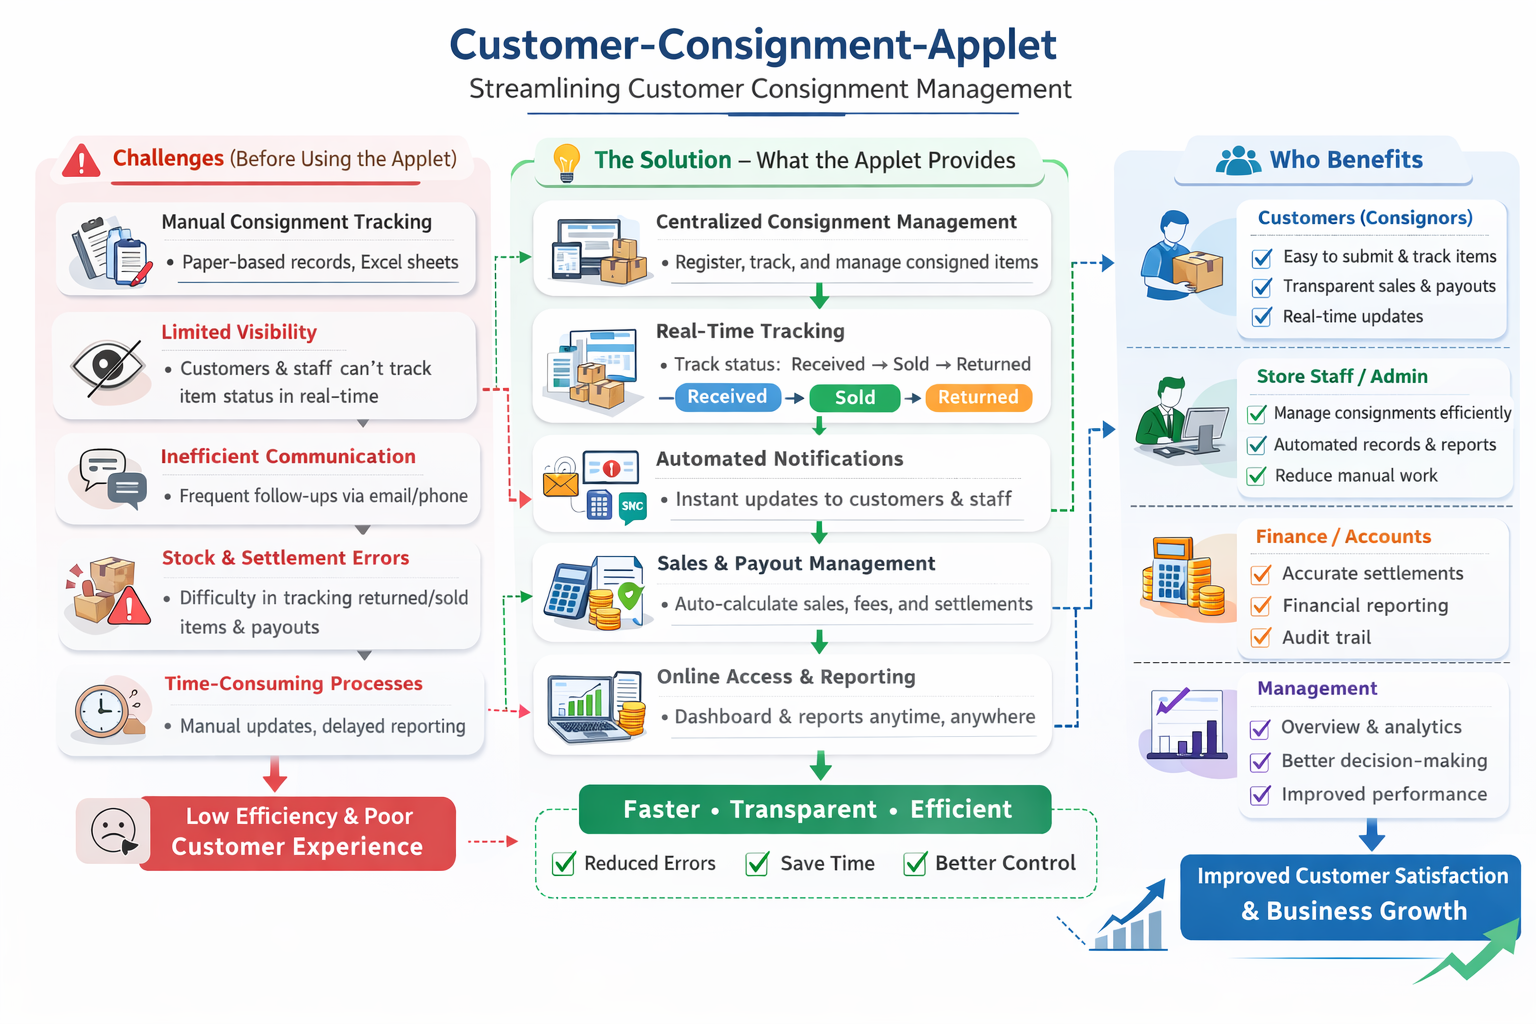
The Customer Consignment Applet is an application within the Bigledger ERP ecosystem. Its primary purpose is to manage and track consignment stock—inventory that a business places at a customer’s location but retains ownership of until the goods are sold or consumed by the customer. The applet facilitates the movement of stock to and from customer premises and provides tools to monitor these internal stock transfers.
Key Features Overview
Who Benefits from This Applet?
Inventory & Warehouse Managers:
- Track where consignment stock is officially located
- Manage the outbound shipments to customers efficiently
- Handle inbound returns for unsold inventory
Sales Representatives & Account Managers:
- Ensure that customers have adequate consignment stock on hand
- Monitor stock consumption rates at various sites
- Proactively replenish goods before they run out
Finance & Operations Teams:
- Maintain accurate asset valuation of off-site goods
- Reconcile the stock that is physically at customer locations
- Guarantee accurate billing upon consumption
What Problems Does This Solve?
The Manual Consignment Tracking Problem:
Tracking off-site stock can be messy. Common issues include:
- Lost visibility on where external stock is physically located
- Delayed invoicing due to poor tracking of what has been consumed
- Messy return processes when dealing with unsold external goods
- Unaccounted inventory leading to inaccurate financial asset reports
The Customer Consignment Applet Solution:
- Centralized tracking - Always know where your consignment stock is
- Automated transfers - Seamlessly process both inbound and outbound stock movement
- Real-time monitoring - Internal stock queues display pending actions and transfer statuses
- Configurable control - Flexible field settings and customized status workflows
Key Concepts
Understanding Consignment Stock Management
The consignment process involves three critical elements working in harmony:
| Element | Definition | Practical Example |
|---|---|---|
| Stock Owner (You) | The business that retains ownership of goods | ABC Electronics Ltd holds ownership of spare parts |
| Stock Location (Customer) | External sites where stock is physically placed | Customer warehouse, retail store, service center |
| Transfer Control | Movement of stock in and out | Dispatching 100 units out, receiving 30 units back |
The Consignment Workflow Framework
Every consignment transaction follows a structured flow:
Your Central Warehouse
│
├─ Transfer Out ──> Stock to customer location (You own it)
│  └─ At Customer: Monitored for consumption/sales
│
└─ Transfer Receive ──> Stock returned to your control
   └─ Reconciliation: Updated in your inventory
The Stock Lifecycle
Understanding how stock moves through your system:
- Transfer Out: You dispatch goods with transfer documentation
- In Transit: System tracks movement status
- At Customer: Stock physically at their location; you own it
- Consumption: Customer uses/sells the goods
- Return: Unsold or unused stock comes back
- Reconciliation: Physical count matches system records
Real-World Consignment Scenarios
Scenario 1: Retail Partner Consignment
Setup: Supply Electronics Store with 50 phones on consignment
- Transfer Out: 50 units to store (you retain ownership)
- At Store: They sell 35, hold 15
- Transfer Receive: 15 unsold units return to you
- Invoice: Only 35 units (what was sold)
Result: Risk transfer only on consumed goods
Scenario 2: Service Center Equipment
Setup: Place RM 80,000 diagnostic equipment at service center
- Transfer Out: Equipment to their facility
- Monitoring: Real-time tracking (not consumed, controlled asset)
- Finance: Equipment on YOUR balance sheet
Result: Asset visibility + partner support
Scenario 3: Warehouse Overflow
Setup: Main warehouse full; use customer's space
- Transfer Out: 1,000 units to overflow location
- Monitoring: Tracked like internal stock
- Transfer Receive: Gradual recall as needed
Result: Extended capacity without buying new warehouse
Key Features
Quick Start Guide
Get up and running quickly with these essential workflows based on your role.
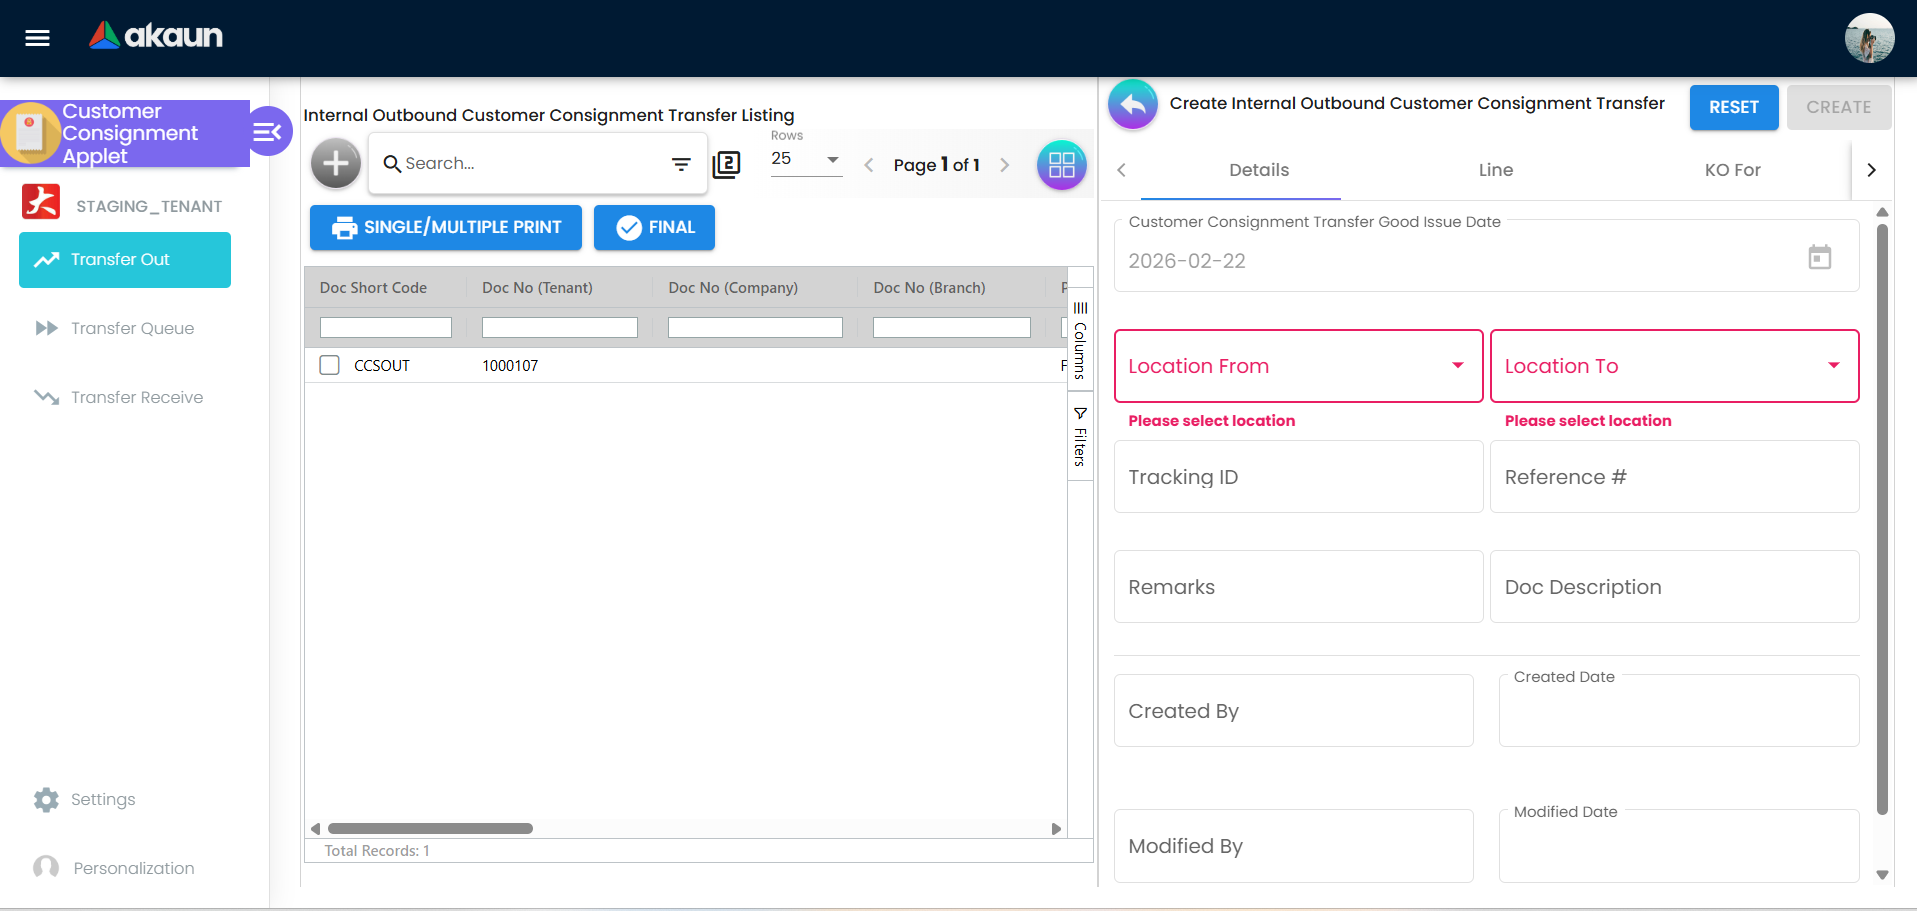
For Warehouse Managers: Dispatching Stock
Goal: Send consignment stock to a customer location in 5 simple steps.
- Navigate: Go to Transfer Out from the sidebar.
Create Transfer: Click "+" → Create a new stock transfer record → System asks for From warehouse and To customer location
Select Origin & Destination:
- Origin Warehouse: Choose which warehouse the stock comes from (e.g., Central Warehouse)
- Destination: Select the customer location receiving the stock (e.g., “ABC Retail Store”)
Add Items:
- Click “Add Line” for each item type
- Select the Inventory Item (e.g., “Widget SKU-001”)
- Enter Quantity (e.g., “50 units”)
- Add Notes if needed (e.g., “Expiry: Dec 2025”)
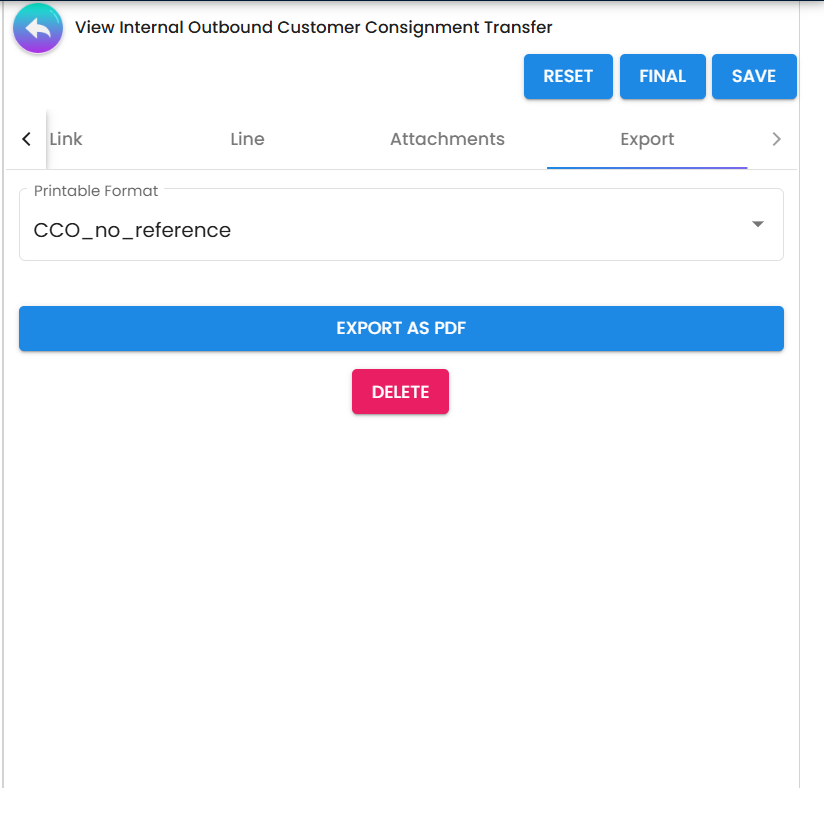
Dispatch & Print:
- Review all details are correct
- Click “Dispatch” or “Submit” to process
- Print your customized delivery order using the printable format
What Happens Next?
You Submit Transfer Out
        ↓
Status: In Transit / Pending Confirmation
        ↓
Customer Receives Stock (Transfer Receive initiated)
        ↓
Stock Now Appears in Transfer Queue (real-time monitoring)
        ↓
You Can Track Location & Status Anytime
Pro Tips:
- ✓ Always print delivery orders before dispatch
- ✓ Keep serial numbers if items are high-value
- ✓ Use batch transfer for multiple same items
- ✓ Check customer location details before confirming
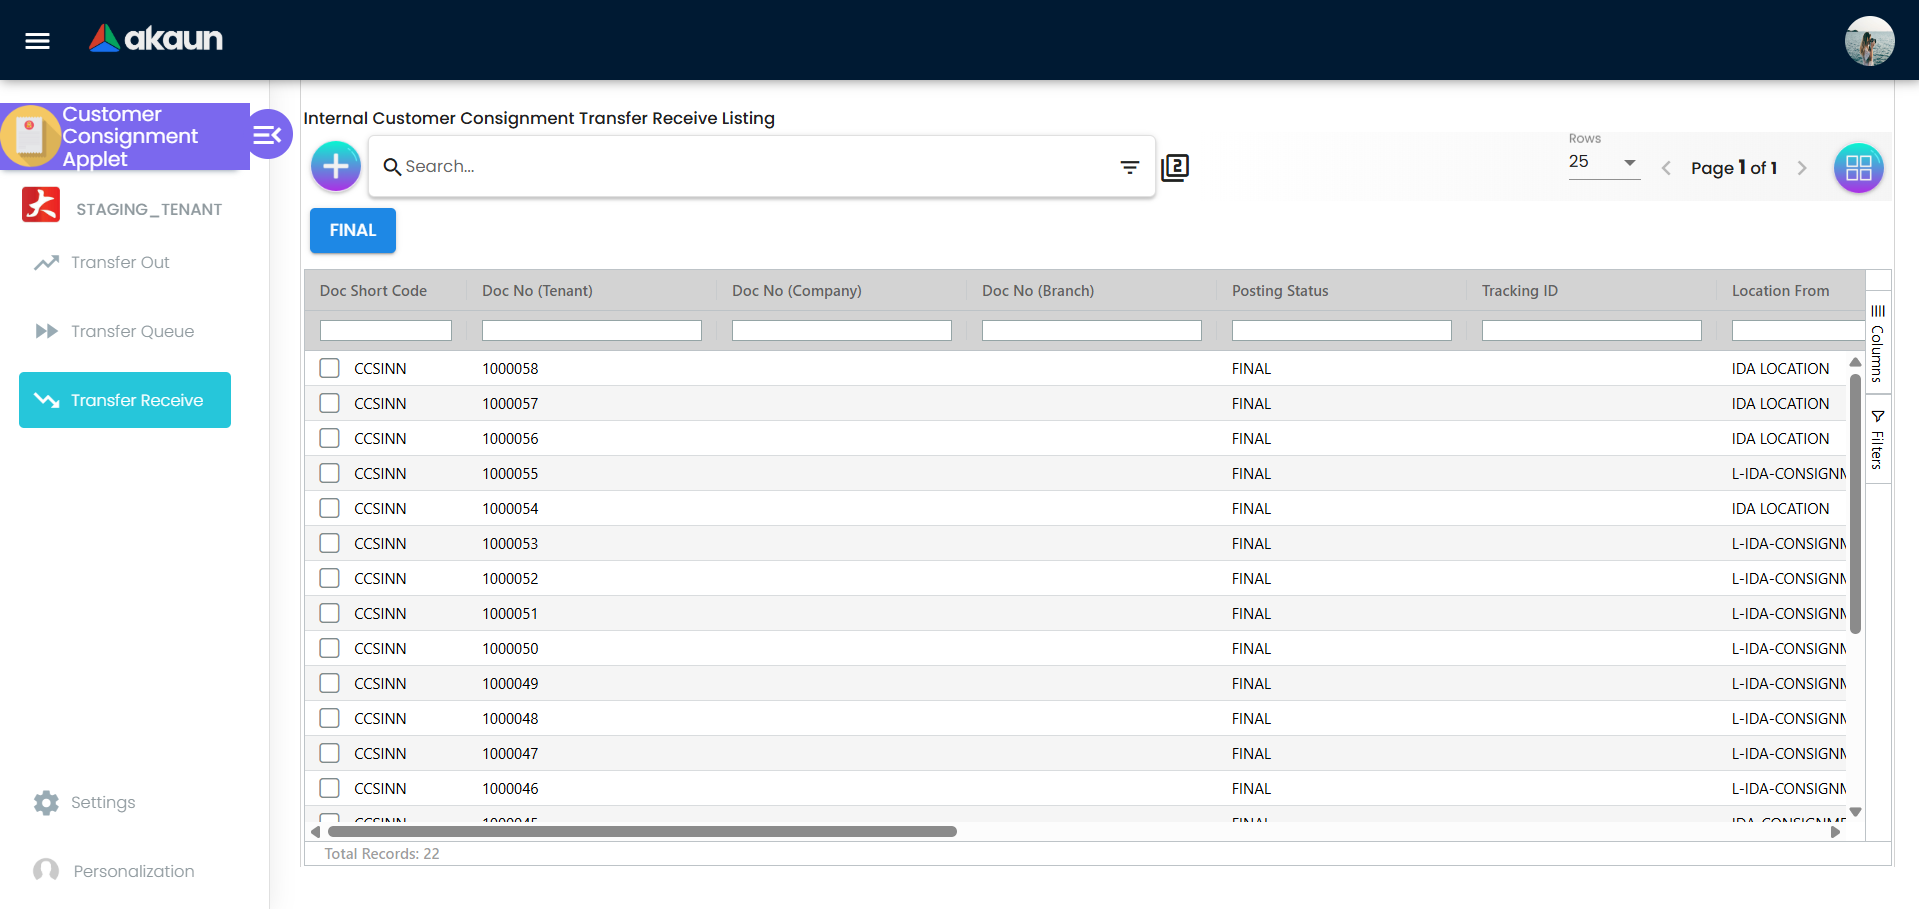
For Sales Reps: Process Incoming Returns
Goal: Receive unsold consignment inventory back from the customer in 4 simple steps.
- Navigate: Access Transfer Receive from the sidebar.
- Initiate Return: Click "+" → Select the customer location returning the goods.
Verify Goods:
- Check incoming items against original transfer documentation
- Input the items and quantities returning to warehouse
- Verify condition (new, good, damaged, expired)
- Accept or flag any discrepancies
Complete Transfer:
- Click “Confirm Receipt” or “Complete”
- System automatically updates your internal inventory
- Stock ownership reverts from customer location back to main warehouse
What Happens Next?
You Complete Transfer Receive
        ↓
Stock Returns to Your Central Inventory
        ↓
System Updates All Balances (automatically)
        ↓
Return Now Visible in Transfer Queue (historical record)
        ↓
Ready for Resale or Disposal
Pro Tips:
- ✓ Match quantities carefully—discrepancies flag for review
- ✓ Note damaged items for quality control
- ✓ Verify expiry dates before acceptance
- ✓ Update inventory status if returned goods can’t be resold
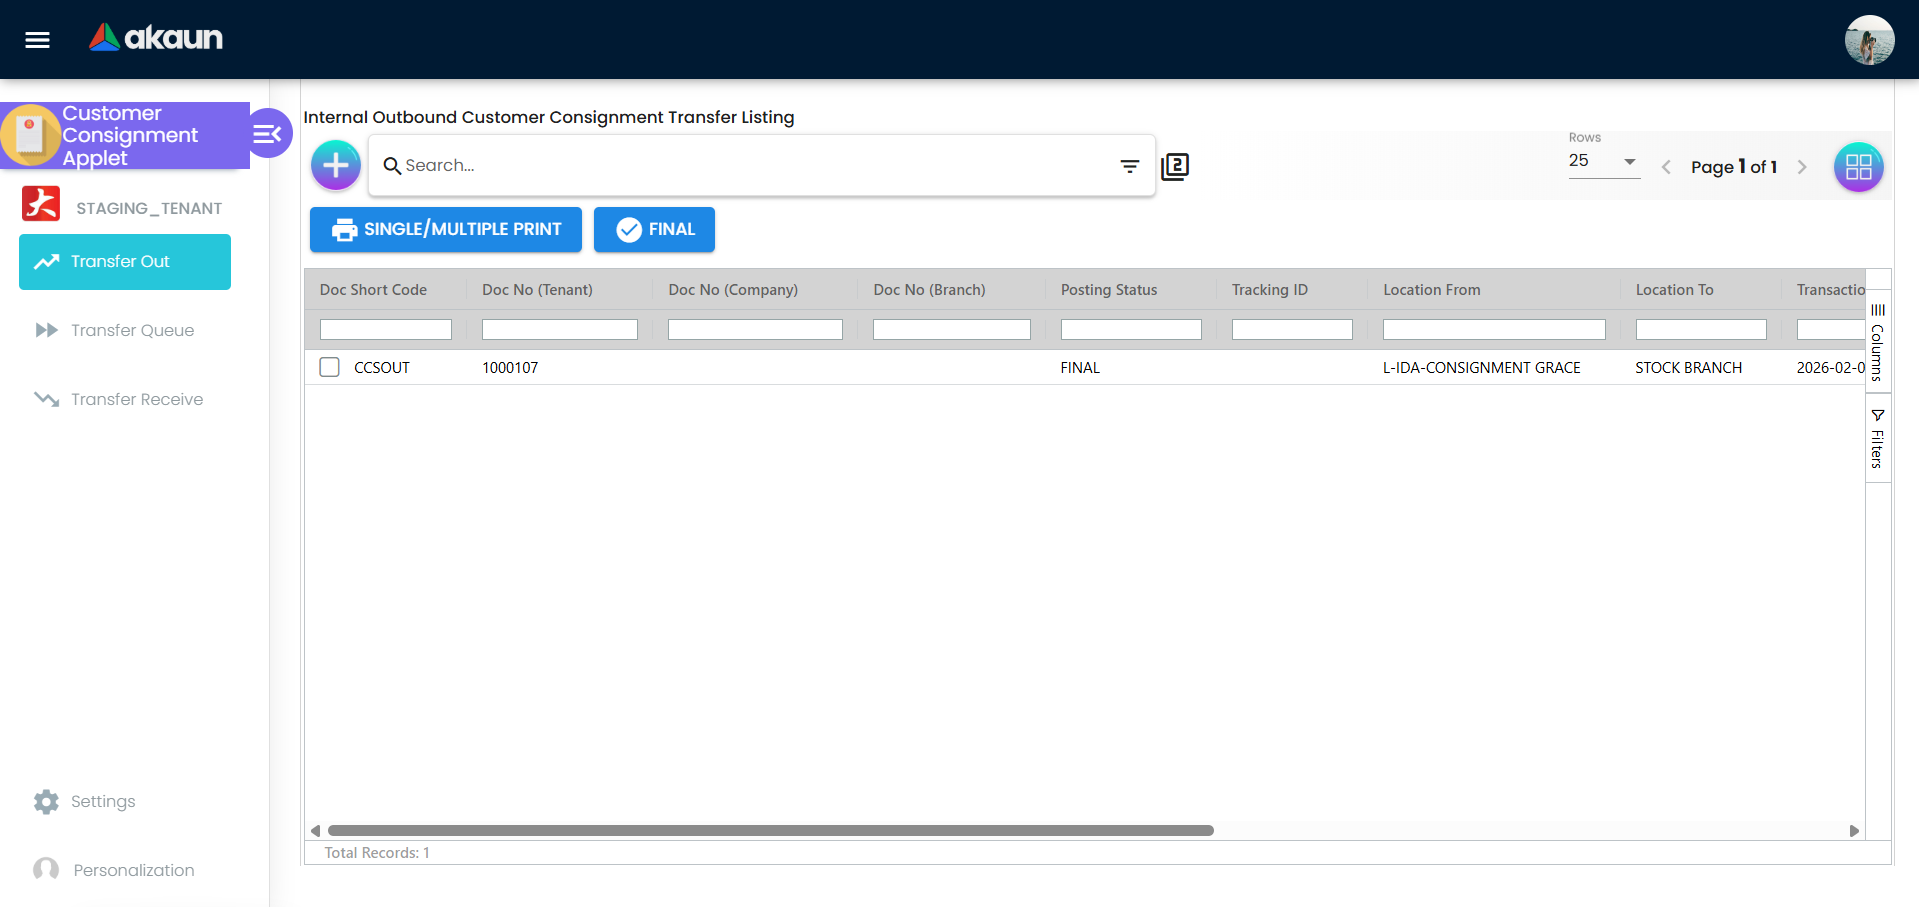
For Operations: Monitor Transfers
Goal: Track the progress of active stock transfers in real-time and identify bottlenecks.
- Access Queue: Navigate to Transfer Queue from the sidebar.
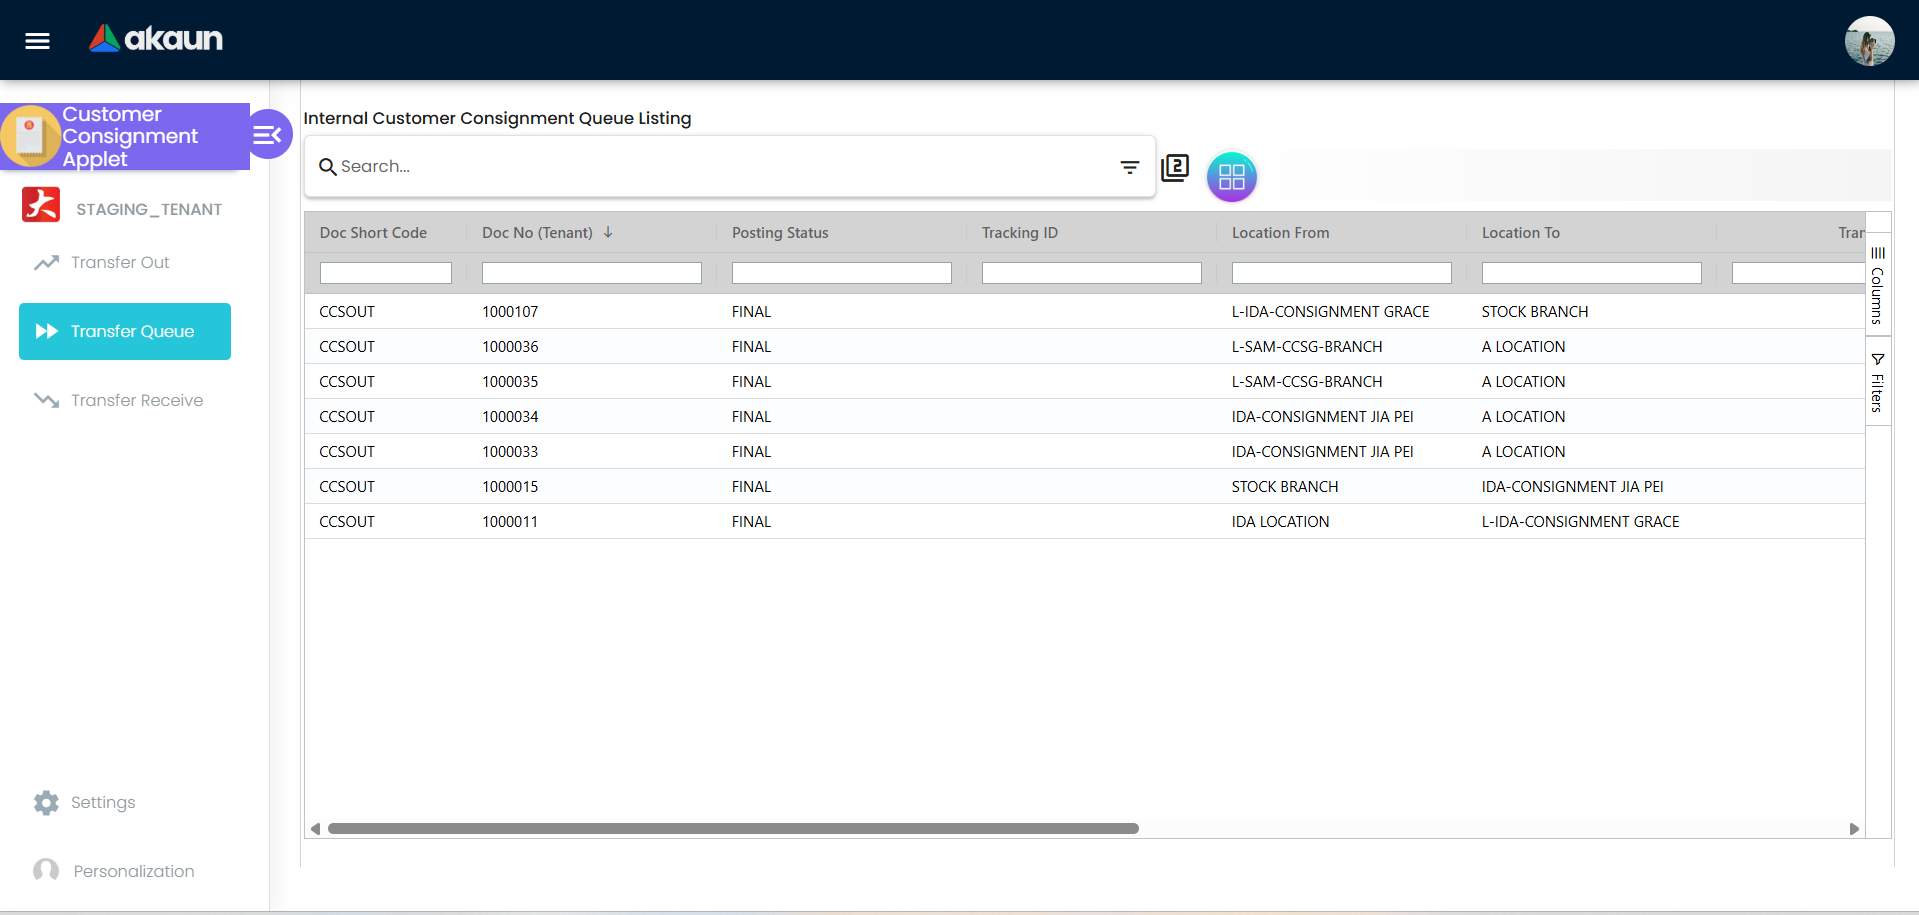
View Transfer Status:
- See all pending outbound transfers (stock on the way out)
- See all pending inbound transfers (stock on the way back)
- Check transfer date, location, status, and items
- Identify any transfers in delayed or exception status
Filter & Search:
- Filter by Location From (where stock originated)
- Filter by Location To (where stock is going)
- Filter by Date Range (when transfer was created)
- Filter by Transaction Date (when the transaction was created)

- Action & Follow-Up:
- Click on any transfer to see detailed line items
- Note any discrepancies or exceptions
- Follow up on delayed transfers with logistics handlers
- Escalate if transfer exceeds expected delivery time
What Happens Next?
Monitor Transfer Queue Daily
        ↓
Identify Delayed Transfers (e.g., >3 days in transit)
        ↓
Contact Logistics / Customer
        ↓
Update Status (In Transit → Delivered → Received)
        ↓
Cross-Verify with Physical Inventory
Pro Tips:
- ✓ Check queue daily (morning review takes 10 minutes)
- ✓ Set alerts for transfers older than X days
- ✓ Compare Transfer Queue to physical inventory counts
- ✓ Document any discrepancies for audit trail
Configuration & Settings
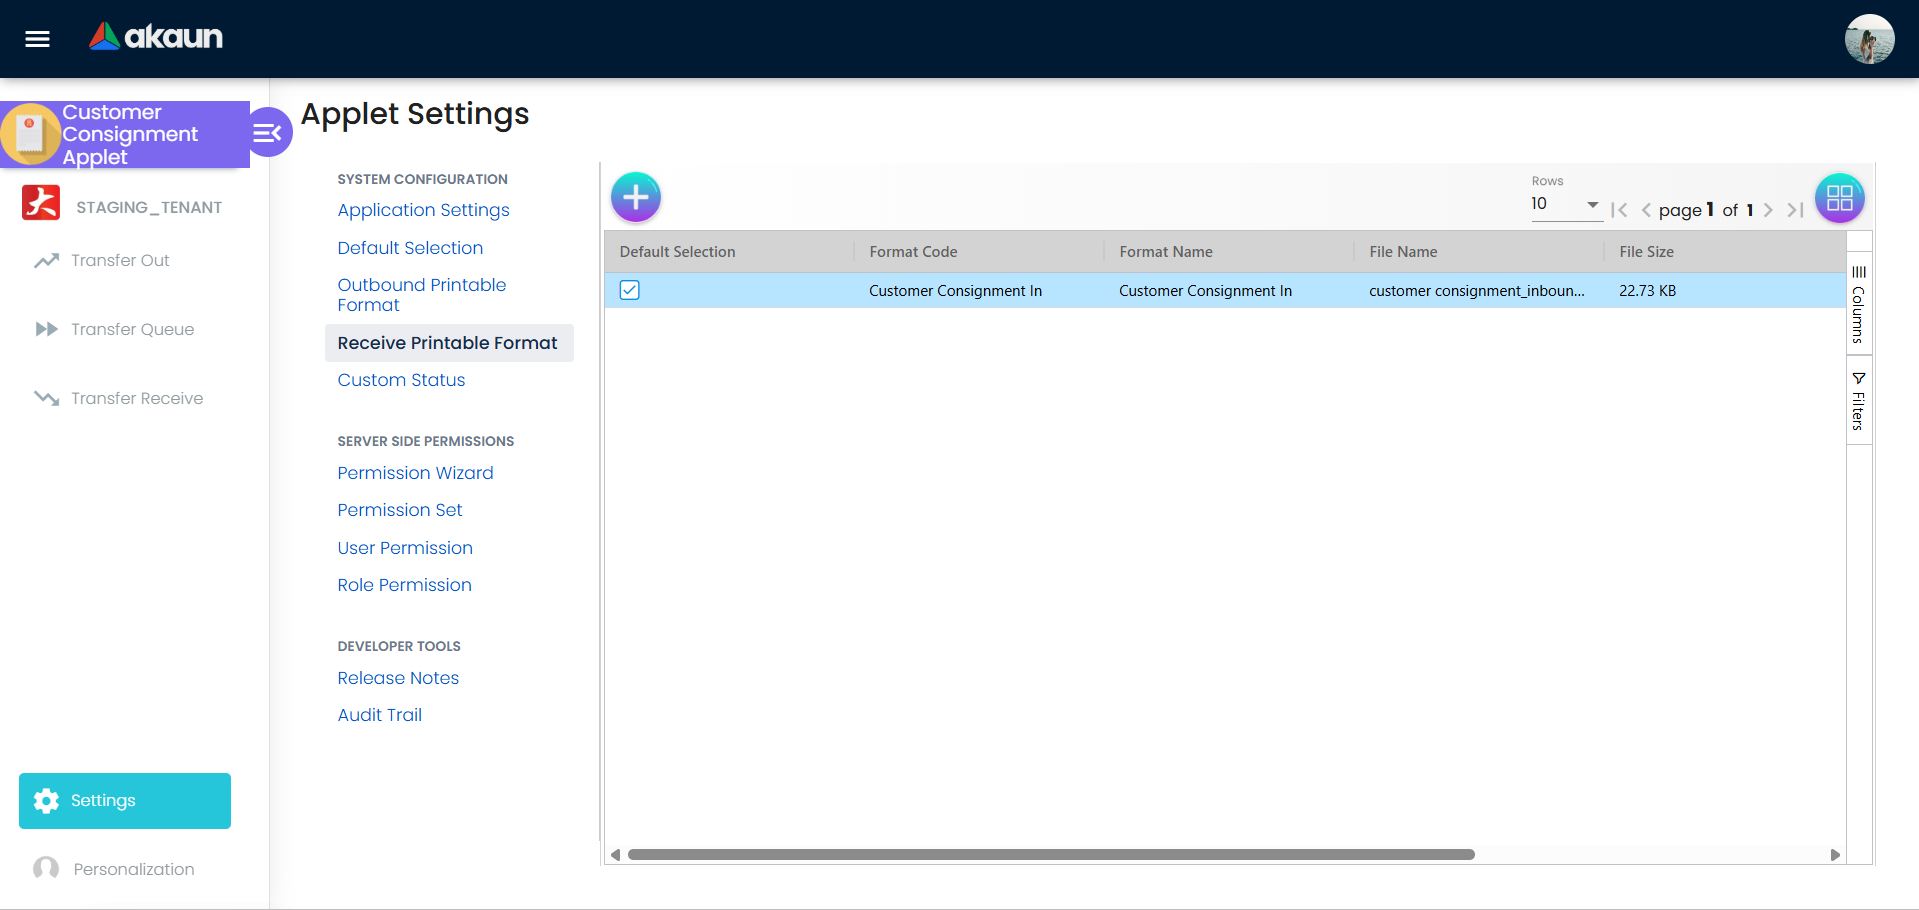
Custom Printables and Formats
- Printable Format Settings: Define customizable document templates for both inbound and outbound transfers, ensuring your paperwork always matches your branding.
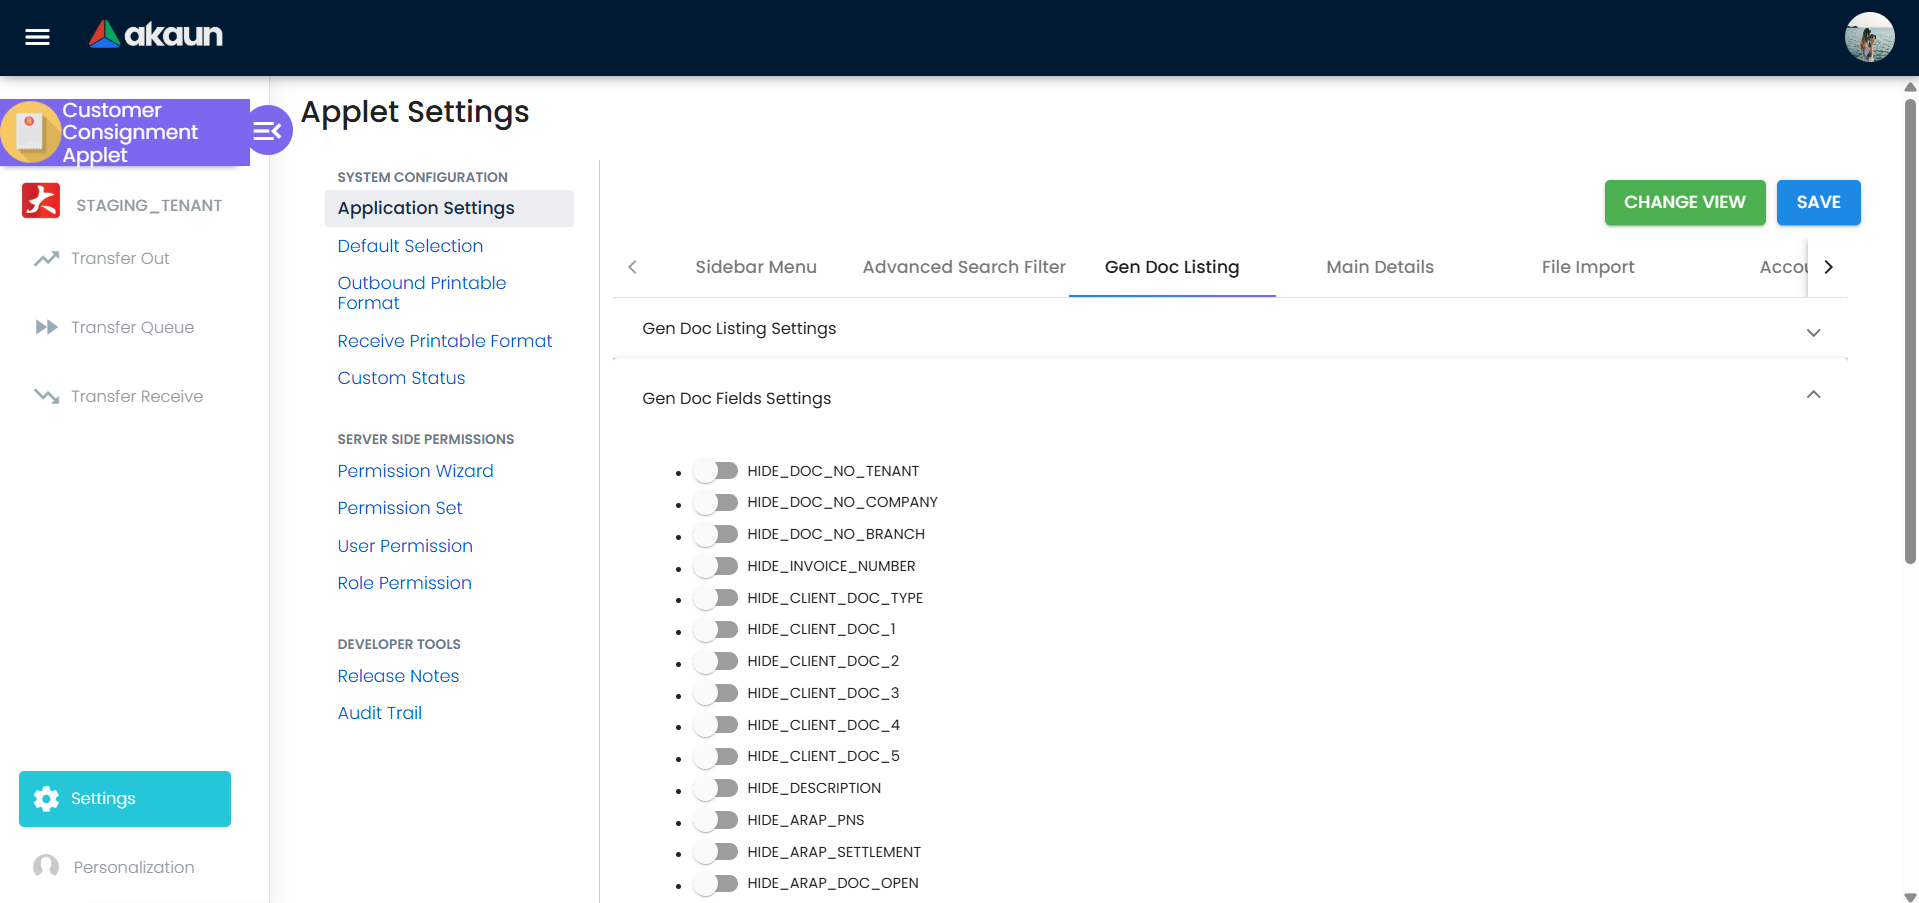
Data and Status Control
- Field Settings: Flexible configuration for data fields based on specific business requirements. Hide irrelevant fields or make essential fields mandatory.
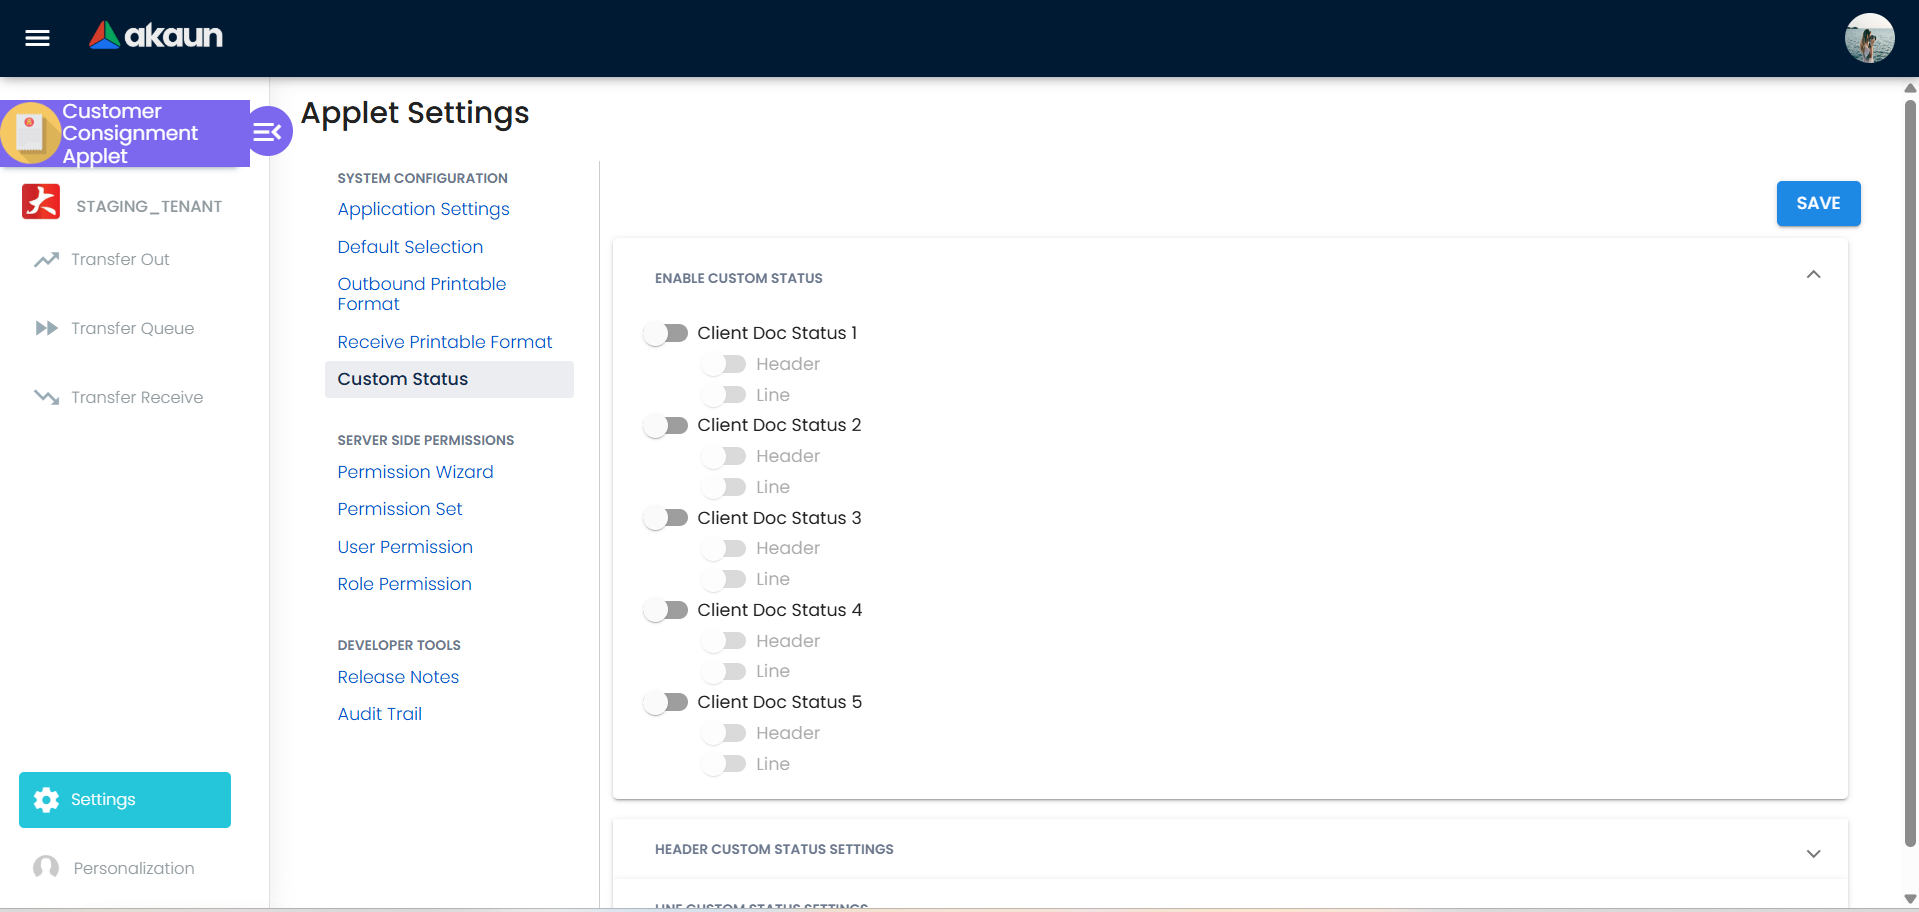
- Feature Visibility & Custom Status: Fine-grained control over which features are visible across the application, combined with the ability to define custom workflow statuses that match your internal processes.
Transfer Templates and Automation
Transfer Templates: Create reusable transfer templates for recurring consignments. Instead of manually creating the same transfer repeatedly, set up a template with standard items, quantities, customers, and locations. Templates can be used as blueprints for one-time and recurring transfers.
Scheduled Events: Configure automatic transfer scheduling using events. Set up recurring transfers (weekly, monthly, quarterly, yearly) tied to your business calendar. The system can automatically trigger transfers based on your template and event configuration, reducing manual data entry and human error.
Common Template Use Cases:
Retail Partner: Weekly shipment of 100 units Widget A to Customer XYZ
Service Center: Monthly refresh of 50 diagnostic kits
Warehouse Overflow: Bi-weekly transfer of seasonal stock to partner storage
Advanced Permission Rules
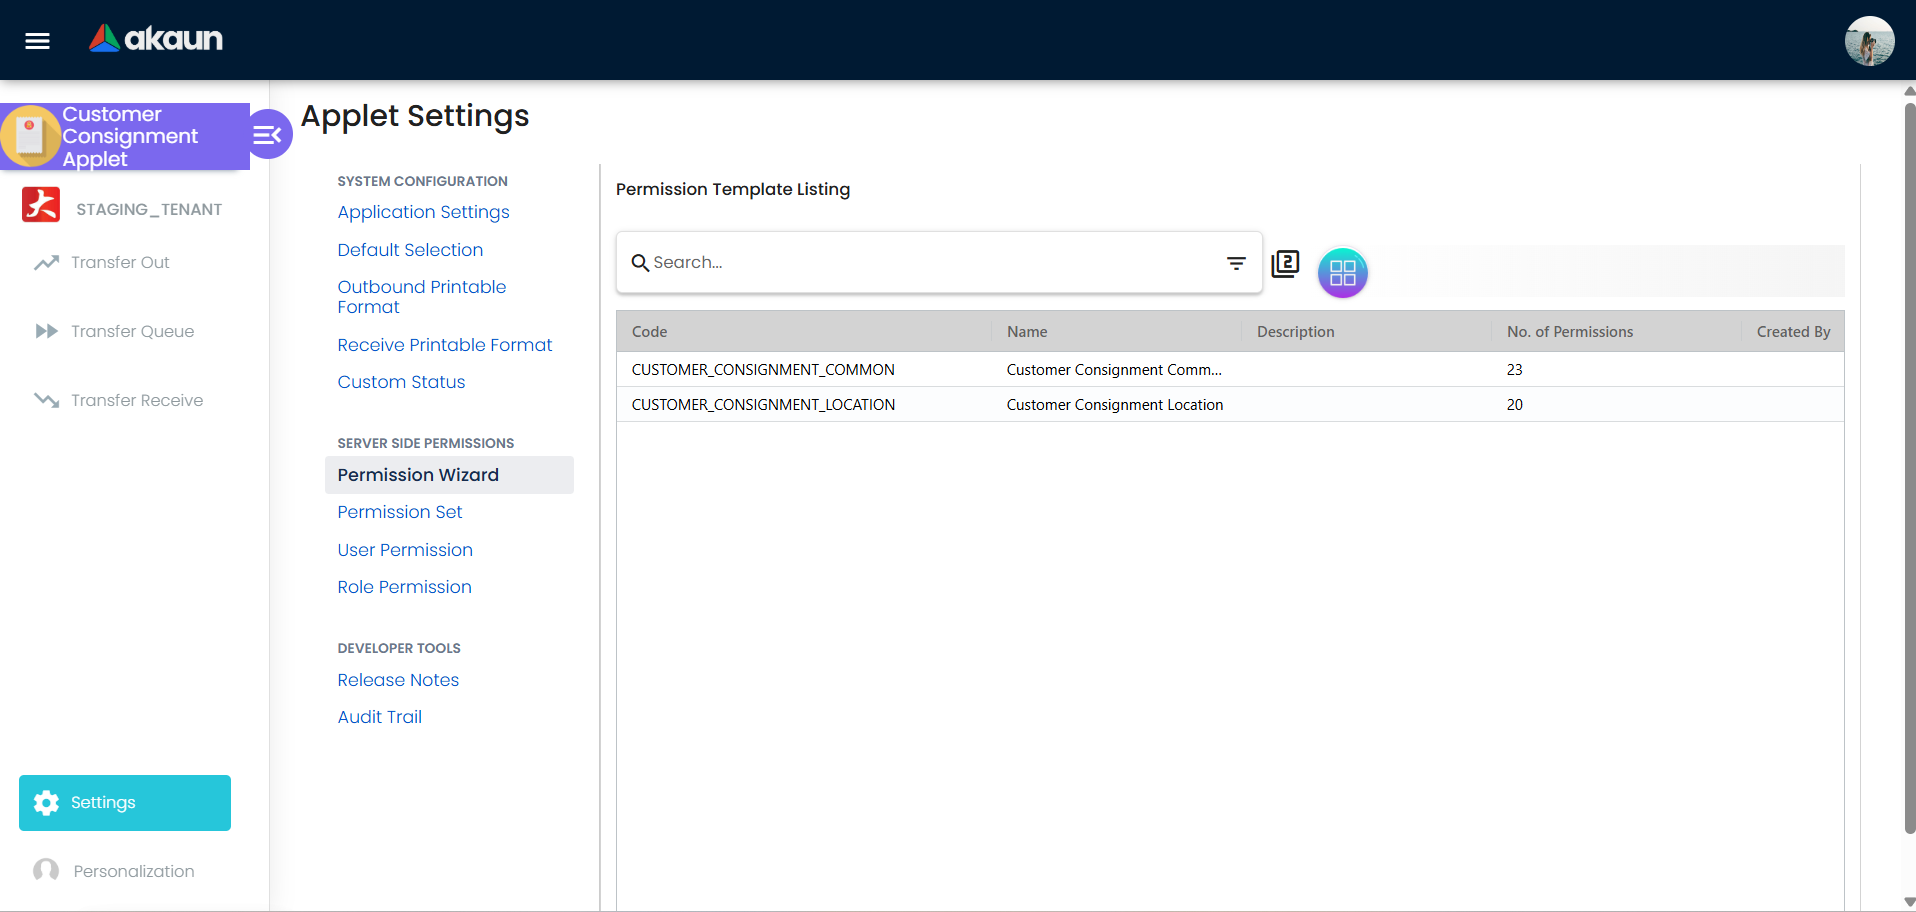
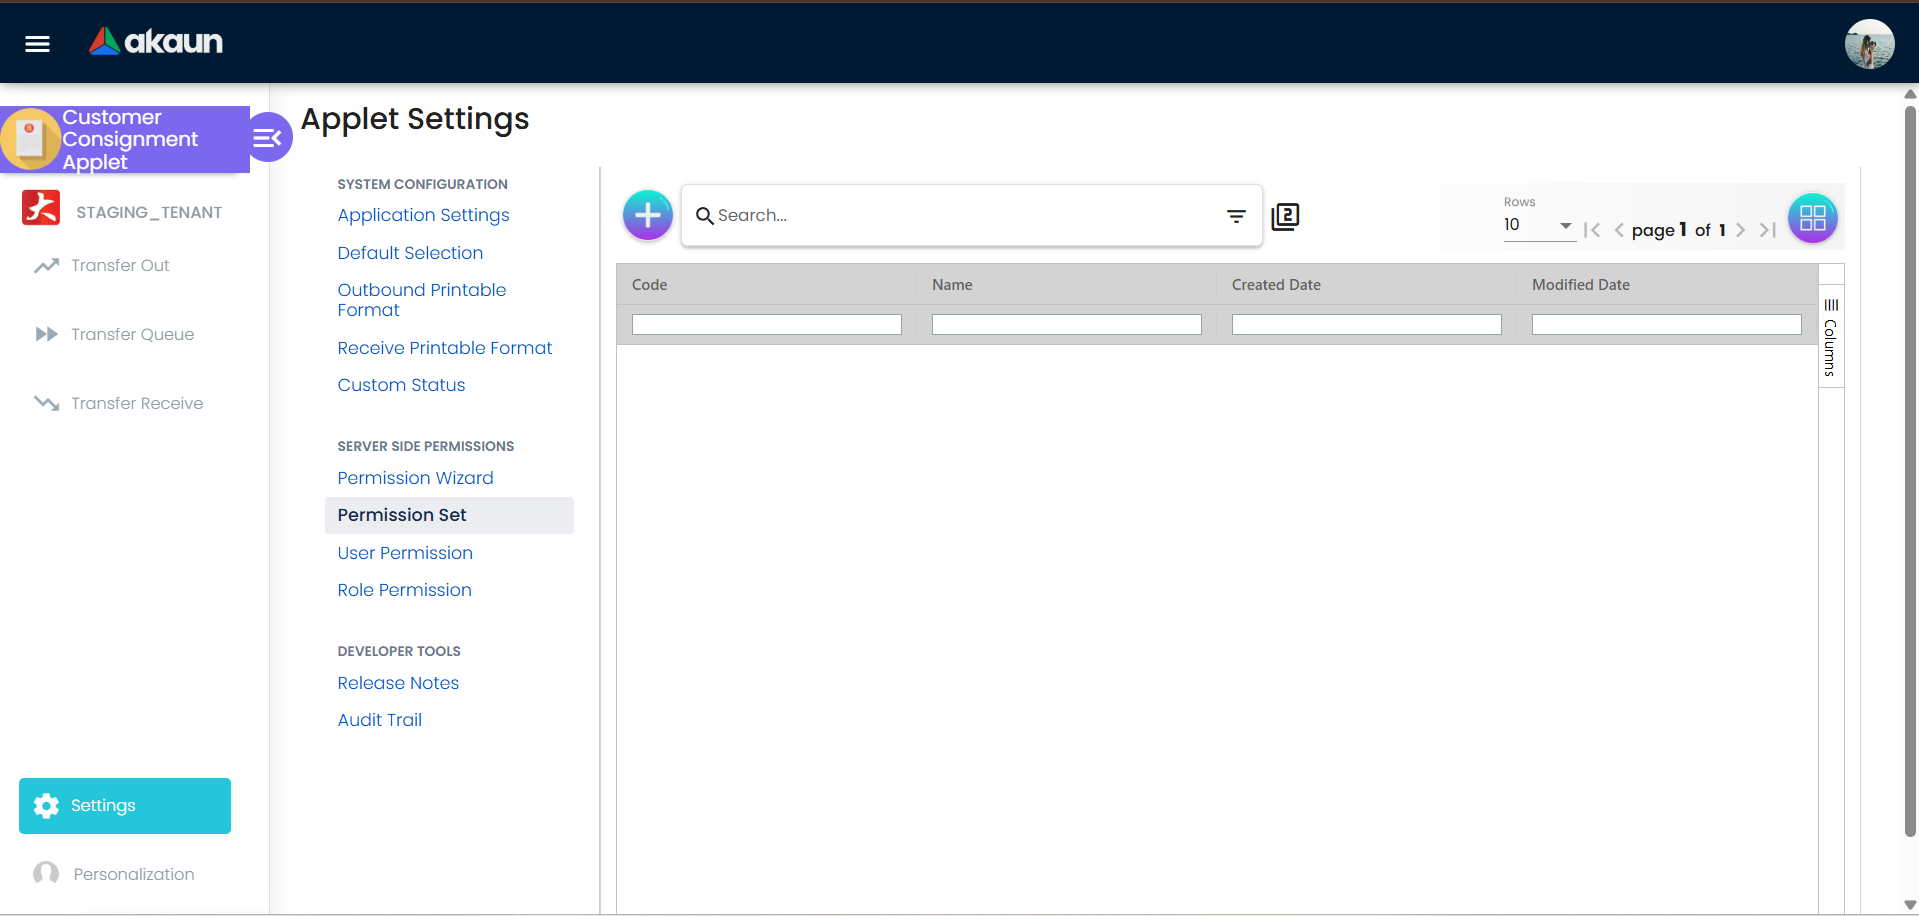
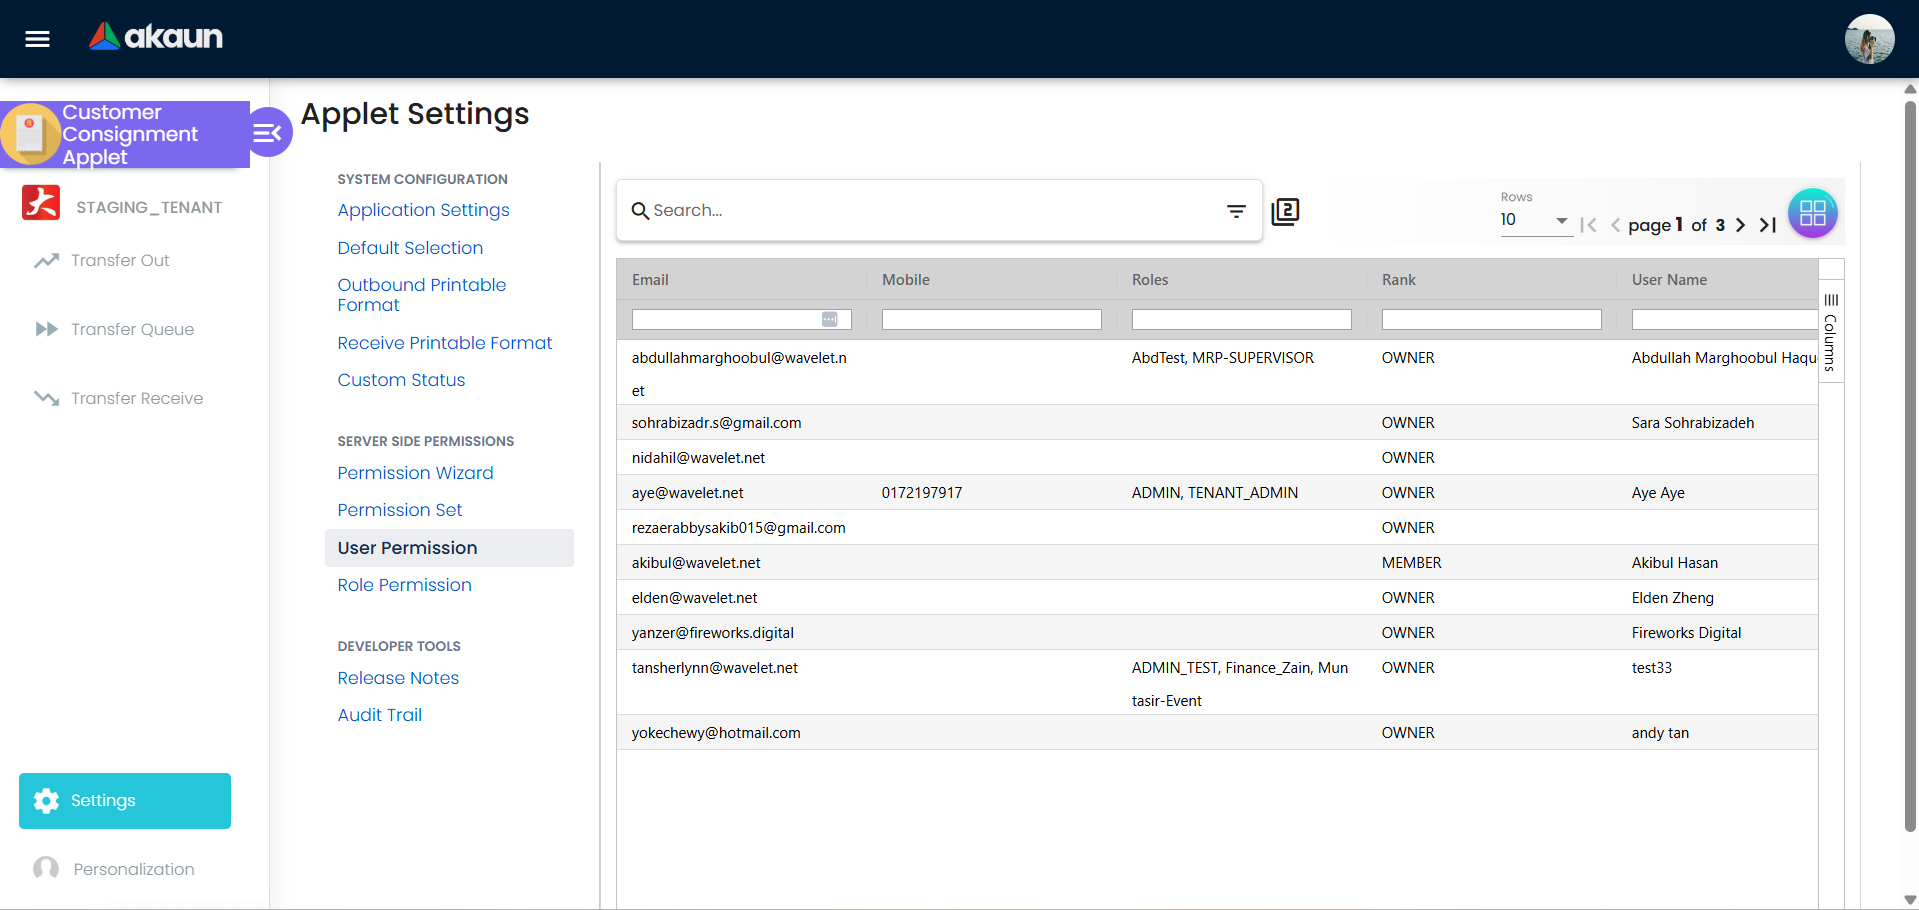
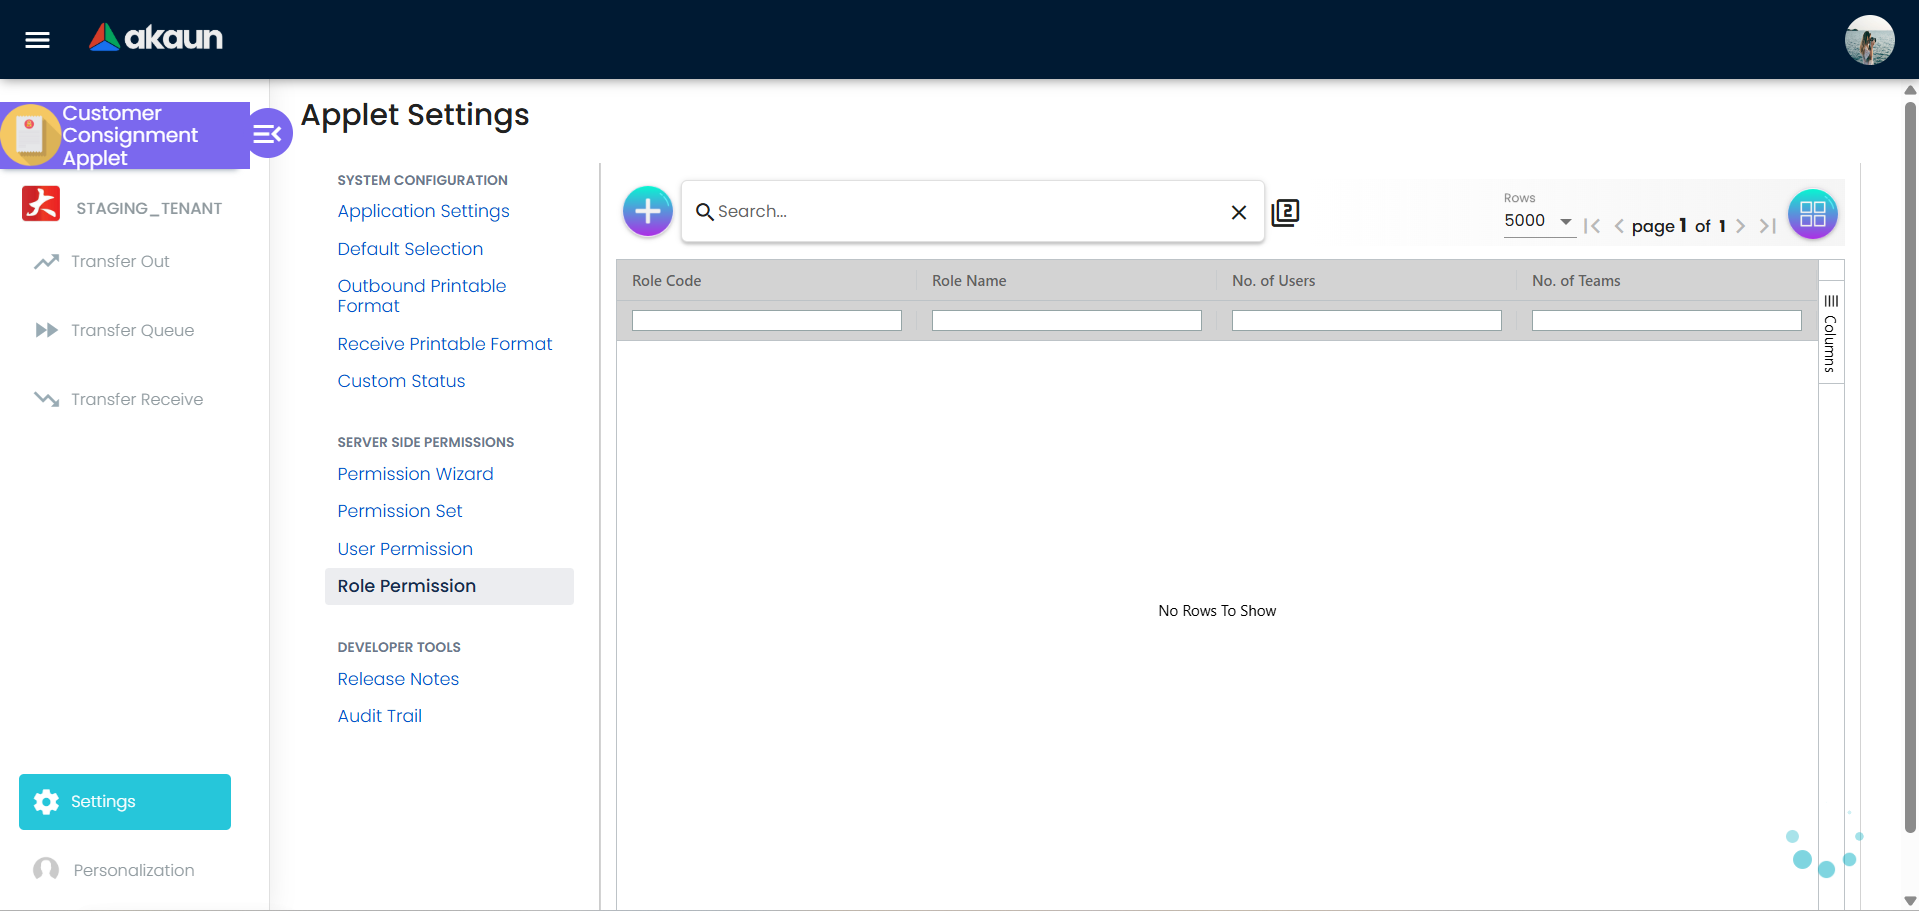
- Advanced Permissions Management: Extensive controls configured through intuitive wizards. Allows you to set precise rules depending on User, Team, Role, and broad Permission Sets.
FAQ
General Consignment Questions
Q: What exactly is consignment stock?
A: Consignment stock is inventory that your business places at a customer’s location but legally retains ownership of until the goods are consumed or officially sold to that customer. You remain the owner and can track/retrieve it anytime.
Q: What’s the difference between consignment and a regular sale?
A: In a regular sale, ownership transfers immediately when goods are delivered. In consignment, YOU retain ownership until payment or consumption. The applet tracks this relationship throughout the lifecycle.
Q: How is consignment inventory different from internal transfers?
A: Internal transfers move stock between your own warehouses (ownership stays with you). Consignment moves stock to customer locations (you own it, but customer controls usage). The applet treats them differently for tracking and billing purposes.
Transfer & Movement Questions
Q: How do we track stock returning from a customer?
A: Use the Transfer Receive feature. It facilitates the smooth return and systematic retrieval of any unsold or unused consignment inventory from the customer’s site back to your company warehouse. The system automatically updates inventory balances.
Q: What if a customer returns fewer items than we transferred out? How do we know what they’ve consumed?
A: Scenario Example:
Transferred Out: 100 units to Customer ABC
Received Back: 30 units
Consumed/Sold: 70 units (100 - 30)

Result: Invoice Customer ABC for 70 units @ unit price
        Add 30 units back to inventory
        Transfer document shows consumption clearly
Q: Can we track stock at multiple customer locations simultaneously?
A: Yes! The Transfer Queue shows ALL active transfers across all locations in one dashboard. Filter by location to focus on specific customers. This works whether you have 2 or 200 customer locations.
Q: What happens if stock is damaged or expired while at a customer location?
A: When receiving stock back, you note the condition (damaged, expired, unsaleable). The system can track these items separately for write-off, warranty claims, or customer disputes. Document in Transfer Receive to maintain audit trail.
Customization & Configuration Questions
Q: Are the delivery transfer documents customizable?
A: Yes! Use Printable Format Settings to create custom document templates for both inbound returns and outbound dispatches. Match your branding, add logos, custom fields, and required information fields.
Q: Can we hide certain fields from users to simplify the interface?
A: Absolutely. Go to Settings > Field Settings to control which fields appear for each user role. You can make fields mandatory, hidden, or optional based on role (Warehouse Manager, Sales Rep, etc.).
Q: Can we define custom transfer statuses (not the default ones)?
A: Yes. Use Settings > Custom Status to create statuses matching your specific workflow (e.g., “Pending QC”, “Awaiting Payment”, “Partially Received”). Define the status flow and who can transition between them.
Permissions & Access Questions
Q: Can we restrict who creates or approves stock transfers?
A: Absolutely. Use Advanced Permissions Management (Settings > Permissions) to configure access by User, Team, or Role. You can allow Create/View/Edit/Delete at granular levels for different user groups.
Q: What if we want different approval rules for different transfer amounts?
A: Set up Advanced Permissions with rules like:
- Small transfers (< RM 5,000): Warehouse Manager approval only
- Large transfers (> RM 5,000): Manager + Finance approval
- Critical items: Additional QC approval
Q: Can a warehouse manager see all customer locations or should we restrict visibility?
A: Both! Use Field Settings & Permissions to:
- Restrict access: “Show only transfers for assigned regions”
- Allow full view: “See all locations but can only modify own region”
- Customer-specific: “Can only view/modify transfers for assigned customers”
Troubleshooting Questions
Q: The physical stock count doesn’t match our Transfer Queue. What went wrong?
A: Diagnostic Steps:
- Check Transfer Queue for pending/incomplete transfers (may not be marked received yet)
- Verify with customers if stock actually arrived
- Look for quantity discrepancies in Transfer Receive
- Check for duplicate transfers created by mistake
- Confirm no internal transfers affecting the location
Solution: Contact customer to confirm, update Transfer Receive with actual quantities, add notes to discrepancy.
Q: A customer lost our consignment paperwork. How do we prove what we sent?
A: Your printed delivery orders and the Transfer Queue history serve as proof. The applet maintains complete transaction history:
- Transfer Out record (what you sent, quantity, date, location)
- Printed delivery order (signed proof)
- Transfer Queue (system audit trail with approver info)
Share the printable document or queue screenshot with the customer.
Q: Can we recall stock from a customer before they consume/sell it?
A: Yes, but you must process it properly:
- Contact customer and agree to transfer back
- Go to Transfer Receive and create a return
- Customer ships stock back
- You receive and confirm in Transfer Receive
- Stock returns to your inventory
Q: What if we need to add more stock to an existing consignment location?
A: Create a new Transfer Out to that same customer location. The system supports multiple transfers to the same location simultaneously. Each transfer has its own tracking and can be managed independently.
Q: How do we handle expired or defective items at customer locations?
A: Option 1 - Return & Write-off:
Discover expired stock at customer
→ Request return via Transfer Receive
→ Receive with note: "Expired, write-off"
→ Inventory shows as unsaleable
→ Finance records write-off
Option 2 - Write-off in Place:
If customer won't return (too costly):
→ Create Transfer Receive for expired items only
→ Note quantity as degraded/expired
→ Deduct from consignment balance
→ Financial record of loss
Configuration & Settings Overview
The Configuration & Settings section provides comprehensive controls for customizing the applet to match your specific business needs:
Technical Architecture (For Developers/Admins)
Understanding the Transfer Processing Layer
The Customer Consignment Applet uses a three-tier transfer processing architecture:
1. Transfer Templates
Purpose: Define reusable transfer configurations
What it Contains:
- Source locations (from which warehouse)
- Destination locations (to which customer)
- Default item lists
- Standard quantities
- Processing rules
Backend Entity: StockTransferTemplateHdr
Use Case: “Every week, we send Widget A to Retail Store XYZ”
2. Transfer Events
Purpose: Schedule when transfers should occur
What it Contains:
- Recurring schedule (Daily, Weekly, Monthly, Yearly)
- Duration and timing
- Start and end dates
- Event filters and grouping
Backend Entity: StockTransferEventHdr
Use Case: “Run this transfer every Monday at 8 AM”
3. Transfer Runs
Purpose: Actual execution instances of transfers
What it Contains:
- Real transfer records (Transfer Out & Transfer Receive)
- Status tracking (In Transit, Completed, On Hold)
- Timestamp and duration
- Item-level details and modifications
- Approver information
Backend Entity: StockTransferRunHdrClient / StockTransferRunHdrContainer
Use Case: “The transfer executed on Monday created these 50 units movement records”
How They Work Together
Transfer Template (Configuration)
    ↓
Transfer Event (Schedule)
    ↓
Transfer Run (Execution)
    ↓
Stock Transfer Records (Transfer Out / Transfer Receive)
    ↓
Inventory Updates
Example Flow:
✅ Admin creates template: "Weekly Supply to Customer ABC"
✅ Admin creates event: "Every Monday, 8 AM"
✅ System auto-triggers: Run instance created
✅ Transfer executed: Items moved from warehouse to customer
✅ Recorded: Transfer Run shows status and history
✅ Queue displays: Real-time visibility in Monitor Queue
API Endpoints (For Integration)
The applet exposes the following backend endpoints:
| Endpoint | Purpose | Method |
|---|---|---|
/stock-transfer-template-hdrs | Manage transfer templates | GET, POST, PUT, DELETE |
/stock-transfer-event-hdrs | Manage transfer events | GET, POST, PUT, DELETE |
/stock-transfer-run-hdrs | View/manage transfer runs | GET, POST, PUT, DELETE |
/stock-transfer-event-filter-items | Filter configuration items | GET, POST, PUT, DELETE |
Summary: Data Flow Verification
✅ Verified Against Codebase:
- Transfer Out feature implements
StockTransferEventHdrandStockTransferRunHdr - Transfer Receive feature uses same run models with reverse flow
- Transfer Queue displays runs with real-time status
- Templates allow configuration-driven transfers
- Events enable scheduling and automation
- Angular UI components handle the user interface
- Backend Java SDK provides data access and validation
Documentation Status: ✅ Comprehensive and Accurate
Coverage: User guides, configuration, FAQ, scenario examples, and technical architecture all verified against actual codebase.