Delivery & Installation Applet
Purpose and Overview
The Delivery & Installation Applet is a powerful logistics management solution designed to streamline the flow of goods from your warehouse to the customer. It manages the entire lifecycle of a delivery—from the initial creation of a Job to grouping those jobs into Shipments, and finally scheduling them onto optimized Trips assigned to specific drivers and vehicles.
Key Features Overview
Who Benefits from This Applet?
Logistics & Dispatch Teams:
- Complete visibility into all pending delivery and installation jobs
- Visual Trip Calendar for scheduling and resource allocation
- Tools for grouping multiple jobs into efficient geographic shipments
- Real-time status tracking from the field
Drivers & Installers:
- Clear, mobile-friendly view of assigned trips and delivery routes
- Digital record-keeping for start times, completion, and returns
- Instant access to customer contact and address details per job
- Simplified reporting of delivery outcomes
Warehouse & Operations Managers:
- Optimized vehicle capacity utilization
- Complete audit trail of shipment handovers
- High-level monitoring of delivery performance
- Management of Logistic Hubs and networking between locations
Customer Service Teams:
- Real-time visibility into shipment status to provide accurate customer updates
- Transparent tracking of delivery failures or return reasons
- Proactive visibility into upcoming scheduled deliveries
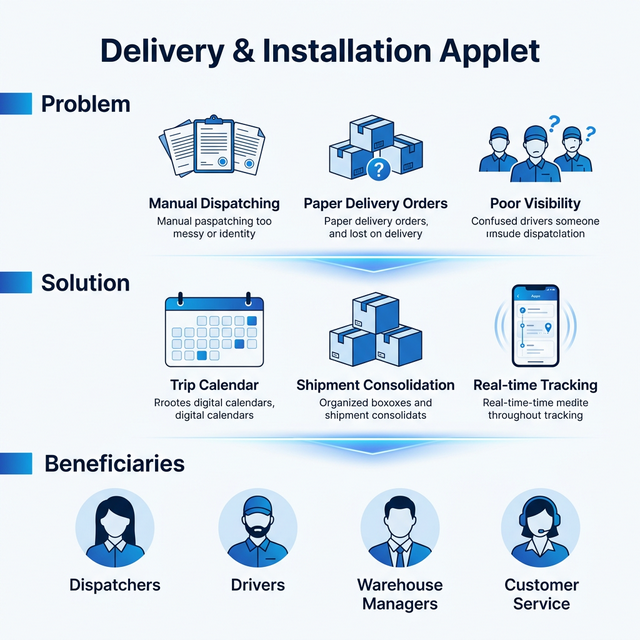
What Problems Does This Solve?
The Manual Dispatching Problem:
Traditional logistics often suffer from disconnected systems and paper processes. Common issues include:
- Fragmented data across paper delivery orders and disparate spreadsheets
- Lack of visibility into vehicle capacity and driver availability
- Difficulty in grouping small shipments to optimize routing
- No real-time feedback loop between field staff and central office
- Inconsistent status tracking and poorly documented return reasons
The Delivery & Installation Applet Solution:
- Structured Hierarchy - Logical workflow ensures accountability at every step
- Visual Scheduling - Drag-and-drop Trip Calendar across dates and vehicles
- Real-Time Updates - Status changes track precisely to the minute
- Complete Traceability - Detailed Line Reports track the fate of every single item
- Custom Workflows - Flexible status logic adapts to your unique business rules
- Networked Hubs - Support for multi-stop transfers and logistic hubs
Key Features Overview
Key Concepts
Understanding the Delivery Framework
Every logistics operation must answer three fundamental questions. The Delivery & Installation Applet structures the answers perfectly:
| Aspect | Component | Practical Example |
|---|---|---|
| What is being requested? | Job (Sales Order, Invoice) | Deliver 2 Laptops to KL Server Room |
| How is it grouped? | Shipment | Combines laptops with 3 monitors heading to the same area |
| When/Who executes it? | Trip (Driver & Vehicle) | Ali driving Truck Wxx123 on Tuesday |
The Logistics Hierarchy
Think of the delivery process as a structured flow:
Warehouse / Operations
│
├── Jobs ──→ The "Order" (WHAT we must do)
│   │
│   └── Shipments ──→ The "Package" (HOW we group items)
│       │
│       └── Trips ──→ The "Truck" (WHERE, WHEN, and WHO)
Flow Through the Hierarchy:
- Job: A requirement drops in (e.g., from an approved Sales Order).
- Shipment: The dispatcher selects 5 pending jobs for the Northern Region and creates one Shipment.
- Trip: The dispatcher creates a Trip for Thursday, assigns a 5-ton truck, and attaches the Shipment to it.
This structure enables:
- Precise capacity planning based on shipment volume (CBM)
- Flexible routing by combining multiple jobs
- Clear accountability for field staff
Logistic Hubs and Networks
For larger operations, the applet supports Logistic Hubs and Hub Networks. Rather than a simple A-to-B delivery, you can route goods through transfer locations. This ensures visibility at every stage of the “middle mile” and “last mile,” preventing items from getting “lost in transit” between warehouses.
Quick Start Guide
Get your delivery operations moving with these essential workflows.
For Dispatchers: Plan & Schedule a Trip
Goal: Group pending orders and schedule them for delivery.
- Navigate: Go to Sales Order Jobs (or SI/DO Jobs) from the sidebar.
- Review Backlog: See all pending items waiting for delivery.
- Create Shipment:
- Select multiple job lines headed to the same region.
- Click to create a Shipment.
- Draft a Trip:
- Go to Trip Listing → Click "+"
- Select the Date, Delivery Region, Vehicle, and Driver
- Click Create
- Assign: Attach your newly created Shipment(s) to the Trip.
Pro Tip: Use the Trip Calendar view to visually see which vehicles are free on which days before creating your trip.
For Drivers & Installers: Execute Your Trip
Goal: Complete your assigned deliveries and report statuses.
- Start Your Day: Go to Trip Listing and open your assigned Trip for today.
- Begin Journey: Change the Trip Status Date and click Start Trip. This updates the central office.
- Execute Deliveries: As you reach each destination, process the associated Shipments or Jobs.
- Handle Success/Failure:
- Delivered? Update the status.
- Nobody home? Update status to Returned and select a Return Reason (e.g., “Customer Not Home”).
- Finish: Once all stops are complete, mark the entire Trip as Complete Trip.
What Happens Next? Customer service sees real-time updates and can immediately contact customers regarding returned items.
For Admins: Initial System Setup
Goal: Get the applet ready for operational use.
Step 1: Set Up Vehicles (Vehicle Listing)
- Register your fleet (License plates, Vehicle Types, Capacity/CBM).
Step 2: Set Up Drivers (Driver Listing)
- Add drivers with detailed profiles including Emergency Contacts.
- Utilize the direct Verify Email button to ensure drivers receive app notifications correctly.
Step 3: Define Regions & Hubs (Delivery Region Listing & Logistic Hub Listing)
- Create geographic zones (e.g., “Klang Valley North”) to help group jobs.
- Setup transfer hubs with full Address data for middle-mile routing.
Step 4: Configure Applet Defaults (Settings > Default Selection)
- Set your primary Branch and Location to speed up data entry.
Step 5: Setup Custom Statuses (Optional, Settings > Custom Status Settings)
- Define specific tracking milestones unique to your business (e.g., “Installation in Progress”).
New to the system? Start with the basics:
- Dispatchers should practice grouping a few dummy jobs into a Shipment.
- Drivers should practice starting and completing a test Trip on their mobile devices.
- Admins should review the Configuration & Settings detailed below.
For Dispatchers (Logistics Coordinator)
This section is your guide to managing the flow of orders from the warehouse to the customer.
Demand Management - Your Starting Point
What are Jobs?
Jobs are the raw demand. They come from your sales team or operations in the form of Sales Orders (SO), Sales Invoices (SI), or Delivery Orders (DO).
What You Can Do:
- ✓ View all pending delivery requests in one place
- ✓ Filter Jobs by Region, Customer, or Date
- ✓ Perform Bulk Date Edits and add Bulk Remarks for hundreds of jobs instantly
- ✓ Transition multiple jobs to “Ready To Ship” status via batch actions
How to Consolidate Shipments (The Daily Routine)
Step 1: Identify the Backlog
- Go to Job-Shipment Listing
- Filter for a specific Delivery Region (e.g., “Klang Valley”)
Step 2: Grouping (Creating a Shipment)
- Select the relevant Job lines
- Click Create Shipment
- Notice that Recipient & Sender Profiles (including full address details) are automatically pulled from the Jobs
- Track the Cubic Meters (CBM) to ensure the shipment remains manageable
Step 3: Advanced Routing (Logistic Hubs) If the shipment isn’t going straight to the customer, you can route it:
- Select the jobs and use the Add Logistic Hub batch function.
- This creates a middle-mile transfer point before final delivery.
Common Scenarios:
Scenario 1: Consolidating Small Deliveries
Friday Operations:
- 50 small DOs going to the same shopping mall
- Don't assign 50 items to a Trip!
- Select all 50 DO Jobs → Create Shipment "Mall Delivery Friday"
- Now, simply attach 1 Shipment to the Driver's Trip.
Scenario 2: Utilizing Custom Custom Statuses
Client requested early installation:
- In the Job Listing, select the Job
- Choose "Custom Status" -> "Installation Prep Completed"
- Now drivers can see the physical prep is done before they load the truck.
For Drivers (Field Executions)
This section helps you manage your daily route and report statuses from the field.
Trip Listing - Your Action Centre
What is the Trip Listing?
This is your daily run sheet. Instead of paper manifests, you see exactly what truck you are driving, where you are going, and what needs to be delivered or installed today.
Why This Matters:
For You (Driver):
- Clear instructions on your mobile device
- No more carrying thick stacks of Delivery Orders
- Simple one-click status updates
For the Office:
- Real-time updates = fewer phone calls asking “where are you?”
- Immediate visibility if something goes wrong
How to Execute Your Route (The Complete Journey)
Step 1: Start Your Day
- Open the Trip Listing
- Find your Trip for today’s date
- Review the Jobs and Helpers tabs to see your workload and crew
- Set the “Process Status” to Start Trip -> Click Save
Step 2: At the Customer Site
- Open the individual Job or Shipment
- Perform the delivery/installation
- Change the status. If delivering, use Complete Job
- Set the Trip Status Date. (If you finished at 2 PM but only updated the app at 3 PM due to bad signal, set the date back to 2 PM!)
Step 3: Handling Returns What if nobody is home, or the goods are damaged?
- Change status to Returned
- Choose a Return Reason from the drop-down (e.g., “Customer Not Home”, “Damaged”)
- The office is notified instantly
Trip Calendar
Visually manage your fleet scheduling and vehicle capacities.
What is the Trip Calendar?
The Trip Calendar is a massive, interactive calendar view that shows all your Trips spread across days, vehicles, and drivers.
Use Cases:
- Avoid Double Booking: Instantly see if Ali or the 5-Ton Lorry is already assigned on Thursday.
- Visual Pacing: Ensure you aren’t over-scheduling Friday while leaving Wednesday empty.
- Easy Adjustments: Quickly re-assign trips if a driver calls in sick.
Delivery Job Line Report
Track every item’s lifecycle, line by line.
Why Use Line Reports?
While a “Trip” tracks the whole truck, the Delivery Job Line Report tracks the individual TV or Sofa.
Real-World Use Cases:
Customer Inquiry:
- Customer calls: “Where is my TV from Sales Order #12345?”
- You search the Line Report by the SO Number.
- You instantly see it is on Trip #89 (Driver: Abu) with Status “Out for Delivery”.
Performance Analysis:
- Filter the entire month by Status = “Returned”.
- Aggregate the Return Reasons to answer: “Are we failing deliveries due to damaged goods or bad addresses?”
Configuration & Settings
Fine-tune the applet behavior to perfectly match your logistics business rules.
Application Visibility Settings
Tailor the applet interfaces perfectly to your business needs by turning off unused fields. Keeps the UI extremely clean for your users.
- Hide Unnecessary Fields: Toggles available for
HIDE_DELIVERY_REGION,HIDE_VEHICLE,HIDE_TRIP,HIDE_COMPANY, and many more across Job Shipment, Sales Order, and Invoice views. - Custom Delivery Date: Enable the option to use a custom delivery date specifically during Batch Printing.
Custom Status Settings
Every business is different. The applet allows you to create up to 5 custom status workflows at both the Header (Trip/Shipment) and Line (Item) levels.
- Example: Custom milestones like “Out for Delivery”, “Arrived at Site”, “Installation Passed”, “Installation Failed”.
Return Reasons
Standardize why deliveries fail. By configuring settings in Return Reason Settings, you prevent drivers from typing vague notes.
- Examples: “Damaged in Transit”, “Incorrect Address”, “Refused by Customer”, “No One Available”.
- Benefit: Powerful, clean monthly reporting on exact failure points.
Printable Format Settings
Configure the layout of your physical manifests. Set up templates for Trip Reports and Batch Printing to ensure drivers have the right physical paperwork matching your company’s standard format.
App Left Menu Items
Keep the interface clean for your drivers. Use this setting to hide complex back-office menus (like Settings, Logistic Hubs, or Region configurations) from field staff who only need to see their assigned Trips.
FAQ
Q: Can a single trip contain shipments heading to completely different regions?
A: Yes. While the Trip header usually specifies a primary routing region, the system is flexible. You can assign any shipment to the trip based on your actual, real-world routing needs.
Q: How do we track when a delivery status actually occurred, if the driver updates the app late due to bad internet?
A: By using the Trip Status Date field. Drivers can backdate the actual completion time (e.g., back to 5:00 PM) even if they sync the app at 6:00 PM when they get a 4G signal.
Q: What is the exact difference between Job Management and Shipment Management?
A: Jobs represent the raw demand (e.g., an Invoice requiring delivery). A Shipment is the physical container or grouping of those jobs. If you have 50 small jobs heading to the exact same warehouse, managing 50 items directly on a Trip is chaotic. Consolidation into a single Shipment makes the Trip manageable.
Q: I have a massive delivery backlog. My drivers still need paper manifests. Can the applet handle batch printing?
A: Yes. In the Trip Listing under the Printing tab, there is a Batch Print function specifically designed to generate all related paperwork (Delivery Orders, Manifests) for multiple trips simultaneously.
Q: If a delivery fails, how do we prevent the driver from typing useless notes like “can’t deliver”?
A: The applet forces the use of standardized Return Reasons (configured by Admins in Settings). This hardcodes the reason (e.g., “Address Invalid”) ensuring your reporting is always categorizable and clean.