Entity Maintenance Applet
Purpose and Overview
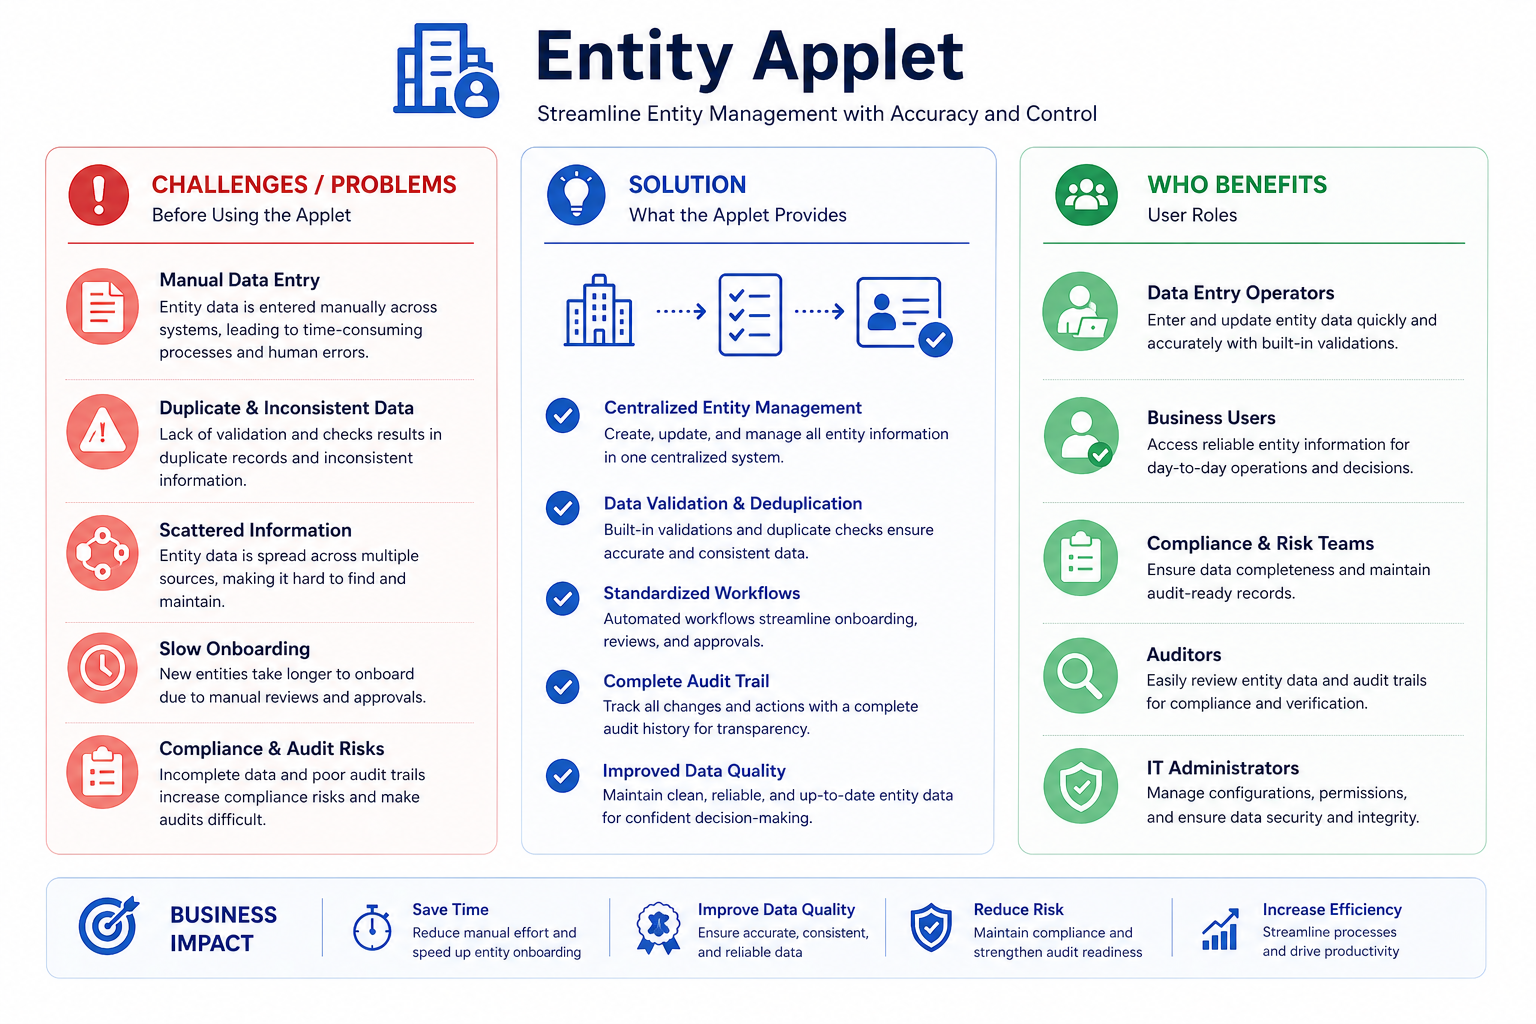
The Entity Applet is the main master-data workspace for maintaining business entities used across operations and finance. It centralizes customer, supplier, employee, and merchant records, then extends each record with category assignments, address/contact data, payment details, tax setup, credit controls, and company mappings.
Key Features Overview
Who Benefits from This Applet?
Sales and Commercial Teams:
- Maintain customer and merchant profiles in one place
- Keep contacts and addresses current for quoting and billing
- Reuse consistent category structures for reporting and segmentation
Procurement and Operations Teams:
- Maintain supplier records with standardized fields
- Organize suppliers with dedicated category hierarchies
- Reduce onboarding delays caused by incomplete master data
Finance and Credit Control Teams:
- Configure payment and tax information per entity
- Set credit terms and credit limits with clear status control
- Maintain AR/AP context and company-level linking for transaction readiness
Master Data Admins and System Owners:
- Govern defaults for branch and location
- Control field-level behavior from settings
- Apply permission and visibility governance when enabled in tenant routes
What Problems Does This Solve?
The Fragmented Entity Master Problem:
When entity data lives in spreadsheets and disconnected systems, teams face:
- Duplicate and inconsistent entity records
- Missing contact, tax, or payment information at transaction time
- Manual credit control outside the platform
- Repeated corrections across sales, purchasing, and finance
- Slow onboarding because ownership and validation rules are unclear
The Entity Applet Solution:
- Single source of truth - one managed profile per entity
- Role-aware setup - entity can be customer, supplier, employee, merchant, or mixed
- Category governance - dedicated modules for Entity, Customer, Employee, and Supplier categories
- Financial readiness - payment config, tax, credit term, and credit limit in one workflow
- Operational completeness - address, contact, login mapping, remarks, and branch/company links
Feature Highlights
Key Concepts
Understanding the Entity Framework
The applet follows a practical framework: identity, role, classification, transaction controls, and risk controls.
| Aspect | Component | Practical Example |
|---|---|---|
| Who is this record? | Entity Header | “ABC Industrial Sdn Bhd” |
| What role does it play? | Type + Entity Type | Supplier + Corporate |
| How is it classified? | Category modules | Supplier Category: Raw Materials |
| How will it transact? | AR/AP Type, Payment Config, Tax | AP with bank transfer and tax code |
| How is exposure controlled? | Credit Term and Credit Limit | NET30 with MYR 100,000 limit |
Entity Lifecycle Structure
Think of the applet as a staged entity lifecycle:
Entity Listing
  -> Create Entity Header
     -> Entity Edit Tabs
        -> Main
        -> Entity Category
        -> Login
        -> Payment Config
        -> Tax
        -> Address
        -> Contact
        -> Intercompany Branch
        -> Company Linking
        -> Remark
        -> Credit Term and Limit
  -> Settings Defaults (if enabled in tenant)
Category Domains
The applet separates category governance into four dedicated modules:
- Entity Category for broad classification
- Customer Category for customer-specific policy and reporting use
- Employee Category for employee-related classification
- Supplier Category for procurement and vendor segmentation
Each module supports create, edit, status control, and parent-category hierarchy.
Quick Start Guide
Use these role-based quick starts to onboard with minimal setup errors.
For Sales and Operations: Create Your First Entity
Goal: Create an entity profile that operations teams can use immediately.
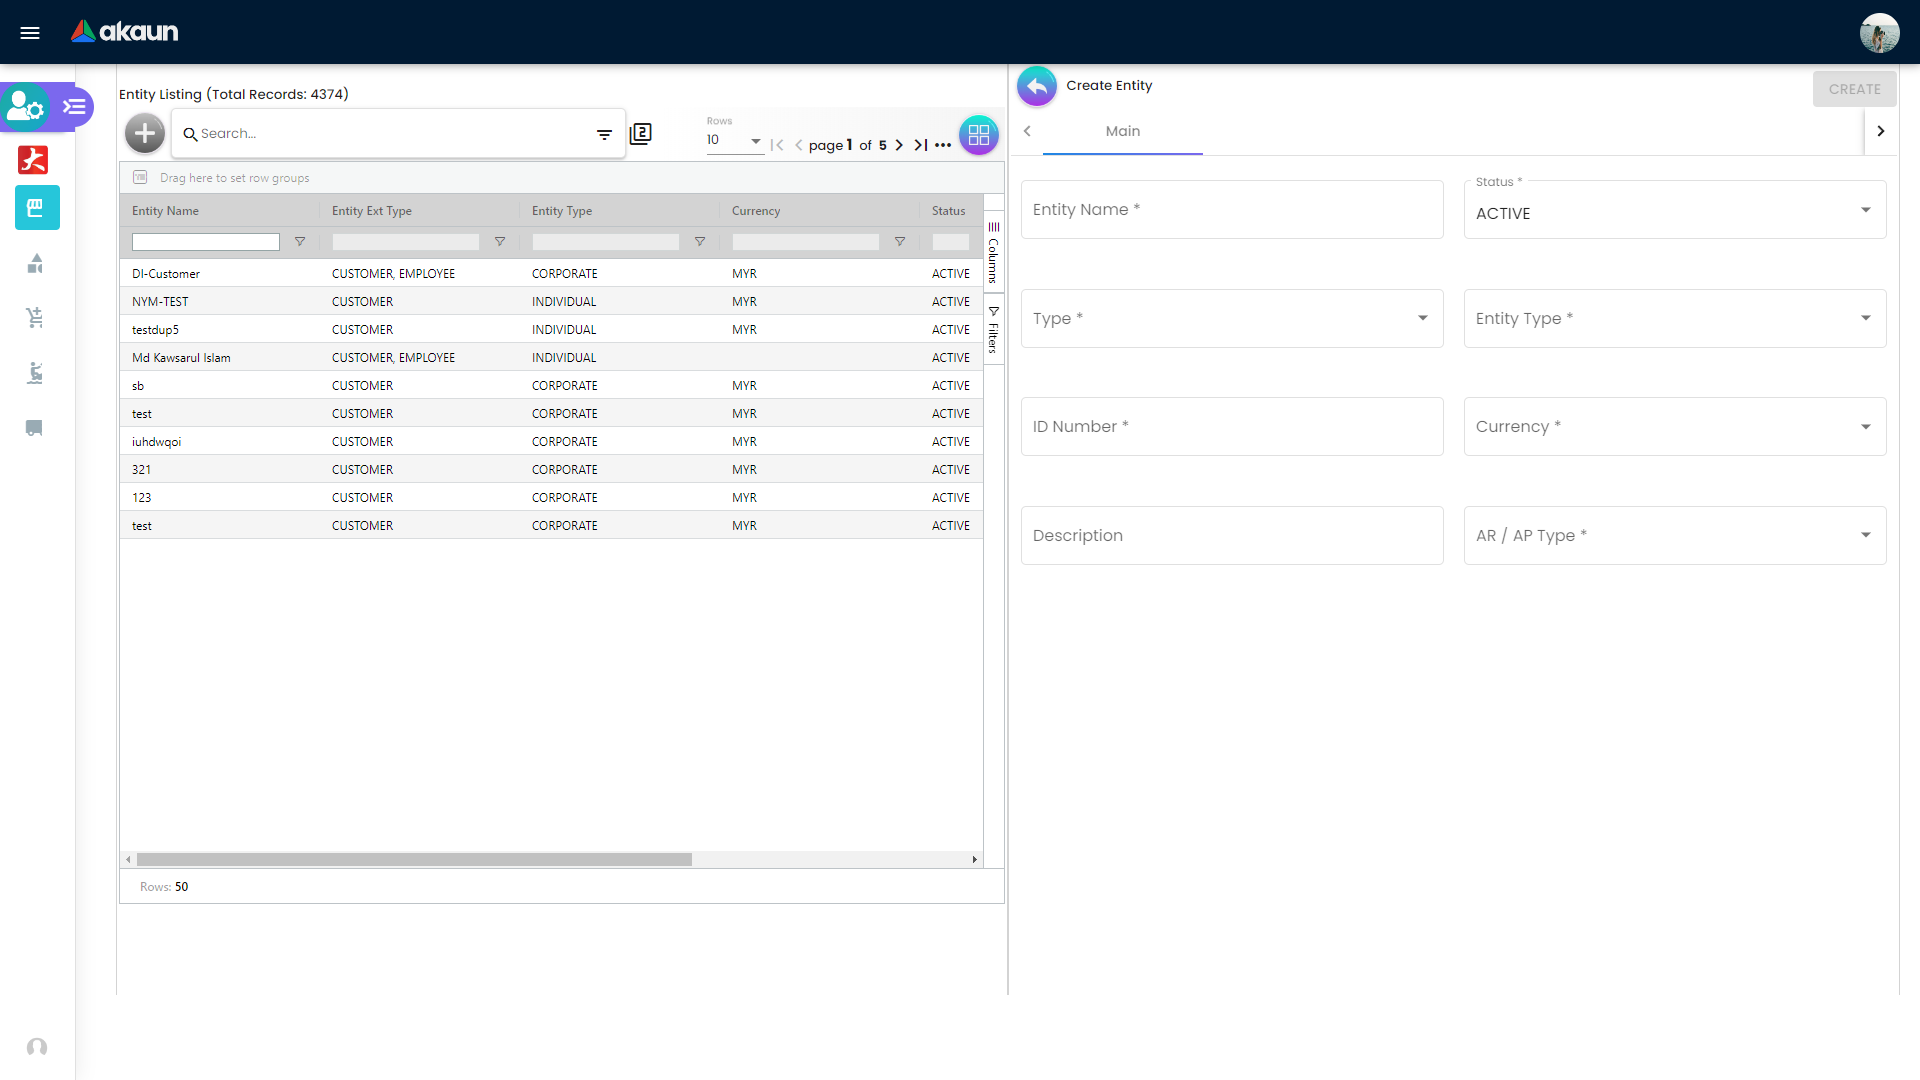
- Open the Entity menu (Entity Listing) and click the + (Create) icon.
- Fill required header fields: Entity Name, Status, Type, Entity Type, ID Number, Currency, AR/AP Type.
- Save the new header and reopen the record in edit mode.
- Complete Address and Contact tabs so teams can transact and communicate.
- Assign the correct Entity Category and validate status as active.
- Return to listing and confirm the record appears correctly in search/filter results.
For Finance and Credit Control: Make the Entity Financially Ready
Goal: Ensure AP/AR processing can run without master-data gaps.
- Open the entity and verify role (customer/supplier/employee/merchant) and AR/AP direction.
- Configure Payment Config with Payee Resident Status, payment type, country, bank, and account data.
- Configure Tax with country, tax type, tax code, rate, and option.
- Add Credit Term and Credit Limit entries with currency and status.
- Set Company Linking and Intercompany Branch where required.
- Perform a readiness check to confirm no mandatory financial fields are missing.
For Admins and Data Owners: Standardize Before Bulk Onboarding
Goal: Build consistent governance so onboarding scales cleanly.
- Define category structures for Entity, Customer, Employee, and Supplier modules.
- Set parent-child hierarchy in each category module where needed.
- Configure Settings > Default Selection if the
Settingsmenu is available in your tenant. - If
Settingsis available, review Settings > Field Settings toggles to standardize form behavior. - Validate route-level governance features such as feature visibility and permissions if enabled in your tenant.
- Run UAT with at least one customer and one supplier onboarding scenario.
Entity Operations Walkthrough
Menu Functionality Reference
The left-side menu in Entity Maintenance commonly includes:
Entity(Entity Listing)Entity CategoryCustomer CategoryEmployee CategorySupplier Category
Use this section as the practical map of each menu and what users can do inside it.
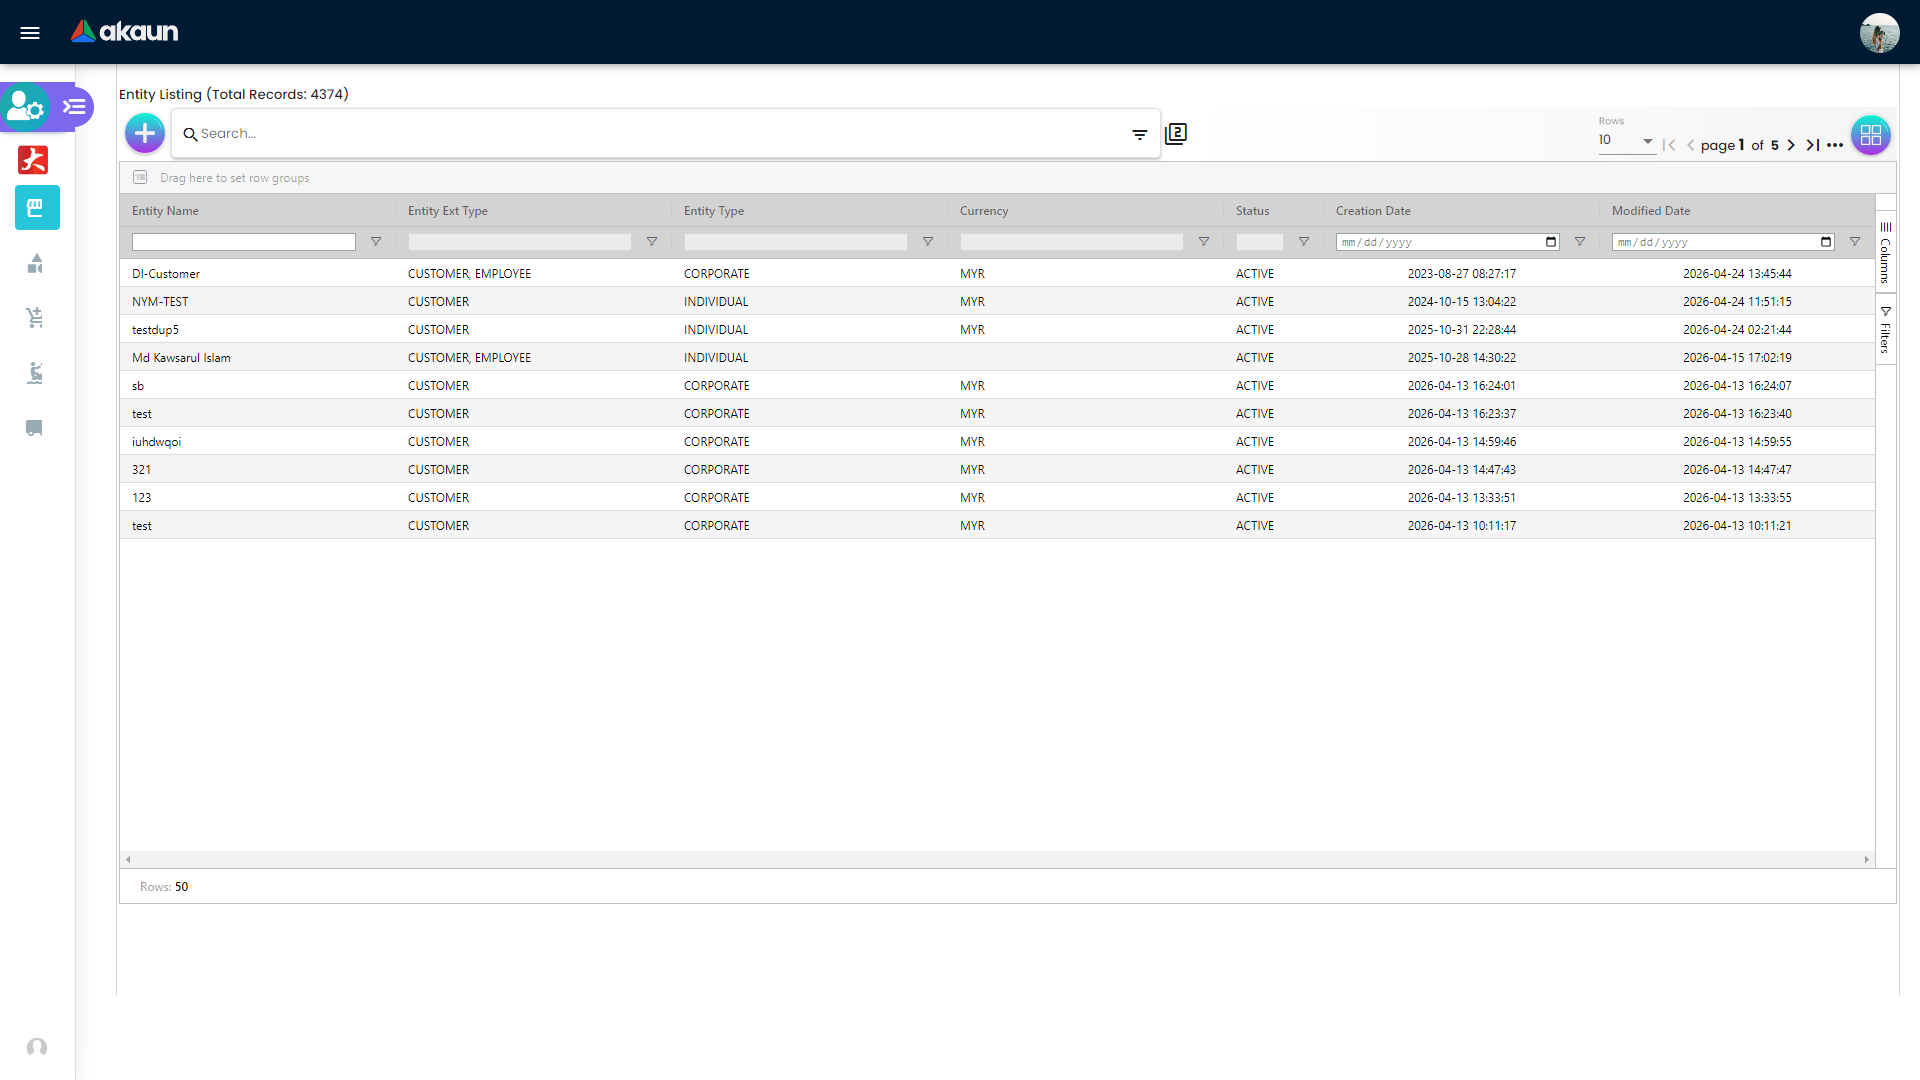
Entity Listing and Search
Menu: Entity
The listing page is the daily control center for entity maintenance:
- Search and advanced filtering
- Grid columns for name, type, ext type, currency, status, creation date, and modified date
- Pagination and row-click navigation to edit pages
- Quick create access for new records
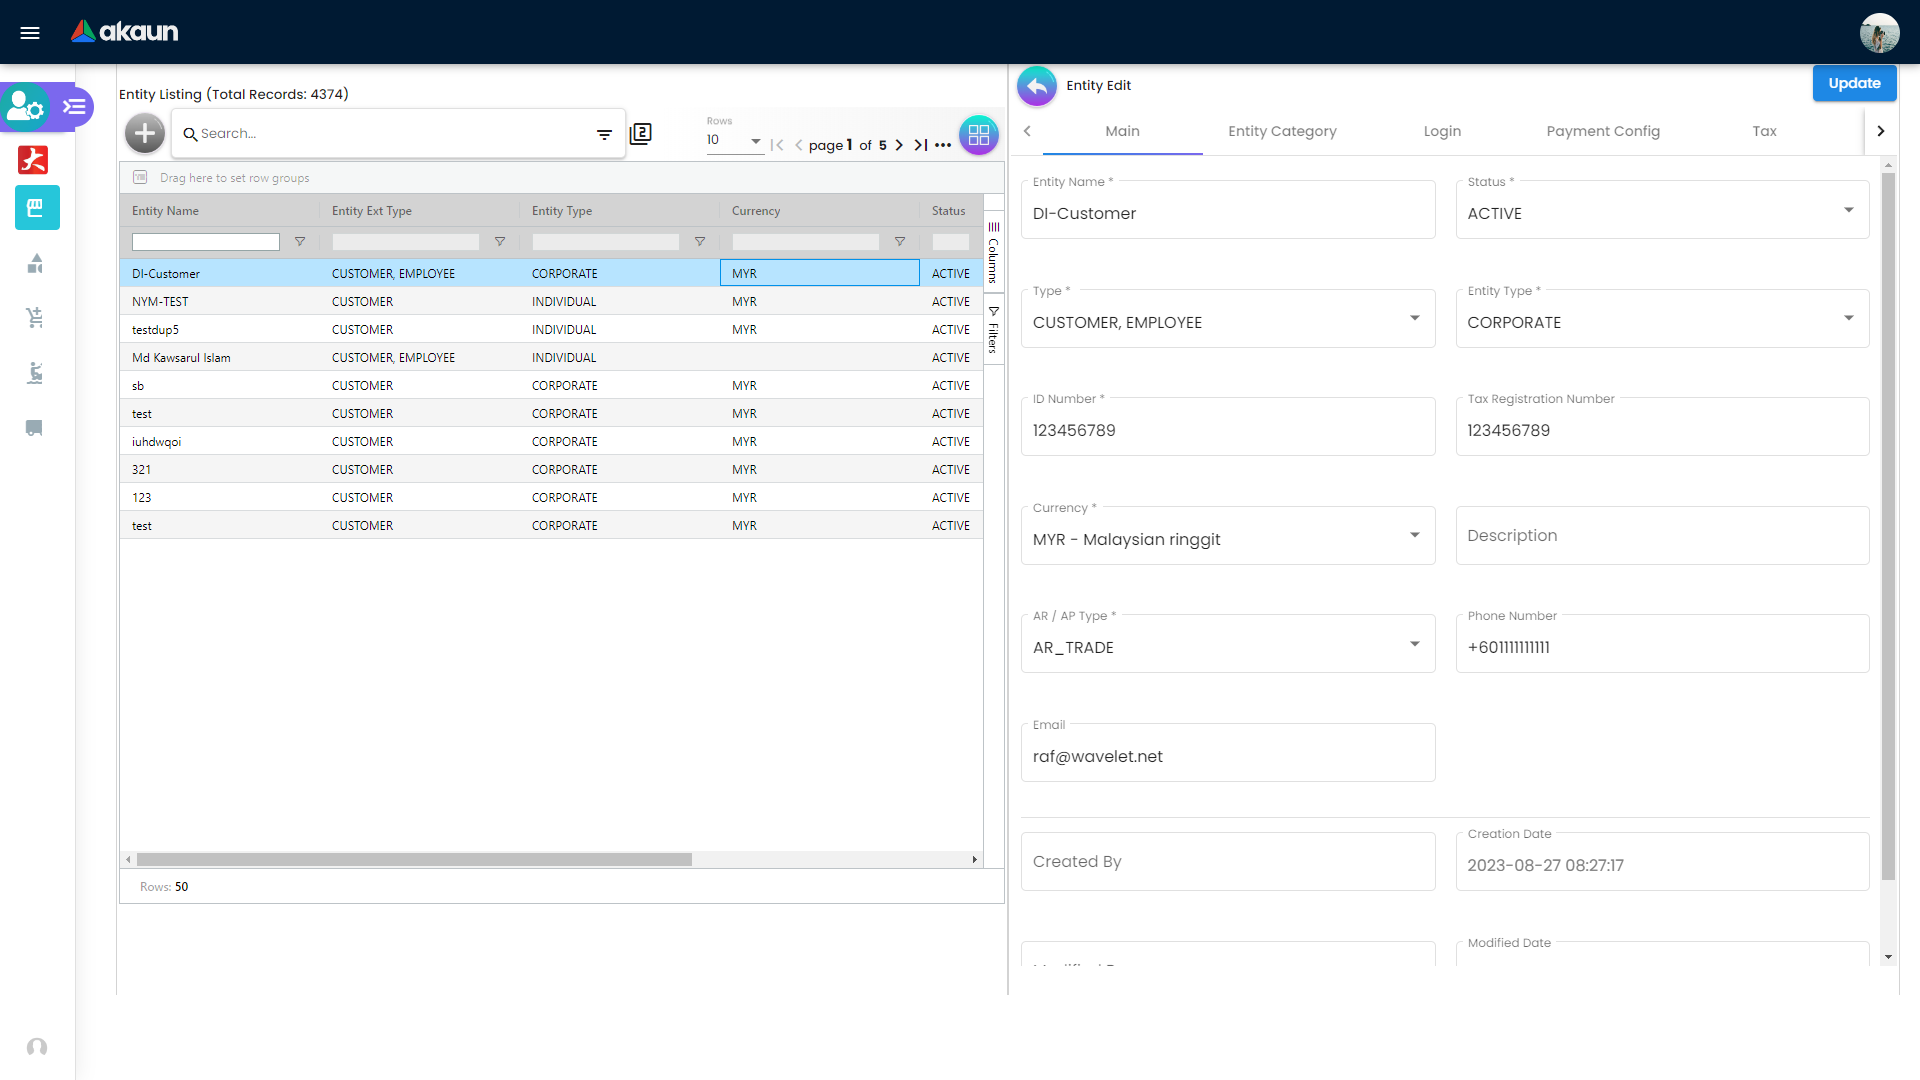
Entity Create and Main Validation Rules
The create flow captures base attributes needed for downstream usage:
- Entity Name
- Status
- Type (
CUSTOMER,SUPPLIER,EMPLOYEE,MERCHANT) - Entity Type (
CORPORATEorINDIVIDUAL) - Identity Type and ID Number
- Tax ID, Currency, Description, and AR/AP Type
The form includes behavior rules:
- If
EMPLOYEEis selected in Type, Entity Type is constrained toINDIVIDUAL - ID field placeholder changes based on Entity Type context
After creation, open any row from Entity Listing to continue on the edit workspace tabs.
Category Management Menus
Each category menu follows a similar listing/create/edit workflow with search and status control.
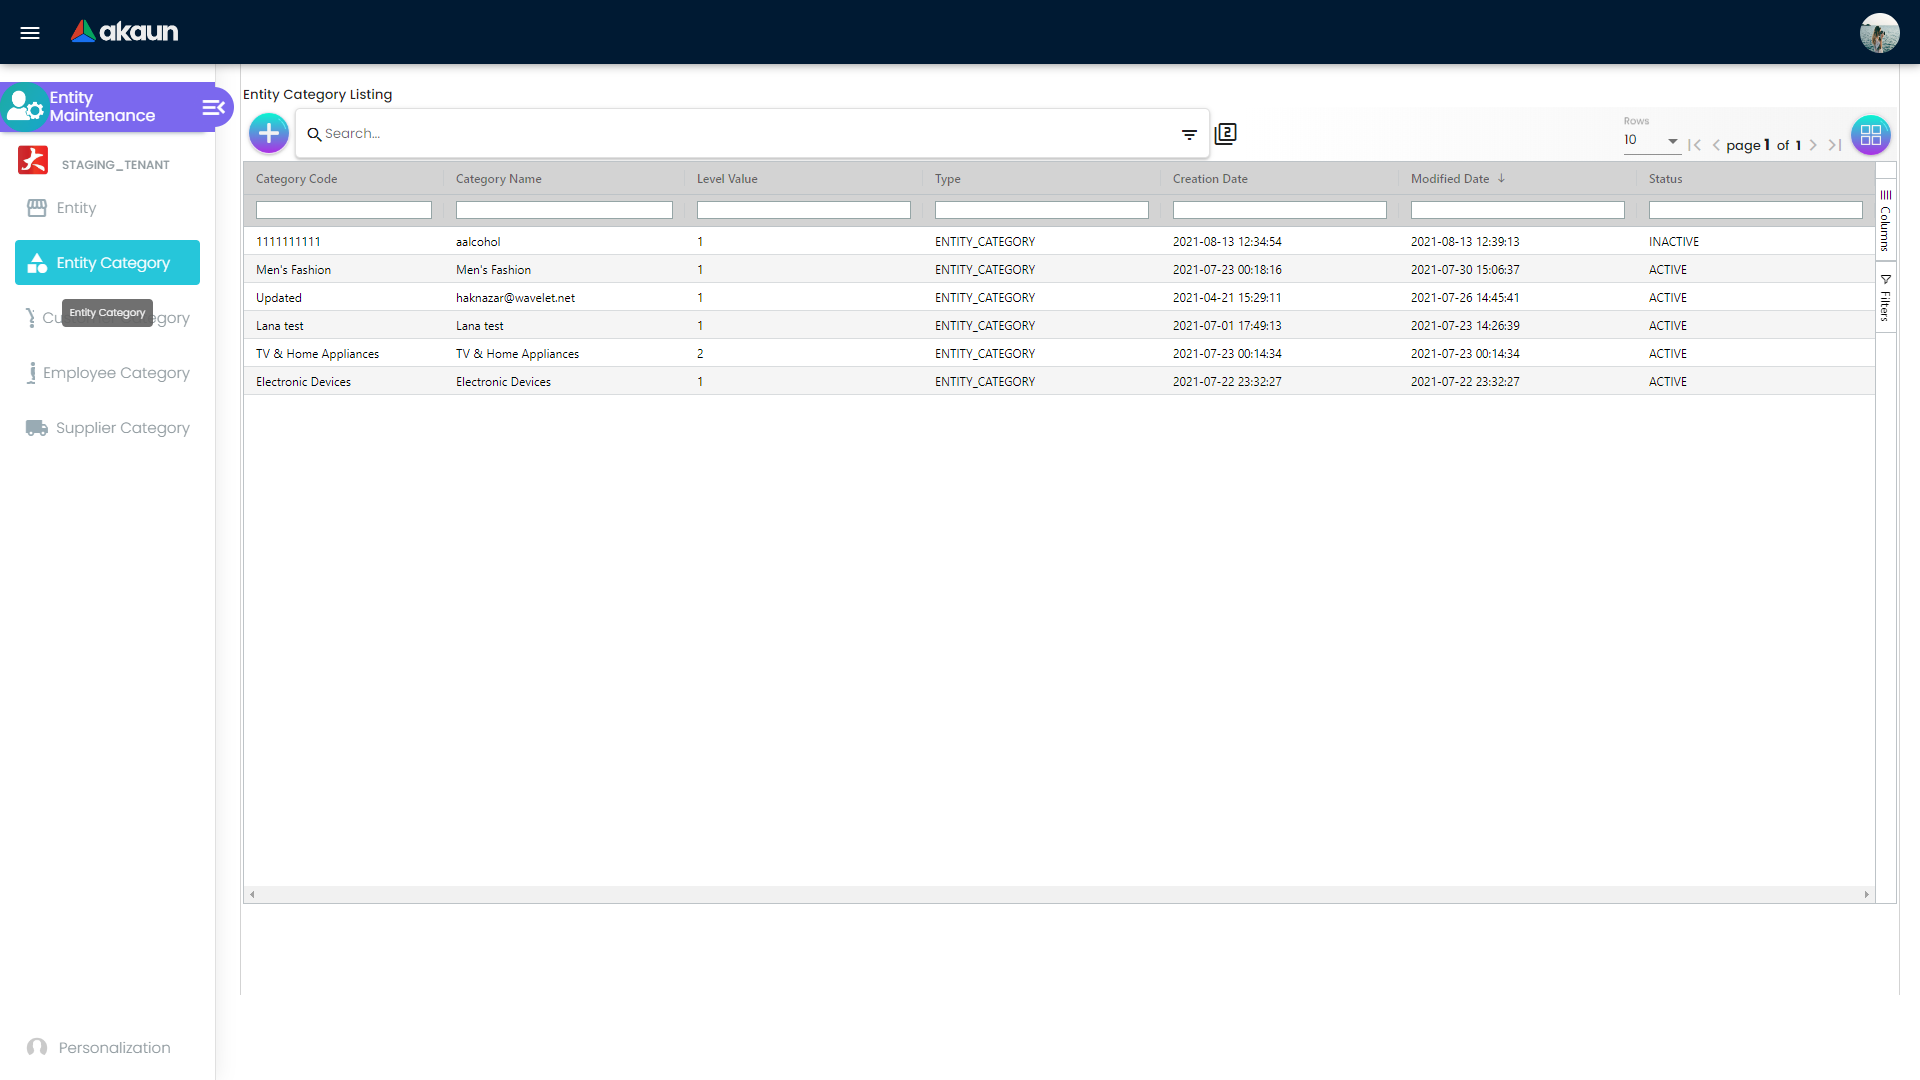
Entity Category
Menu: Entity Category
Use this menu to maintain broad entity classification used across modules.
Key functionality:
- Create new entity category records
- Edit category names and status
- Set parent category and hierarchy level
- Search existing categories for cleanup and governance
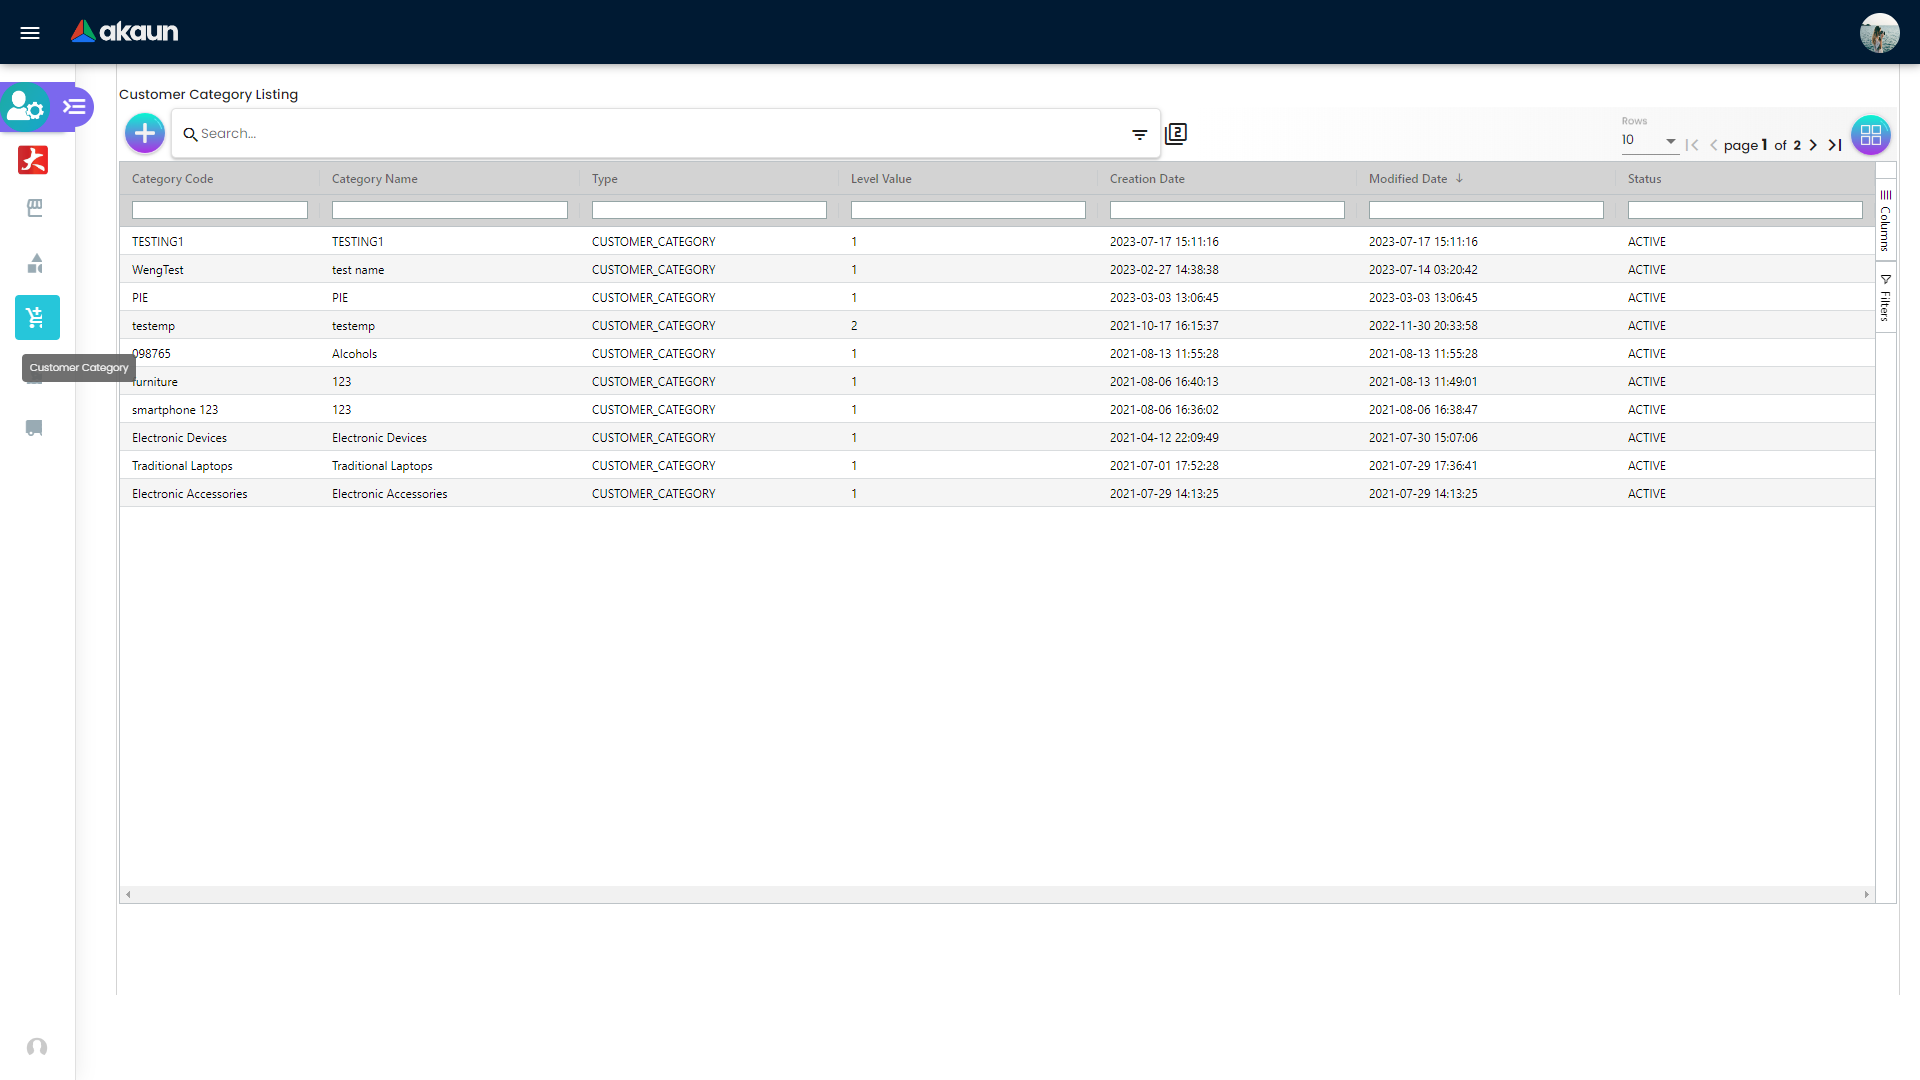
Customer Category
Menu: Customer Category
Use this menu to maintain customer-specific segmentation for customer policies and reporting.
Key functionality:
- Create customer category records
- Set category code, name, and status
- Maintain parent-child category structure
- Search and filter customer category lists
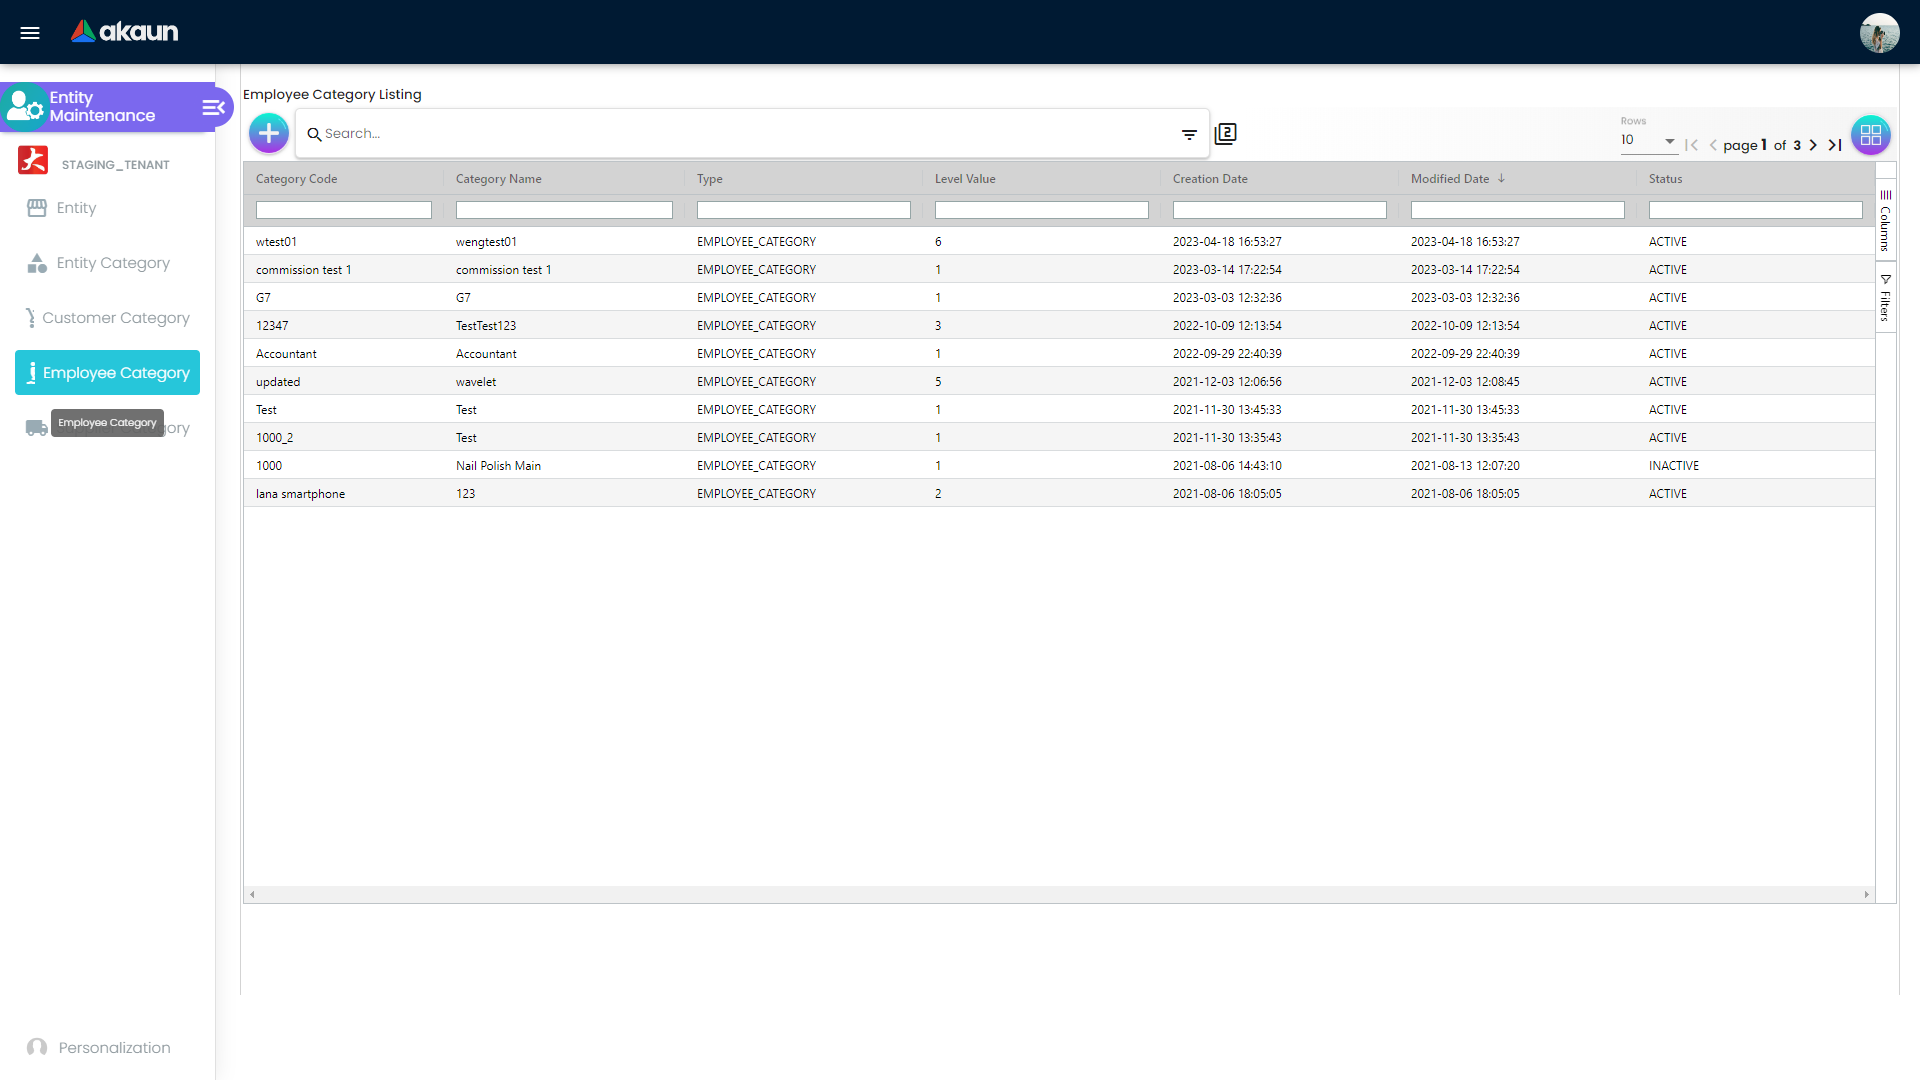
Employee Category
Menu: Employee Category
Use this menu to classify employee entities for internal assignment and reporting control.
Key functionality:
- Create employee category records
- Maintain category names and active/inactive status
- Apply parent category where hierarchy is required
- Review and search employee category records
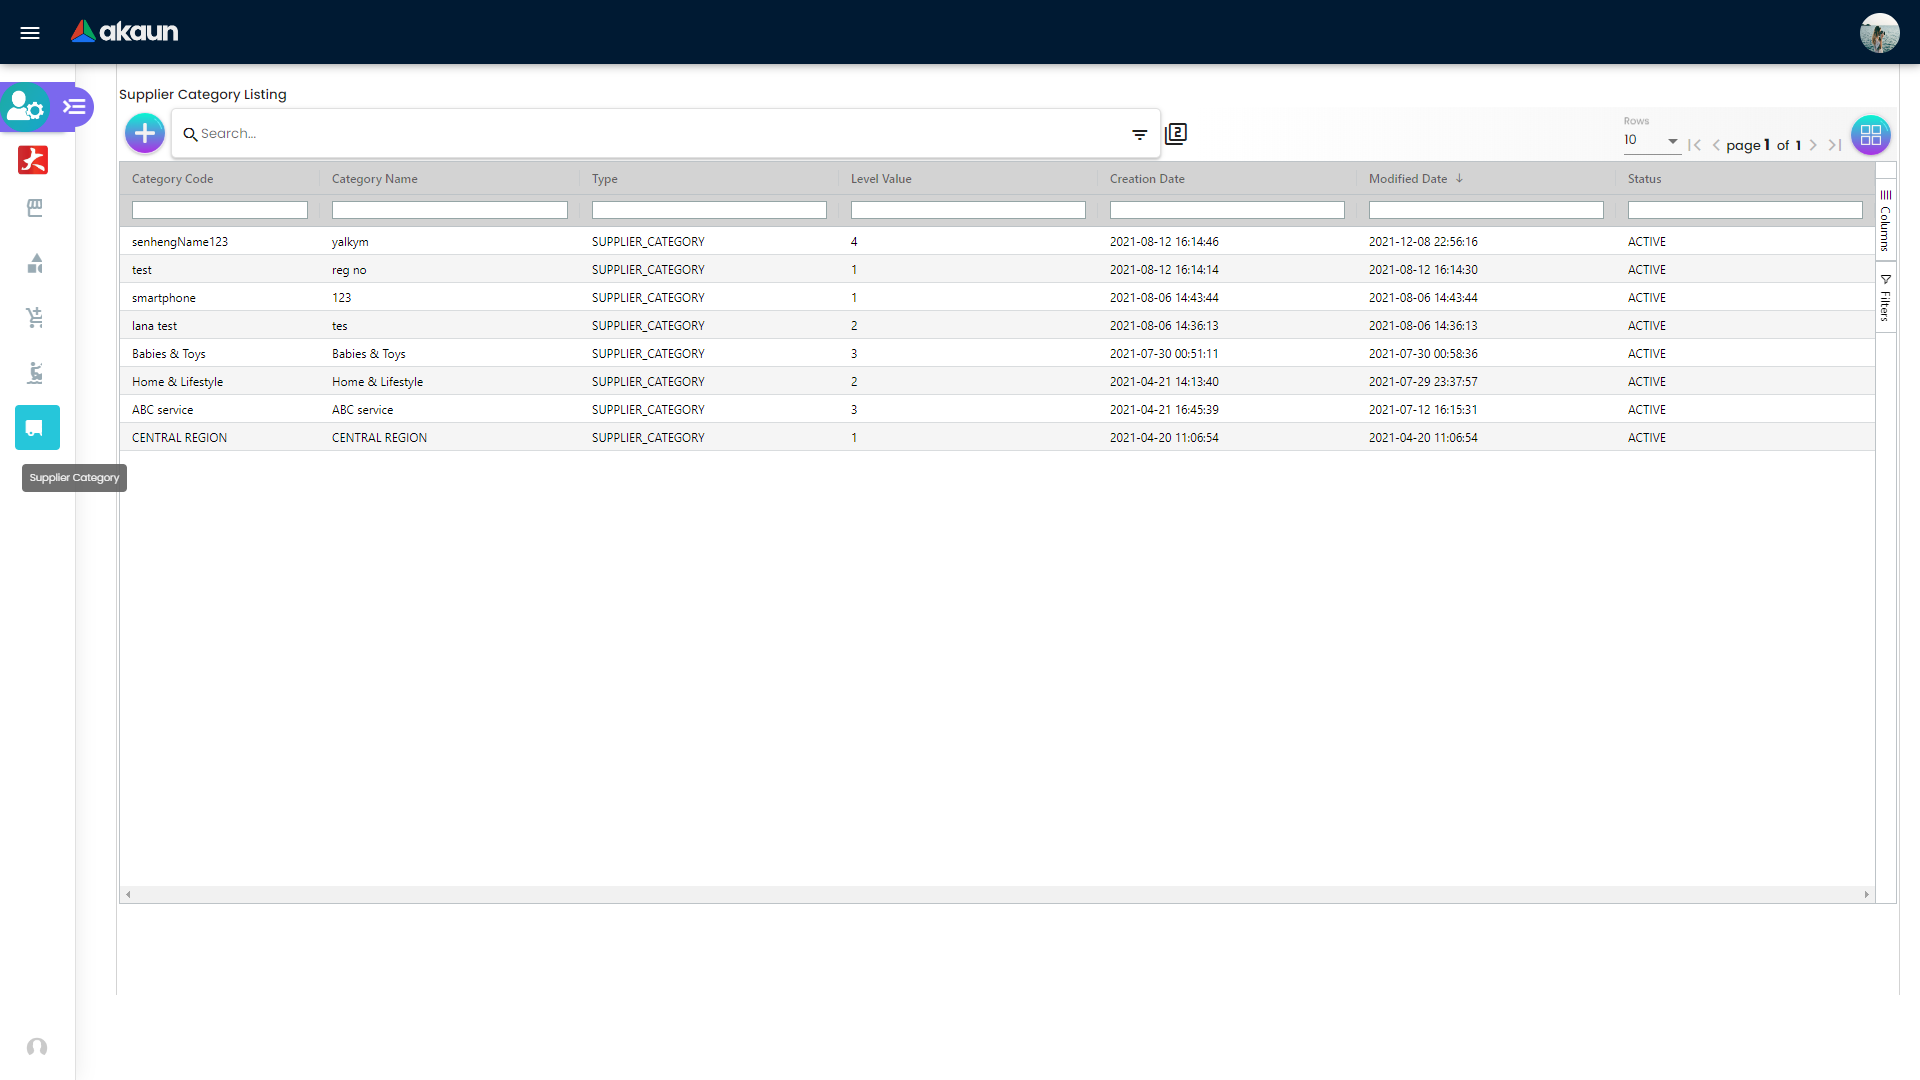
Supplier Category
Menu: Supplier Category
Use this menu to maintain supplier segmentation for procurement and vendor governance.
Key functionality:
- Create and update supplier category records
- Maintain status and hierarchy structure
- Standardize supplier grouping for purchasing operations
- Search supplier categories for faster maintenance
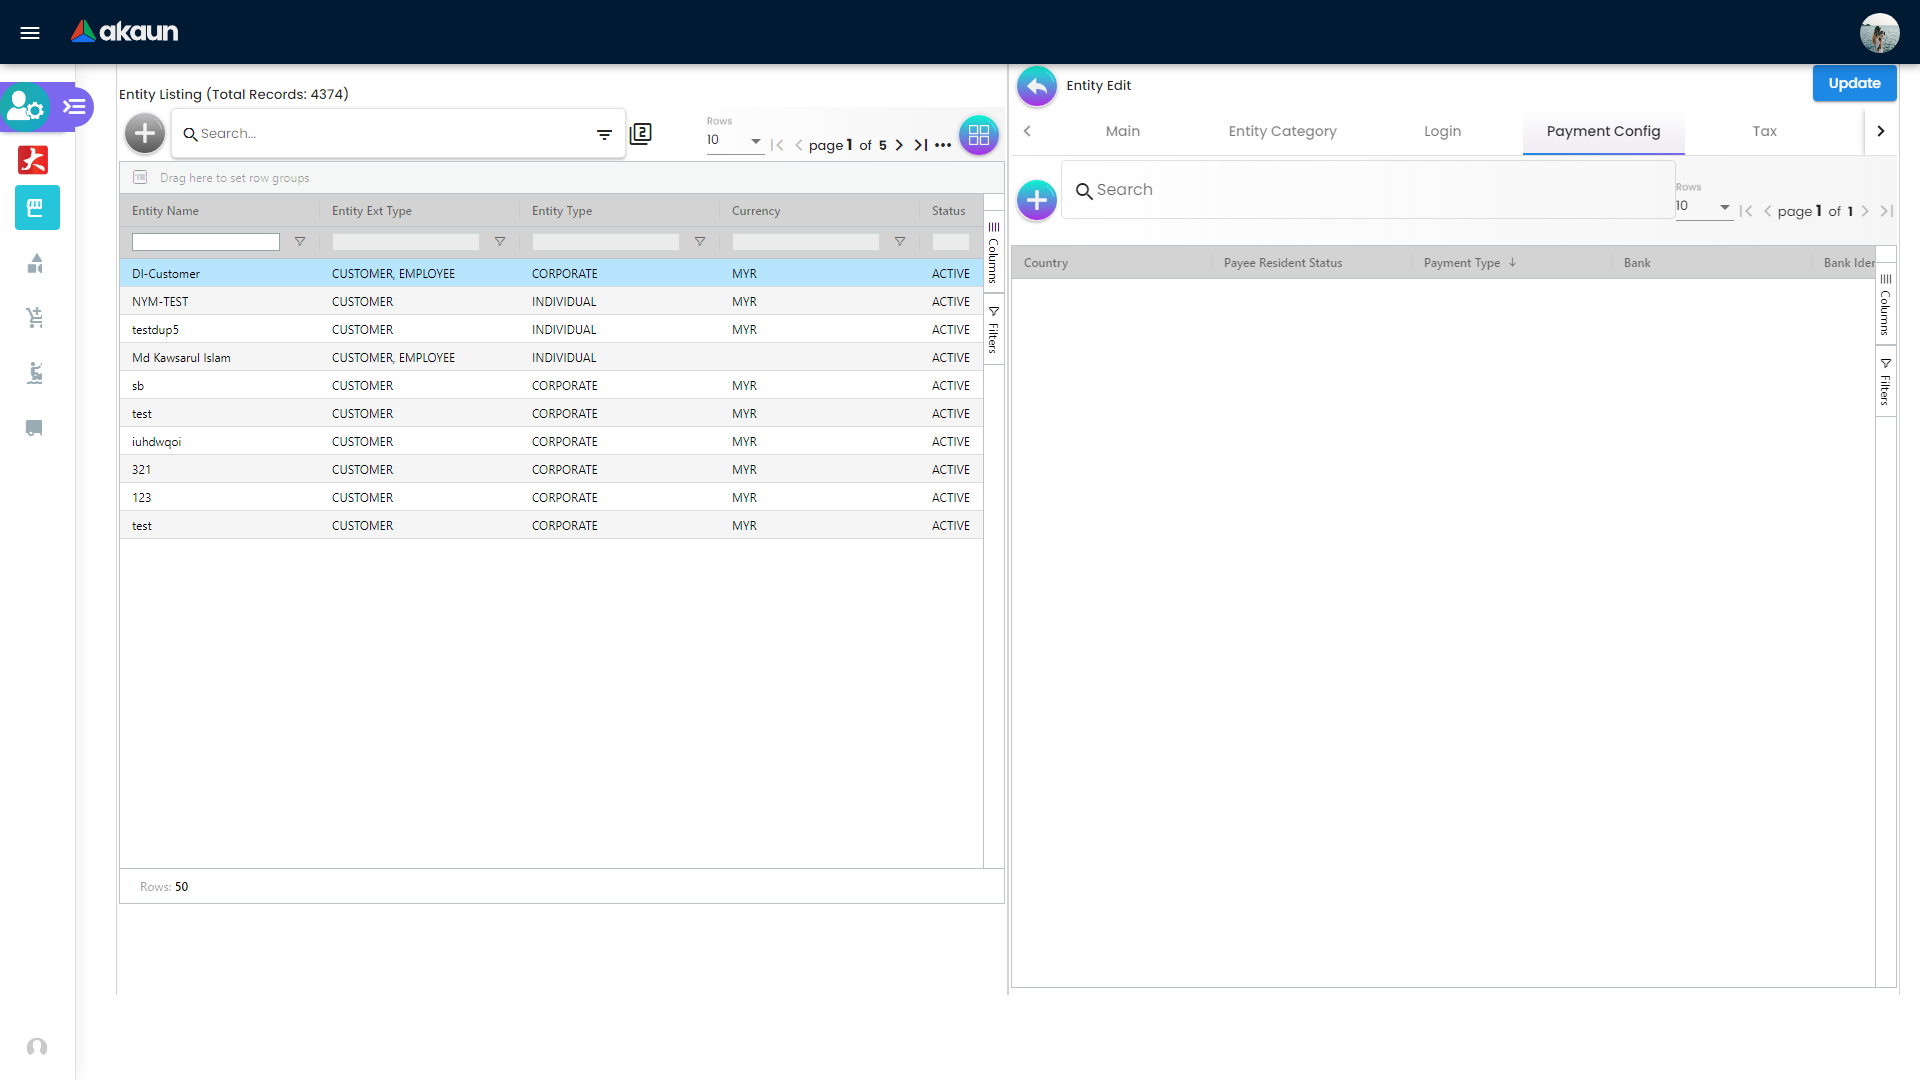
Payment Configuration
Payment configuration captures settlement-related details used by finance:
- Payee Resident Status
- Payment type
- Country and bank
- Bank identifier code
- Account number and account holder name
- IBN number and account expiry
Credit Term and Limit
Credit governance is handled in two linked sections:
- Credit Term for term logic and timing offsets
- Credit Limit for amount, currency, and status controls
These controls support risk management before approving orders or credit exposure.
Company Linking and Intercompany Branch
Company and branch mapping ensures entities are available in the correct context:
- Company Linking maps entity to company scope and AR/AP context
- Intercompany Branch maps entity to specific intercompany branch relationships
Use both sections when entities operate across multiple companies or branches.
Configuration Settings
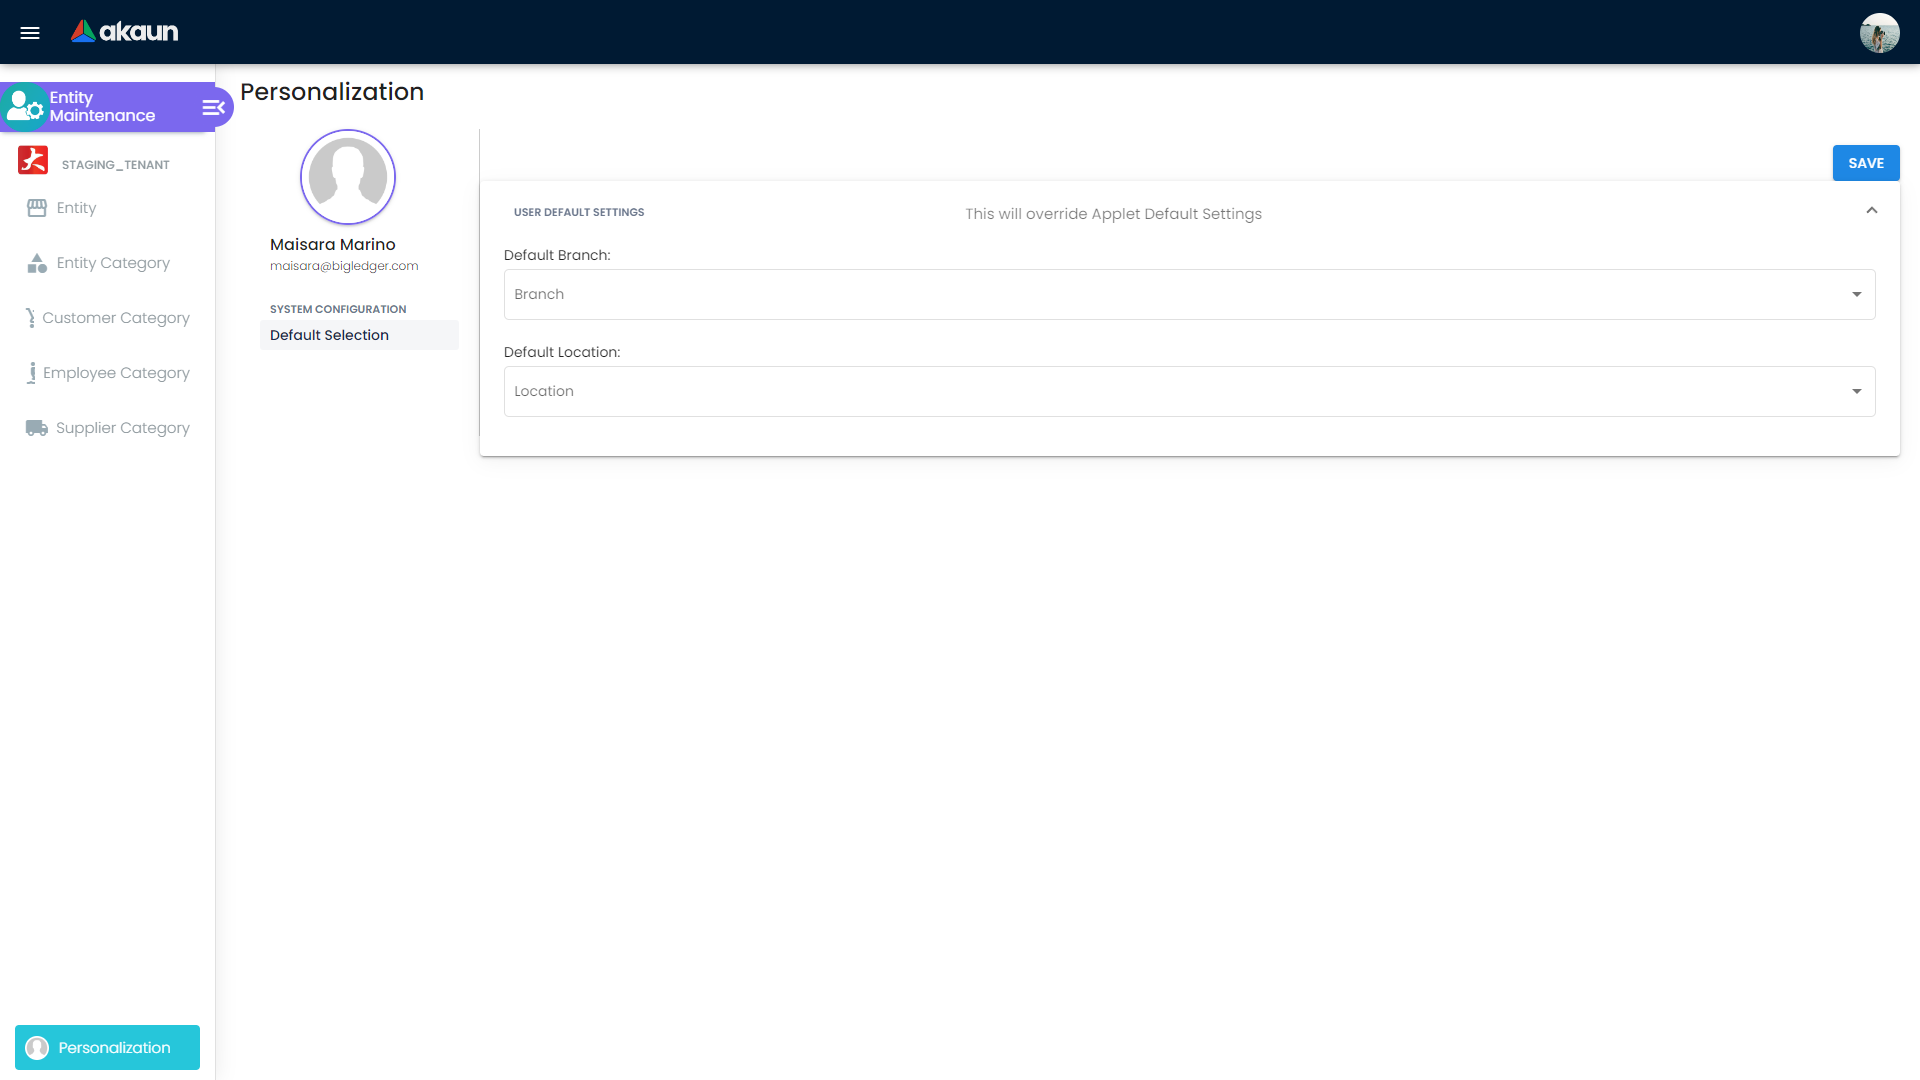
Applet Default Selection (Settings > Default Selection)
Configure applet-wide defaults:
- Default Branch
- Default Location
These defaults reduce repetitive data entry and improve consistency.
Settings menu is not exposed for Entity Maintenance. If this happens, request tenant admin/role permission updates before applying default settings.Field Settings (Settings > Field Settings)
Field settings allow toggle-based control for selected form areas. Common toggles include:
- Unit Discount
- SST/VAT/GST
- WHT
- Blanket Order
- Segment
- G/L Dimension
- Profit Center
- Project
Advanced Governance Routes (Tenant Dependent)
Depending on tenant configuration, additional settings routes may be available:
Settings > WebhookSettings > Feature VisibilitySettings > Permission Set ListingSettings > User Permission ListingSettings > Team Permission ListingSettings > Role Permission Listing
Use these routes to align security, visibility, and operational governance.
Label and i18n Notes
The applet primarily uses built-in labels from component definitions. A lightweight i18n helper is used for dropdown tree selection text (for example, showing All when no specific item is selected).
FAQ
Q: Why does my new entity not appear where I expect after saving?
A: Verify status is active, check the assigned role/type, confirm company or intercompany links, and ensure your role permissions allow visibility in that module.
Q: When should I use Entity Category versus Customer or Supplier Category?
A: Use Entity Category for broad classification, and role-specific categories when reporting or process rules are specific to customer, supplier, or employee contexts.
Q: Do I need to fill Payment, Tax, and Credit for every entity?
A: Not always. For entities that will be used in AP/AR transactions, these sections should be completed before go-live. For non-transactional records, fields can be completed later based on policy.
Q: Can one entity hold multiple roles (for example, both customer and supplier)?
A: Yes. The Type field supports multi-role usage, so one profile can represent multiple business relationships when governance allows it.
Q: How can we prevent duplicate entity creation?
A: Enforce pre-create search by legal name and registration ID, maintain naming standards, and assign a data steward to review uncertain matches.