Fixed Asset
Overview
The Fixed Asset applet keeps the register of a tenant’s capitalised assets — what was bought, which company, branch and location holds it, which employee is responsible for it, what it cost, how it depreciates and which GL codes its depreciation posts to. It is opened by the finance team that owns the fixed-asset ledger, usually after a purchase invoice has been finalised.
It is not a document applet. It has no document type, no FINAL status and no numbering series.
It keeps its own records — assets, their depreciation configuration and schedule, depreciation runs,
categories, attachments and imports — and writes journals directly.
Assets reach the register three ways: created by hand on the Asset Register screen, uploaded through the Import Fixed Asset CSV screen, or converted automatically from a finalised Purchase Invoice (Internal) line whose item is flagged as a fixed-asset item.
What it will not do. It will not depreciate on a schedule — every month is a run somebody opens and presses RUN on, and a month nobody runs is simply not depreciated. It will not generate a depreciation schedule: the months an asset is eligible for are added one at a time by hand. It will not inherit depreciation settings from the asset’s category. It will not revalue, impair, transfer between companies, or reverse accumulated depreciation when an asset is disposed of. And the depreciation run has enough sharp edges — set out under Lifecycle and effects — that a first month should be run on a copy of the data and reconciled line by line in Ledger and Journal before it is trusted with a period close.
Where it fits
| Direction | What | Why |
|---|---|---|
| Upstream | Purchase Invoice (Internal) | A line whose item transaction type is FIXED_ASSET_REGISTER can be converted into a DRAFT asset record |
| Upstream | Inventory Item Maintenance | The item’s property_json carries the type and category_guid copied onto the converted asset |
| Upstream | Chart of Account | Supplies the asset GL code, the depreciation-expense GL code and the accumulated-depreciation GL code |
| Upstream | Organization | Company, branch and location; the company’s FIXED_ASSET_REGISTER default GL link used by the purchase conversion |
| Upstream | Employee | The person-in-charge drop-down reads entity headers |
| Downstream | Ledger and Journal | Every acquisition, adjustment, disposal, other journal and depreciation line lands here as a journal |
| Downstream | Financial Report | Depreciation expense and accumulated depreciation reach the P&L and balance sheet through the ledger |
Screens and menus
The applet mounts at applet/tnt/wavelet/erp/asset-register-applet and its sidebar has five entries.
| Menu | Route | What it shows |
|---|---|---|
| Asset Register | asset-register | The asset listing, plus create and edit |
| Asset Category | asset-category | The category master |
| Depreciation Run | depreciation-run | Monthly run headers and their result lines |
| Reports | reports | The fixed-asset report with PDF and XLS export |
| Import Fixed Asset | file-import | CSV upload and the per-row staging grid |
Asset Register
The listing columns are Asset Code, Asset Name, Category, Company, Location, Purchase Date, Purchase Price, Depreciation Method and Asset Status. It is an ag-Grid server-side grid with an advanced-search panel over company, branch, location, purchase-date range and asset-code range.
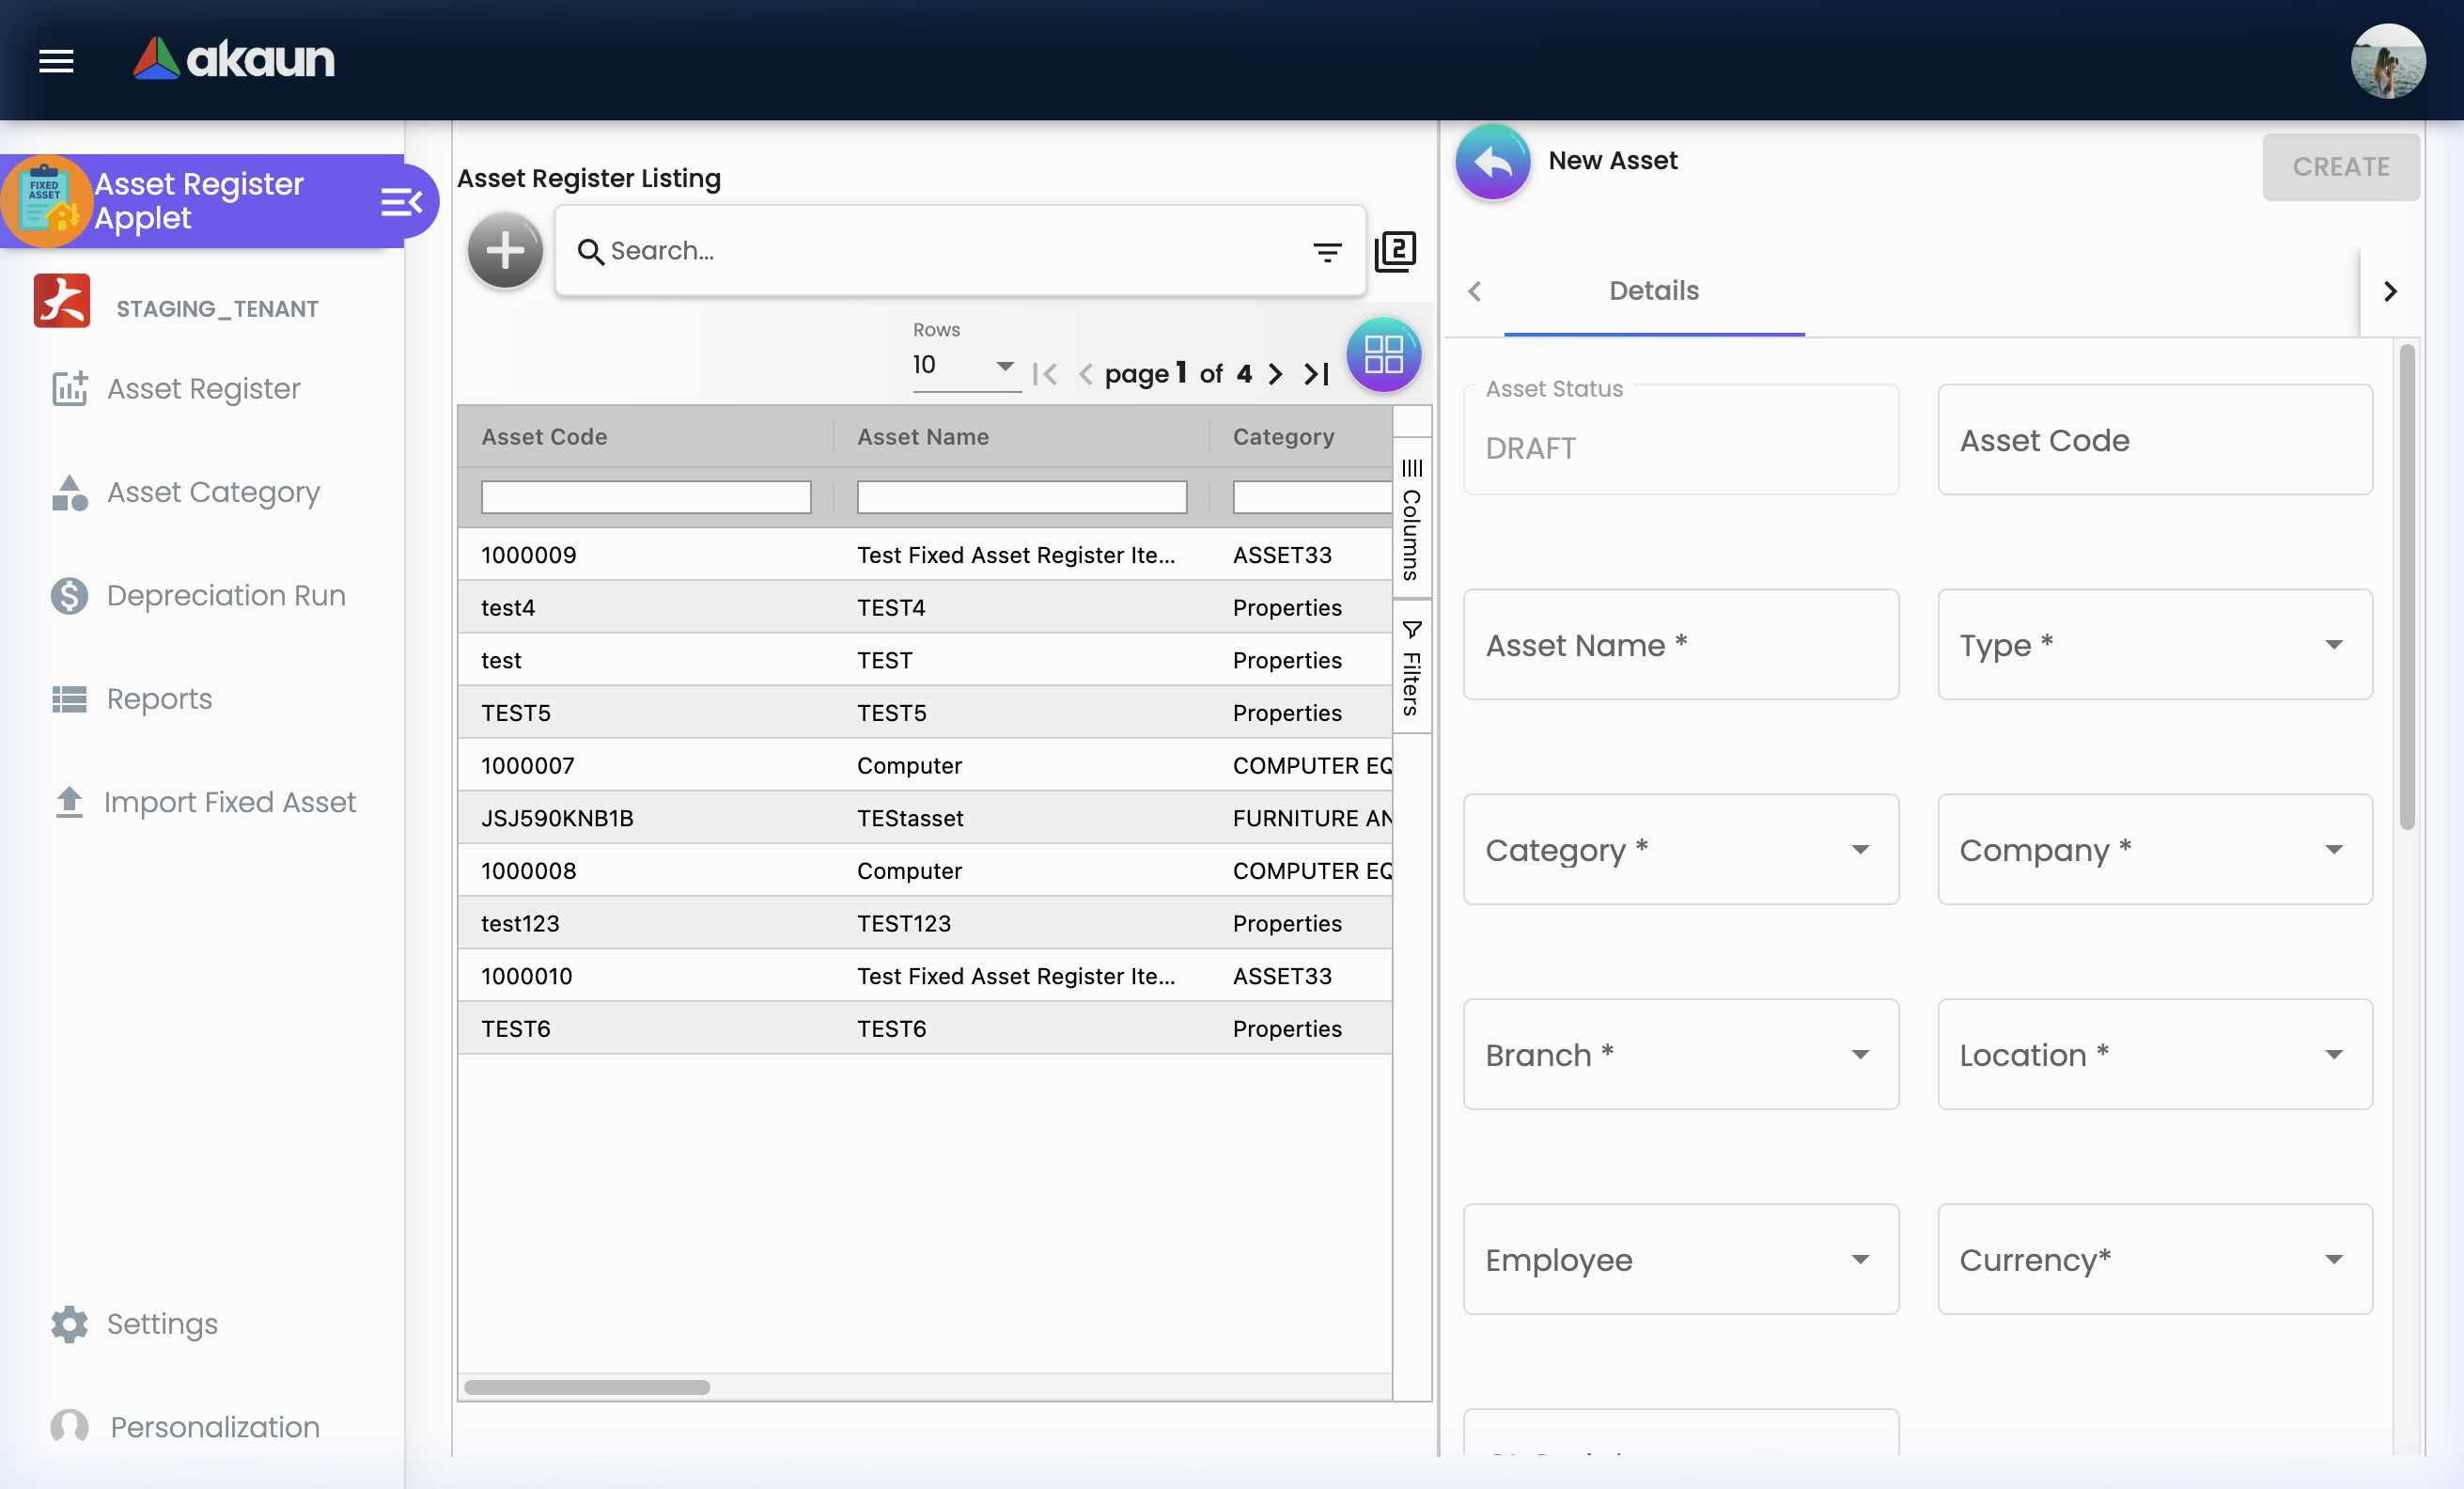
The create screen has a single Details tab. Two further tabs — Depreciation (Configuration and Schedule) and Transactions — exist in the template but are commented out, so depreciation cannot be configured until after the asset has been created.
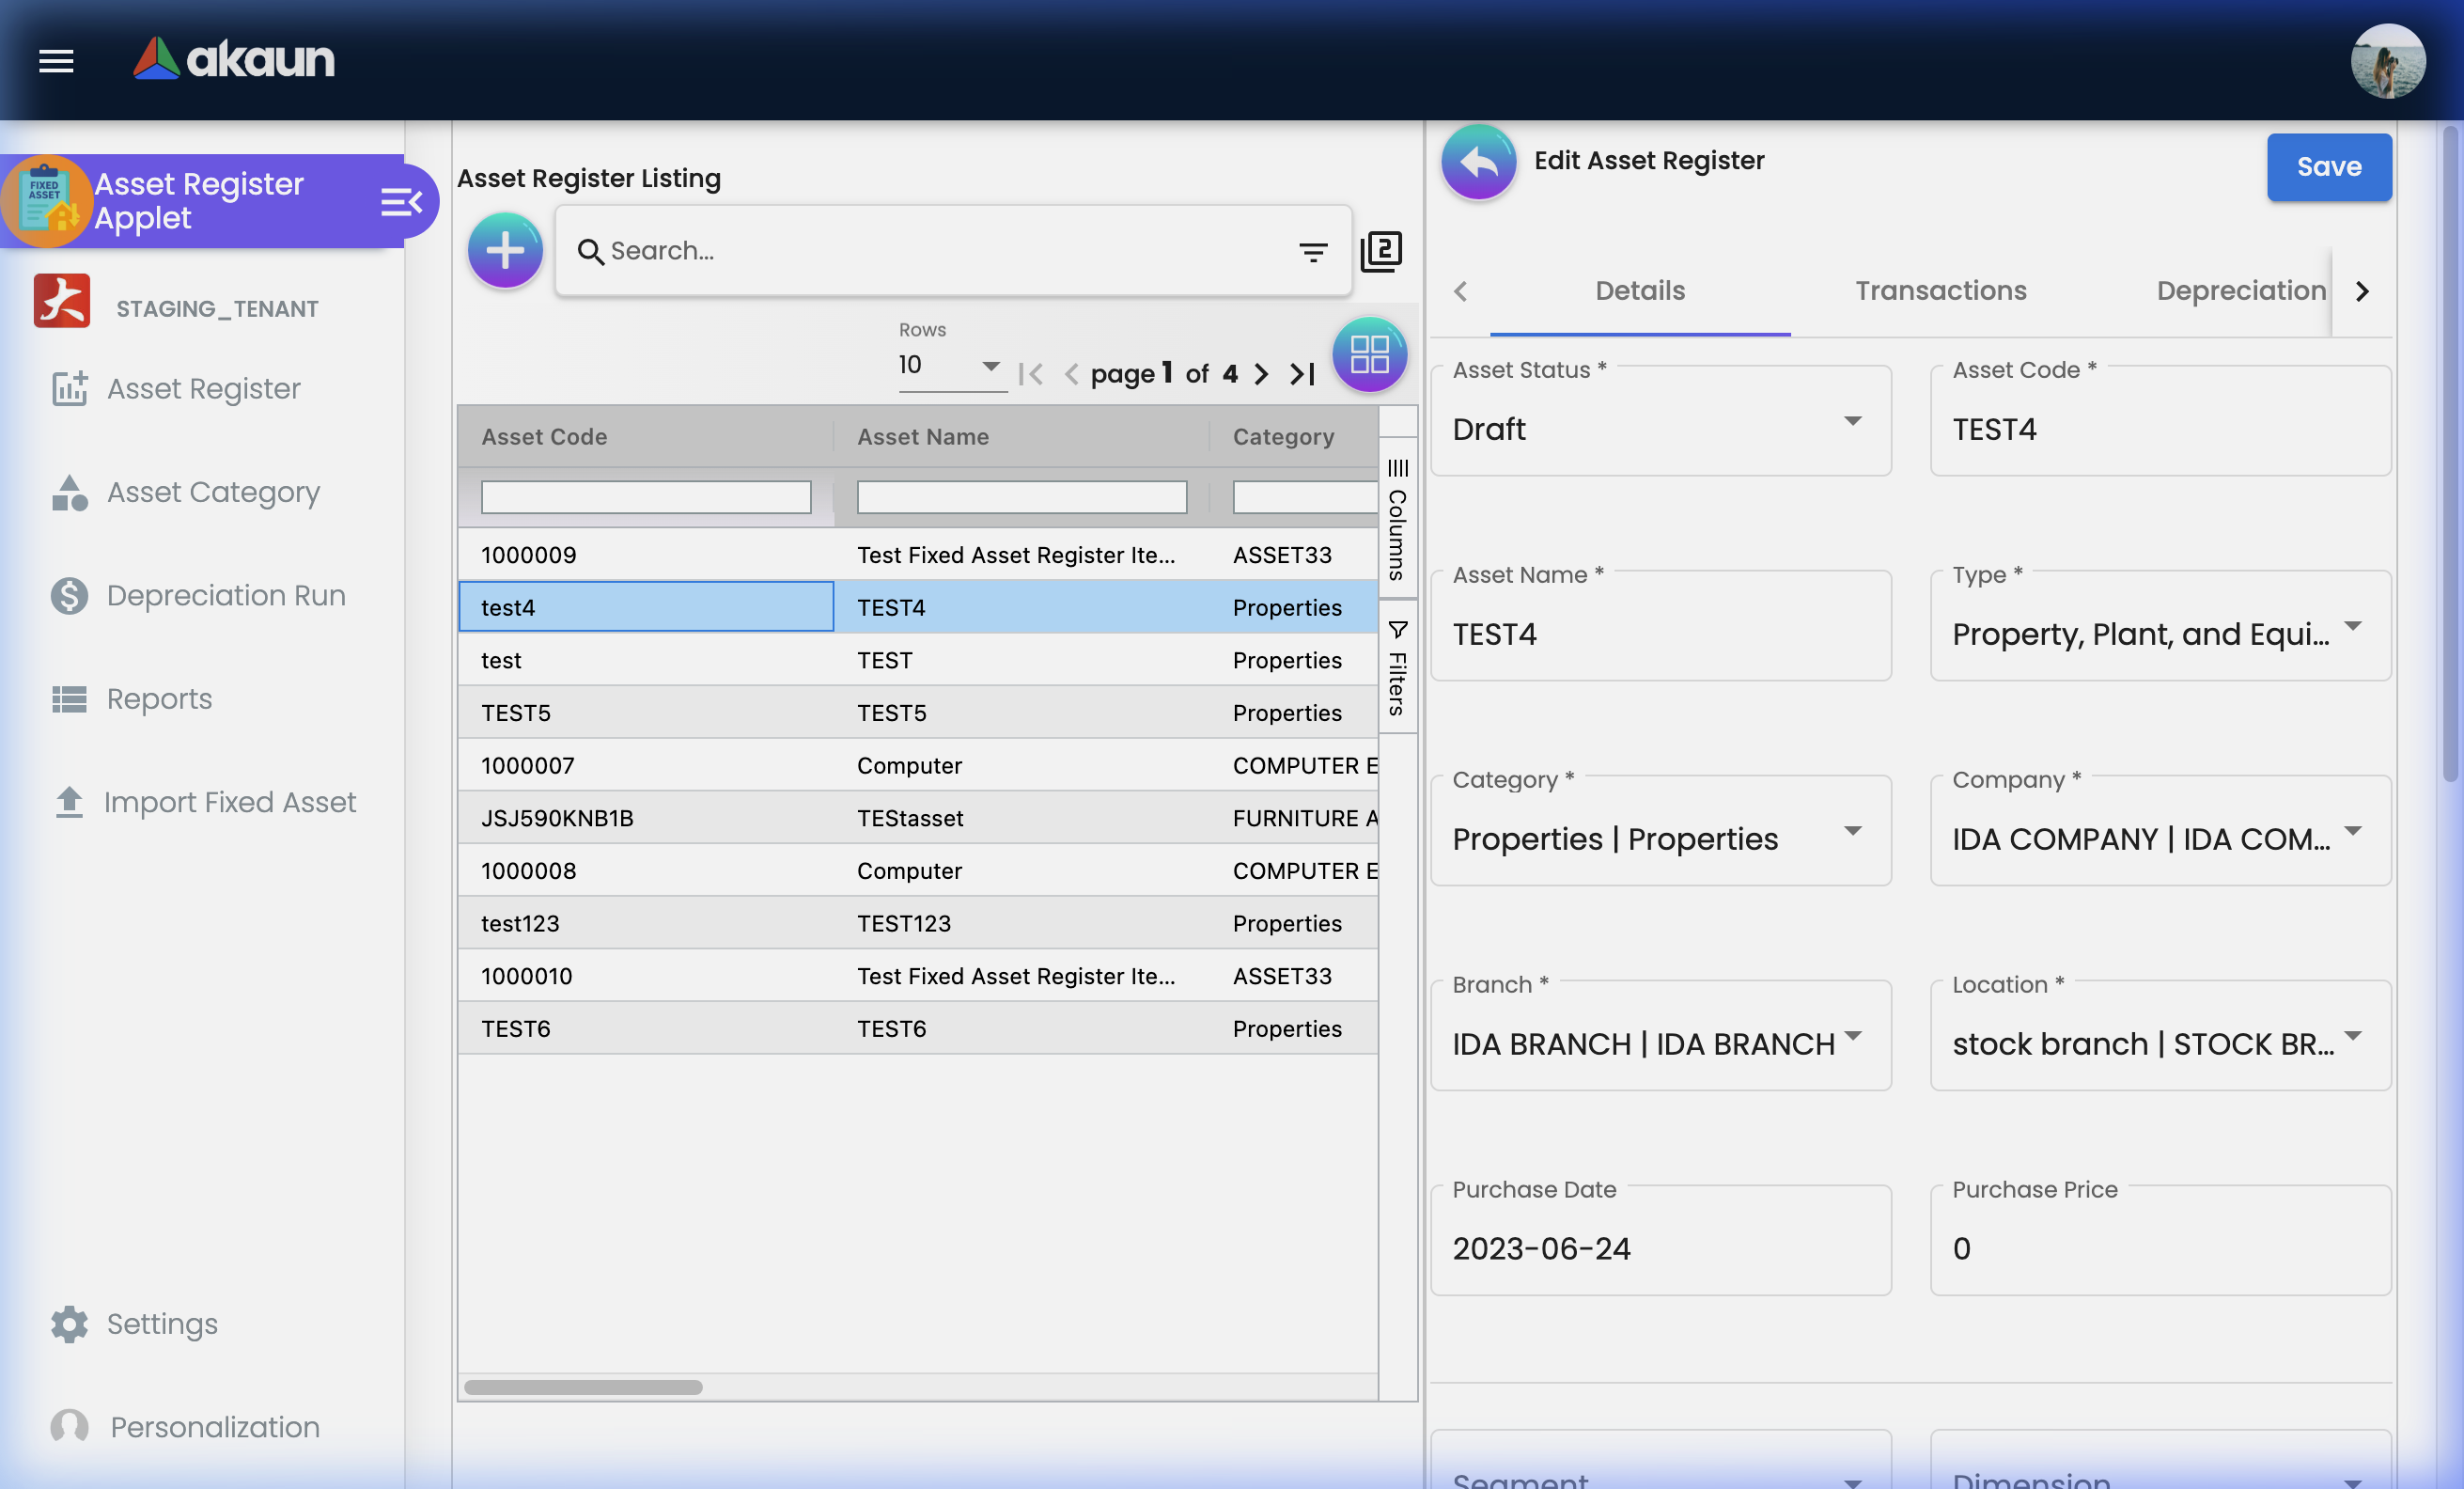
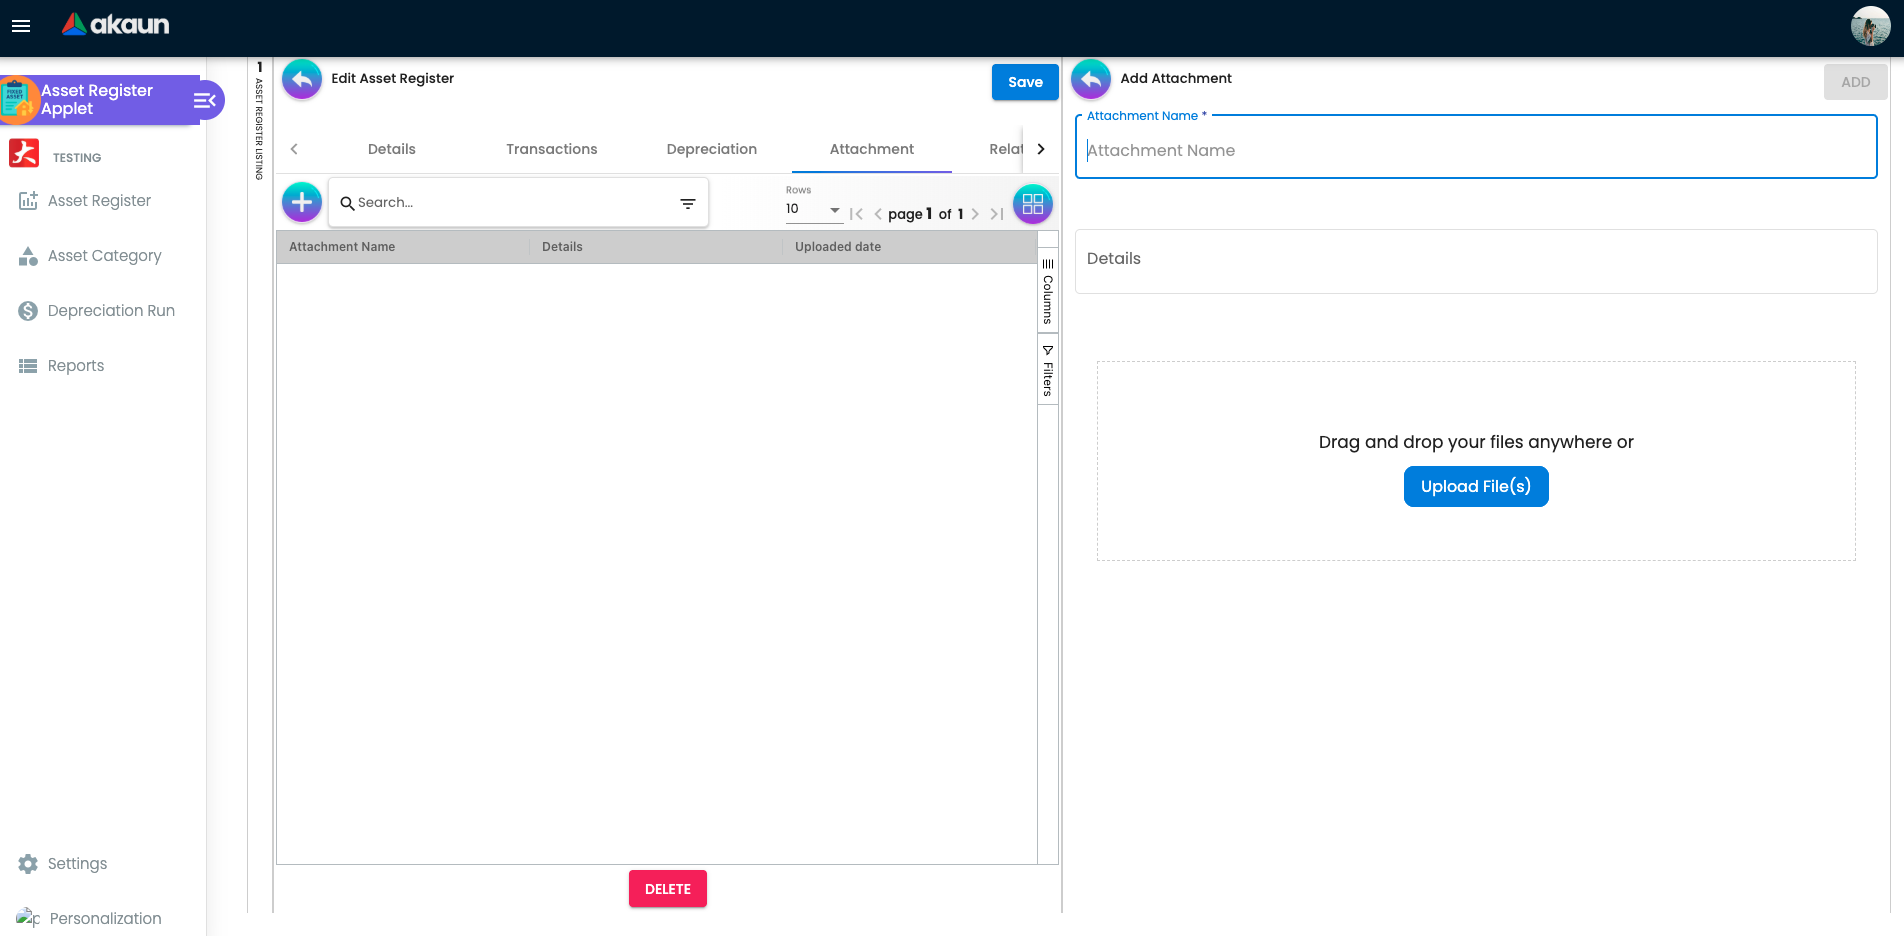
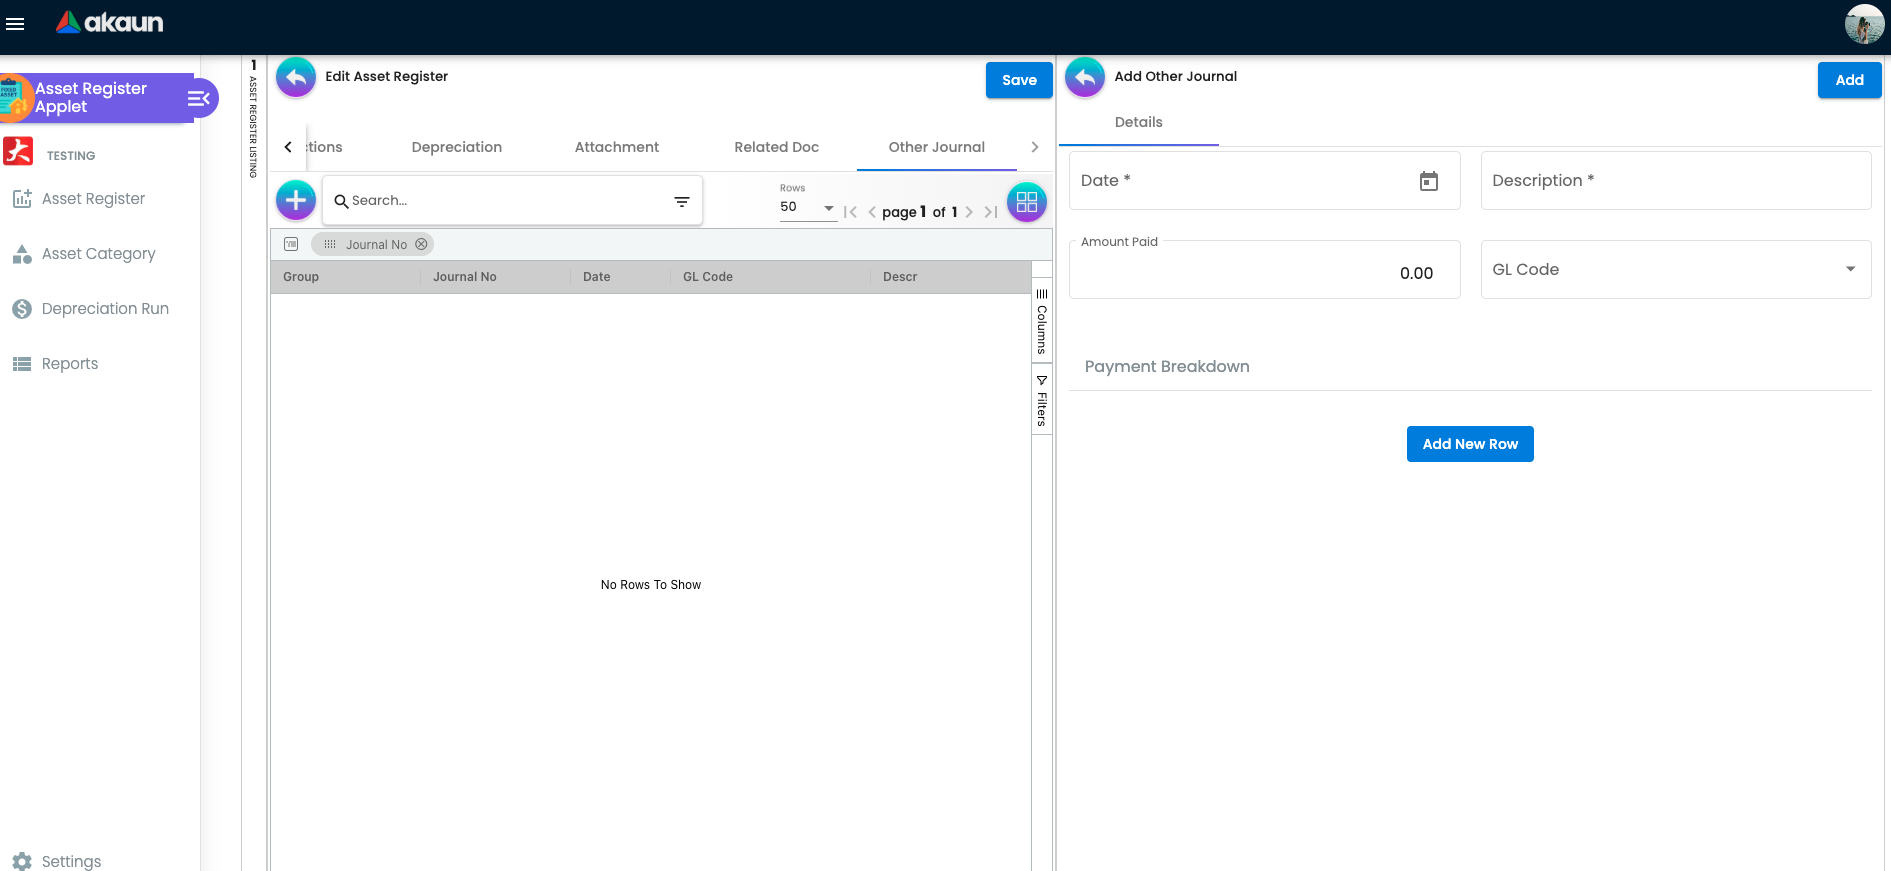
The edit screen has six tabs — Details, Transactions, Depreciation (with Configuration and Schedule sub-tabs), Attachment, Related Doc and Other Journal — and their order is controlled by the Default Selection setting (see Configuration).
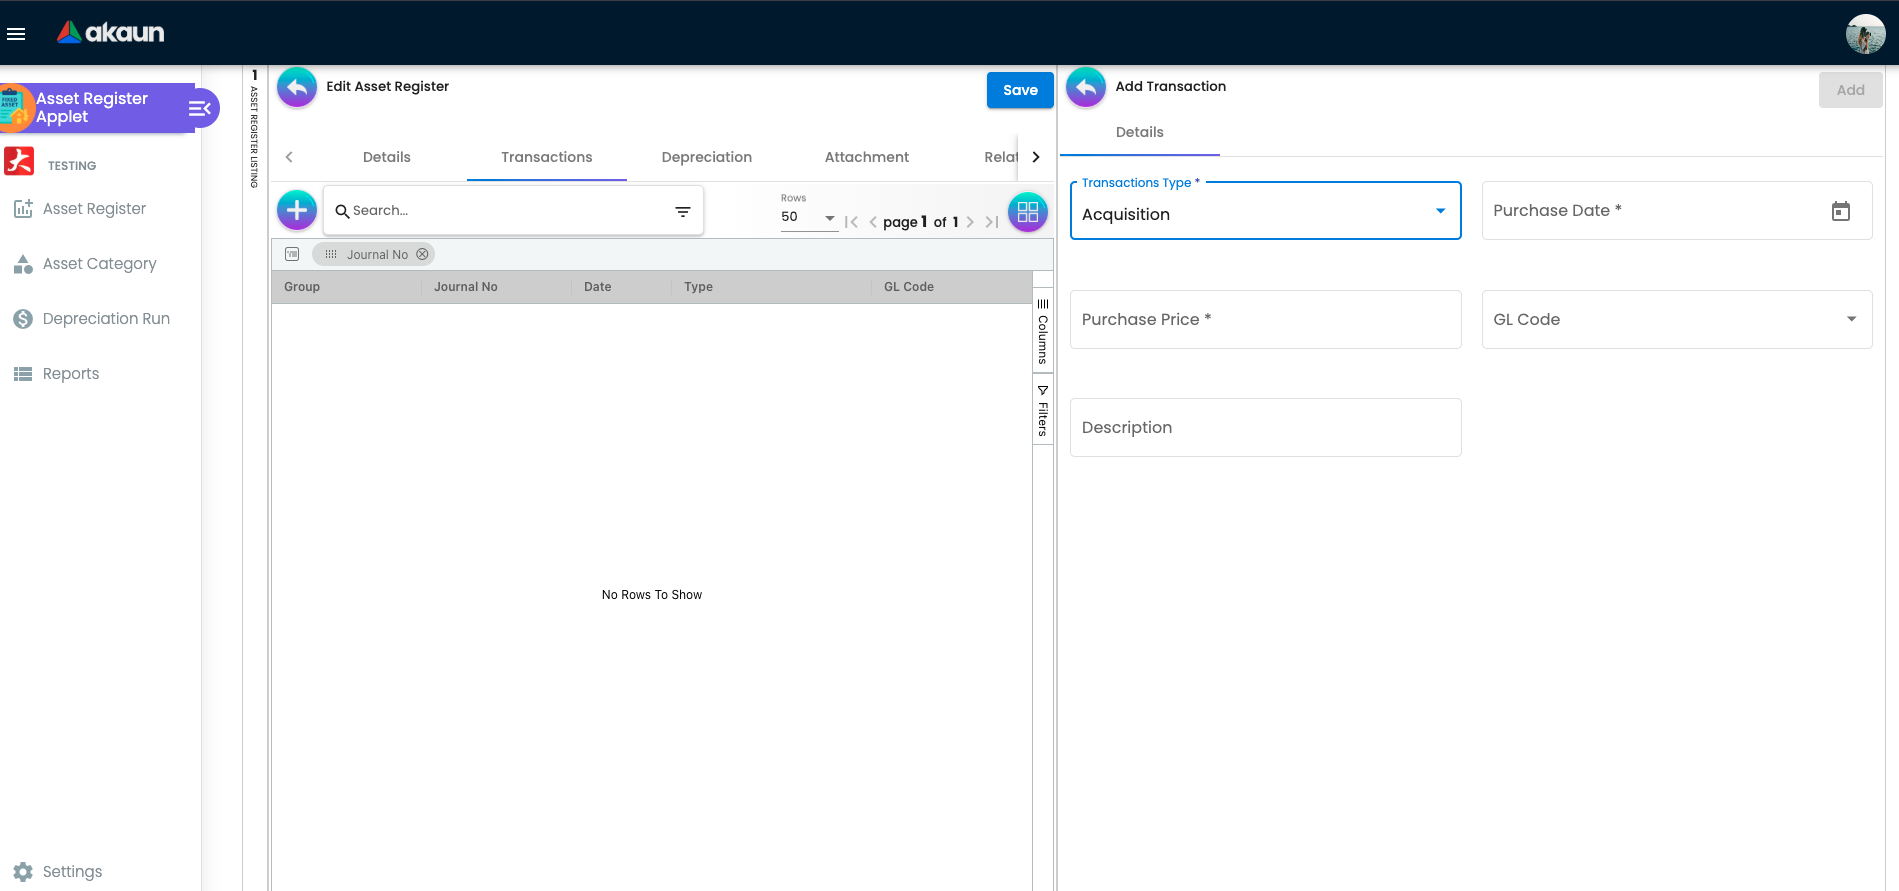
Two of them carry more weight than their names suggest. Transactions is the only screen on which an asset’s purchase price, disposal price and gain or loss are ever decided, and every row added there posts a journal straight to the ledger — there is no draft and no approval step. Depreciation → Schedule is not a generated plan: it is a hand-kept list of the individual months this asset is allowed to depreciate in, added one month at a time, and a month with no row here is a month the depreciation run will not touch.
There is no delete button on the edit screen — the markup is commented out.
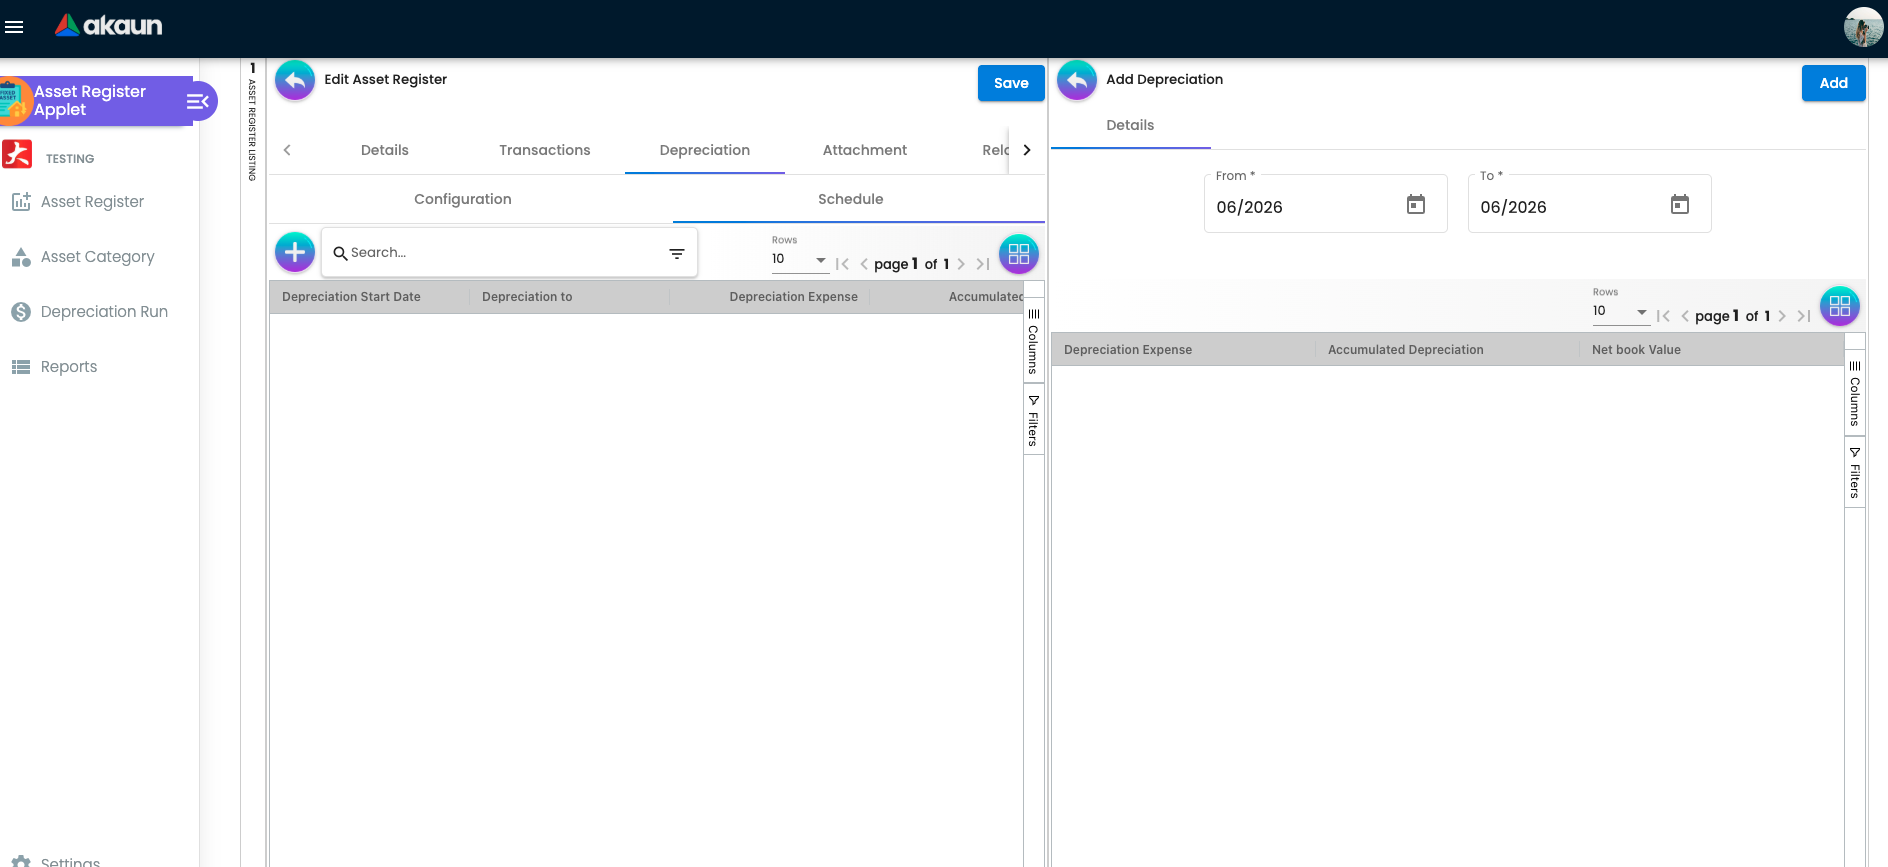
The Add Depreciation panel adds one month at a time: it takes a single month/year and adds one schedule row with that month’s first and last day. There is no “generate the whole schedule” action.
Asset Category
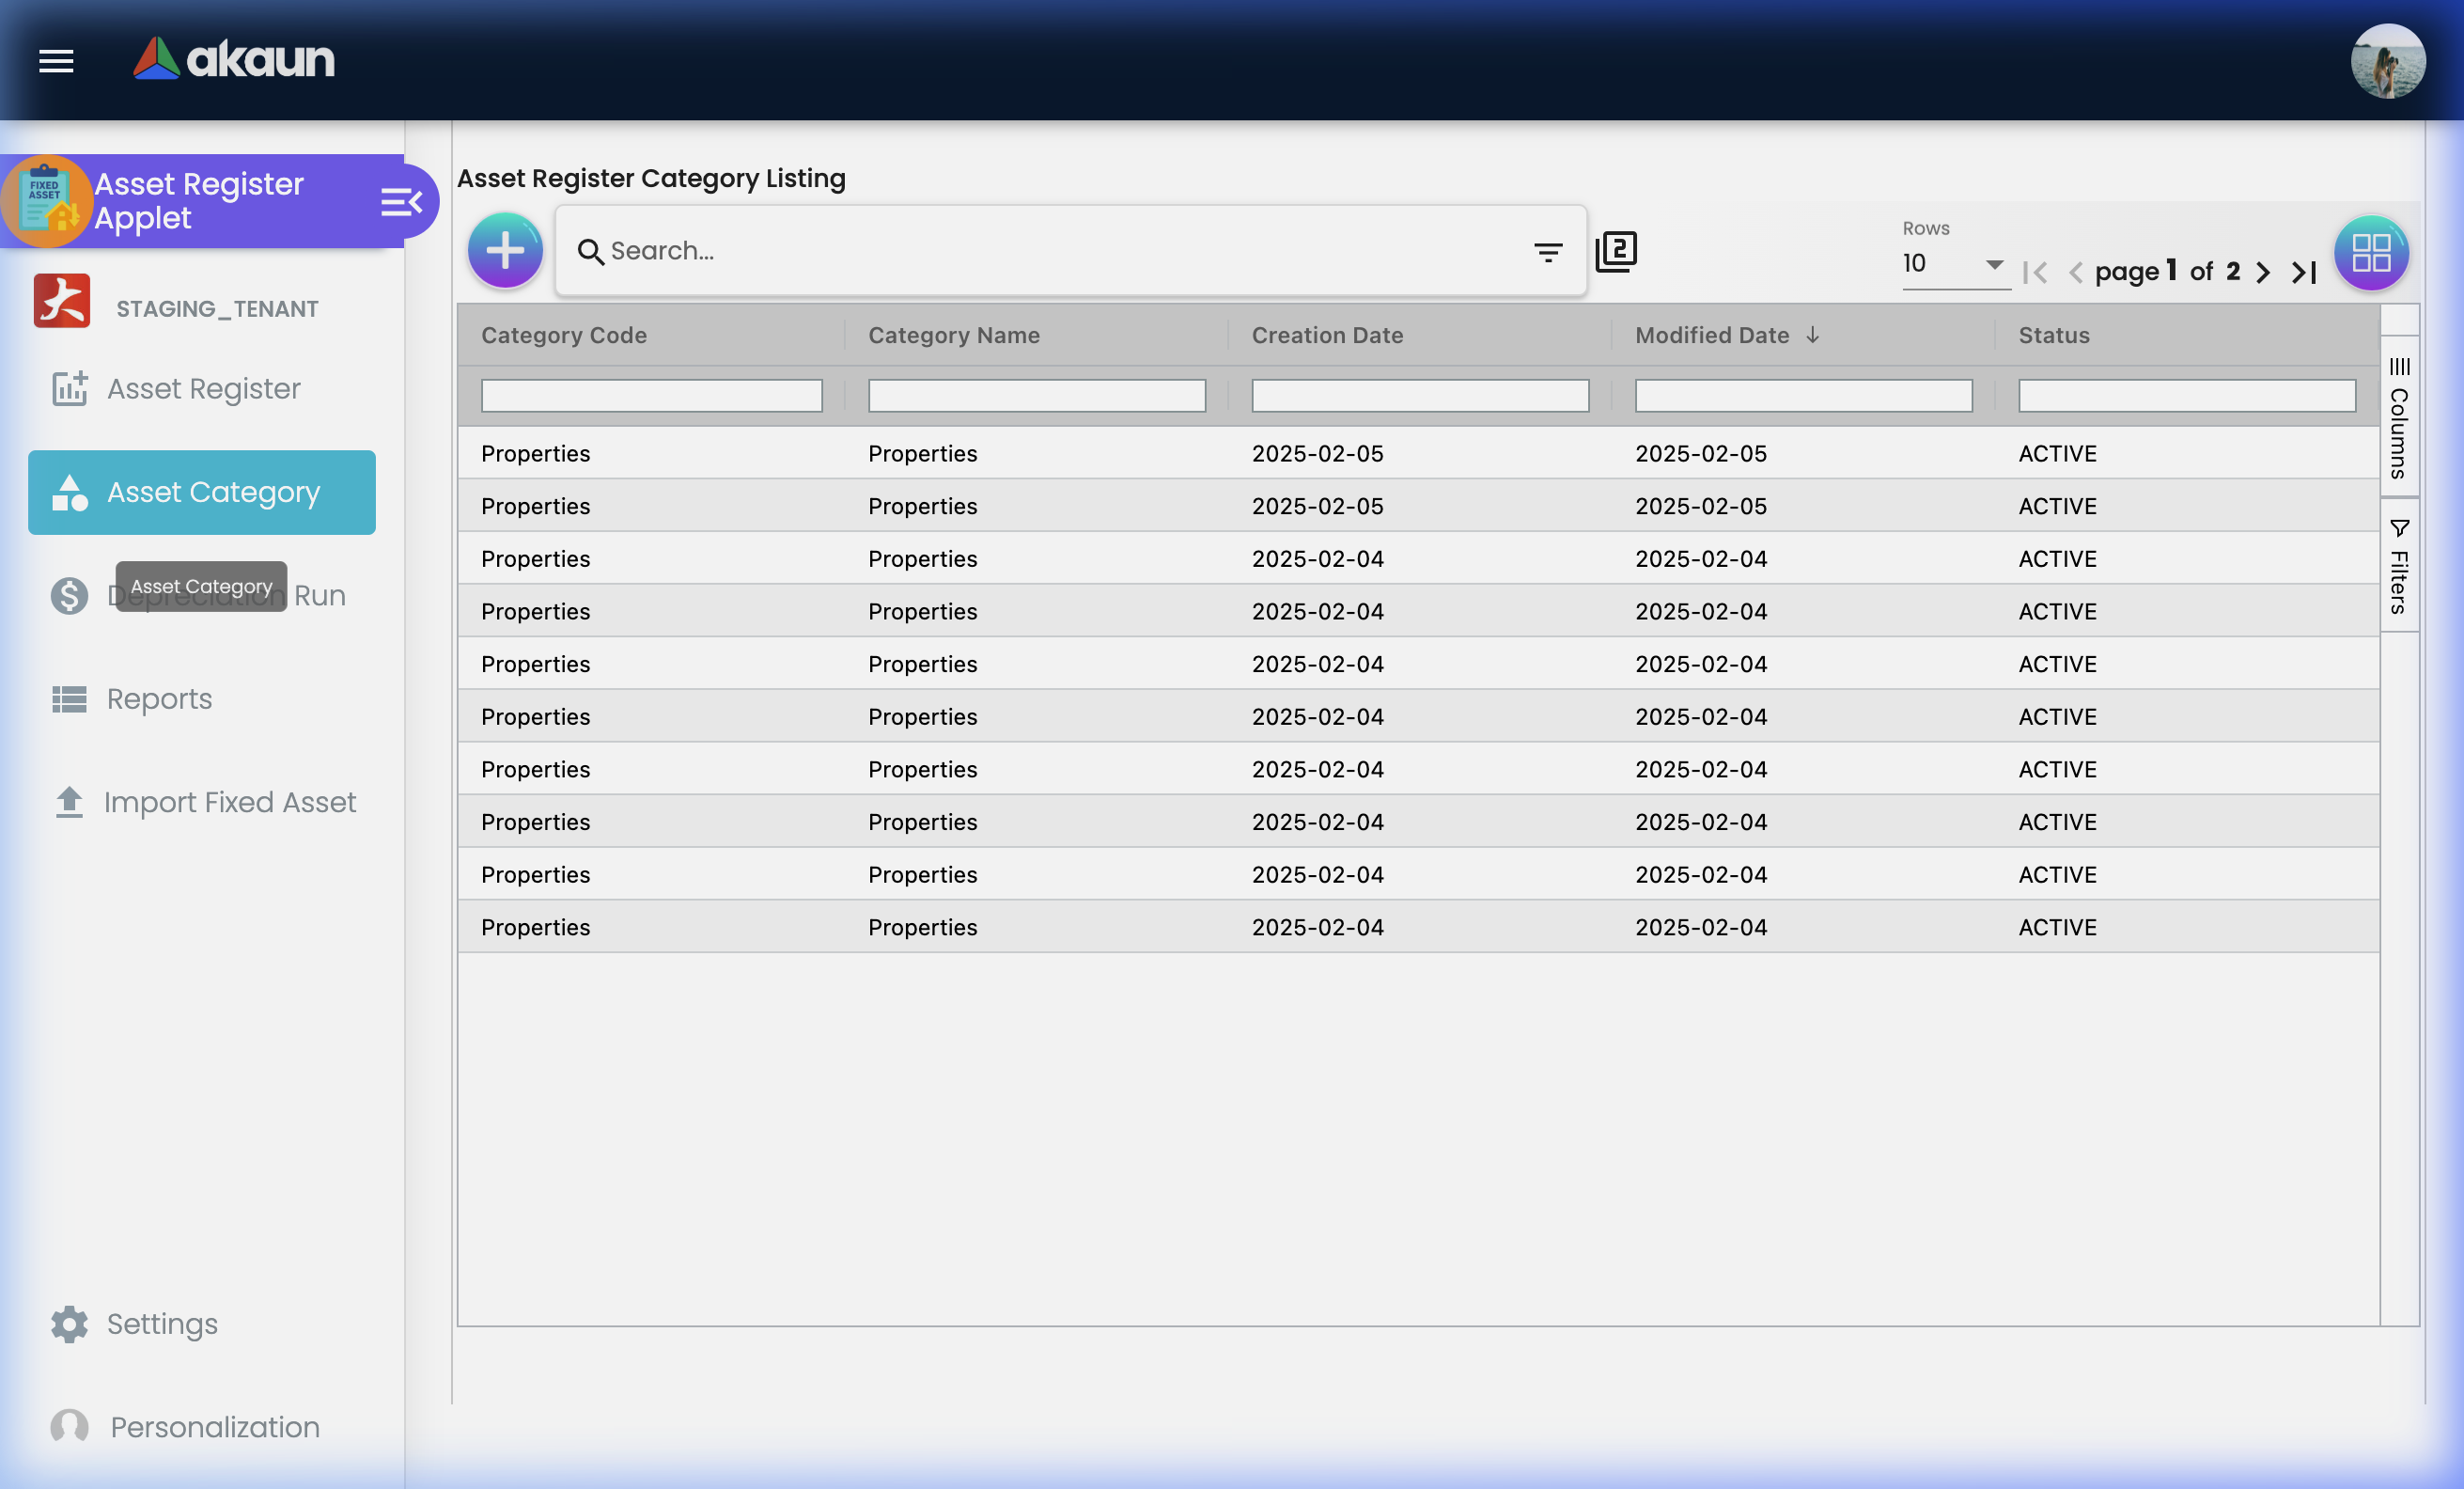
Categories carry a code, a name, a description and a status of ACTIVE or INACTIVE. Code, name
and status are required. A category groups assets on the register listing and on the report, and
that is all it does — it carries no depreciation defaults that an asset inherits.
The platform does have a category-level depreciation configuration — a method, an averaging method, a
rate, a useful life, a residual value and both depreciation GL codes, reachable through the API with
its own permission family (API_TNT_DM_FA_CATEGORY_DEPRECIATION_CONFIG_*) — but nothing in the
fixed-asset path uses it: the depreciation run uses the per-asset configuration only, and no screen
reads or writes the category’s. Configure depreciation on each asset.
Depreciation Run
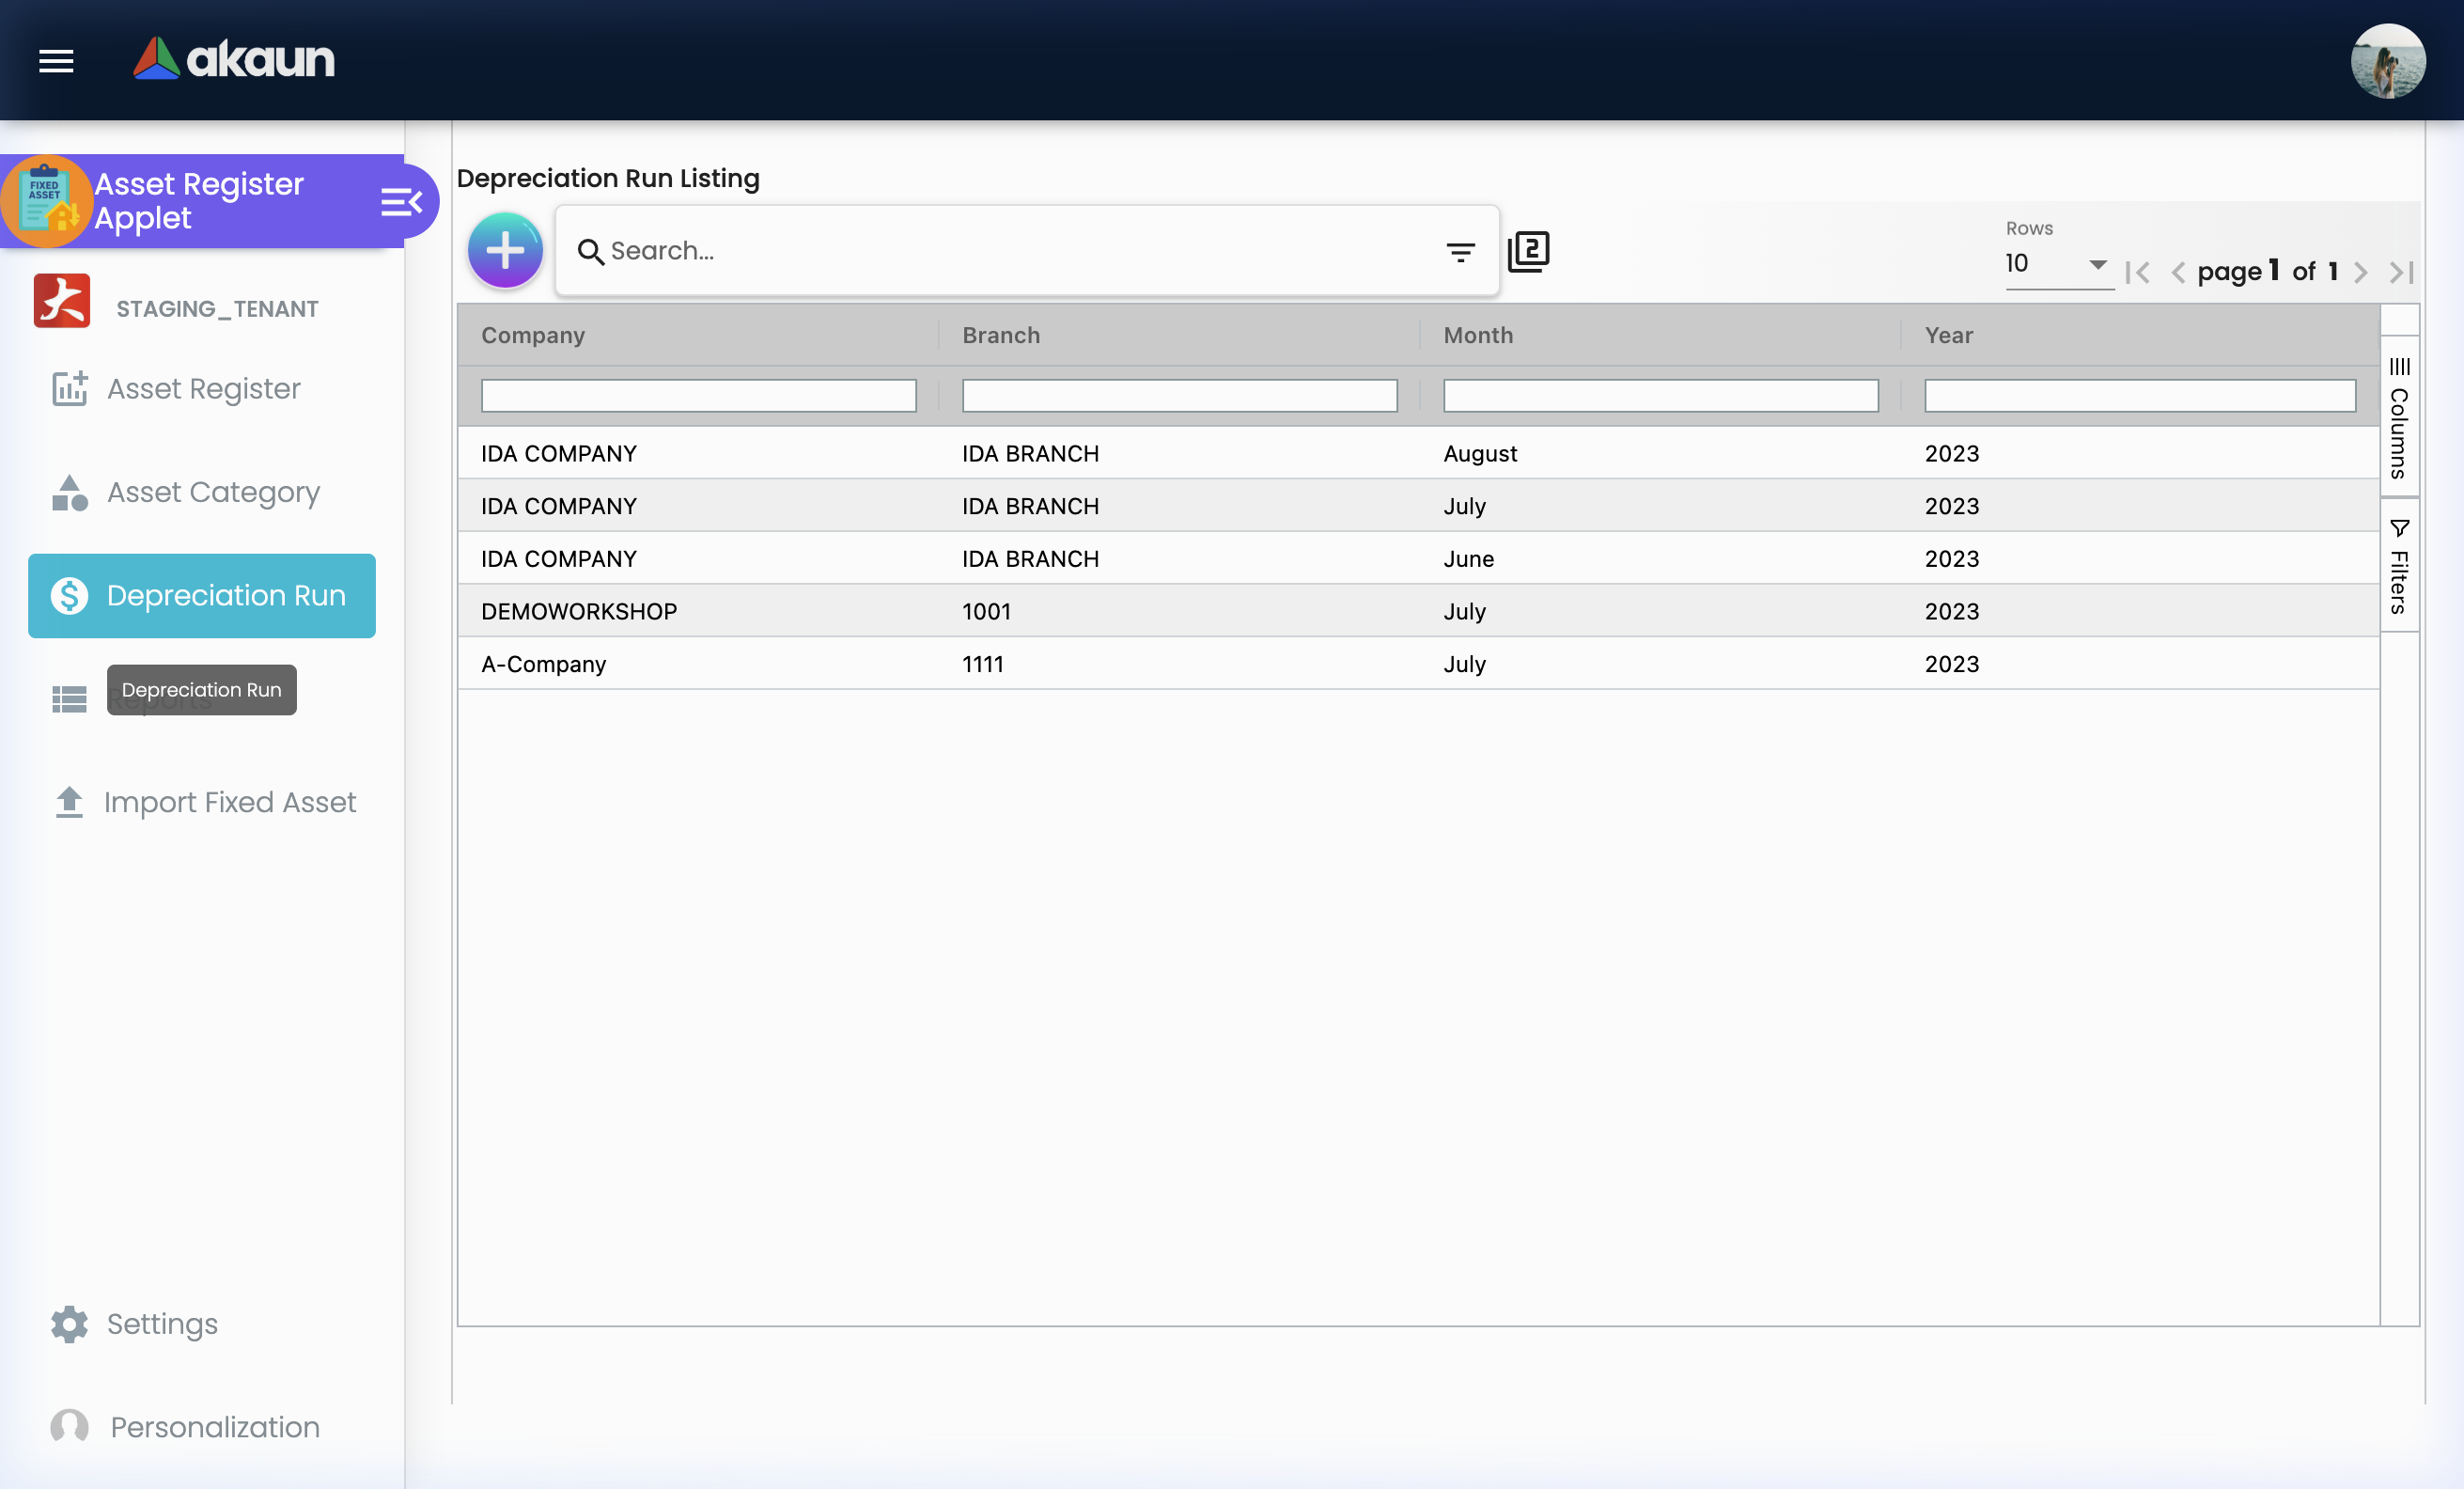
A run header holds only Company (required), Branch (optional) and a month/year picker. Opening a run
shows a read-only Main tab and a Lines tab; the + button on the Lines tab opens the
Registered Assets listing, and the RUN button lives there — not on the run header. That is the
only place the run is triggered from.
Import Fixed Asset
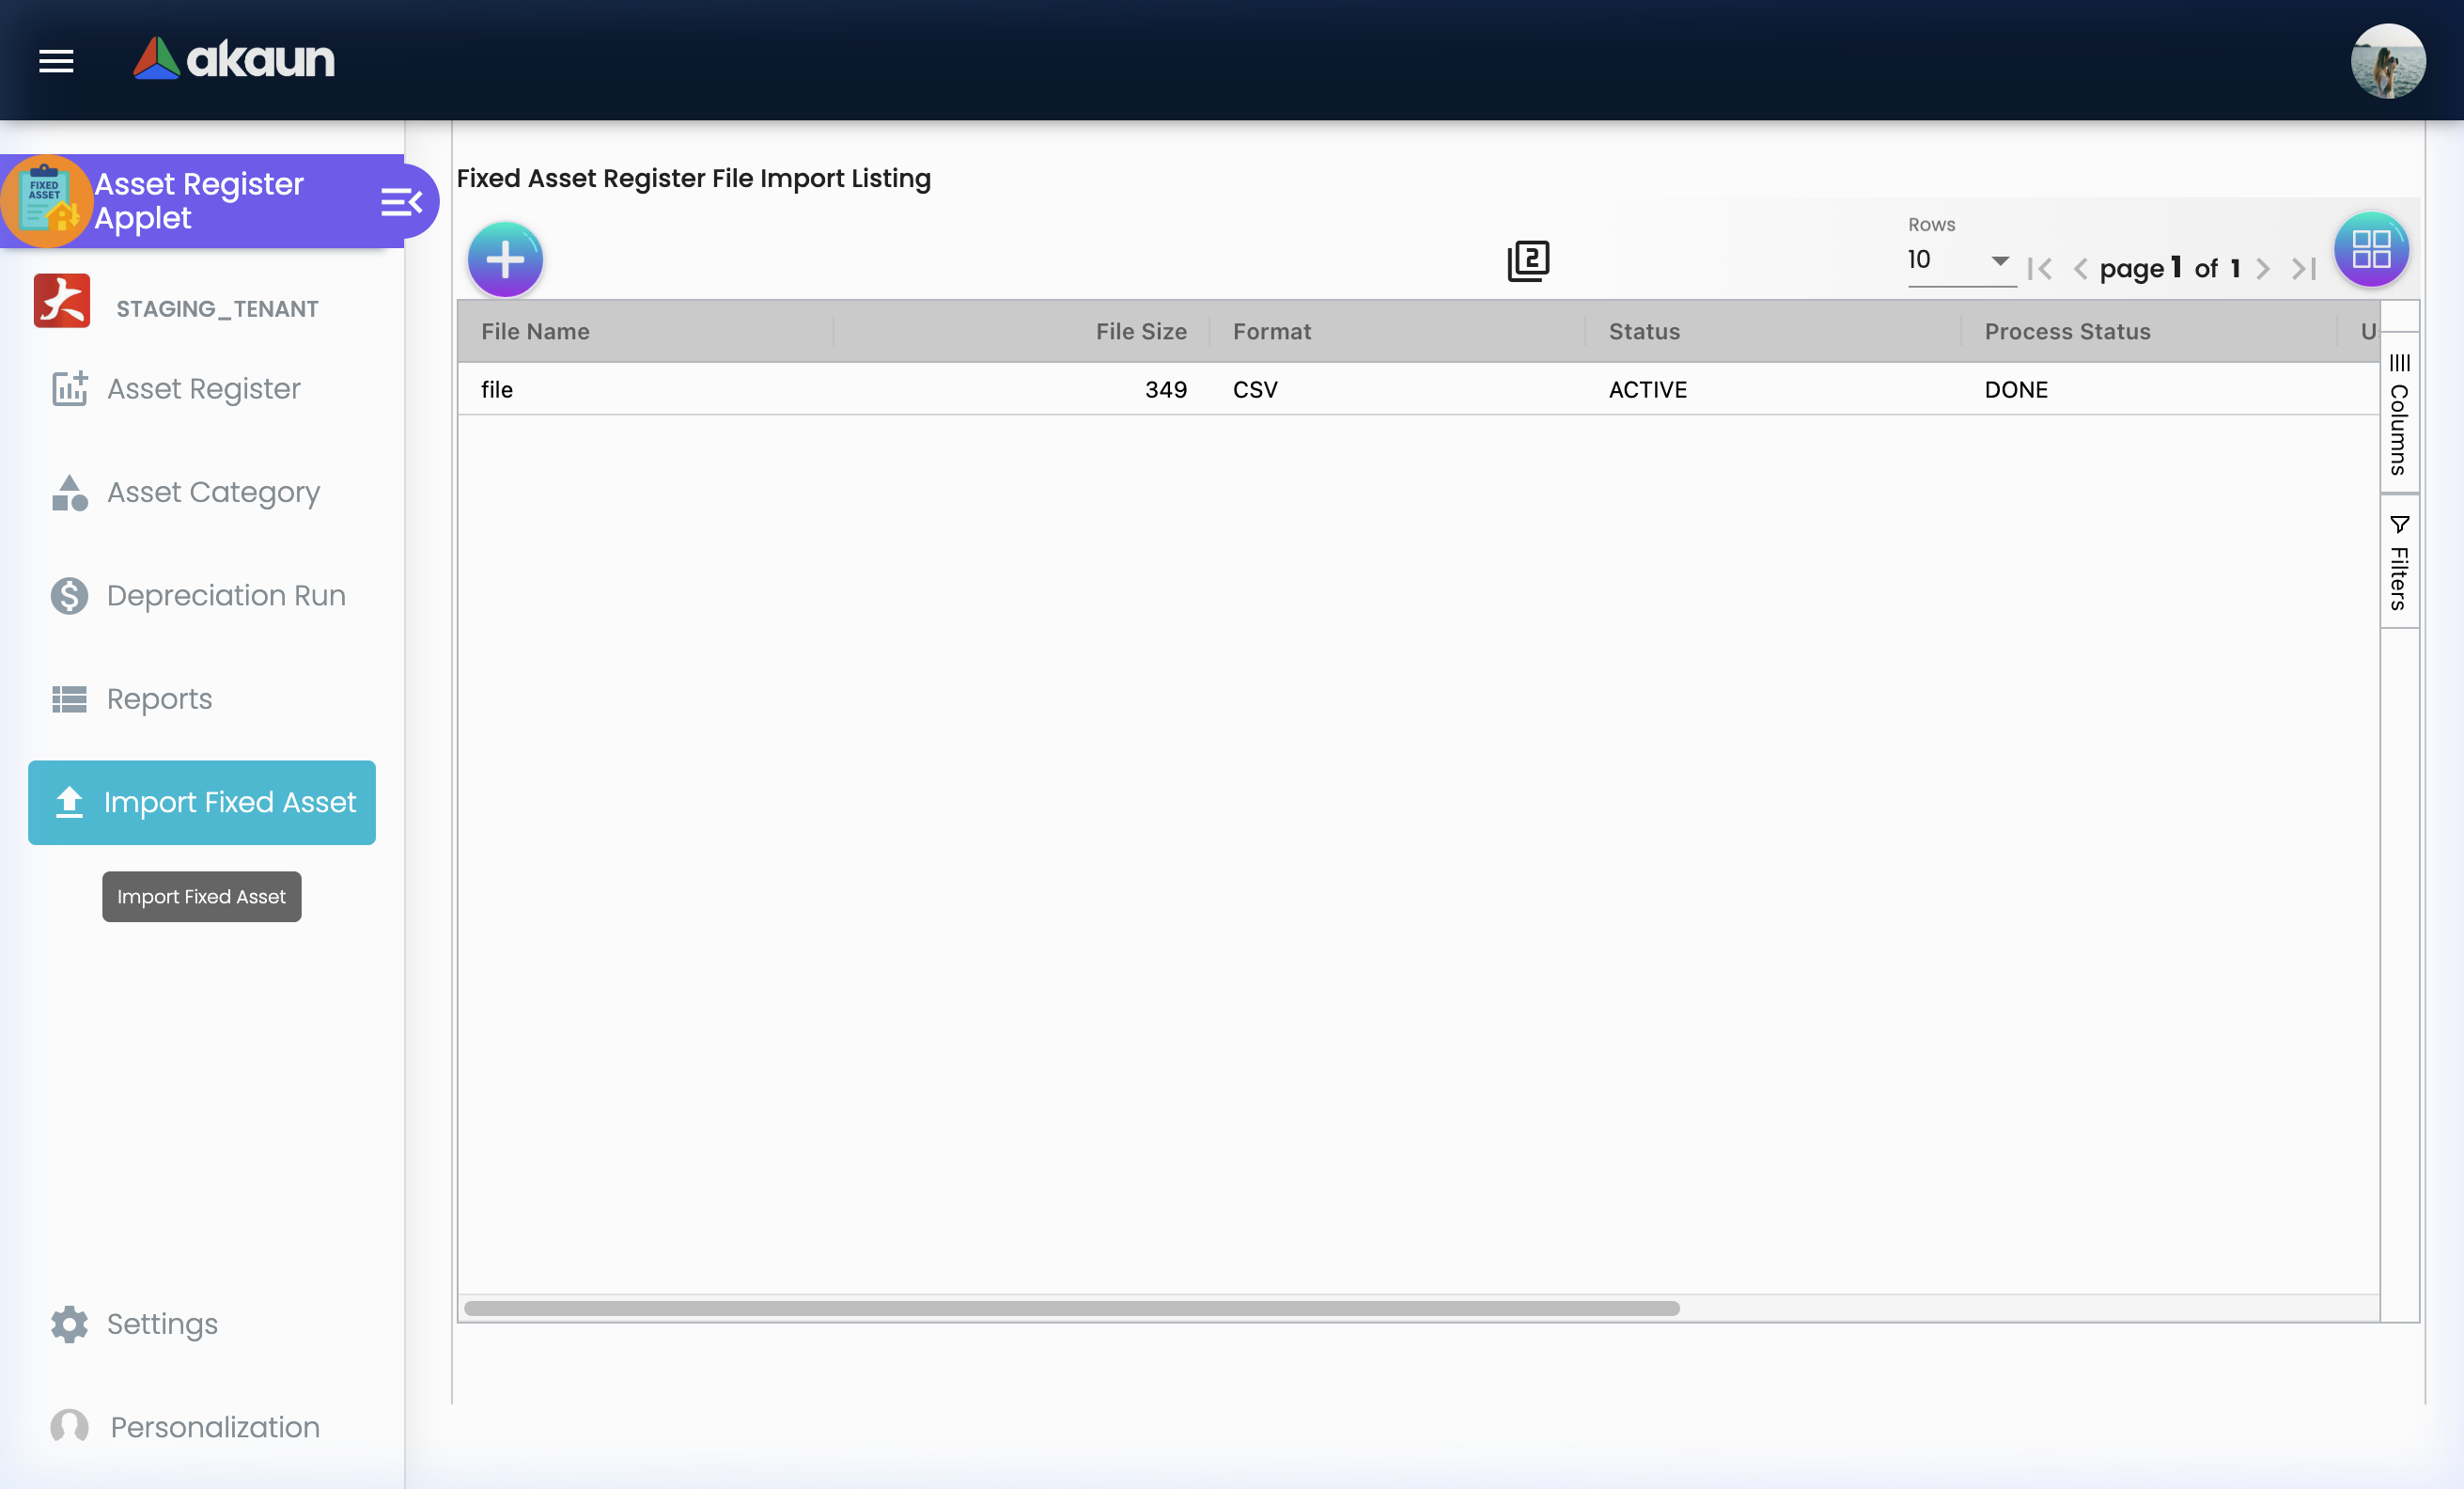
Columns are File Name, File Size, Format, Status, Process Status, User Error Message, Created Date and Updated Date. A blank template can be downloaded from the screen.
Reports
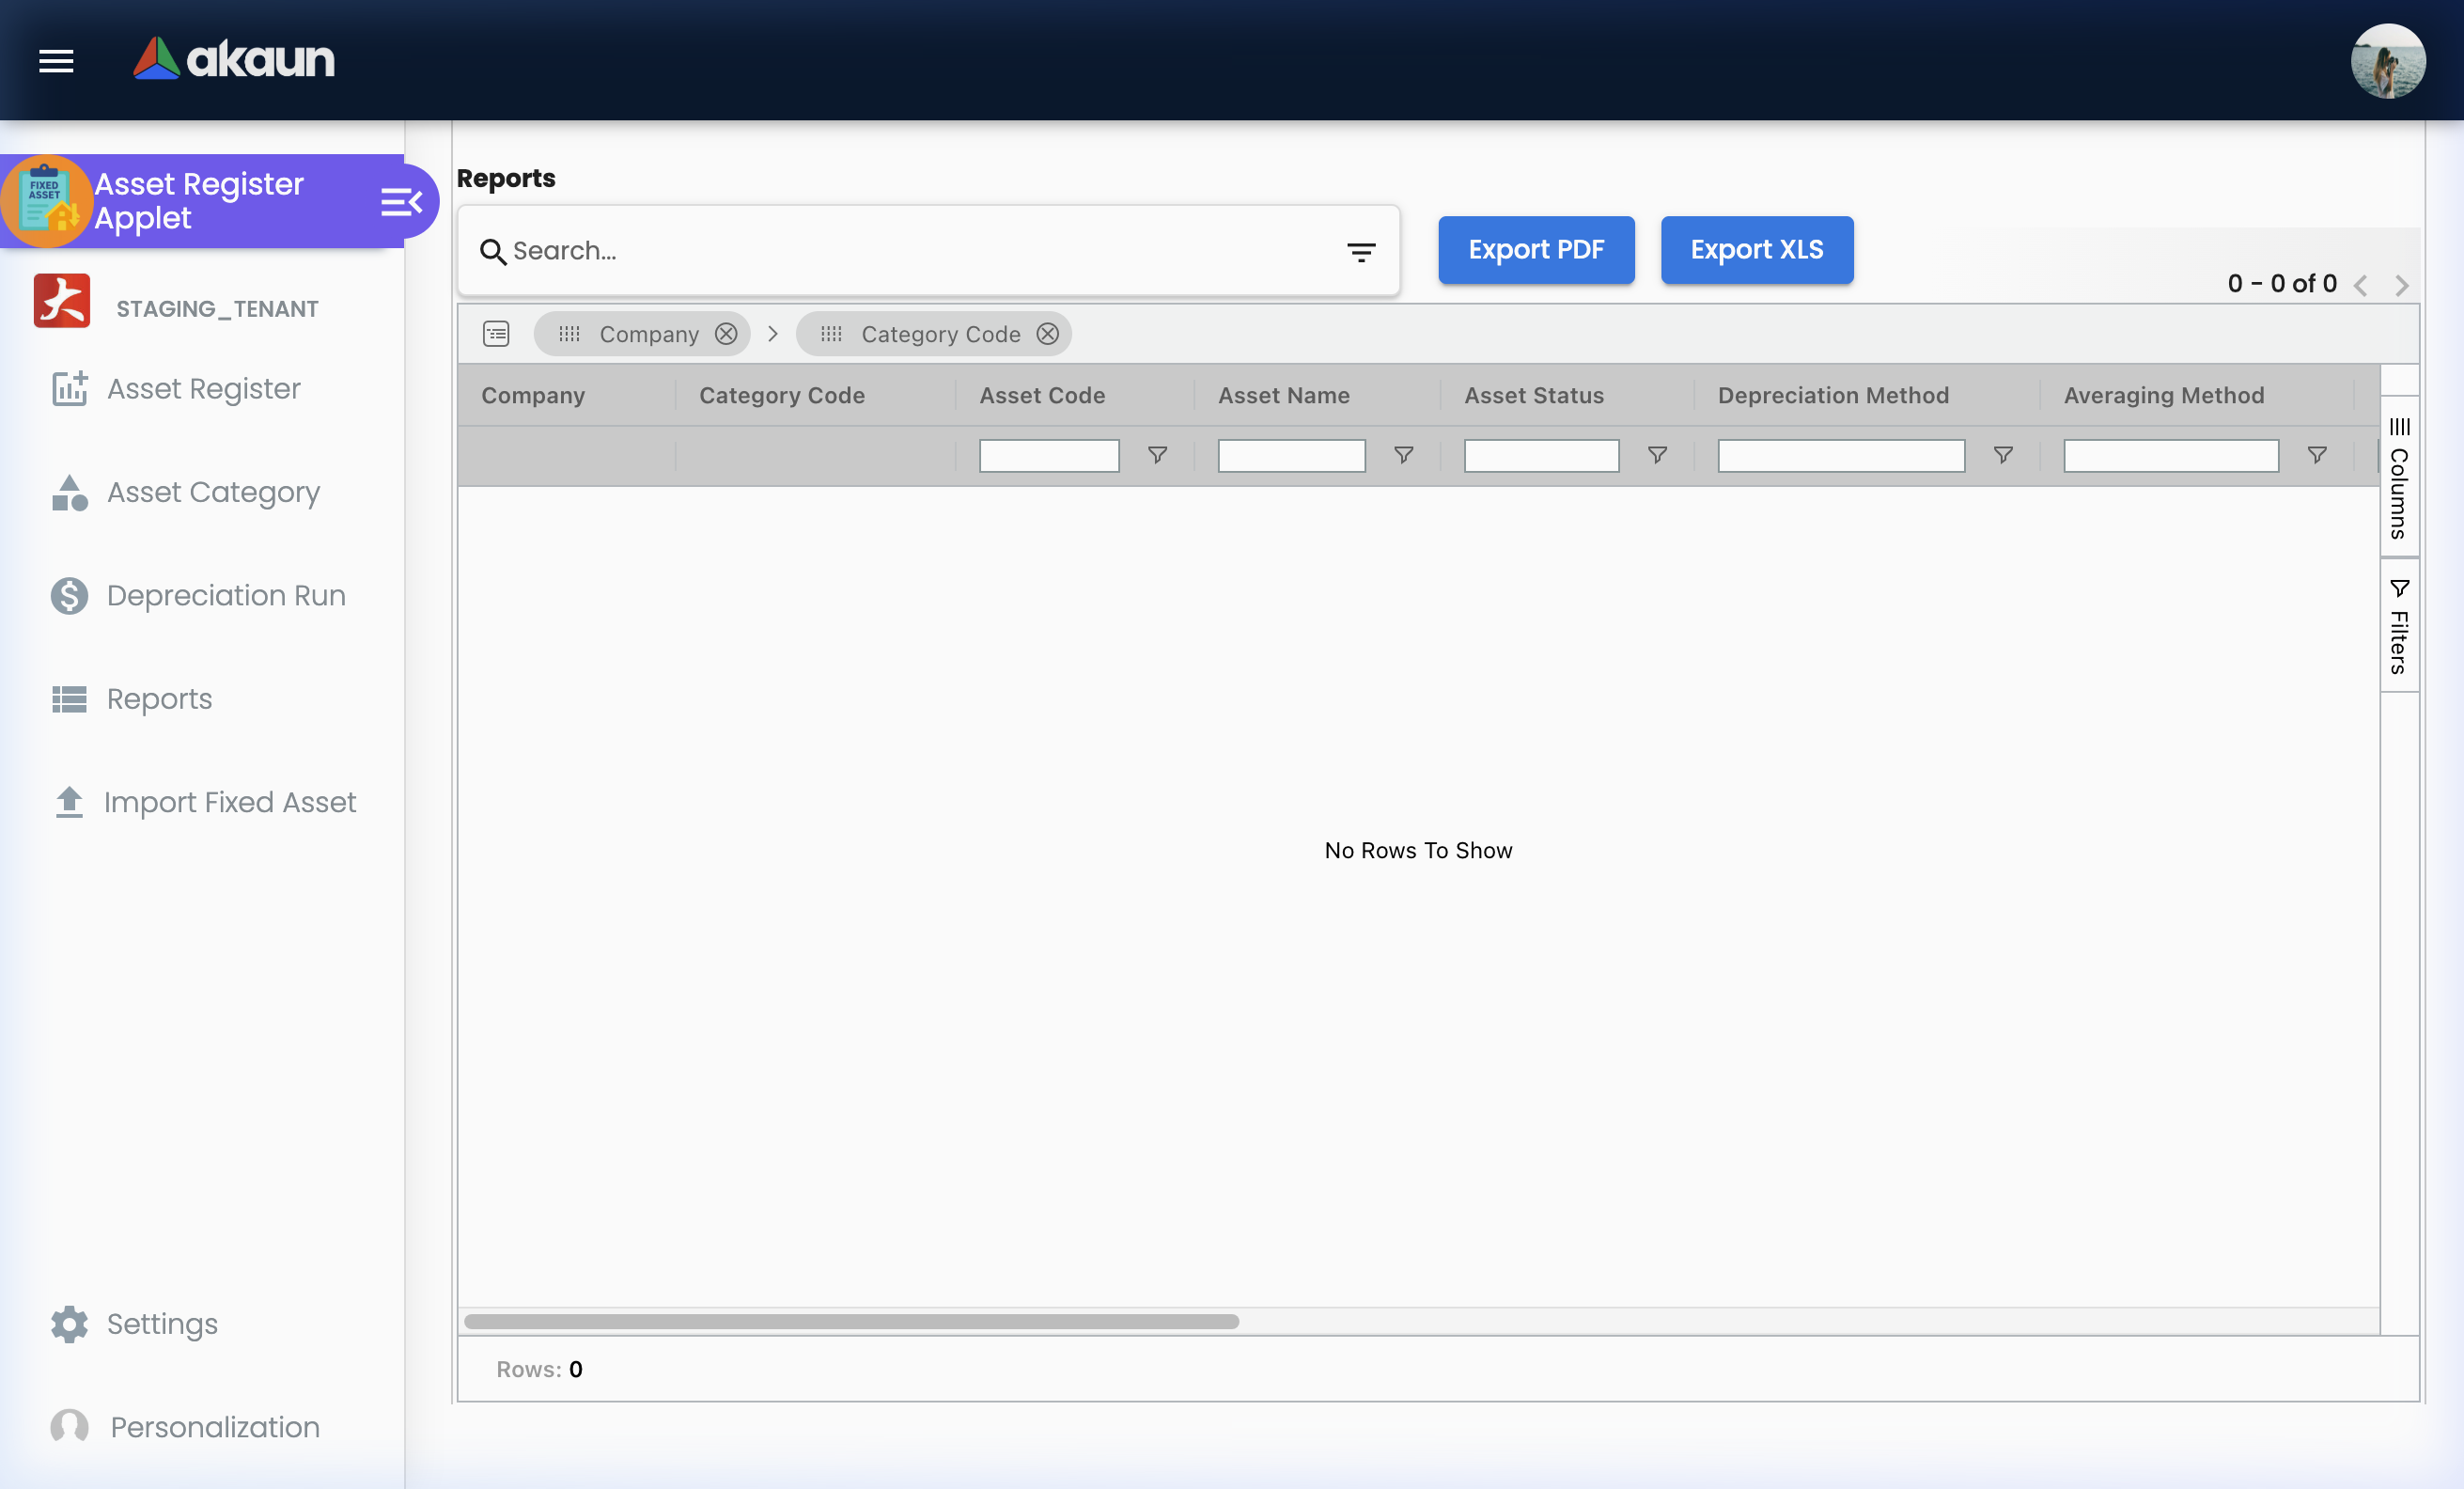
The report is a grouped ag-Grid (Company → Category Code) over Asset Code, Asset Name, Asset Status, Depreciation Method, Averaging Method, Purchase Date, Disposal Date, Useful Life, Purchase Price, Residual Value, Depreciation Month, Depreciation Year and Depreciation Amount, with PDF and XLS export.
The screen sends only two things — a company (it refuses to search without one, with “Please select the company”) and a month range. What it does with them is not obvious from the result:
- An asset that has never been through a depreciation run does not appear at all. The report filters on the run’s month and year, so an asset with no run is left out. Together with the configuration and the schedule it also requires, an asset needs a configuration, a schedule row and a completed run inside the range before the report will show it. The report is a record of depreciation that happened, not a register of assets.
- Rows multiply. The run-line join is on the asset alone, with no month condition, so each asset contributes one row per (schedule month × run line) pair inside the range. The Depreciation Amount column is filled only where the run month equals the schedule month; every other row of the pair carries a blank amount. Twelve months of schedule and twelve runs means 144 rows for that asset, twelve of them with a number.
- The endpoint behind the screen (
POST fa/fixed-asset-registers/reports) accepts more filters than the screen sends — branch, category, depreciation method, averaging method, asset status and a keyword. Two of them, depreciation method and averaging method, name columns that do not exist on the configuration table (depreciation_methodandaveraging_method, where the columns aredepr_methodanddepr_ave_method), so a request that sets either fails in the database. The rest — and the month range itself — are built inside a conditional on the company list, so a request with no company applies none of them and returns every asset for every month.
Configuration
Before you can use it
| Prerequisite | Where it is set | Why it matters here |
|---|---|---|
| A chart of accounts with an asset GL code, a depreciation-expense GL code and an accumulated-depreciation GL code | Chart of Account | All three drop-downs are filtered by the company’s chart of accounts; the GL code is required on the edit screen and both depreciation GL codes are required on the Configuration sub-tab |
| Company, branch and location | Organization | Company, Branch and Location are required on the asset form |
A company FIXED_ASSET_REGISTER default GL link | Organization → Company | Only used by the purchase-invoice conversion. If the link is missing the backend creates a GL code named “Fixed Asset Register” and the company link for it rather than failing |
A primary ledger for the company (obj_type = 'PRM') | Chart of Account | Every journal this applet writes is stamped with it; the depreciation processor and the journal endpoint both look it up by company |
| At least one asset category | This applet → Asset Category | Category is required on the asset form |
| Employee entities | Employee | Only needed if you want a person-in-charge on the asset |
Applet settings
The applet has its own settings screens. They are tenant-wide, not per user — see How settings are stored and who they apply to.
One setting in this applet does anything at all.
| Setting | What changes | Default when never saved | Advisory or hard |
|---|---|---|---|
ASSET_REGISTER_DETAILS_TAB_ORDER | The order of the tabs on the Edit Asset screen, for everyone in the tenant. The screen reads the saved list, drops entries that no longer name a tab, and appends any tab added since at the end — so an upgrade that adds a tab puts it last rather than losing it | The declared order: Details, Transactions, Depreciation, Attachment, Related Doc, Other Journal | Cosmetic; changes no data and no validation |
On the screen and doing nothing
- Field Settings (Settings → System Configuration → Field Settings) renders eight toggles — Unit Discount, SST/VAT/GST, WHT, Blanket Order, Segment, G/L Dimension, Profit Center, Project — and a SAVE button. Nothing on that screen is saved or used, and SAVE does nothing; the same eight-toggle placeholder appears in several other master-data applets. Four of the eight — Unit Discount, SST/VAT/GST, WHT and Blanket Order — name concepts the fixed-asset form does not have at all.
- Default Branch, Default Location and Default Company. The first two are rendered as drop-downs
on Default Selection and saved;
DEFAULT_COMPANYhas no control but is filled in when you choose a branch, so it is saved too, and choosing a branch also fillsDEFAULT_LOCATIONwith that branch’s main location. All three do nothing in this applet: creating an asset still starts with Branch, Location and Company empty. (They are live settings in other applets, which is why they look as though they should work.) - Every other setting of the document applets — the
INCLUDE_*andENABLE_*families,PRINTABLE, and fifty custom-status settings — is not shown, not saved and not used here. There is no custom-status feature on the fixed-asset screens.
Personalization
The Personalization menu lists Field Settings and Default Selection. Two problems, both in the applet’s own code:
personalizationItemspoints its first entry atfield-settings, but the personalization route has no such child (its children arepersonal-default-selectionandsidebar), so the link falls through to the applet’s404page.- The Personal Default Selection screen never assigns
appletContainer— the subscription that would populate it is commented out — so its branch and location value-change handlers dereferenceundefinedthe moment you touch either drop-down, and its SAVE emitsundefined. No personal default is ever stored.
The sidebar route is wired but is not listed in the Personalization menu.
The settings menu is partly unroutable
The settings menu shows the applet’s own groups plus the shared ones:
| Group | Item | Route exists in this applet? |
|---|---|---|
| System Configuration | Field Settings | yes (the stub above) |
| System Configuration | Default Selection | yes |
| Server Side Permissions | Permission Wizard | no — falls through to the applet’s 404 |
| Server Side Permissions | Permission Set | yes |
| Server Side Permissions | User Permission | yes |
| Server Side Permissions | Role Permission | yes |
| Developer Tools | Release Notes | no — falls through to the applet’s 404 |
| Developer Tools | Applet Log | no — falls through to the applet’s 404 |
Conversely, three screens have no menu link: Feature Visibility, Webhook and Team Permission. Opening Settings lands on the Feature Visibility screen (“Teams — Manage Team Access”) even though nothing in the menu points there, and that screen’s SAVE button does nothing.
Settings in other applets that control this applet
| Setting | Where it is set | Effect here |
|---|---|---|
Company default GL link FIXED_ASSET_REGISTER | Organization → Company | The asset GL code used by the purchase-invoice conversion. Created automatically if absent |
Item property_json.type and property_json.category_guid | Inventory Item Maintenance | Copied onto assets created by the purchase-invoice conversion. The category is only applied if the GUID resolves to an existing, readable category |
Applet trigger configuration for the FIXED_ASSET_REGISTER_ITEM_TYPE subscriber | Applet Trigger configuration (tenant) | Whether finalising a Purchase Invoice (Internal) automatically creates asset records. Without an enabled subscriber link the conversion never runs |
Feature visibility and permissions
No client-side permission definitions are seeded for this applet, and the applet contains no
SHOW_*/HIDE_* permission constants. All access control is server-side, through the permission
families below. Each endpoint accepts the OWNER and ADMIN variants in addition to the one named.
| Family | Gates |
|---|---|
API_TNT_DM_FA_HEADER_* | The asset register header |
API_TNT_DM_FA_REGISTER_* | The asset container endpoints, the by-depreciation-schedule query and the report |
API_TNT_DM_FA_CATEGORY_* | Asset categories |
API_TNT_DM_FA_CONFIG_* | Per-asset depreciation configuration |
API_TNT_DM_FA_SCHEDULE_* | Depreciation schedule rows |
API_TNT_DM_FA_ATTACHMENT_* | Asset attachments |
API_TNT_DM_FA_DEPRECIATION_RUN_HDR_* | Depreciation run headers |
API_TNT_DM_FA_DEPRECIATION_RUN_LINE_* | Depreciation run lines. The RUN button needs the CREATE variant, not UPDATE |
API_TNT_DM_FA_CATEGORY_DEPRECIATION_CONFIG_* | Category-level depreciation configuration (no screen in this applet) |
API_TNT_DM_ERP_FIXED_ASSET_IMPORT_FILE_HDR_READ | The file-import listing |
GET fa/fixed-asset-registers/purchase/{genericDocGuid} — the endpoint that converts a purchase
invoice into asset records — is declared as an AnonymousTenantEndpoint. It performs no permission
check and returns OK whether or not the document exists or the conversion succeeded.Fields
Details tab (create)
The create form takes the identification you would expect — Asset Status, Asset Code, Asset Name,
Type (PROPERTY_PLANT_EQUIPMENT, LONG_TERM_INVESTMENT or INTANGIBLE_ASSET), Category, Company,
Branch, Location, Employee (person in charge), Currency, GL Code, the four analysis dimensions
(Segment, Dimension, Project, Profit Center), Serial Number, Warranty Expiry and Description. Name,
Type, Category, Company, Branch, Location and Currency carry Validators.required; nothing else
does. Five of them behave in ways the screen does not show:
| Field | What the screen does not tell you |
|---|---|
| Asset Status | Fixed to DRAFT and disabled. On the edit screen it becomes a drop-down offering Draft and Registered only. The column is free text: the shared constants name four values (ACTIVE, INACTIVE, DRAFT, REGISTERED), the depreciation processor writes a fifth (DEPRECIATED) that is in none of them, and no screen can set or clear it. See Asset statuses |
| Asset Code | Leave it blank and the applet generates a random string of letters and digits — not a numbering series, so the codes are not sortable and carry no meaning. The duplicate check is a browser-side scan of the codes already fetched into the listing, and it only runs on the generated code: type a code of your own and nothing checks it — there is no uniqueness rule in the data-consistency object and no unique index on the column. The toast, when it fires, reads “Auto-generated Asset Code already exists! Click save again!” |
| Employee | Selecting one stores both the entity GUID and a copy of the name, in pic_name. The copy is taken at the moment you select and is never refreshed, so renaming the employee later leaves the old name on the asset |
| GL Code | The drop-down is labelled GL Code* on create but the control carries no Validators.required, so an asset can be created without one. You find out on the Transactions tab, where every entry is refused with “Asset GL Code does not exist” until the asset has one |
| Description | Has no input control on either form. The template renders an empty <div formControlName="descr">, so a description can never be typed in. The value is still copied into the request, always empty — and the CSV import does not fill the gap either (see below) |
Purchase Date and Purchase Price are not on the create form, and they are readonly on the edit
form. The applet sends purchase_date = today and purchase_price = 0 — together with
depr_method = "DRAFT", depr_ave_method = "DRAFT", depr_start = now, depr_rate = 0 and
useful_life = 0 — because the data-consistency object rejects a null in every one of them
(FIXED_ASSET_HDR_PURCHASE_DATE_IS_NULL_OR_EMPTY,
FIXED_ASSET_HDR_DEPRECIATION_METHOD_IS_NULL_OR_EMPTY, and so on for all seven). "DRAFT" is not a
valid depreciation method; it is a placeholder that keeps the create call from failing, and it is
what a brand-new asset carries until somebody completes the Configuration sub-tab. A real purchase
price arrives by one of three routes only — an Acquisition transaction followed by Save, the CSV
import, or the purchase-invoice conversion.
Depreciation → Configuration
The sub-tab takes a depreciation start date, a method, an averaging method, a residual value, a rate, a useful life and the two depreciation GL codes. Start date, method, averaging method and both GL codes are required; residual value, rate and useful life are not. What the screen cannot show you is which of them the processor will actually look at, and in what units:
| Field | What the screen does not tell you |
|---|---|
| Depreciation Method | Four choices — NO_DEPRECIATION, STRAIGHT_LINE, DECLINING_BALANCE, DOUBLE_DECLINING_BALANCE — but the method and the averaging method are not independent. Of the eight pairings, four produce a number, two are NO_DEPRECIATION and are meant to, and two return zero with no message: declining balance and double declining balance both compute nothing under ACTUAL_DAY. See What the depreciation run computes before choosing |
| Depreciation Rate (%) | Labelled as a percentage, applied as a plain multiplier against book value once per month: bookValue.multiply(depr_rate). It is divided neither by 12 nor by 100. A rate captured the way the label reads — 20 for 20% a year — writes off twenty times the asset’s value in the first month. Used only by the two declining-balance methods |
| Useful Life (Years) | Optional on the form, and used only by straight line, as (purchase price − residual value) ÷ (useful life × 12). Every asset starts life with a useful life of zero, and a division by zero comes out as zero, so a straight-line asset whose useful life was never filled in here depreciates by nothing and reports no error |
| Residual Value | Does two jobs: it is deducted from the depreciable base and it is the run’s stop condition. At its default of zero the stop condition fires on the first run — see The stop condition |
| The two GL codes | Chosen here, but the depreciation journal reads them from the asset header, not from this row. Saving writes both copies (below); anything that writes one without the other — an API caller, or a failed second request — leaves the maths and the posting disagreeing |
Saving the edit screen writes these values to both the asset and its depreciation configuration, as two independent saves with no error handling — if the configuration save fails the asset change is still saved. The run then reads the rate and the residual value from the configuration and the GL codes from the asset, so the two copies are not interchangeable.
REGISTERED and the
Details and Configuration forms are valid, while the Configuration handler additionally requires at
least one row on the Transactions tab. Edit the Configuration sub-tab last and an asset cannot reach
REGISTERED without an acquisition; edit the Details tab last and it can. The transaction flag is
also one-way — it is set to true when the Transactions grid reports rows and never set back to false.Transactions tab
Every entry asks for a transaction type, a date, a GL code and a description, plus the amounts that
type needs: Purchase Price for an Acquisition, Recoverable Amount and a computed Adjusted Amount for
an Adjustment, Asset Value for Asset Held for Sale, Disposal Price for a Disposal. Gain/Loss is
read-only on the last two. Only Type and Date carry Validators.required — the GL code does not, and
a journal line without one is rejected by the backend rather than by the form.
| Field | What the screen does not tell you |
|---|---|
| Transactions Type | The list you are offered depends on whether the asset already has an acquisition journal. With none, the only choice is Acquisition; with one, the other three replace it and Acquisition disappears. An asset created by the CSV import or by the purchase-invoice conversion has a purchase price but no acquisition journal, so its only offered transaction is a second acquisition, and Adjustment, Disposal and Asset Held for Sale cannot be reached from this screen at all |
| Purchase Price (Acquisition) | Posts the journal, and writes the date and price onto the asset in the browser only — the panel has no code that sends the asset. The values reach the database only if you then press Save on the asset itself. Leave the screen instead and the journal exists, the register still says purchase_price = 0, and every depreciation computed from it is zero |
| Gain/Loss | Not book value. It is your price minus the debit total of the first acquisition journal found on this asset — accumulated depreciation and every Adjustment since are ignored. “First” is not “earliest”: the query carries no sort of its own and the backend’s default is the journal’s own GUID, a random UUID, so an asset with two acquisition journals takes an arbitrary one |
| Adjusted Amount | Same base: recoverable amount minus that acquisition total. It is computed when you press the calculate control, not as you type |
Import Fixed Asset (CSV columns)
code, name, type, category_code, company_code, branch_code, location_code, currency,
gl_code, purchase_date, purchase_price, serial_number, warranty_expiry, employee_name,
description.
Only code and name are checked for emptiness up front. Every code column is resolved by lookup
and throws a specific message on failure — <INVALID CATEGORY CODE>, <INVALID COMPANY CODE>,
<INVALID HDR BRANCH CODE>, <INVALID LOCATION CODE>, <INVALID GL CODE>, <INVALID EMPLOYEE NAME>, <INVALID LEDGER CODE>. The employee is matched on name, not code. The GL code is
matched on gl_code_1. If no subledger exists for the resolved GL code and company, the import
creates one.
There are no depreciation columns in the import. Imported assets carry the same "DRAFT" and zero
placeholders a hand-created asset gets, have no depreciation configuration row and no schedule, and
so will not be picked up by a depreciation run or appear in the report until both are added by hand —
one asset at a time, one schedule month at a time.
Two more things the template does not say. The description column is parsed and thrown away:
the column is declared on the staging row and the row builder never calls setDescr on the asset, so
the import is not a way round the Description field having no input control. And an imported asset gets an
employee_guid but no pic_name, where an asset created on screen gets both — so the person-in-charge
name is blank on imported rows even when the employee resolved.
Lifecycle and effects
Asset statuses
DRAFT → REGISTERED → (DEPRECIATED, set by a depreciation run). An asset’s status can also be
ACTIVE or INACTIVE through the API, but the screen offers only Draft and Registered.
The Save button on the edit screen is enabled when the status is DRAFT and the Details form is
valid, or when the status is REGISTERED and both the Details form and the Depreciation
Configuration form are valid. Whether an existing Transactions row is also required depends on
which of the two forms you edited last, because each one recomputes the flag with a different rule
and the Configuration handler is the stricter of the two — see the callout under
Depreciation → Configuration. Treat “a complete configuration and at
least one transaction” as the intent, and do not rely on the button to enforce it.
Nothing on the edit screen writes DISPOSED. The handler computes it when the last transaction type
was a disposal and then overwrites it with the Details form’s own status value on the next line, so
the value never leaves the browser. A disposed asset stays REGISTERED (or DEPRECIATED); the
disposal is visible only as a journal.
What creates a journal
Nothing here goes through the ordinary document posting. Every journal is assembled and sent by the applet or by the depreciation run.
Transactions tab — the browser builds the journal lines, sums them, refuses to send if debits do not equal credits (a toast in the browser, “Journal Transaction is not balanced”), and then posts the journal:
| Type | Debit | Credit | Amount |
|---|---|---|---|
| Acquisition | asset GL code | the GL code you pick | Purchase Price. The date and price are also written onto the asset in the browser only — see the Transactions tab above; they are persisted by the asset’s own Save, not by this panel |
| Adjustment (amount ≥ 0) | the GL code you pick | asset GL code | Adjusted Amount |
| Adjustment (amount < 0) | asset GL code | (undefined) | Absolute Adjusted Amount. The credit line goes out with no GL code, so the journal is rejected |
| Disposal | asset GL code, at the acquisition amount | the GL code you pick, at the Disposal Price | plus a gain/loss line on the GL code you pick for it |
| Asset Held for Sale | asset GL code, at the acquisition amount | the GL code you pick, at the Asset Value | plus a gain/loss line |
Disposal does not reverse accumulated depreciation; the entry is written against the acquisition amount, not the net book value.
Other Journal tab — a free-form journal of transaction type TXN: one “main” line plus any number
of Payment Breakdown rows, each line debited if its amount is positive and credited if negative, with
the same client-side balance check.
None of these lines names a subledger. That is fine: the journal finds the subledger from the line’s GL code and company, and creates one if none exists.
Depreciation run — see below.
The depreciation run, step by step
- You create a run header: company (required), branch (optional), month and year.
- You open the run, go to the Lines tab, press
+, and press RUN on the Registered Assets screen. That needsAPI_TNT_DM_FA_DEPRECIATION_RUN_LINE_CREATE. - The backend deletes every existing line on that run and permanently deletes the journals those lines produced, then rebuilds.
- It selects the assets that have both a depreciation configuration and a schedule row for that month and year. An asset with no configuration, or no schedule row for the month, is silently skipped.
- One run line is created per selected asset, copying the method, averaging method, rate, useful life, residual value, purchase price, purchase date and disposal date onto the line, and each line is depreciated at once, inside the same request, rather than left for a background worker.
Nothing runs depreciation on a timetable. Pressing RUN is the only thing that creates a line, and depreciation only ever acts on a line that already exists. There is nothing for a schedule to trigger. A month in which nobody opens a run and presses RUN is simply not depreciated, and nothing reports its absence.
The selection ignores the run’s company and branch, and is capped at 100 assets. It filters on the month and year only. A run therefore processes at most 100 assets — from every company in the tenant, ordered by asset GUID — while stamping the run header’s company and branch onto every journal it writes.
The list you look at before pressing RUN is not the list the run processes. The Registered Assets grid shows the same selection limited to the run’s company (not its branch), so the preview is scoped to the run’s company and the run is not. Nothing on the screen says so.
Two more things about the selection that the screen cannot show:
- The Advanced Search panel on Registered Assets changes nothing. It sends company, branch, location, a purchase-date range and an asset-code range, and the screen’s query uses only the company, branch, location and the schedule month and year. The rest are accepted and dropped. The same filters do work on the Asset Register listing.
- A month added twice is depreciated twice. The Add Depreciation panel has no duplicate check, and the selection takes every schedule row, so two schedule rows for the same month yield two run lines for that asset in that month. Each one sums only the lines dated strictly before the month it is processing, so neither sees the other: both compute the same amount, both write the same accumulated depreciation onto the asset, and both post a journal. The ledger moves twice; the asset’s accumulated depreciation moves once.
What the depreciation run computes
| Averaging method | Straight Line | Declining Balance | Double Declining Balance |
|---|---|---|---|
FULL_MONTH | (purchase price − residual value) ÷ (useful life × 12) | (purchase price − accumulated depreciation) × rate | (purchase price − accumulated depreciation) × rate × 2 |
ACTUAL_DAY | (purchase price − residual value) ÷ days in the purchase month × days counted — see below | returns zero | returns zero |
ACTUAL_DAY is only worked out for straight line; for any other method it gives zero.
NO_DEPRECIATION gives zero under both averaging methods, as intended.
ACTUAL_DAY does not prorate the month being depreciated, and it never divides by the useful life.
Both the divisor and the multiplier are taken from the purchase date’s month. They are set to the
same number and only differ when the month being run is the purchase month, in which case the
multiplier becomes the days from the purchase date to the end of that month. In every other month the
two cancel and the result is the whole of purchase price − residual value — the entire depreciable
value, in one month. Choose FULL_MONTH unless you have confirmed otherwise on your own tenant.The rate is applied as written: book value × rate, once per month, with no division by 12 and no division by 100. A rate captured as an annual percentage will depreciate far too fast.
Several of the inputs are not read from the database at the moment of calculation. The whole asset — its purchase price, its accumulated depreciation and its depreciation configuration — is copied when the run line is created and read back from that copy. The purchase price and accumulated depreciation the declining-balance formulas divide by are therefore the values as they stood when RUN was pressed, not as they stand when the line runs. That is why two lines for the same asset and month (above) produce the same number rather than a diminishing one.
The stop condition, and the status flip
After computing the month’s amount the run sums all earlier run lines for the asset, adds the new amount, and then branches on
new accumulated depreciation ≤ residual value- True — it saves the amount, the new accumulated depreciation and the net book value
(
purchase price − accumulated depreciation) on the run line, writes the accumulated depreciation back onto the asset header, sets the asset’s status toDEPRECIATED, and creates the journal. - False — it sets the asset’s status to
DEPRECIATEDand then permanently deletes every run line for that asset dated on or after this month, together with their journals. No journal is created for this month.
With the usual residual value of zero, any positive depreciation amount makes the comparison false on
the very first run. The asset is marked DEPRECIATED and no depreciation journal is written.
The order of the writes matters if the journal fails. On the true branch the run updates the run
line, then writes the accumulated depreciation and the DEPRECIATED status onto the asset, and only
then builds and posts the journal, separately. If the journal fails, the run line and the asset keep
the values already written. The visible result is an asset whose accumulated depreciation has moved
with no journal behind it. Re-running the month is the recovery — it deletes the line and rebuilds —
but nothing on any screen tells you the month needs re-running: the failure is recorded in a job error
log that no applet shows.
The depreciation journal
The journal is written directly by the run, not through the ordinary document posting. It carries
transaction type DEPRECIATION, is marked automatic and is posted from the moment it is created —
there is no draft to review — and both the header and the two lines are described as
AUTO CREATED FROM FIXED ASSET DEPRECIATION PROCESSOR. To find these in
Ledger and Journal, filter on that transaction type;
each one also records the asset and the run line that produced it.
Four of its properties are worth knowing because they come from somewhere other than where you would look:
| Property | Where it comes from, and why that matters |
|---|---|
| Company and branch | From the run header, not from the asset. Because the run’s asset selection ignores company entirely (above), a journal can be stamped with one company while depreciating an asset that belongs to another |
| Currency | From the asset’s currency, while the ledger is the run company’s primary ledger. A foreign-currency asset writes a foreign-currency journal into that ledger |
| The two GL codes | The two depreciation GL codes on the asset — not the depreciation configuration you filled in, which holds its own copy of both. Saving the edit screen writes both copies; anything that writes only one leaves them disagreeing |
| Dates | The transaction and document dates are the first of the depreciated month, while the posting date is the moment RUN was pressed. Re-running an old month therefore back-dates the entry and stamps today’s posting date |
Each depreciation line is added to the journal only if the asset carries a subledger for it — one for depreciation expense and one for accumulated depreciation — and nothing sets either: no screen has a field for them, and the Configuration sub-tab writes the two GL codes and stops. The asset’s own subledger, which the CSV import and the purchase-invoice conversion do fill in, is a different one, and the depreciation journal does not use it.
Unless the two subledgers are set on the asset through the API, both lines are dropped and the run creates a journal header with no lines and zero debits and credits. The journal validator does not reject an empty or unbalanced journal, so nothing surfaces an error, and the run still reports success.
The two lines are also merged when they share a subledger: debits and credits are summed into the first line, keeping that line’s GL code. Point both configuration GL codes at the same subledger and the expense and the accumulation become a single line whose debit and credit cancel.
Asset creation from a purchase invoice
The conversion reads a purchase invoice and picks the lines whose item is a fixed-asset item (item type
FIXED_ASSET_REGISTER) — on an INTERNAL_PURCHASE_INVOICE only.
For each such line it creates one asset (not one per unit) with:
- code and name from the item; quantity = the line’s base quantity
- purchase price = line amount ÷ base quantity — the unit price
- company, branch, location, segment, dimension, project, profit centre and transaction date from the document header
- serial numbers from the line, joined into one comma-separated string
- asset type and category from the item’s fixed-asset settings
- GL code from the company’s
FIXED_ASSET_REGISTERdefault GL code, creating a GL code named “Fixed Asset Register” and the company default if it is missing - the asset’s subledger found (or created) for that GL code and company
- status
DRAFT, and the same"DRAFT"/ zero placeholders for the depreciation fields
On success it marks the invoice’s fixed-asset posting as POSTED, which is also what stops the
conversion running twice (POSTED or VOID are both skipped).
The conversion runs as a follow-on job of finalising the purchase invoice — only where your tenant’s trigger configuration switches it on. Without that, finalising a purchase invoice creates no assets.
Related applets
- Purchase Invoice (Internal) — the document whose fixed-asset lines can become asset records.
- Inventory Item Maintenance — where an item is marked as a fixed-asset item and given its default asset type and category.
- Chart of Account — supplies all three GL codes and the primary ledger the journals are stamped with.
- Ledger and Journal — where every journal this applet
writes can be found; filter on transaction type
DEPRECIATIONorTXN, or on the acquisition, adjustment and disposal types. - Organization — company, branch, location and the company default GL link used by the purchase conversion.
- Employee — the person-in-charge drop-down.
- Financial Report — where depreciation reaches the statements.
Troubleshooting
| Symptom | Cause | Fix |
|---|---|---|
| RUN says “Successfully run the depreciation” and the Lines tab is empty | The toast fires on any response, and the grid is not refreshed. The commonest real cause is that no asset matched: the selection needs a depreciation configuration and a schedule row for that exact month | Reopen the run’s Lines tab. If it is still empty, open an asset and check Depreciation → Configuration and Depreciation → Schedule |
| Run lines exist but the journals have no lines | A journal line is added only when the asset carries a depreciation subledger, and nothing sets one | This needs a product fix. Until then, treat the depreciation journal as not produced and post depreciation from Ledger and Journal |
An asset is marked DEPRECIATED after one run and never depreciates again | The stop condition compares accumulated depreciation against the residual value; with a residual value of zero it is false on the first run | Understand the flag as “the run has touched this asset”, not “fully depreciated”. Re-running the month deletes and recreates the lines |
| A run picks up assets from another company | The run’s selection filters only on month and year, not on company, branch or location | Check the run’s lines before relying on them, and reconcile the journals by the run header’s company |
| A run only ever produces about 100 lines | The run’s selection stops at 100 assets | Splitting the month across several runs does not help — the selection is identical each time, so there is no configuration that works around it. Depreciate the remaining assets through a manual journal for now, and report it as a product defect: send the run’s company, the month, the number of assets you expected and the number of lines you got (what to send) |
| An acquisition was entered but the asset still shows Purchase Price 0 | The Add Transaction panel posts the journal and writes the price onto the asset in the browser only; nothing sends the asset | After adding an Acquisition, press Save on the asset before leaving the screen. If you have already left, reopen the asset, re-enter the price path, or correct it through the API |
| Adjustment, Disposal and Asset Held for Sale are missing from the transaction type list | The list depends on whether the asset has an acquisition journal. Assets created by the CSV import or the purchase-invoice conversion have a purchase price but no acquisition journal | Add an Acquisition transaction first, or post the disposal directly in Ledger and Journal |
| The Advanced Search on the Registered Assets screen changes nothing | That screen uses only company, branch, location and the schedule month and year; the code and date criteria are dropped | Use the Asset Register listing for those filters |
| An asset never appears on a run | The selection needs a depreciation configuration and a schedule row for that exact month and year | Open the asset → Depreciation → Configuration and complete it, then Depreciation → Schedule → + and add the month |
| An asset never appears on the report | The report needs a depreciation configuration, a schedule row and a completed depreciation run inside the month range — assets that have never been run are left out | Complete the configuration and the schedule, then run the month. The report shows depreciation that happened, not assets that exist |
| A negative Adjustment transaction is rejected | The credit line of a negative adjustment is sent with no GL code, so the journal is rejected (..._JOURNAL_LINE_OBJECT_GLCODE_GUID_IS_NULL) | Record the reversal as a positive adjustment in the opposite direction, or use the Other Journal tab |
| “Journal Transaction is not balanced” on the Transactions or Other Journal tab | A client-side check in the browser, before anything is sent | Correct the amounts. This is not a backend rejection |
| “Asset GL Code does not exist” when adding a transaction | The asset has no GL code. Possible because GL Code is not required on the create form | Open the asset’s Details tab and set the GL Code, then save |
| Saving the edit screen updates the asset but not its depreciation configuration | Save makes two independent saves with no error handling | Reopen the asset and check the Configuration tab; re-save if the values did not stick |
| The Description field cannot be filled in | Neither form has an input for it, and the CSV import reads its description column without storing it | Use the Attachment tab’s Details field, or set the description through the API |
| Permission Wizard, Release Notes or Applet Log opens a 404 | The shared settings menu renders those links but this applet declares no route for them | Use another applet for those screens |
| Personalization → Field Settings opens a 404, and Personal Default Selection saves nothing | The personalization menu points at a route that does not exist, and the personal settings component never populates its container | Use Settings → Default Selection instead |
An imported row fails with <INVALID EMPLOYEE NAME> | The import matches employees by entity name, exactly | Correct the name in the CSV, or clear the column |
An imported row fails with <INVALID LEDGER CODE> | The import looks for the ledger whose code is PRIMARY — not scoped to the row’s company. It takes the first match in the tenant | The tenant needs a ledger whose code is literally PRIMARY. In a multi-company tenant, check which one the subledgers it creates were attached to |
| Two assets have the same Asset Code | There is no uniqueness rule anywhere — no validator, no unique index. The one check is a browser-side scan of the codes already fetched into the listing, and it runs only on the auto-generated code, so typing your own code skips it entirely | Decide a coding convention outside BigLedger and check the listing before saving. Entering the code by hand removes the only check there is |