Payment Voucher (Internal) Applet
Purpose and Overview
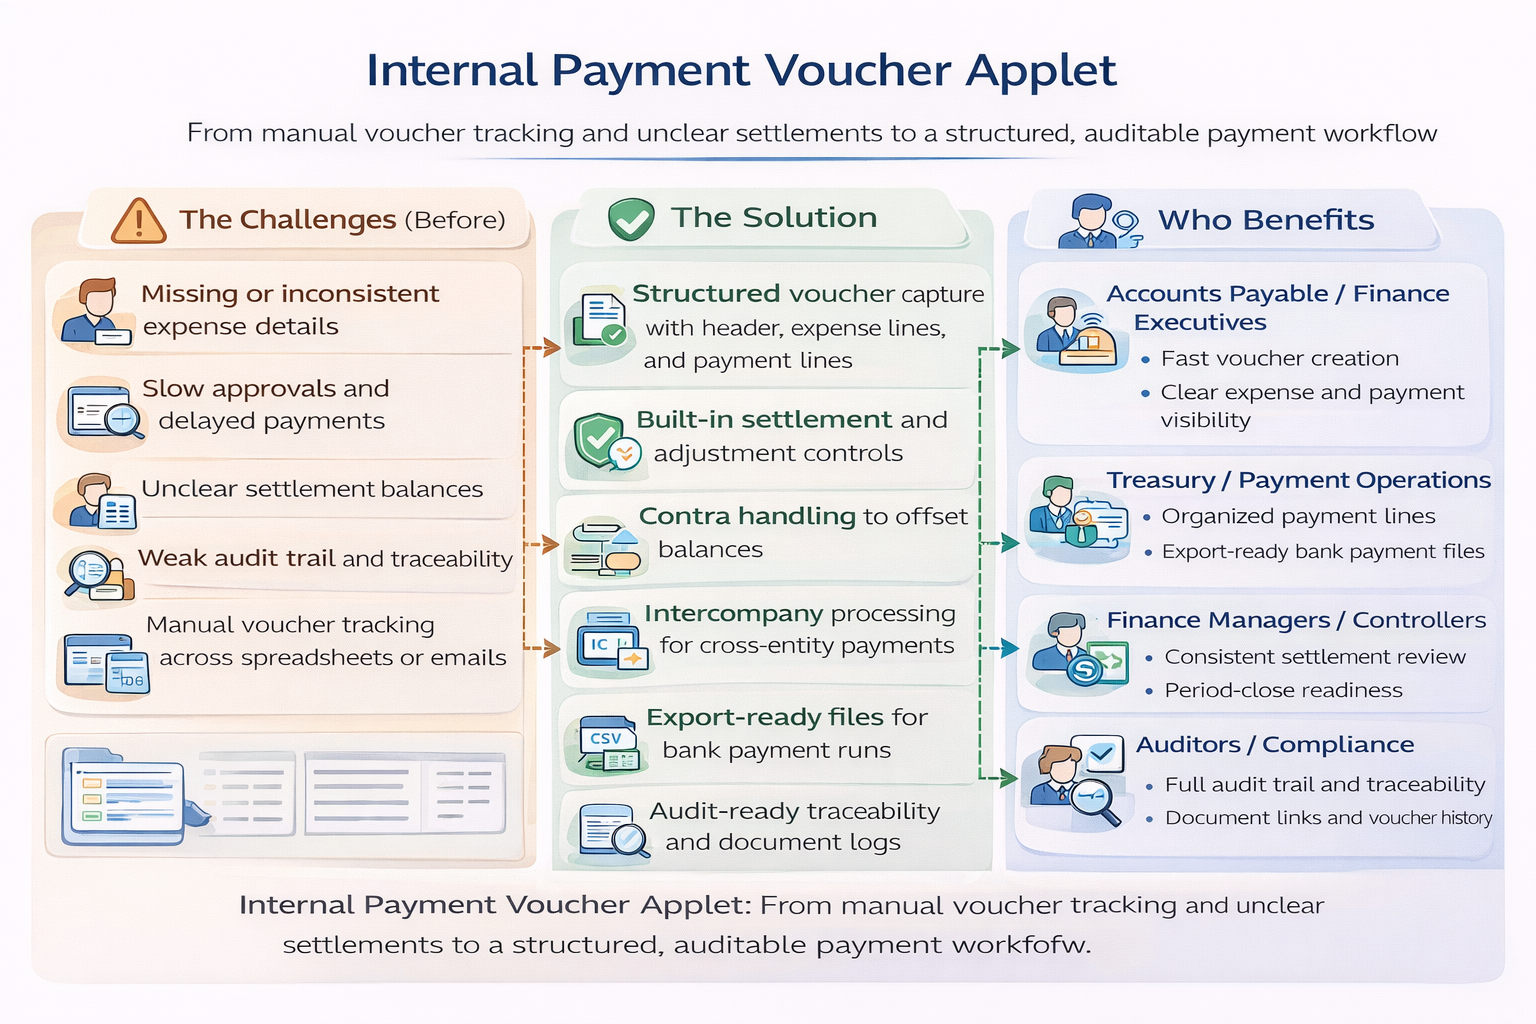
The Payment Voucher (Internal) Applet is a structured tool for creating, reviewing, finalizing, and tracing internal payment vouchers. It combines expense entry, payment method selection, settlement control, and posting visibility in one workflow.
Who Benefits from This Applet?
Accounts Payable and Finance Executives:
- Faster voucher creation and updates
- Clear visibility of expense, payment, and balance position
- Controlled actions such as Final, Discard, and Void
Managers and Controllers:
- Easier document review before finalization
- Better control of settlement and correction flows
- Stronger posting and audit traceability
Treasury and Payment Operations:
- Structured payment lines for payment execution
- Export-ready payment files for bank processing
- Better control of payment timing and method
Auditors and Compliance Teams:
- Full history of voucher status and changes
- Traceable links to posting impact
- Supporting attachments and document relationships
What Problems Does This Solve?
The Manual Payment Voucher Problem:
Manual processes often cause:
- Missing or inconsistent expense details
- Slow review and delayed payment processing
- Unclear settlement balances
- Weak traceability for posting and audit
The Payment Voucher (Internal) Applet Solution:
- Structured voucher capture for header, expenses, and payment lines
- Controlled settlement handling with adjustments and contra
- Trace-ready posting visibility through Trace Document and logs
- Bulk file operations for import and export
- Role-based controls for finance operations and approvals
Key Features Overview
Key Concepts
Understanding the Payment Voucher Framework
| Aspect | Component | Practical Example |
|---|---|---|
| Who is paid? | Entity or Supplier | Vendor ABC Trading |
| What is paid? | Expense Line Item | Freight Charge, RM 2,500 |
| How is it settled? | Payment Line and Method | Bank transfer, cash, cheque |
| Where does it post? | GL and Cashbook Trace | Freight expense GL and cashbook |
Payment Voucher Hierarchy Structure
Think of payment voucher processing as a structured flow:
Organization
│
├── Entity/Supplier ──> WHO is paid?
│   │
│   └── Voucher Header ──> Core document details
│       │
│       ├── Account Details
│       ├── Expense Lines
│       └── Payment Lines
│
└── Adjustments and Contra ──> Balance corrections
    │
    └── Trace Document ──> Posting visibility
Flow Through the Hierarchy:
- Organization: Company policies and controls
- Entity/Supplier: Payee and account details
- Voucher Header: Date, branch, currency, and references
- Expenses: Expense lines and allocations
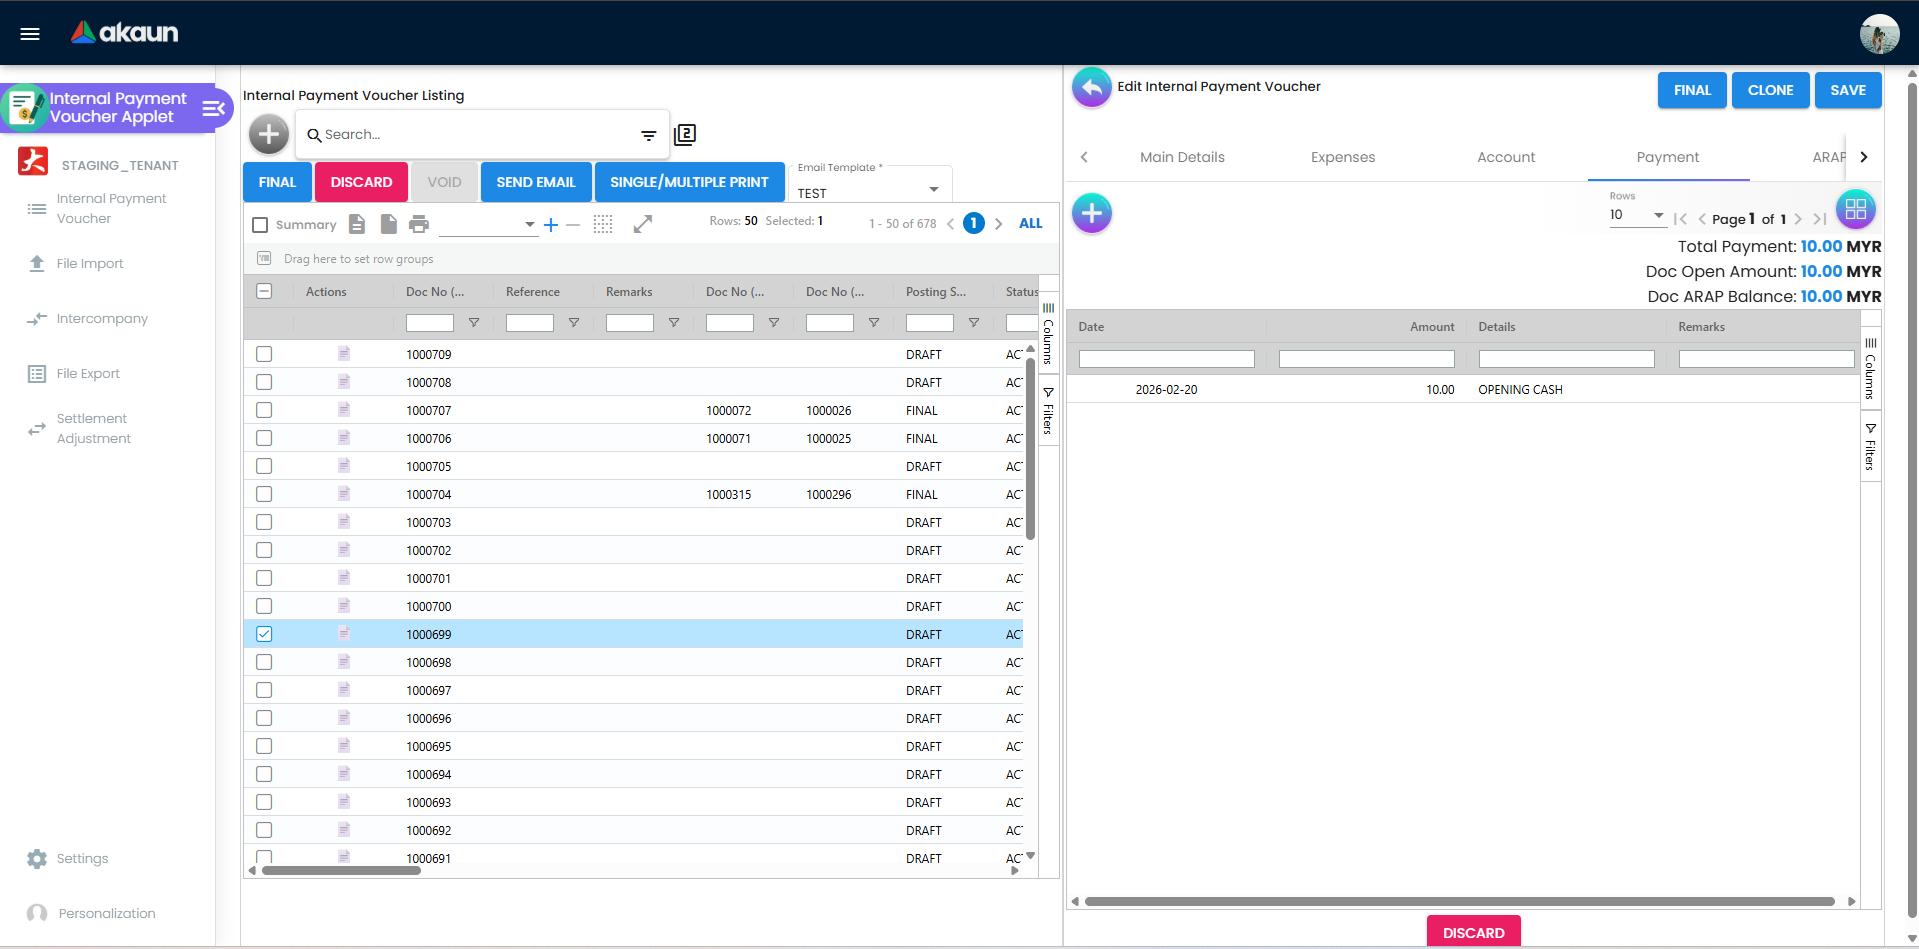
- Payment: Settlement method and payment amounts
- Adjustments/Contra: Corrections and offsets when needed
- Trace Document: Posting verification and audit tracking
The “Golden Triangle” of Payments
| Component | Role | Example |
|---|---|---|
| Voucher Header | The payment document | IPV-2026-00045 |
| Payment Lines | How payment is executed | Bank transfer, cheque |
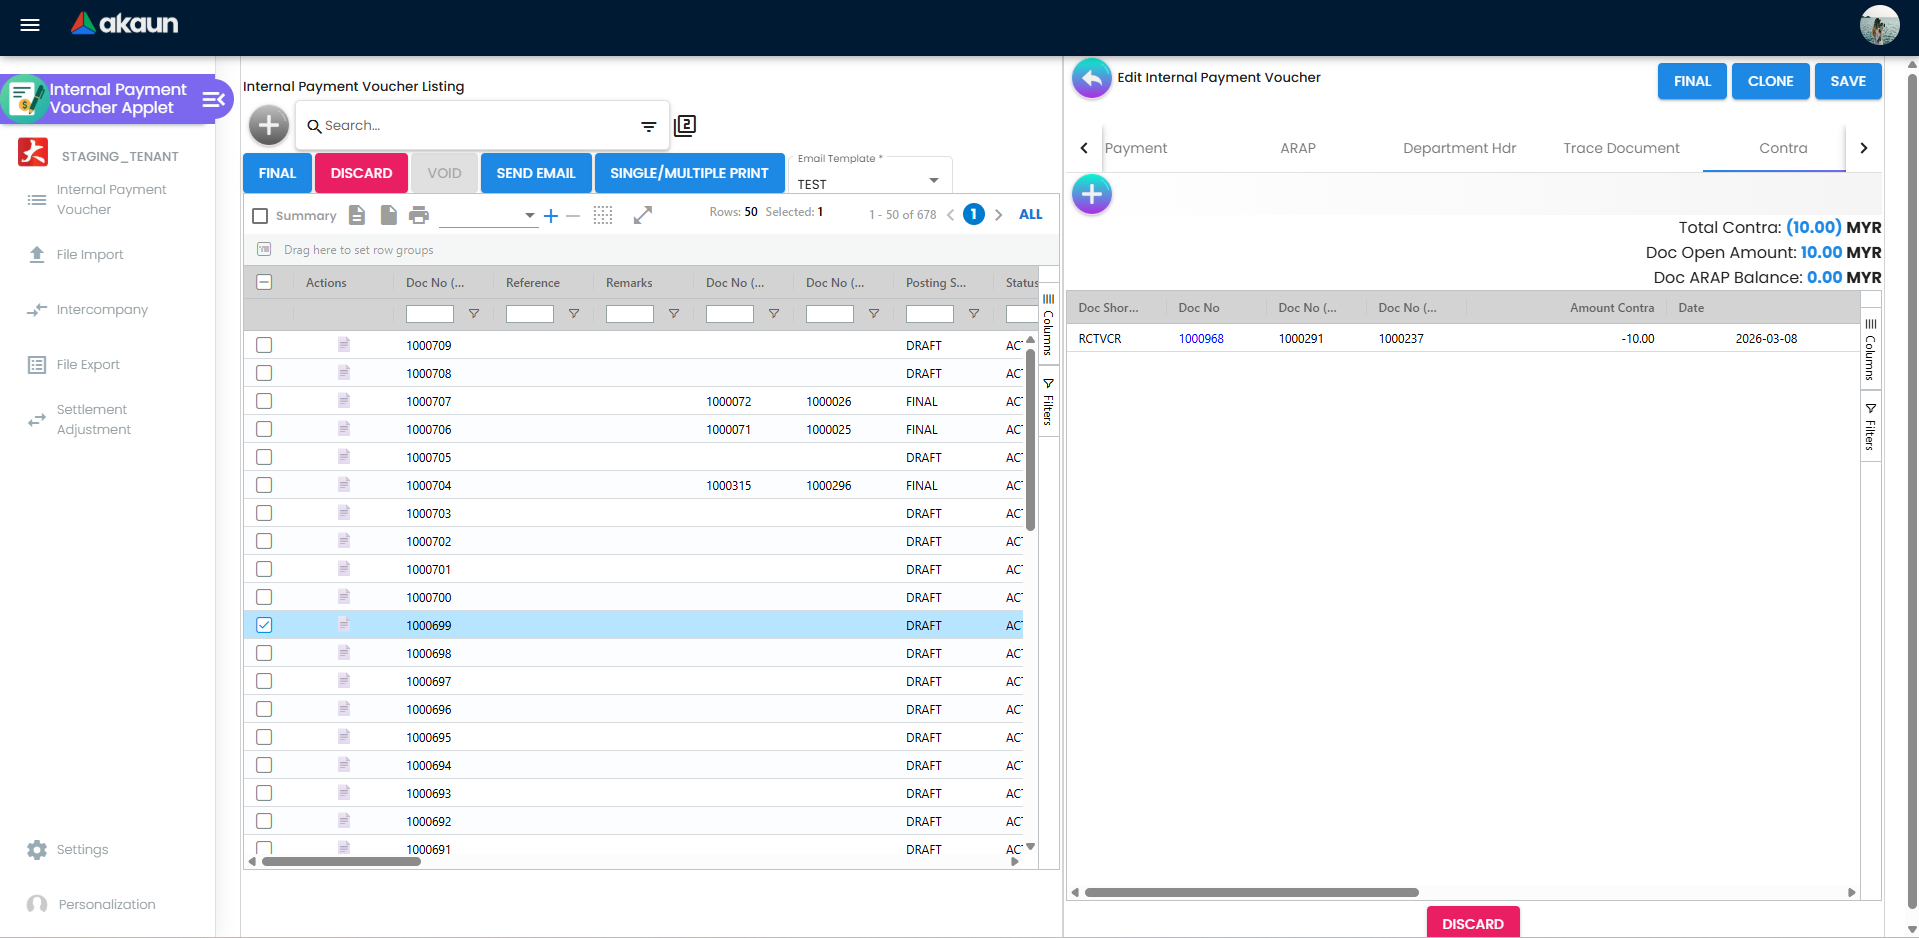
| Contra | How balance is offset | Offset against related AP document |
How they link:
- You create the voucher header and expense lines.
- You add payment lines to settle the amount.
- You use contra only when a true document offset is required.
- You verify the final balance in AR/AP before finalizing.
Quick Start Guide
Get started quickly with these essential workflows.
For Finance Executives: Create Your First Payment Voucher
Goal: Create, balance, and save a payment voucher correctly.
- Go to Payment Voucher (Internal) from the sidebar.
- Click + and enter voucher header details (branch, date, currency, reference).
- Open Account and select entity, billing, and shipping details.
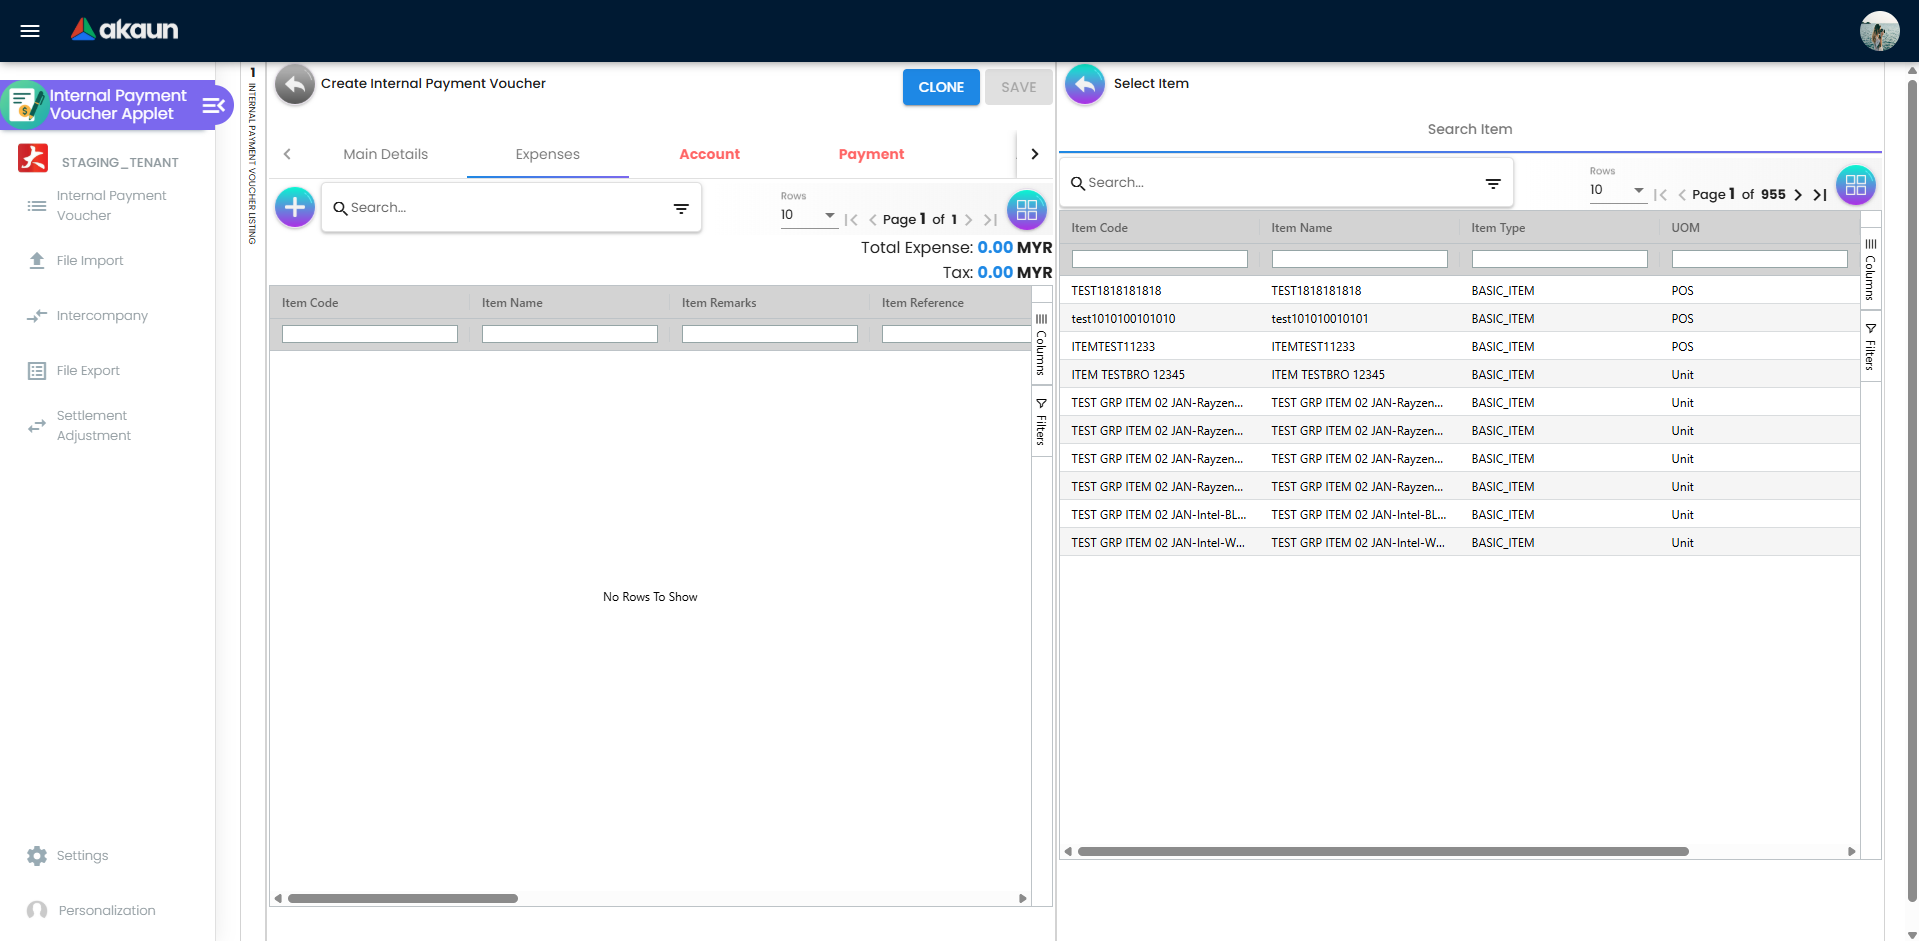
- Open Expenses and add line items with amount and allocation.
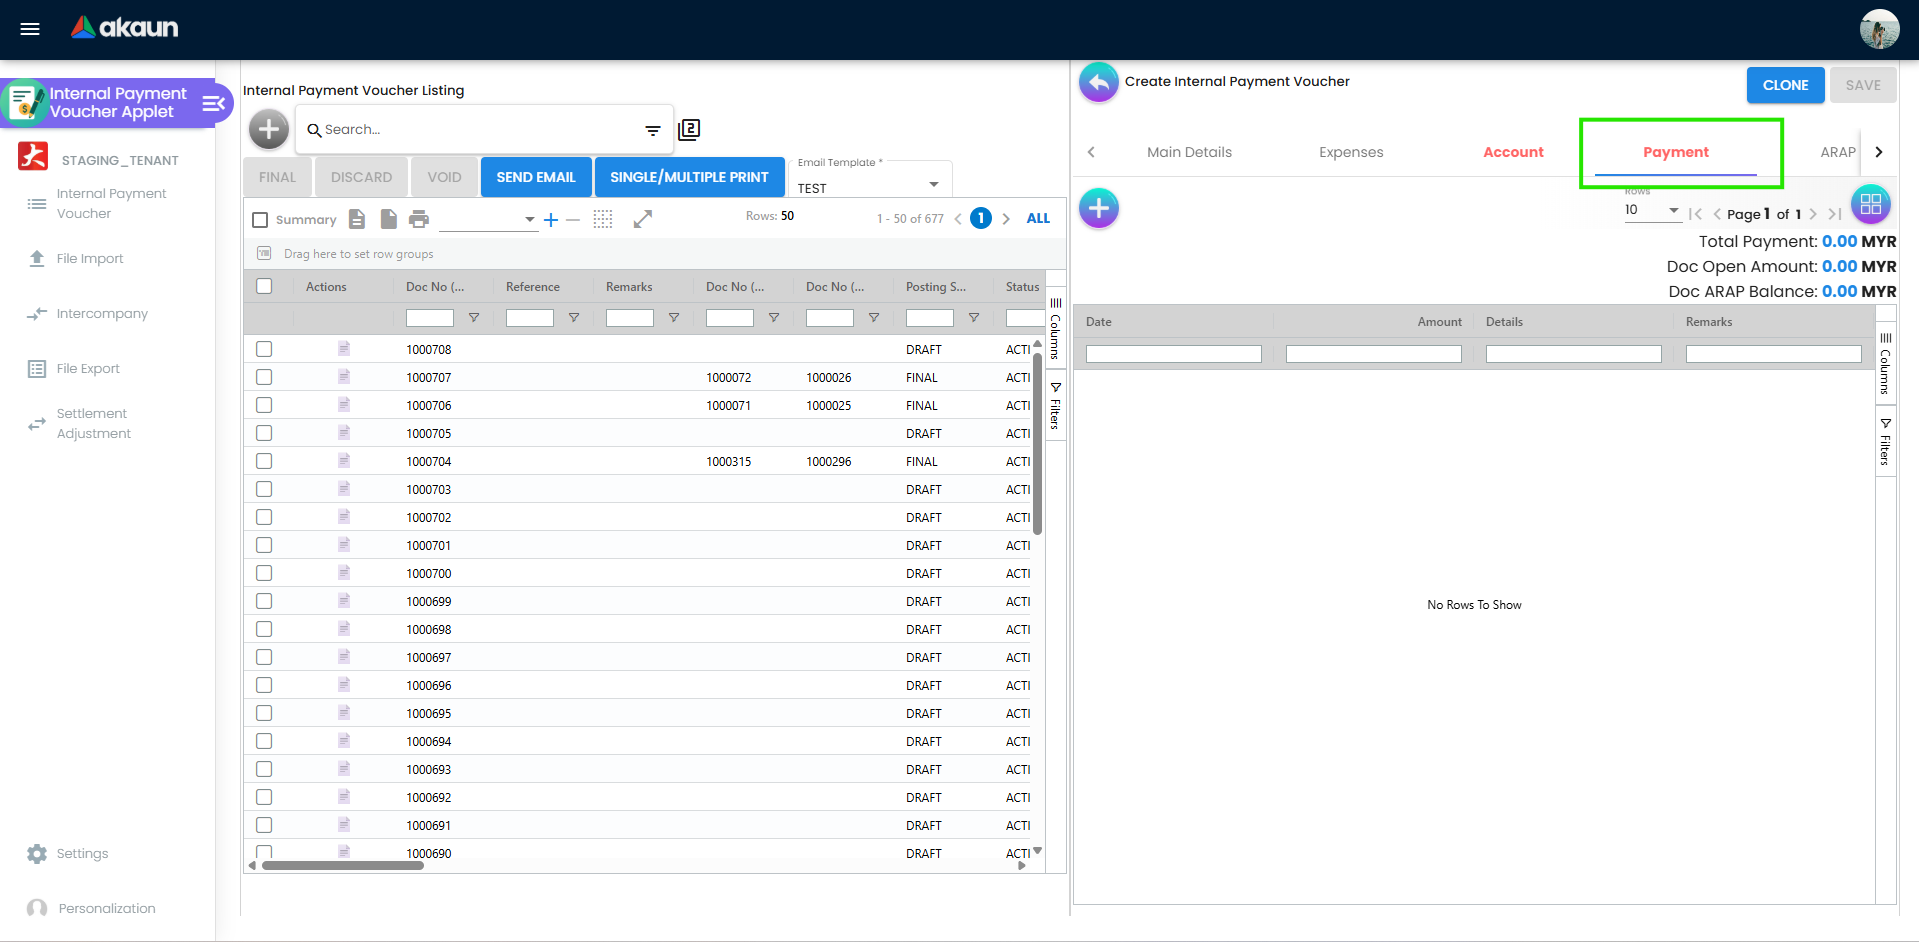
- Open Payment and add payment lines to match the payable amount.
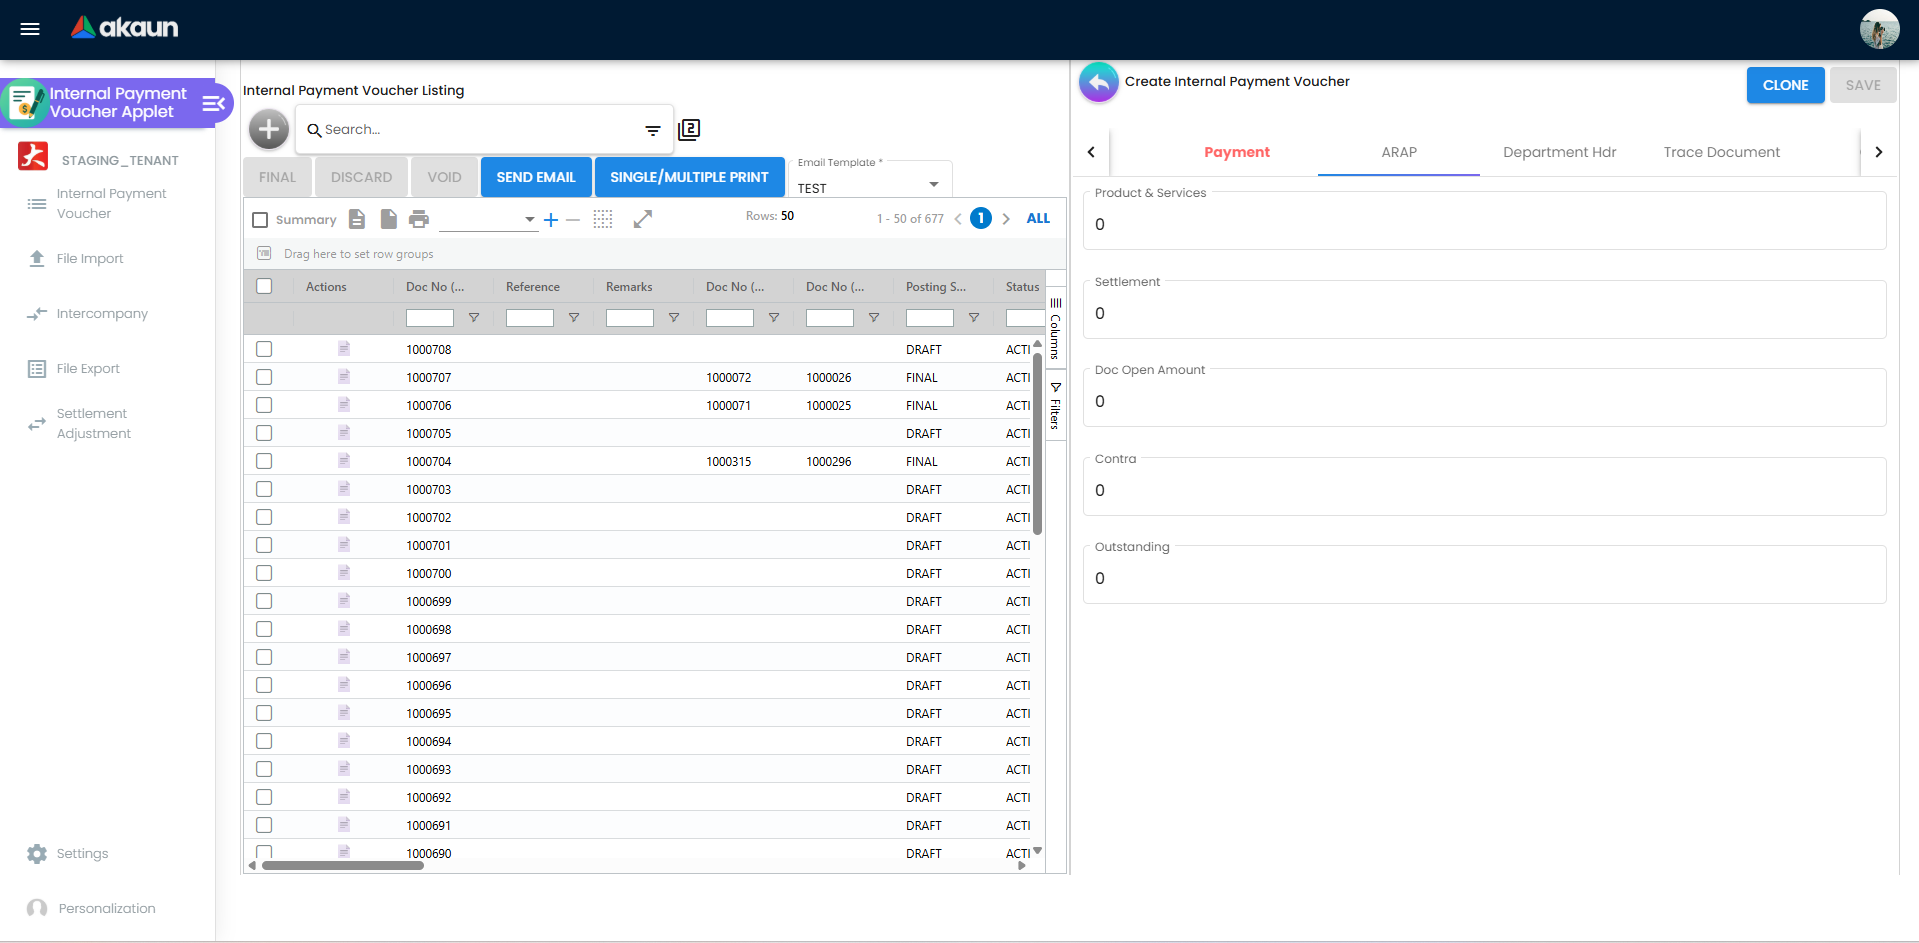
- Review AR/AP balance.
- Save as draft or click Final when complete.

For Managers/Controllers: Review and Finalize
Goal: Review accuracy and finalize only balanced vouchers.
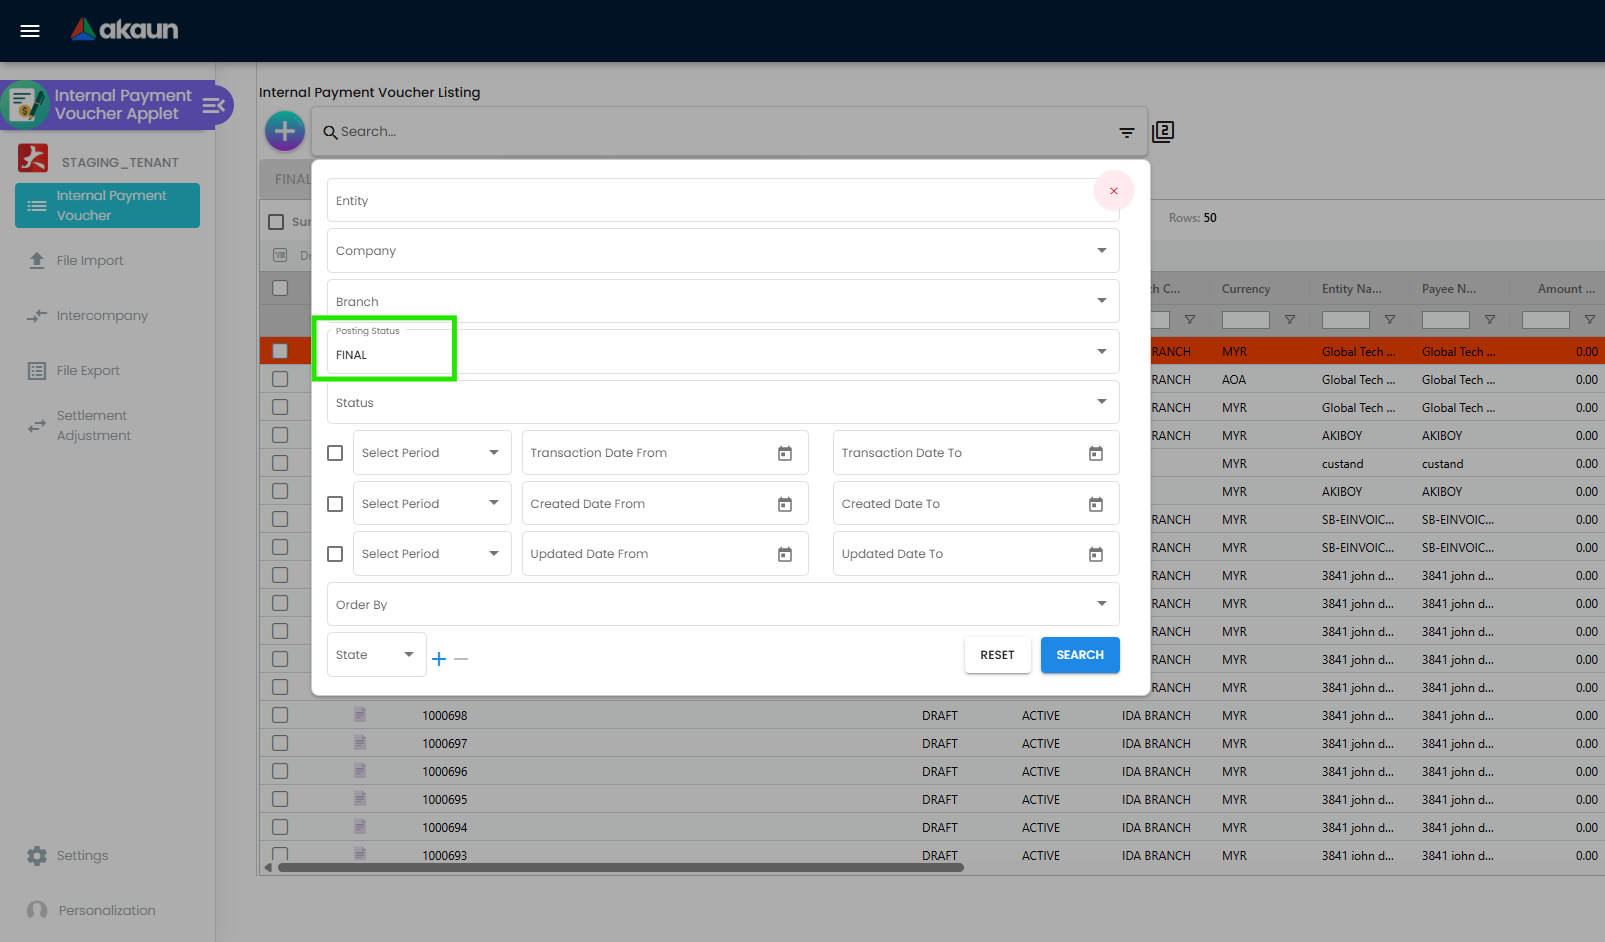
- Open Payment Voucher (Internal) and filter by status/date.
- Review Main Details, Expenses, and Payment tabs.
- Check Settlement Adjustment or Contra only if balances do not align.
- Review Trace Document readiness.
- Click Final when all checks pass.
Separate these two flows clearly:
- Payment to supplier: Use the Payment tab to settle the supplier amount.
- Payment to expense: If Expense = Payment (for example RM100 expense and RM100 payment), voucher balance is 0, so no contra is needed.
For Admins: Initial System Setup
Goal: Configure core settings for stable voucher operations.
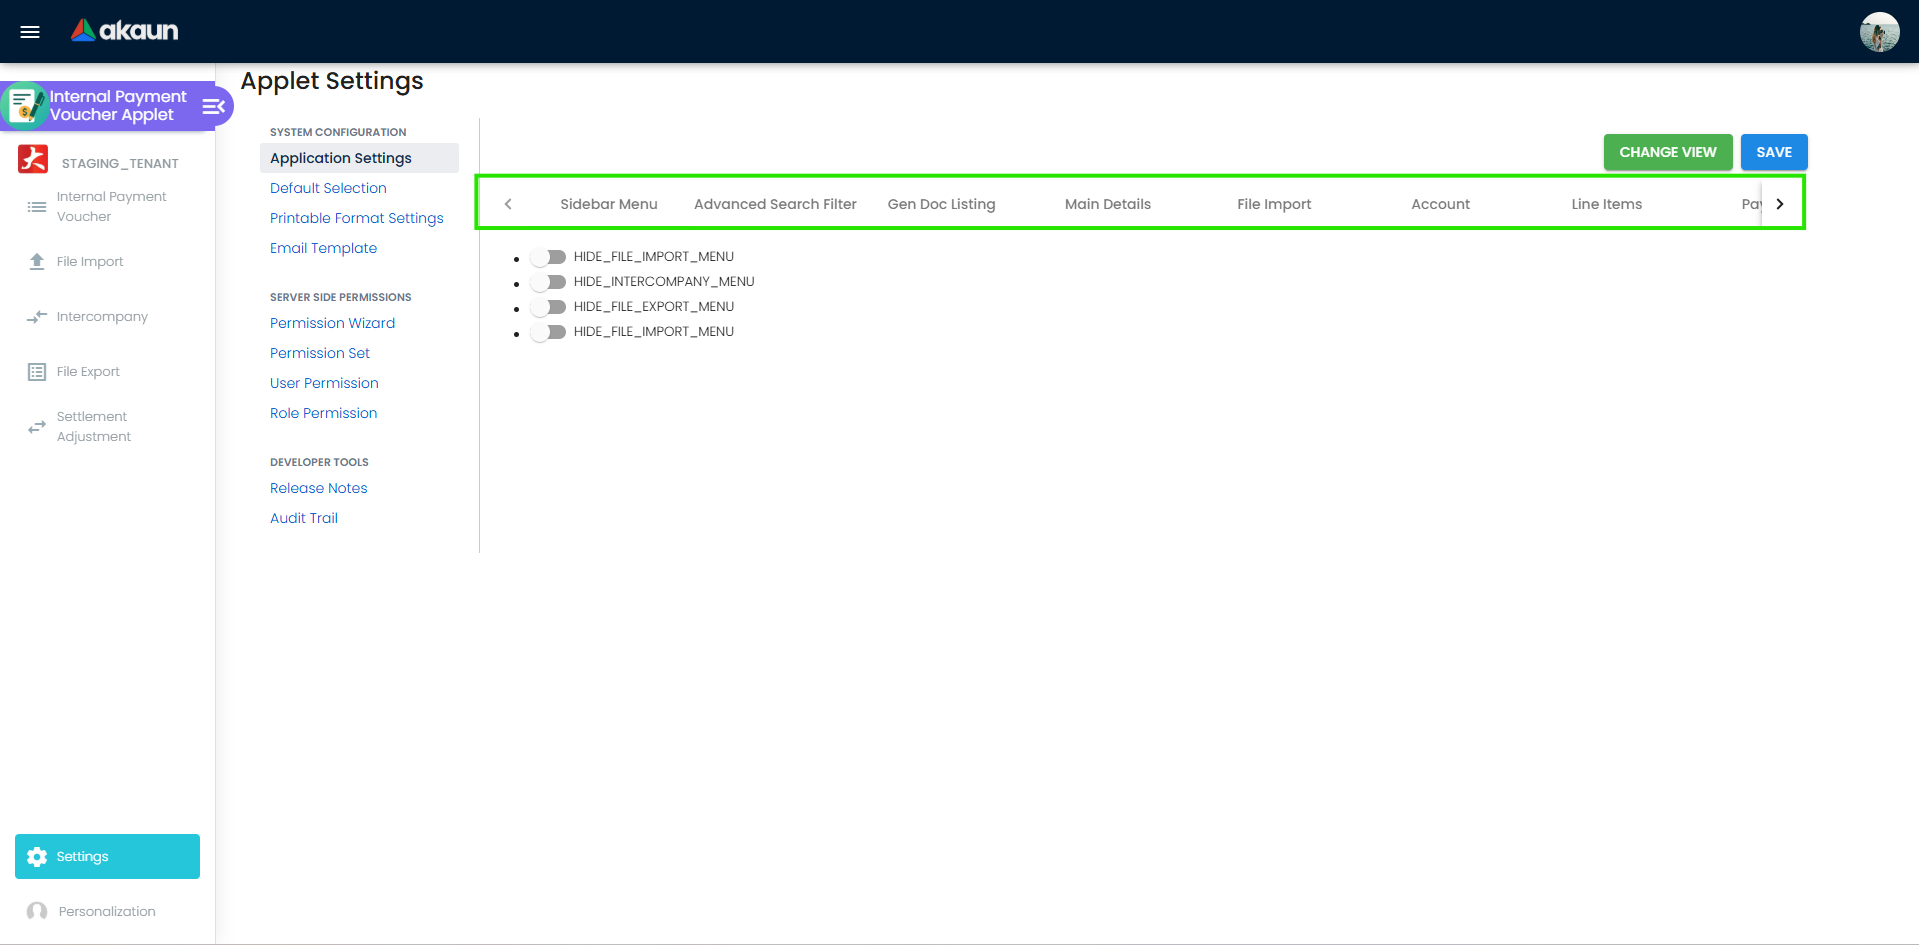
Step 1: Application Settings (Settings > Application Settings)
- Configure tab visibility and field behavior
- Enable or disable optional flows
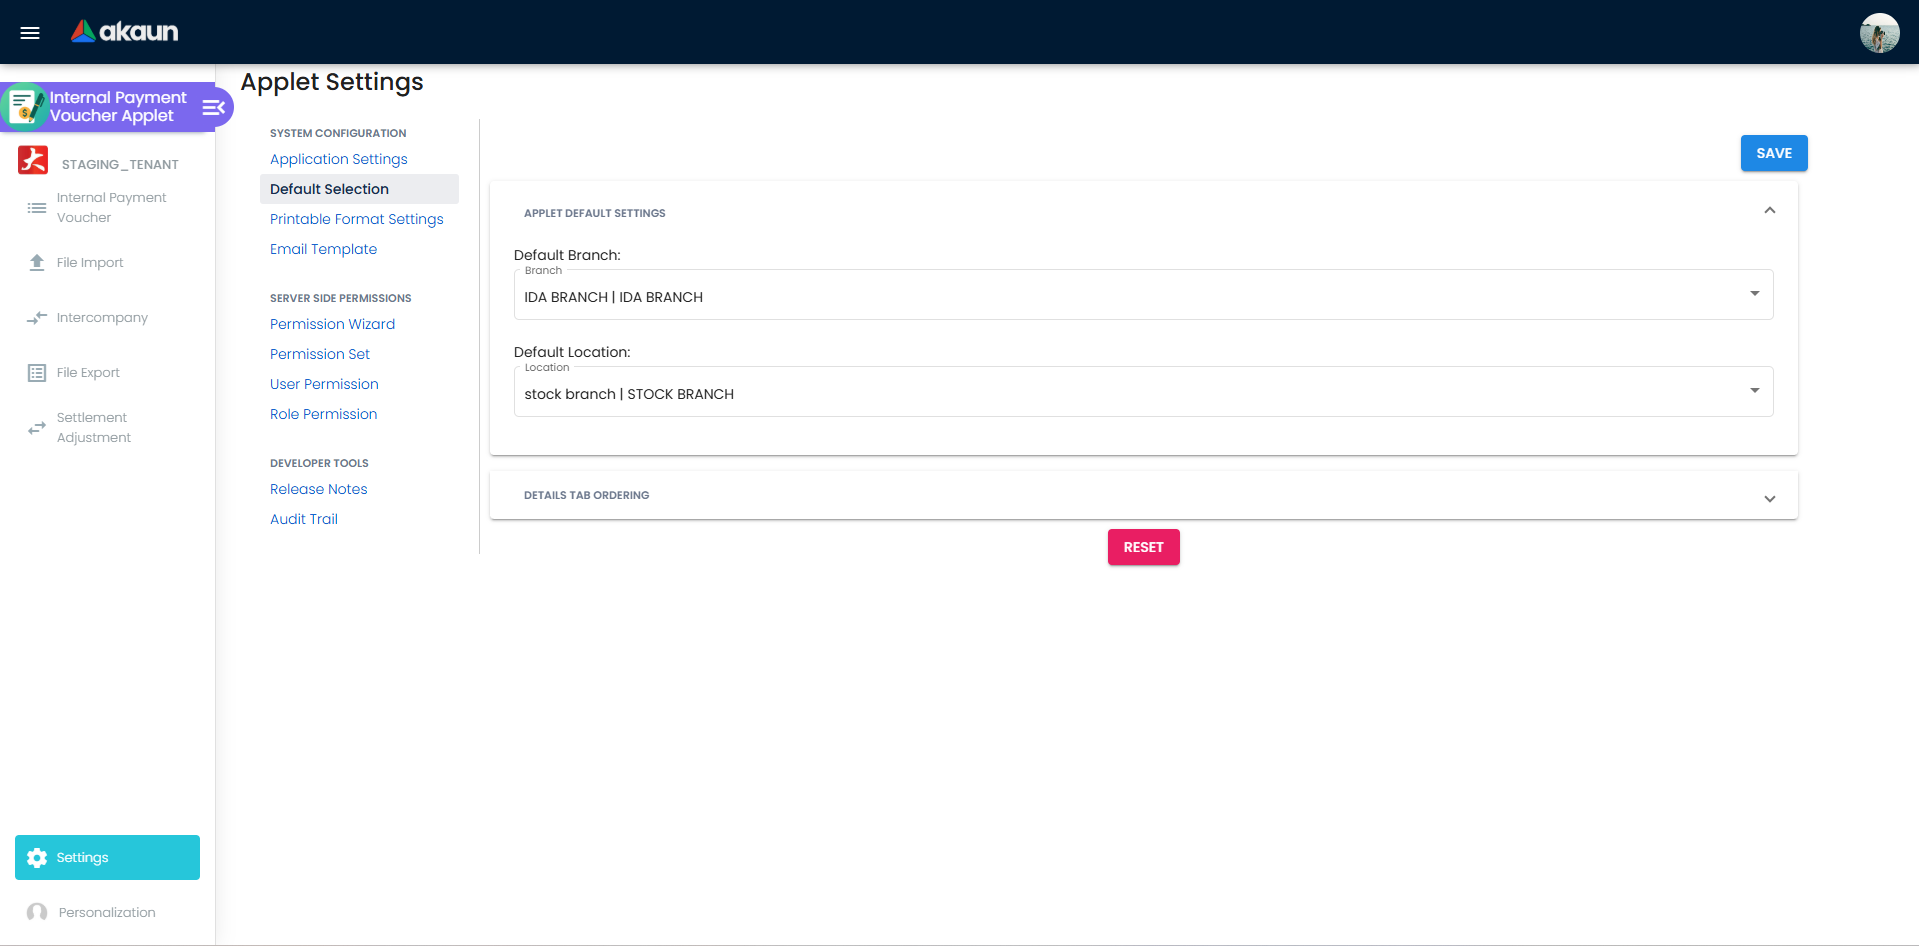
Step 2: Default Selection (Settings > Default Selection)
- Configure default branch and location values
- Reduce manual input during voucher creation
Step 3: Printable Format Settings (Settings > Printable Format Settings)
- Set voucher print layout and output templates

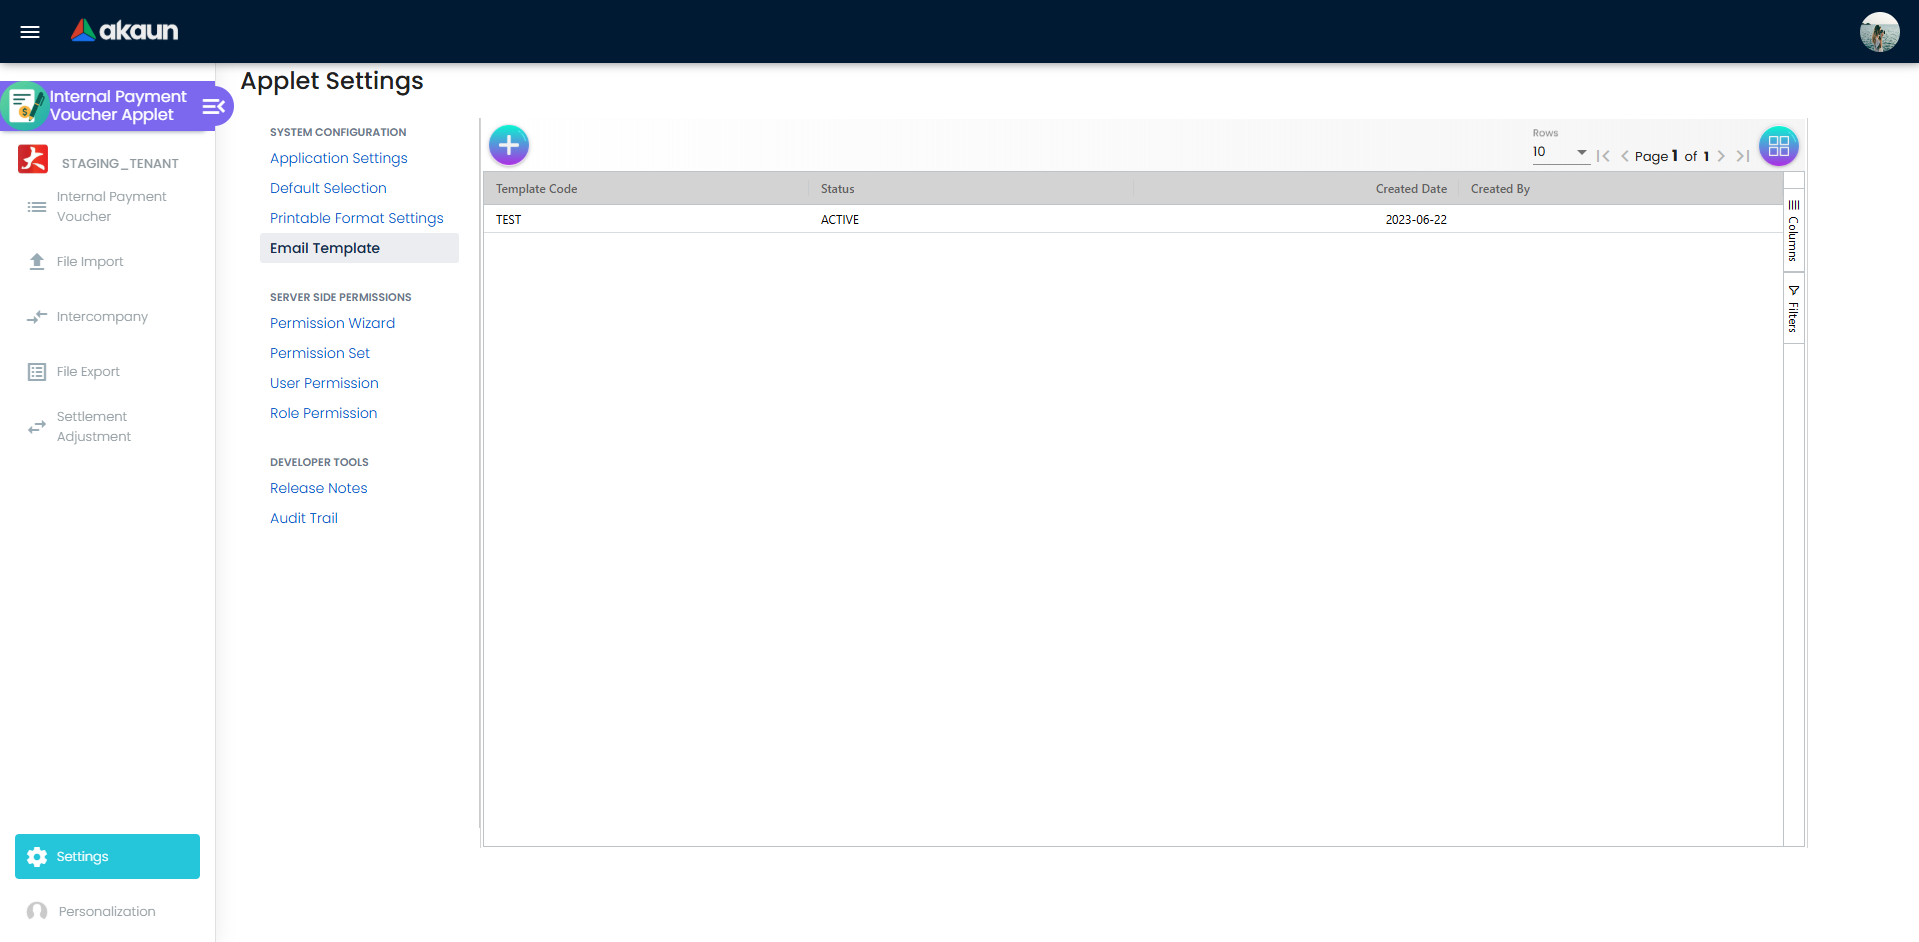
Step 4: Email Template (Settings > Email Template)
- Configure voucher email subject and body templates
- Ensure correct recipient communication format
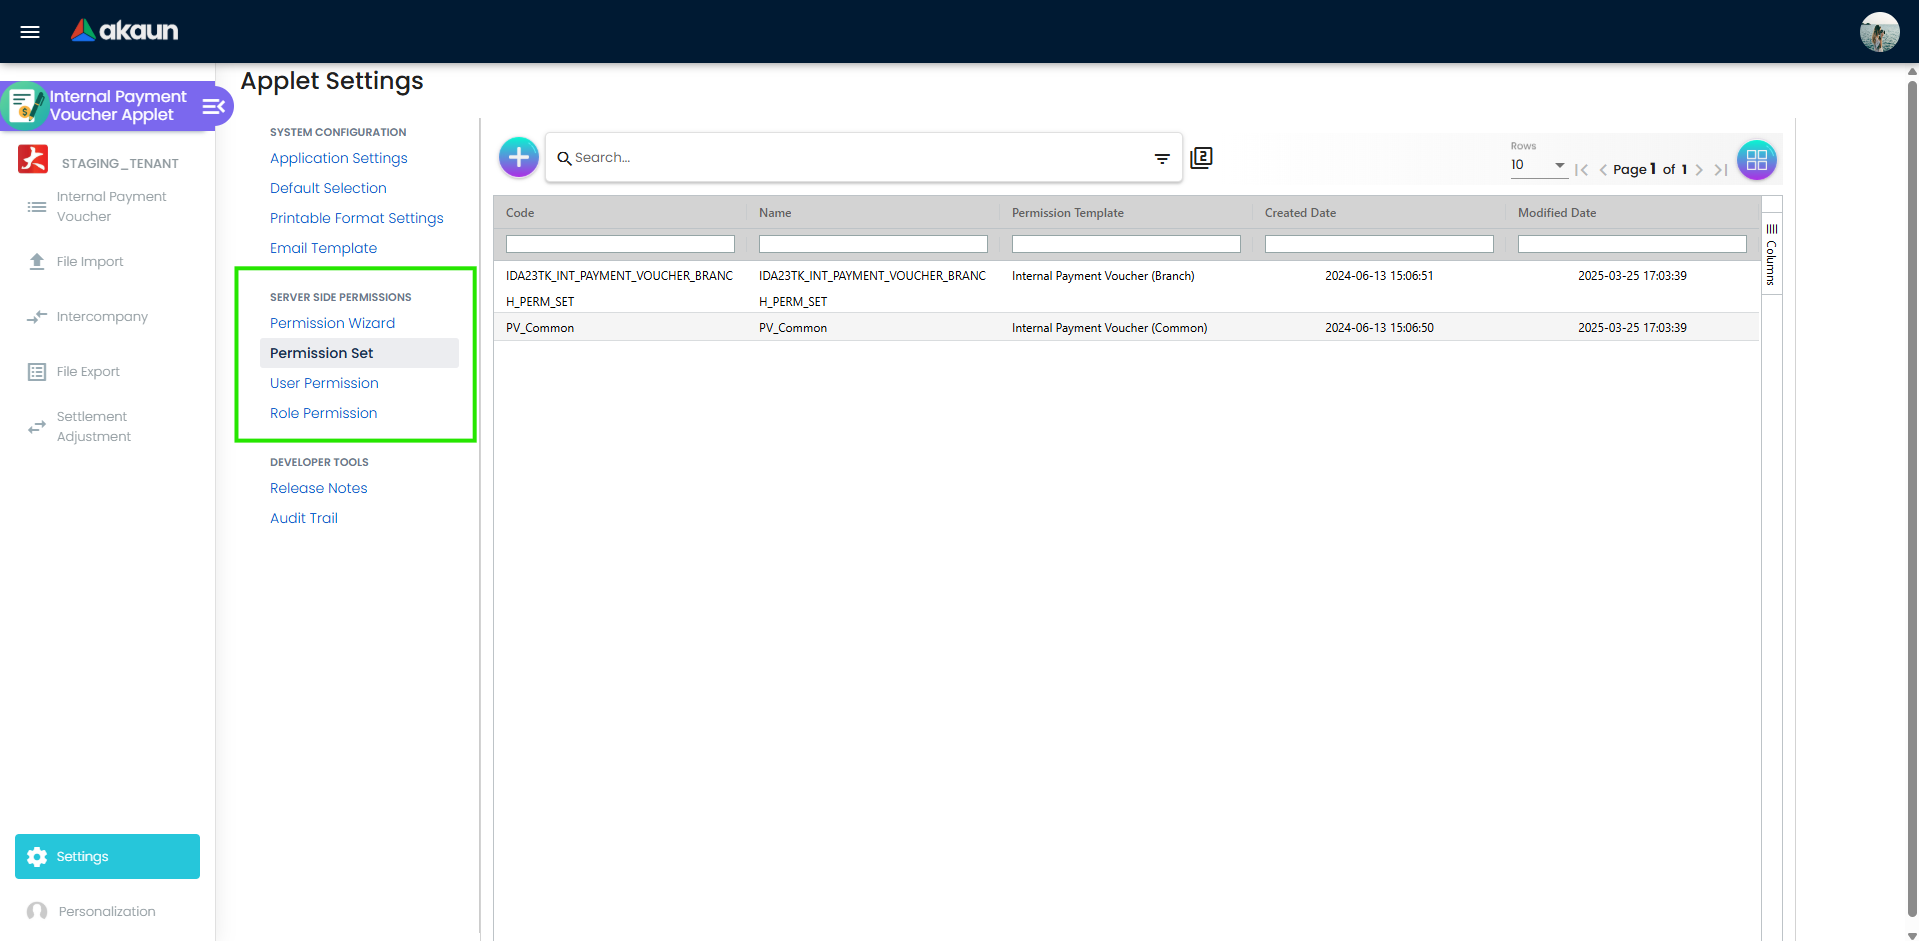
Step 5: Permissions and Feature Visibility
- Control user access to actions and menus
- Verify finance roles can perform required tasks
Step 6: Test End-to-End Flow
- Create test voucher
- Add expenses and payment lines
- Finalize and verify trace visibility
New to the system? Start in this order:
- Finance users submit and save a test voucher.
- Managers practice review and finalization.
- Admins validate settings and permissions.
Settlement Tracking
Monitor settlement balances and outstanding amounts in real time.
What is Settlement Tracking?
Settlement Tracking shows how much of a voucher is already settled, what remains outstanding, and whether corrections are needed before finalization.
For Finance Users:
- Confirm payment lines match expense lines
- Avoid incorrect contra usage
- Finalize only when balance checks pass
For Managers and Controllers:
- Validate correction flows before final approval
- Ensure posting-impact documents are accurate
For Treasury Operations:
- Confirm payable position before export runs
- Reduce payment and reconciliation exceptions
How to Check Your Settlement Position
- Open the voucher in edit mode.
- Review all payment lines in Payment tab.
- Review AR/AP for outstanding and settled amounts.
- If required, review Settlement Adjustment or Contra.
- Recheck totals after any expense or payment update.
Key Features
- Real-time recalculation after payment and expense edits
- Correction flow through Settlement Adjustment
- Contra support for document-to-document offsets
- AR/AP visibility for pre-final verification
Common Scenarios
Scenario 1: Partial Payment
Voucher amount: RM 10,000
Payment recorded: RM 6,000
Status: Partially settled, RM 4,000 outstanding
Scenario 2: Full Settlement with Contra
Voucher amount: RM 5,000
Payment: RM 2,000
Contra offset: RM 3,000
Status: Fully settled
Scenario 3: Expense and Payment Fully Matched
Expense total: RM 100
Payment total: RM 100
Voucher balance: RM 0
Action: No contra required
Tips for Finance Teams
- Recheck settlement after editing expense lines
- Use adjustments for correction flows instead of reissuing documents
- Finalize only after AR/AP balance validation
For Daily Users
This section is your practical reference for daily voucher operations.
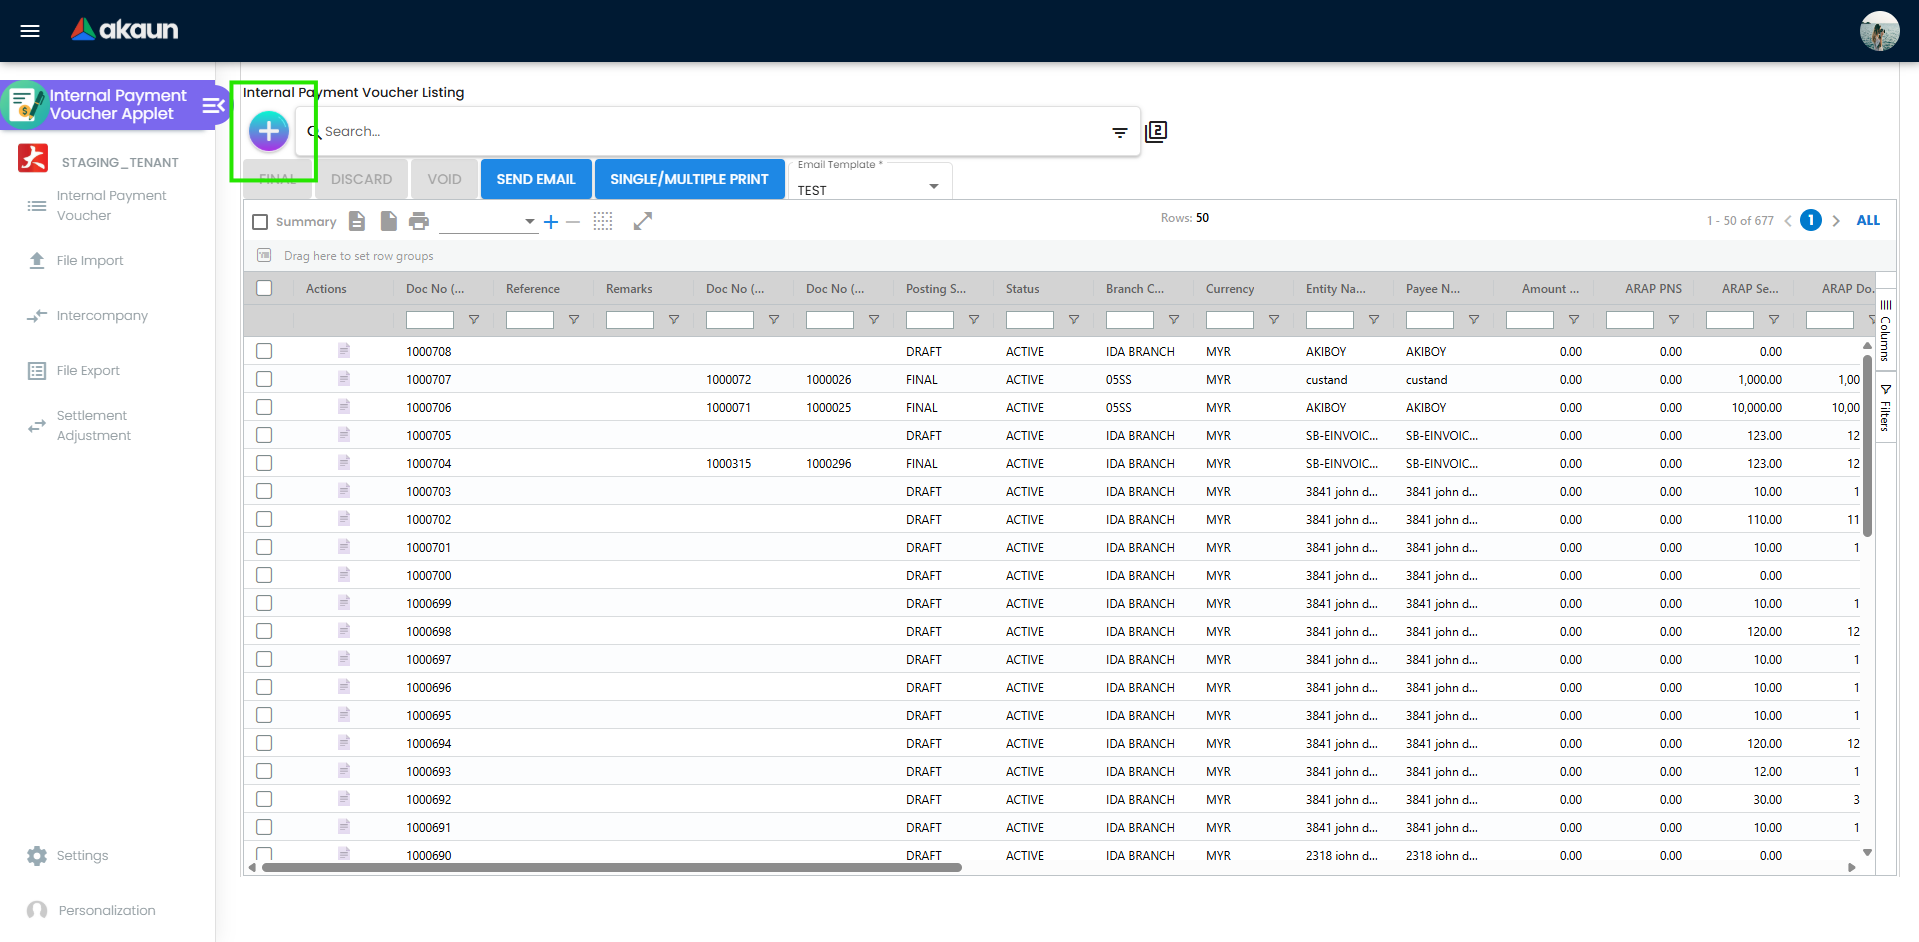
Payment Voucher Listing and Edit Workspace
What You Can Do:
- Create, edit, and clone vouchers
- Use Final, Discard, and Void based on status
- Send voucher email and print from listing
- Track posting visibility in Trace Document
Common Statuses
| Status | What It Means | Typical Action |
|---|---|---|
| Draft | Work in progress | Continue editing and save |
| Final | Finalized posting document | Trace and monitor |
| Discarded | Draft cancelled | No posting impact |
| Voided | Final document cancelled | Keep audit trail |
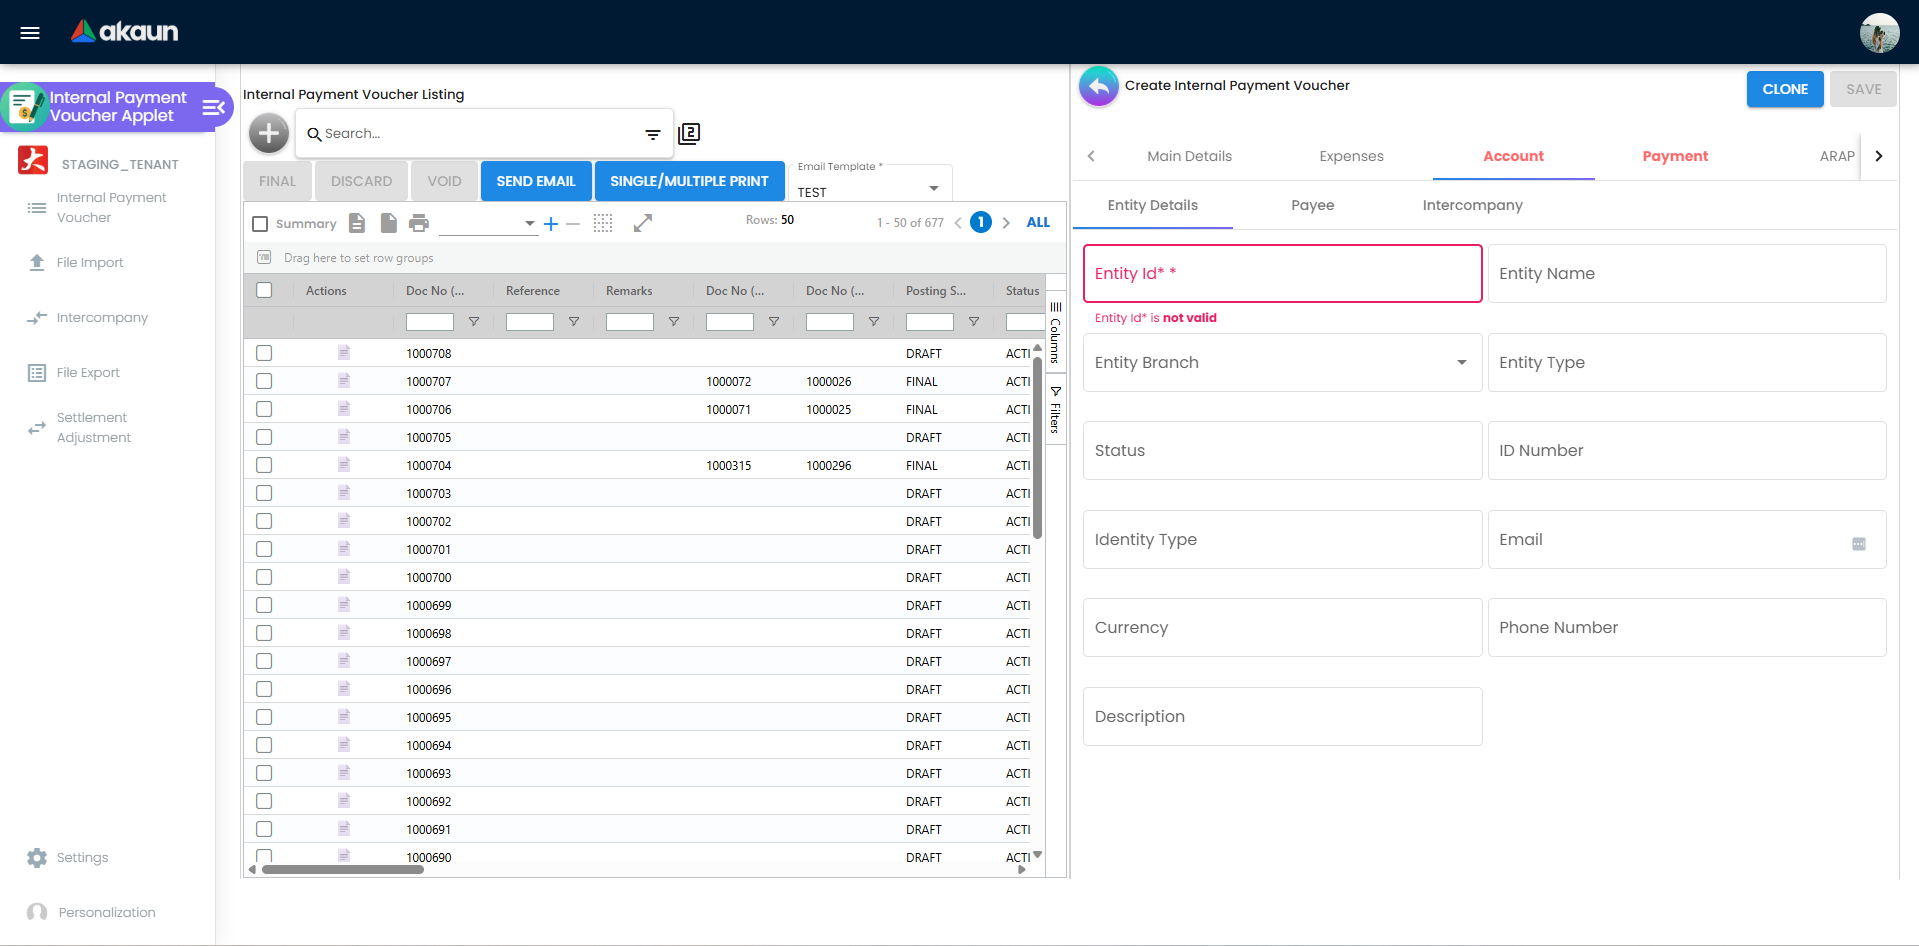
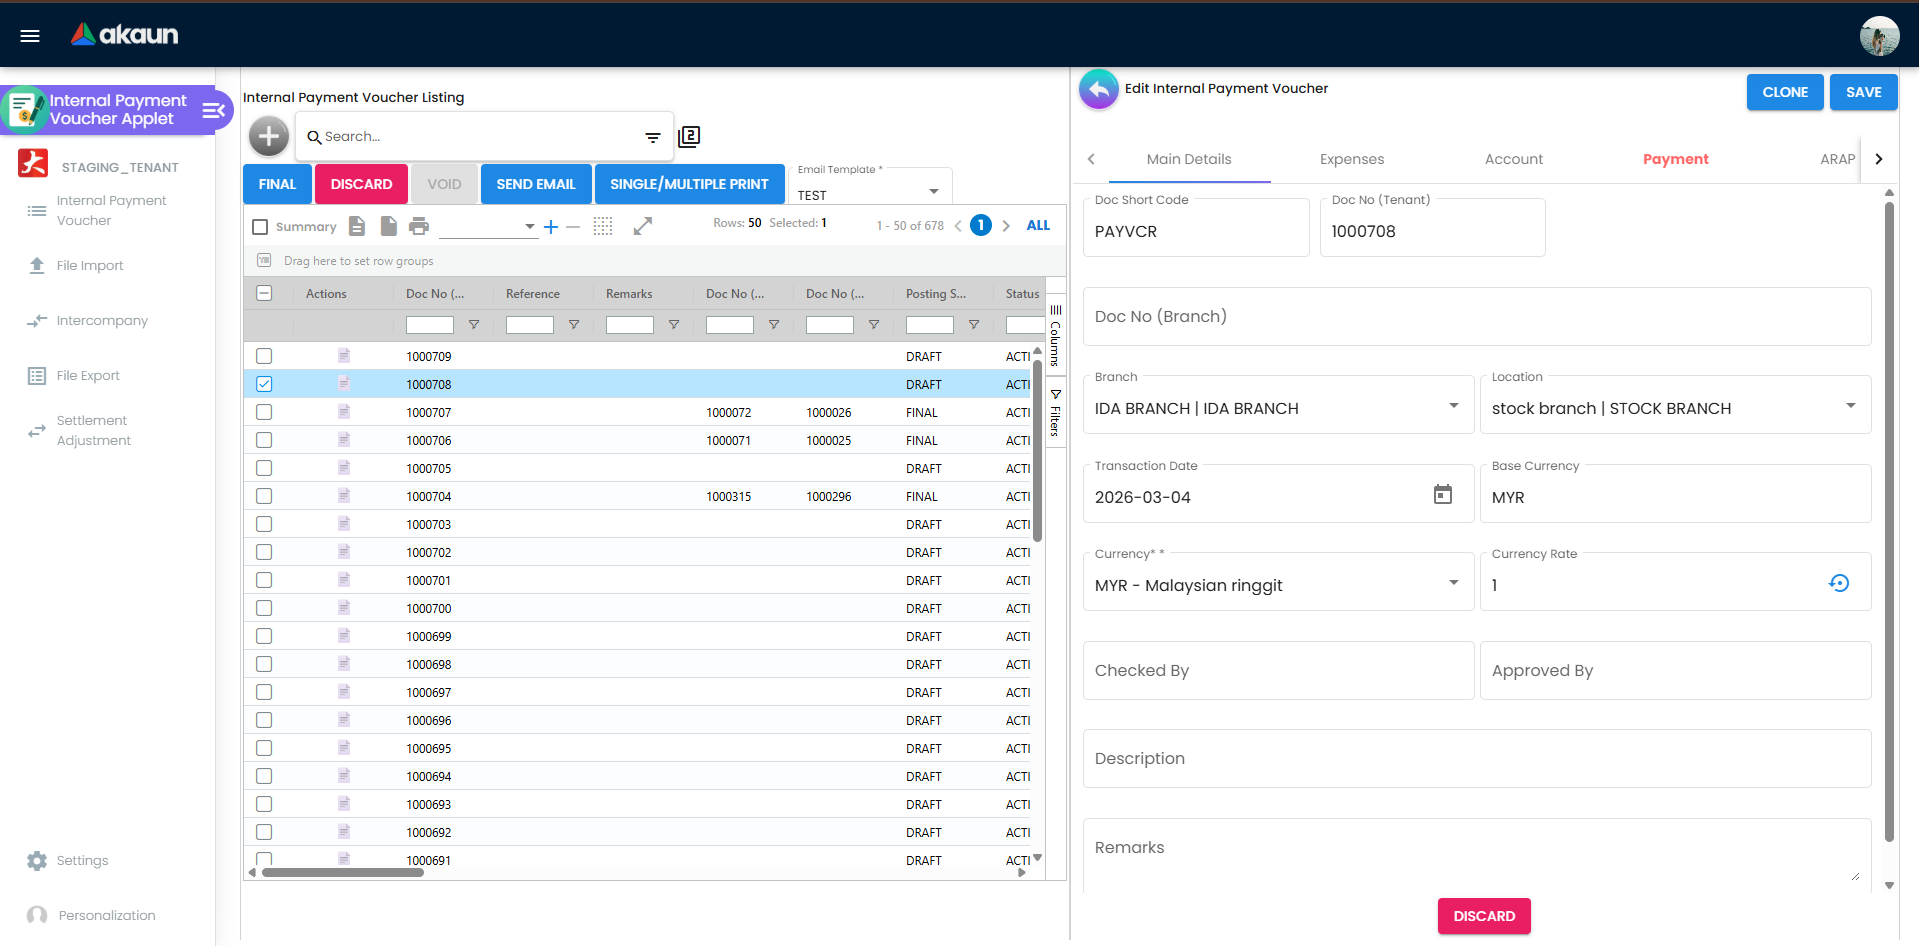
Core Tabs in Edit View
- Main Details: Header information
- Account: Entity and account-related details
- Expenses: Expense lines and allocation
- Payment: Settlement/payment line input
- Doc Link: System-generated KO relationships
Conditional and Advanced Tabs
- AR/AP: Outstanding and settled amount review
- Settlement Adjustment: Post-final settlement corrections
- Expenses Adjustment: Post-final expense corrections
- Contra: Offset against related documents
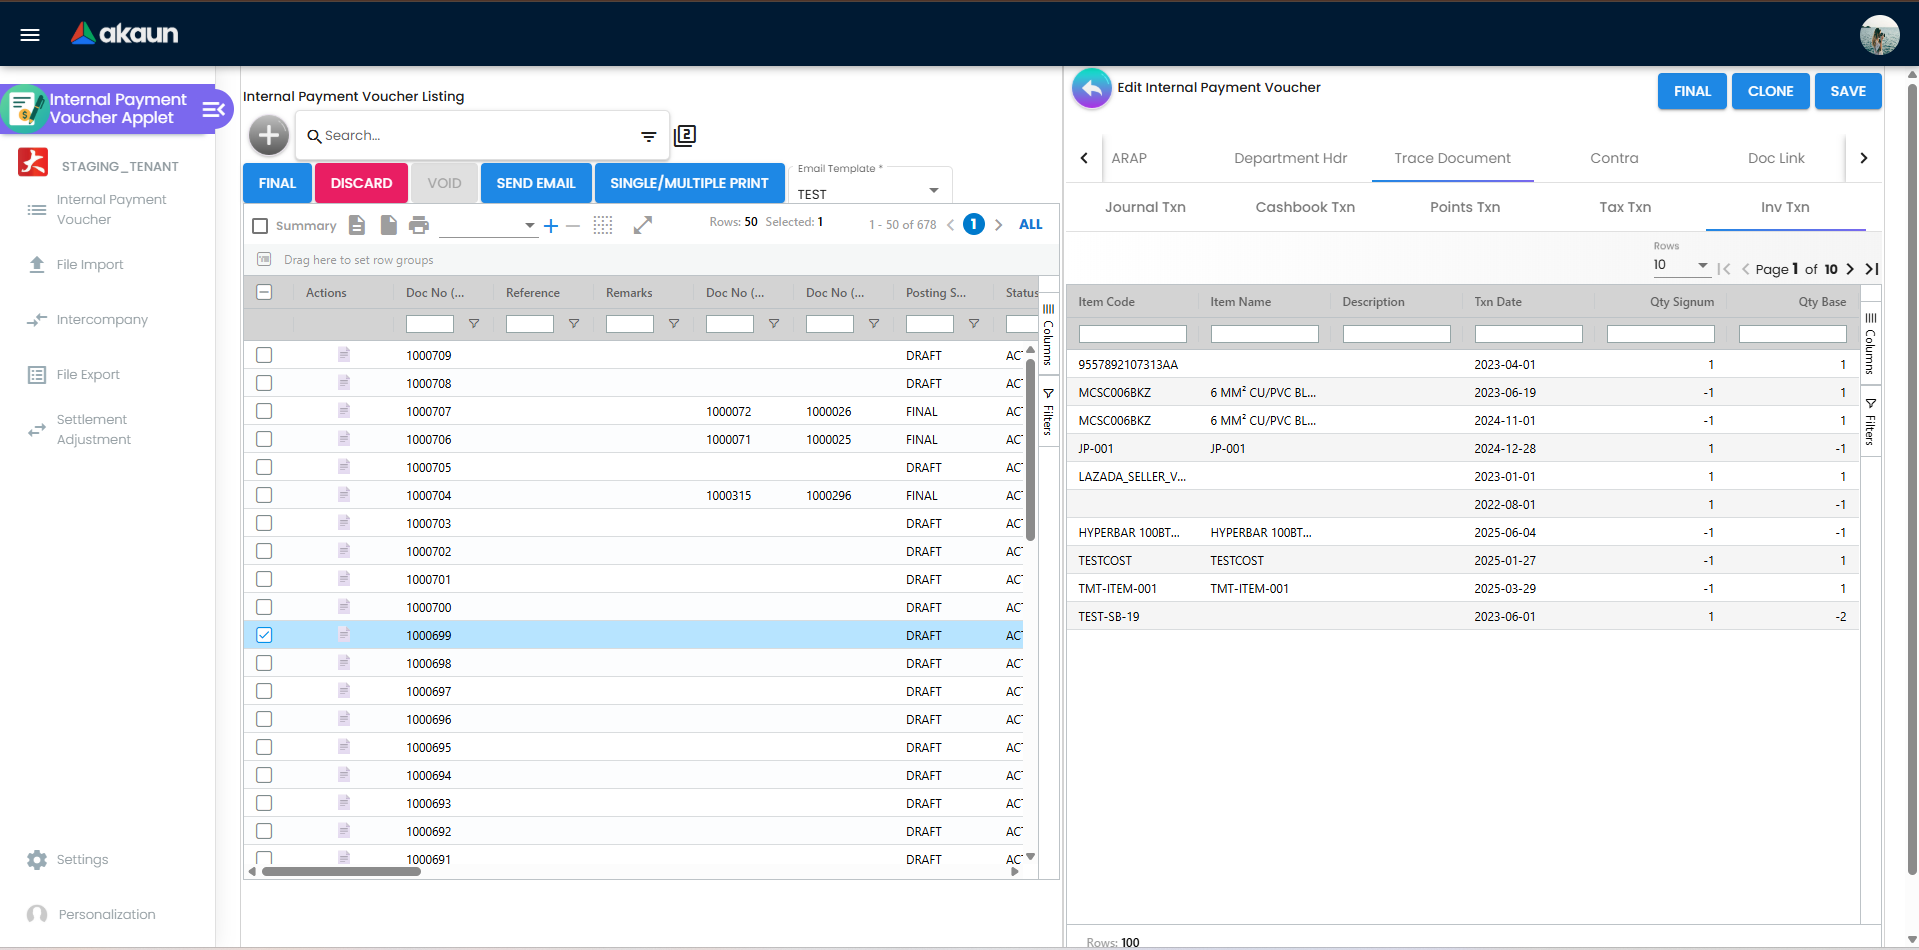
- Trace Document: Journal and cashbook visibility
- Attachments: Supporting files
- Intercompany: Cross-entity processing flow
Voiding Payment Vouchers
Use Void when a finalized voucher must be cancelled while preserving an audit trail. Use Discard for drafts.
When to Use Void (Common Scenarios)
- Finalized voucher has incorrect supplier or amount
- Payment should not proceed
- Finalized voucher must be reversed for control reasons
- Duplicate finalized voucher needs cancellation
When to Use Discard Instead
- Voucher is still draft and should be abandoned
- You want to cancel without creating posting impact
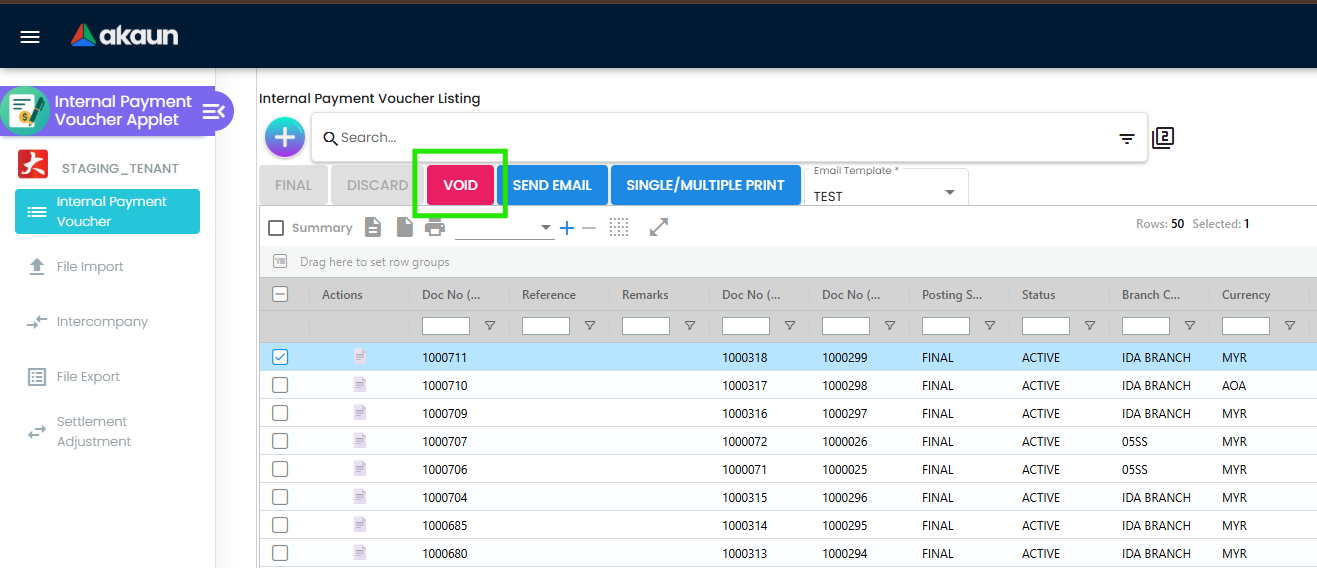
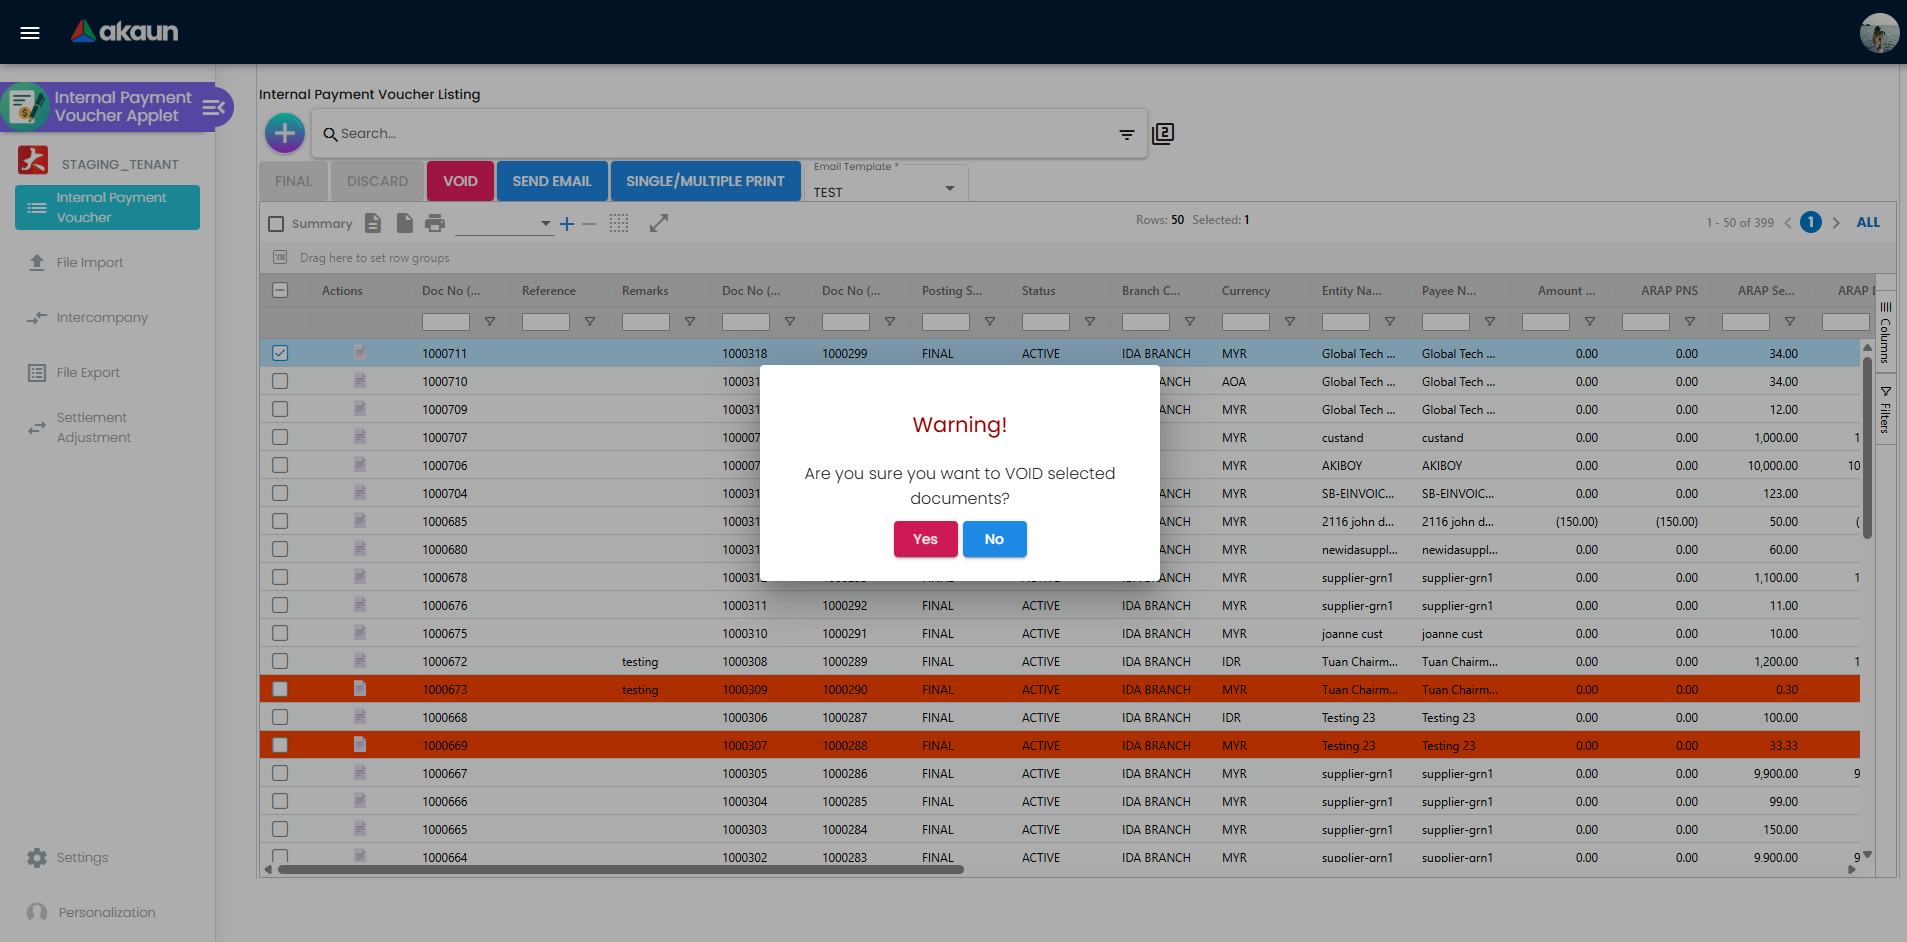
How to Void a Payment Voucher
- Open Payment Voucher (Internal) listing.
- Filter for Final vouchers.
- Select target voucher and click Void.
- Confirm the void action.
- Verify posting status changes to Voided.
Handling Final or Posted Vouchers
- Check Trace Document to understand current posting impact
- Confirm settlement position in Payment, AR/AP, or Settlement Adjustment
- Coordinate with finance control when policy requires pre-void review
- If void is restricted, use adjustment or contra correction flows
Feature Reference
Line Item and Expenses
Use Expenses tab to capture:
- Itemized expense amounts
- Costing and allocation details
- Optional item-level references such as serial or batch
Payments and Settlement
Use Payment tab to manage:
- Payment method selection (bank, cash, transfer, cheque, and configured methods)
- Multiple payment lines
- Currency and exchange-rate impact (when enabled)
Adjustments and Contra
Use these options for corrections:
- Expenses Adjustment for expense-side corrections
- Settlement Adjustment for payment-settlement corrections
- Contra for valid document offset scenarios

Intercompany Processing
Intercompany menu provides two queues:
- Unprocessed: Transactions pending processing
- Processed: Completed intercompany transactions
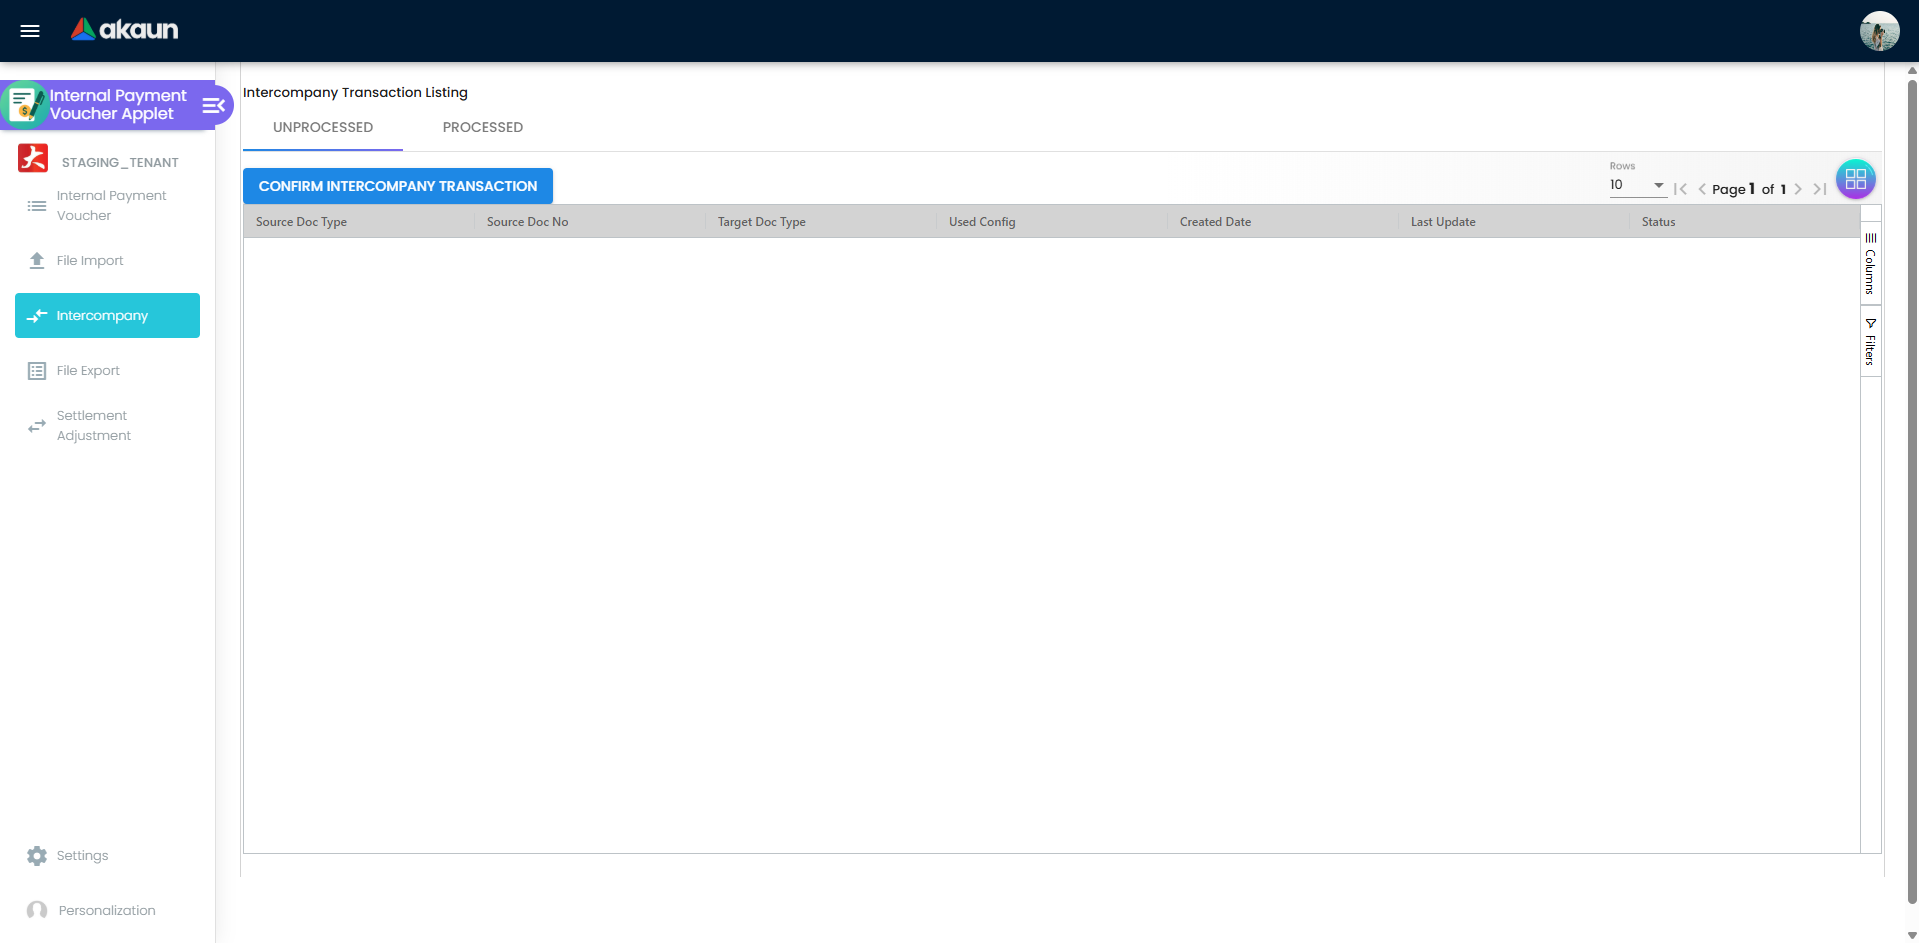
Where Intercompany Data Comes From
Intercompany records are generated from finalized vouchers with intercompany data in Account tab.
How to Create an Intercompany Transaction
- Create or edit a voucher.
- Fill intercompany fields in Account tab.
- Save and finalize the voucher.
- Open Intercompany and process the new queue entry.
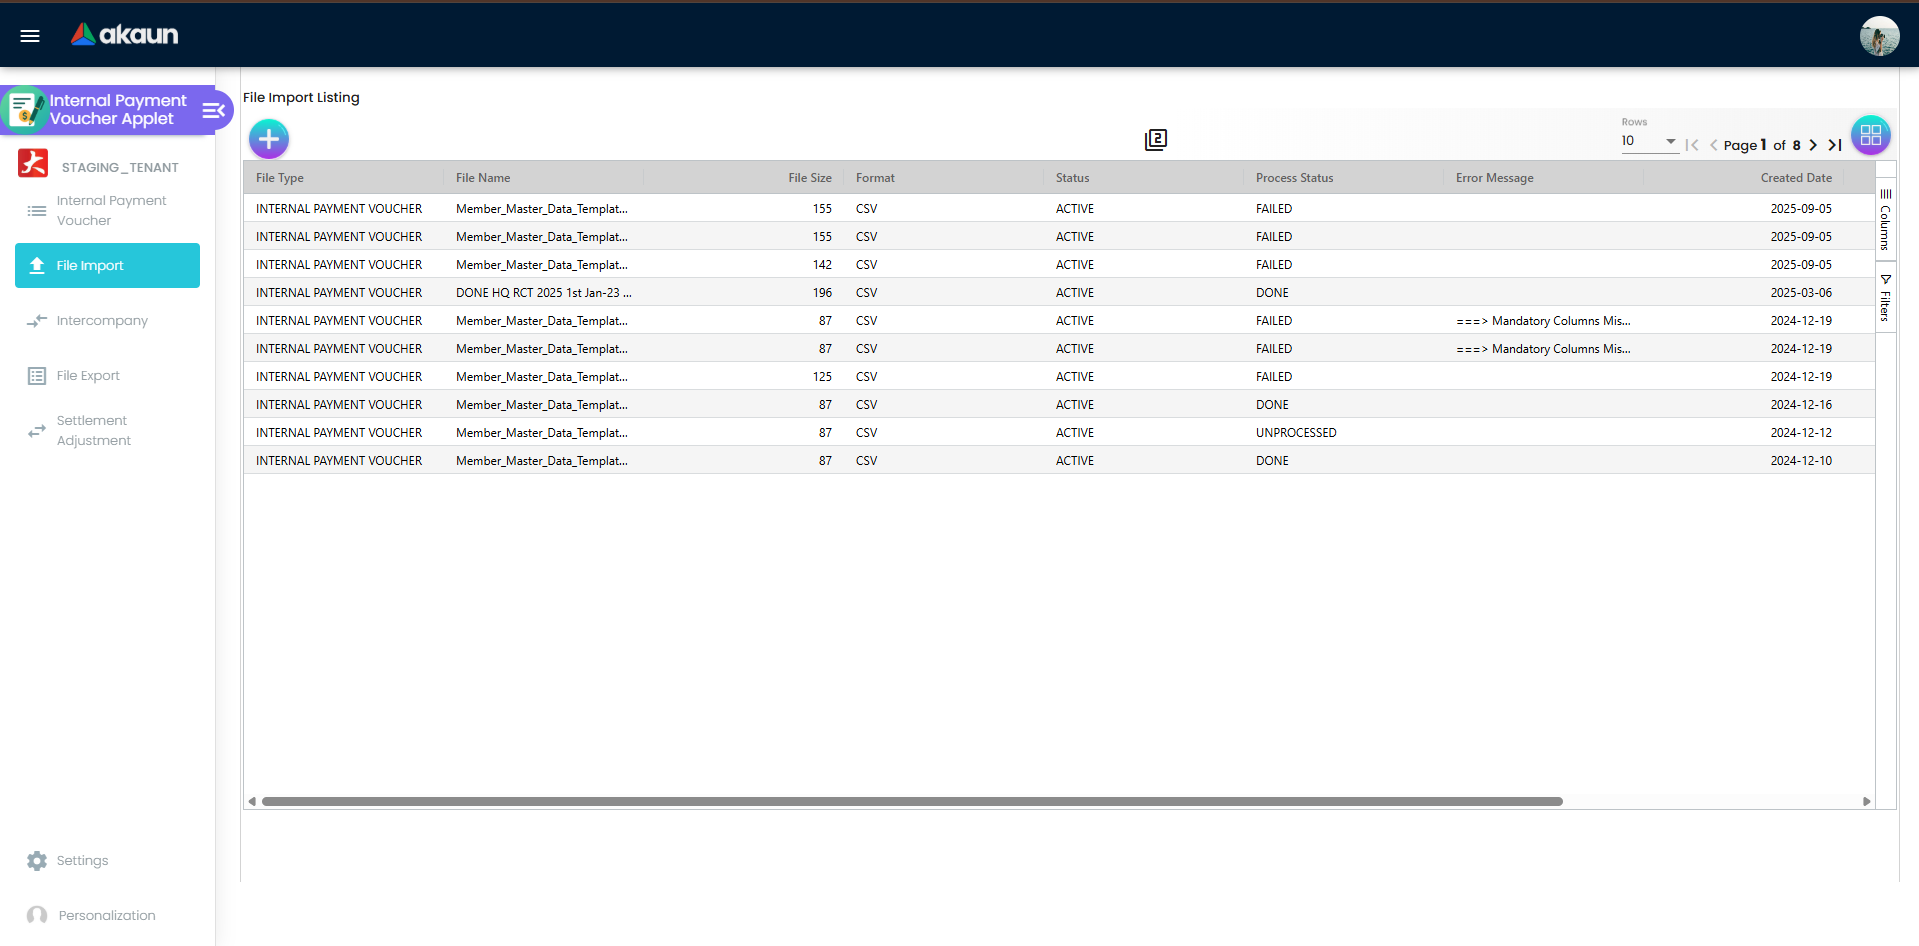
File Import
Bulk upload flow:
- Open File Import.
- Upload source file.
- Review Checking tab.
- Fix errors and re-upload if needed.
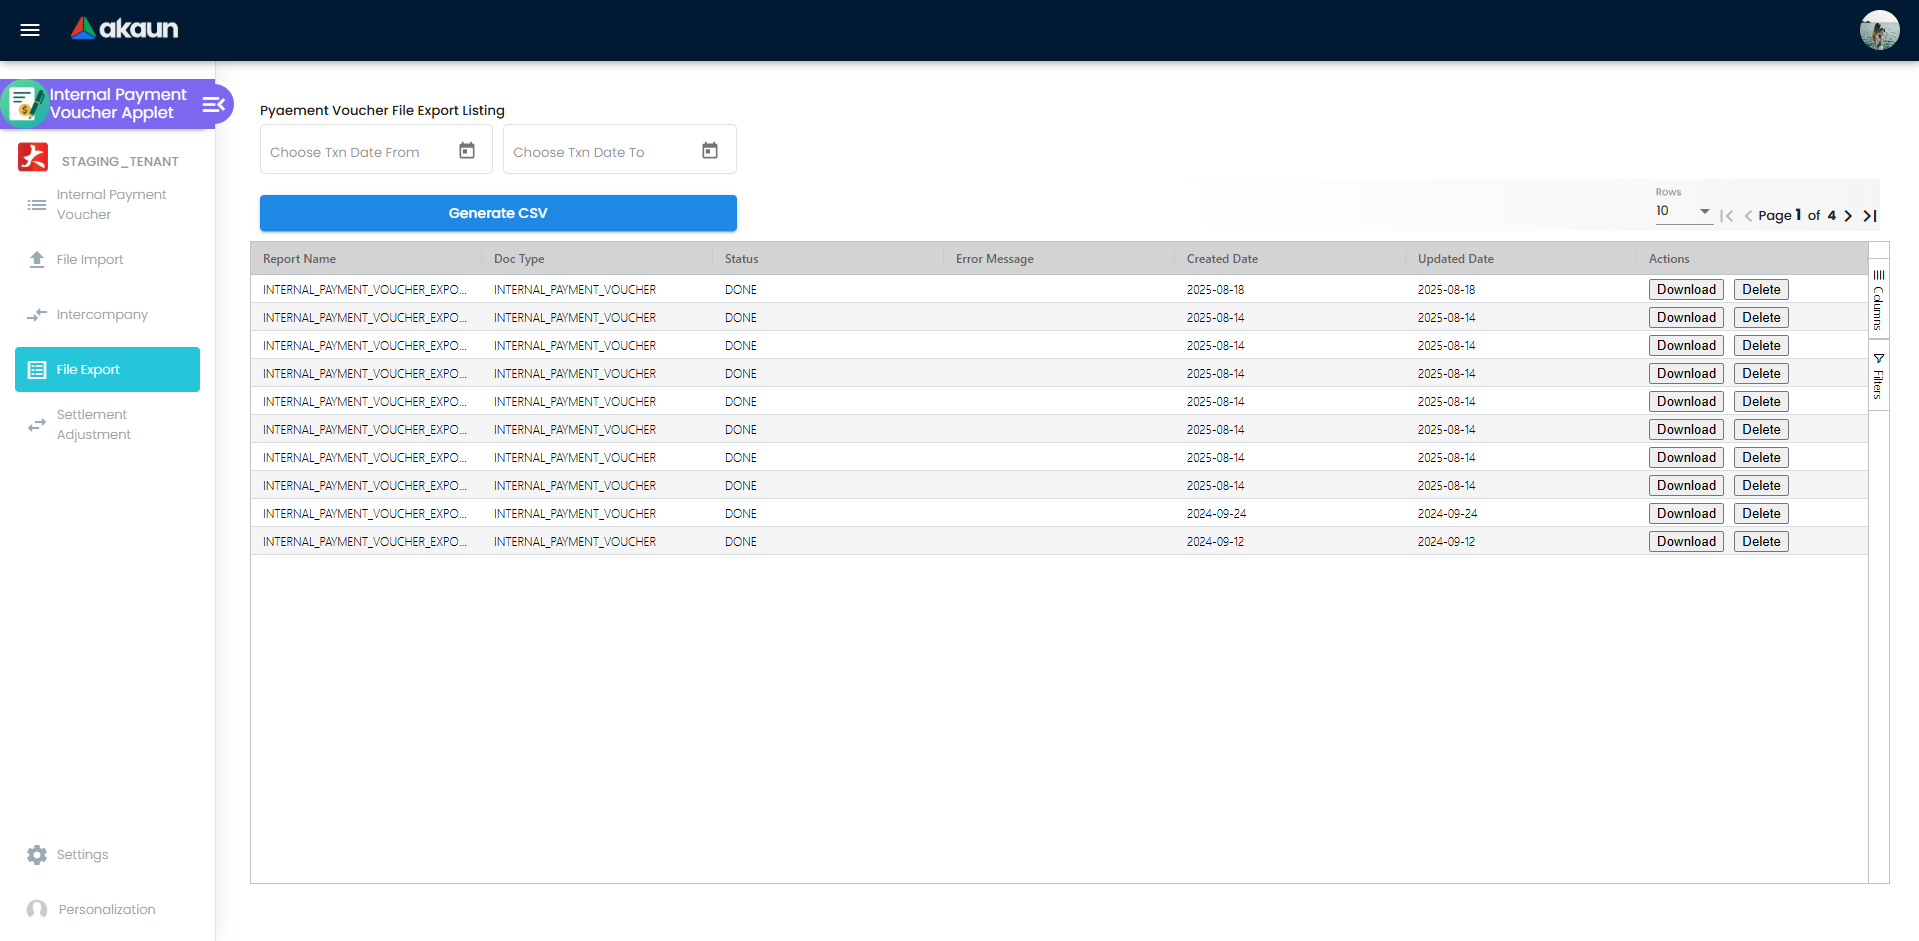
File Export CSV
Export flow:
- Open File Export.
- Select transaction date range.
- Click Generate CSV.
- Download from generated record.
Reporting and Audit
Trace Document
Use Trace Document after finalization to verify posting results such as:
- Journal transactions
- Cashbook transactions
- Tax transactions
- Other configured traces
Applet Log
Use Settings > Applet Log to review:
- Who performed each action
- What changed
- When changes occurred
This supports compliance reviews, troubleshooting, and audit validation.
Configuration and Settings
Configure the applet under Settings:
- Application Settings: Field and tab behavior
- Default Selection: Default values for faster entry
- Printable Format Settings: Print/PDF layout controls
- Email Template: Email body and subject templates
- Feature Visibility: Show/hide features by role
- Permissions: Role and user access control
- Webhook: Outbound integration behavior
- Release Notes: Version change visibility
- Applet Log: Audit history
Related Applets
- Supplier Maintenance Applet: Manage supplier master data used in payment vouchers.
- Chart of Account Applet: Define GL accounts used for postings.
- General Ledger Applet: Review journal impact from finalized vouchers.
- Cashbook Applet: Validate cash and bank movement tied to vouchers.
Summary
The Payment Voucher (Internal) Applet provides a controlled and traceable workflow for internal payment processing. It combines voucher creation, expense capture, payment settlement, corrections, and audit visibility in one operational flow.
FAQ
Q: Why is the Final button disabled? A: Required data may be incomplete, the voucher may be unbalanced, or your role may not have final permission.
Q: When should I use Contra? A: Use Contra only for valid document offset cases, not to force-match totals when expense and payment already match.
Q: What if expense total and payment total are equal? A: If both are equal (for example RM100 and RM100), voucher balance is 0 and no contra is required.
Q: How do I export payment files for the bank? A: Open File Export, select date range, click Generate CSV, then download from generated rows.
Q: Where do I check posting impact? A: Open the voucher and go to Trace Document after finalization.
Q: Why can’t I see Intercompany records? A: You may not have access permissions, or there are no intercompany transactions in your scope.
Q: Is Send Email used for approval workflow? A: No. Send Email is for sending voucher output to supplier or recipient, not for approval routing.