Non Stock and Trade In Applet
Purpose and Overview
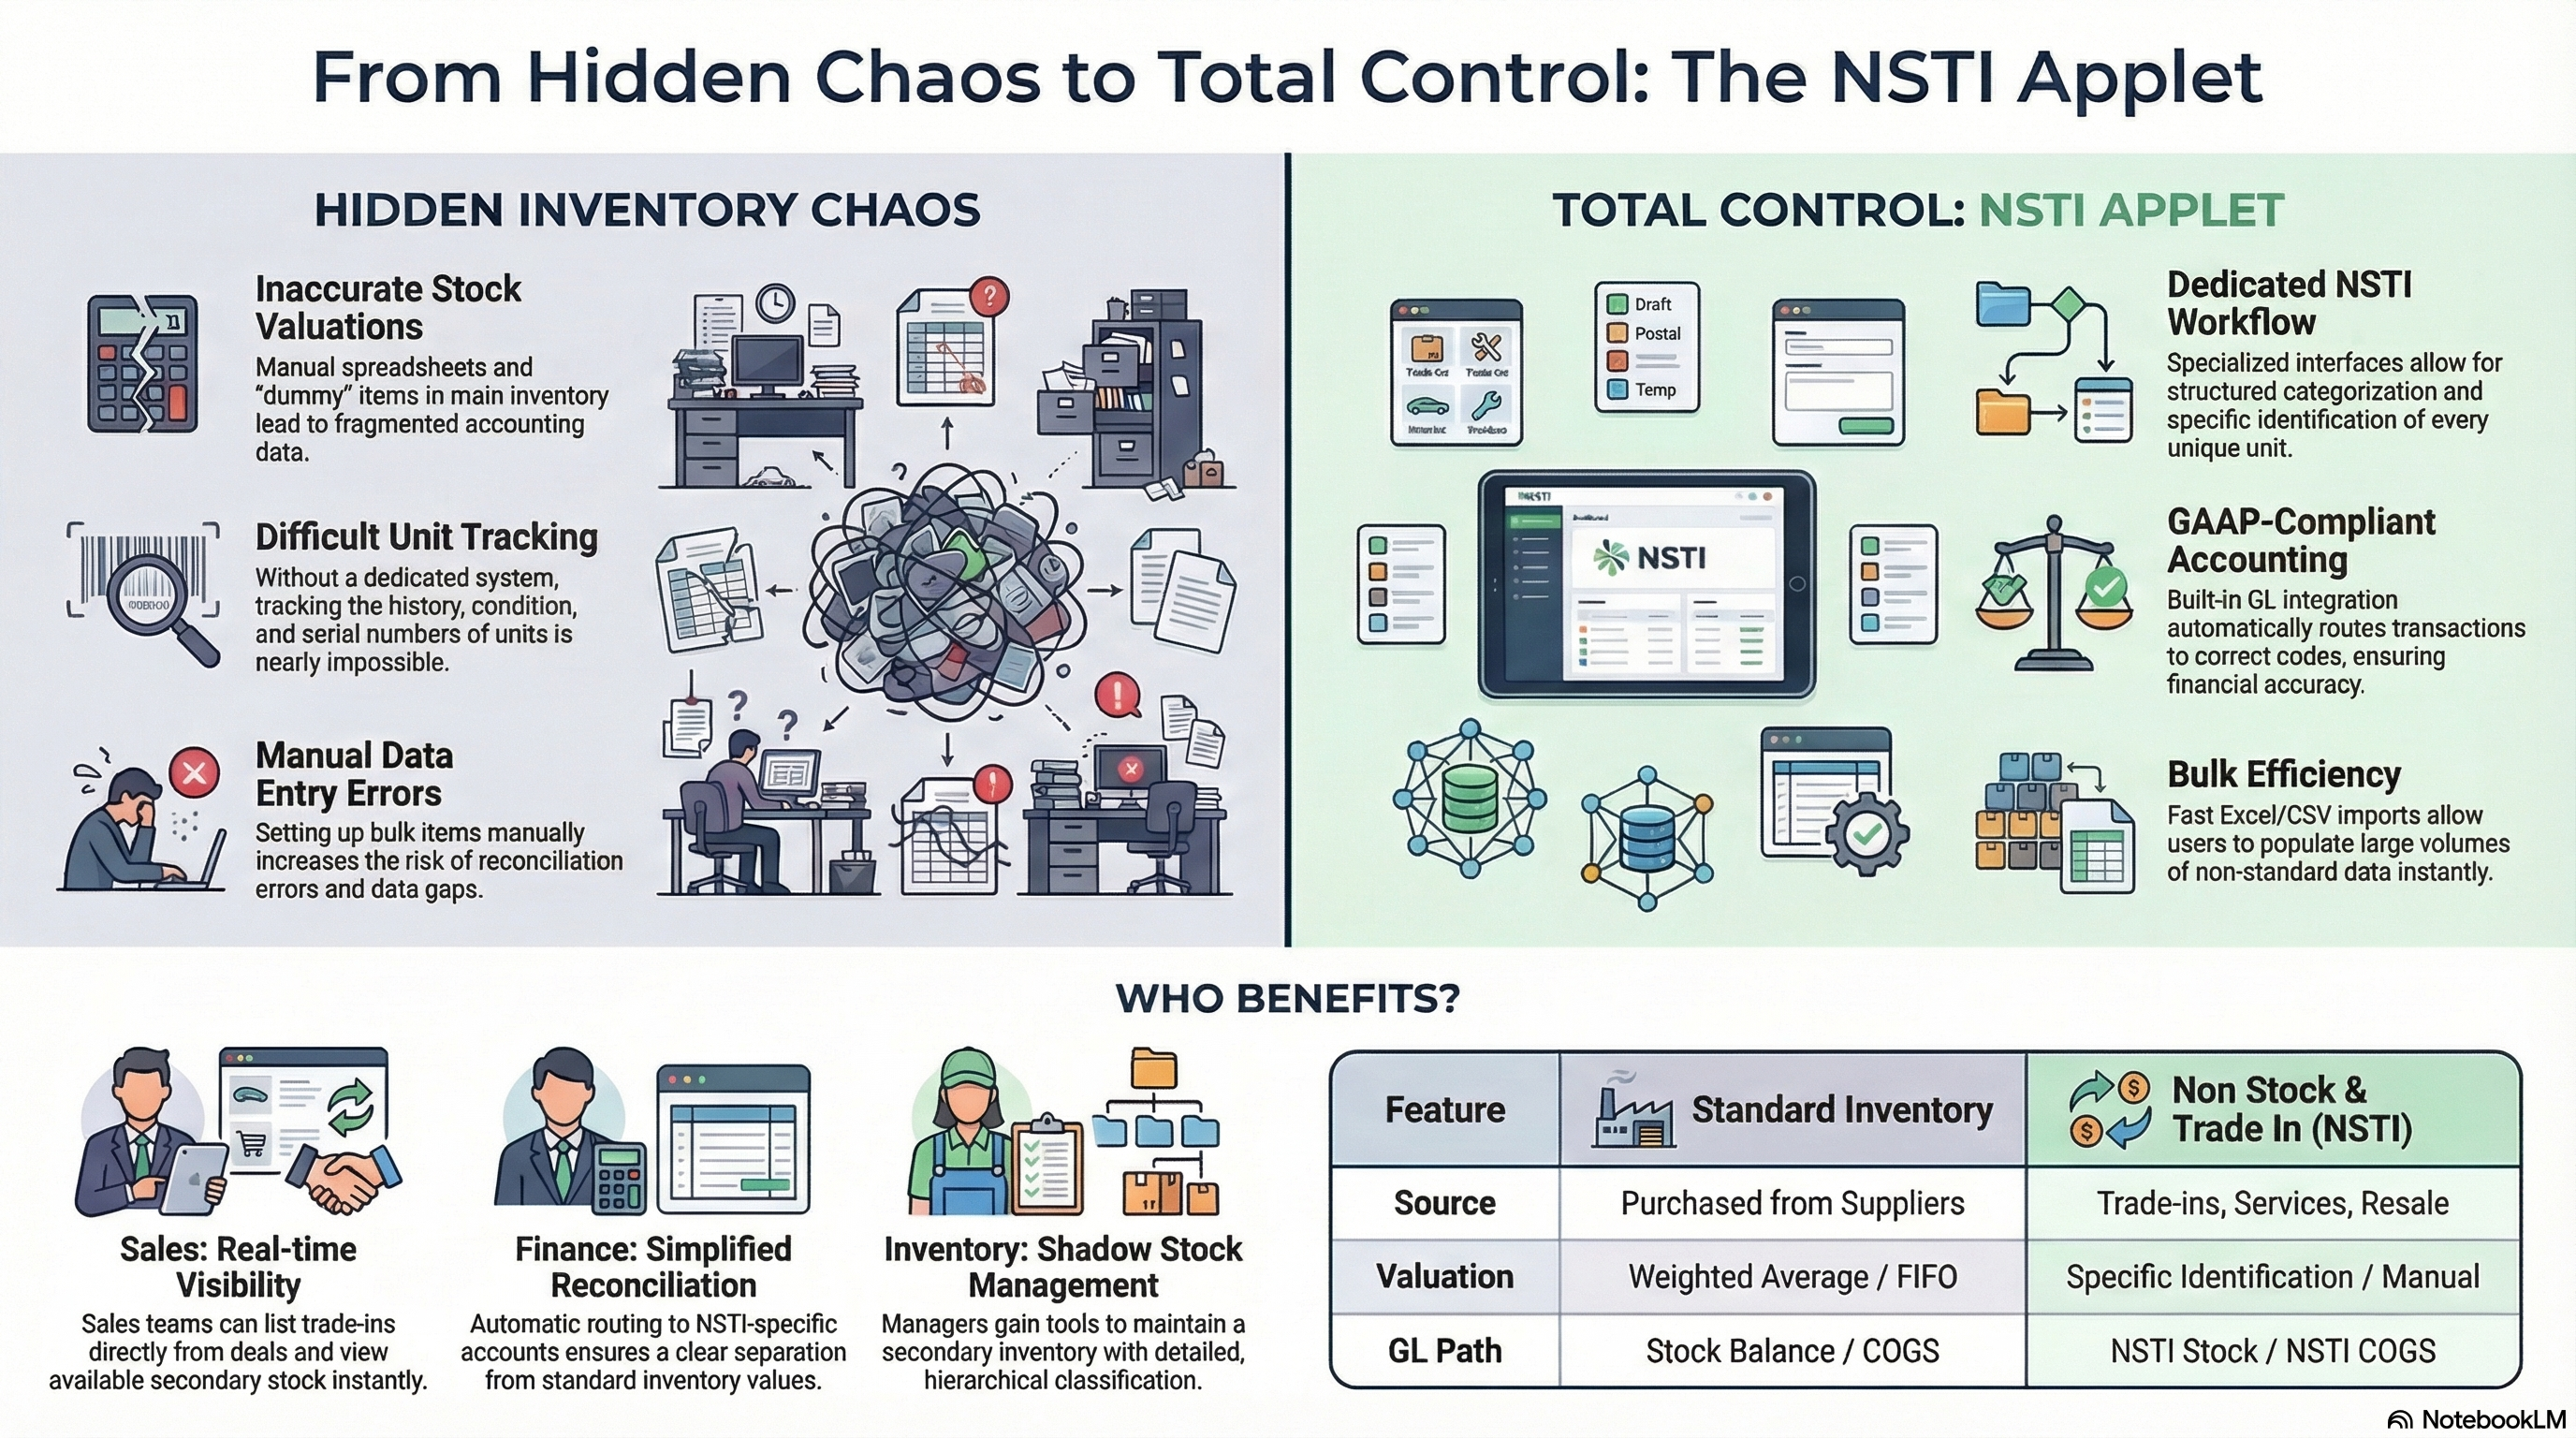
The Non Stock and Trade In (NSTI) Applet is a specialized inventory management tool designed for items that don’t fit into your standard “new stock” workflow. This includes used or refurbished “Trade-In” stock, non-inventory goods, and specialized services that require individual unit tracking.
Who Benefits from This Applet?
Sales Team:
- Quickly create and list trade-in items directly from customer deals
- Access specialized categories for non-standard stock
- Real-time visibility into available trade-in inventory
Finance Team:
- Automatic routing of NSTI transactions to correct GL accounts
- Clear separation between standard inventory and trade-in/non-stock values
- Simplified reconciliation for unique sales scenarios
Inventory Managers:
- Manage a secondary “shadow” inventory for trade-ins
- Detailed classification of non-stock categories
- Tools to import bulk lists of non-standard items
What Problems Does This Solve?
The Hidden Inventory Problem:
Many businesses handle trade-ins or non-stock services using manual spreadsheets or “dummy” items in their main inventory. This leads to:
- Inaccurate stock valuations in the General Ledger
- Difficulty tracking the history and condition of trade-in units
- Fragmented data between sales and accounting
- Manual errors during bulk item setup
The NSTI Applet Solution:
- Dedicated Workflow - Specialized interfaces for creating and editing non-stock and trade-in items
- GAAP-Compliant Accounting - Built-in integration with GL codes specifically for NSTI stock and COGS
- Structured Categories - Flexible category hierarchy designed for secondary market goods
- Bulk Efficiency - Fast imports for large volumes of non-standard data
Key Features Overview
| Menu Item | Description |
|---|---|
| NSTI Stock | The central dashboard for creating and managing individual units. |
| NSTI Category | Define the hierarchical classification structure for your items. |
| File Import | Bulk upload items via standardized CSV/Excel formats. |
| Settings | Global configuration for fields, permissions, and webhooks. |
| Personalization | User-specific dashboard and sidebar customizations. |
Key Concepts
NSTI vs. Standard Inventory
Understanding the difference is critical for accurate reporting:
| Feature | Standard Inventory | Non Stock & Trade In (NSTI) |
|---|---|---|
| Source | Purchased from Suppliers | Trade-ins, Services, Resale |
| Valuation | Weighted Average / FIFO | Specific Identification / Manual |
| Primary Use | Core Business Sales | Secondary Market / One-offs |
| GL Path | Stock Balance / COGS | NSTI Stock / NSTI COGS |
Category Hierarchy
The Applet uses a structured approach to classification:
- NSTI Category: The high-level grouping (e.g., “Mobile Phones”, “Refurbished Laptops”).
- NSTI Stock: The individual item or unit (e.g., “iPhone 13 - Grade B - Serial #12345”).
Quick Start Guide
Set up your NSTI workflow in three easy steps.
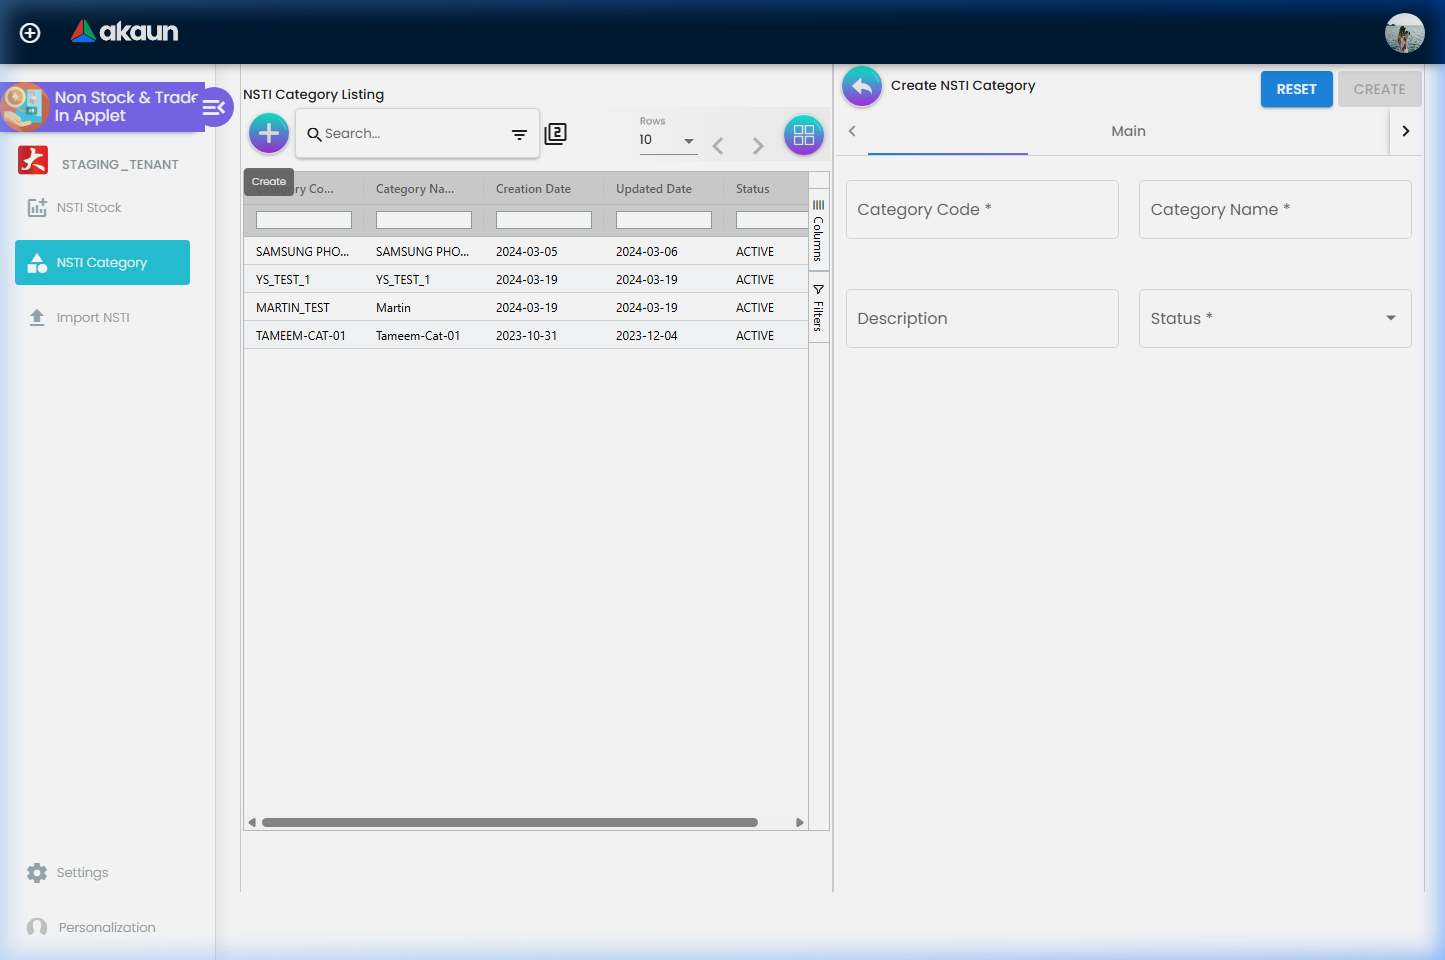
For Admins: Category Setup
Goal: Create the classification system for your items.
- Navigate to NSTI Category Listing.
- Click Create to add a new category.
- Define the Name and optional Description.
- (Advanced) Link to a parent category to build a hierarchy.
What happens next? These categories will now appear as options when users create new stock items.
Tip
Pro Tip: Use clear, broad categories (e.g., “Handsets”, “Labor Fees”) to keep your reporting clean and avoids over-granularity.
For Sales/Inventory: Adding Stock
Goal: Put an item into the system.
- Navigate to NSTI Stock Listing.
- Click Create to open the edit form.
- Select the appropriate Category.
- Enter the item details (Code, Name, Description).
- Save to add it to your listing.
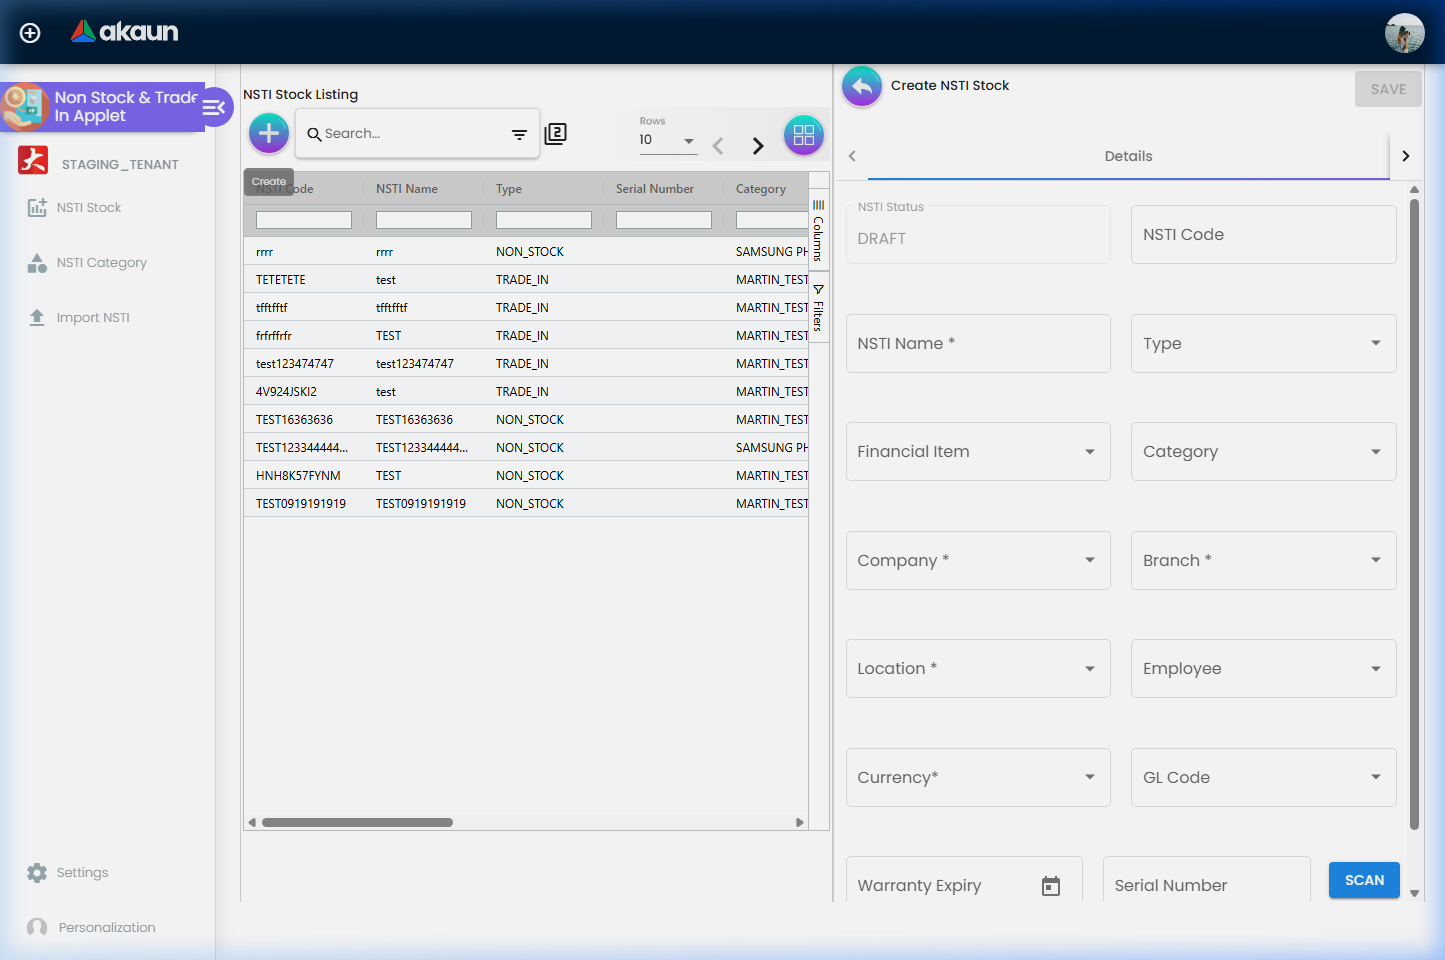
What happens next? The item is now available for selection in Sales Invoices or specialized inventory vouchers.
Tip
Pro Tip: If the item has a serial number (like a phone), enter it in the Serial Number field to ensure specific tracking of that unit.
For Finance: Verifying the Link
Goal: Ensure transactions hit the right accounts.
- Open the Chart of Account Applet.
- Go to Companies > Default GL Codes.
- Ensure the NSTI (Closing + COGS) accounts are mapped under the Stock tab.
What happens next? The system will automatically use these accounts for any transaction involving an NSTI item.
Important
Critical: If these mappings are missing, the system will error out during the posting of any invoice containing NSTI items.
Feature Sections
The NSTI Stock Listing is your control center for all individual trade-in units and specialized items.
Key Listing Columns:
- NSTI Code/Name: Core identifiers for the item.
- Type: Classification of the stock entry.
- Serial Number: Unique hardware identifier (critical for handsets/laptops).
- Category: The hierarchical grouping assigned to the item.
- Branch/Location: Where the item is physically stored.
- Amount: The purchase price including tax.
- Stock Balance: Current quantity available in the system.
- Posting Status: Indicates if the item is in
DRAFT,TEMP, orPOSTAL.
Advanced Edit Fields:
- Financial Item: Link to specific GL-mapped accounts.
- Employee: Assign ownership or responsibility for a unit.
- GL Code: Specific override for accounting entries.
- Warranty Expiry: Track remaining protection for refurbished units.
- Pricing Trails: View-only history of Purchase vs. Sales prices.
Category Management
Organize your items to make them searchable and reportable.
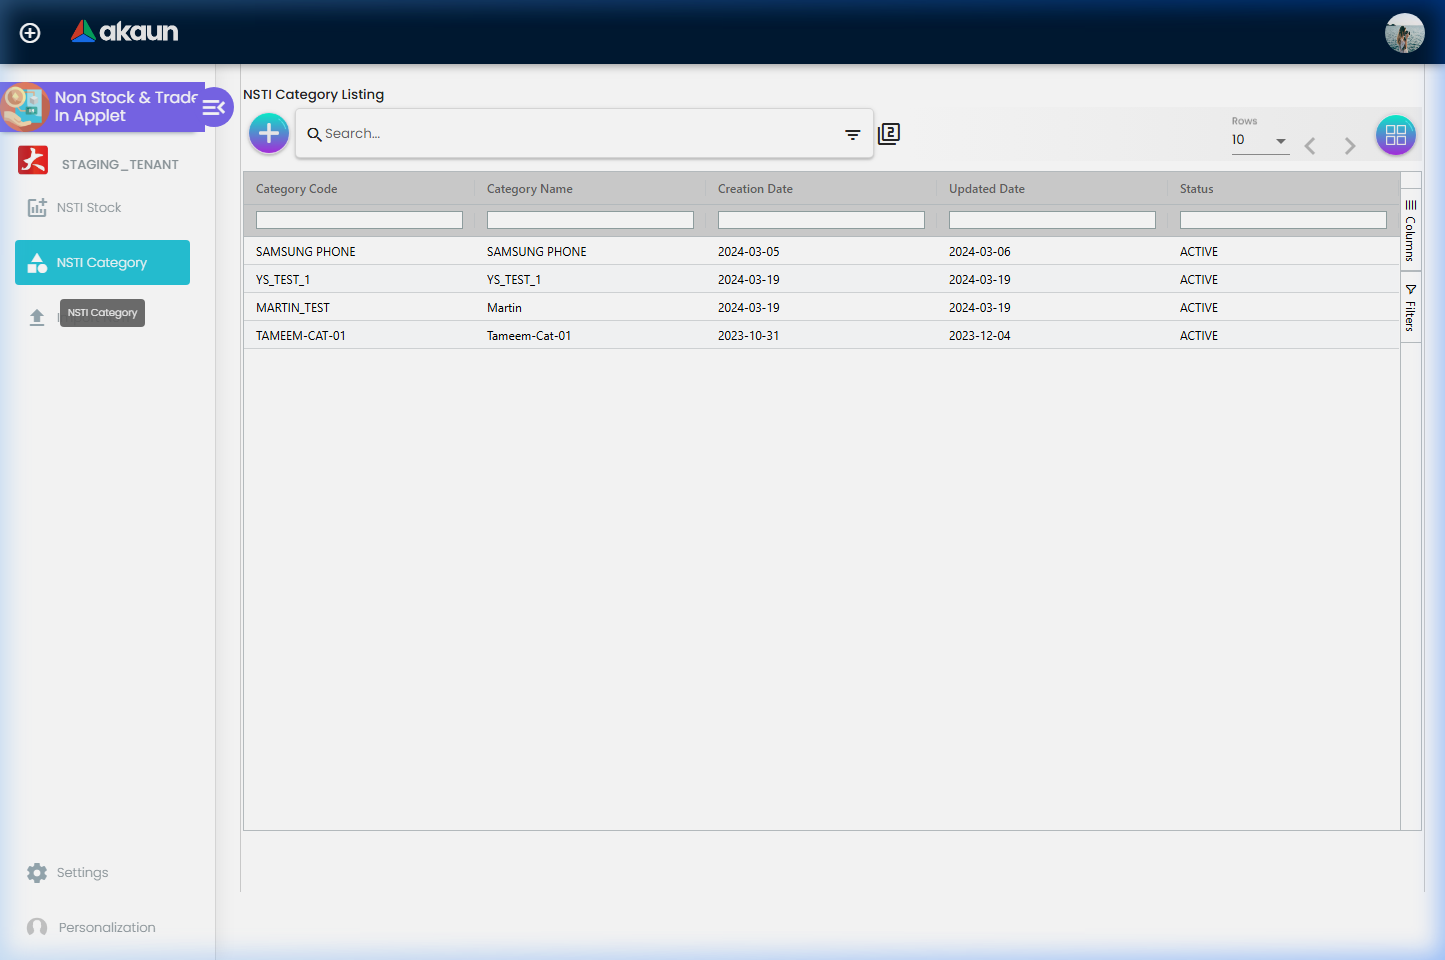
Key Fields:
- Code: Unique identifier for the category.
- Name: User-friendly name (e.g., “Warranty Services”).
- Parent Category: For nested organization (Electronic -> Handheld -> Phone).
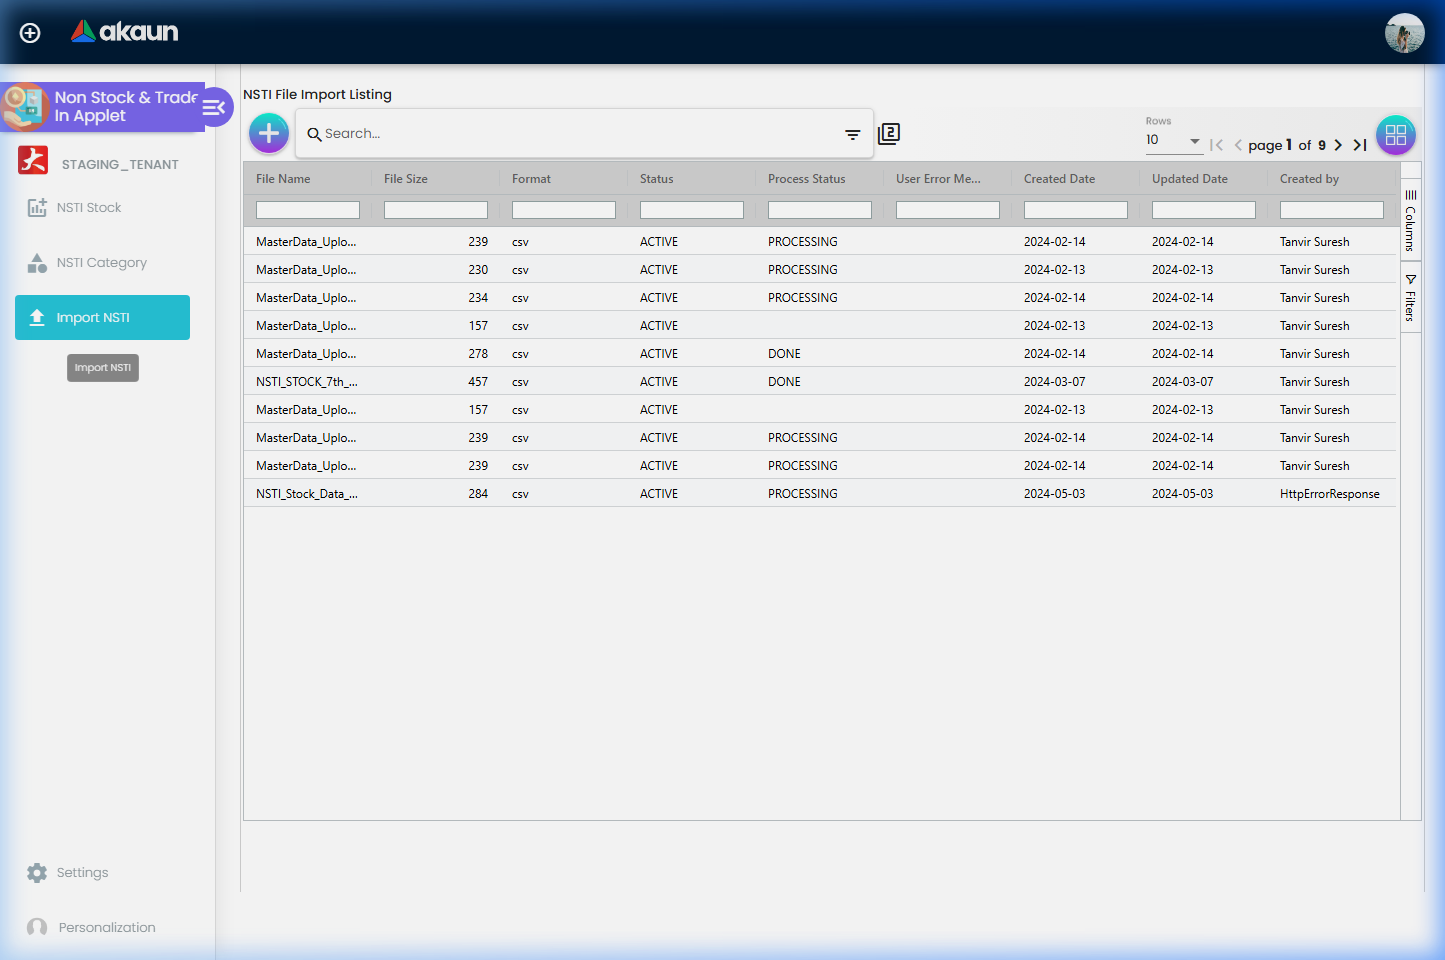
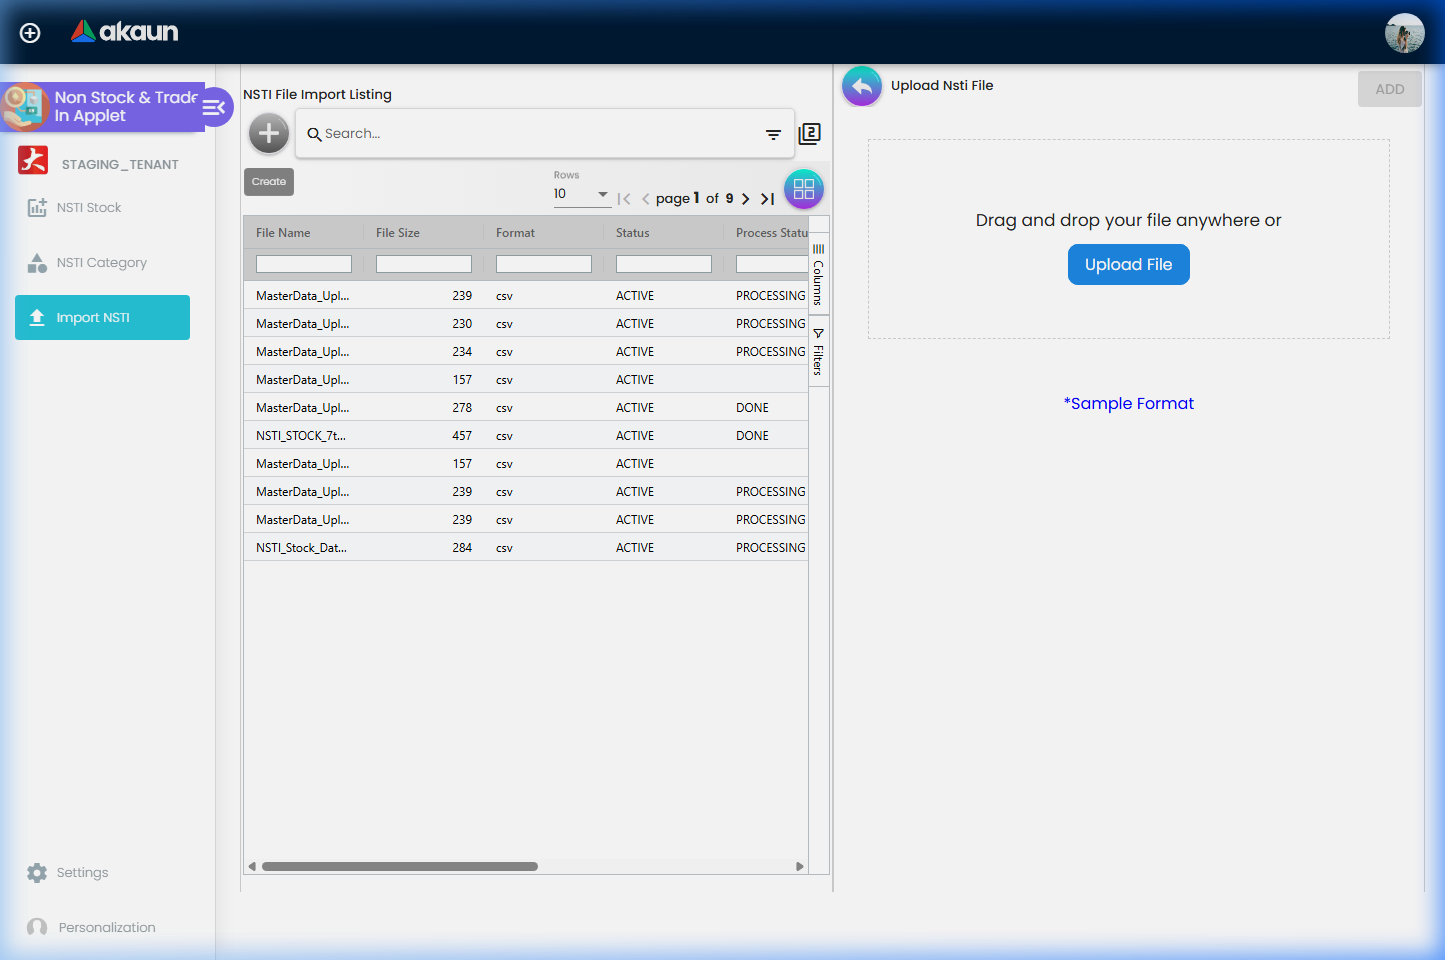
File Import Workflows
Avoid manual entry when dealing with large volumes of data.
- Navigate to File Import.
- Download the official Sample Format.
- Prepare your CSV/Excel file according to the template.
- Upload and click Add to populate your stock list instantly.
- Review the Import Listing to monitor process status and error logs.
User Scenarios & Workflows
Scenario 1: Electronic Trade-In
A customer wants to trade in their iPhone 12 for a new iPhone 15.
- The Sales rep checks the NSTI Stock Listing to see if a similar unit exists.
- They click Create and select the “Trade-In Handsets” category.
- They record the serial number and condition in the description.
- The item is saved with a valuation (e.g., RM 1,200), which is then applied as a credit in the sales applet.
Scenario 2: One-Off Specialized Service
A company provides a one-time “On-site Server Configuration” service.
- Instead of creating a permanent inventory item, the admin creates an NSTI Stock item.
- They category it under “Professional Services”.
- The item is issued on an invoice, and the revenue is automatically routed to the NSTI Revenue account.
Scenario 3: Bulk Stock Migration
A new branch is opening, and they have 500 second-hand units to register.
- The manager goes to Import NSTI.
- They download the Sample Format and fill it with all 500 units.
- They upload the file, and within minutes, the entire collection is live and searchable.
Management Tips
For Sales Teams
- ✓ Use Serial Numbers: Always record serial numbers for trade-ins to prevent warranty fraud.
- ✓ Standardize Names: Use a consistent naming convention (e.g., [Brand] [Model] [Condition]) for better searchability.
- ✓ Check Categories: Before creating a new item, ensure it doesn’t already exist under a generic code.
For Finance & Admins
- ✓ Audit GL Mappings: Monthly, check the Chart of Account Applet to ensure NSTI accounts haven’t been accidentally changed.
- ✓ Review Categories: Periodically merge redundant categories to maintain a clean hierarchy.
- ✓ Monitor “Draft” Items: Ensure items in
DRAFTstatus are finalized or deleted to keep the listing accurate.
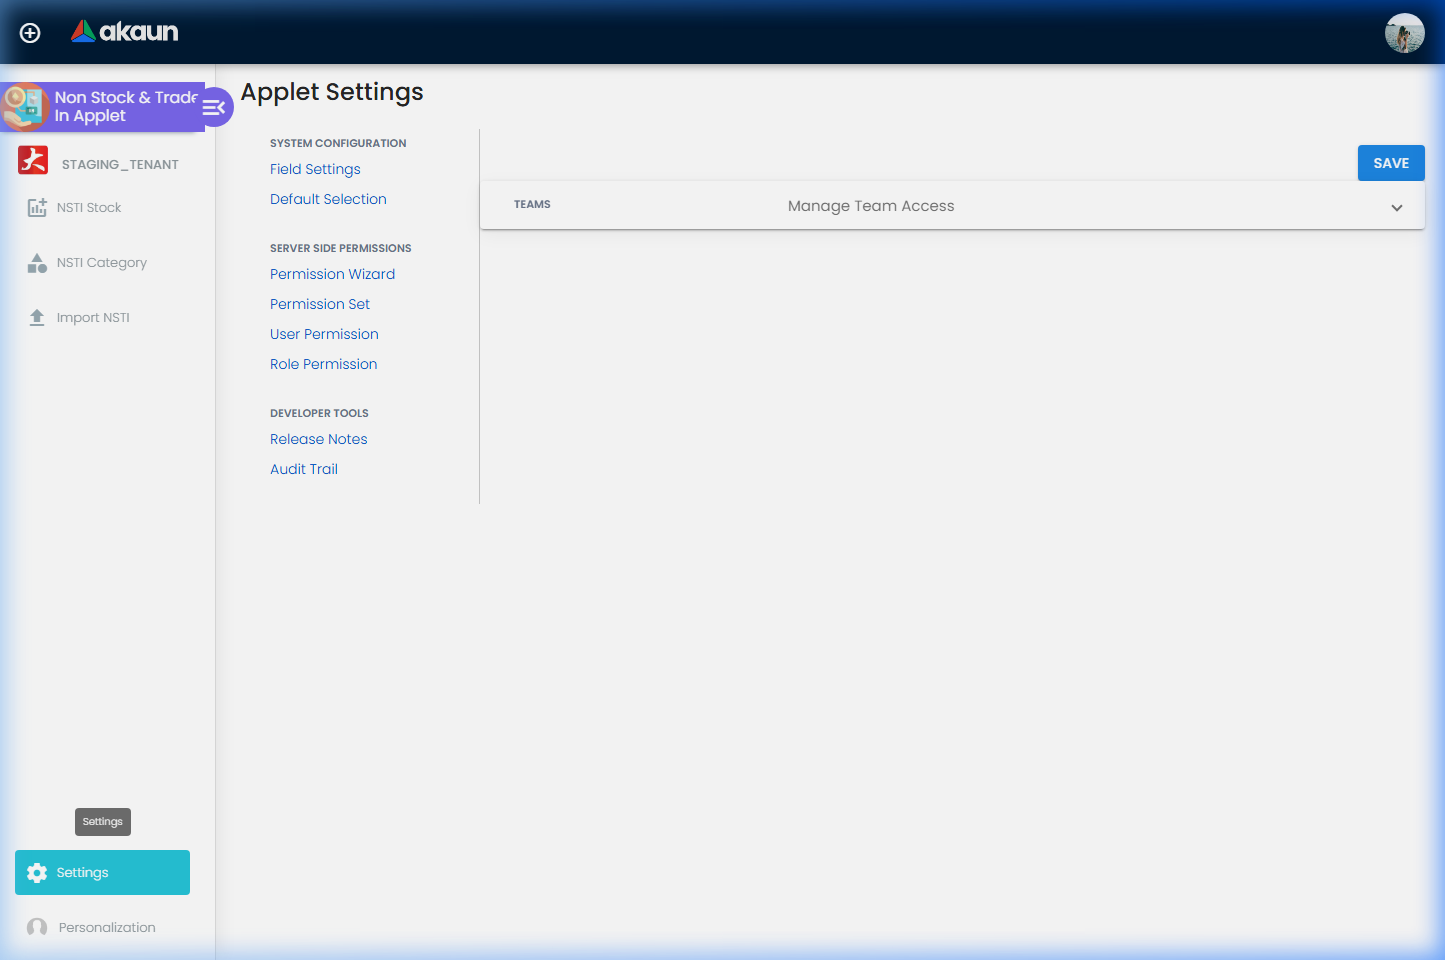
Configuration & Settings
The NSTI Applet’s behavior is influenced by global settings found in the Organization Applet:
| Setting | Purpose |
|---|---|
| DEFAULT_NSTI_GL_CODE | Defines where revenue/COGS for these items is recorded by default. |
| ALLOW_NESTED_NSTI_CATEGORIES | Enables or disables the creation of sub-categories. |
Common Mistakes & Troubleshooting
| Problem | Cause | Solution |
|---|---|---|
| Invoice “Posting Error” | Missing Default GL Code for NSTI. | Go to COA Applet > Companies > Default GL Codes and map the NSTI fields. |
| Duplicate Stock Code | Stock codes must be unique across the system. | Append a suffix or serial number to the code to ensure uniqueness. |
| Category Not Showing | Category might be deactivated. | Go to NSTI Category, find the category, and set Status to ACTIVE. |
FAQ
What qualifies as an NSTI item?
Any item that is not part of your standard vendor-sourced inventory. This includes used products traded in by customers, specific services that require code tracking, or one-off “as-is” sales.
How is NSTI different from standard Inventory?
Standard inventory is usually tracked via automated purchase orders and weighted average costs. NSTI is designed for more manual control, often used for items where each unit has a unique history (like trade-ins).
Can I import items from Excel?
Yes! Use the Import NSTI feature in the sidebar to bulk-upload your items using our CSV template.
How do I link an NSTI item to the GL?
Links are handled automatically via the Default GL Codes in the Chart of Account Applet. Ensure your “NSTI” accounts are mapped there, and the system handles the rest.
Can I track serial numbers for NSTI items?
Absolutely. We recommend entering the unique serial number in the Serial Number or Code field during creation to enable pinpoint tracking of that specific unit’s lifecycle.
What happens if I delete an NSTI category?
Items already linked to that category will remain, but you will not be able to filter for that category or create new items under it. It is generally better to set the status to INACTIVE rather than deleting.