Stock Transfer Applet
Purpose and Overview
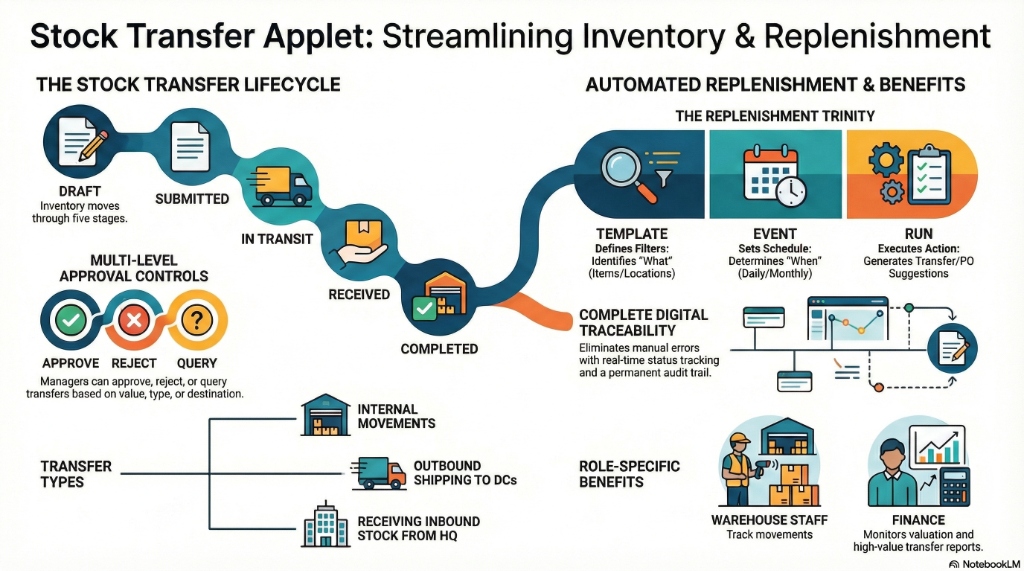
The Stock Transfer Applet enables seamless movement of inventory between locations, warehouses, and bins within your organization. It provides complete visibility and control over internal stock transfers with approval workflows.
Key Features Overview
Who Benefits from This Applet?
Warehouse Staff:
- Create and process stock transfers
- Track items being transferred
- Receive incoming transfers
- Manage bin-level movements
Inventory Managers:
- Monitor inter-location stock movements
- Approve transfer requests
- Ensure inventory accuracy across locations
- Track transfer performance metrics
Operations Teams:
- Coordinate stock balancing between locations
- Manage seasonal inventory distribution
- Handle urgent stock replenishment
- Monitor transfer lead times
Finance Teams:
- Track inventory valuation across locations
- Ensure accurate stock costing
- Monitor high-value transfers
- Generate transfer reports
What Problems Does This Solve?
Traditional Stock Transfer Challenges:
- Manual transfer tracking prone to errors
- No visibility into stock in transit
- Difficult to trace movement history
- Delayed receiving and posting
- Inconsistent transfer procedures
The Stock Transfer Solution:
- Digital workflows - Create and approve transfers electronically
- Real-time tracking - See transfer status at every stage
- Complete traceability - Full audit trail of all movements
- Approval controls - Multi-level approval for transfers
- Integration ready - Links to inventory and accounting systems
Key Features Overview
Key Concepts
Stock Transfer Types
| Type | Description | Example |
|---|---|---|
| Internal Transfer | Between locations within same company | Main Warehouse → Branch Store |
| Outbound Transfer | From your location to another | HQ Warehouse → Regional DC |
| Inbound Transfer | Receiving from another location | Receiving from HQ |
Transfer Status Flow
Draft → Submitted → In Transit → Received → Completed
                 ↓
              Rejected (if failed approval)
Status Definitions:
- Draft: Transfer created but not yet submitted
- Submitted: Awaiting approval or processing
- In Transit: Goods have left source location
- Received: Destination has acknowledged receipt
- Completed: Transfer fully processed and posted
- Rejected: Transfer was rejected by approver
Quick Start Guide
For Warehouse Staff: Create a Stock Transfer
Goal: Transfer stock from your location to another in 5 steps.
- Navigate: Go to Stock Transfer Listing from the sidebar
- Create Header: Click "+" → Enter transfer details:
- Source Location: Your warehouse/location
- Destination Location: Where items are going
- Transfer Date: Date of transfer
- Reference: Transfer reference number
- Add Items:
- Click “Add Line”
- Select Item Code from dropdown
- Enter Quantity to transfer
- Select Bin (if applicable)
- Repeat for all items
- Review: Verify all items and quantities
- Submit: Click Submit → Transfer goes for approval/processing
What happens next? Transfer is processed and items move to destination.
For Managers: Approve Transfers
Goal: Review and approve pending stock transfers.
- Check Pending: Go to Pending Approvals (notification badge shows count)
- Review Details:
- Source and destination locations
- Items and quantities being transferred
- Transfer justification/notes
- Decide:
- Approve: Click ✓ Approve → Transfer proceeds
- Reject: Click ✗ Reject → Add reason → Transfer cancelled
- Query: Request more information from requestor
For Admins: Configure Transfer Settings
Goal: Set up stock transfer options and workflows.
- Approval Settings: Define who can approve transfers
- Location Mapping: Configure allowed transfer routes
- Default Settings: Set up default values for new transfers
- Permissions: Control who can create/edit/delete transfers
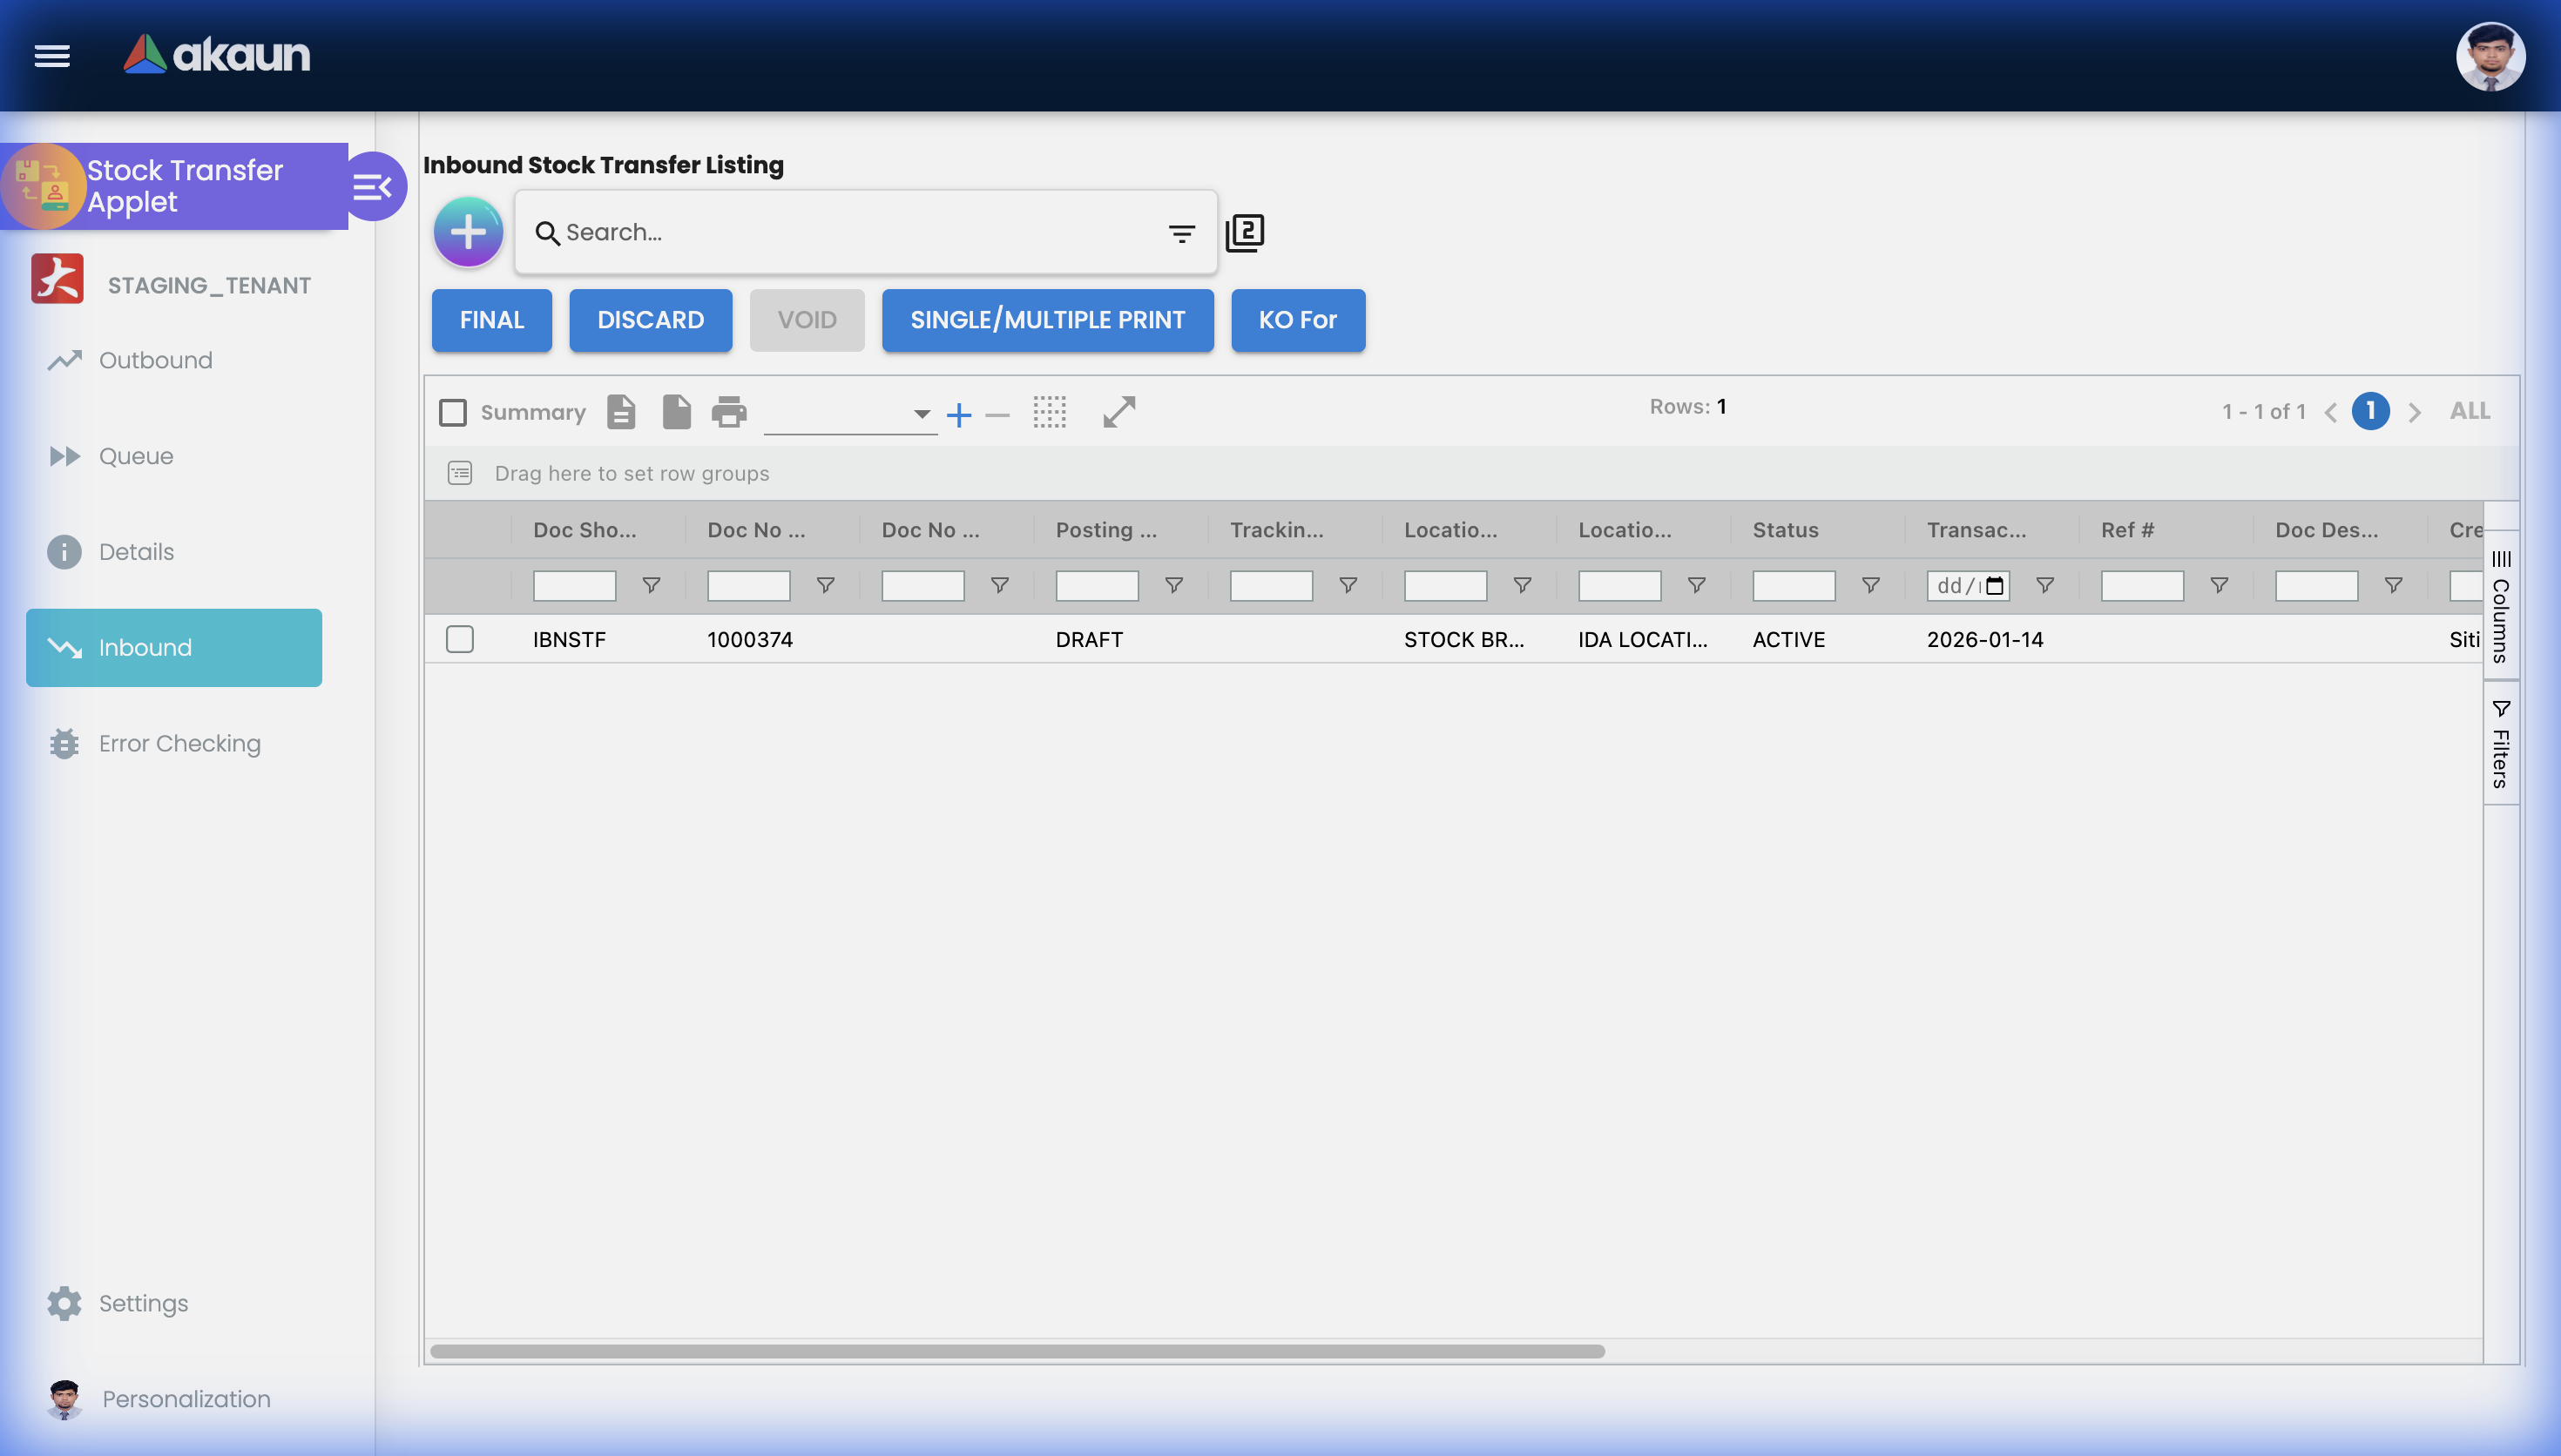
Stock Transfer Listing
Main Transfer Listing
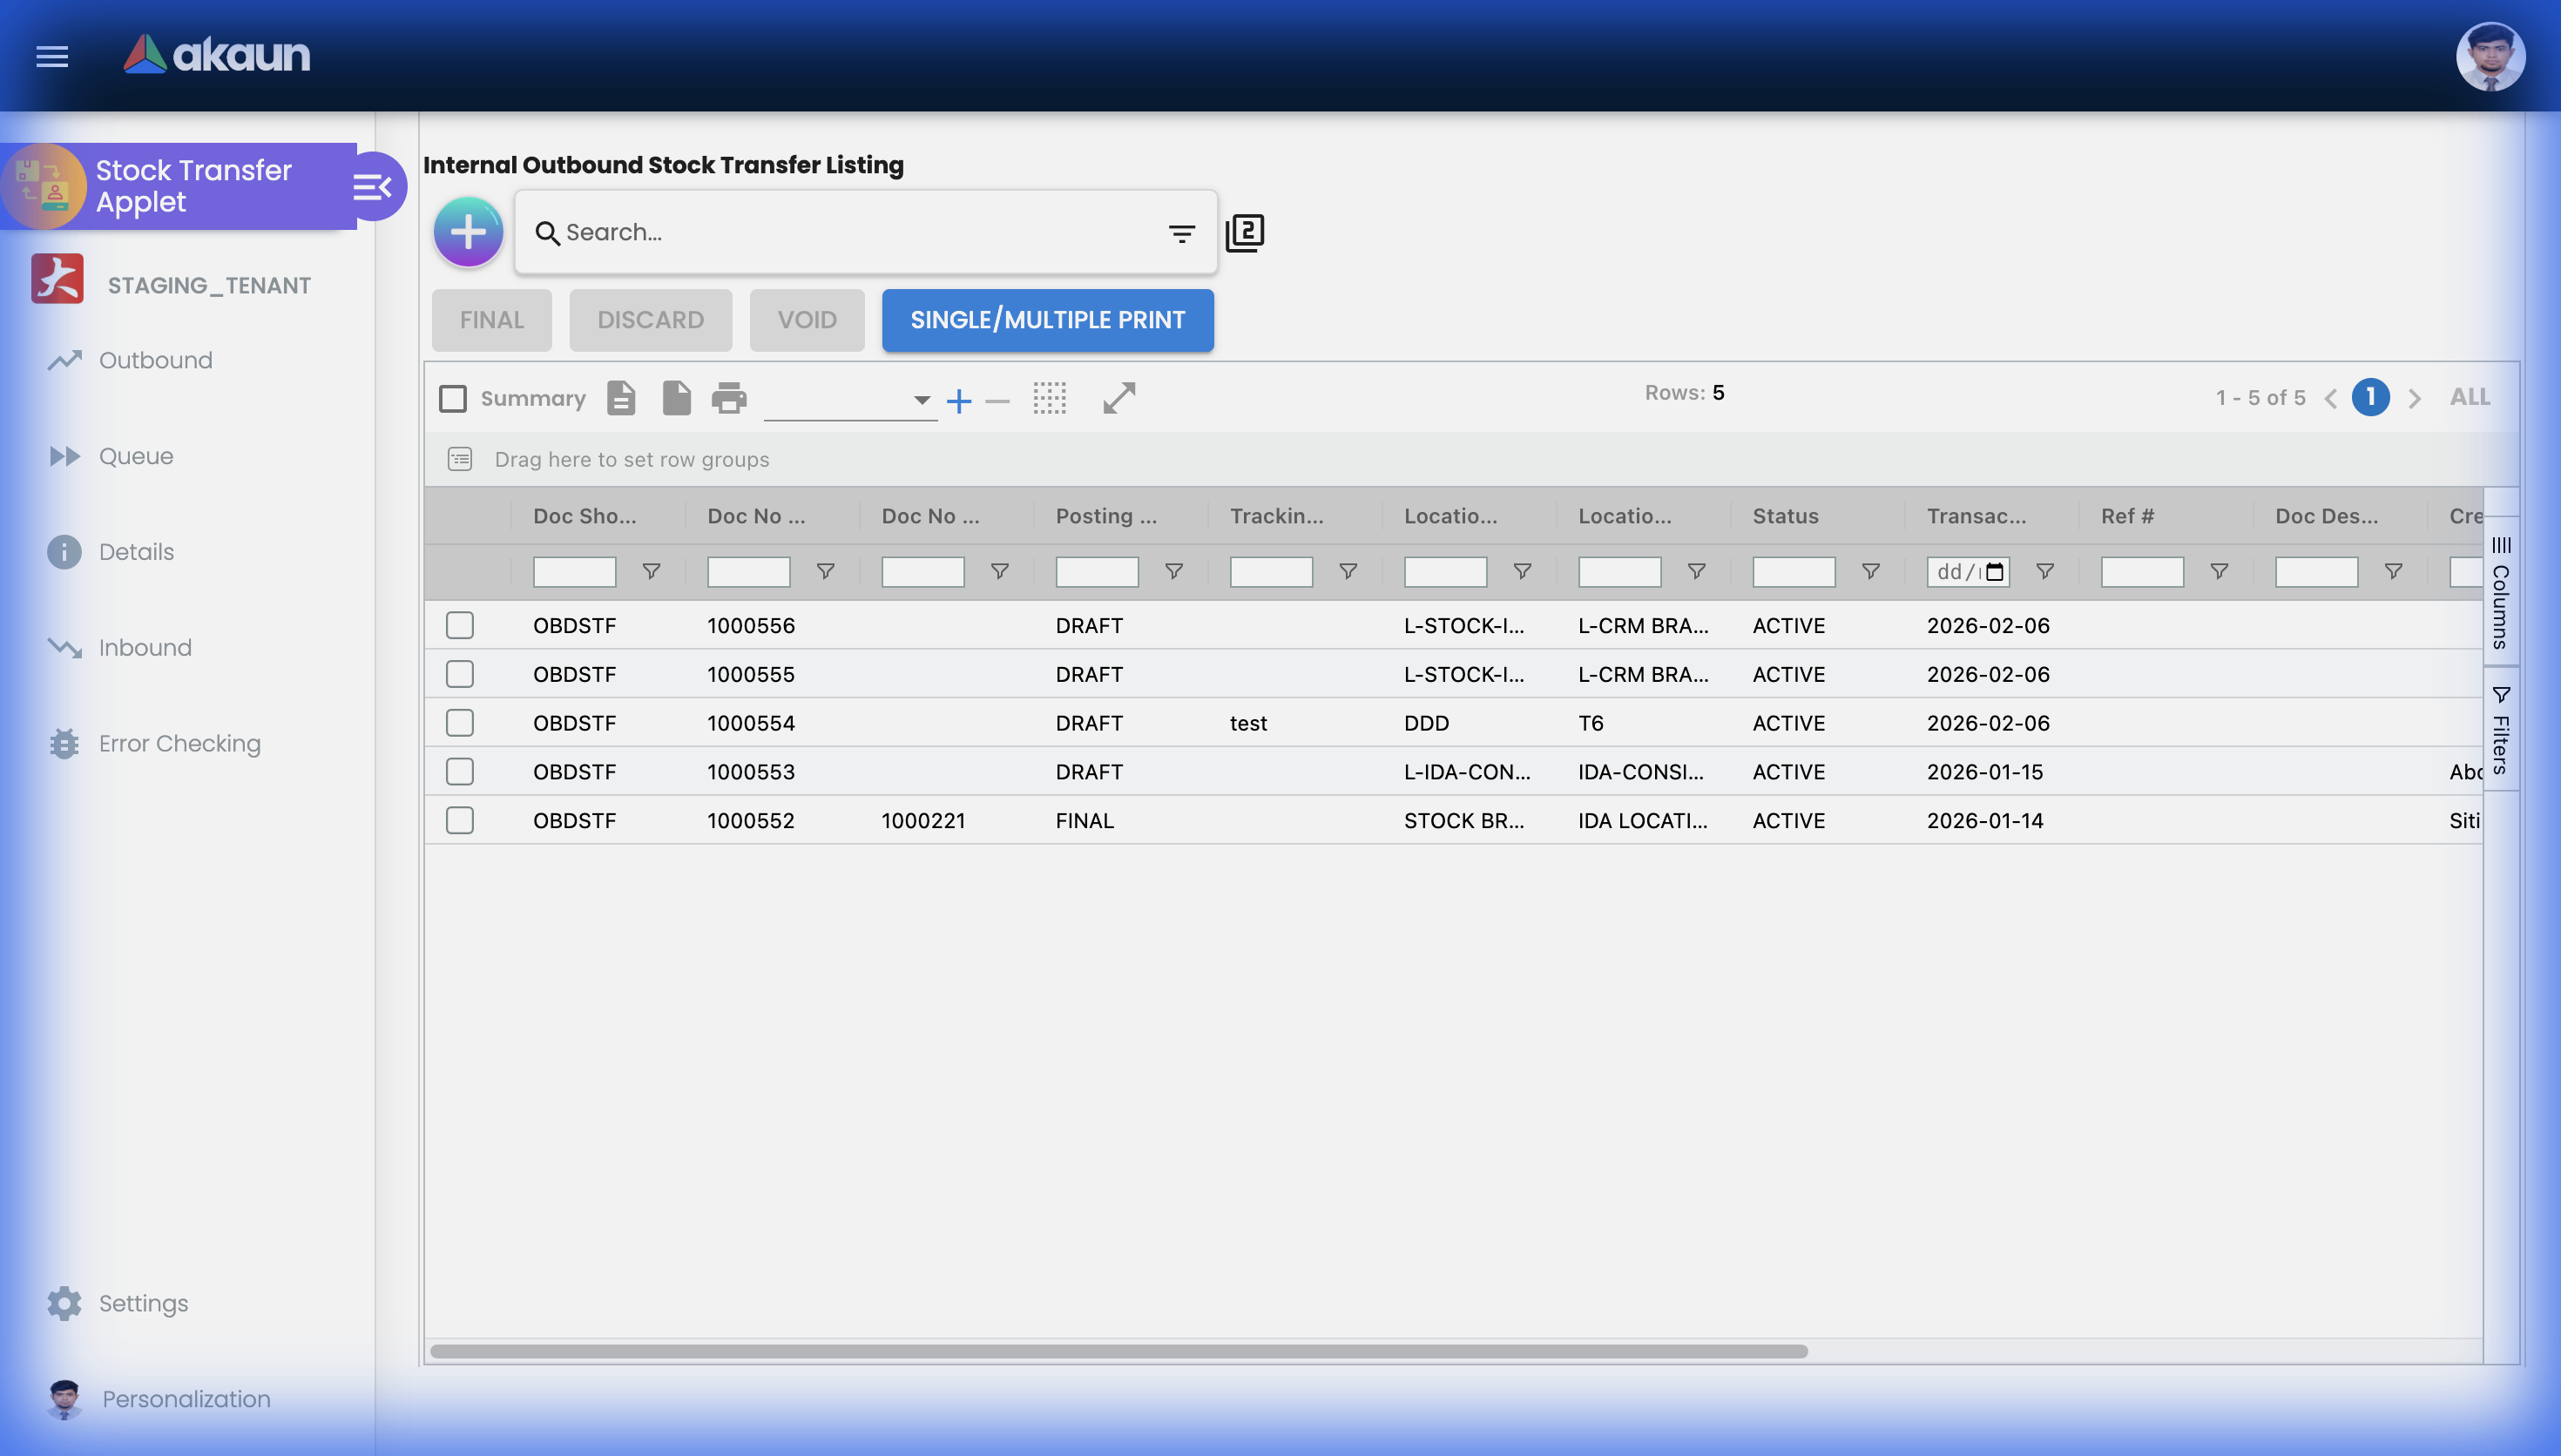
View all stock transfers with filters for:
- Status - Draft, Submitted, In Transit, Completed
- Date Range - Filter by transfer date
- Source Location - Where transfers originate
- Destination Location - Where transfers go
Key Columns
| Column | Description |
|---|---|
| Transfer No | Unique transfer identifier |
| Date | Transfer date |
| Source | Origin location/warehouse |
| Destination | Receiving location/warehouse |
| Status | Current transfer status |
| Items | Number of line items |
| Total Qty | Total quantity being transferred |
Create Stock Transfer
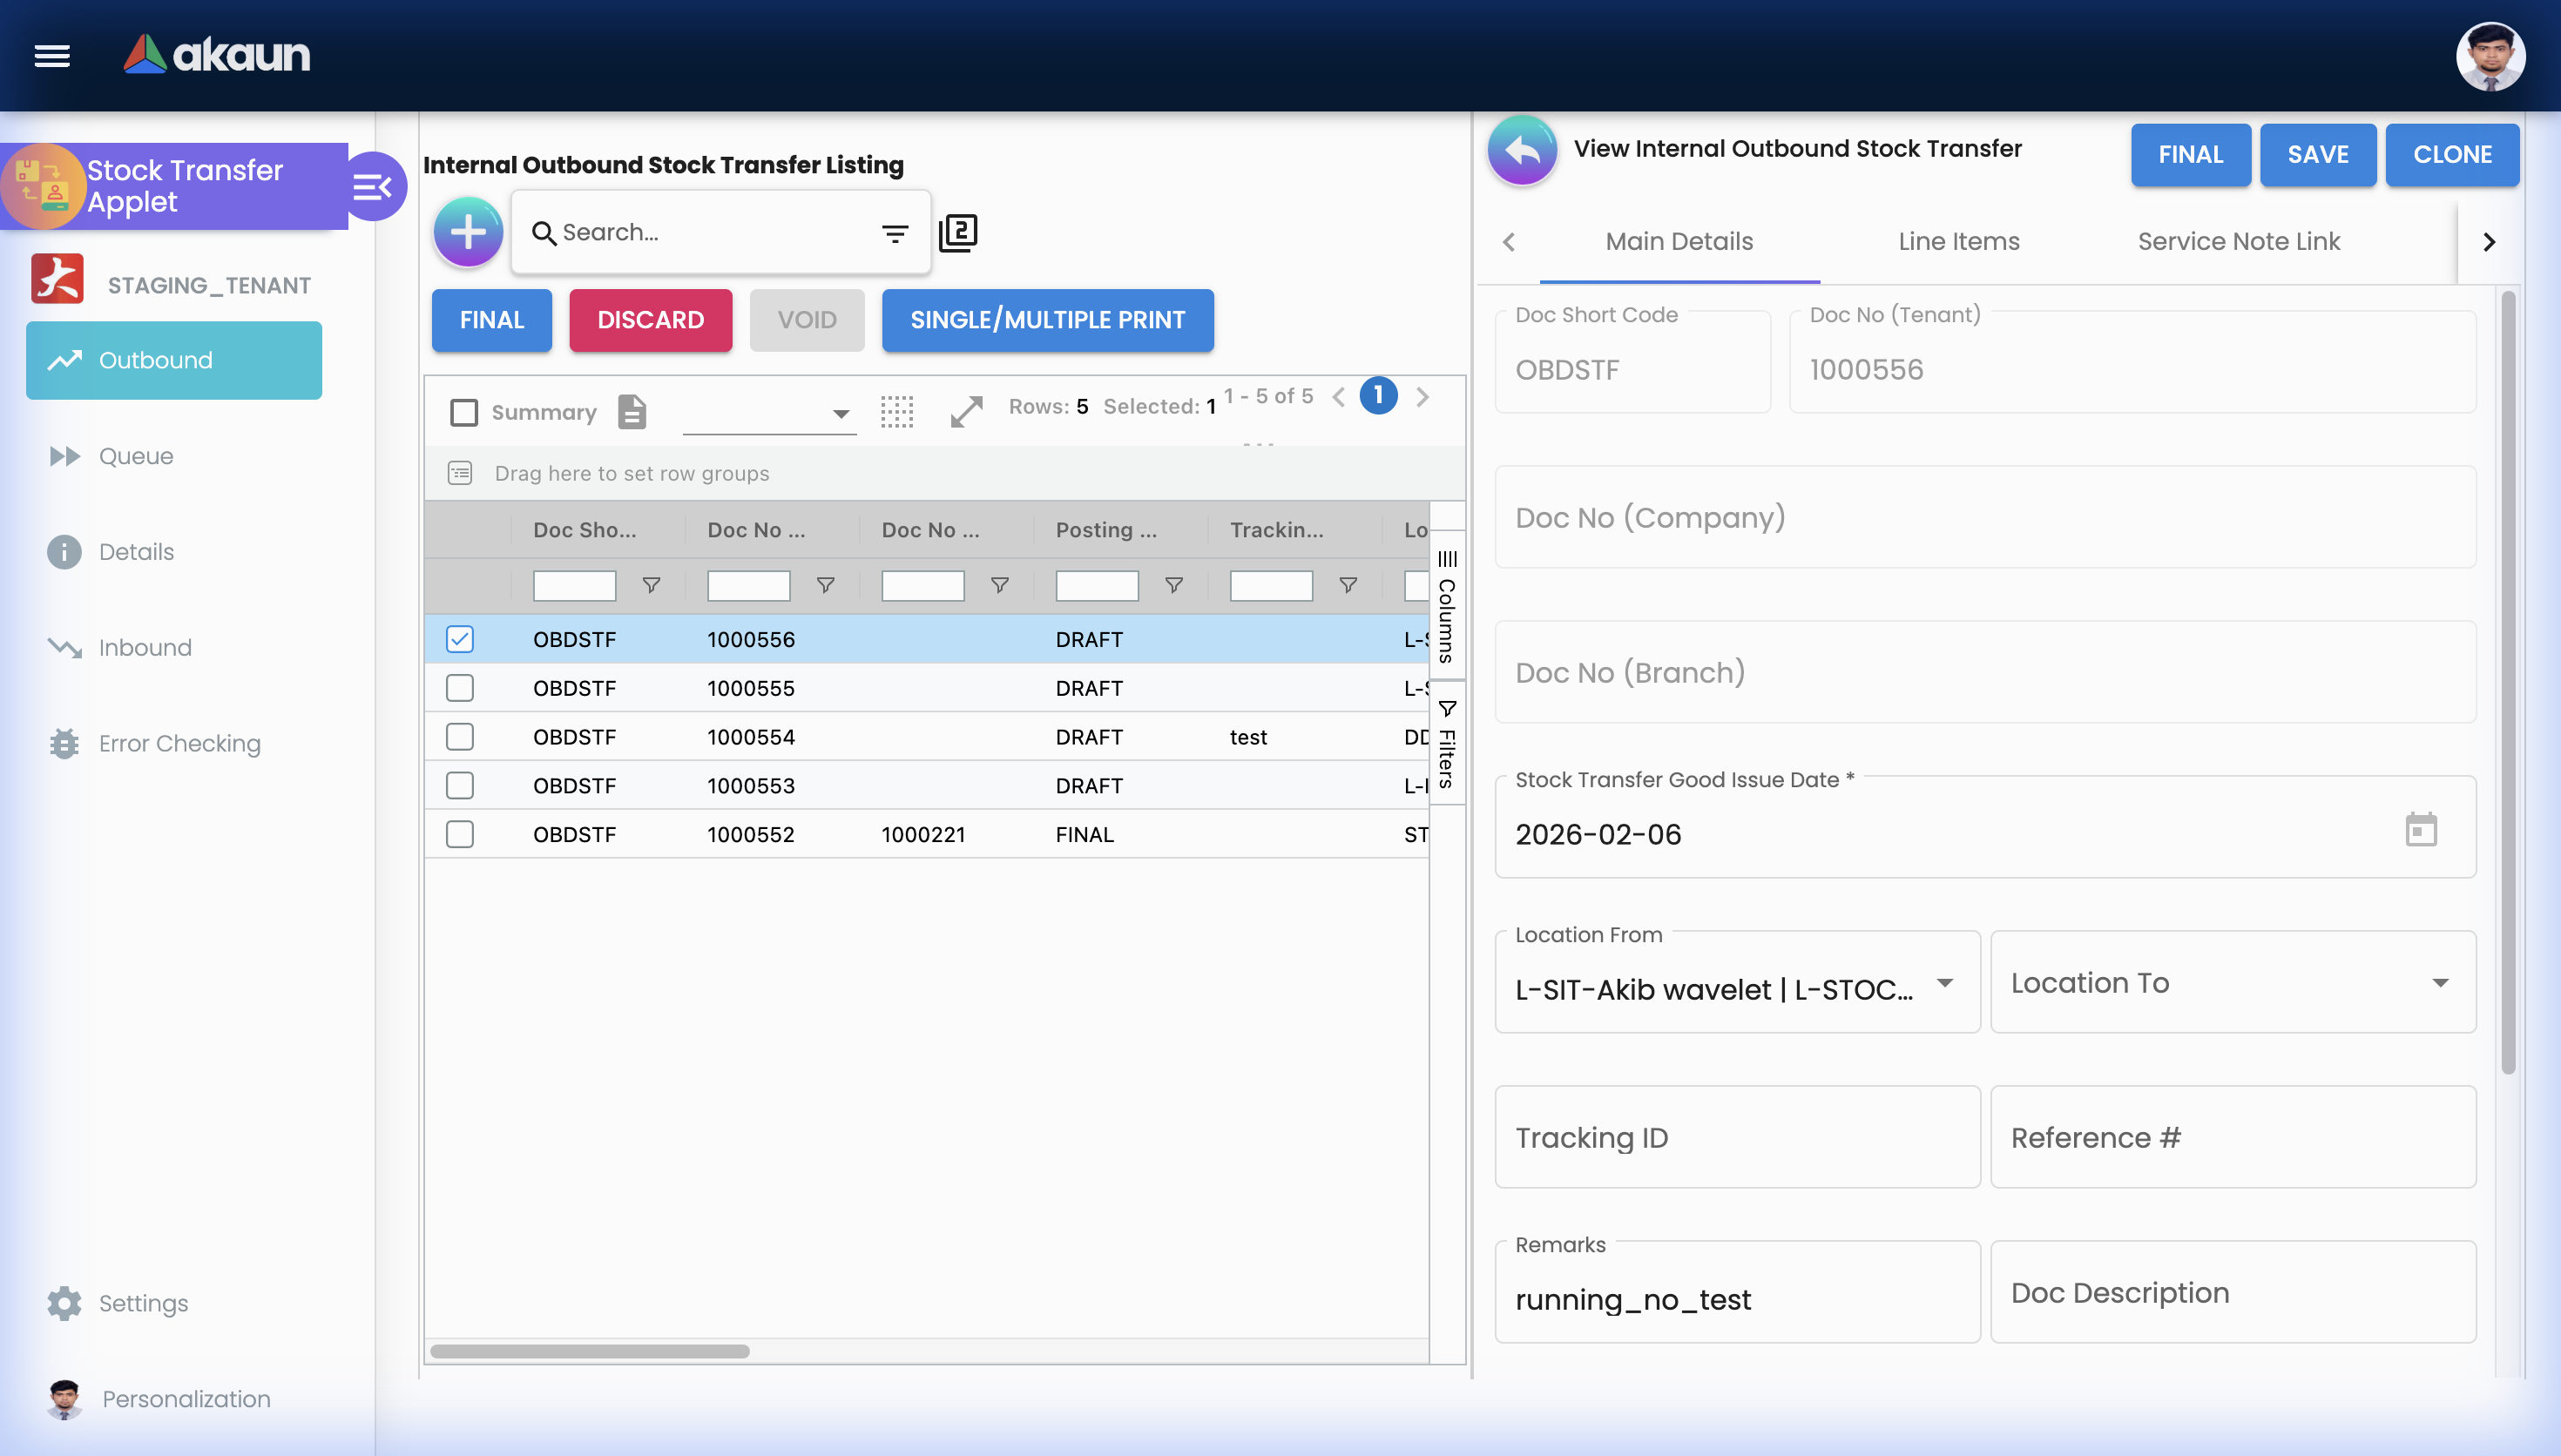
Transfer Header
Enter the following information when creating a new transfer:
| Field | Description | Required |
|---|---|---|
| Source Location | Where items are coming from | Yes |
| Destination Location | Where items are going | Yes |
| Transfer Date | Date of the transfer | Yes |
| Reference | External reference number | No |
| Notes | Additional information | No |
Adding Line Items
For each item to transfer:
- Select Item: Choose from item master
- Enter Quantity: How many units to transfer
- Select Bin (if using bin management): Source bin location
- Add Notes: Item-specific notes if needed
Serial/Batch Items
For items with tracking:
- Serial Numbers: Select specific serial numbers to transfer
- Batch Numbers: Select batches and quantities
Transfer Details
Viewing a Transfer
Open any transfer to see:
- Header Information: Source, destination, dates
- Line Items: Items being transferred with quantities
- Status History: Complete audit trail
- Attachments: Supporting documents
Editing a Transfer
Only Draft status transfers can be edited:
- Modify quantities
- Add/remove items
- Update notes
- Change dates
Approval Workflow
Approval Process
Depending on your organization’s settings:
- Automatic Approval: Low-value transfers may proceed without approval
- Single Approval: One approver reviews and decides
- Multi-Level Approval: Multiple approvers based on value or type
Approval Actions
| Action | Effect |
|---|---|
| Approve | Transfer proceeds to next stage |
| Reject | Transfer cancelled with reason |
| Query | Request more information |
| Delegate | Assign to another approver |
Stock Replenishment System
The Stock Replenishment System automates the process of identifying and replenishing low stock items. It uses a Template → Events → Runs pattern for flexible, automated stock management.
Understanding the Relationship: These three settings work together:
- Template → Defines WHAT to replenish (item filters, supplier filters, location filters)
- Events → Defines WHEN to replenish (schedule, recurring rules)
- Runs → Executes the replenishment (manual or automated processing)
  flowchart TD
    A[Replenishment Template] -->|Defines filters| B[Items to Monitor]
    A -->|Used by| C[Replenishment Event]
    A -->|Used by| D[Replenishment Run]
    C -->|Recurring Schedule| E[Automatic Processing]
    D -->|Manual Execution| F[One-time Processing]
    E --> G[Generate Transfer/PO Suggestions]
    F --> G
Replenishment Template (Stock Replenishment Template)
Templates define which items to monitor for replenishment and from whom to replenish.
Creating a Template - Field-by-Field Guide:
| Field | Purpose | Required |
|---|---|---|
| Template Name | Identifies this template | Yes |
| Description | Explain the template’s purpose | No |
| Status | Active/Inactive | Yes |
Editing a Template - 6 Tabs:
When you select a template to edit, you’ll see:
| Tab | Purpose |
|---|---|
| Details | Basic info + audit fields (Created By, Modified By, etc.) |
| Items Filter | Select which items to include/exclude from replenishment |
| Suppliers Filter | Filter by preferred suppliers |
| Locations Filter | Which locations to monitor for low stock |
| Category Filter | Filter by item categories |
| Items List | View the resulting list of items to monitor |
Real-World Scenario - Setting Up a Template:
Goal: Monitor all electronics in the Main Warehouse from approved suppliers.
- Create Template: “Electronics Replenishment”
- In Items Filter tab: Select electronics item codes
- In Suppliers Filter tab: Add approved electronics vendors
- In Locations Filter tab: Select “Main Warehouse”
- In Category Filter tab: Select “Electronics” category
- Save → Check Items List tab to verify the items included
Replenishment Events (Stock Replenishment Events)
Events define when replenishment checks should occur—either one-time or on a recurring schedule.
Creating an Event - Field-by-Field Guide:
| Field | Purpose | Required |
|---|---|---|
| Replenishment Template | Which template to use | Yes |
| Event Code | Unique identifier for this event | Yes |
| Event Name | Descriptive name | Yes |
| Cycle Start Date | When to start checking | No |
| Cycle End Date | When to stop (for one-time events) | No |
| Recurring | Enable recurring schedule | No |
| Recurrence Editor | Define frequency (daily, weekly, monthly) | Conditional - shows when Recurring is checked |
| Description | Additional notes | No |
| Status | Active/Inactive | Yes |
Real-World Scenario - Monthly Replenishment Check:
Goal: Check electronics stock every 1st of the month.
- Create Event: “Monthly Electronics Check”
- Select Template: “Electronics Replenishment”
- Check Recurring checkbox
- In Recurrence Editor: Set to “Monthly” on day 1
- Set Status: Active
- Save → System will automatically run on the 1st of each month
Replenishment Runs (Stock Replenishment)
Runs are manual executions of replenishment checks. Use these for ad-hoc or one-time replenishment processing.
Creating a Run - Field-by-Field Guide:
| Field | Purpose | Required |
|---|---|---|
| Replenishment Template | Which template to use | No |
| Run Name | Identify this run | Yes |
| Current Run Start Date | Date range for this run | No |
| Current Run End Date | End of date range | No |
| Previous Run Name | Reference to last run (read-only) | No |
| Previous Run Start Date | Last run’s start date | No |
| Previous Run End Date | Last run’s end date | No |
| Description | Notes for this run | No |
| Status | Status of the run | Yes |
Real-World Scenario - Emergency Stock Check:
Goal: Run an urgent replenishment check after a large order depleted stock.
- Go to Stock Replenishment → Create Run
- Select Template: “Electronics Replenishment”
- Set Run Name: “Emergency Check - March 2024”
- Set dates for the period to analyze
- Save → Review the items list generated
- Create transfer requests or POs based on results
Best Practices for Stock Replenishment
✓ Start with Templates: Set up comprehensive templates with all filters before creating events
✓ Use Recurring Events for Regular Checks: Weekly or monthly schedules reduce manual work
✓ Manual Runs for Ad-hoc Needs: Use runs for urgent or one-off replenishment checks
✓ Review Items List: Always check the Items List tab after editing filters to verify coverage
✗ Avoid Too Many Overlapping Events: Multiple events on the same template can create duplicate suggestions
Configuration & Settings
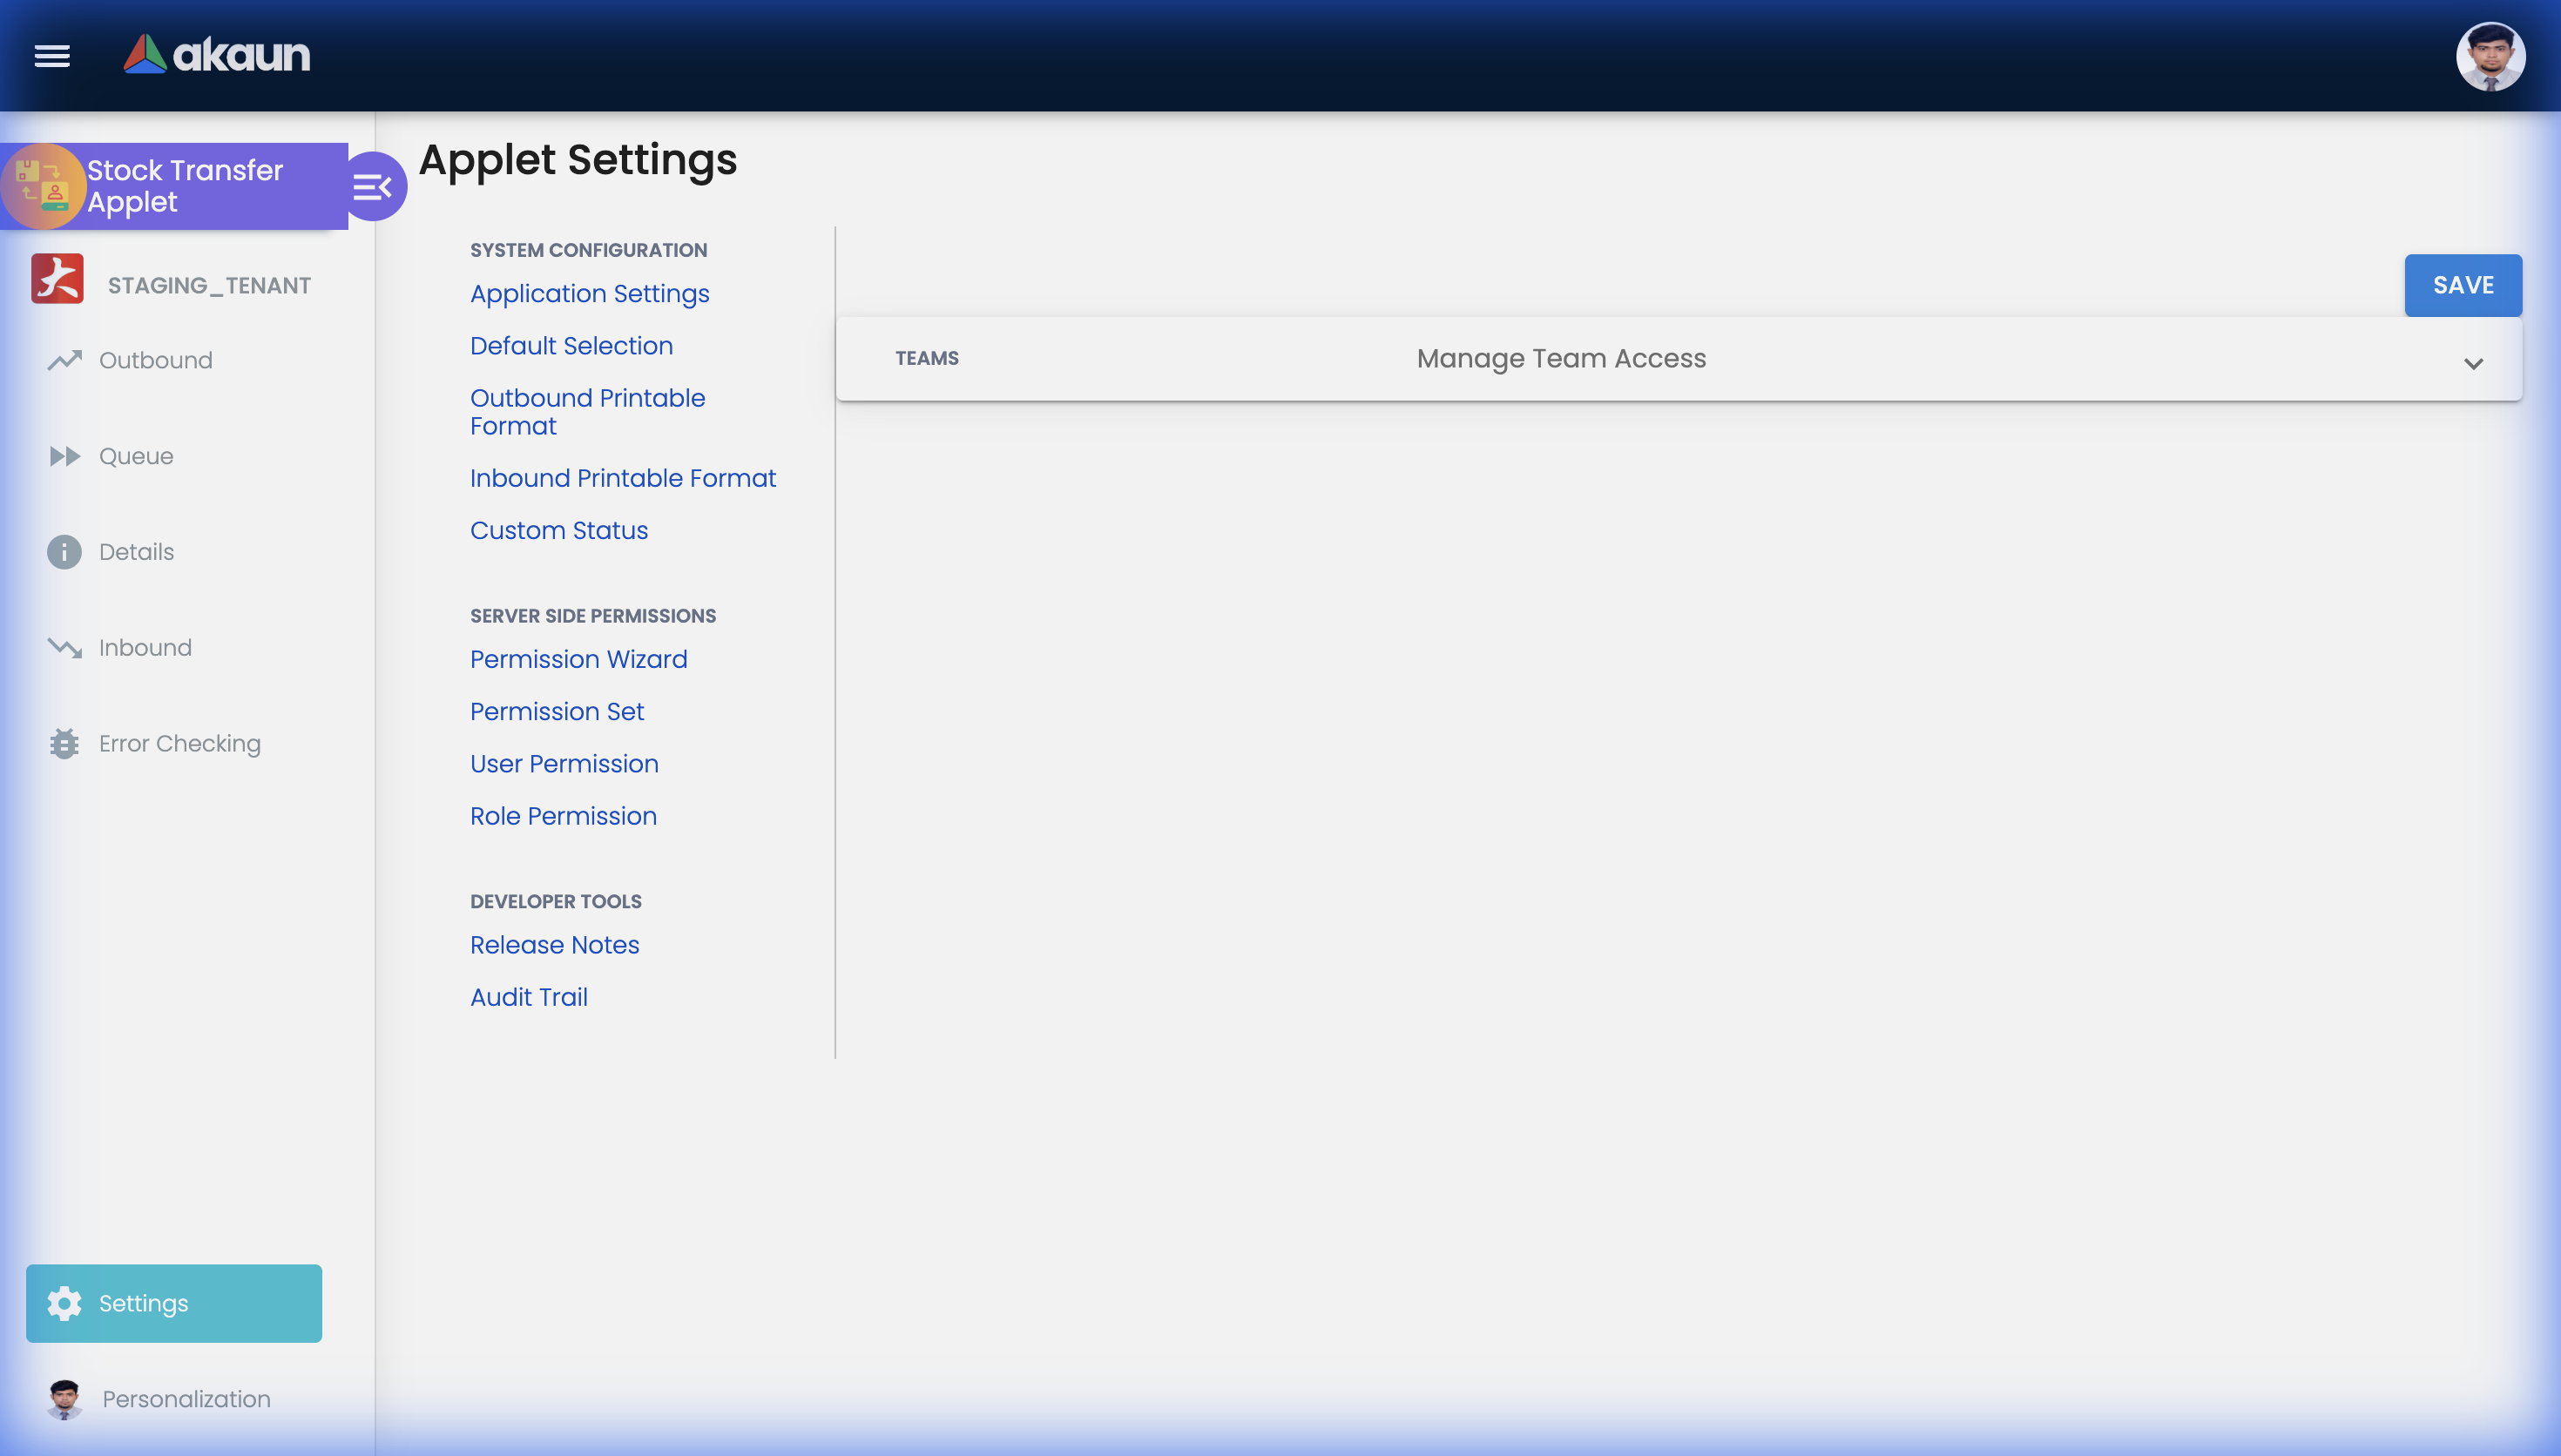
Custom Status (Settings > Custom Status)
Define custom transfer statuses beyond the default ones to match your workflow.
| Field | Purpose | Example |
|---|---|---|
| Status Name | Display name | “Pending Inspection” |
| Status Code | Internal code | “PENDING_INSPECT” |
| Description | Explain when to use | “Waiting for quality check” |
Use Case: Add “Quality Check” status for transfers that need inspection before receiving.
Default Settings (Settings > Default Settings)
Configure default values that auto-populate when creating new transfers.
| Setting | What It Does |
|---|---|
| Default Source Location | Pre-selects your usual source warehouse |
| Default Destination | Pre-selects common destination |
| Default Transfer Type | Internal, Inbound, or Outbound |
Field Configuration (Settings > Field Configuration)
Customize which columns appear in listing views and their order.
- Add/remove columns from listings
- Reorder columns by drag-and-drop
- Save configurations per user
Printable Format Settings
The applet has two separate printable format settings for inbound and outbound transfers:
Inbound Printable Format (Settings > Inbound Printable Format Settings)
Configure print templates for receiving documents.
Edit View Tabs:
| Tab | Purpose |
|---|---|
| Details | Template name, format settings |
| Line | Line item layout configuration |
Outbound Printable Format (Settings > Outbound Printable Format Settings)
Configure print templates for shipping documents.
Edit View Tabs:
| Tab | Purpose |
|---|---|
| Details | Template name, format settings |
| Line | Line item layout configuration |
Applet Log (Settings > Applet Log)
Audit trail showing all user actions within the applet.
| Column | Description |
|---|---|
| Table Name | Which data was affected |
| Action | CREATE, UPDATE, DELETE |
| Action Date | When it happened |
| Description | Details of the change |
Release Notes (Settings > Release Notes)
View applet version history and feature updates.
Personalization
Personal Default Settings
Save your preferred source location and filters.
Sidebar Customization
Arrange menu items to match your workflow.
FAQ
Q: Can I transfer items between different companies? A: No, stock transfers are within the same company. For cross-company movements, use Inter-Company Stock Transfer or Sales/Purchase documents.
Q: What happens if destination rejects the transfer? A: The items remain at the source location. Review the rejection reason and create a new transfer if needed.
Q: Can I track partial receipts? A: Yes, destination can receive partial quantities. The transfer shows partial receipt status until fully received.
Q: How do I cancel a transfer in transit? A: Transfers in transit cannot be cancelled. Destination must receive and then create a return transfer.
Q: Can I transfer items with serial numbers? A: Yes, you must select specific serial numbers during transfer creation. They will be moved to the destination.