Warehouse Management Applet
Purpose and Overview
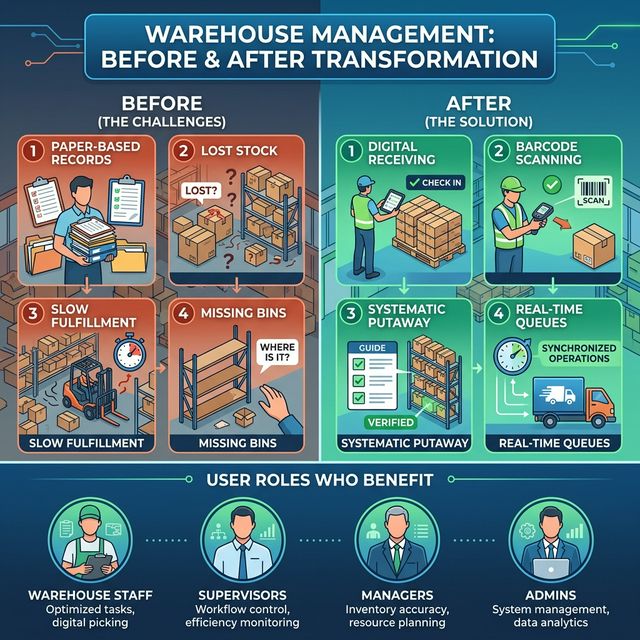
The Warehouse Management Applet is a powerful solution designed to digitise and streamline the entire warehouse operations lifecycle. It moves beyond simple stock tracking by integrating inbound receiving, space allocation, putaway workflows, and outbound order fulfilment — all in one connected system.
Who Benefits from This Applet?
Warehouse Staff & Operators:
- Guided step-by-step inbound receiving with supplier linking
- Barcode scanning (Scan Session) for fast, error-free processing
- Clear putaway instructions with bin-level location assignment
- Picking and packing workflows with cart-based scanning
Warehouse Supervisors:
- Queue management for inbound processing and putaway tasks
- Picker and packer assignment to fulfillment tasks
- Real-time monitoring of pending queues across all operations
- Layout and node management for precise warehouse organisation
Inventory & Logistics Managers:
- End-to-end visibility from goods receipt to shipment dispatch
- Space utilization tracking and container assignment
- Serial number, batch number, and bin location traceability
- Shipment document generation and delivery tracking
IT & System Administrators:
- WMS item maintenance, category, and category group configuration
- Field-level application settings and feature visibility controls
- Permission management at user, team, and role levels
- Webhook integration for external system connectivity
What Problems Does This Solve?
The Manual Warehouse Problem:
Traditional warehouse management relies on paper-based records, spreadsheets, and verbal instructions. Common issues include:
- Lost or misplaced stock due to poor location tracking
- Slow order fulfilment from disorganised picking
- Incorrect shipments from unverified packing
- No real-time visibility into stock locations or container contents
- Difficulty managing warehouse space efficiently
- Serial numbers and batch numbers tracked manually in spreadsheets
The Warehouse Management Applet Solution:
- Digital receiving — Record inbound deliveries with supplier linking, line items, and document references
- Systematic putaway — Assign items to precise bin locations and track container contents
- Queue-based processing — Items flow automatically into inspection and putaway queues
- Smart picking — Priority-sorted picking queues with live stock balance visibility
- Scan-verified packing — Barcode scanning ensures packed items match the order
- Complete traceability — Serial number, batch, and bin tracking at every stage
Key Features Overview
Key Concepts
Understanding the Warehouse Flow
Every warehouse operation follows a structured flow from goods receipt to customer shipment. The Warehouse Management Applet provides a dedicated component for each stage:
| Stage | Component | Practical Example |
|---|---|---|
| Receive | Receiving Doc | Supplier delivers 500 units → Create receiving document linked to supplier |
| Inspect | Processing Queue | Verify quantity, check serial numbers, confirm WMS item attributes |
| Store | Putaway List | System assigns items to Zone A, Rack 3, Shelf B based on space |
| Locate | Space Allocation & Containers | Query which container holds Item X at any moment |
| Pick | Picking Queue → Picking List | Sales order triggers pending items in queue; assign to a picker |
| Pack | Packing List | Picker hands items over; packer scans and verifies into shipment |
| Ship | Doc Link & GenDoc | Generate delivery note or stock transfer, record tracking ID |
Warehouse Hierarchy Structure
Think of the warehouse organisation as nested levels, from physical building down to individual bin:
Organisation
│
├── Warehouses ──→ Physical locations (e.g., Main Warehouse, Cold Store)
│   │
│   ├── Layouts ──→ Floor plans for each warehouse
│   │   │
│   │   └── Nodes ──→ Zones → Racks → Shelves → Bins (specific addresses)
│   │
│   └── Containers ──→ Moveable storage units (pallets, bins, totes)
│       │
│       └── Space Allocation ──→ Items assigned to specific containers/nodes
│
├── Inbound Process ──→ Goods coming IN
│   │
│   ├── Receiving Doc ──→ Header record of each delivery
│   ├── Receiving Line Items ──→ Item-by-item detail with serial/batch/bin
│   ├── Processing Queue ──→ Items pending inspection
│   ├── Putaway List ──→ Storage assignment instructions
│   ├── Putaway Processing Queue ──→ Active putaway tasks
│   └── Scan Session ──→ Barcode scanning for fast receiving
│
└── Outbound Process ──→ Goods going OUT
    │
    ├── Picking Queue ──→ All pending order items across all customers
    ├── Picking List ──→ Per-picker task list with locations
    └── Packing List ──→ Verification and shipment preparation
The “Three Pillars” of Warehouse Management
To effectively use the system, understand how the three core processes connect:
| Pillar | Analogy | Definition | Example |
|---|---|---|---|
| Inbound | “The Loading Dock” | Everything about goods arriving and being stored | Receiving 500 units from Supplier ABC, processing, and placing in Zone A |
| Storage | “The Map” | Knowing where everything is at all times | Container C-04 contains 200 units of Item X at Rack B-2 |
| Outbound | “The Dispatch Bay” | Fulfilling orders by picking, packing, and shipping | Customer order for 50 units → picked from Zone A → packed → shipped |
How they link:
- Inbound puts goods into storage with known locations
- Storage (Space Allocation) maintains the map of where everything is
- Outbound uses the map to pick the right items from the right locations
Quick Start Guide
Get up and running quickly with these essential workflows.
For Warehouse Staff: Receive Your First Shipment
Goal: Record and process an incoming delivery in 5 steps.
- Navigate: Go to Inbound Process > Receiving Doc from the sidebar
- Create the Header: Click "+" → Select the Supplier from the account picker → Enter a reference number → Create
- Add Line Items:
- Click “Add Line”
- Search for the Item by code or name
- Enter received Quantity and UOM
- Add a Tracking ID if provided by the supplier
- Record Serial Numbers (scan or manually enter) if the item requires individual tracking
- Process: Items automatically appear in the Processing Queue for inspection — verify quantities and WMS attributes
- Putaway: Once processed, the item appears in the Putaway List — assign a container and storage location
What happens next? Items are tracked at their exact bin location, ready for outbound order fulfilment.
Pro Tip: Use the Scan Session feature to scan barcodes in bulk instead of manually entering items one by one.
For Warehouse Staff: Fulfil Your First Order
Goal: Pick and pack items for a customer order.
- Check the Picking Queue: Go to Outbound Process > Picking Queue
- See all pending order items sorted by Sales Invoice and Delivery Date
- Check Location Balance and Company Balance columns to confirm stock is available
- Create a Picking List:
- Select items to fulfil → Click "+" to create a new Picking List
- Assign a registered Picker from the dropdown
- Confirm line items and quantities
- Pick the Items:
- Picker goes to the warehouse and collects items from the listed locations
- Use Add to Cart (scan) or Add to Cart (Manual) to confirm each item picked
- System tracks picked vs. pending quantities in real time
- Pack and Ship:
- Go to Outbound Process > Packing List → Click "+"
- Assign a Packer, select the Warehouse, and link to the customer
- Use Packed List Scan to verify items being packed
- Add Tracking ID for the shipment
- Use Doc Link to generate or attach the shipping document
What happens next? The order is dispatched and delivery status is tracked via the linked document.
For Admins: Initial System Setup
Goal: Get the warehouse system ready for operations in 6 steps.
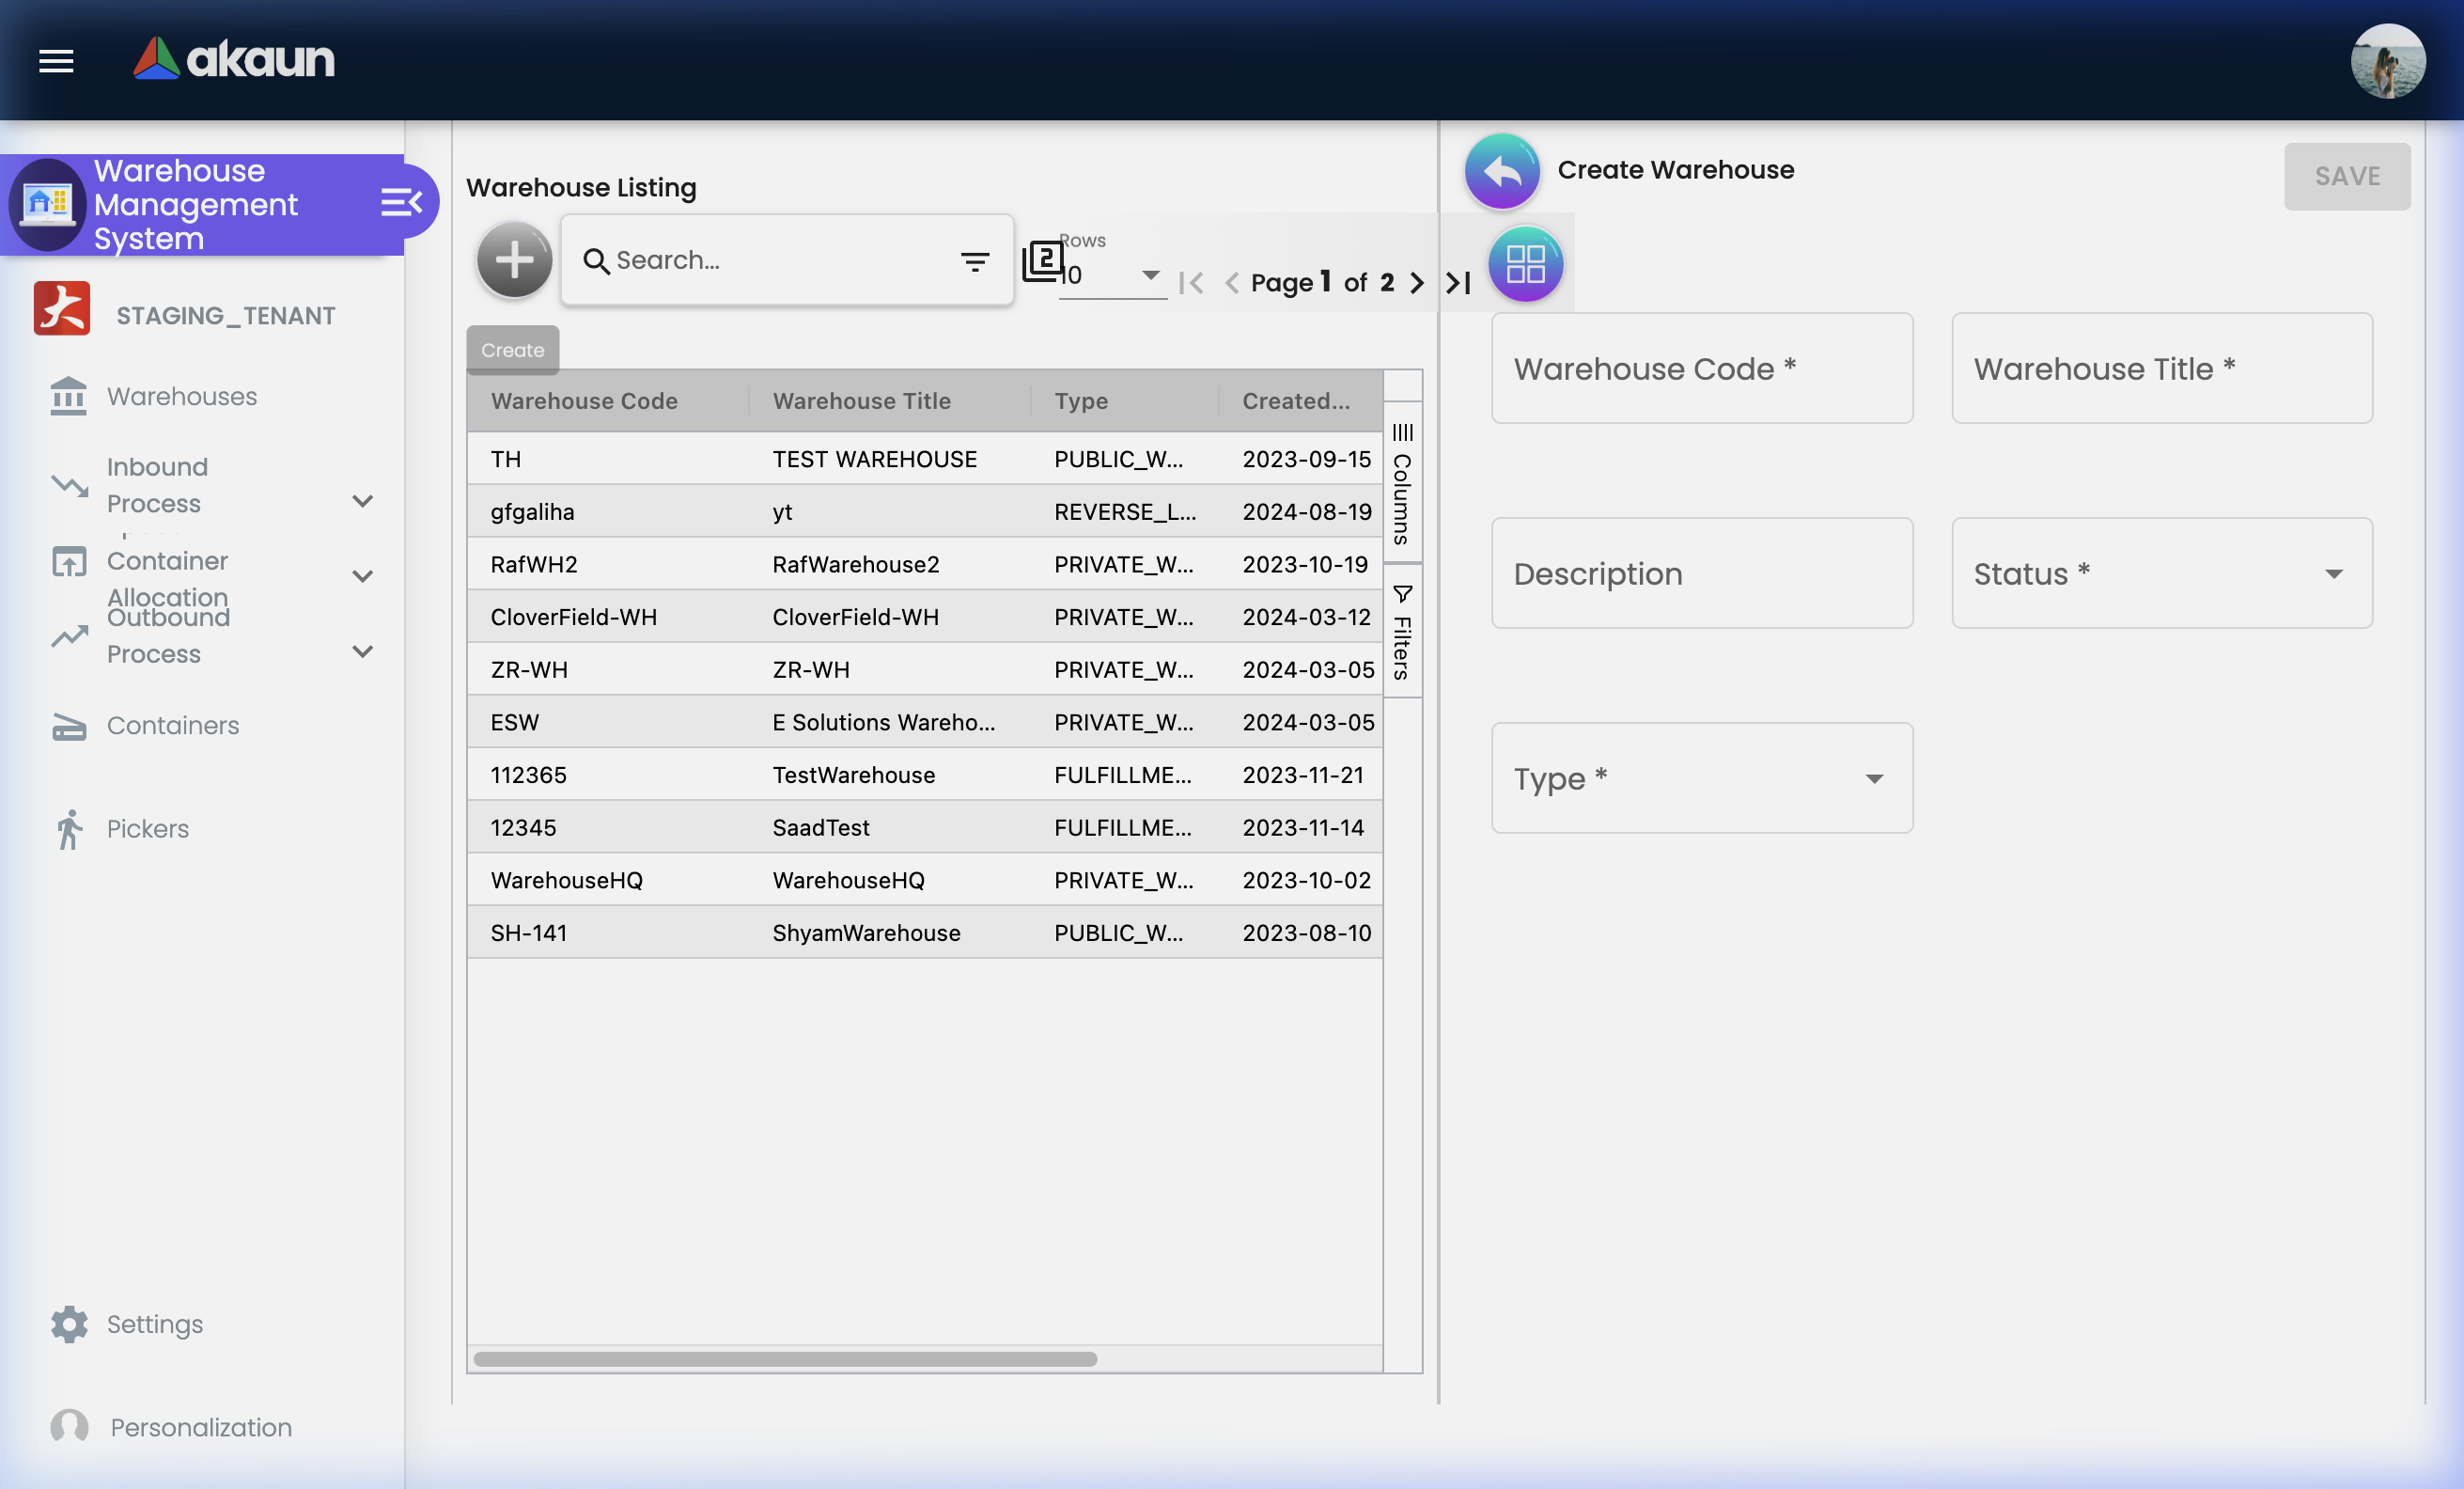
Step 1: Create Warehouses (Warehouses)
- Create each physical warehouse with a unique Code, Title, and Description
- Set status to ACTIVE
Step 2: Define Warehouse Layouts and Nodes (Within each Warehouse)
- Create one or more Layouts (e.g., “Ground Floor”, “Mezzanine Level”)
- Under each Layout, create Nodes in a hierarchy:
- Zone → Rack → Shelf → Bin
- Assign scan codes to nodes for barcode-based location verification
Step 3: Register Containers (Containers)
- Create entries for all physical containers (pallets, totes, cages)
- Each container gets a unique code and scan code
Step 4: Configure WMS Items (Settings > WMS Item Maintenance)
- Link items to WMS-specific attributes (storage requirements, handling notes)
- Set up Item Categories and Category Groups for reporting
Step 5: Assign Pickers (Pickers)
- Register warehouse staff as pickers
- Pickers must be registered before they can be assigned to Picking Lists
Step 6: Configure Settings
- Set up Default Selection for auto-populated warehouse/layout fields
- Configure Application Settings for required/optional field behaviour
- Define Feature Visibility to show/hide menu items per role
- Set up Permissions (User, Team, Role-based access)
For Supervisors: Monitor Your Team’s Operations
Goal: Understand what your team is working on and keep operations flowing.
- Check inbound queues: Go to Inbound Process > Processing Queue
- See all items received and waiting for processing
- Identify items pending too long — follow up with receiving staff
- Manage putaway: Go to Inbound Process > Putaway List
- Review open putaway tasks
- Reassign tasks if a staff member is unavailable
- Monitor outbound picking: Go to Outbound Process > Picking Queue
- Check items with upcoming delivery dates
- Ensure all urgent orders have Picking Lists created and assigned
- Assign and track pickers: Go to Outbound Process > Picking List
- Verify pickers have received their tasks
- Follow up on Picking Lists that were created more than 4 hours ago
- Review packing status: Go to Outbound Process > Packing List
- Check for any Packing Lists stuck in “In Progress” status
- Confirm dispatched orders have tracking IDs entered
Delegation Tip: If a picker calls in sick, go to Pickers, mark them as INACTIVE for the day, and reassign their open Picking Lists to an available team member.
New to the system? Start with the basics:
- Warehouse staff should try creating a Receiving Doc to practice the inbound flow
- Supervisors should check the Processing Queue and Picking Queue to understand pending work
- Admins should review the Configuration & Settings section below before going live
Warehouse Listing
Create and manage your physical warehouse locations.
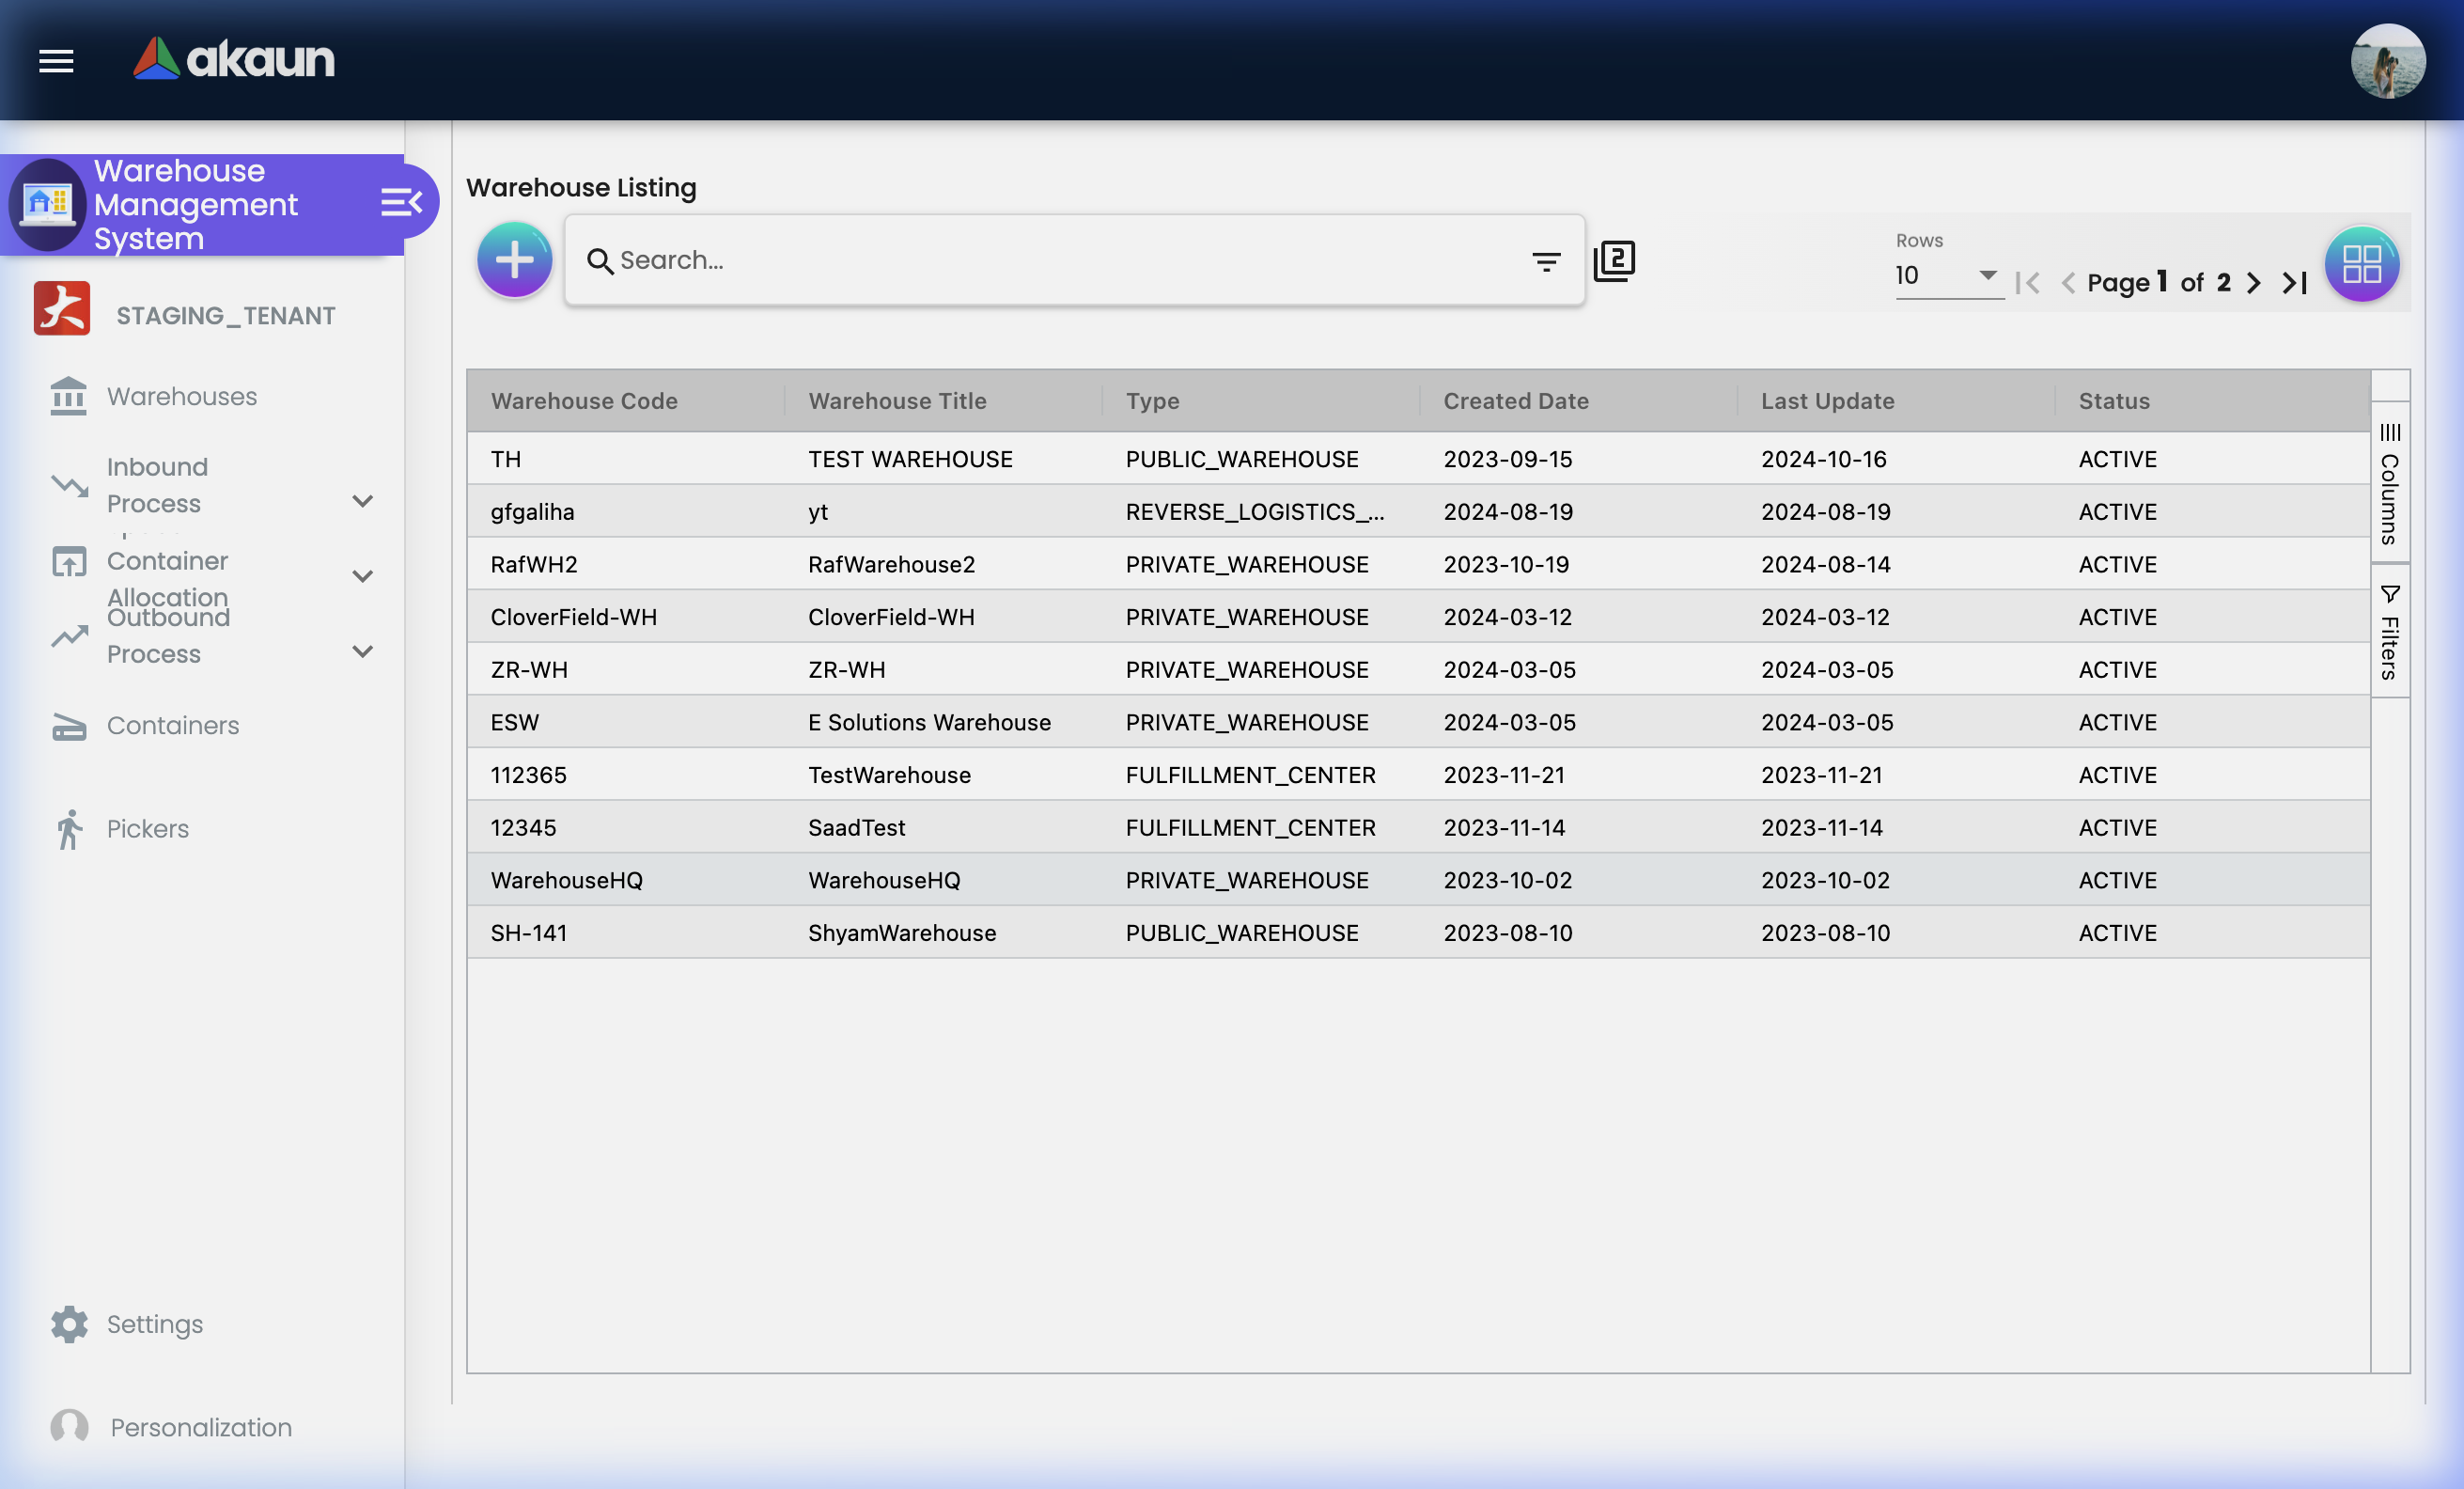
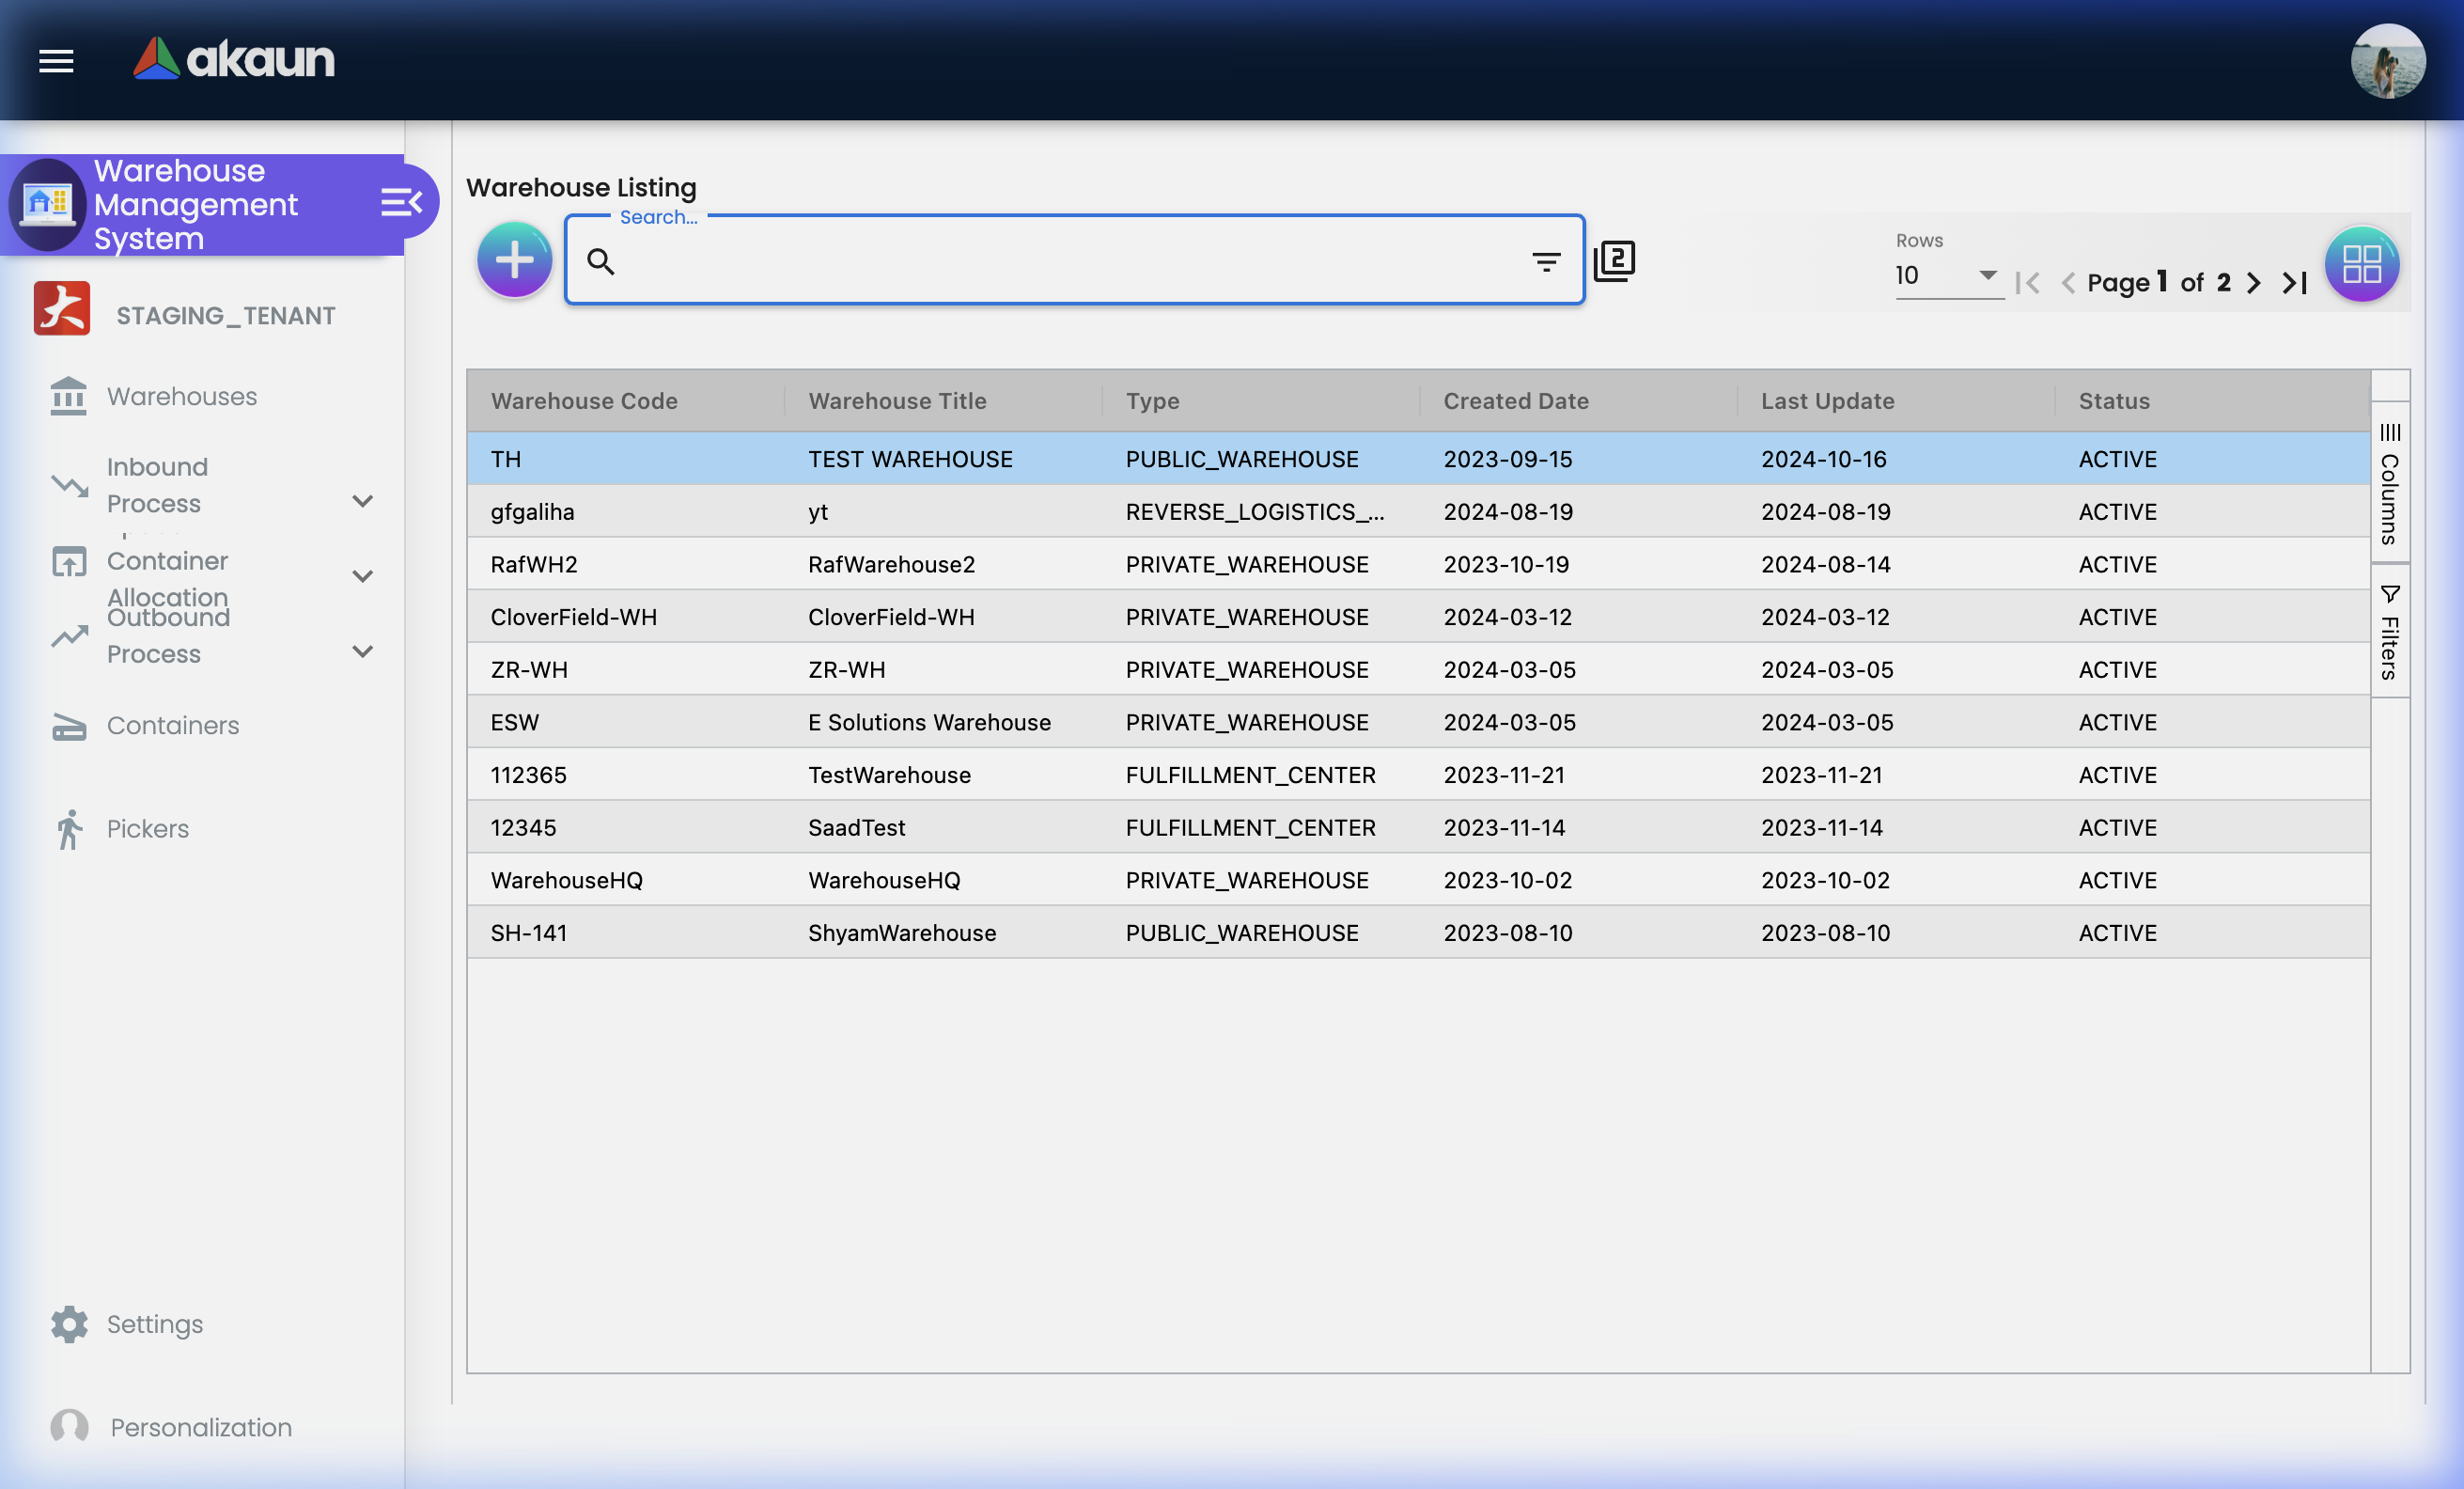
What is the Warehouse Listing?
The Warehouse Listing is the master register of all physical warehouses your organisation operates. Every inbound and outbound transaction is linked to a warehouse, making this the cornerstone of the entire system.
What You Can Do:
- ✓ Create new warehouse records
- ✓ View all warehouses with code, title, type, and status
- ✓ Edit warehouse details (name, description, status)
- ✓ Navigate into Layouts and Nodes for each warehouse
- ✓ Delete or deactivate warehouses no longer in use
Warehouse Fields
| Field | Purpose | Example |
|---|---|---|
| Warehouse Code | Unique identifier used in all transactions | WH-001 |
| Warehouse Title | Human-readable display name | “Main Distribution Centre” |
| Description | Additional notes about this warehouse | “Primary warehouse for Klang Valley region” |
| Status | ACTIVE (operational) or INACTIVE (archived) | ACTIVE |
| Created By / Date | Audit trail of who created the record | admin@company.com, 2024-01-15 |
| Last Updated By / Date | Audit trail of last modification | warehouse.manager@company.com, 2024-12-01 |
Warehouse Tabs Overview
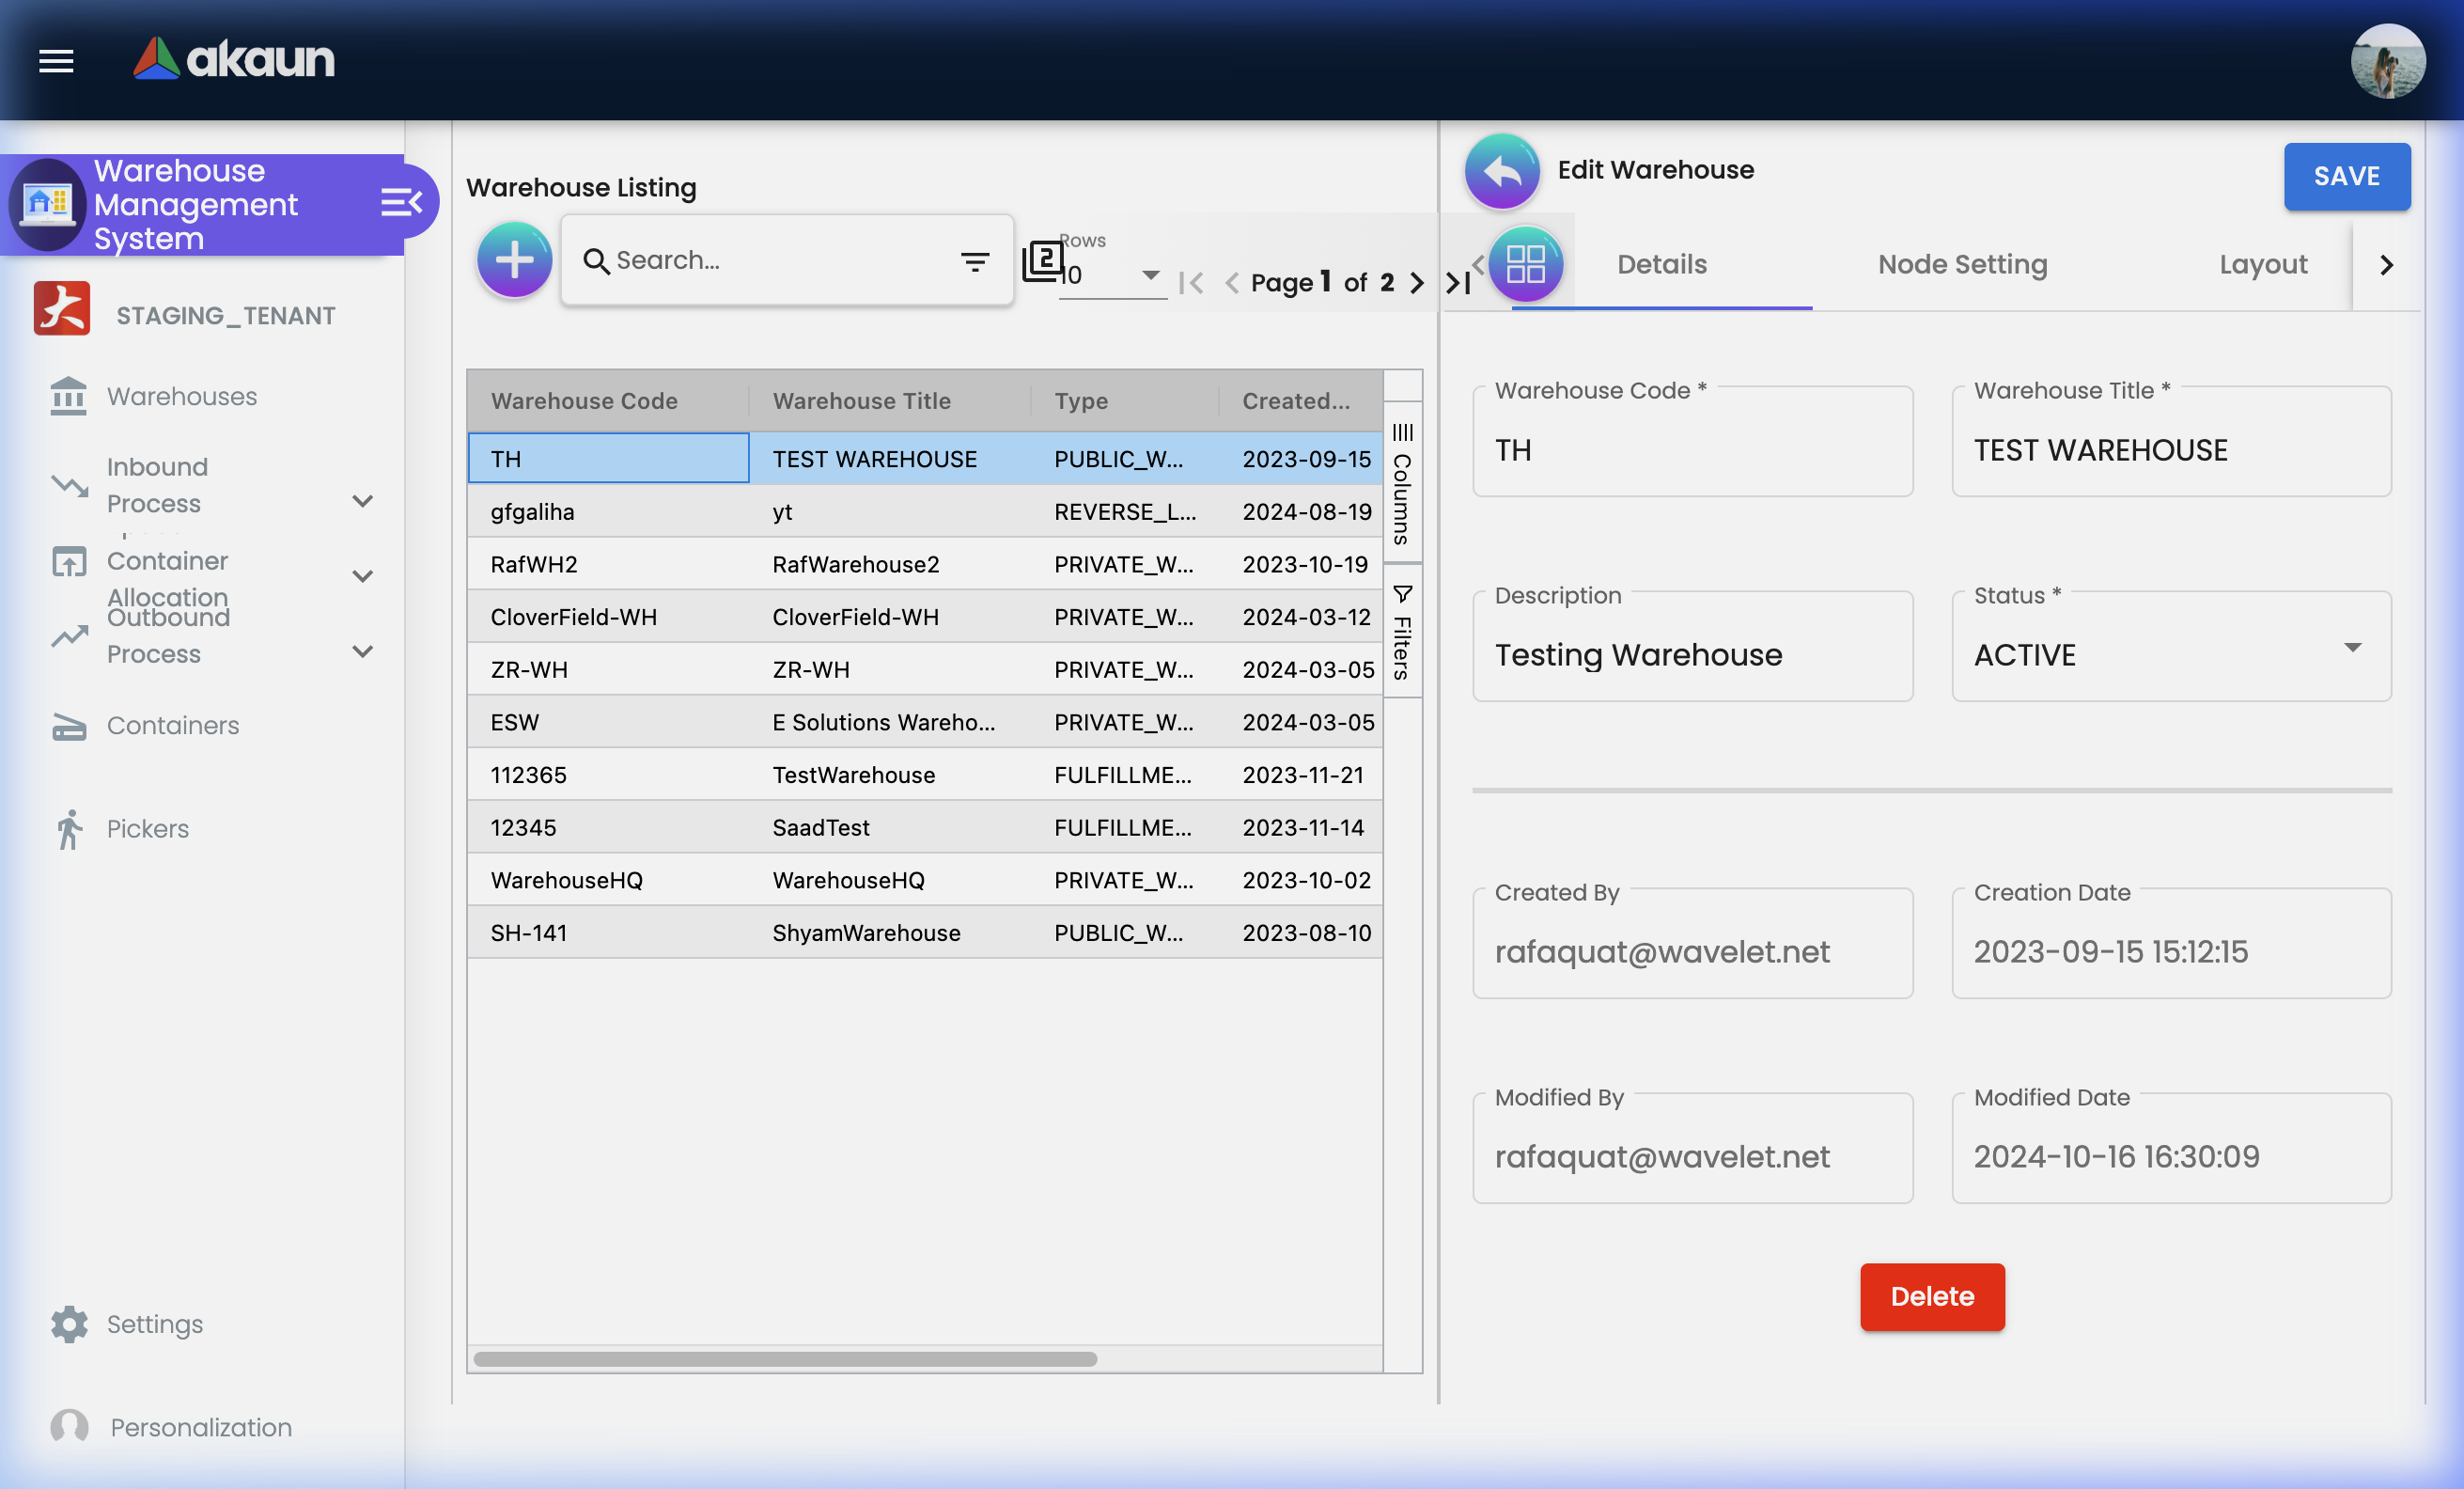
When you open a warehouse record, you’ll see these tabs:
| Tab | Purpose |
|---|---|
| Main Details | Edit warehouse code, title, description, and status |
| Layouts | Manage the floor plans and spatial organisation of this warehouse |
Warehouse Layouts
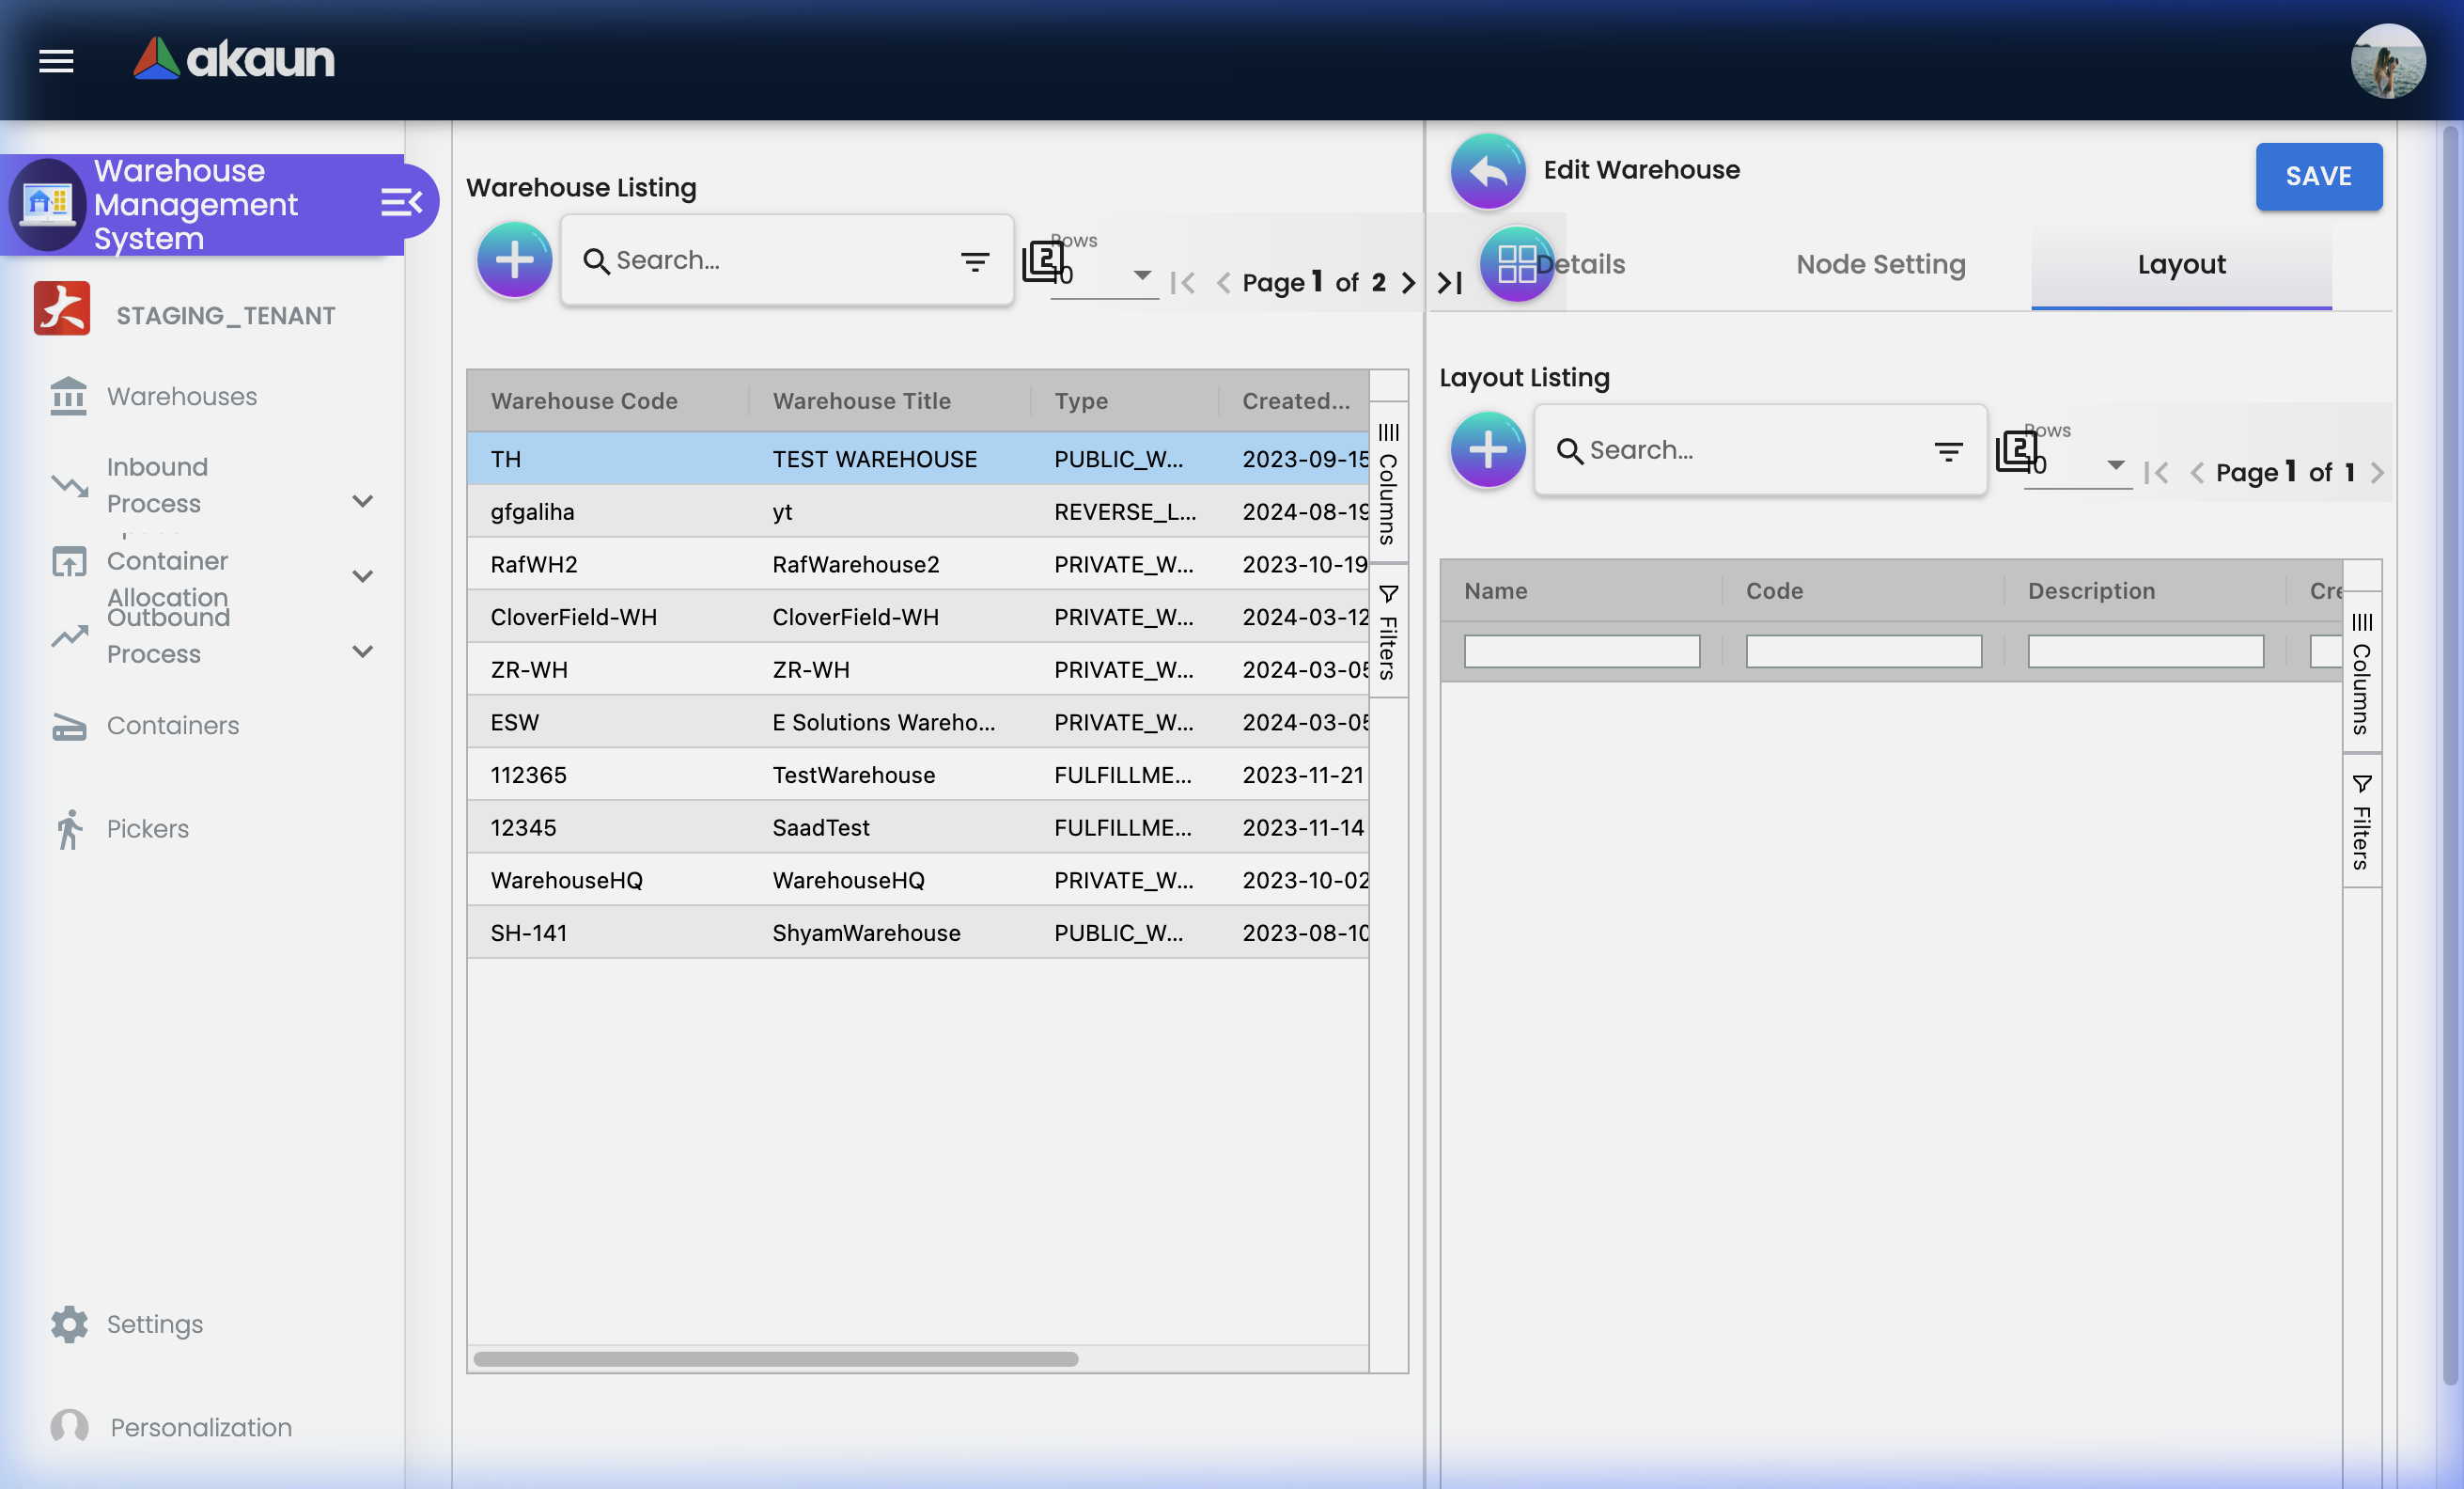
Each warehouse can have one or more Layouts — blueprints that define how the space is physically organised.
What is a Layout?
A Layout represents a floor plan or zone map within your warehouse. Use layouts to segment a warehouse (e.g., “Ground Floor”, “Cold Storage Area”, “Mezzanine”).
| Layout Field | Description | Example |
|---|---|---|
| Name | Display name of the layout | “Ground Floor Layout” |
| Code | Unique identifier | GFL-001 |
| Description | Notes about this layout area | “Main receiving bay and racking area” |
| Status | Active or Inactive | ACTIVE |
Layout Nodes

Within each Layout, you create Nodes — the individual addressable storage locations in your warehouse. Nodes follow a parent-child hierarchy to model the physical structure.
Warehouse: Main Distribution Centre (WH-001)
│
├── Layout: Ground Floor (GFL-001)
│   ├── Node: Zone A — Receiving Area
│   │   ├── Node: Rack A-1
│   │   │   ├── Node: Shelf A-1-1 (Bin level)
│   │   │   └── Node: Shelf A-1-2 (Bin level)
│   │   └── Node: Rack A-2
│   └── Node: Zone B — Bulk Storage
│       ├── Node: Rack B-1
│       └── Node: Rack B-2
│
└── Layout: Cold Store (COLD-001)
    └── Node: Zone CS-1 (Temperature-controlled)
Node Features:
- Hierarchical structure (any depth: zones → aisles → racks → shelves → bins)
- Stock tracking at node level — query what’s stored at any specific location
- Stock quantity editing for manual adjustments
- Scan code assignment for barcode-based location verification during putaway and picking
Real-World Node Setup Example:
Problem: Your team keeps putting items in the wrong place because locations aren’t clearly defined.
Solution:
- Create a Layout for each floor or area
- Add top-level Zone nodes (e.g., “Zone A - Dry Goods”, “Zone B - Electronics”)
- Under each zone, add Rack nodes (A-1, A-2, B-1…)
- Under each rack, add Shelf nodes (A-1-Top, A-1-Middle, A-1-Bottom)
- Print barcode labels for each shelf node
- Now putaway and picking workflows can reference exact locations and scan-verify them
Inbound Process
Manage the complete flow of goods entering your warehouse.
The Inbound Process covers every stage from the moment a delivery truck arrives at the loading dock until items are placed in their designated storage locations and their details are in the system.
Receiving Doc
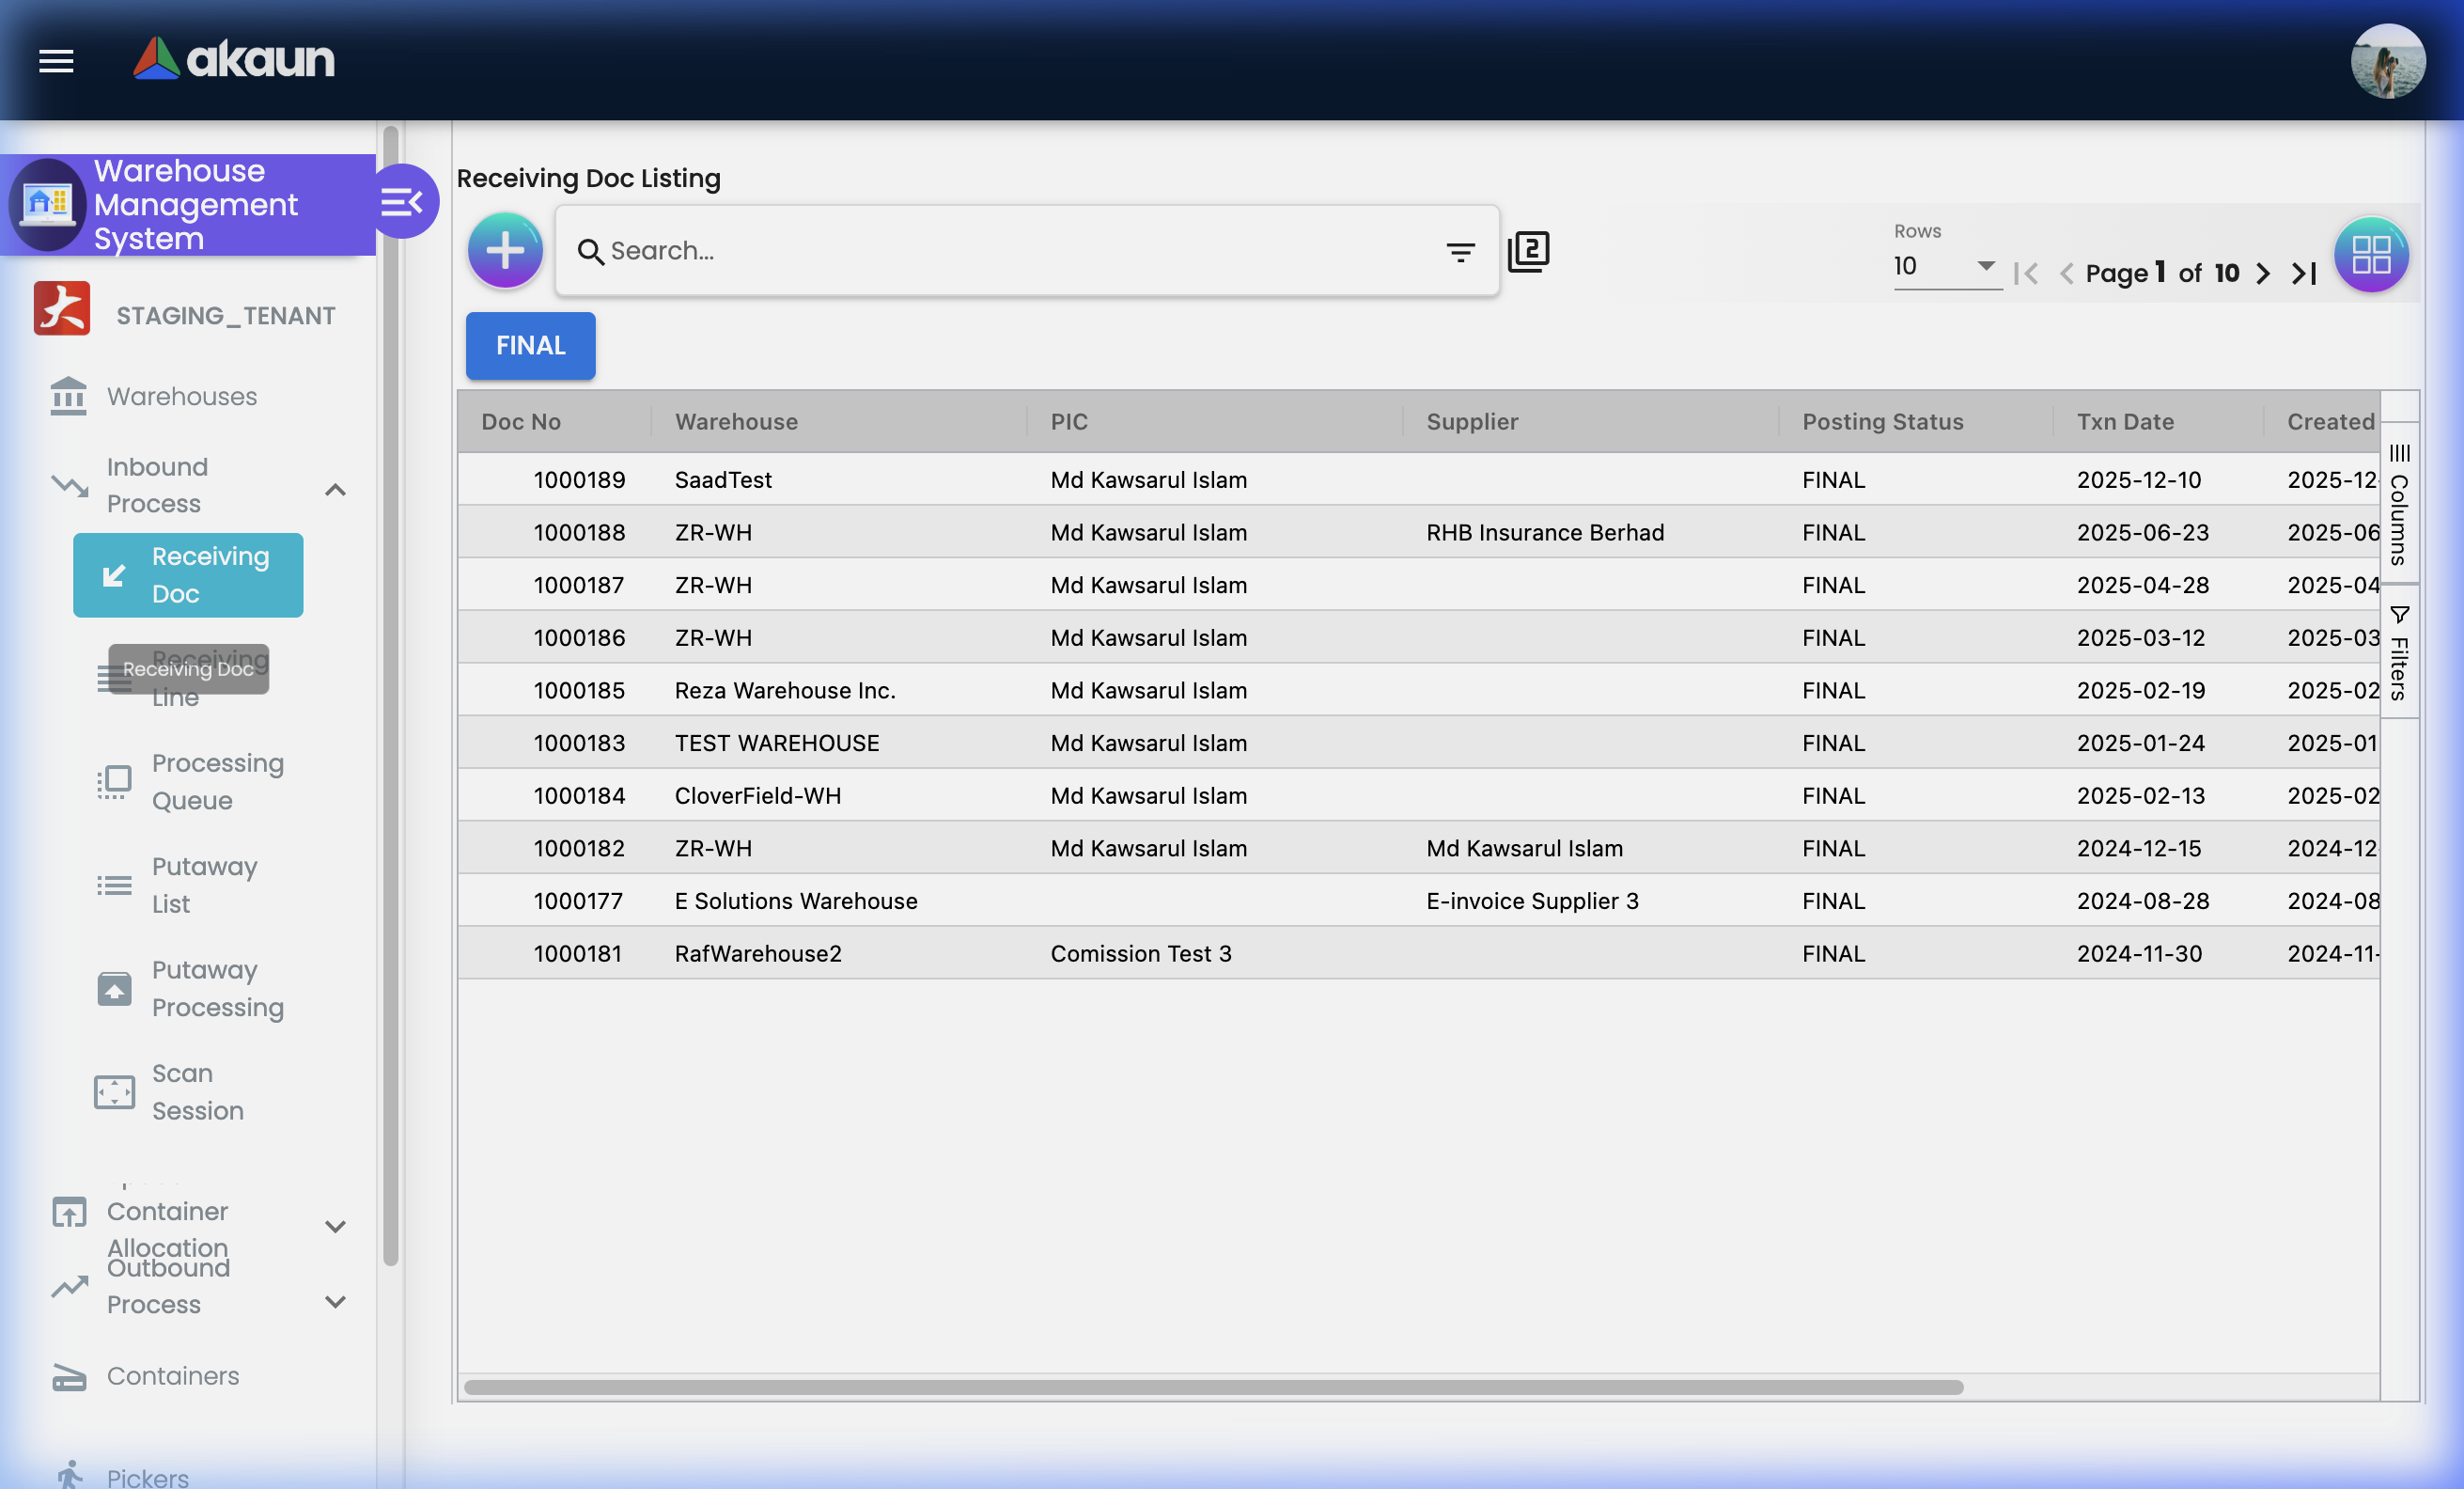
What is a Receiving Doc?
A Receiving Document (also called a Goods Received Note) is the official record of a delivery arriving at your warehouse. It links to a supplier, captures what was received, and triggers downstream processes (processing queue, putaway).
Receiving Doc Listing Columns:
| Column | Description |
|---|---|
| Doc No | Auto-generated receiving document number |
| Warehouse | The warehouse that received the goods |
| PIC | Person in charge of receiving |
| Supplier | The supplier who delivered the goods |
| Posting Status | Whether the document has been posted to inventory |
| Txn Date | Transaction/delivery date |
| Created Date | Date the document was created |
| Last Update | Date of the last modification |
| Status | Current status of the receiving document |
Receiving Doc Statuses Explained:
| Status | What It Means | What to Do |
|---|---|---|
| Draft | Created but items not yet confirmed | Add all line items and verify quantities before saving |
| Submitted | Lines added and document is pending posting | Items should flow to the Processing Queue automatically |
| Posted | All items processed and posted to inventory | Record is closed — no further edits allowed |
| Cancelled | Receiving doc voided before posting | Investigate reason before cancelling — inventory will not be affected |
Receiving Doc — Tab Overview:
When you open a Receiving Doc, you’ll work across these tabs:
| Tab | Purpose |
|---|---|
| Account | Supplier details — who the goods came from |
| Line Items | Individual items received with quantity, UOM, and tracking |
| Xtn GenDoc Line Link | Link receiving lines to external purchase order or source document lines |
| Print the receiving document (GRN) |
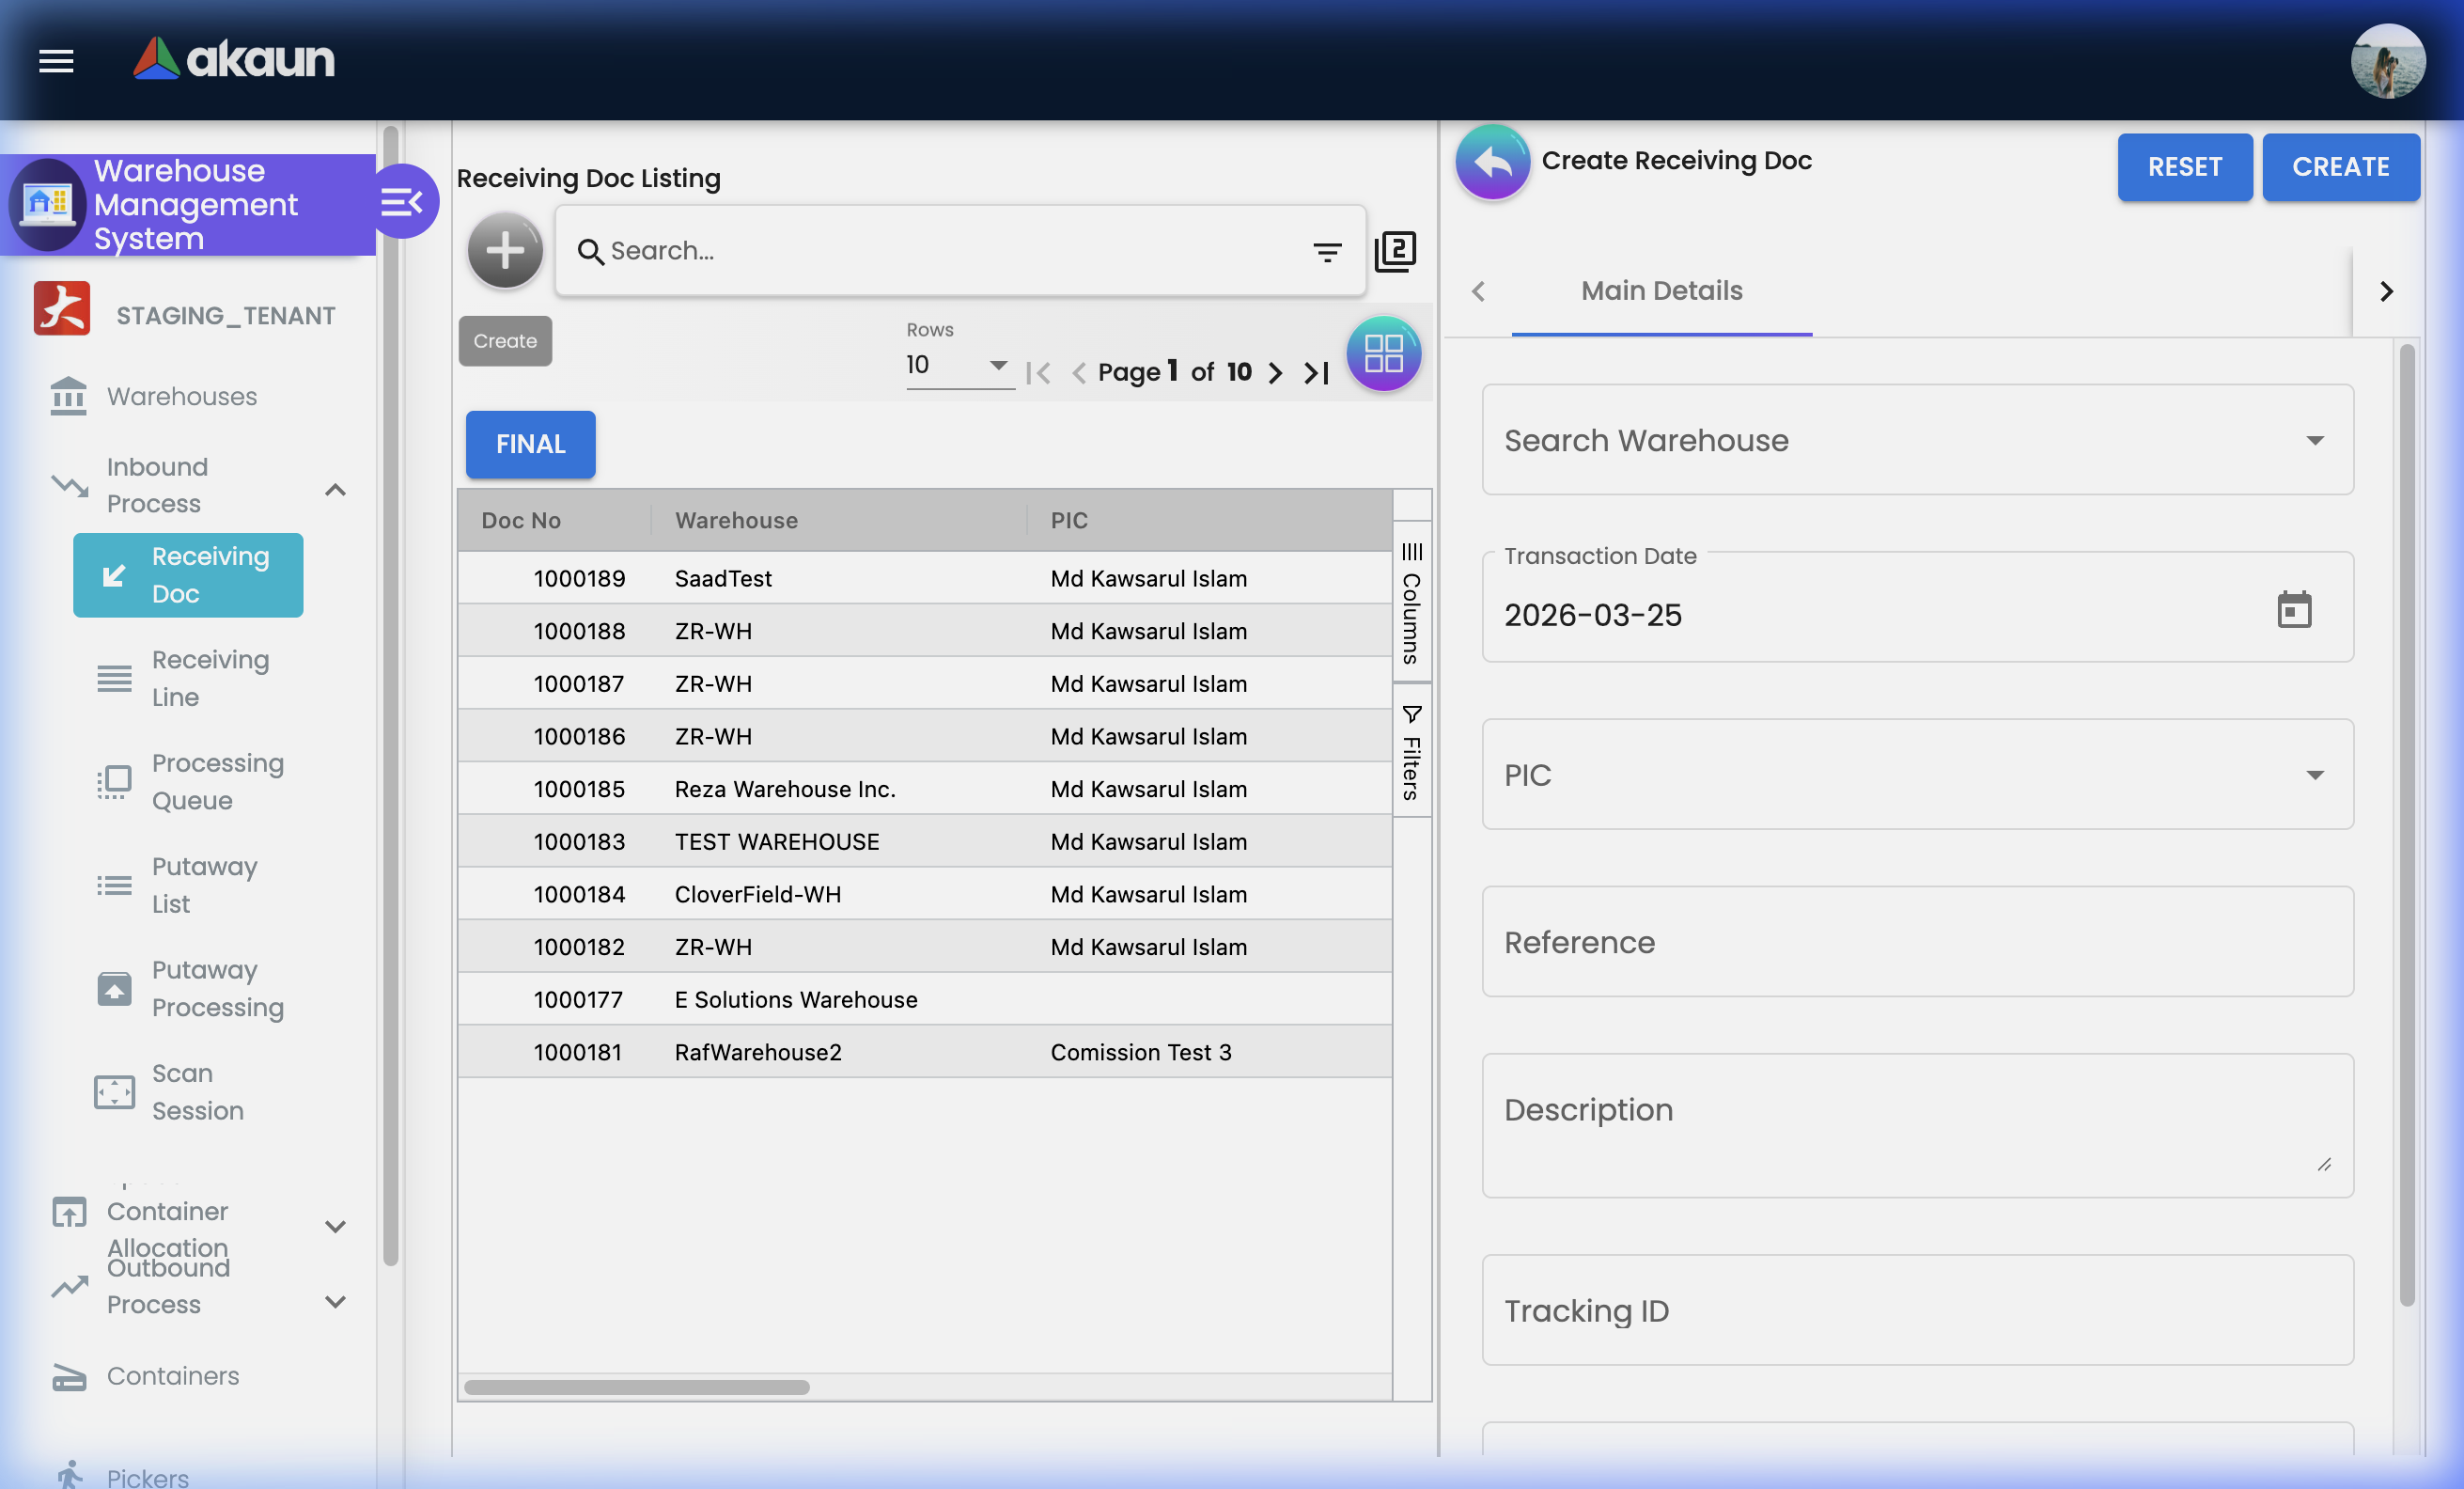
How to Create a Receiving Doc (Step-by-Step):
Step 1: Create the Document Header
- Go to Inbound Process > Receiving Doc
- Click "+" to create a new document
- System opens the Account tab — select the Supplier:
- Search by Supplier Code or Name
- Select and review full entity details (name, contact number, type)
- Set the Billing Address (where invoices come from)
- Set the Shipping Address (if the delivery origin differs)
- Click Create or save the header
Step 2: Add Line Items
- Go to the Line Items tab
- Click “Add Line”
- Fill in the line item:
- Item: Search by item code or name
- Quantity: Enter the received quantity
- UOM: Select unit of measure
- Tracking ID: Enter the supplier’s tracking or lot reference
- Save the line and repeat for each item in the delivery
- For items requiring serial number tracking, open the line and use the Serial Number tab
Step 3: Link to Source Documents (Optional)
- Go to the Xtn GenDoc Line Link tab
- Click "+" to link this receiving line to an existing Purchase Order line
- System pulls: Doc No, Item Code, Item Name, Type, UOM, Quantity, Tracking ID
- This creates a clear audit trail from PO → GRN
Real-World Scenarios:
Scenario 1: Routine Supplier Delivery
Supplier ABC delivers PO-2024-001: 500 units of Item X

Steps:
1. Create Receiving Doc header → Select Supplier ABC
2. Add Line: Item X, Qty 500, UOM = Each
3. Link to PO-2024-001 via Xtn GenDoc Line Link tab
4. Save → Item appears in Processing Queue

Result: Full traceability from PO to physical receipt
Scenario 2: Delivery Discrepancy
PO stated 500 units. Delivery only has 480 units.

Steps:
1. Create Receiving Doc: Item X, Qty 480 (actual received)
2. Link to PO line (system shows PO qty = 500)
3. Note the discrepancy in the description
4. Save and notify procurement team

Result: Inventory reflects what's actually on the shelf, not what was ordered
Scenario 3: Items Requiring Serial Number Tracking
Receiving 20 laptop computers (each has a unique serial number)

Steps:
1. Create Receiving Doc: Laptops, Qty 20
2. Open the line item → go to Serial Number tab
3. Method A (Scan): Use barcode scanner to scan each unit
4. Method B (Import): Upload a CSV file with 20 serial numbers
5. Verify count matches: 20 serial numbers = 20 units

Result: Each laptop is individually tracked from day of receipt
Tips for Receiving Staff:
✓ Always count before entering: Physical count first, system entry second — never assume
✓ Scan barcodes where possible: Use the Serial Number scan function to eliminate manual entry errors
✓ Link to source documents: Always link to the Purchase Order so discrepancies are visible
✓ Note discrepancies immediately: Record actual received quantities even if they differ from the PO
❌ Common Mistakes:
- Entering the PO quantity instead of actual received quantity
- Not recording serial numbers at the time of receipt (hard to trace later)
- Forgetting to link to the source PO (makes reconciliation difficult)
- Creating duplicate receiving docs for the same delivery
Receiving Line Items
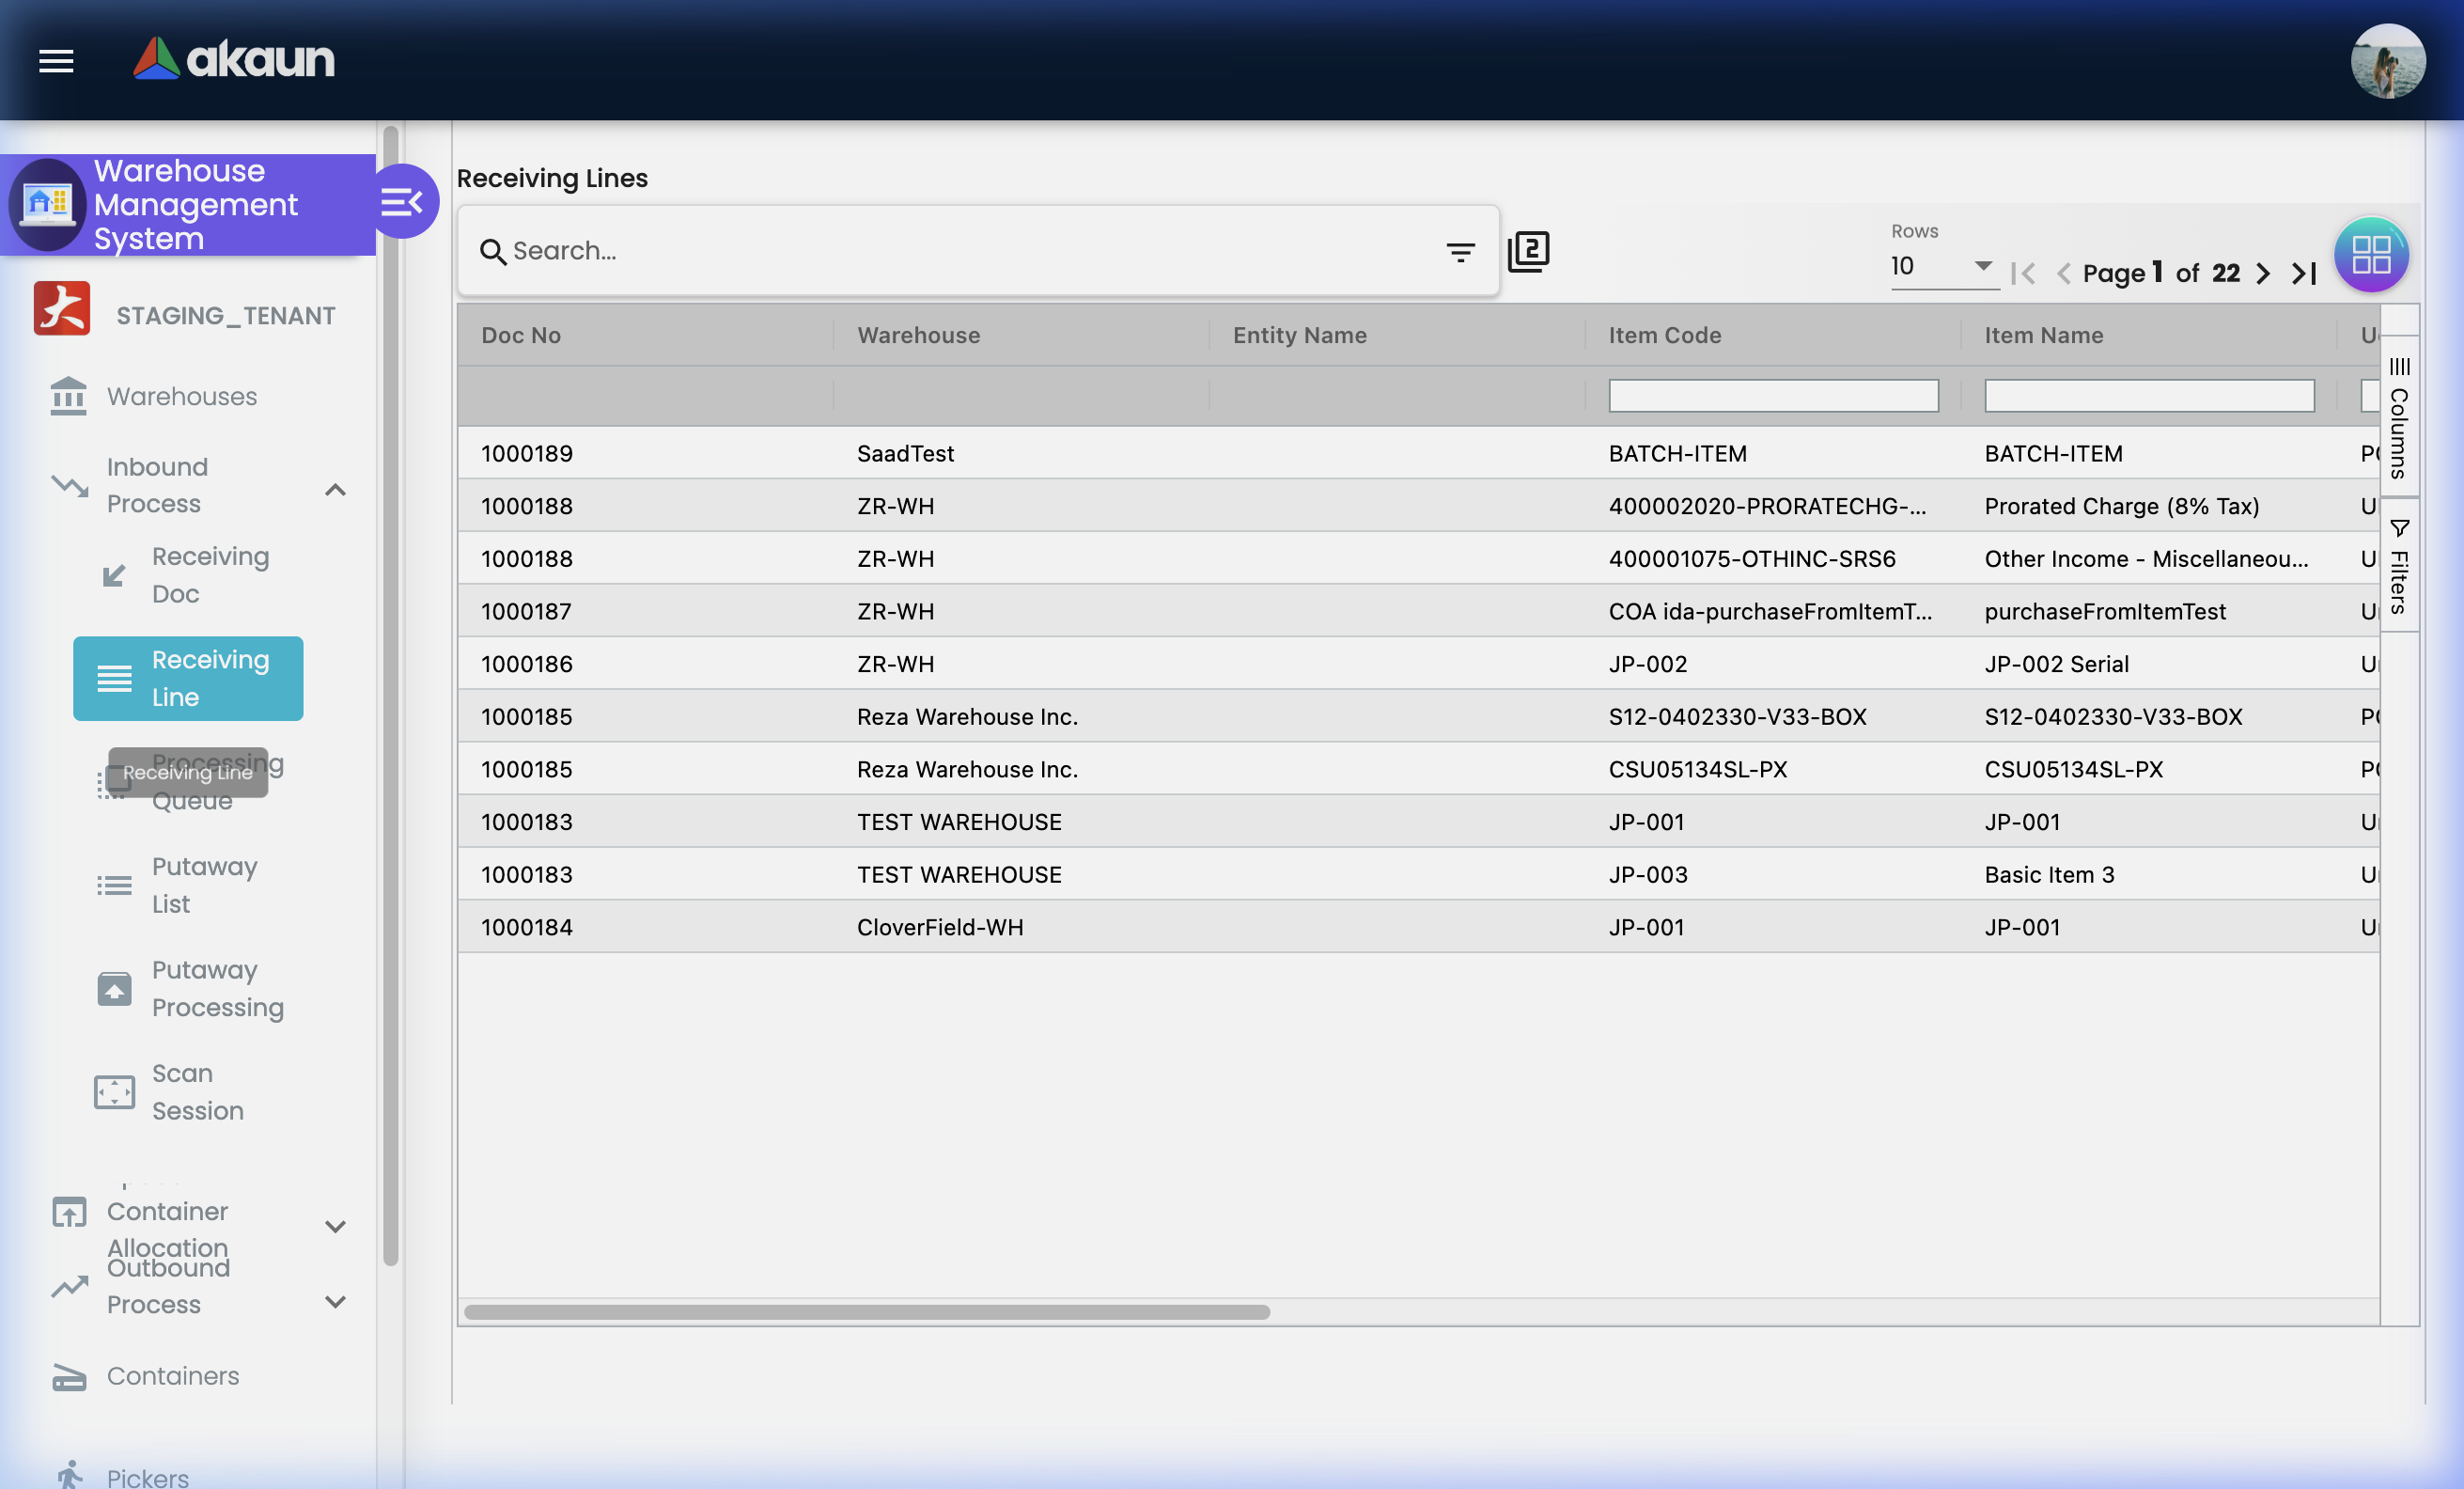
Individual item-level view across all receiving documents.
The Receiving Line Items view gives you a flat, searchable list of every item received — across all receiving documents. It’s your “what came in” history.
Why This View Is Useful:
- Find a specific item without knowing which Receiving Doc it belongs to
- Track all receipts of a specific item across multiple deliveries
- Review serial numbers, batch numbers, and bin assignments
Key Data Tracked Per Line:
| Field | Details |
|---|---|
| Item Code & Name | The product identifier |
| Quantity & UOM | How much was received and in what unit |
| Tracking ID | Supplier-provided lot/delivery reference |
| Serial Numbers | Individual unit identifiers (electronics, high-value goods) |
| Batch Numbers | Manufacturing batch reference (pharmaceuticals, food) |
| Bin Numbers | Physical storage bin assigned to this receipt |
Receiving Line Item — Tabs Overview:
| Tab | Purpose |
|---|---|
| Main Details | Core fields: item code, name, quantity, UOM, tracking ID |
| Serial Number | Manage individual serial numbers (manual, scan, import) |
| Batch Number | Record manufacturing batch/lot details |
| Bin Number | Assign or view the physical bin location for this item |
Serial Number Management in Detail:
For items that need individual tracking (e.g., electronics, machinery, high-value assets):
| Method | How to Use | Best For |
|---|---|---|
| Manual Entry | Type each serial number one at a time | Small quantities (< 10 units) |
| Scan | Use a barcode scanner connected to the device | Medium quantities with barcoded labels |
| Import | Upload a CSV/Excel file with all serial numbers | Large quantities (> 50 units) |
Batch Number: Used for goods manufactured in batches — commonly required for pharmaceuticals, food, chemicals, and cosmetics. A batch number groups all units made in the same production run.
Bin Number: Identifies where within the warehouse this item will be stored. Assigned during putaway, this field provides the physical address for retrieval during picking.
Processing Queue
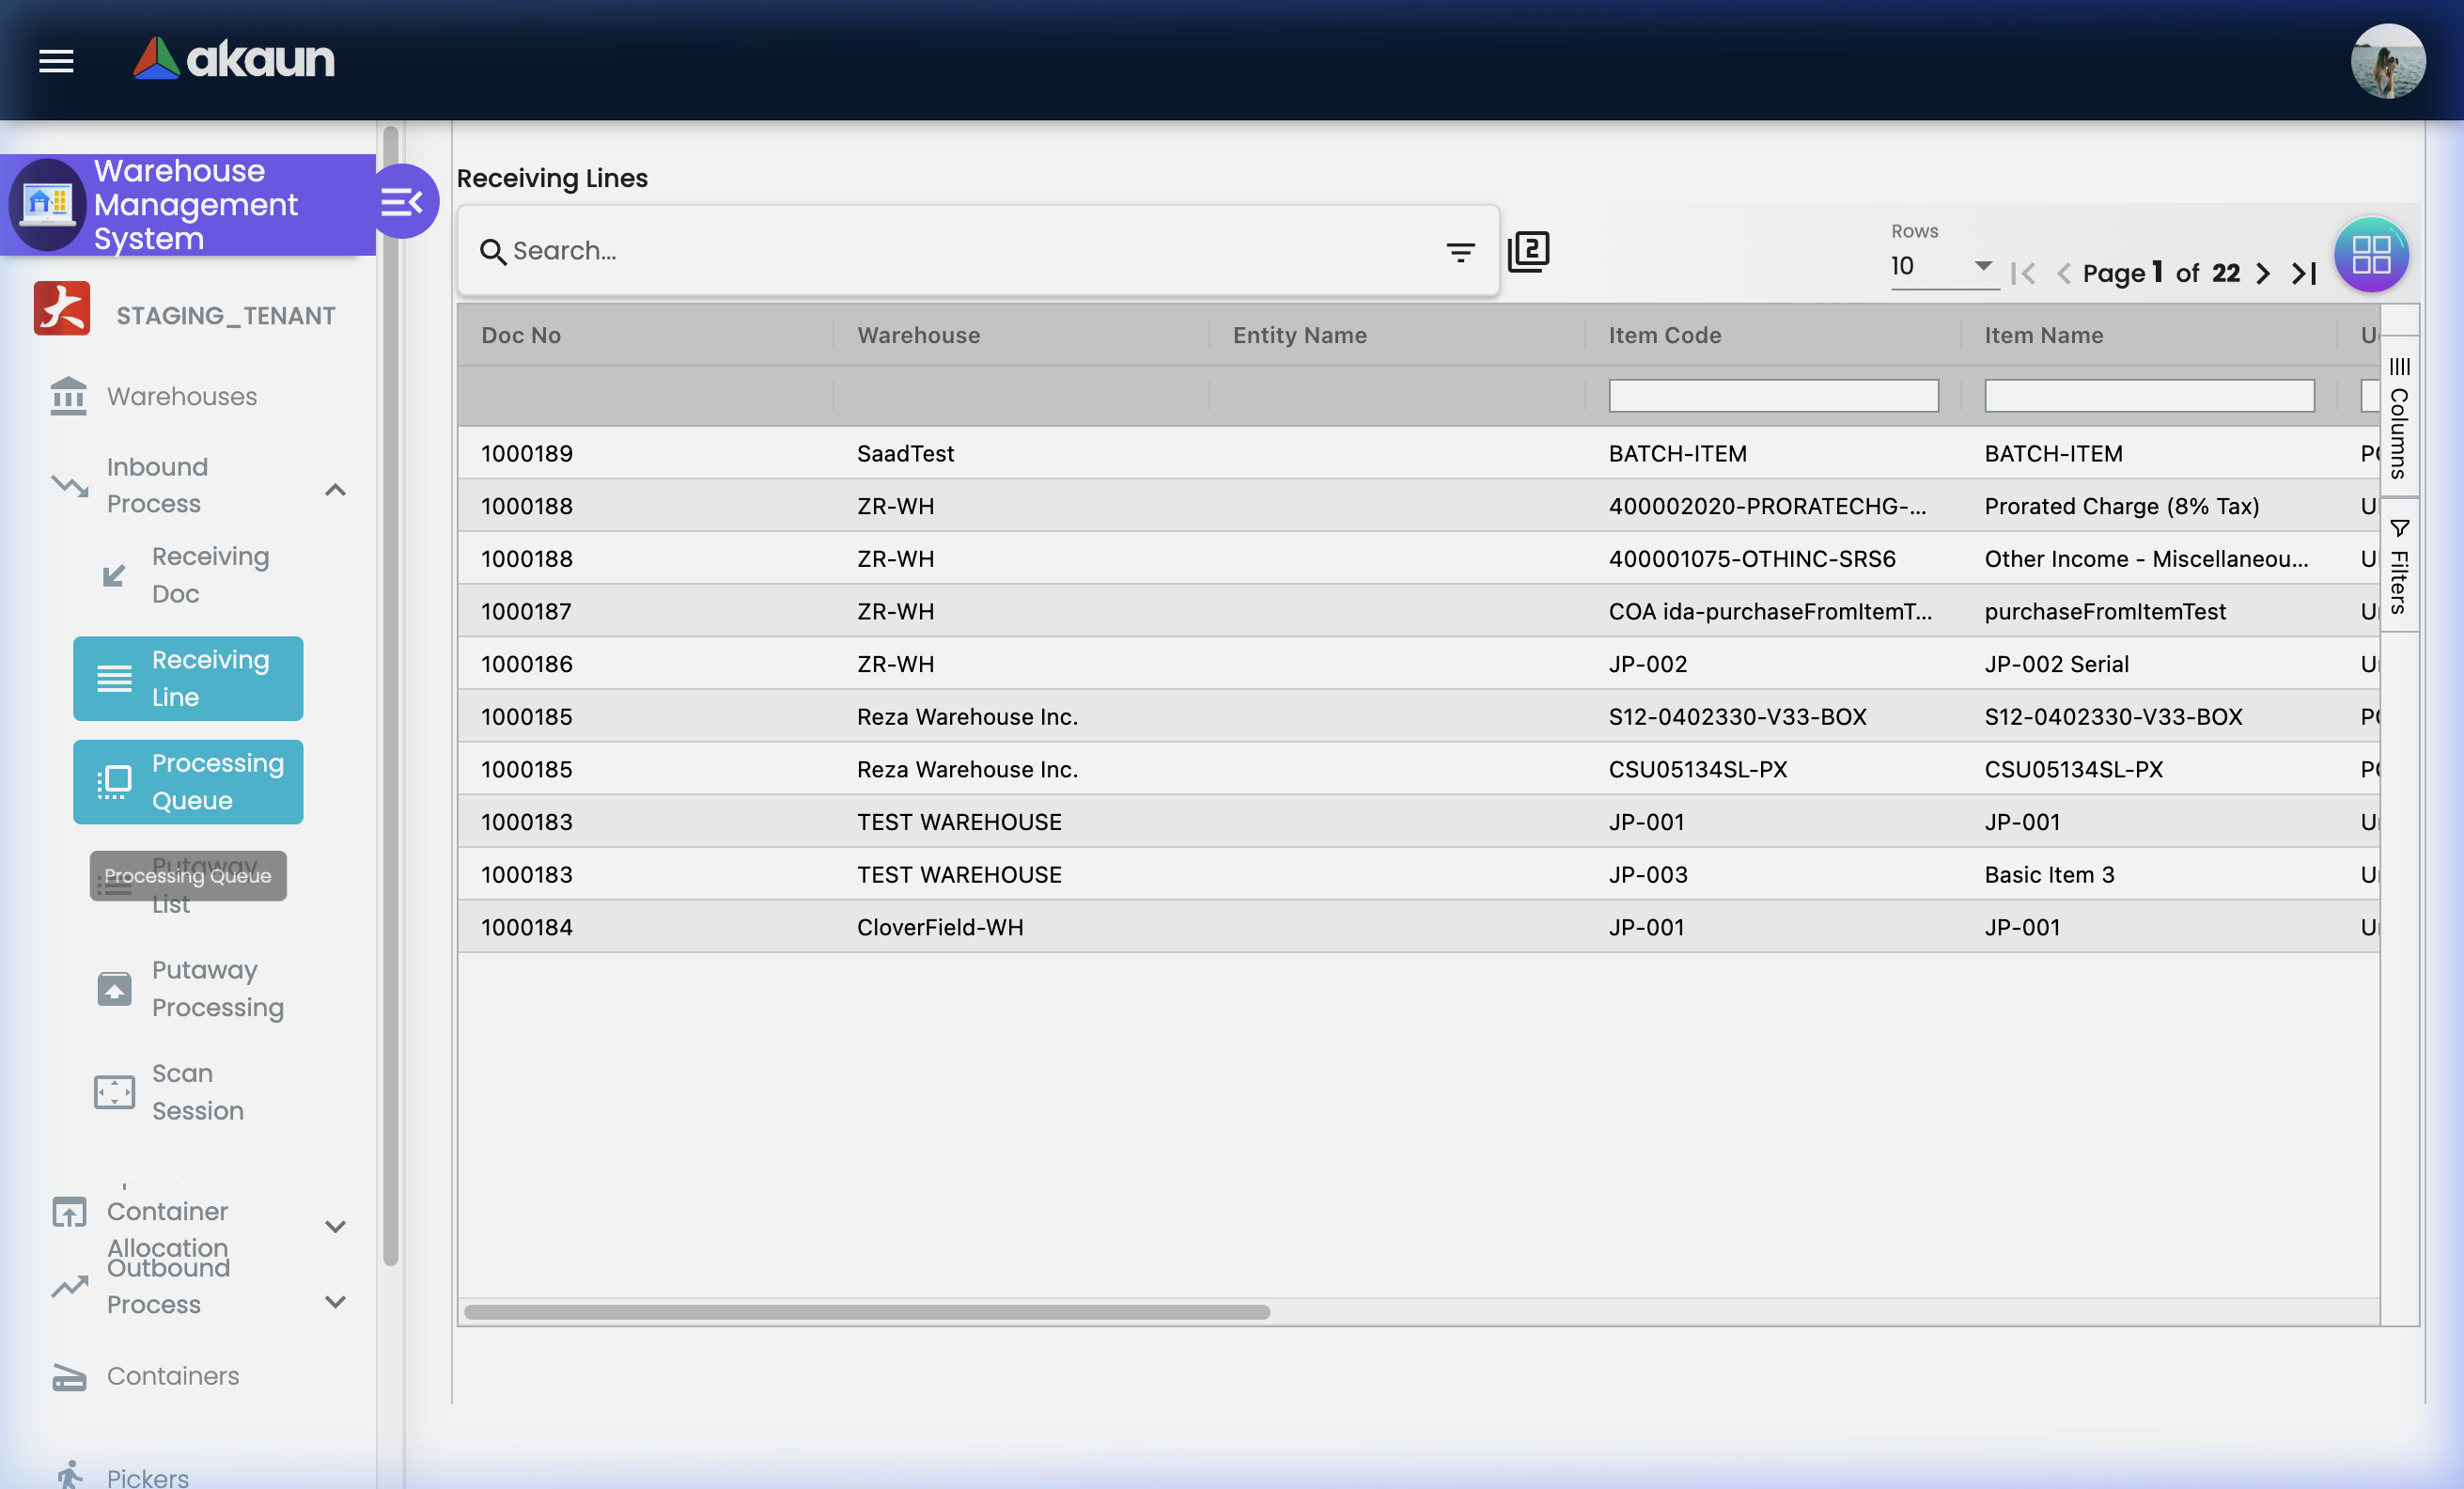
Items awaiting inspection and processing after receiving.
What You Can Do in the Processing Queue:
- View all items that have been received but not yet processed
- Link items to storage containers
- Review and edit WMS-specific item attributes
- Assign items to space allocations (containers/locations)
- Use the Space Selection interface to choose storage locations manually
- Track the processing status of each item
Processing Queue — Tabs Overview:
| Tab | What It Shows | What to Do Here |
|---|---|---|
| Main Details | Core info: document reference, item, qty, status | Review and confirm the received item |
| WMS Items | WMS-specific attributes for this item | Set handling instructions, storage class |
| Financial Items | Accounting/financial item data | Verify financial codes if required |
| Inventory Items | Inventory-level item details | Check inventory records |
| Space Container Allocation | Assigned container(s) for this item | View or assign containers |
| Space Selection | Location selection interface | Choose the storage location manually |
How to Process a Queue Item:
- Go to Inbound Process > Processing Queue
- Select an item from the queue
- Review Main Details — confirm item, quantity, source document
- Check WMS Items tab — set any required WMS attributes
- Space Container Allocation tab — assign a container if applicable
- Space Selection tab — choose a specific node/bin location
- Save — the item is now ready for putaway
Real-World Scenario:
Problem: 200 units of a fragile component arrived. They need special handling labels and must be stored in Zone C (fragile goods area), not in general storage.
Solution:
- Open the item in the Processing Queue
- Go to WMS Items tab — add “FRAGILE” handling flag
- Go to Space Selection — choose Zone C as the target location
- Save — the Putaway List entry will now direct staff to Zone C
Putaway List
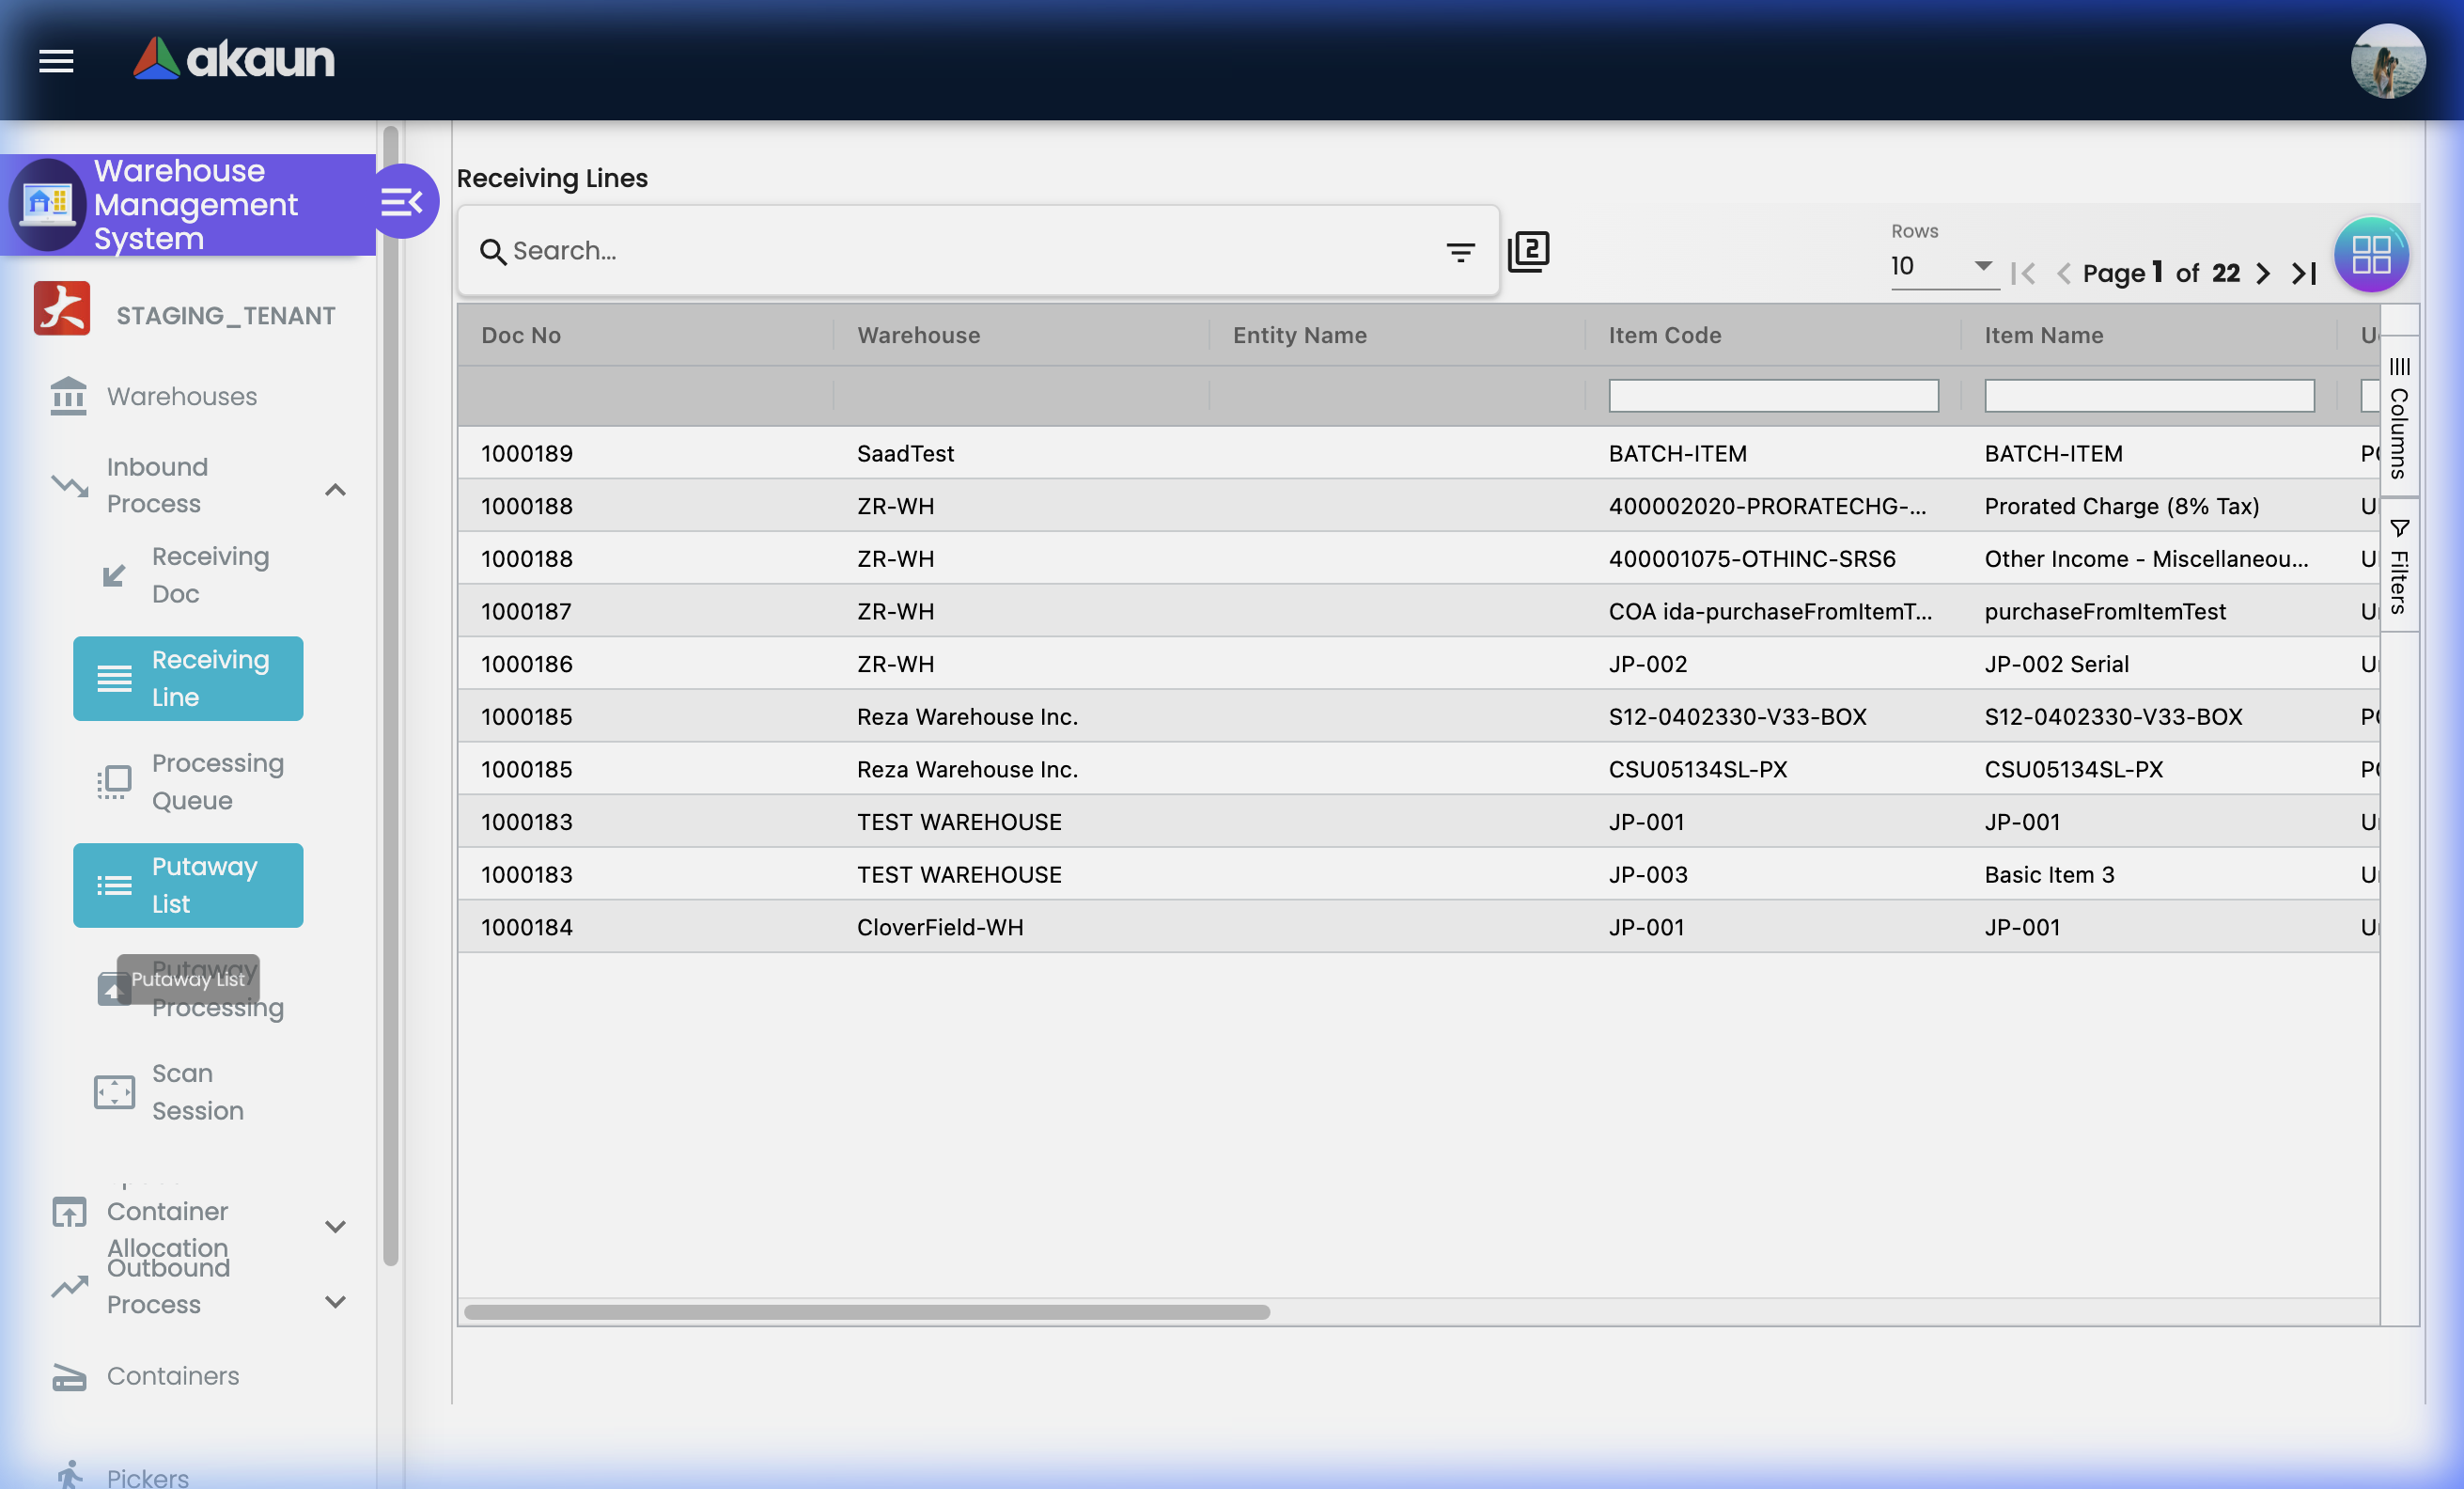
Instructions for storing processed items in their designated warehouse locations.
After items are processed (inspected and approved in the Processing Queue), they need to be physically moved to their storage locations. The Putaway List is the instruction set that tells warehouse staff exactly where to place each item.
How Putaway Works:
- Items are processed in the Processing Queue
- System generates or staff creates Putaway List entries
- Each entry specifies: Item + Quantity + Target Container + Target Location
- Warehouse staff follow the list, physically move items to assigned locations
- Staff confirm completion — items are now tracked at their stored location
Putaway List Columns:
| Column | Description |
|---|---|
| Warehouse | Which warehouse this putaway belongs to |
| Putaway No. | Auto-generated putaway list number |
| Container Code | Container assigned to hold these items |
| Container Scan Code | Barcode for scanning the container |
| Space | Storage node/location description |
| Space Scan Code | Barcode for scanning the storage location |
| Space Allocation Status | Whether the space has been allocated |
| Created Date / Last Update | Timestamps for the record |
| Status | Current completion status |
Tips for Efficient Putaway:
✓ Print the Putaway List: Give staff a physical copy to carry through the warehouse
✓ Use Scan Codes: Set up scan codes on containers and nodes so staff can verify the correct location with a scan
✓ Follow FIFO: Place new stock behind older stock to ensure First-In-First-Out usage
✓ Group by Destination: Process all items going to Zone A before Zone B to reduce travel
Putaway Processing Queue

Active putaway tasks currently in progress.
The Putaway Processing Queue shows putaway tasks that have been started but not yet completed. This real-time view gives supervisors visibility into ongoing storage operations and helps identify bottlenecks.
Use This View To:
- Monitor which putaway tasks are in progress vs completed
- Identify tasks that have been pending too long
- Reassign tasks if a staff member is unavailable
Scan Session
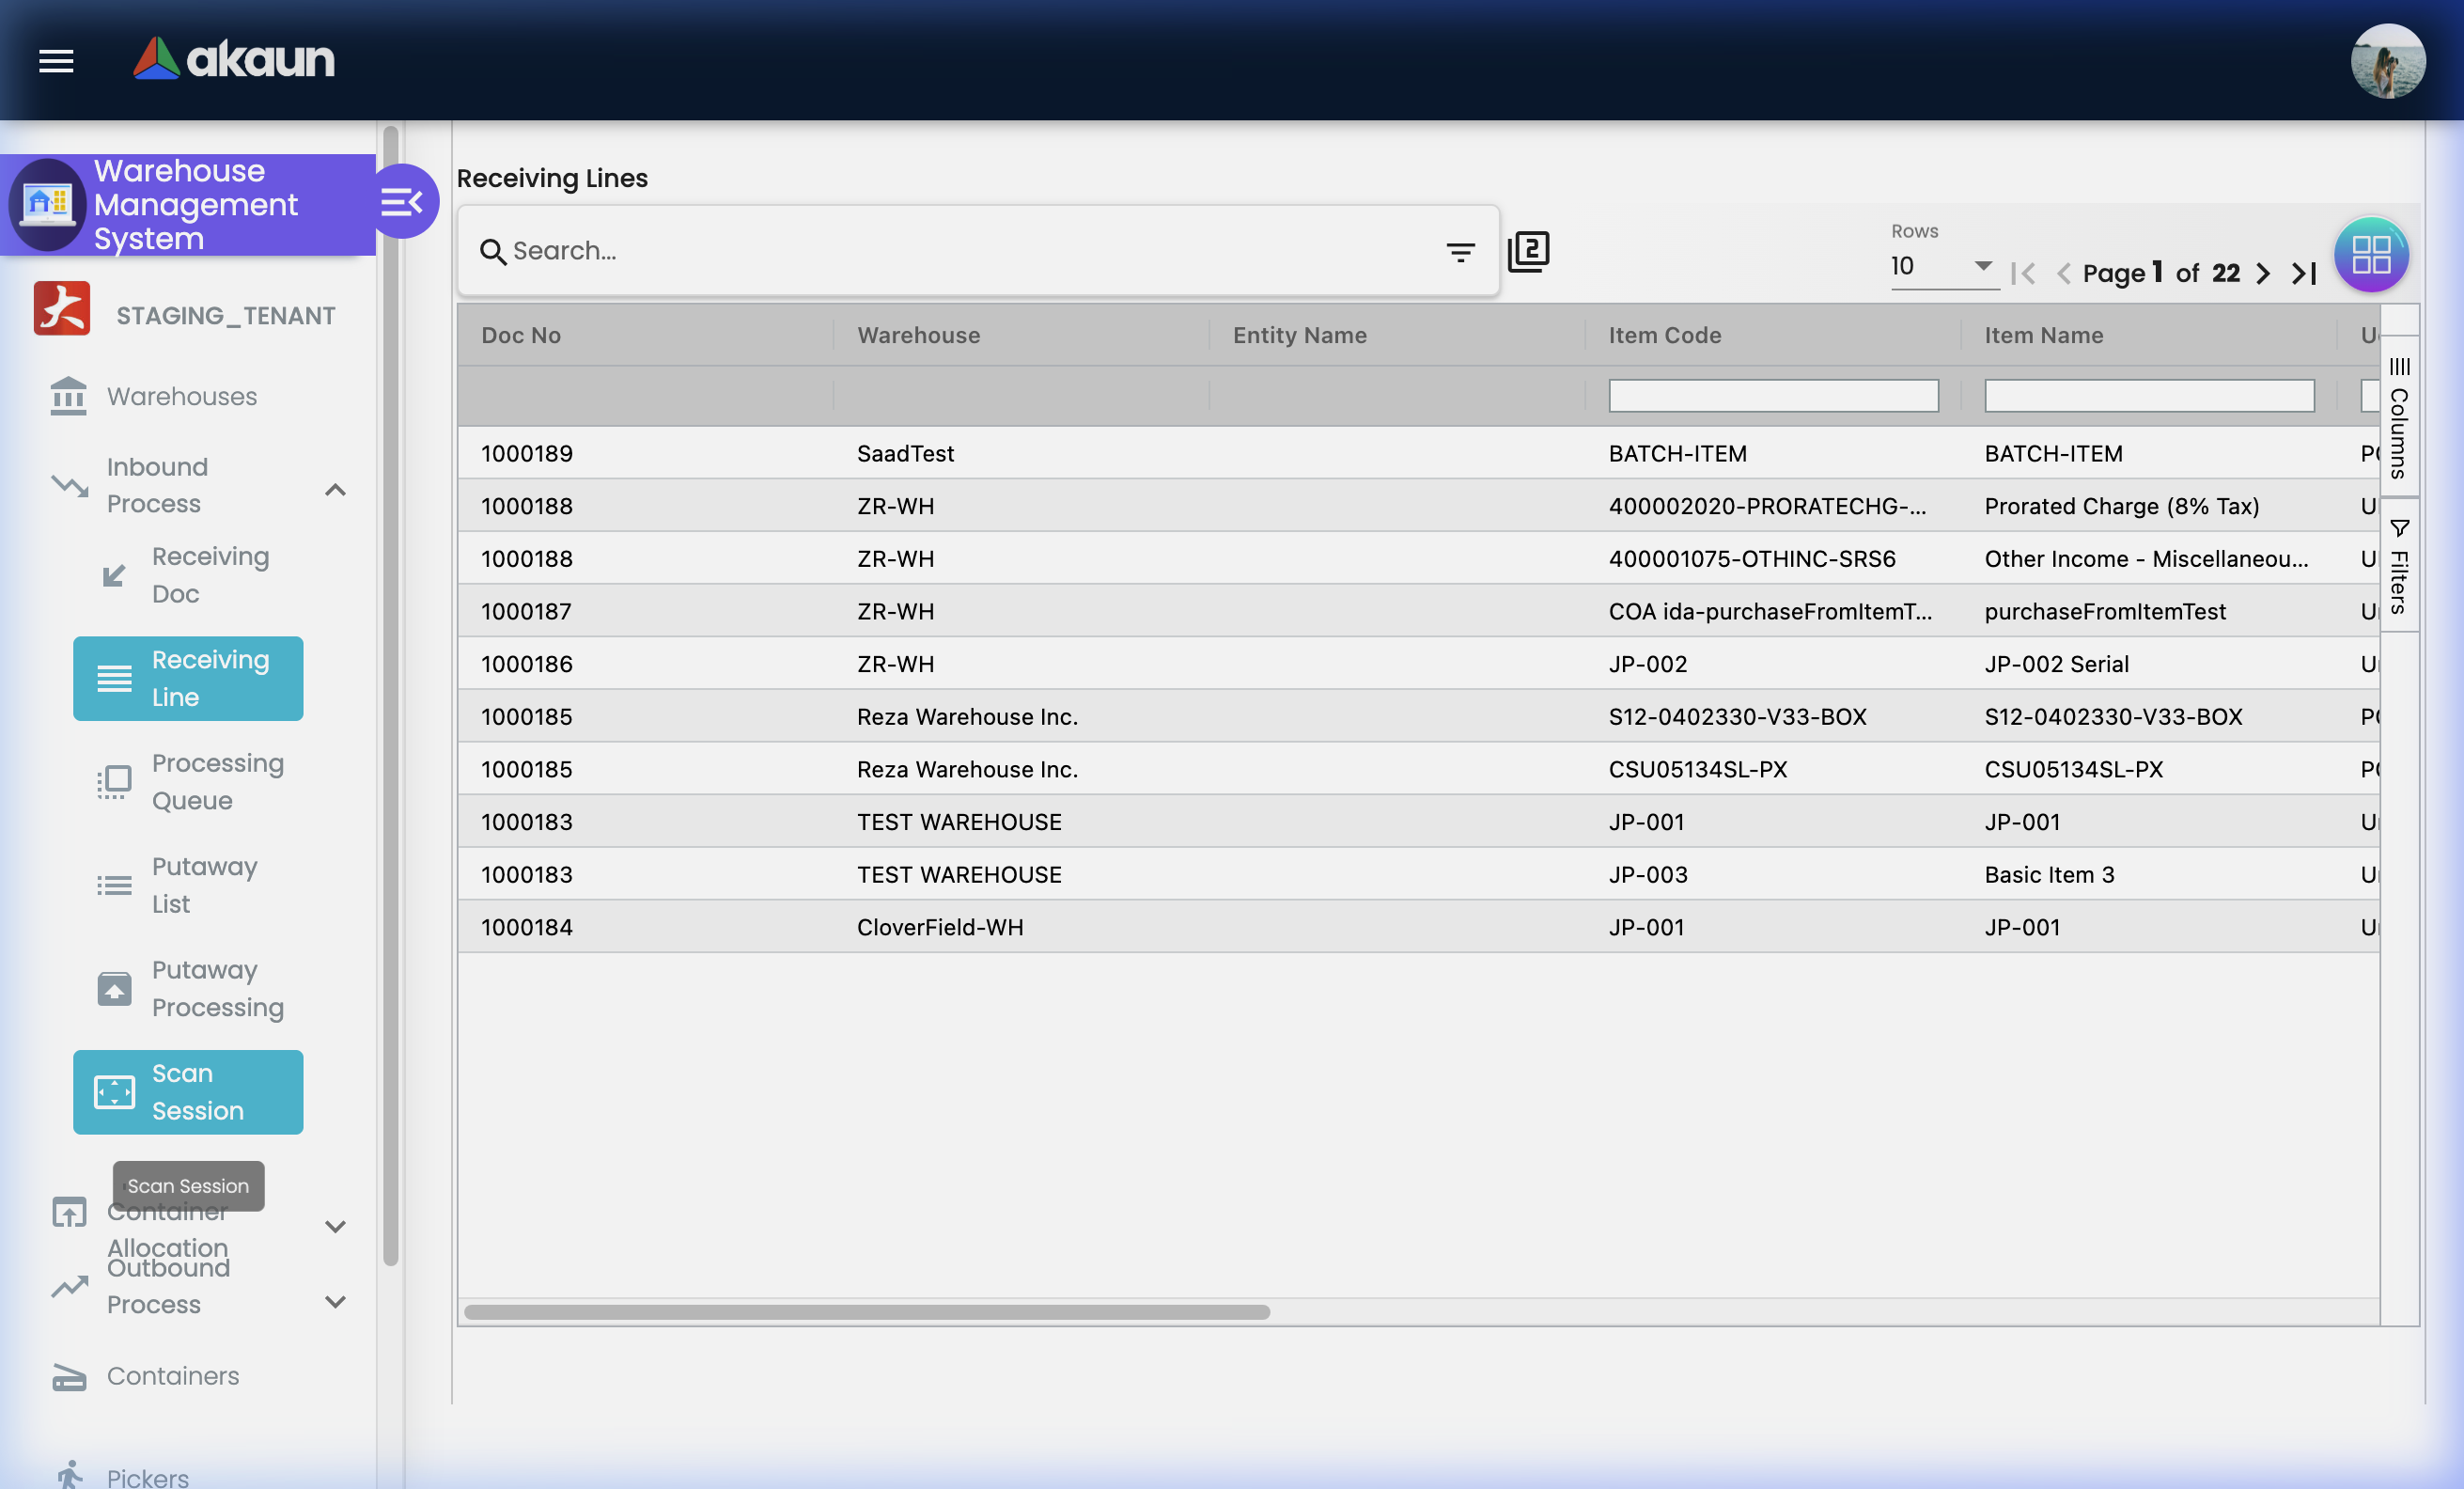
Barcode scanning sessions for efficient, accurate receiving.
Scan Session provides a dedicated scanning interface for processing large deliveries quickly using barcode scanners — no manual data entry required.
How a Scan Session Works:
- Go to Inbound Process > Scan Session
- Create a new session (link to a Receiving Doc or standalone)
- Use a barcode scanner to scan each item as it comes off the delivery vehicle
- System matches scanned codes to known items
- Review the scan session summary before confirming
- Confirm — scanned items are recorded in the receiving system
Benefits:
- ✓ Dramatically faster than manual entry for large shipments
- ✓ Eliminates typos from manual data entry
- ✓ Barcode verification confirms item identity
- ✓ Session-based tracking provides accountability (who scanned what, when)
- ✓ Batch process hundreds of items in minutes
Best For:
- High-volume FMCGs or consumer goods with barcoded packaging
- Electronics receiving with manufacturer serial number barcodes
- Returns processing where speed matters
Outbound Process
Manage the complete flow of goods leaving your warehouse.
The Outbound Process covers order fulfilment from the moment a sales order triggers a pick request, through to physical picking, packing, and dispatching the shipment.
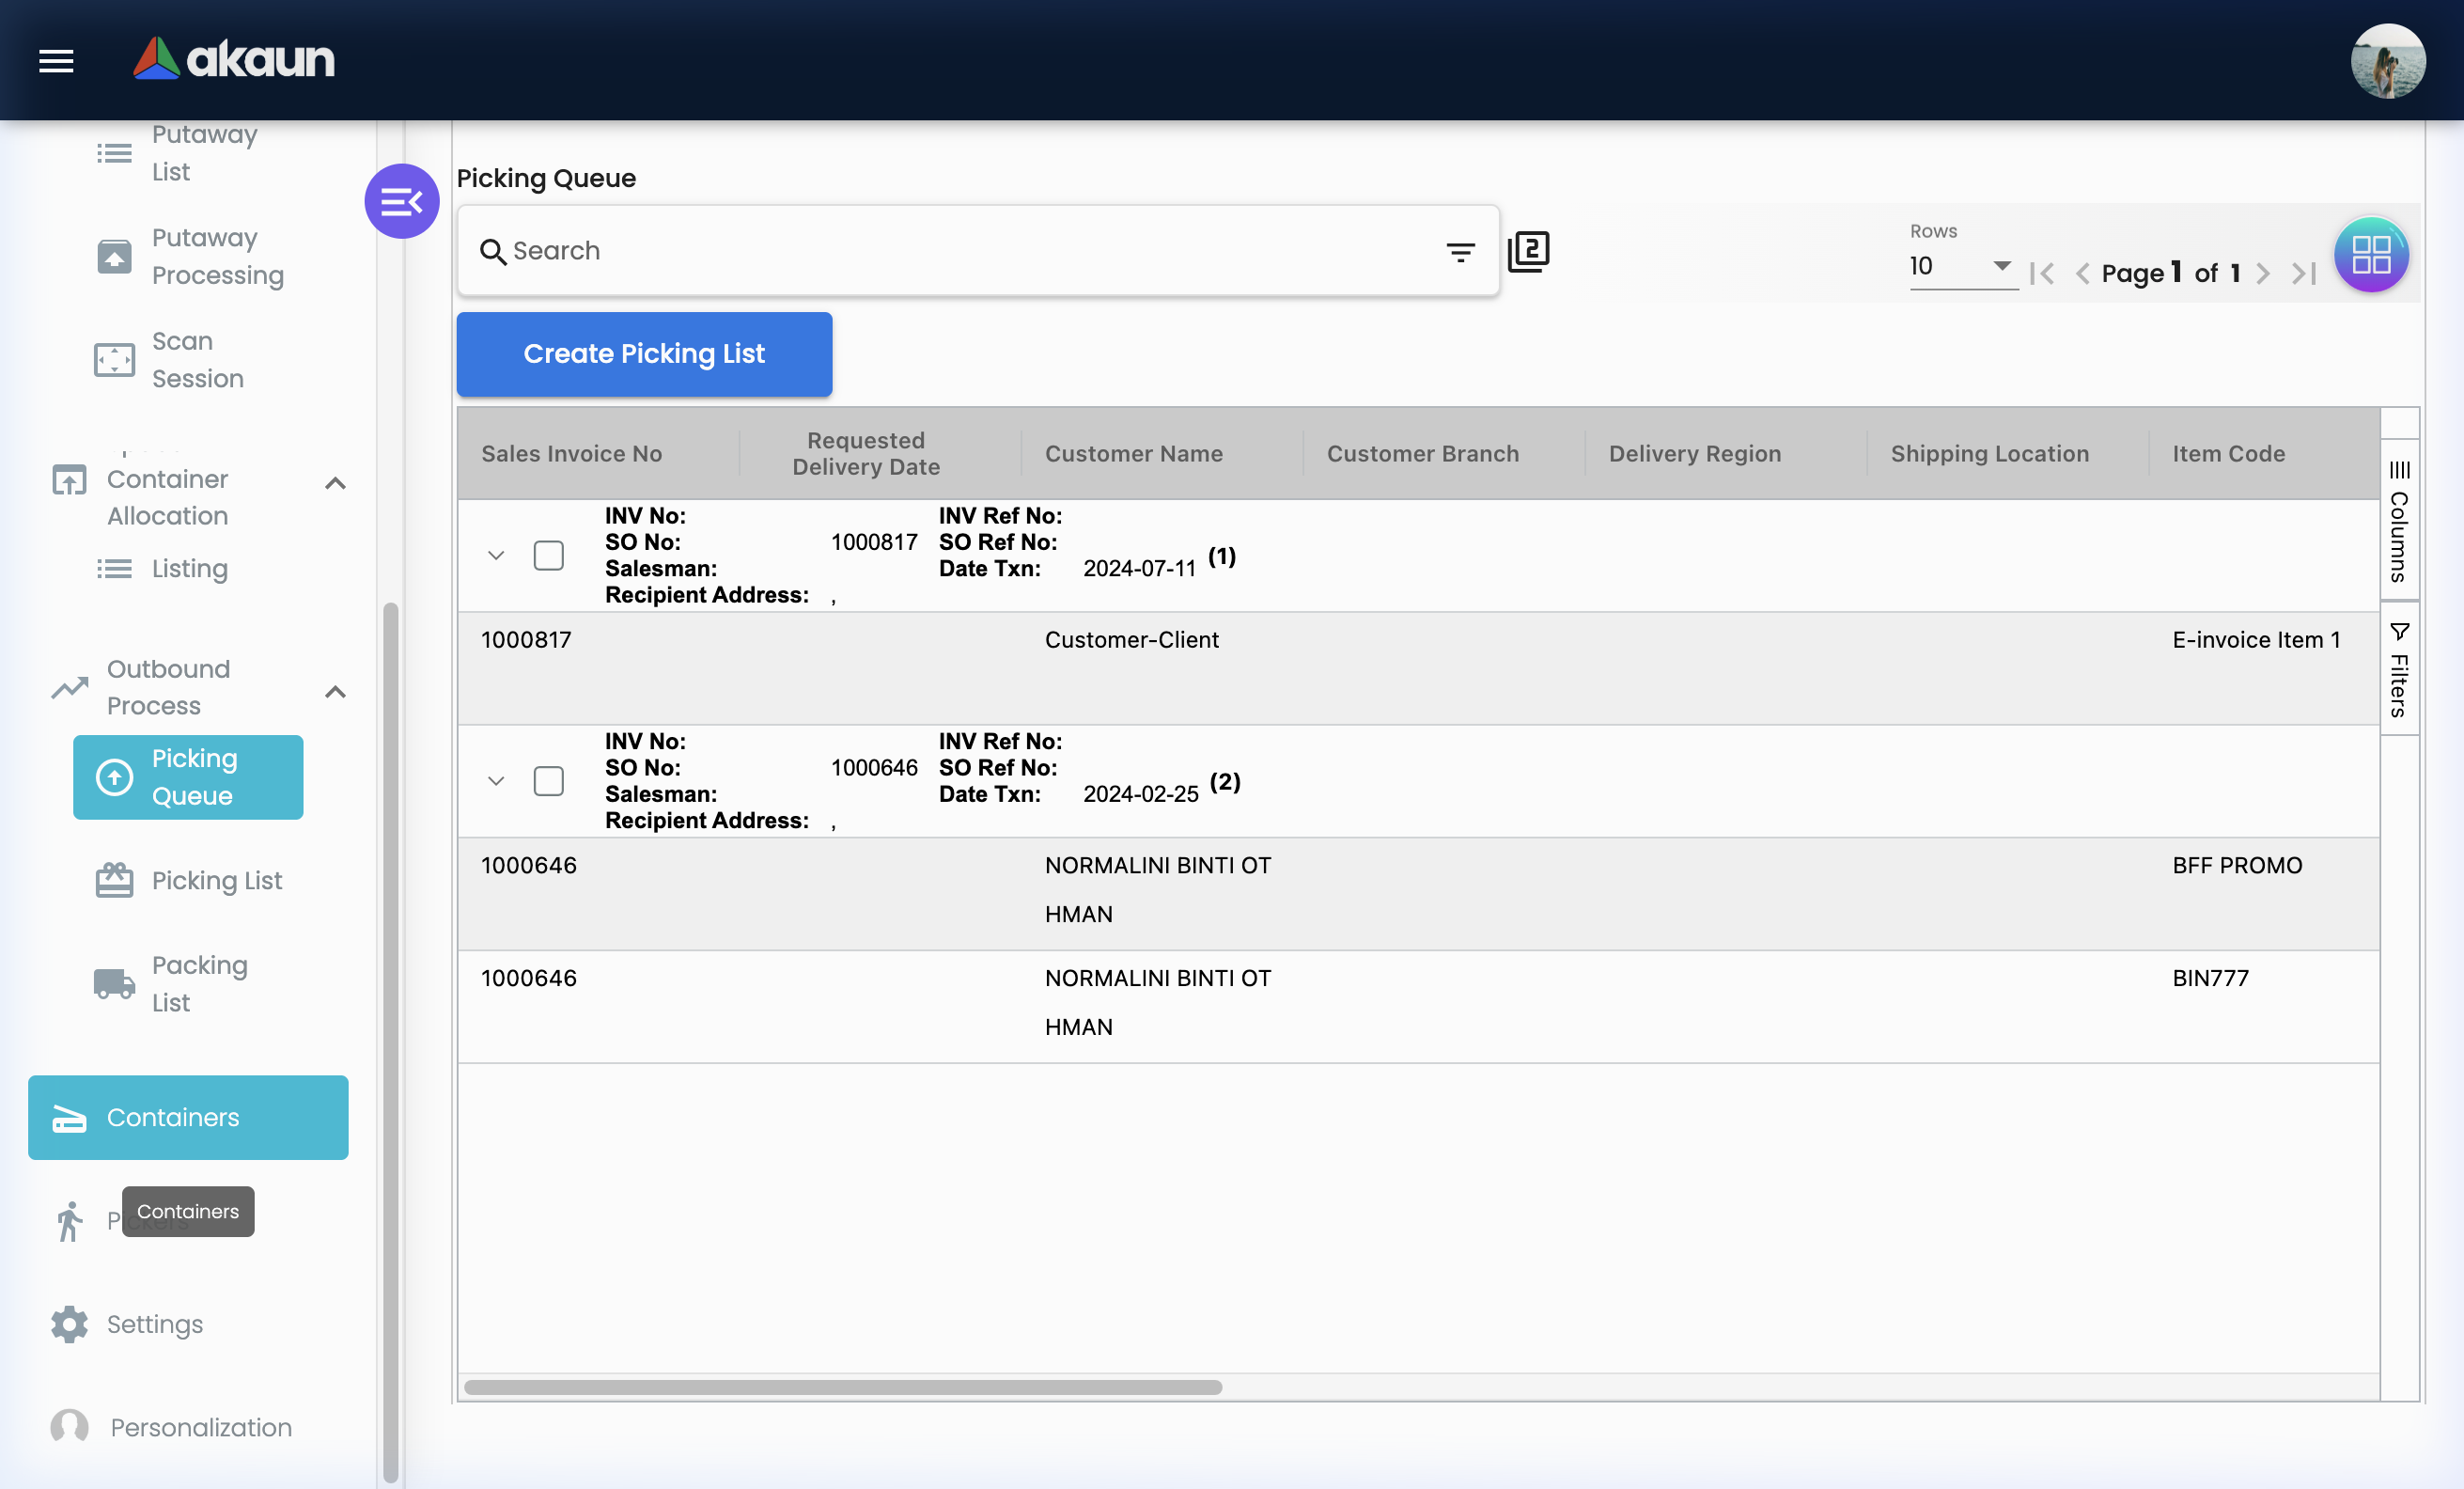
Picking Queue
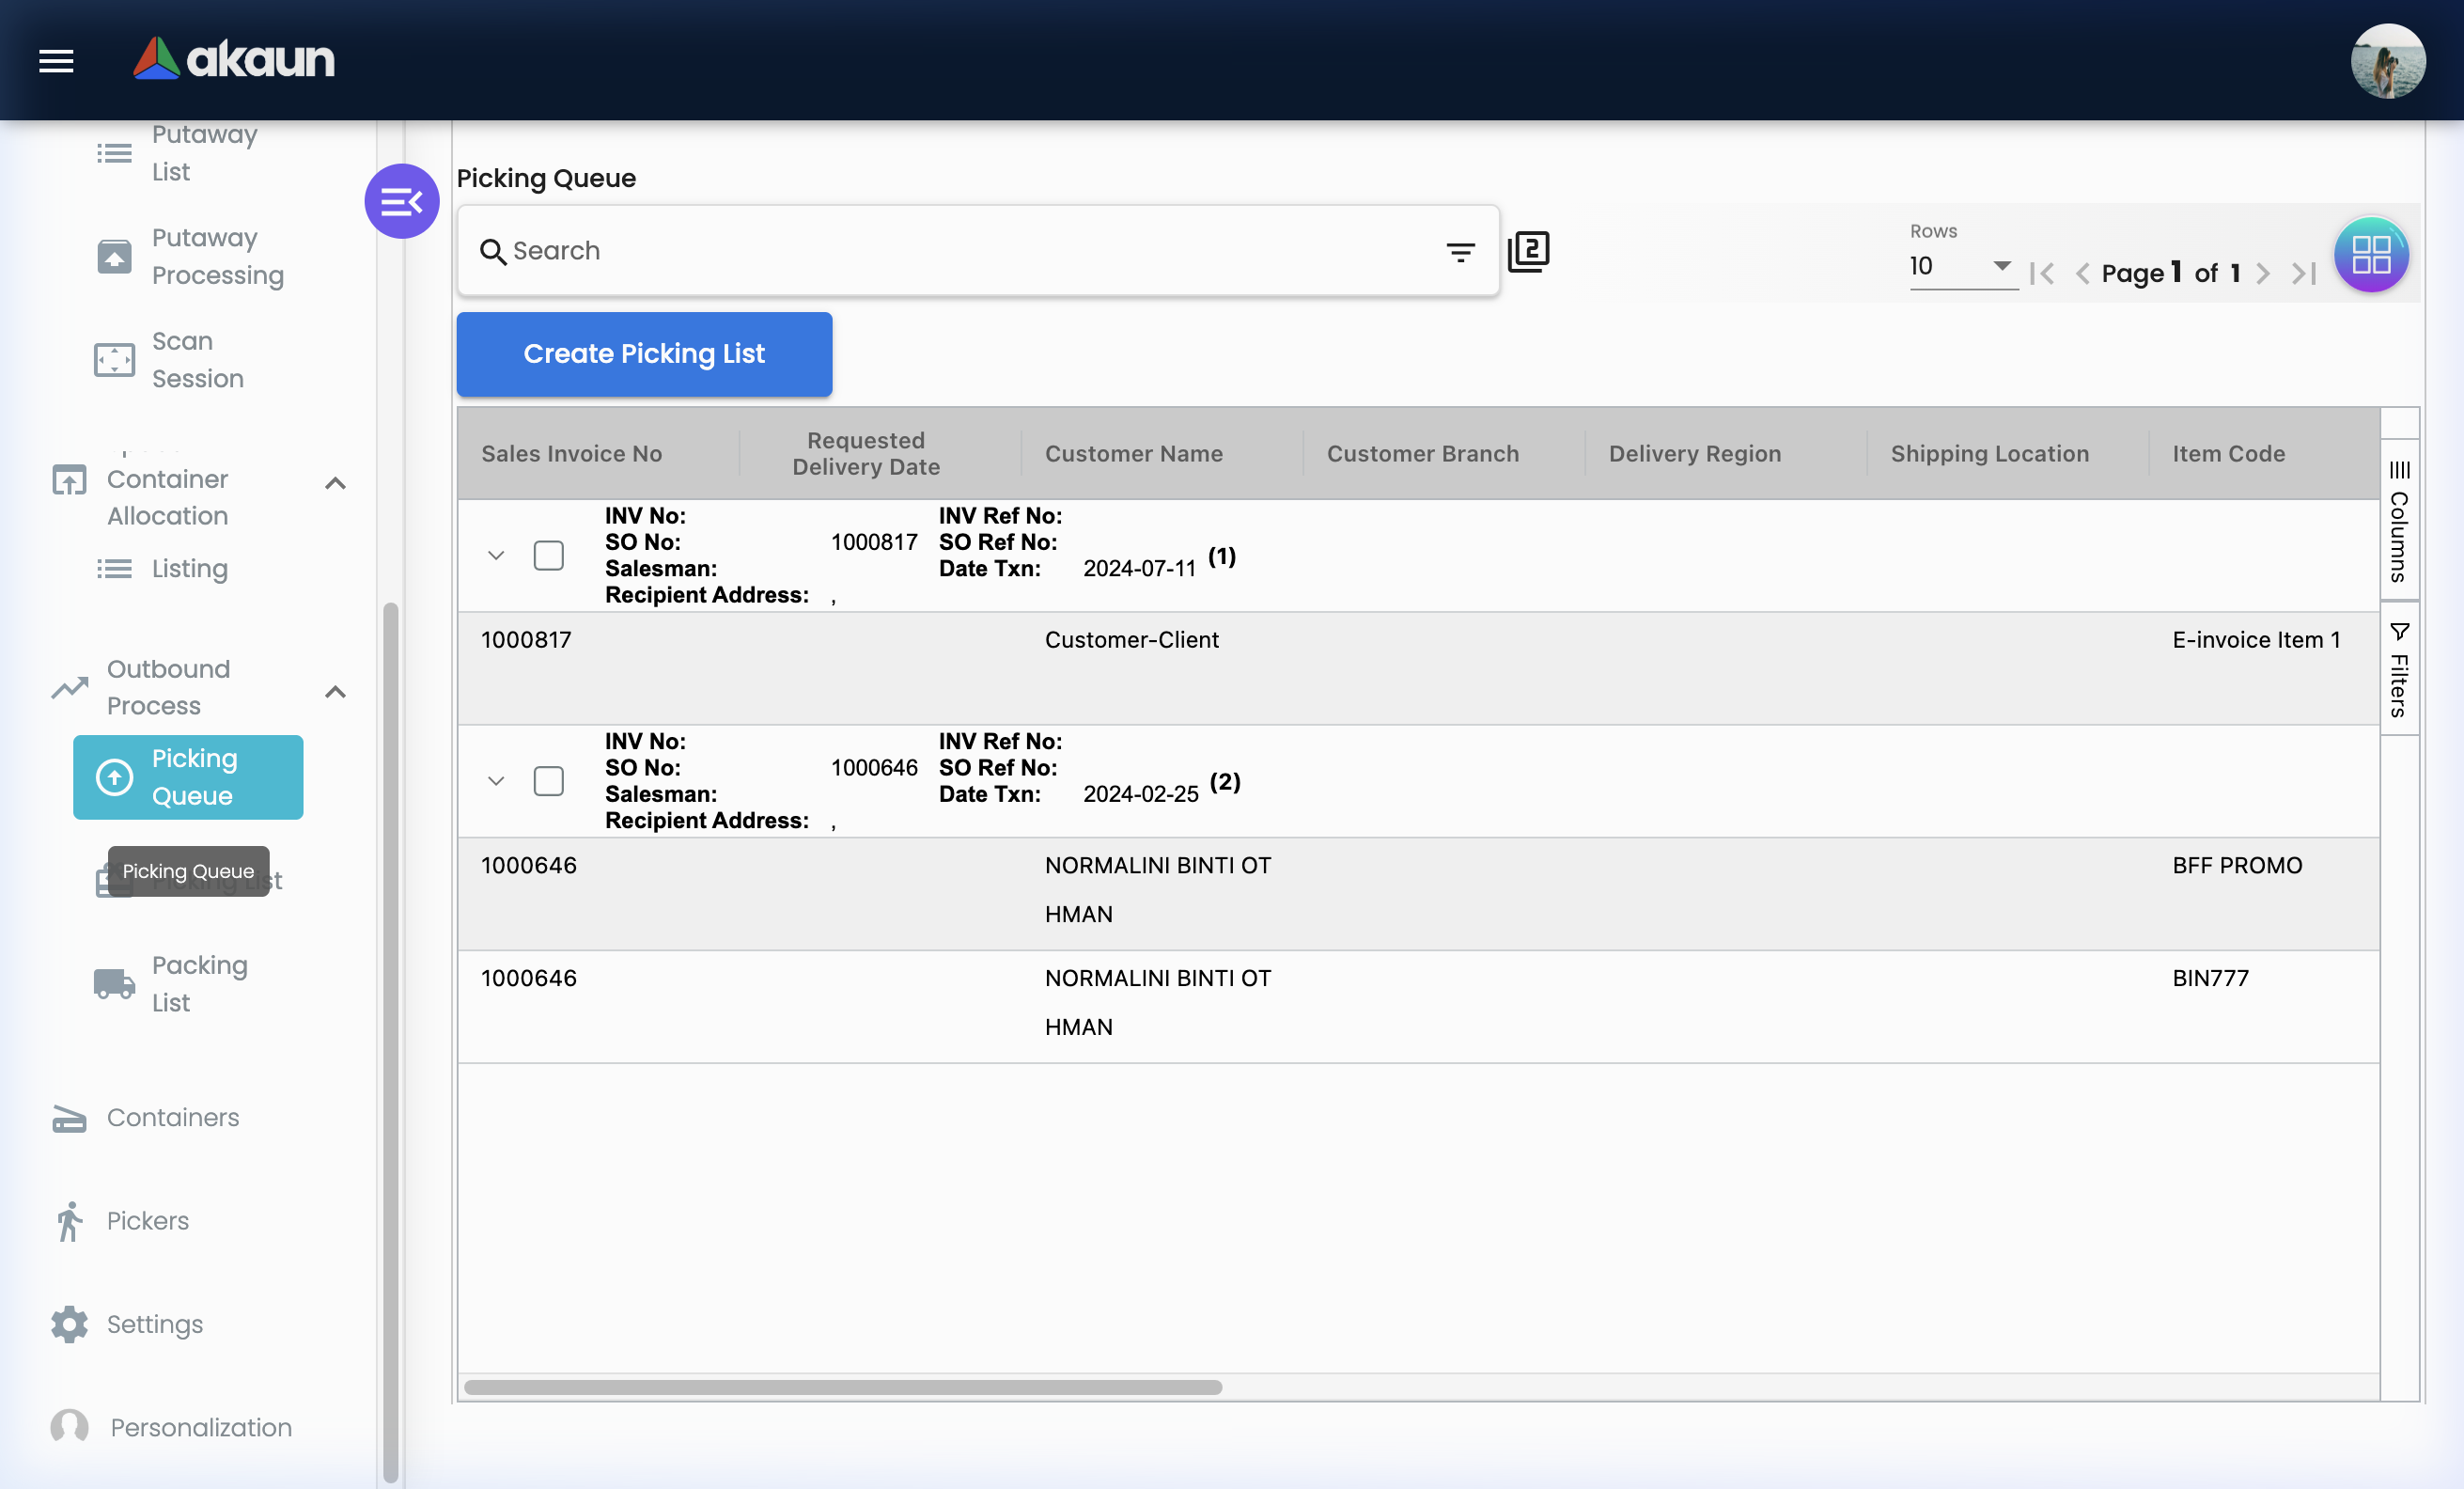
All pending order items awaiting fulfilment — your outbound command centre.
The Picking Queue aggregates items from all pending customer orders that require goods to be picked from the warehouse. It is sorted to help warehouse supervisors prioritise fulfilment.
Picking Queue Columns:
| Column | What It Shows | Why It Matters |
|---|---|---|
| Sales Invoice No | Source sales document | Trace back to the customer order |
| Requested Delivery Date | Customer’s required delivery date | Prioritise urgent orders |
| Customer Name | The customer to fulfil | Know whose order you’re picking |
| Customer Branch | The customer’s branch | Important for multi-branch customers |
| Delivery Region | State/region for delivery | Route planning |
| Shipping Location | Specific delivery address | Final destination address |
| Item Code | Product code to pick | What to pick |
| Item Name | Product name | Confirm correct item |
| Delivery Type | Method of delivery | Standard, Express, Self-collect |
| Base Quantity | Total quantity ordered | Full order amount |
| UOM | Unit of measure | Each, Box, Pallet, etc. |
| Qty Pending | Still to be picked | How much is outstanding |
| Qty To Deliver | Quantity for this delivery | Could be partial delivery |
| Location Balance | Stock at the pick location | Is the item available where expected? |
| Company Balance | Total company-wide stock | If location is empty, can source elsewhere |
| Delivery Status | Current delivery state | Pending, In Progress, Completed |
| Remarks | Delivery notes | Special instructions from customer |
How to Use the Picking Queue:
Step 1: Review Pending Items
- Go to Outbound Process > Picking Queue
- Review items sorted by Requested Delivery Date (most urgent first)
- Check Location Balance — if it shows 0, investigate before creating a picking list
- Check Qty Pending vs Qty To Deliver — understand scope of work
Step 2: Create a Picking List
- Select one or more items from the queue
- Click "+" to create a Picking List
- Assign a registered Picker
- Confirm and save the picking list
Step 3: Monitor Progress
- Return to the Picking Queue to see updated Qty Pending as picking progresses
- Items fully picked will no longer appear as pending
Common Picking Queue Scenarios:
Scenario 1: Urgent Order
Customer XYZ requests next-day delivery.
Requested Delivery Date: Tomorrow

Steps:
1. Filter queue by Delivery Date (ascending)
2. XYZ order appears at top
3. Check Location Balance: 50 items available ✓
4. Create Picking List → Assign to picker
5. Expedite packing → Same-day dispatch

Result: Customer receives on time
Scenario 2: Insufficient Stock
Order for 100 units. Location Balance shows 60. Company Balance shows 60.

Options:
A) Partial delivery: Create list for 60 units now, backorder 40
B) Wait: Source remaining 40 from supplier first
C) Investigate: Were 40 units reserved for another order?

Action: Check with manager before creating picking list
Picking List
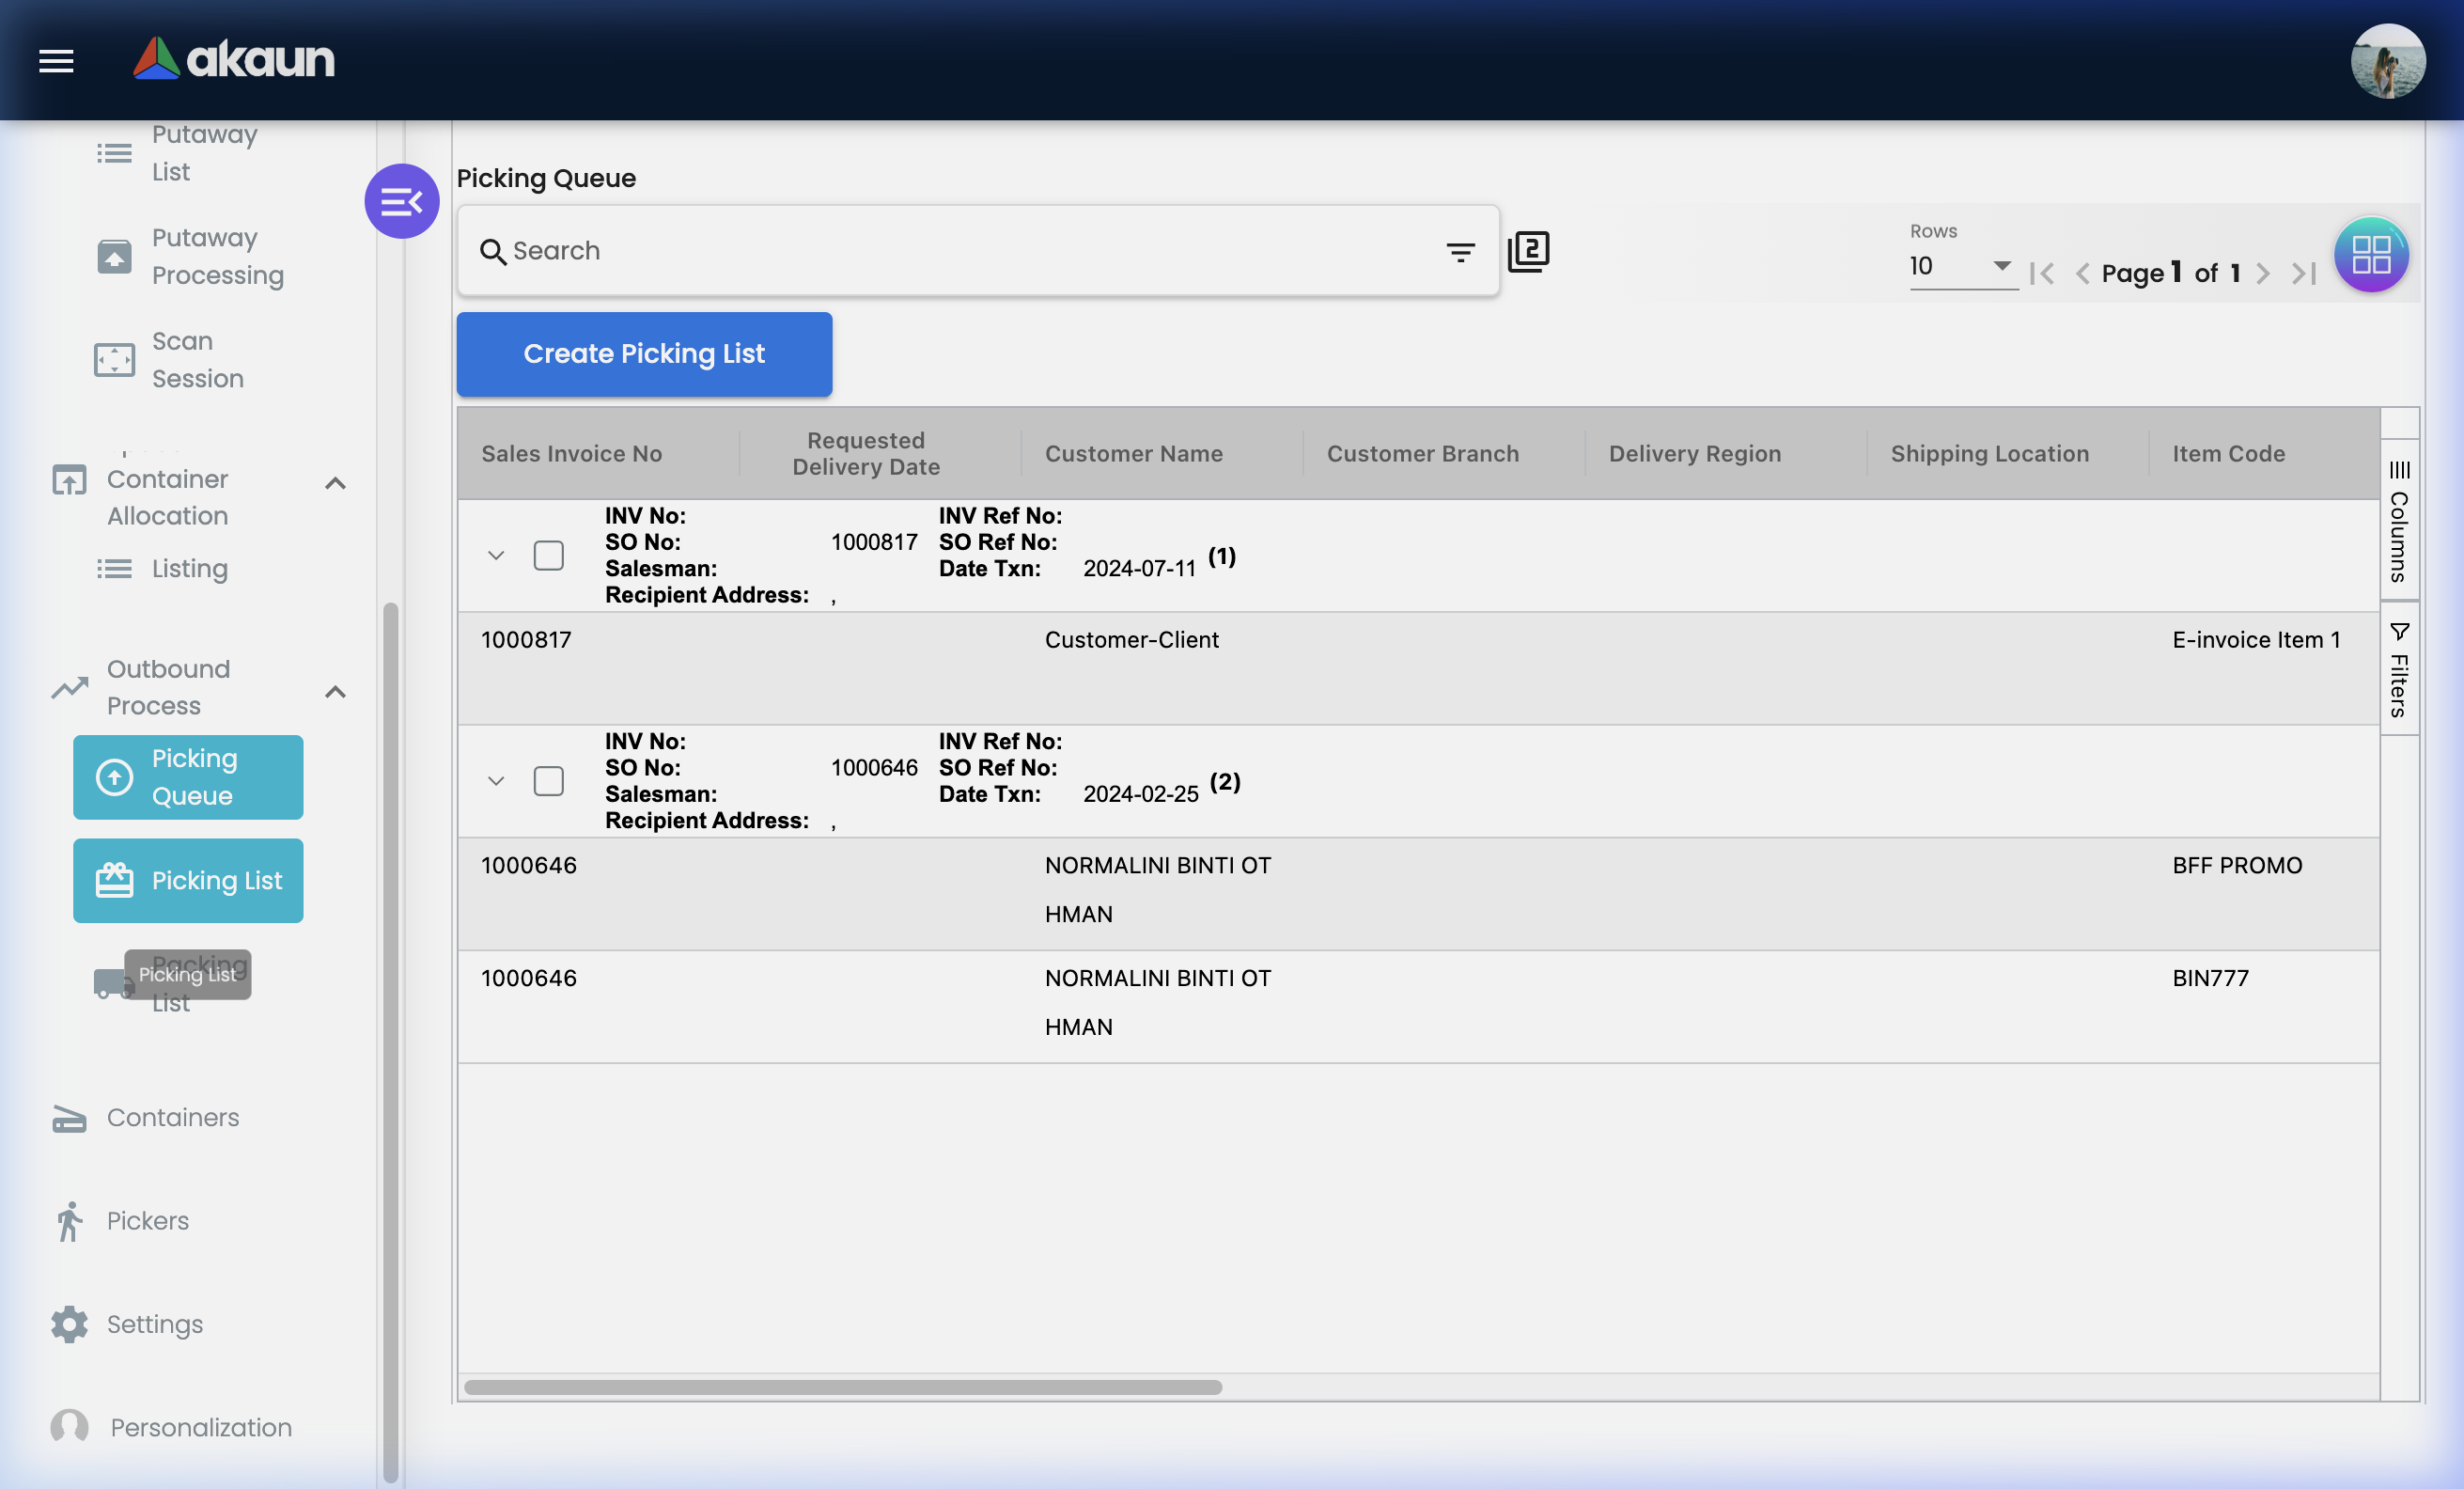
The per-picker task sheet for collecting items from warehouse locations.
A Picking List is a work order assigned to a specific Picker (warehouse staff member). It tells them exactly what to collect, how much, and from which locations — their “shopping list” for the warehouse floor.
Picking List — Tab Overview:
| Tab | Purpose |
|---|---|
| Main Details | Reference, date, description, picker assignment |
| Lines | Line items to pick — item, quantity, storage location |
| Add to Cart | Scan-based cart filling as items are picked |
| Add to Cart (Manual) | Manual entry for picked items (no scanner needed) |
| Container Scan | Scan container codes during picking to link to storage |
| Space Scanner | Scan shelf/bin location codes to verify correct pick location |
| Discarded Carts | Items removed from the cart (cancelled or errors) |
How to Create and Manage a Picking List:
Step 1: Create the List
- Go to Outbound Process > Picking List
- Click "+" to create a new list
- Fill in Main Details:
- Reference number (optional — for your internal reference)
- Pick date
- Description or notes
- Select the Picker from the dropdown (only registered pickers appear)
- Click Create
Step 2: Add Lines
- Go to the Lines tab
- Add items from the picking queue, specifying:
- Item Code & Name
- Quantity to Pick
- Source Location (the bin the picker should go to)
- Save lines
Step 3: Execute Picking
- Picker receives the list (printed or on mobile device)
- Goes to the listed locations and collects items
- Scans or manually enters each item into the Add to Cart tab as they pick
- Space Scanner tab: picker scans the bin location barcode to confirm they’re at the right shelf
- Container Scan tab: picker scans the container holding the goods for traceability
Step 4: Complete
- Once all lines show picked quantities matched, the picking list is complete
- Items are ready to hand to the Packing station
Picking List Best Practices:
✓ One picker per list: Assign clearly so accountability is clear
✓ Organise by zone: Group pick items by warehouse zone to minimise travel distance
✓ Use Space Scanner: Always scan the bin location to prevent picking from the wrong shelf
✓ Mark discarded items: If an item can’t be found, use Discarded Carts with a note — don’t silently skip it
✓ Complete the same day: Picking lists should be executed and completed on the same day they’re created
❌ Common Mistakes:
- Assigning items to a picker who is off-duty
- Not scanning location codes (leads to picking from wrong bin)
- Ignoring the Company Balance — just because the location shows 0 doesn’t mean the item is out of stock company-wide
Packing List
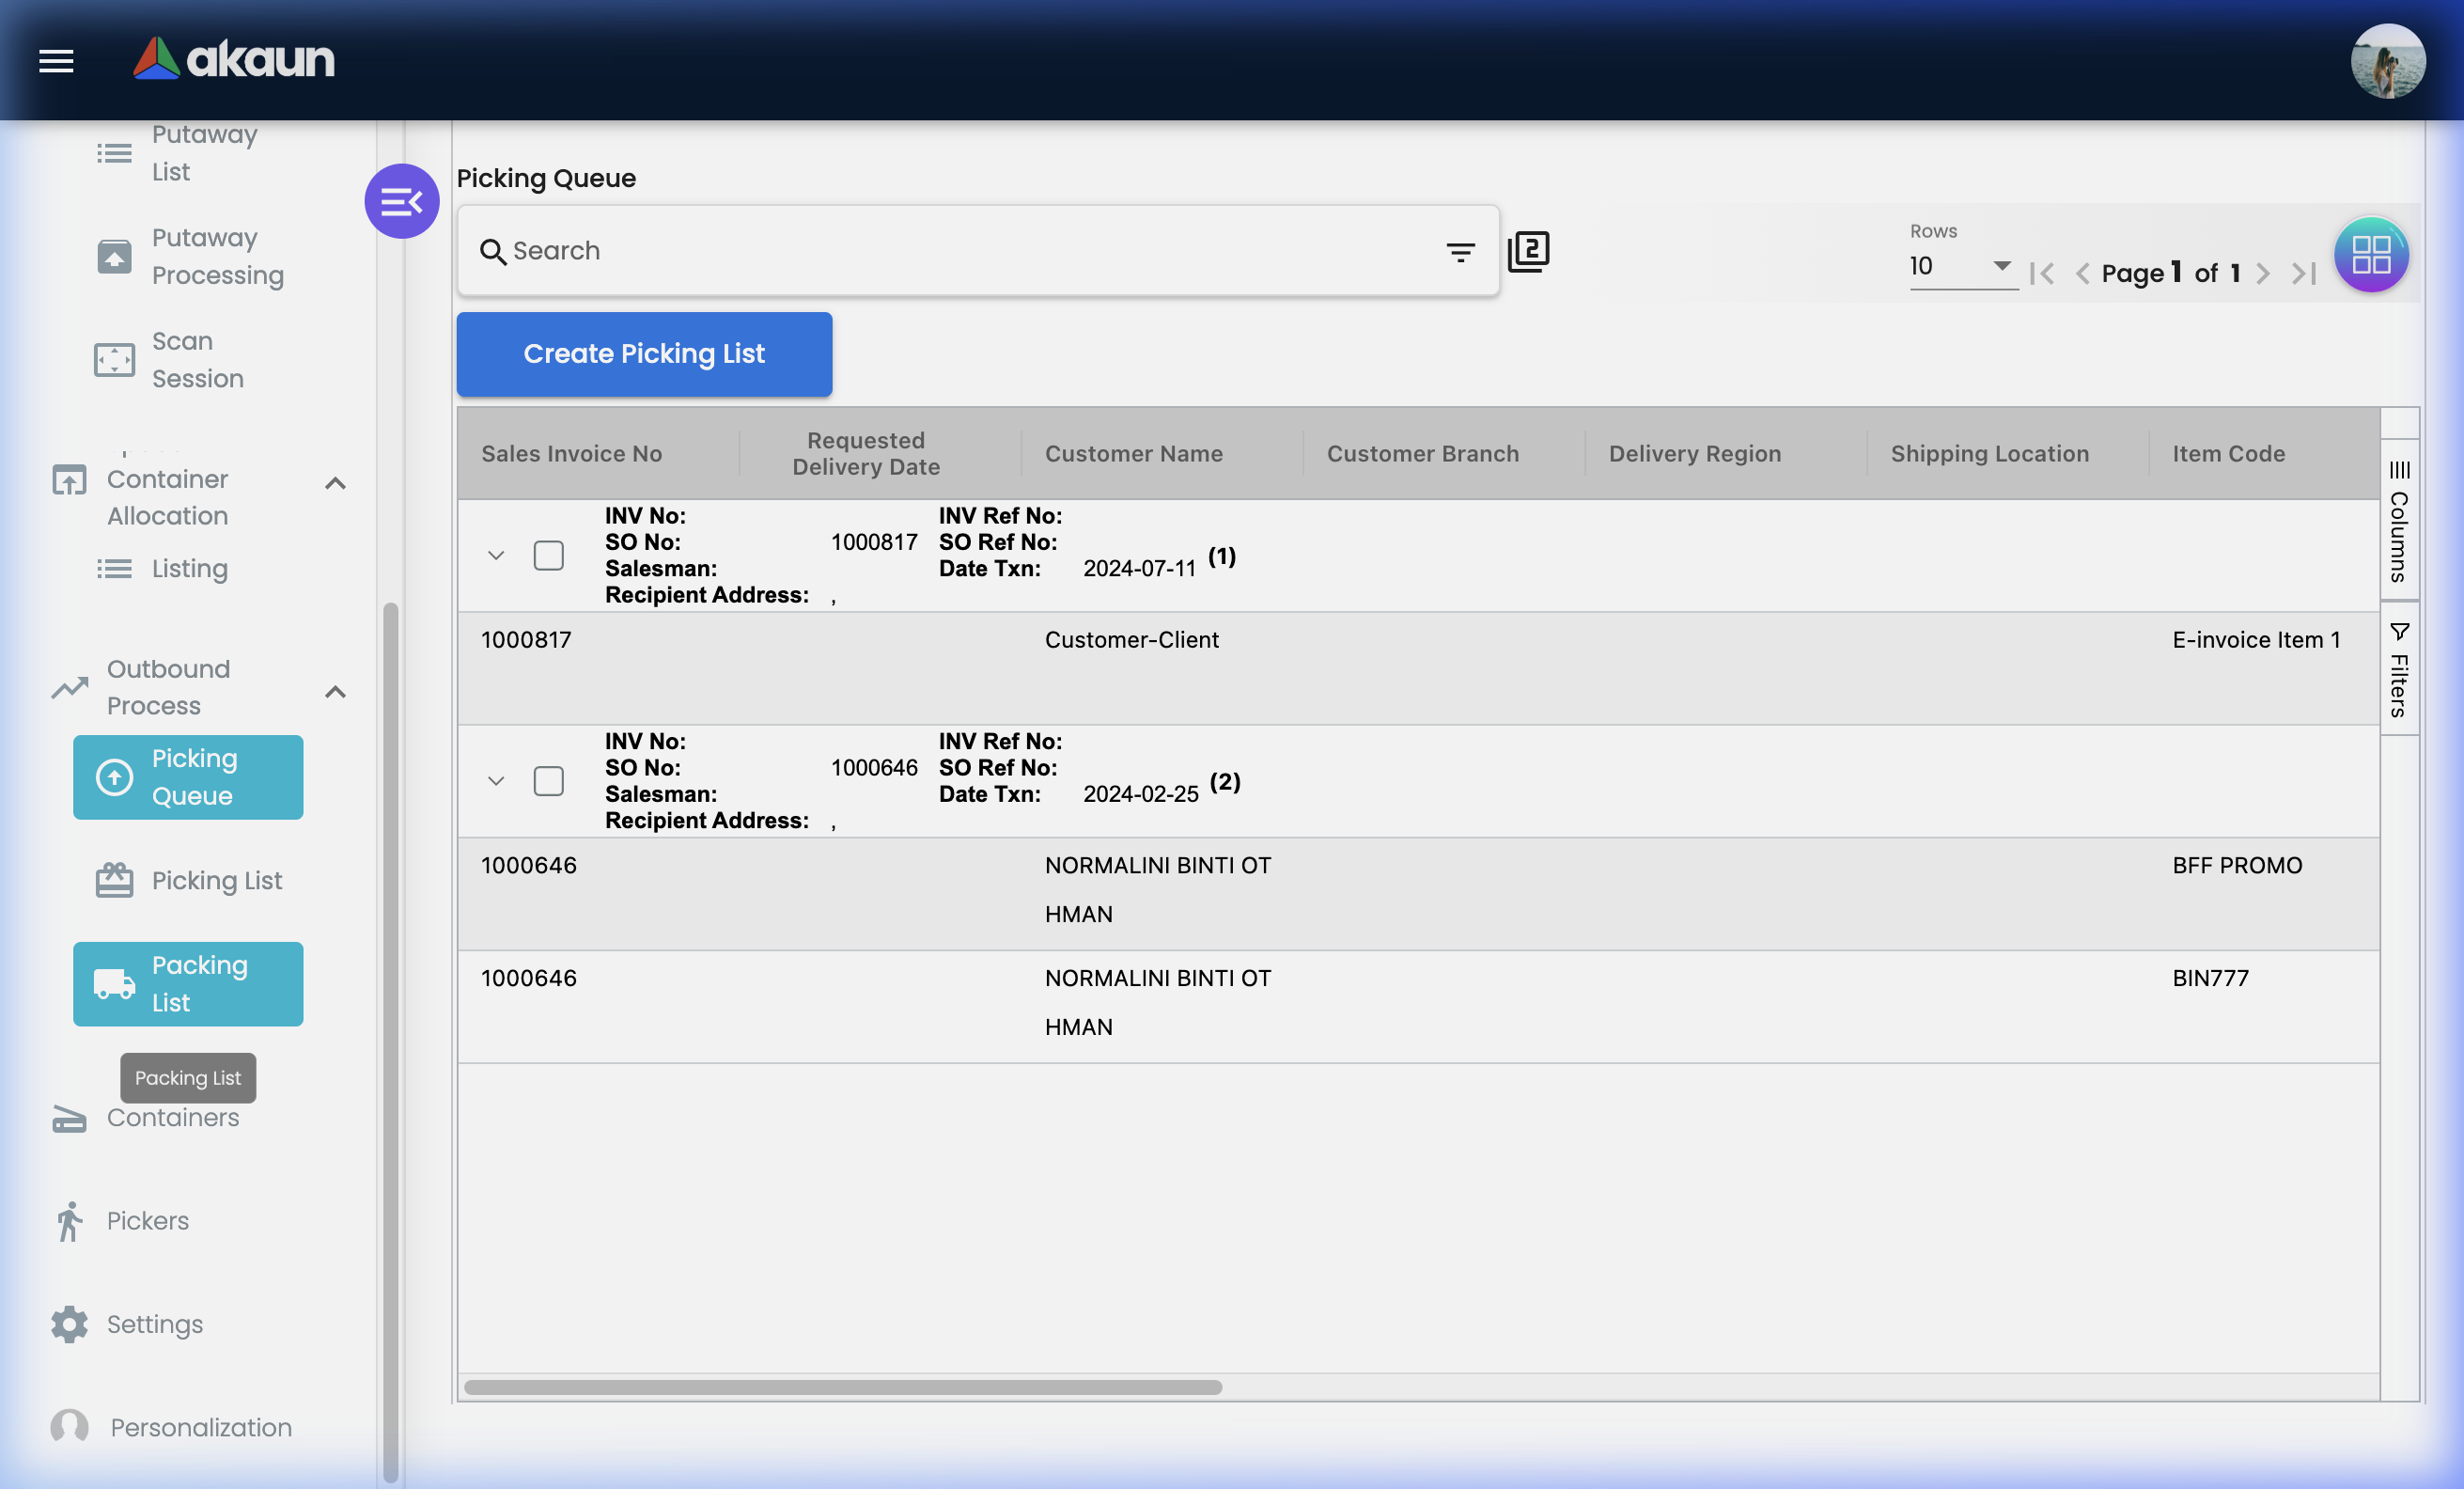
Verify and pack items for shipment.
The Packing List is the final quality control gate before goods leave your warehouse. It takes picked items, verifies them against the order, and prepares the physical shipment — with a packer responsible for accuracy.
Packing List Columns:
| Column | Description |
|---|---|
| Doc No | Auto-generated packing list number |
| Packing Date | Date the items were packed |
| Customer | Customer this shipment is for |
| Customer Branch | Customer’s branch location |
| Packer | Staff member who performed the packing |
| Warehouse | Source warehouse |
| Reference No | External reference (e.g., courier booking reference) |
| Tracking Id | Shipment tracking number from courier |
| Posting Status | Whether posted to financial/inventory systems |
| Status | Packing list lifecycle status |
Packing List Statuses:
| Status | What It Means | What to Do |
|---|---|---|
| Draft | Created but not yet packed | Complete packing and verify all items |
| In Progress | Packing underway | Packer is actively working through items |
| Packed | All items verified and packed | Ready to hand to logistics |
| Posted | Posted to inventory and finance | Shipment dispatched, records closed |
| Cancelled | Cancelled before dispatch | Investigate before cancelling |
Packing List — Tab Overview:
| Tab | Purpose |
|---|---|
| Account | Customer details (entity, billing address, shipping address) |
| Lines | Line items from the picking list to be packed |
| Packed Product | Items confirmed as packed (with quantities and verification) |
| Packed List Scan | Scan-based item verification during packing |
| Discarded Packed Product | Items removed during packing (errors or substitutions) |
| Doc Link | Link or generate shipping/delivery documents |
| GenDoc Conversion | Generate stock transfer documents or other related records |
| Print packing slips, delivery notes, and shipment labels |
How to Create a Packing List:
Step 1: Create the Header
- Go to Outbound Process > Packing List
- Click "+" to create a new packing list
- Fill in Main Details:
- Packing Date
- Assign a Packer from the dropdown
- Select the Warehouse goods are shipping from
- Click Create
Step 2: Set the Account
- Go to Account tab
- Select the Customer (entity)
- Confirm or set the Billing Address and Shipping Address
Step 3: Add Lines
- Go to the Lines tab
- Add items from the picking list(s) associated with this shipment
- System links quantities and item references from picking
Step 4: Pack and Verify
- Go to Packed List Scan tab
- Use a barcode scanner to scan each item being placed in the box/carton
- System verifies scanned items against the Lines list
- Any discrepancy is flagged before the box is sealed
Step 5: Finalise and Ship
- Add the Tracking ID (courier tracking number)
- Add the Reference No (courier booking or air waybill)
- Go to Doc Link tab — link to or generate the delivery/shipping document
- Go to Print tab — print the packing slip and any required labels
- Hand the shipment to the courier/logistics team
Real-World Packing Scenarios:
Scenario 1: Standard Customer Order
Customer XYZ orders: 10x Product A, 5x Product B
Picking complete. Packer receives items.

Steps:
1. Create Packing List → Assign Packer: Ali
2. Account tab: Select Customer XYZ → Confirm shipping address
3. Lines tab: Add 10x Product A, 5x Product B
4. Packed List Scan: Scan each product as packed
   - 10 scans for Product A ✓
   - 5 scans for Product B ✓
5. Add Tracking ID: JNT-2024-00123
6. Print packing slip
7. Hand to JnT courier

Result: Accurate order, fully documented
Scenario 2: Quantity Discrepancy Found During Packing
Lines show: 5x Product B
Packer physically has: 4x Product B

Steps:
1. Stop packing — do not seal the box
2. Go to Discarded Packed Product — note 1 unit missing
3. Notify supervisor
4. Supervisor checks Picking List — picker confirms only 4 were picked (location was short)
5. Options:
   A) Ship 4 now, backorder 1 → Update Packing List to 4 units
   B) Source 1 unit from another location and complete

Result: Discrepancy caught before shipment — customer never receives wrong quantity
Scenario 3: Generating a Stock Transfer Document
Internal transfer: Warehouse A ships 100 units to Warehouse B

Steps:
1. Create Packing List (internal transfer)
2. Go to GenDoc Conversion tab
3. Generate a Stock Transfer document
4. Post the transfer

Result: Inventory deducted from Warehouse A, added to Warehouse B — full audit trail
Tips for Packers:
✓ Always scan — never assume: Scanning forces verification; manual checking allows errors
✓ Record tracking numbers immediately: Enter the courier tracking ID before handing over the shipment
✓ Print and attach packing slips: Every box should have a packing slip inside
✓ Use discarded product tracking: If you remove an item, always record it with a reason
✓ Seal only after verification: Don’t seal boxes until the Packed Product count matches the Lines list
Space Container Allocation
Track exactly what is stored where in your warehouse.
What is Space Container Allocation?
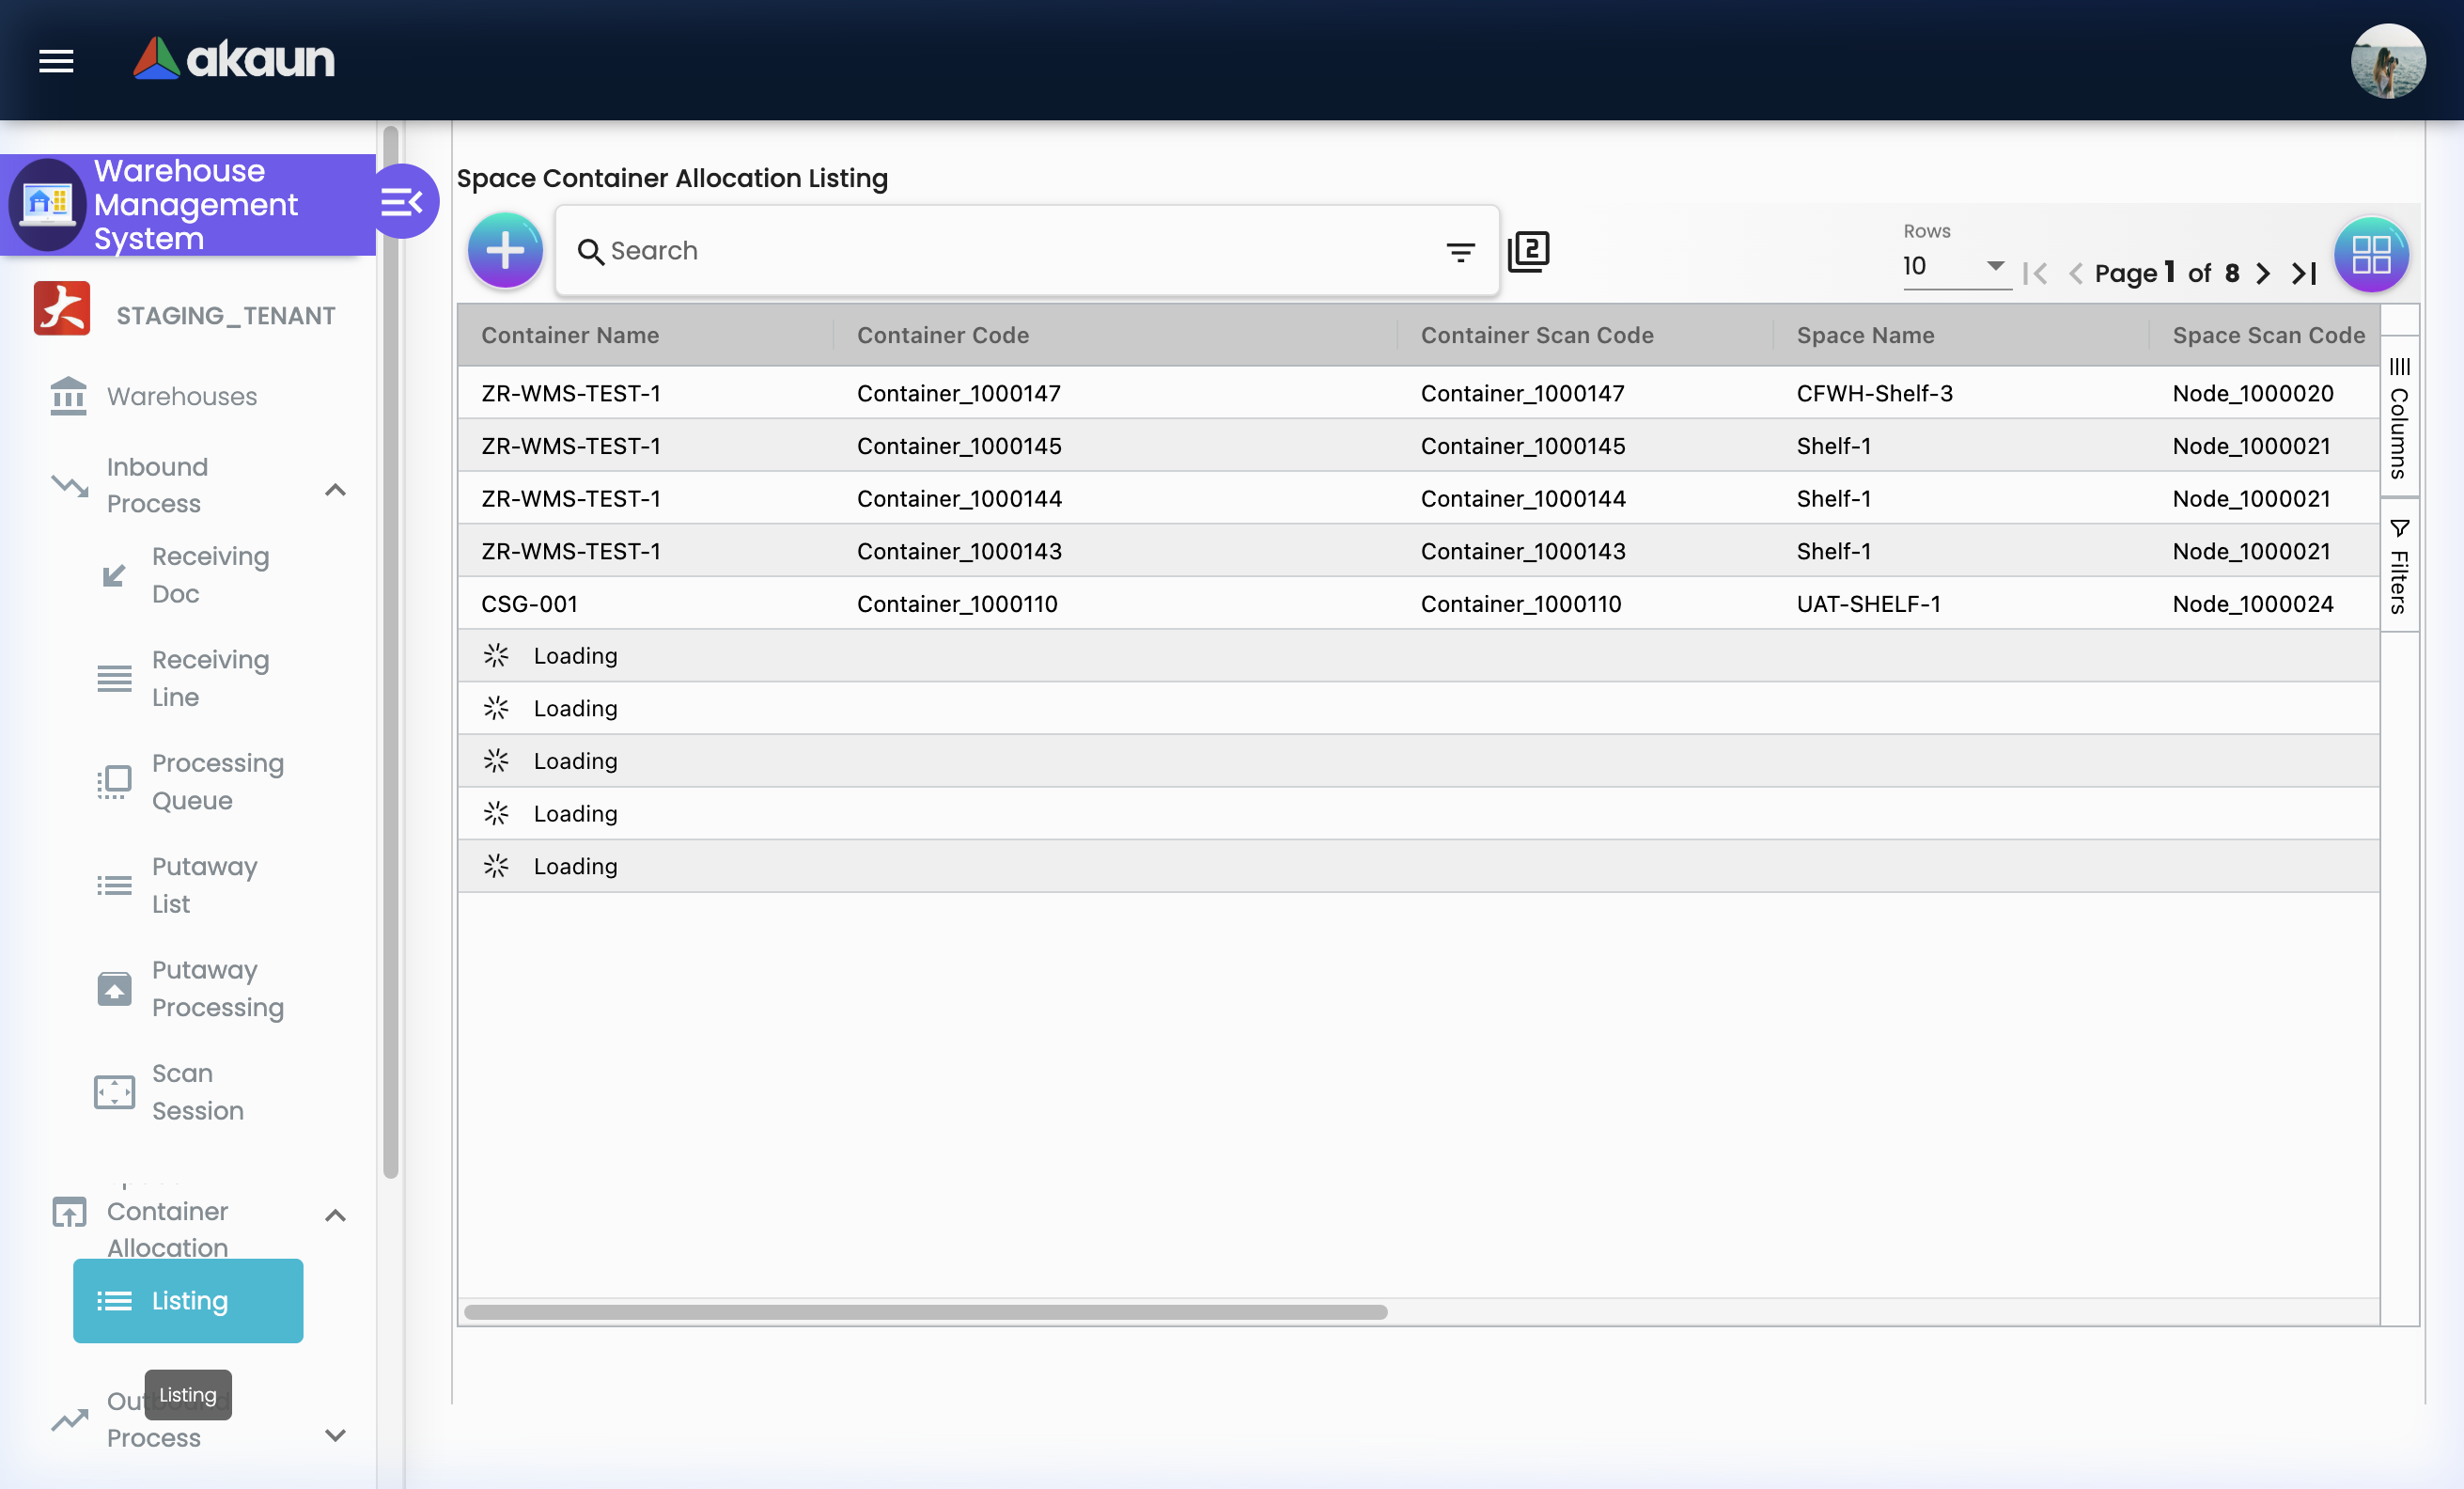
Space Container Allocation is the inventory-location mapping system. It answers the key warehouse question: “Where is Item X right now?” — connecting items to specific containers and storage nodes.
What You Can Do:
- ✓ Create new space allocations (assign items to containers and locations)
- ✓ View the full listing of current item-to-location assignments
- ✓ Edit existing allocations (reassign items when reorganising)
- ✓ Link items to specific containers for movement tracking
- ✓ Review historical allocation records for audit purposes
How Allocations Work:
Item: Product X (100 units)
    ↓ assigned to
Container: Pallet P-042
    ↓ located at
Node: Rack A-2, Shelf Middle (WH-001 > Ground Floor > Zone A > Rack A-2)
This link means: if you need to pick Product X, go to Rack A-2, Middle Shelf, find Pallet P-042.
Space Container Allocation — Tabs Overview:
| Tab | Purpose |
|---|---|
| Main Details | Core allocation — item, container, location node, quantity |
| Create | Form to create a new space allocation |
| Edit | Modify an existing allocation |
Real-World Scenarios:
Scenario 1: Assigning a Received Item to Storage
Received: 200 units of ITEM-ABC
Available Space: Rack B-1, Top Shelf (Container: BIN-021)

Steps:
1. Inbound Processing Queue → open the item
2. Go to Space Container Allocation tab
3. Click "Add Allocation"
4. Select Container: BIN-021
5. Select Node: Rack B-1 > Top Shelf
6. Enter Quantity: 200
7. Save

Result: System now knows ITEM-ABC (200 units) is at Rack B-1 Top Shelf in BIN-021
Scenario 2: Reorganising the Warehouse
Reorganisation: Moving Product Y from Zone A to Zone C (new cold storage)

Steps:
1. Find current allocation: Product Y → Zone A, Rack A-3
2. Edit the allocation → Change Node to Zone C, Rack C-1
3. Save

Result: System immediately reflects the new location
Containers
Register and manage the physical storage containers in your warehouse.
What are Warehouse Containers?
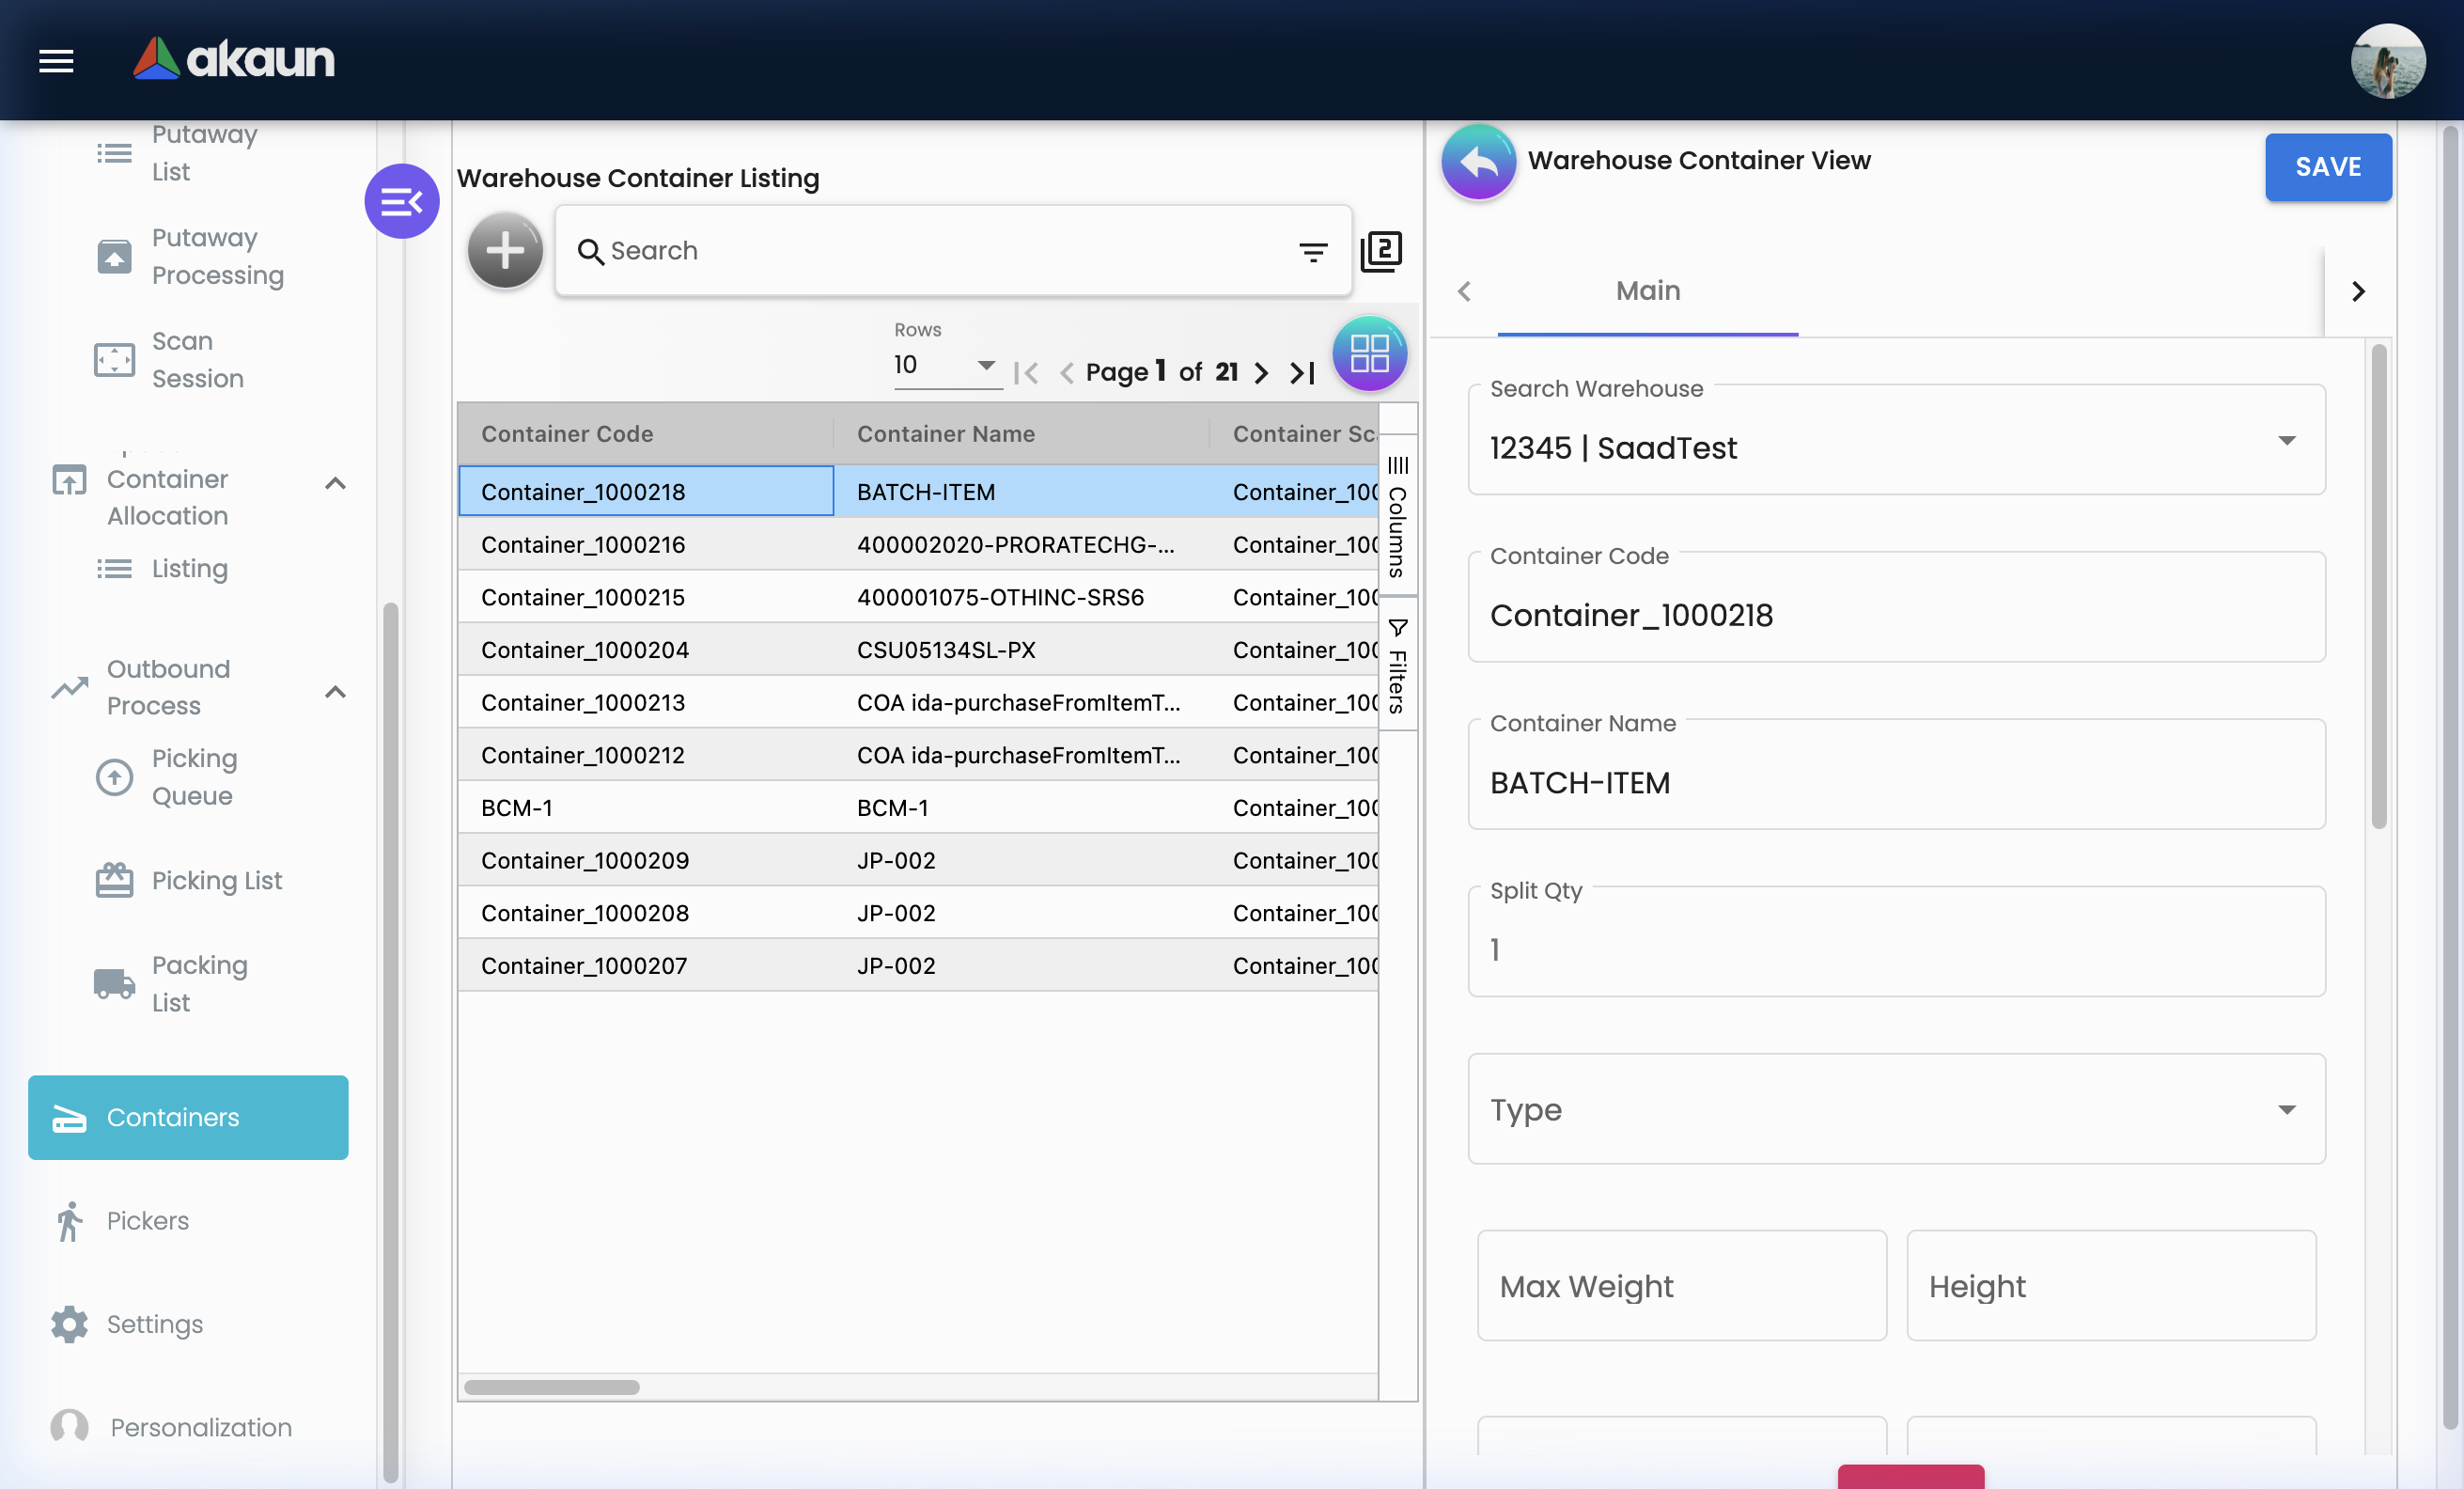
Containers represent moveable storage units — pallets, totes, bins, cages, roll cages, or any physical container used to hold and transport goods within the warehouse. Every container gets a unique code and can be linked to items and locations.
What You Can Do:
- ✓ Register new containers with unique codes and scan codes
- ✓ View all containers and their current contents
- ✓ Edit container information (type, scan code, description)
- ✓ Link containers to space allocations
- ✓ Track which container is at which location
Container Record Fields:
| Field | Purpose | Example |
|---|---|---|
| Container Code | Unique identifier | PLT-001, BIN-042, CAGE-007 |
| Container Scan Code | Barcode value for scanning | PLT001 |
| Description | Type or purpose | “Heavy duty pallet for bulk goods” |
| Status | ACTIVE or INACTIVE | ACTIVE |
Tips for Container Management:
✓ Label every container: Print and attach barcodes — scanning eliminates location errors
✓ Standardise names: PLT = Pallet, BIN = Storage Bin, CAGE = Roll Cage — consistent naming makes searches easier
✓ Retire damaged containers: Mark as INACTIVE to prevent them being used in picking or putaway
Pickers
Register and manage warehouse staff responsible for order picking.
What is Picker Management?
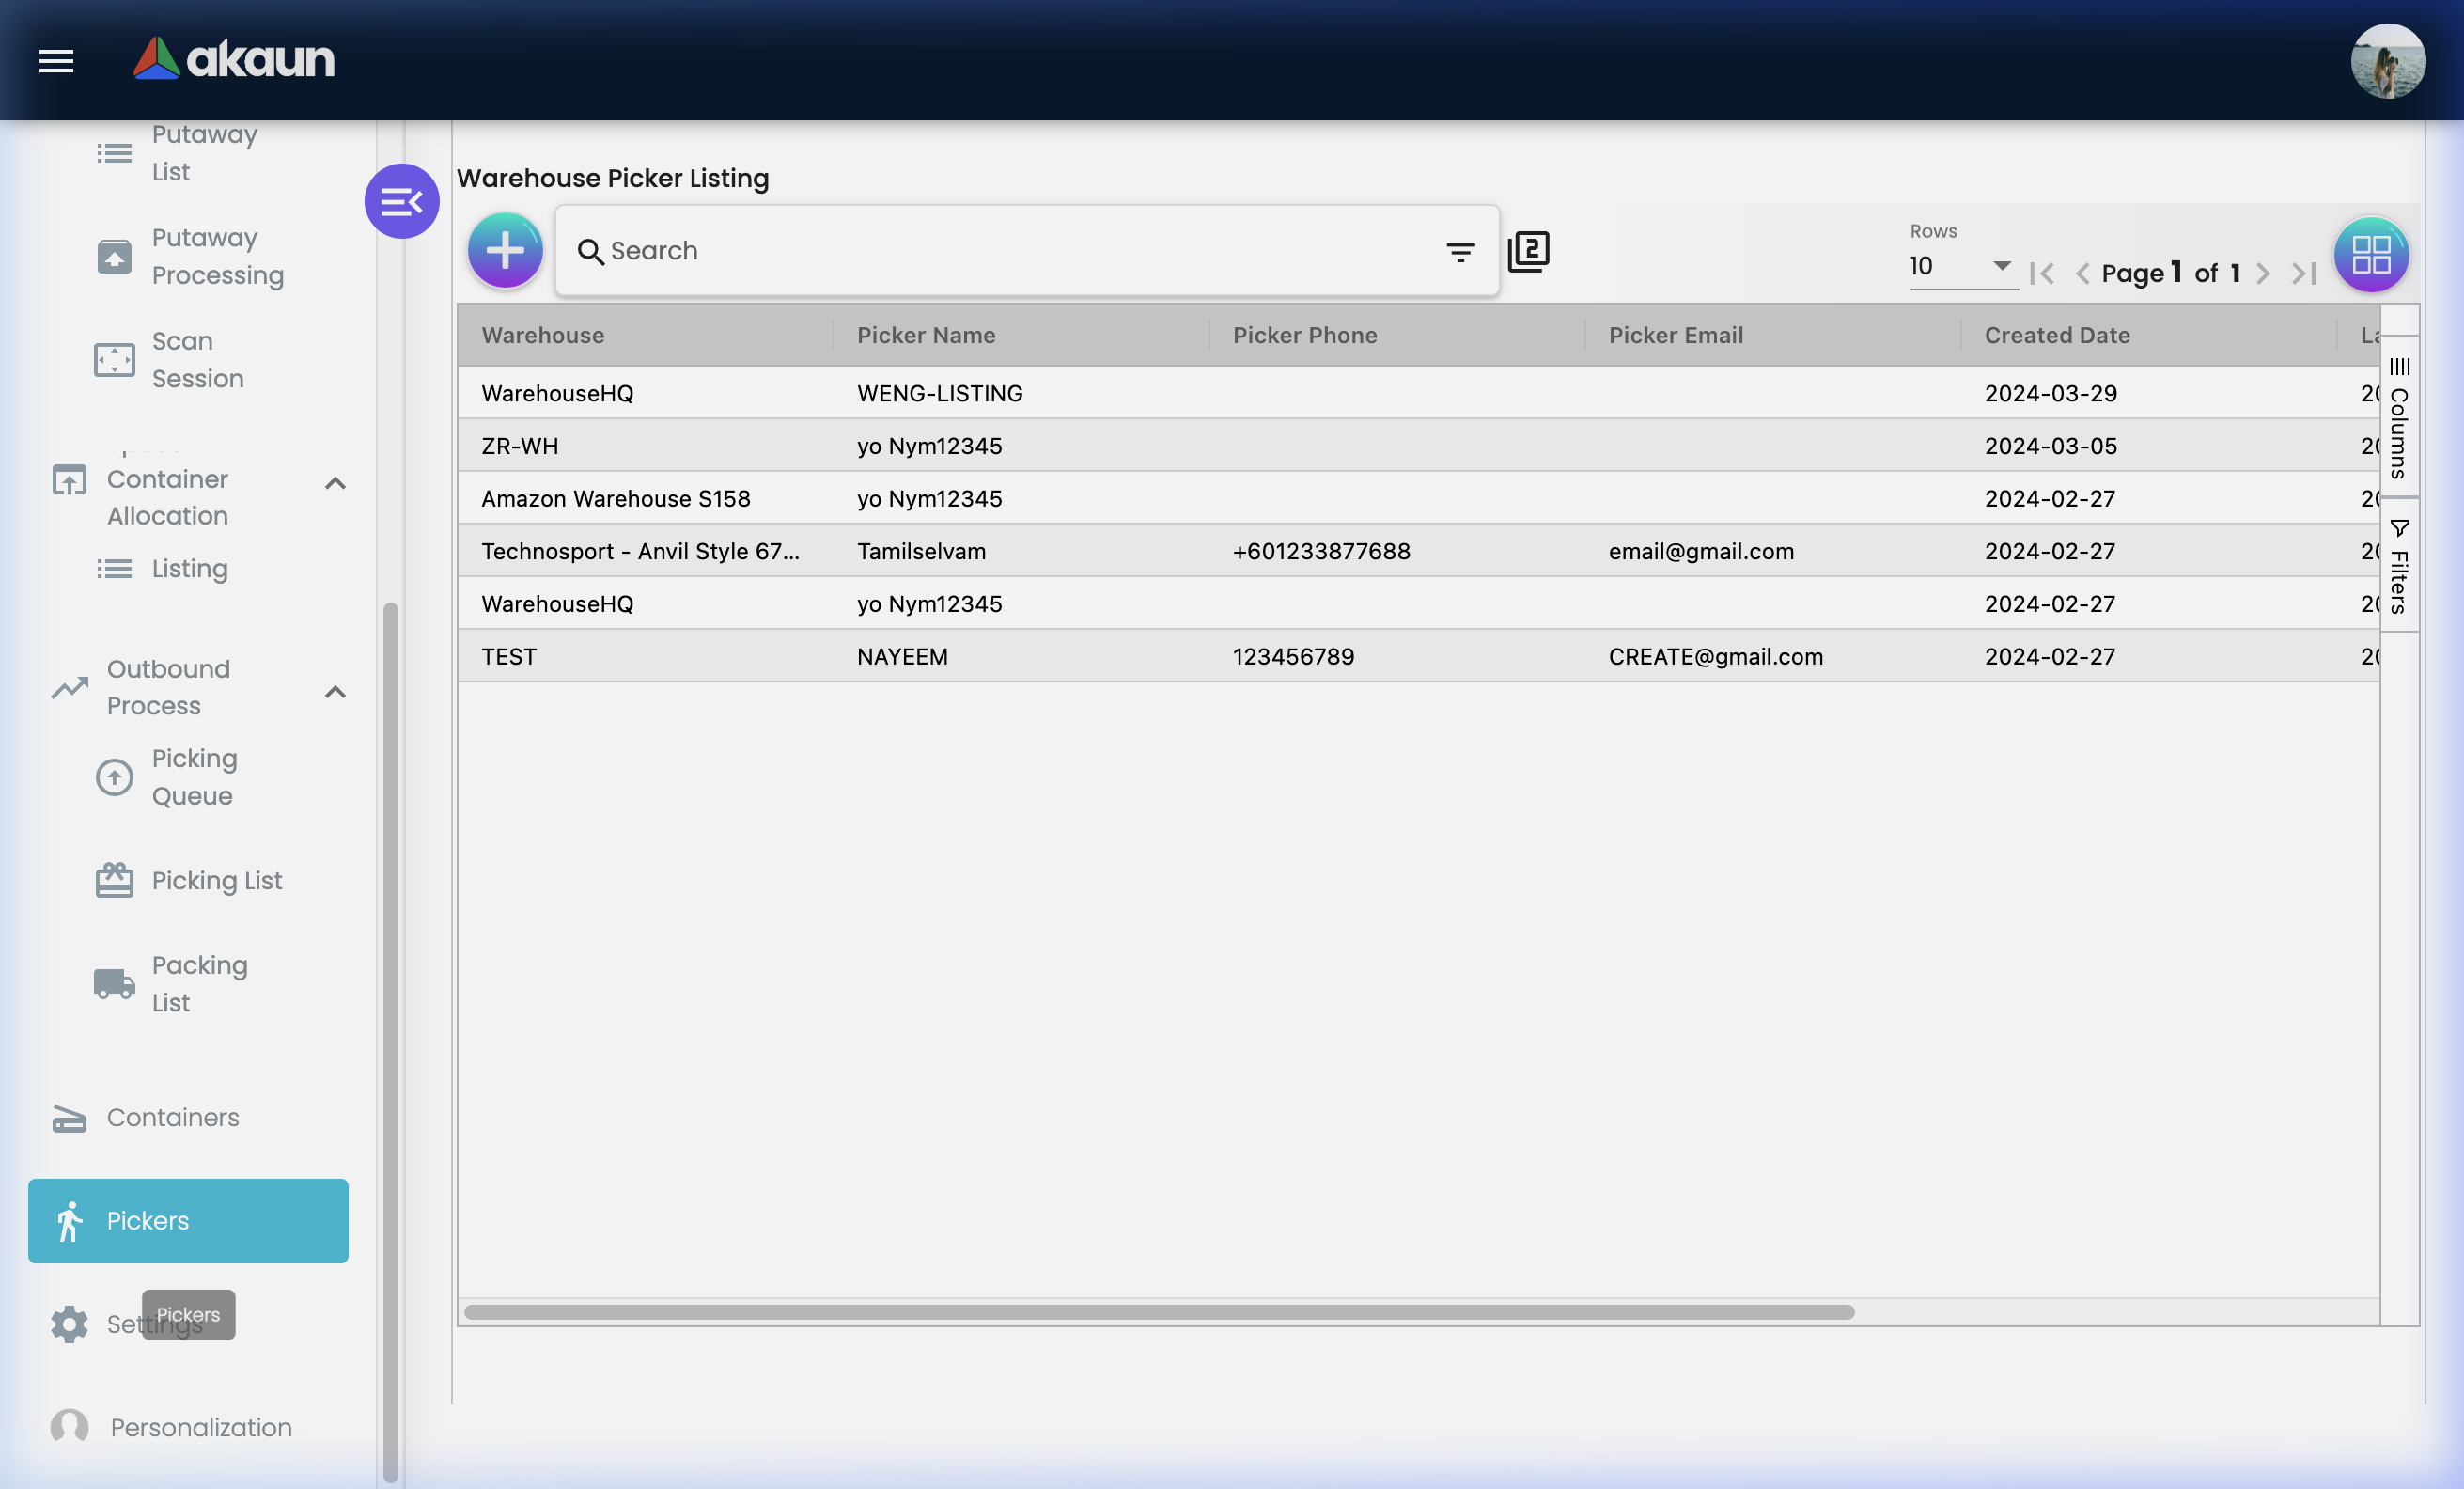
The Pickers section is the master register of your warehouse’s picking workforce. Only registered pickers can be assigned to Picking Lists — this ensures accountability and makes workload management easy.
What You Can Do:
- ✓ Register new pickers (link to employee records)
- ✓ View all registered pickers and their details
- ✓ Edit picker details or status
- ✓ Assign pickers to Picking Lists from the Outbound module
Why Register Pickers Separately?
Not all warehouse employees are picking-eligible. Some staff may only work in receiving, or only in packing. Maintaining a separate Pickers list means:
- Picking List assignment shows only qualified, active pickers
- Supervisors can track workload per picker
- Performance data can be tracked at picker level
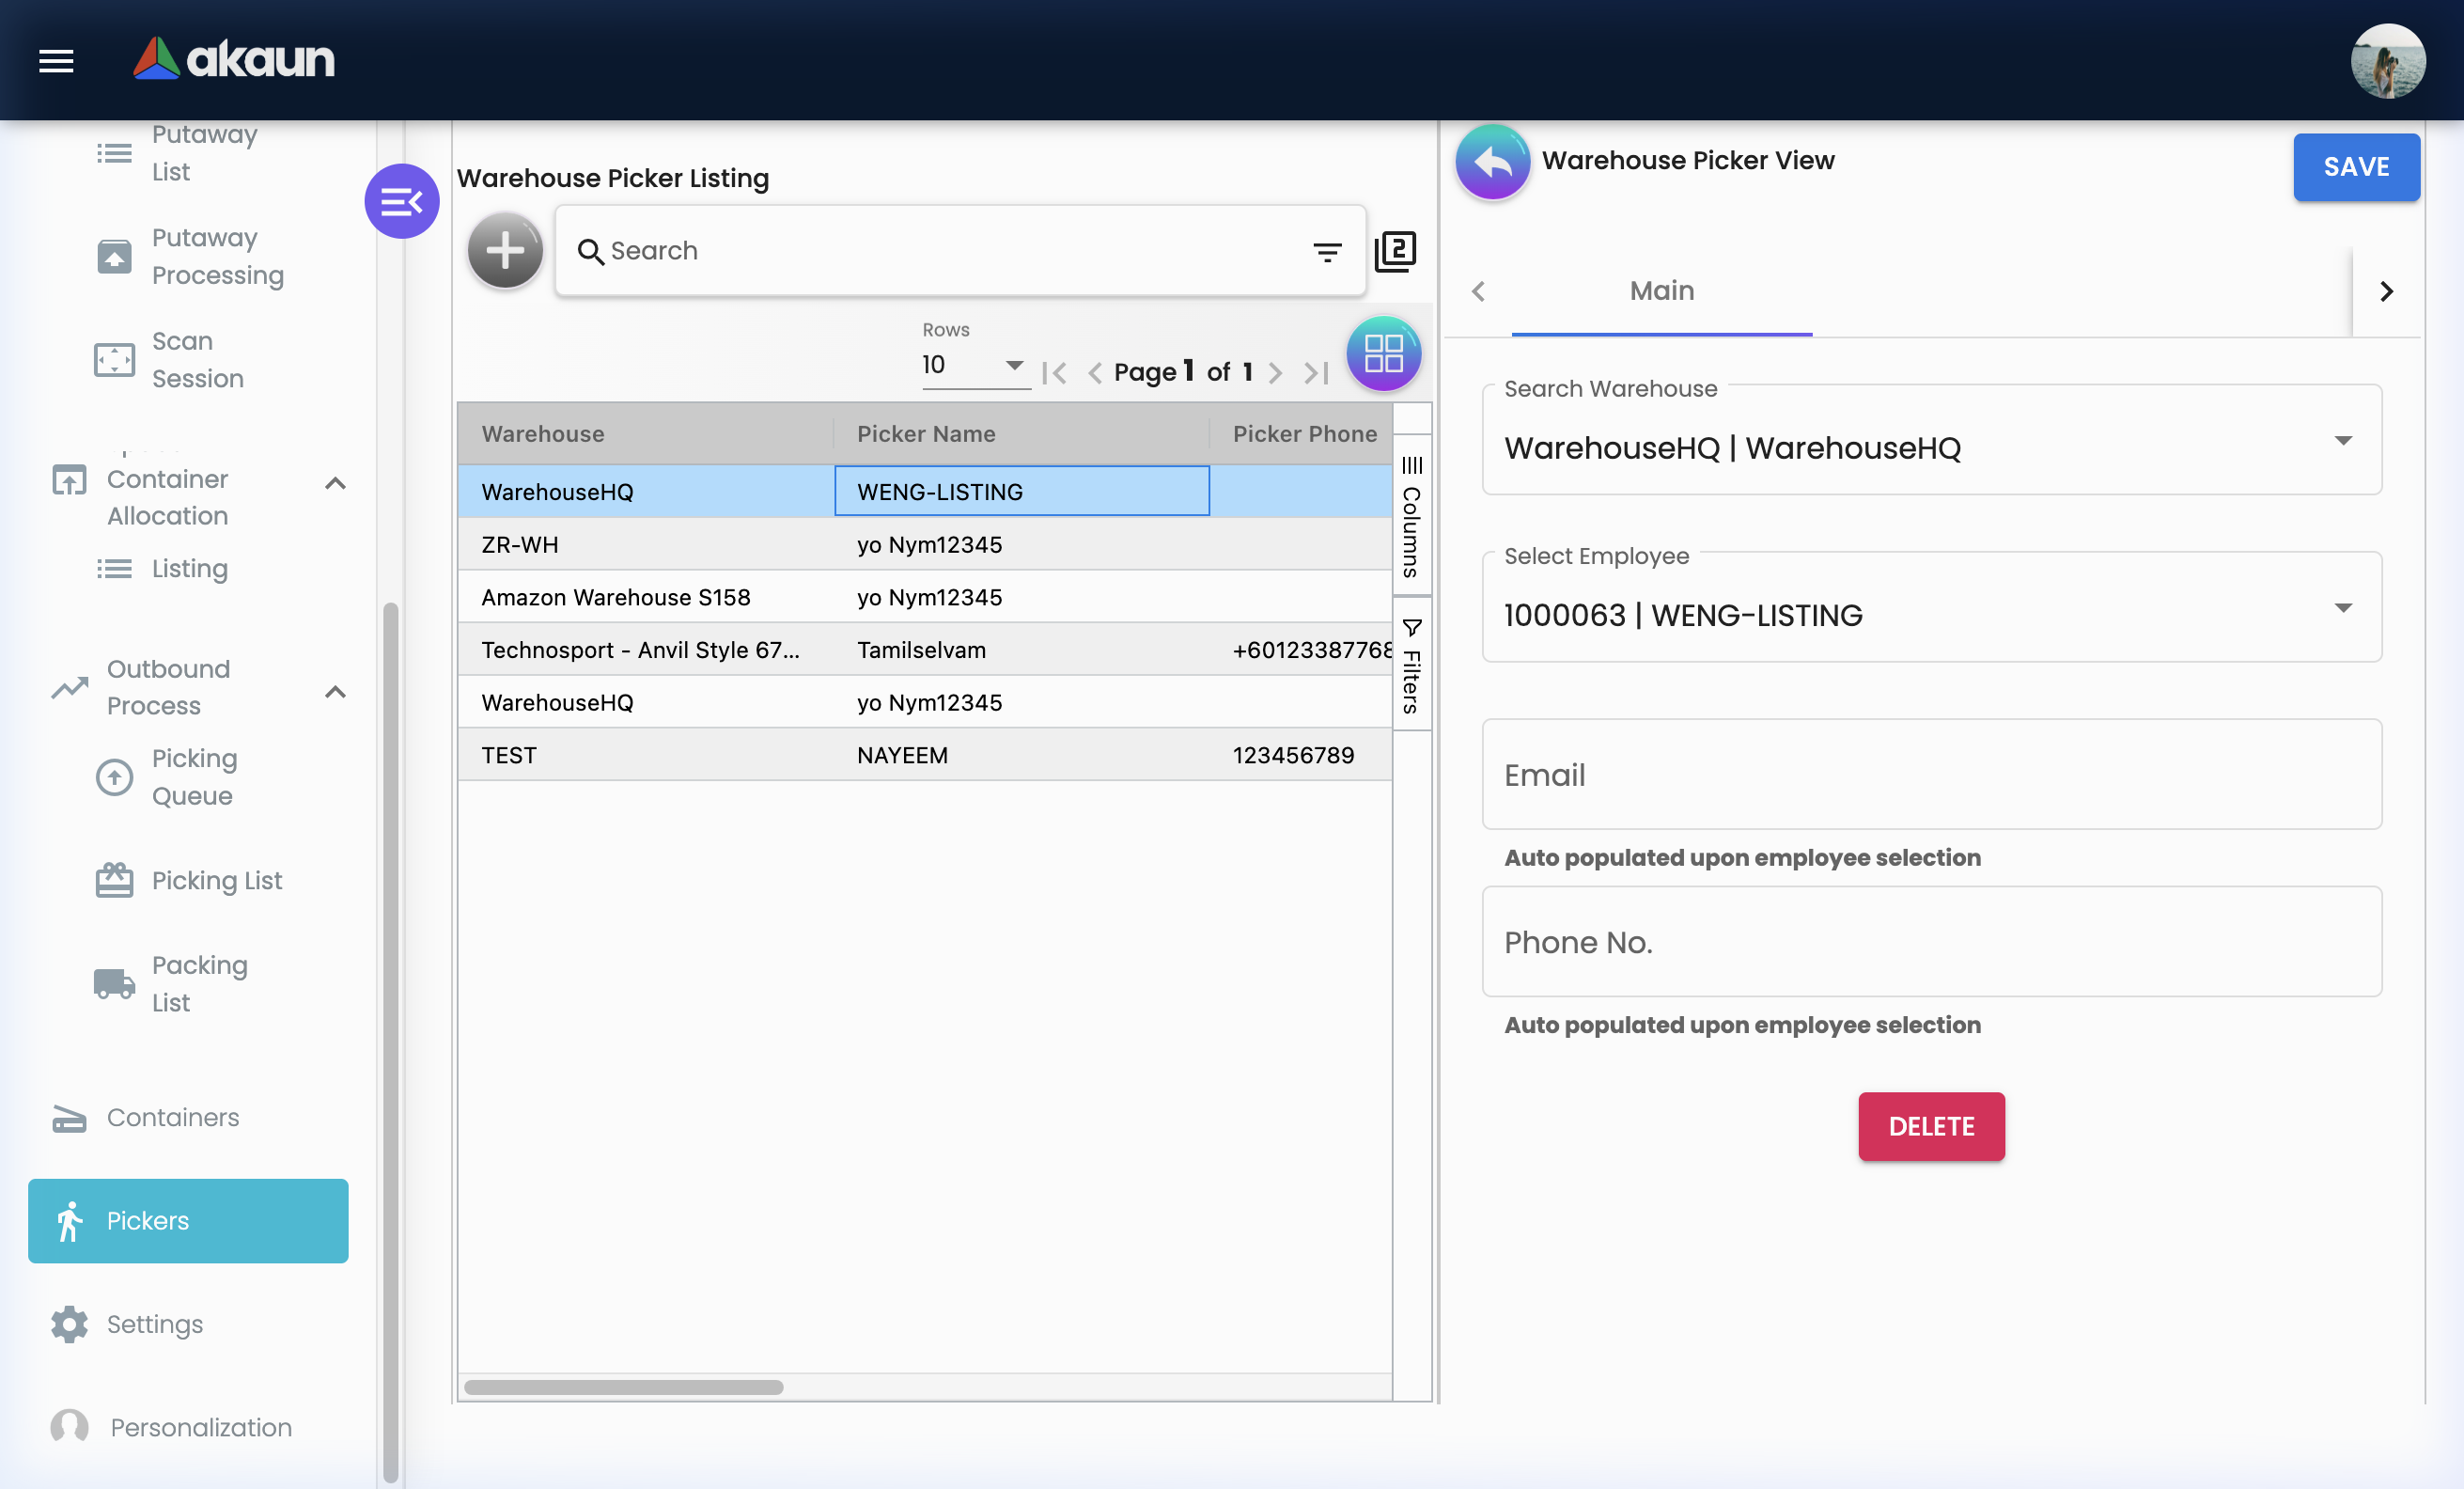
Common Scenarios:
Scenario: New Picker Joins the Team
New team member Sarah is trained for picking duties.

Steps:
1. Go to Pickers
2. Click "+"
3. Select Sarah from the employee/user list
4. Set status to ACTIVE
5. Save

Result: Sarah now appears in the Picker dropdown when creating Picking Lists
Scenario: Picker Goes on Extended Leave
Ali is on 2-week medical leave.

Steps:
1. Go to Pickers → Find Ali
2. Edit → Set status to INACTIVE (or leave as ACTIVE if temporary)

Result: Supervisors won't accidentally assign Ali during his leave
Configuration & Settings
System-level configuration for administrators.
The Settings section is where administrators configure how the Warehouse Management Applet behaves for your organisation — from field requirements to permission access controls.
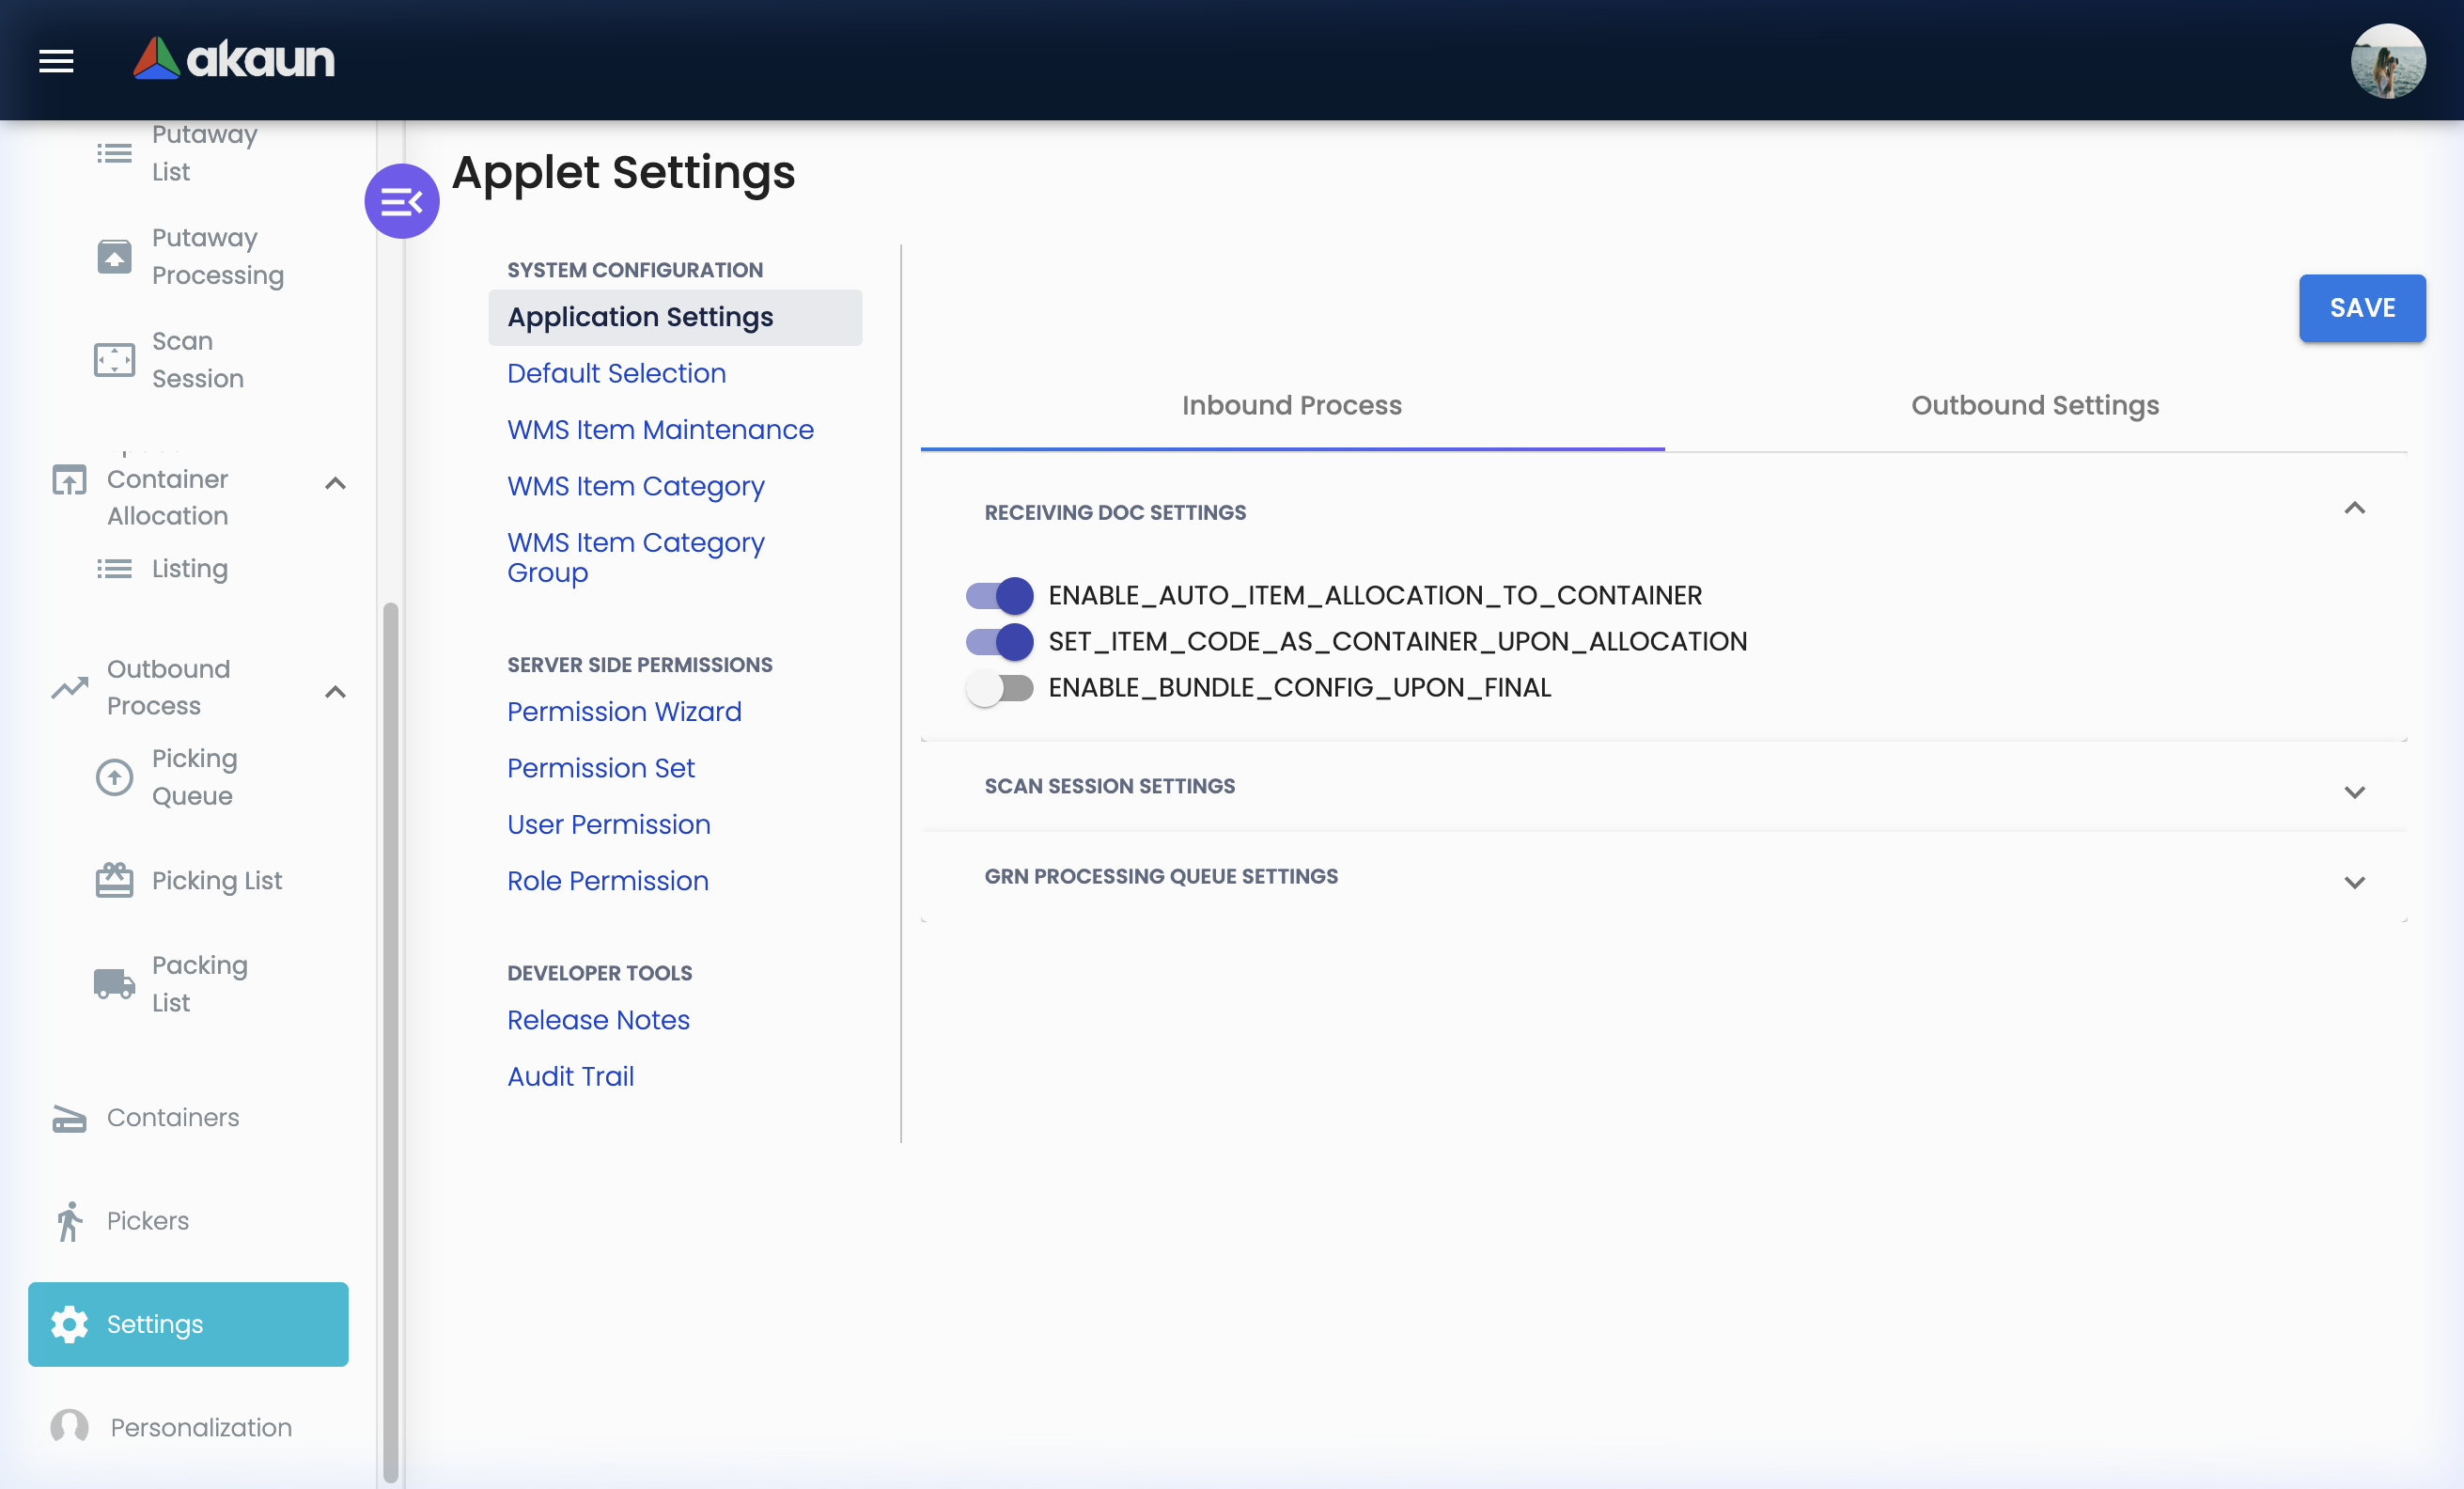
Application Settings (Settings > Application Settings)
Control field-level behaviour across the applet.
Application Settings let administrators define whether specific fields are Required, Optional, or Hidden throughout the receiving, processing, picking, and packing workflows.
Creating an Application Setting:
| Field | Purpose | Example |
|---|---|---|
| Setting Name | Descriptive identifier | “Require Tracking ID on Receiving” |
| Module | Which module this applies to | Receiving Doc, Packing List |
| Field | The specific field to control | Tracking ID, Reference No |
| Behaviour | Required / Optional / Hidden | Required |
Real-World Setup Examples:
Example 1: Enforce Tracking ID in Receiving
Problem: Staff sometimes forget to enter the supplier’s tracking reference, making it impossible to trace shipments later.
Solution: Go to Settings > Application Settings. Create a setting that makes Tracking ID a Required field in the Receiving Doc. Now staff cannot save a receiving document without entering it.
Example 2: Hide Financial Fields from Warehouse Staff
Problem: Warehouse operators don’t need to see financial GL codes in the Processing Queue, but the field is visible and causing confusion.
Solution: Set the Financial Items fields to Hidden for the Warehouse Operator role. The fields disappear from their view.
Default Selection (Settings > Default Selection)
Pre-fill common fields to speed up data entry.
Default Selection lets admins set system-wide default values that auto-populate when creating new records. This is especially useful for single-warehouse organisations where every transaction belongs to the same warehouse.
| Setting | Example Value | Benefit |
|---|---|---|
| Default Warehouse | “Main Distribution Centre” | Auto-selects warehouse on every new doc |
| Default Layout | “Ground Floor” | Auto-populates layout during putaway |
| Default UOM | “Each” | Pre-fills unit of measure |
WMS Item Maintenance (Settings > WMS Item Maintenance)
Configure warehouse-specific attributes for your inventory items.
WMS Item Maintenance extends your standard inventory items with warehouse-management-specific properties — storage requirements, handling instructions, and WMS classification.
What You Can Configure Per Item:
- Storage class or type (fragile, hazardous, cold chain, oversized)
- Handling notes or special instructions for warehouse staff
- WMS category assignment
- Min/max storage quantities or stacking rules
Creating/Editing a WMS Item:
- Go to
Settings > WMS Item Maintenance - Search for the inventory item by code or name
- Click to open and edit
- Set WMS attributes:
- Category: Link to a WMS Item Category
- Handling Notes: Free text for special instructions
- Storage Requirements: Any special conditions
- Save
Real-World Examples:
Example 1: Electronics Item
Item: Laptop Computer (ITEM-LAP-001)
WMS Category: Electronics
Handling Notes: "Fragile — handle with care. Do not stack more than 3 high."
Storage Zone: Zone B (dry, temperature-controlled)
Example 2: Hazardous Chemical
Item: Industrial Solvent (ITEM-SOL-005)
WMS Category: Hazardous Materials
Handling Notes: "MSDS required. Gloves and goggles mandatory. Segregate from food items."
Storage Zone: Zone H (hazmat store, ventilated)
WMS Item Category (Settings > WMS Item Category)
Group items into logical categories for warehouse management.
WMS Item Categories let you classify items for storage, handling, and reporting purposes. Unlike inventory financial categories, these are warehouse-operational categories.
Creating a Category — Field Guide:
| Field | Purpose | Example |
|---|---|---|
| Category Name | Display name | “Fragile Goods”, “Cold Chain”, “Hazardous Materials” |
| Category Code | Unique identifier | FRAG, COLD, HAZ |
| Description | What belongs in this category | “All items requiring careful handling due to breakage risk” |
| Status | Active / Inactive | ACTIVE |
Editing a Category — Tabs:
| Tab | Purpose |
|---|---|
| Main Details | Edit name, code, description, and status |
| Items | See all WMS items assigned to this category |
Best Practices:
- Keep categories operationally meaningful (not financial — that’s for standard inventory)
- 5–10 categories is usually sufficient: Fragile, Cold Chain, Hazardous, Oversized, High-Value, Standard
- Align categories with your physical storage zones
WMS Item Category Group (Settings > WMS Item Category Group)
Group multiple categories for higher-level reporting and management.
Category Groups allow you to bundle related WMS Item Categories together. For example:
- Group: Special Handling → includes Fragile, Hazardous, Oversized categories
- Group: Standard Storage → includes Dry Goods, General items
This enables analysis at a higher level without losing category-level detail.
Feature Visibility (Settings > Feature Visibility)
Control which menu items and features each role can see.
Feature Visibility lets administrators show or hide specific sections of the applet for different user roles. This simplifies the interface for users who don’t need certain features.
Common Configurations:
| Role | Visible Features | Hidden Features |
|---|---|---|
| Warehouse Operator | Receiving Doc, Picking List, Scan Session | Space Container Allocation, Settings |
| Warehouse Supervisor | All features except Settings admin | Permission Wizard, Webhook |
| Logistics Manager | Outbound Process, Reporting | WMS Item Maintenance, Layout Nodes |
| System Admin | All features | None |
How to Configure:
- Go to
Settings > Feature Visibility - Select the role or user group
- Toggle features On (visible) or Off (hidden)
- Save — changes take effect immediately
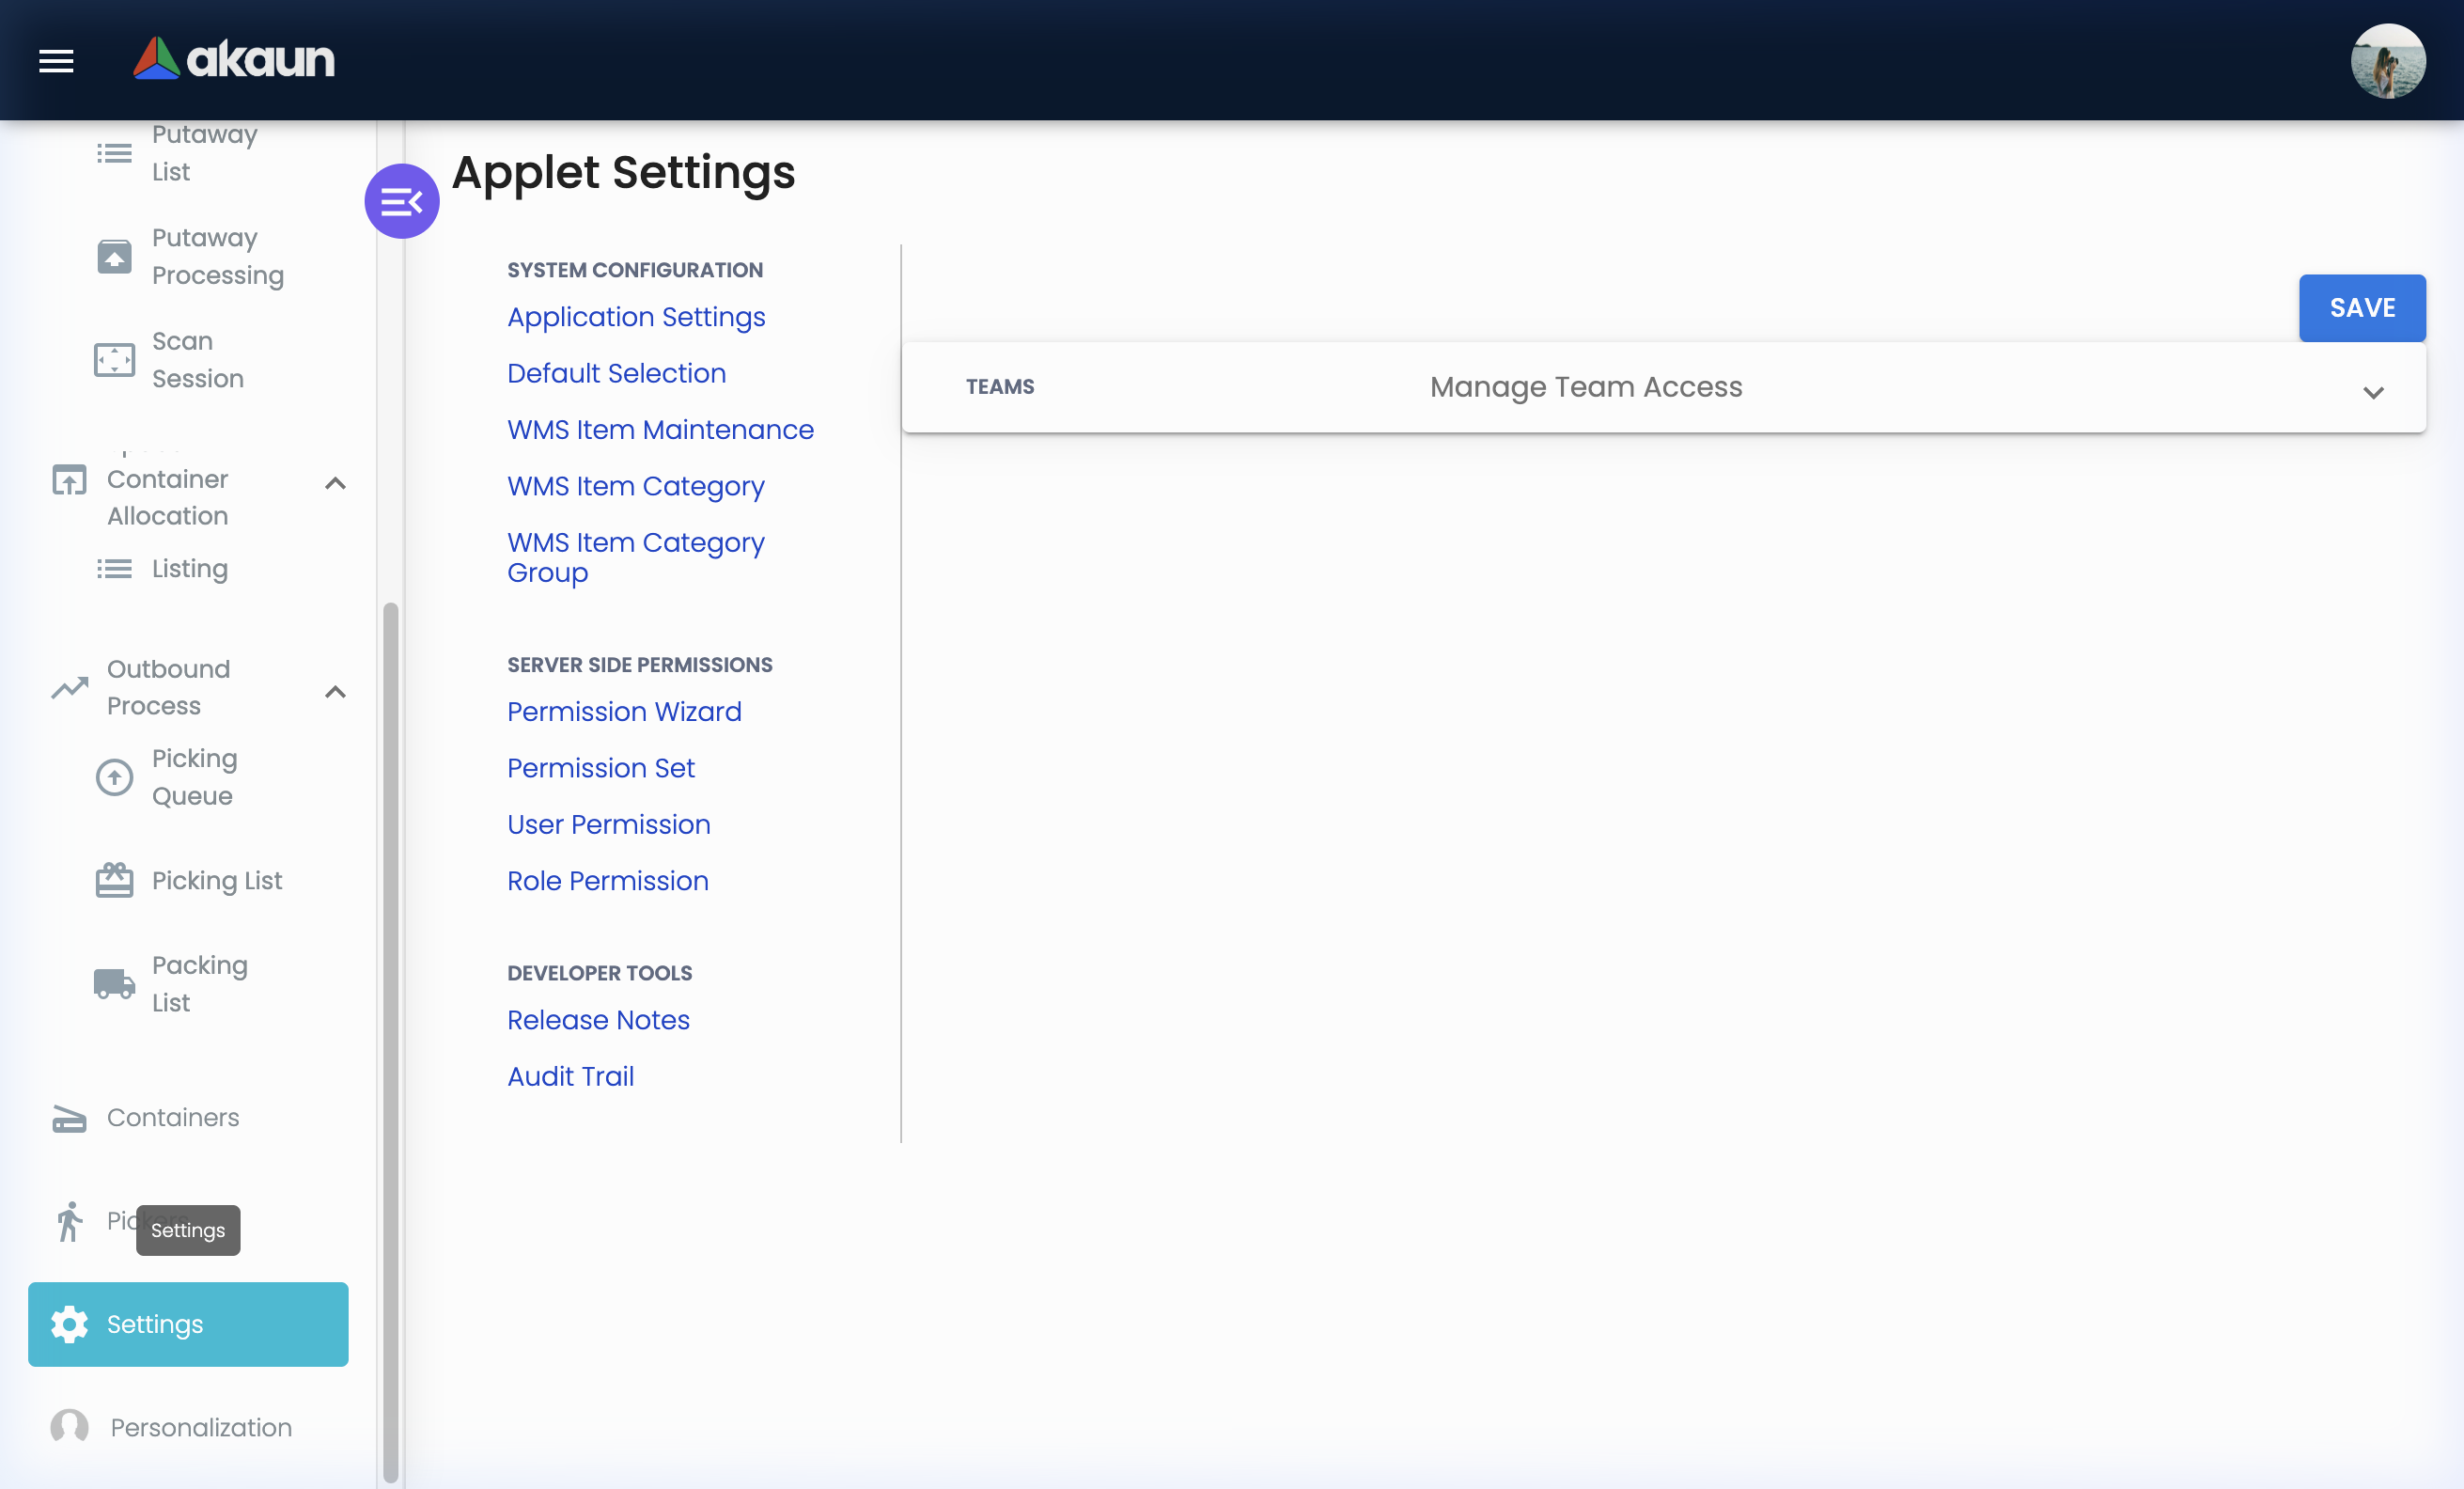
Permission Management (Settings > Permissions)
The Warehouse Management Applet supports comprehensive, layered permission controls:
| Permission Type | Description | Use Case |
|---|---|---|
| Permission Wizard | Step-by-step guided setup for common configurations | New system setup, quick role configuration |
| Permission Set | Pre-defined bundles of permissions for common roles | Assign “Picker Set” to all pickers at once |
| User Permission | Individual access controls per user | Special cases — one user needs extra access |
| Team Permission | Group-based access for warehouse teams | “Receiving Team” group gets inbound access |
| Role Permission | Role-based access (Manager, Staff, Admin) | Most common approach — configure once per role |
| Client-Side Permission | Frontend UI-level permission controls | Hide/show specific buttons or actions |
Recommended Approach:
- Use Permission Wizard for initial setup
- Create Permission Sets for each warehouse role (Receiver, Picker, Packer, Supervisor)
- Assign users to Permission Sets via Role Permission
- Use User Permission only for exceptions
Webhook (Settings > Webhook)
Connect the warehouse system to external platforms via event notifications.
Webhooks allow the Warehouse Management Applet to notify external systems when key warehouse events occur — without requiring those systems to constantly poll for updates.
Common Webhook Use Cases:
| Event | Notification | External System |
|---|---|---|
| Receiving Doc created | “Goods received from Supplier X” | ERP, Finance system |
| Packing List posted | “Shipment dispatched for Order Y” | Customer portal, Logistics platform |
| Picking List completed | “Order Z items picked and ready” | Warehouse management dashboard |
| Space allocation created | “New stock at Location A-1-B” | Inventory monitoring system |
Configuring a Webhook:
- Go to
Settings > Webhook - Click "+" to create a new webhook
- Enter the Endpoint URL of the receiving system
- Select the Event to trigger the notification
- Configure authentication (if required by the external system)
- Test and activate
Personalization
Customise the applet for your individual work preferences.
Default Selection (Personal)
Set personal default values for fields you use repeatedly. Unlike the system-level default selection (which applies to all users), personal defaults only apply to your login.
Examples:
- My Default Warehouse: Set to your primary warehouse — pre-fills automatically
- My Default Layout: Pre-selects your most-used layout in putaway workflows
Sidebar Customization
Reorder or pin your most-used menu items to the top of the sidebar for quick access.
How to Customise:
- Go to Personalization in the sidebar
- Select which menu items to pin or hide
- Drag to reorder if supported
- Save — your sidebar reflects your preferences every login
Reporting & Audit
How to Review Receiving History
To review what goods were received in a specific period:
- Go to Inbound Process > Receiving Doc
- Filter by:
- Date Range: (e.g., November 2024)
- Supplier: (specific vendor)
- Status: (Posted, Draft, etc.)
- Export to Excel for detailed analysis
How to Review Shipment History
To review what has been dispatched:
- Go to Outbound Process > Packing List
- Filter by:
- Date Range and Customer
- Posting Status: Posted (fully dispatched)
- Open individual records to see packed products and tracking IDs
Stock Location Audit
To audit what is stored at a specific location:
- Go to Space Container Allocation
- Filter by Node/Location or Container Code
- See all items currently allocated to that location
- Cross-reference with physical count
Audit Best Practices:
✓ Reconcile Monthly: Compare Space Container Allocation records against physical counts
✓ Review Receiving vs PO: Check that all receiving documents link to purchase orders
✓ Verify Putaway Completion: Ensure all items in Processing Queue are resolved (none left pending indefinitely)
✓ Check Packing List Status: Any Packing Lists in “Draft” status older than 3 days may indicate a stuck process
Audit Trail (Settings > Applet Log)
The Audit Trail (also known as Applet Log) is your system’s comprehensive log of every action taken within the Warehouse Management Applet. This feature is essential for compliance, tracing missing stock, and troubleshooting.
Listing View - What You Can See:
| Column | Description | Example |
|---|---|---|
| Table Name | Which data table was affected | bl_wms_putaway_list |
| Action | Type of action performed | CREATE, UPDATE, DELETE |
| Action Date | When the action occurred | 2024-01-15 |
| Description | Details of what changed | “Status changed from PENDING to COMPLETED” |
| Status | Current status of the log entry | ACTIVE |
Advanced Search Options:
- Table Name: Filter by specific module data table (e.g., “bl_wms_grn_hdr” for receiving documents)
- Action Name: Filter by action type (e.g., “Show only UPDATEs”)
- Action By: Filter by the user who performed the action (e.g., “Show all actions by John Tan”)
Real-World Scenario:
Problem: An item's bin location was changed but the physical stock is still in the old location.
Action:
1. Go to Settings > Applet Log
2. Search by Table Name: "bl_wms_space_container_allocation"
3. Search by Action: "UPDATE"
4. Find the item code in the Description
5. Identify who made the change in the system and contact them
FAQ
Q: How do I find where a specific item is stored in the warehouse?
A: Go to Space Container Allocation and search by Item Code or Item Name. You’ll see the container and node (layout location) assigned to that item. Alternatively, check the Layout Nodes within a warehouse — each node shows its current stock balance.
Q: What’s the difference between Receiving Doc and Receiving Line Items?
A: The Receiving Doc is the header — one document per delivery, linked to a supplier. Receiving Line Items is the detail — one row per item received. If a delivery contained 10 different products, there is 1 Receiving Doc and 10 Receiving Line Items.
Q: Can I use barcode scanning instead of manual data entry?
A: Yes — in two ways. The Scan Session feature handles bulk receiving by scanning item barcodes off the delivery. For serial number capture within a Receiving Line Item, use the Serial Number > Scan function to scan individual unit barcodes.
Q: What’s the difference between Picking Queue and Picking List?
A: The Picking Queue is a view of ALL pending order items across all customers — it’s the master backlog. A Picking List is a specific work assignment created from the queue for a named picker, containing a subset of those items. Think of it as: Queue = the full to-do list; Picking List = today’s tasks assigned to one person.
Q: Stock shows 0 in Location Balance but Company Balance is positive. What does that mean?
A: Location Balance is the stock at the specific pick location (a bin or node). Company Balance is the total stock across all locations company-wide. This means the stock exists but is held in a different location — perhaps another bin, another warehouse, or on a pallet that hasn’t been assigned to a pick location. Go to Space Container Allocation to find where the stock is currently allocated.
Q: How do I handle a shipment discrepancy found during packing?
A: Do not seal the box. Record the discrepancy in the Discarded Packed Product tab with a note explaining the issue (wrong item, damaged unit, short-pick). Notify the supervisor. Determine whether to: (a) ship a partial quantity and backorder the rest, or (b) locate the missing items and complete the order before dispatch.
Q: How do I set up storage locations (bins, racks, shelves)?
A: Navigate to Warehouses → open the warehouse → go to the Layouts tab → open or create a Layout → add Nodes in a hierarchy. The typical structure is: Zone → Aisle → Rack → Shelf → Bin. Each node can have a scan code assigned for barcode-based location verification.
Q: Can I restrict which features warehouse operators can see?
A: Yes. Go to Settings > Feature Visibility to show or hide specific menu items per role. For example, you can hide the Space Container Allocation and Settings menus for Warehouse Operator roles while keeping them visible for Supervisors and Admins. Combine with Settings > Permissions for full access control.
Q: How do I handle a returned item from a customer?
A: Customer returns are typically processed through a dedicated RMA (Return Merchandise Authorization) applet or using a Receiving Doc with a specific “Return” type/category. Create a new Receiving Doc linking back to the original customer (acting as the supplier for the return), process the item into the queue, inspect it for damage, and then allocate it back to the appropriate warehouse space or a designated returns bin.
Q: What should I do if a barcode scan is not recognized during Pick or Pack?
A: This usually means the item or location’s Scan Code is missing or incorrect in the master data. First, try manually entering the item code. Then, notify an admin to check the item’s configuration in WMS Item Maintenance or the Warehouses > Layout > Node settings. They need to verify that the Scan Code matches exactly what is printed on the barcode label.