Production Planning & Monitoring Applet
Purpose and Overview
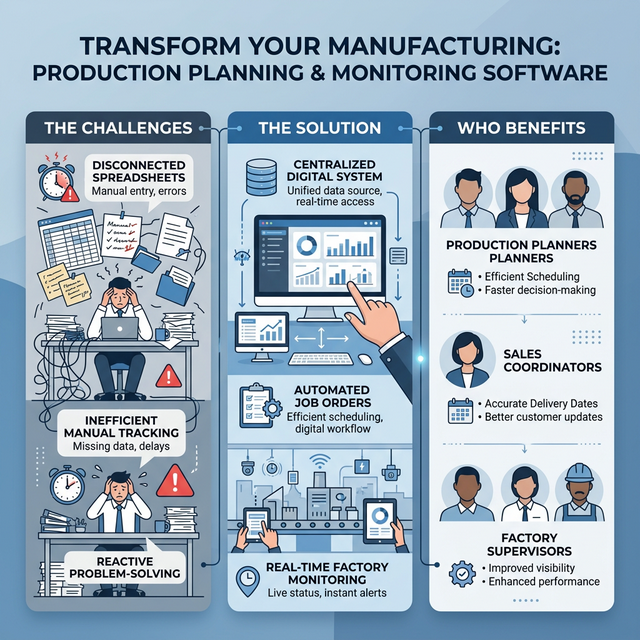
The Production Planning & Monitoring (PPM) Applet is your central hub for converting customer demand into factory floor instructions. It bridges Sales Orders with Manufacturing Operations, ensuring clear communication and complete traceability from order to delivery.
Key Features Overview
Who Benefits from This Applet?
Production Planners:
- Create and manage Job Orders (defining Container vs. Ad-Hoc quantities)
- Approve or reject system-generated production requests
- Link Job Orders directly to customer demand (Make-to-Order)
- Monitor factory capacity and set work priorities
Sales Coordinators:
- Check production status for specific customer orders in real-time
- Review detailed Stock Balance Summaries (reservations vs. job orders)
- Obtain accurate delivery estimates without interrupting the factory
- Track end-to-end order fulfillment
Factory Supervisors:
- Review the daily production load across all stations
- Identify bottlenecks before they pause operations
- Flag and sequence urgent work instructions
What Problems Does This Solve?
The Manual Planning Problem:
Traditional production planning relies on disconnected spreadsheets, manual order tracking, and verbal communication. Common issues include:
- Missing the link between Customer Sales Orders and Factory Job Orders
- Over-producing or under-producing due to a lack of real-time inventory checks
- Inability to quickly check the status of a specific customer’s order
- Missing a centralized queue of what needs to be produced next and in what order
The PPM Applet Solution:
- Centralized demand management — Auto-generated production requests straight from sales orders
- Accurate capacity planning — Outstanding reports that factor in existing warehouse stock
- Seamless traceability — Clear links from the Job Order down to the exact customer Sales Order
- Real-time visibility — Live status monitoring for both planners and sales teams
Core Capabilities
Key Concepts
| Concept | What It Means | Example |
|---|---|---|
| Production Request | Auto-generated demand from Sales Orders | Customer orders 500m cable → System creates request |
| Job Order | Formal manufacturing instruction | JO-2024-001: Produce 500m Armored Cable |
| Job Template | Pre-defined process sequence | Armoring → Bedding → Cabling → Testing |
| Process Instance | Individual manufacturing step | “Armoring” step with materials and machine assigned |
| Make-to-Order | Produce for specific customer order | Link Job Order to SO-2024-001 |
| Make-to-Stock | Produce for inventory | Ad hoc quantity for warehouse |
Quick Start Guide
Get up and running quickly with these essential workflows.
For Production Planners: Processing Daily Demand
Goal: Convert incoming sales orders into factory instructions.
- Review Requests: Navigate to the Production Requests menu to see pending demand from Sales.
- Make Decisions: For each request, verify if you have stock. If not, click Approve to authorize production.
- Create Job Order: Go to Master List → add a new Job Order. Select the Item Code, Branch, and the Job Template (Process Instance Group Name).
- Link Quantities: Open the Sales Order Link tab in the Job Order to allocate quantities to specific customer orders.
- Generate Steps: Switch to the Process Instance tab and click Generate Process Instance to expand the manufacturing steps.
For Factory Supervisors: Prioritizing Operations
Goal: Ensure the factory floor knows what to work on next.
- Review Load: Navigate to the Processes menu to see all active manufacturing steps across all Job Orders.
- Identify Urgent Work: Filter by Process Type (e.g., all “Cutting” jobs).
- Set Priorities: Click into critical Process Instances and mark them as High Priority.
- Check Readiness: Review the Input Summary to ensure materials are available before operators start on the floor.
For Sales Coordinators: Checking Job Status
Goal: Answer customer questions about delivery timelines.
- Find the Order: Navigate to the Sales Orders menu within the applet.
- Review Status: Look up the specific Customer Name or Order Number.
- Check Stock Balance: Click into the Item Details to review the Stock Balance Summary.
- Relay Information: Check pending Job Orders to provide an accurate delivery estimate.
For Admins: Initial System Setup
Goal: Configure the foundational settings before planners begin operations.
- System Prerequisite: Ensure Machines, Process Types, Process Templates, and Job Templates are fully populated in the Process Maintenance Applet.
- Global Defaults: Go to Settings > Default Selection and define the Default Branch and Default Location for production.
- Field Configuration: Go to Settings > Field Settings to enable necessary accounting fields (Segment, G/L Dimension, Profit Center, Project) and tax lines (SST, WHT).
- Custom Statuses: Navigate to Settings > Custom Status and activate any bespoke lifecycle flags your floor uses (e.g., “Quality Hold”, “Awaiting Parts”).
- Printables: Upload any specific Sales Order (SO) Printables required logically in Settings > Printables.
Core Workflows and Operations
1. Managing Production Requests
Production Requests are auto-generated when Sales Orders are confirmed. This is your daily queue of what needs to be made.
Navigate to Production Requests menu to see all pending requests.
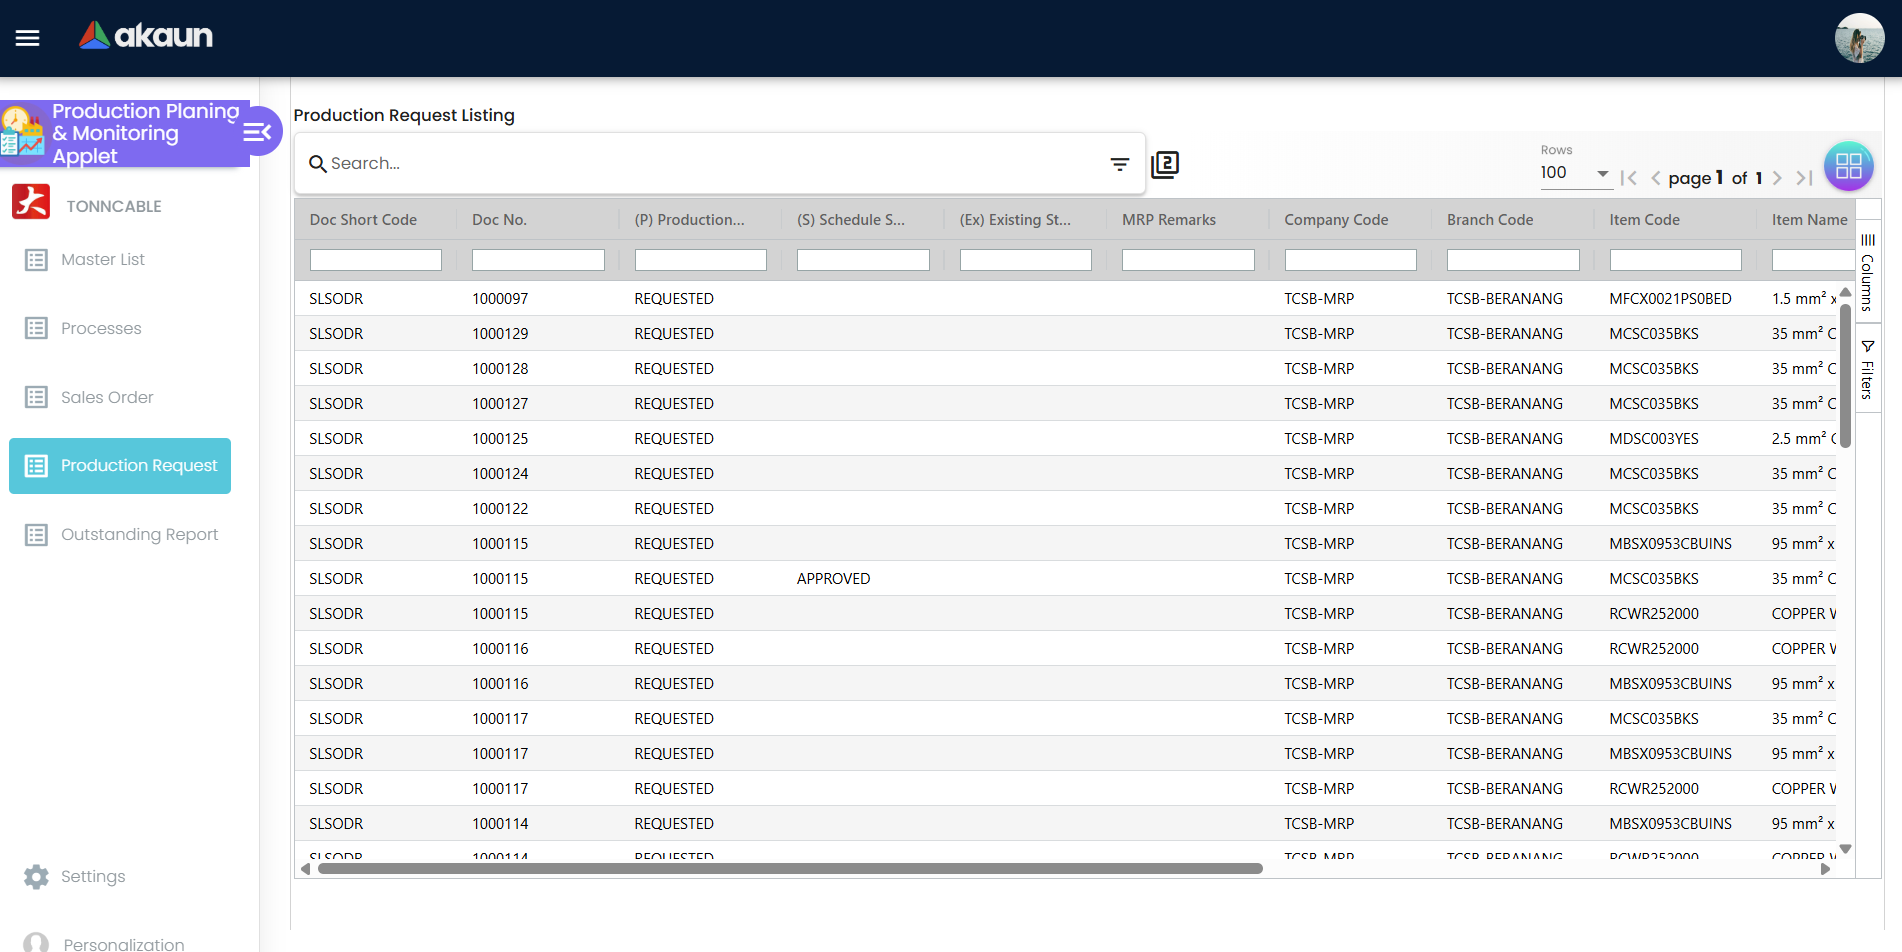
For each request, choose one of three actions:
| Action | When to Use | Result |
|---|---|---|
| Approve | Need to manufacture (no stock or insufficient) | Creates Job Order |
| Reject | Duplicate, invalid, or cancelled order | Removes from queue |
| Mark as EX | Sufficient stock available in warehouse | Fulfills from inventory, no production |
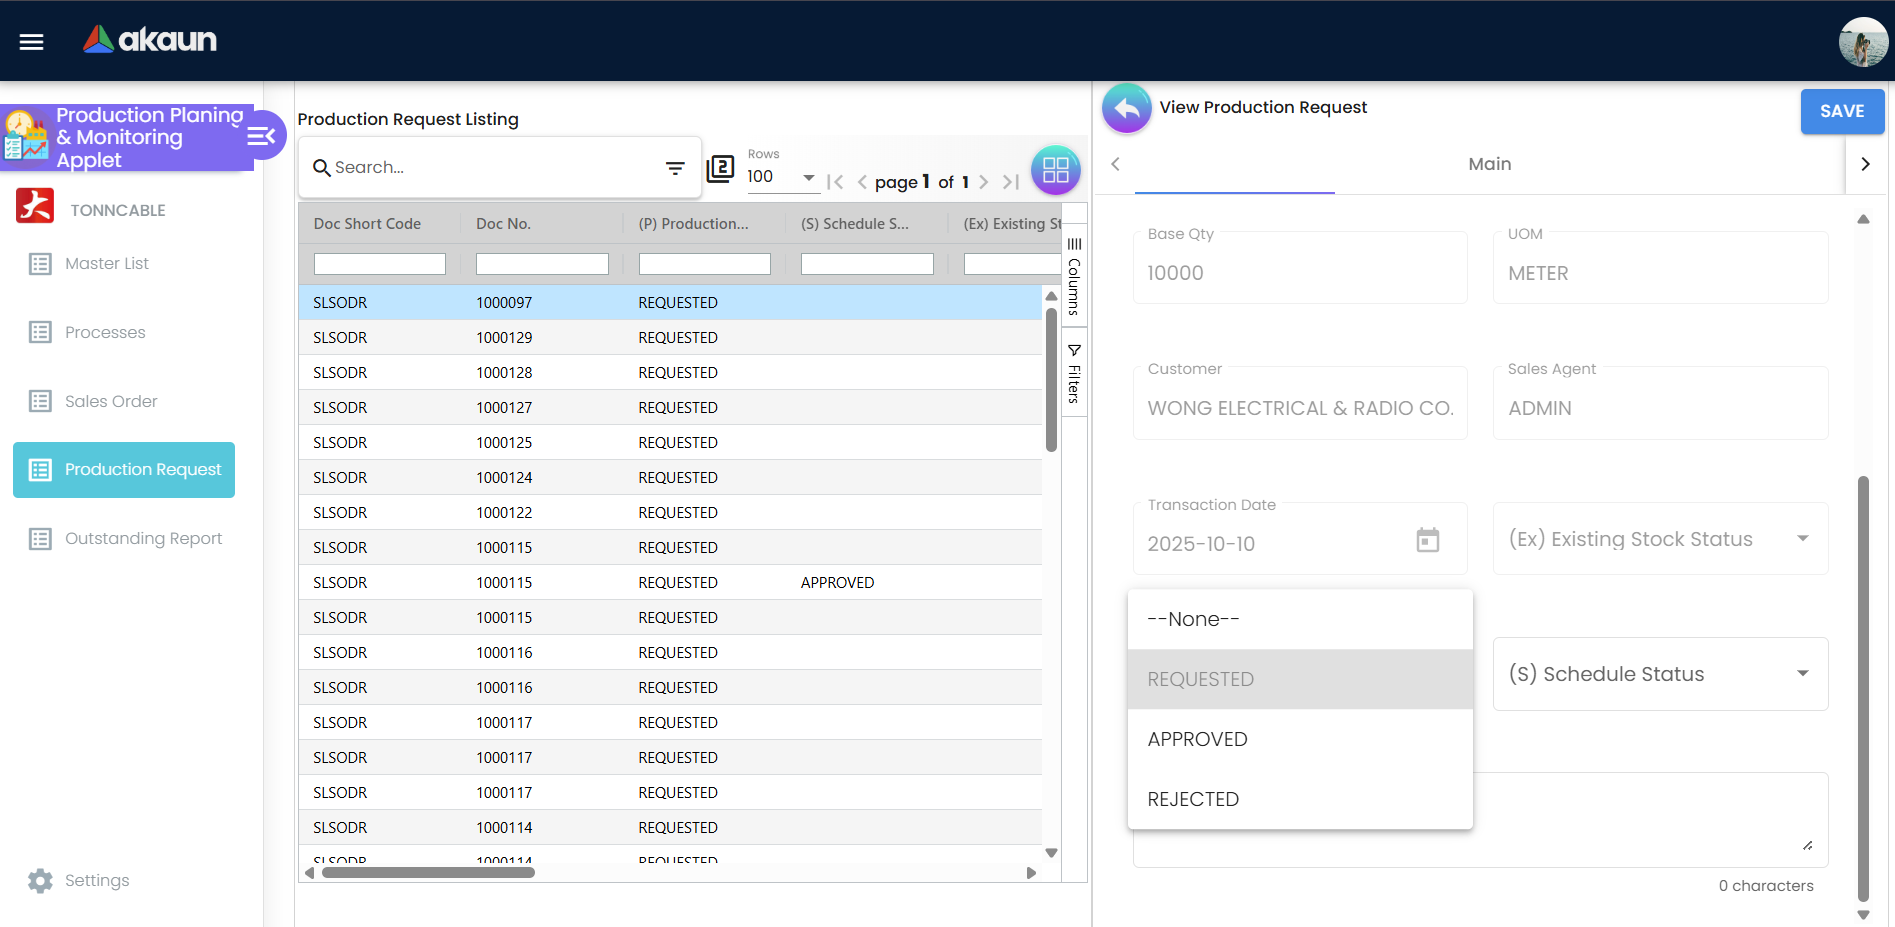
Outstanding Production Report
This report aggregates all pending production demand and shows you the gap between what’s requested and what you have in stock. It’s your capacity planning tool.
Click Filter and generate outstanding report to view a CSV export showing the Total Outstanding Quantity, Net Outstanding (after stock), Linked Sales Orders, and Request Dates.
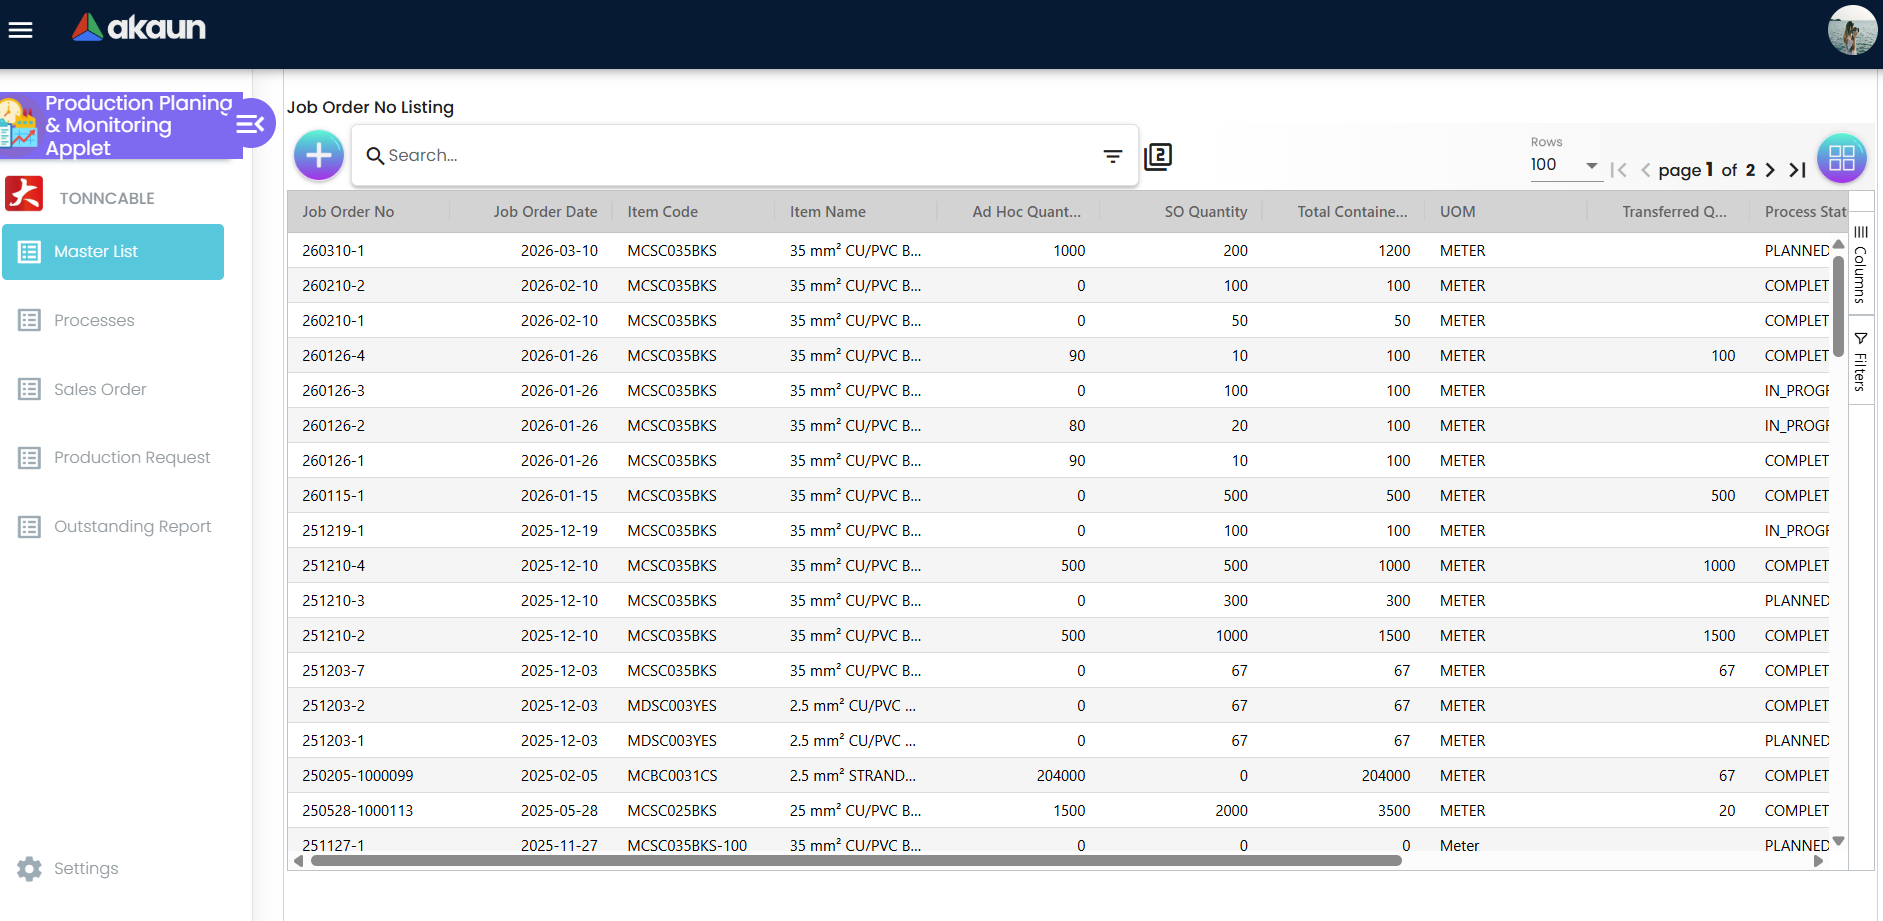
2. Creating Job Orders (Master List)
A Job Order is the formal manufacturing instruction that tells the factory floor what to make, how to make it, and what materials are needed.
From Master List, click "+" to open the Job Order form.
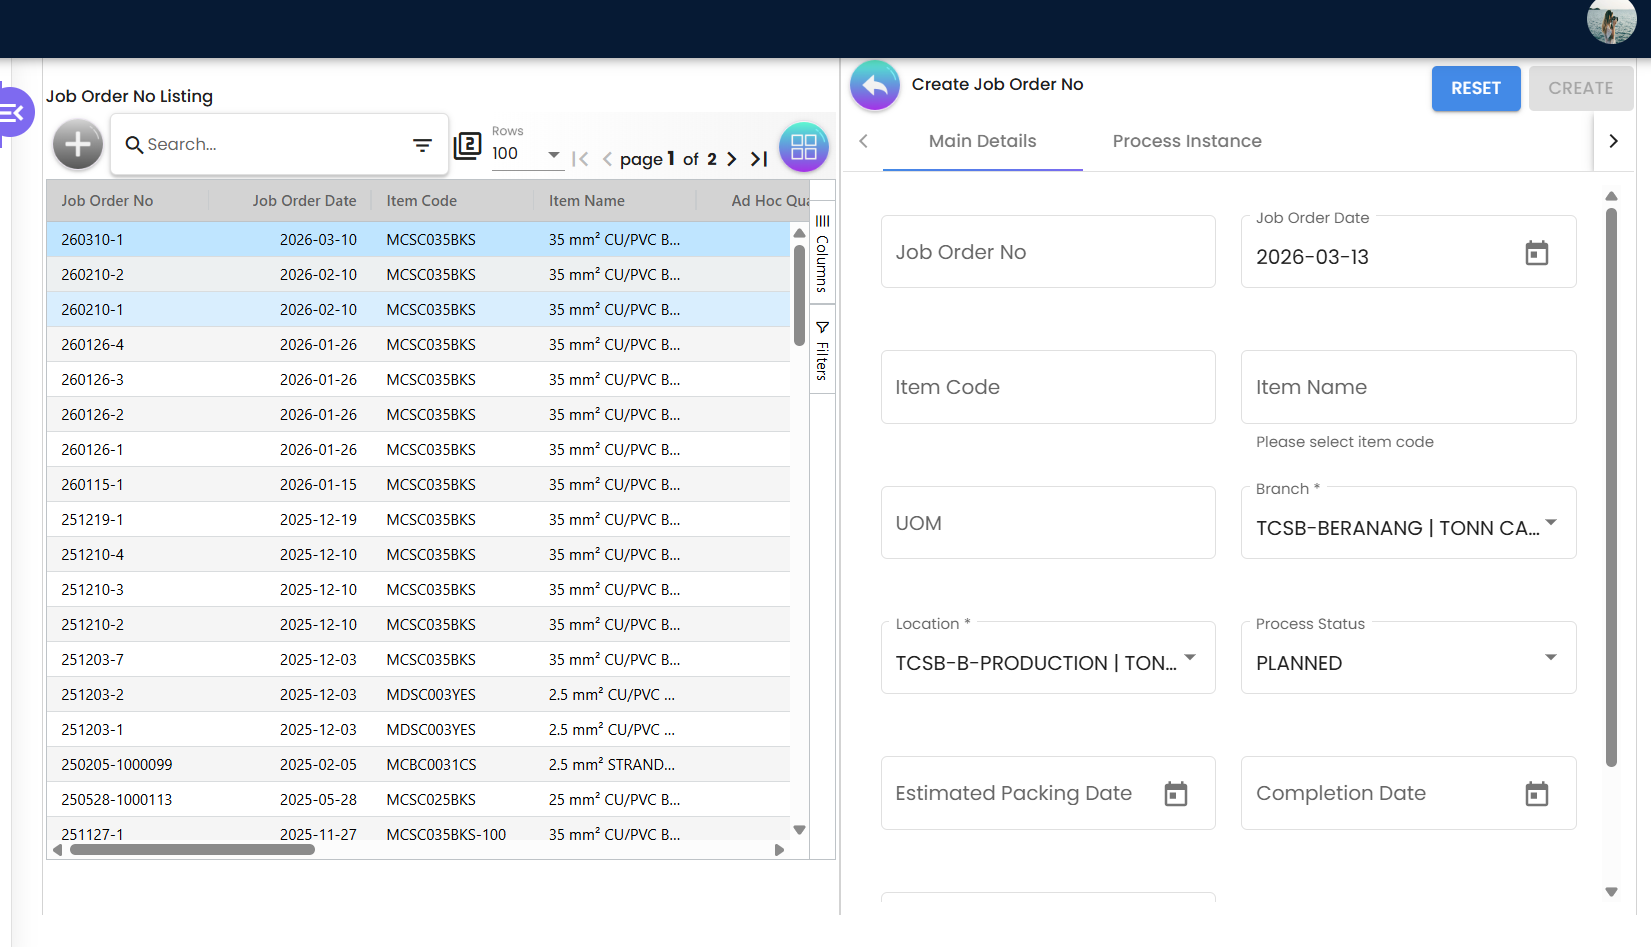
- Branch: Sets both your production location and where finished goods will be deposited.
- Job Order Number: Leave blank for sequential auto-numbering.
- Process Instance Group Name (Job Template): Your production recipe.
- Estimated Packing Date & Completion Date: Used for timeline projections.
- Process Status: The current lifecycle flag.
Generating Process Instances
Creating the Job Order doesn’t automatically generate the manufacturing steps. Open your Job Order and navigate to the Process Instance tab.
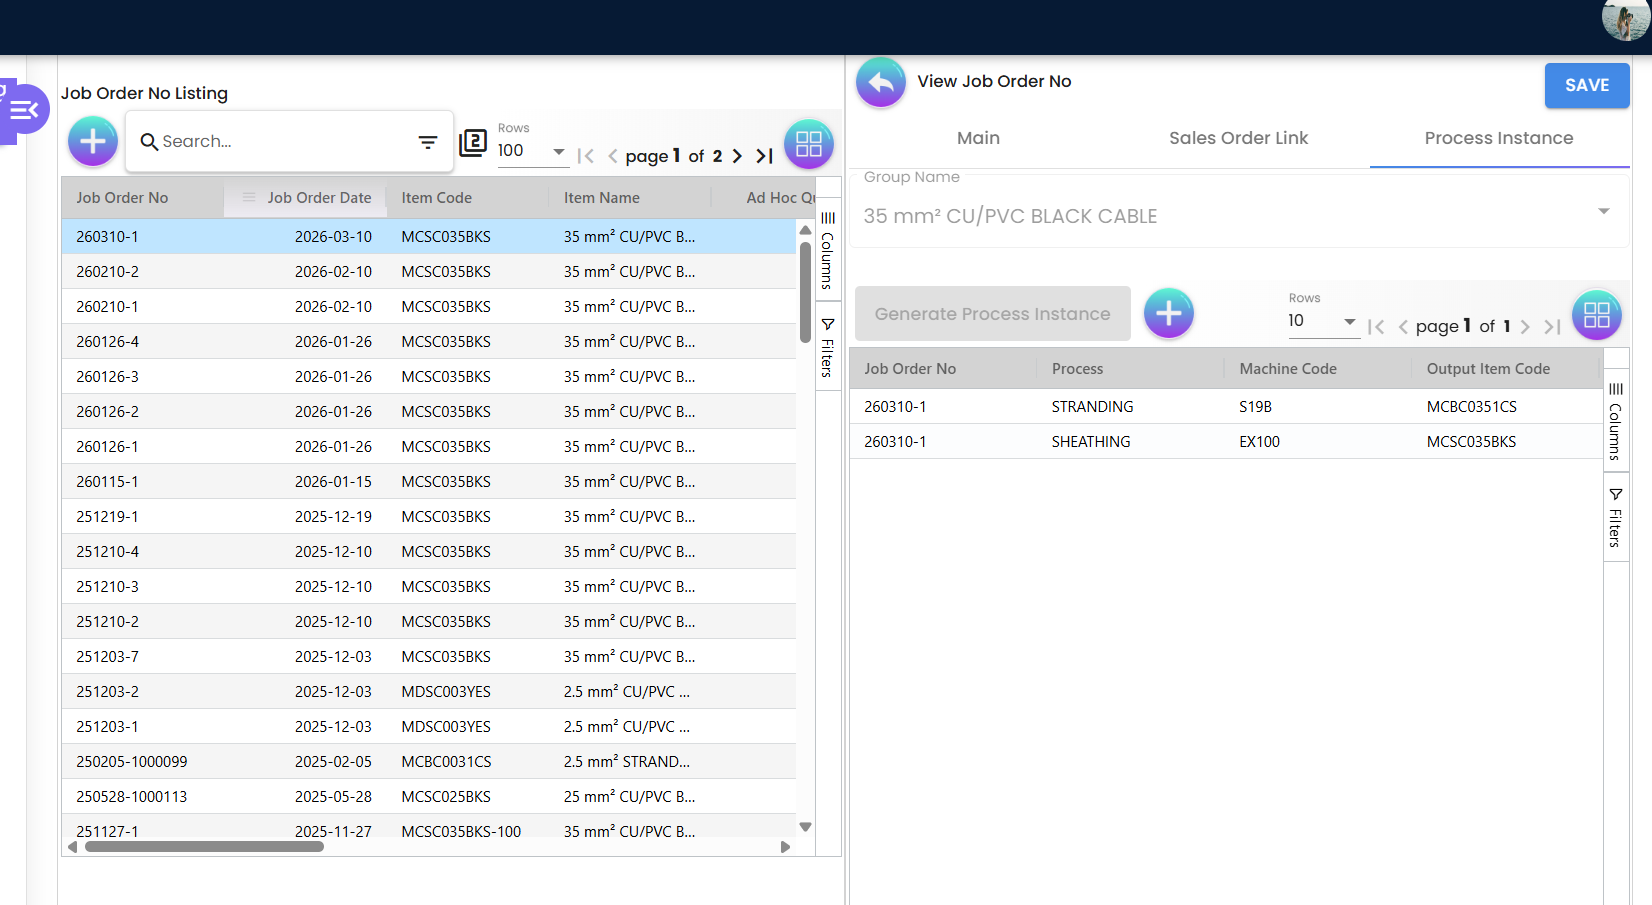
Click Generate Process Instance to expand the Job Template into individual, executable steps.
Inactivating Unnecessary Steps
Sometimes you don’t need to run every step (e.g., reworks or semi-finished goods available). Click on a generated Process Instance and select Inactivate. The system grays it out, removing its input materials from your material plan.
Defining Quantities: Make-to-Order vs Make-to-Stock
The system tracks two distinct types of production quantities on the main form, which map directly to your production strategy:
Make-to-Order (Container Quantity via Sales Order Linking) For customer-specific production, open the Sales Order Link tab.
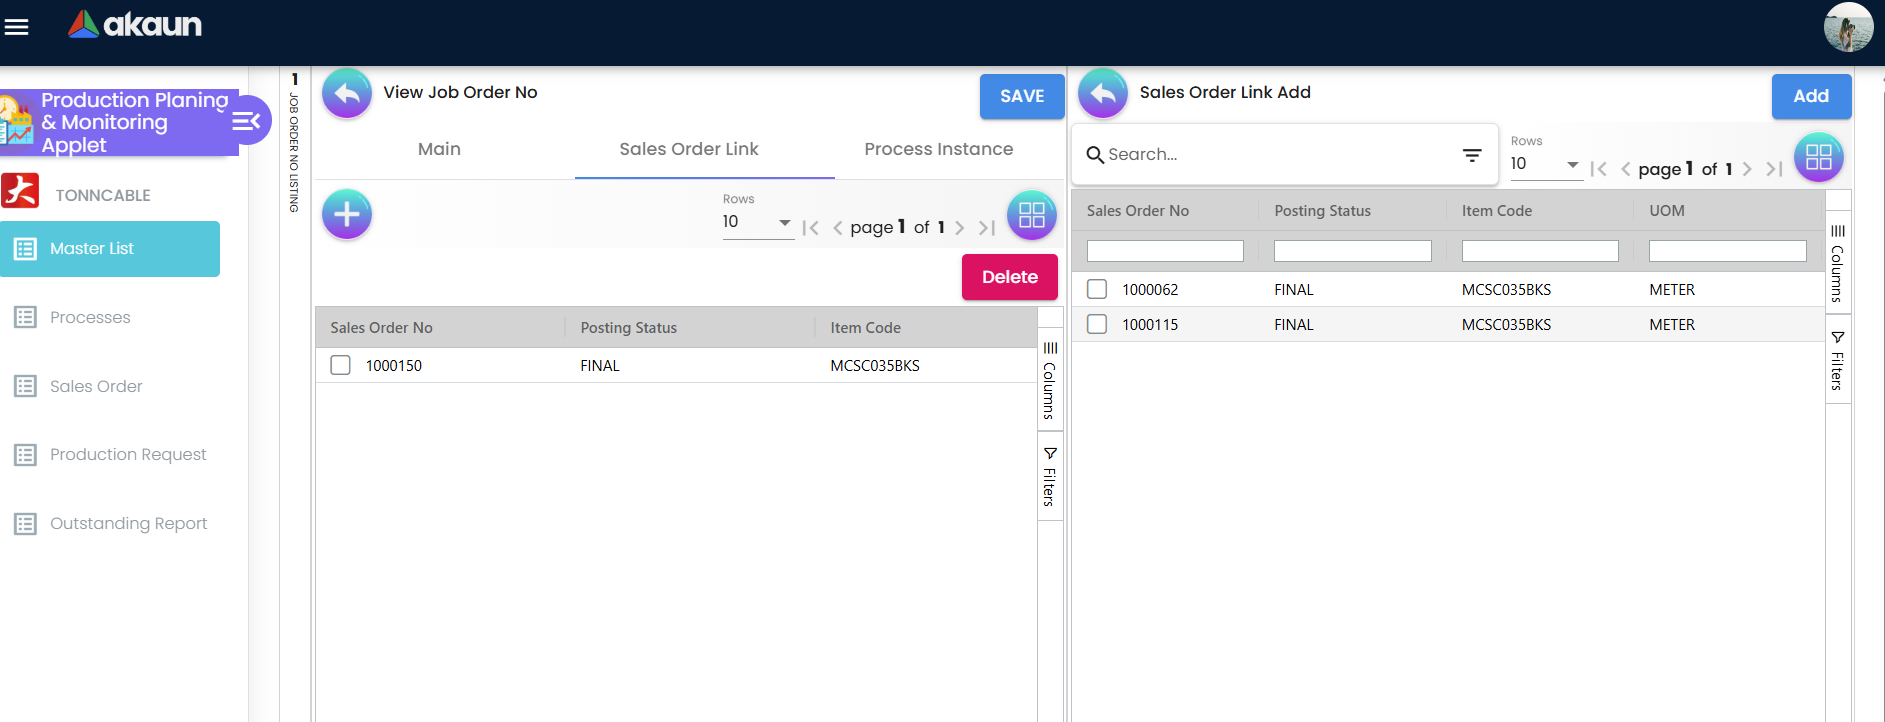
Select the SO line and enter your production quantity. This populates the Container Quantity (Sales Order Quantity) field on the main details page, giving you complete customer traceability.
Make-to-Stock (Ad-Hoc Quantity) For forecast-based production, simply enter an Ad-Hoc Quantity in the Job Order main details. The finished goods go to the warehouse as safety stock without being tied to a specific order.
Total Quantity: The system automatically sums the Container Quantity and the Ad-Hoc Quantity to show you the total production run measure.
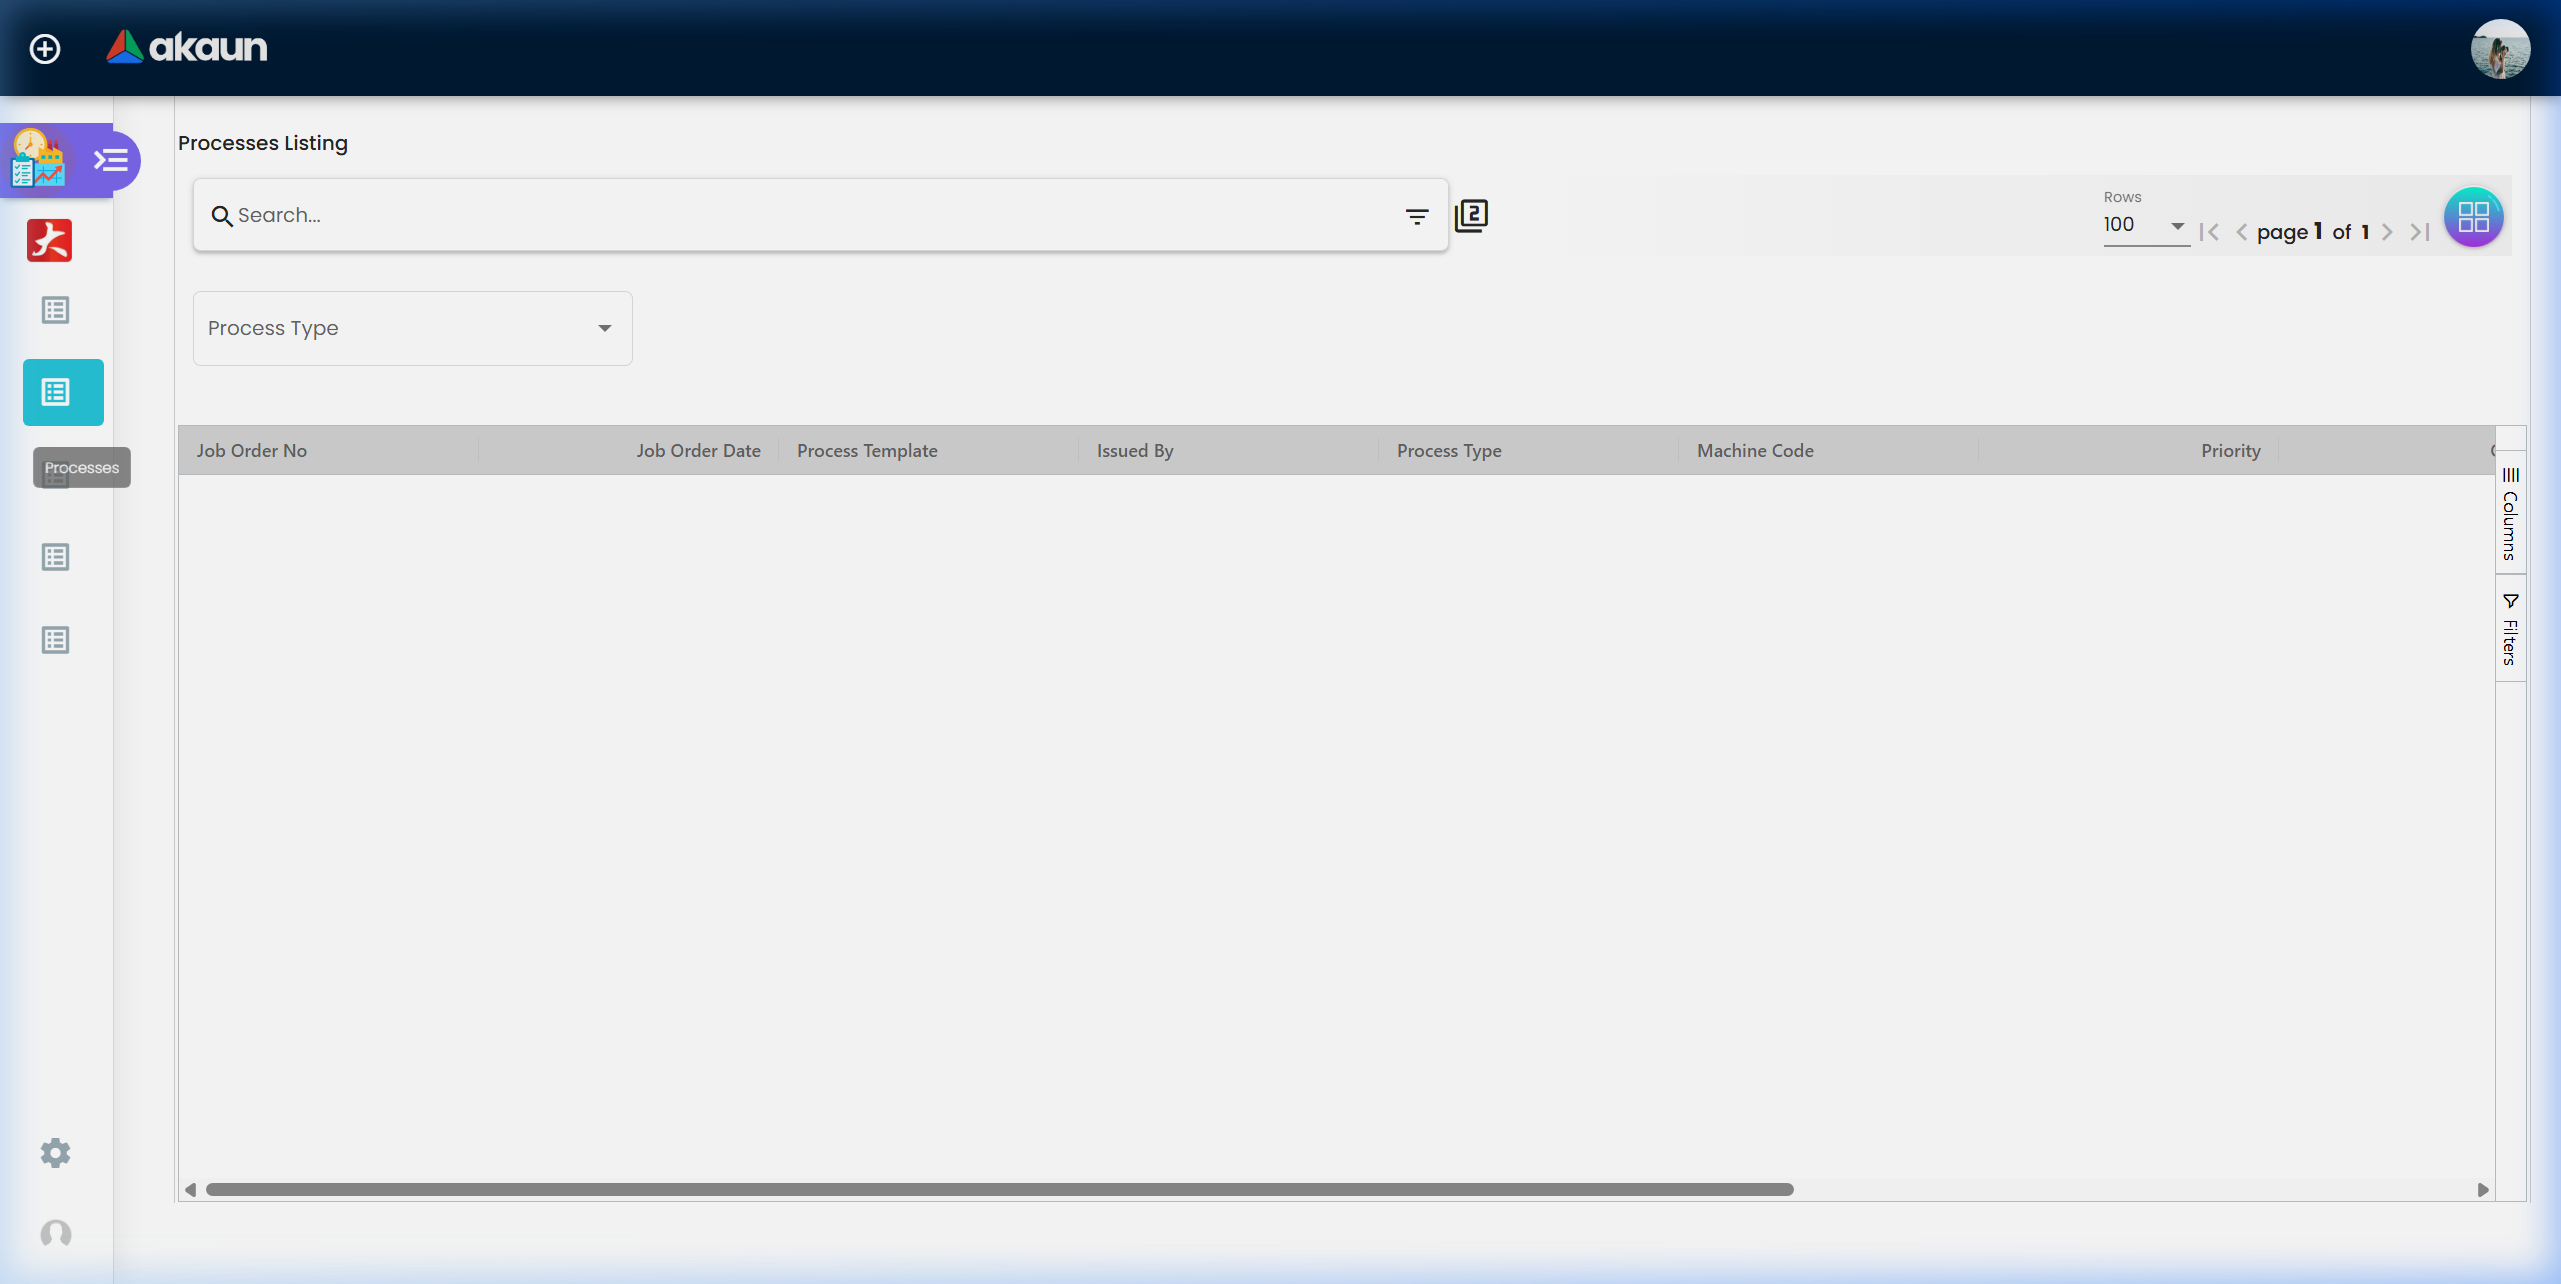
3. Monitoring Production
Processes Menu: Step-Level View
See all manufacturing steps across all Job Orders to identify bottlenecks at specific machines or set High Priority flags.
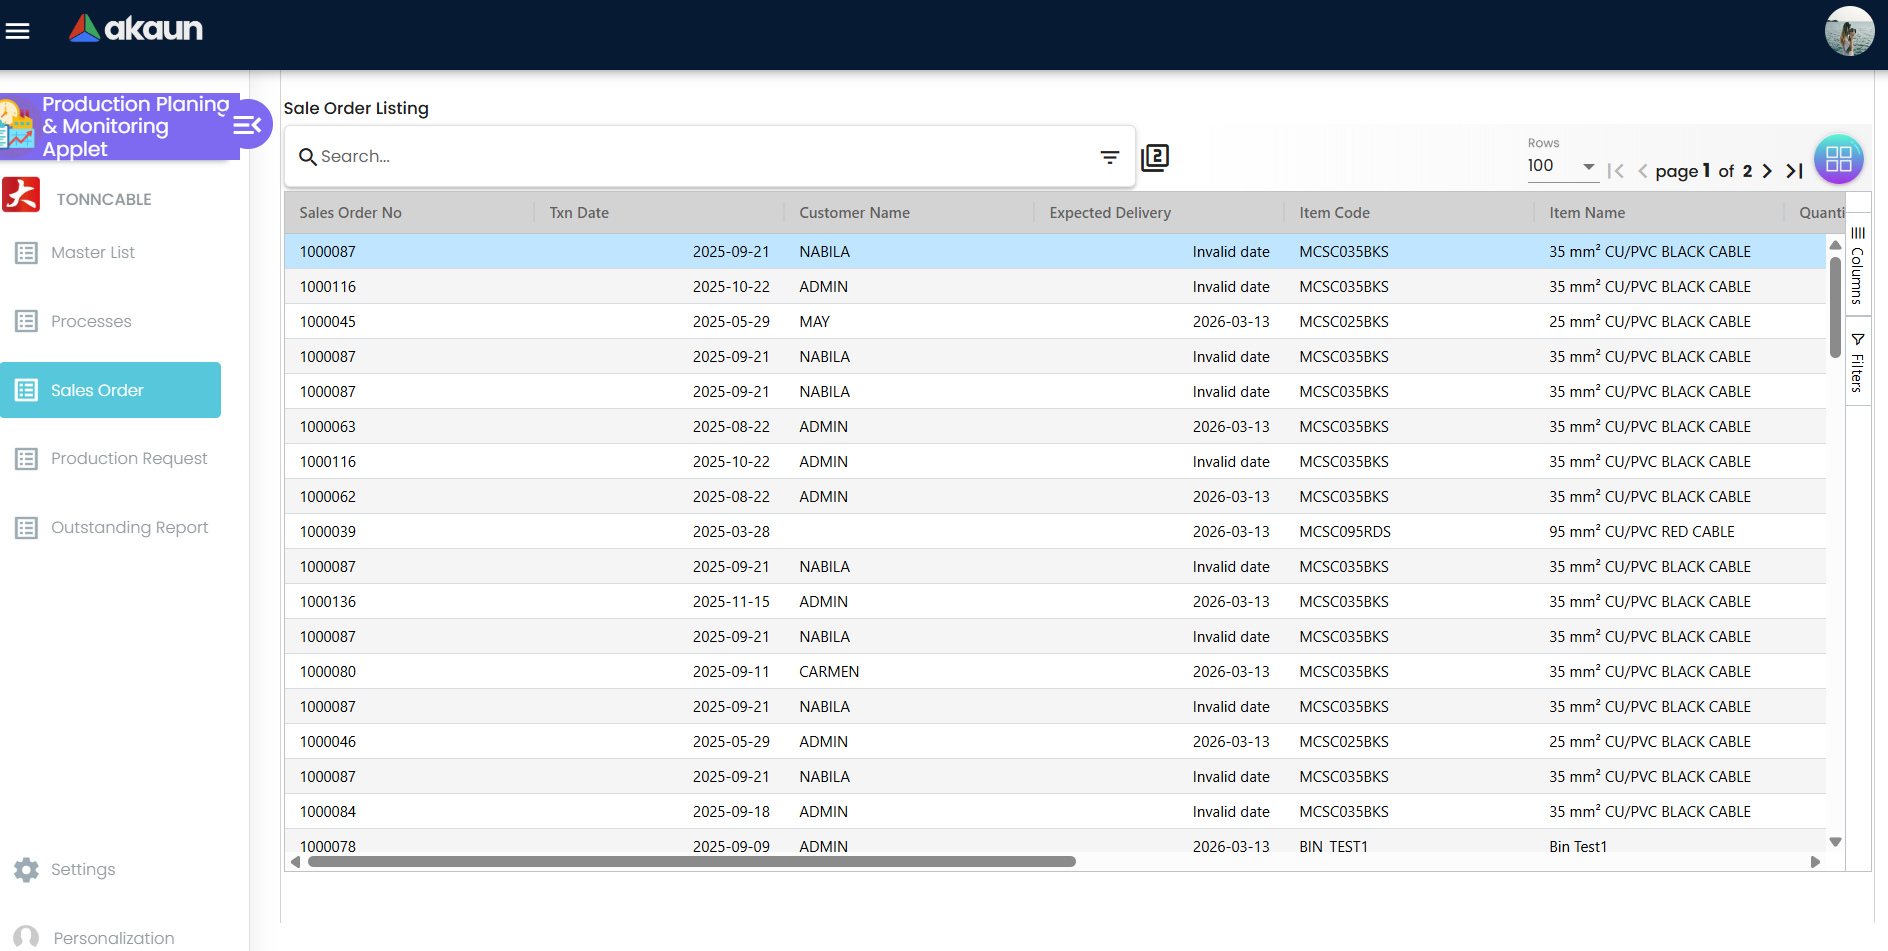
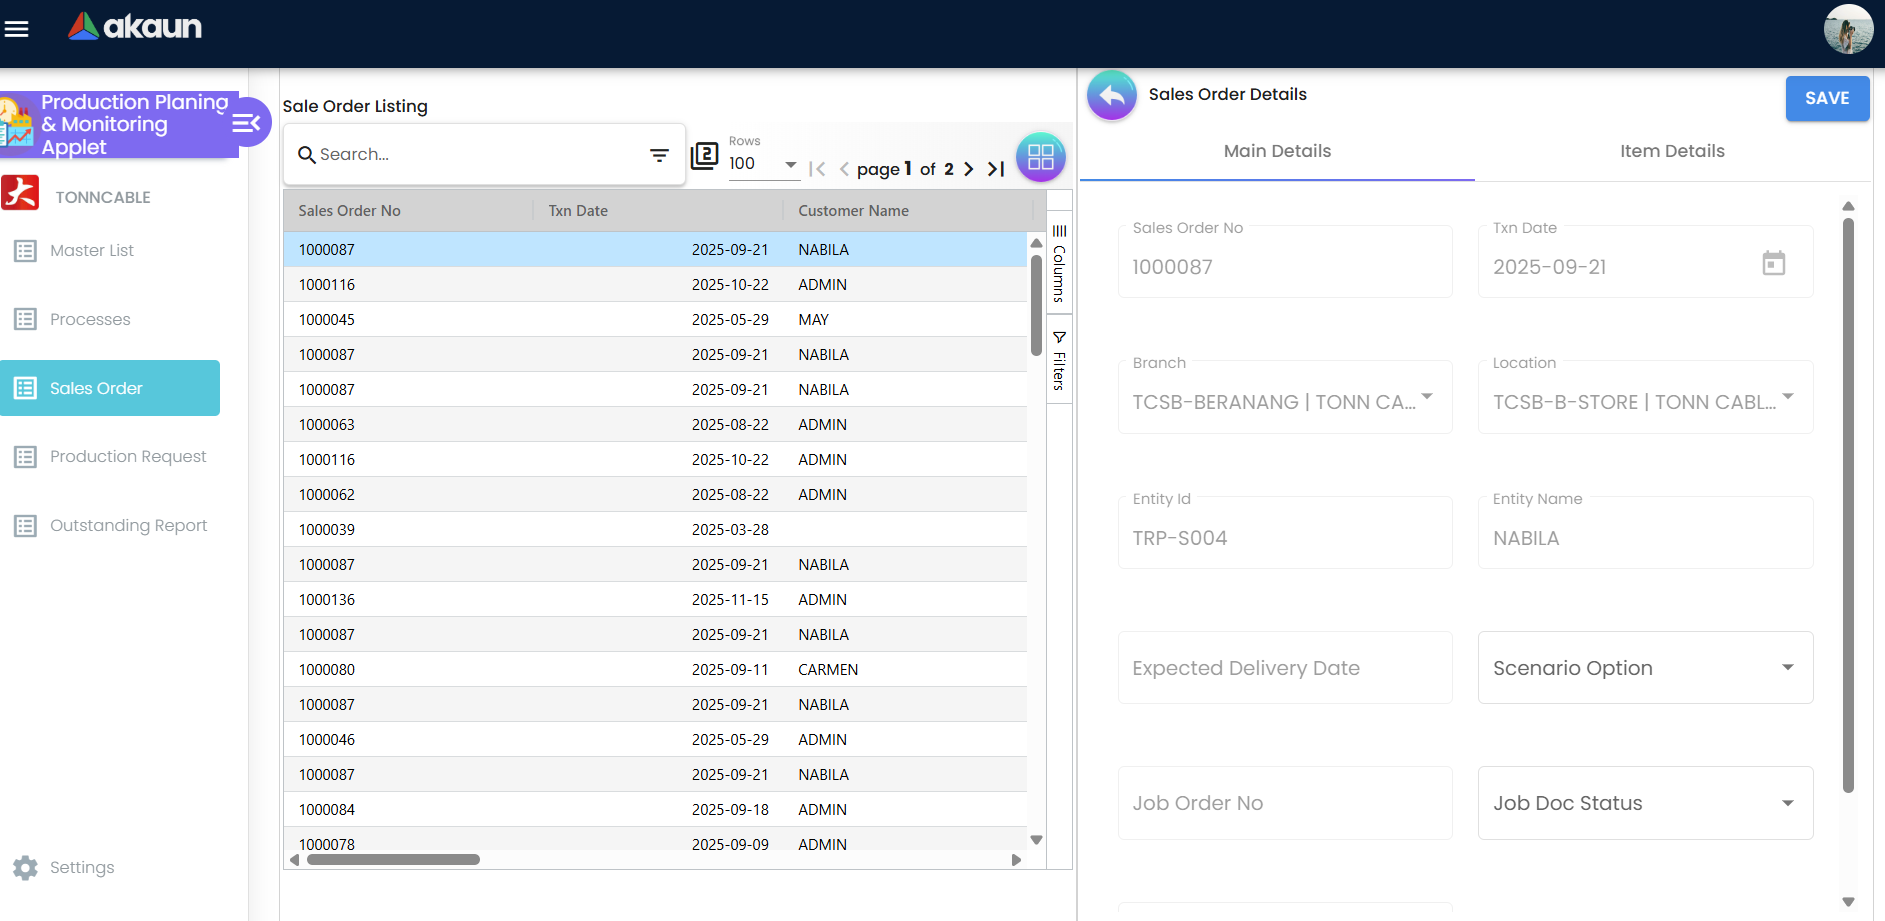
Sales Orders Menu: Customer View
Track production status from the customer order perspective.
Stock Balance Summary From the Sales Order view, navigating into the Item Details reveals a deeply granular Stock Balance Summary. This dashboard is the ultimate truth for Sales Coordinators, displaying:
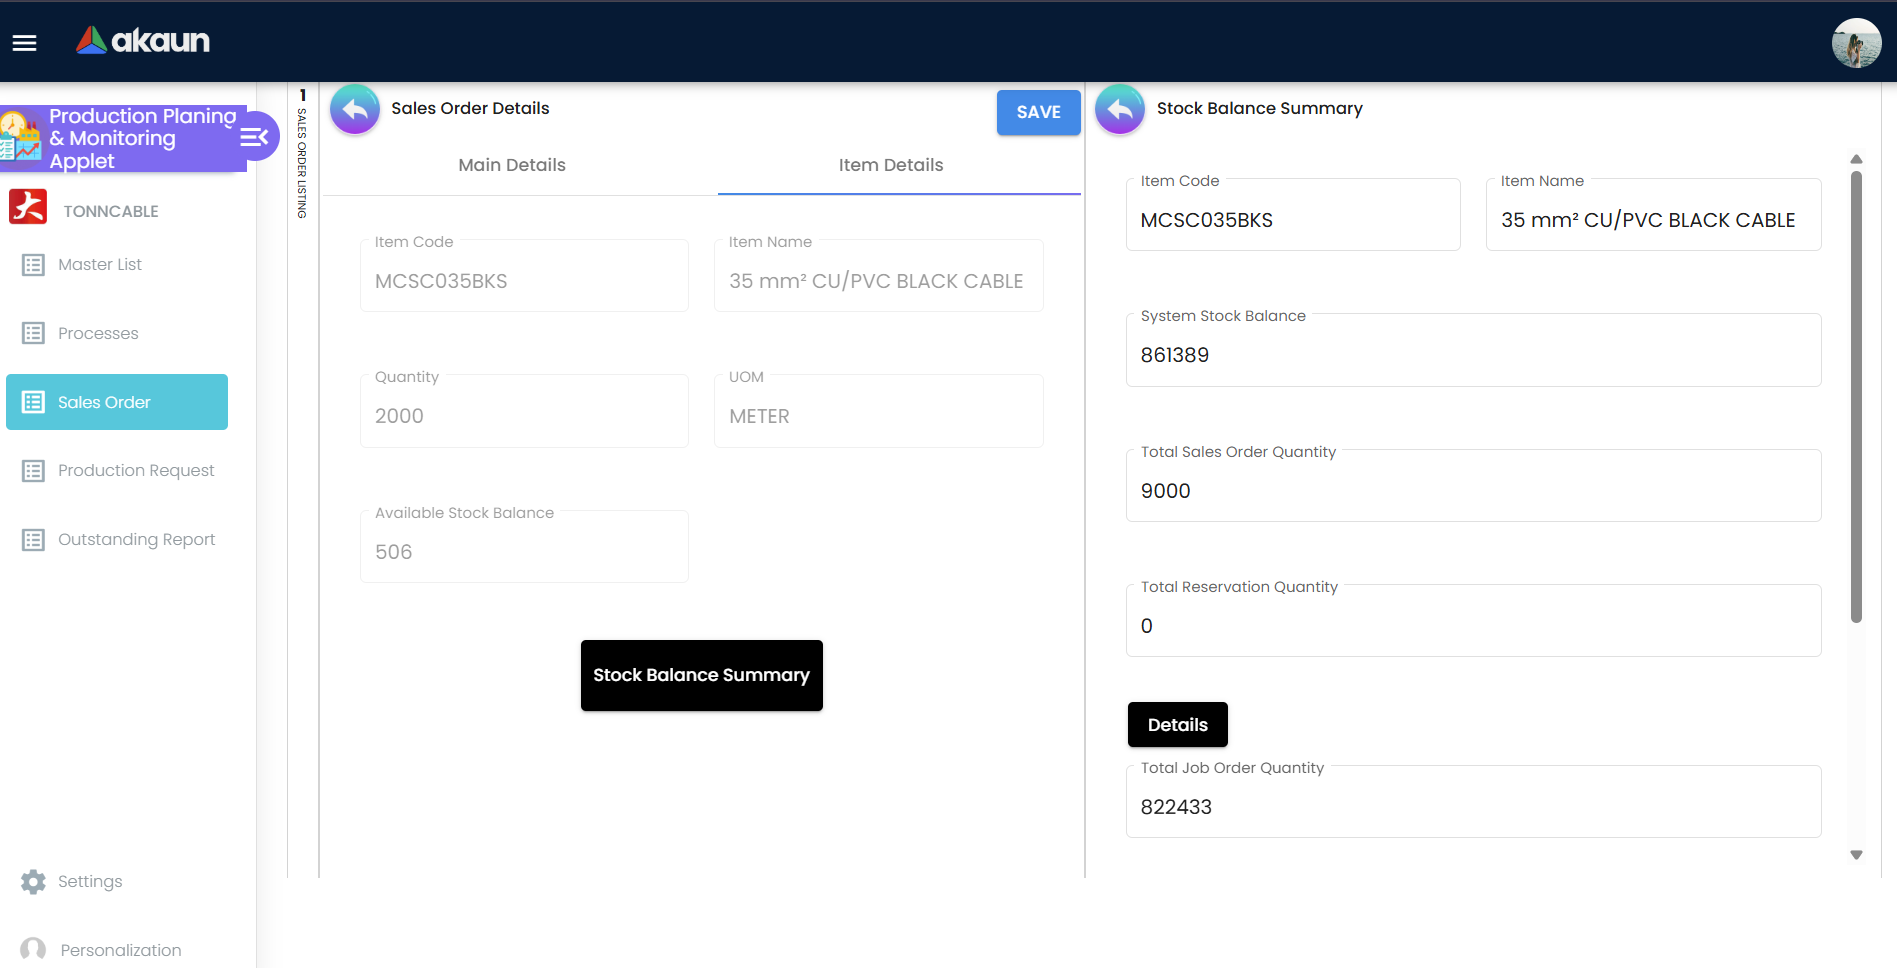
- System Stock Balance
- Total Sales Order Quantity
- Total Reservation Quantity (with drill-down details)
- Total Job Order Quantity (with drill-down details)
- Available Stock Inclusive / Not Inclusive of Reserve
Status Flow:
Planned → Released → In Progress → Completed
Configuration & Settings
Job Order Numbering
Control how your Job Orders are numbered via Application Settings → Master List Main Details.
Automatic (Recommended):
- Leave Job Order Number blank when creating
- System generates sequential numbers (e.g., JO-2024-0001) ensuring no duplicates
Manual:
- Enable manual numbering for custom project-based numbering or legacy system integration.
Field Configuration
Under Settings > Field Settings, you can enable operational flags based on how your business organizes its data:
Department Settings: Track job orders against specific financial or organizational divisions.
- Toggle the visibility of Segment, G/L Dimension, Profit Center, and Project.
Tax / Line Settings:
- Toggle the visibility of SST/VAT/GST and WHT forms on data entry.
Custom Status Engine
You can map highly customized lifecycle stages to both your document Headers and Line Items.
Under Settings > Custom Status, the system allows you to configure up to 5 Custom Header Statuses and 5 Custom Line Statuses. You can set specific localized names and descriptions for these statuses to match your unique factory workflow terminology.
Item Category Groups
Configure Category Groups in Application Settings to enable targeted filtering.
Benefits:
- Filter Production Requests by specific category types (e.g., Cables vs Assemblies)
- Generate highly focused Outstanding Reports
- Easily assign production planners to specific product lines
Frequently Asked Questions (FAQ)
1. Why can’t I see any incoming Production Requests?
Check if the original Sales Orders have been moved to “Confirmed” status. The system only generates requests for confirmed orders. If they are confirmed, try clearing your filters and refreshing the view.
2. Why is the Job Template dropdown empty when I create a Job Order?
The selected item has not been configured with a Job Template in the Process Maintenance Applet. You must define the process steps and group them as a template there before you can use them here.
3. Why didn’t my manufacturing steps (Process Instances) automatically generate?
This is by design to give you a chance to review the Job Order. You must navigate to the Process Instance tab inside the Job Order and manually click the “Generate Process Instance” button.
4. I get an error when adding a Sales Order Linking quantity. Why?
The quantity you entered likely exceeds the “Balance Quantity” available for that Sales Order. You must enter an amount that is less than or equal to the remaining available balance.
5. How do I actually move a Job Order from “Planned” to “In Progress”?
You don’t manually change this status here. Job Orders progress from “Planned” to “Released” and eventually to “In Progress” once operators begin executing the steps in the Manufacturing Operations Applet. Your role here is to plan and monitor that execution.
6. I want to add an internal project code to my Job Orders, how do I do that?
Go to Settings > Field Settings and toggle “Project” under Department Settings. This will expose the Project selection field on the Job Order main details page.
7. How do I print specific Sales Order documents?
Navigate to Settings > Printables where an administrator can upload an ‘SO Printable’ layout. Once uploaded and selected, it will be available for printing in the Sales Order view.