Internal Consignor Purchase Billing Applet
Purpose and overview
What this applet is for
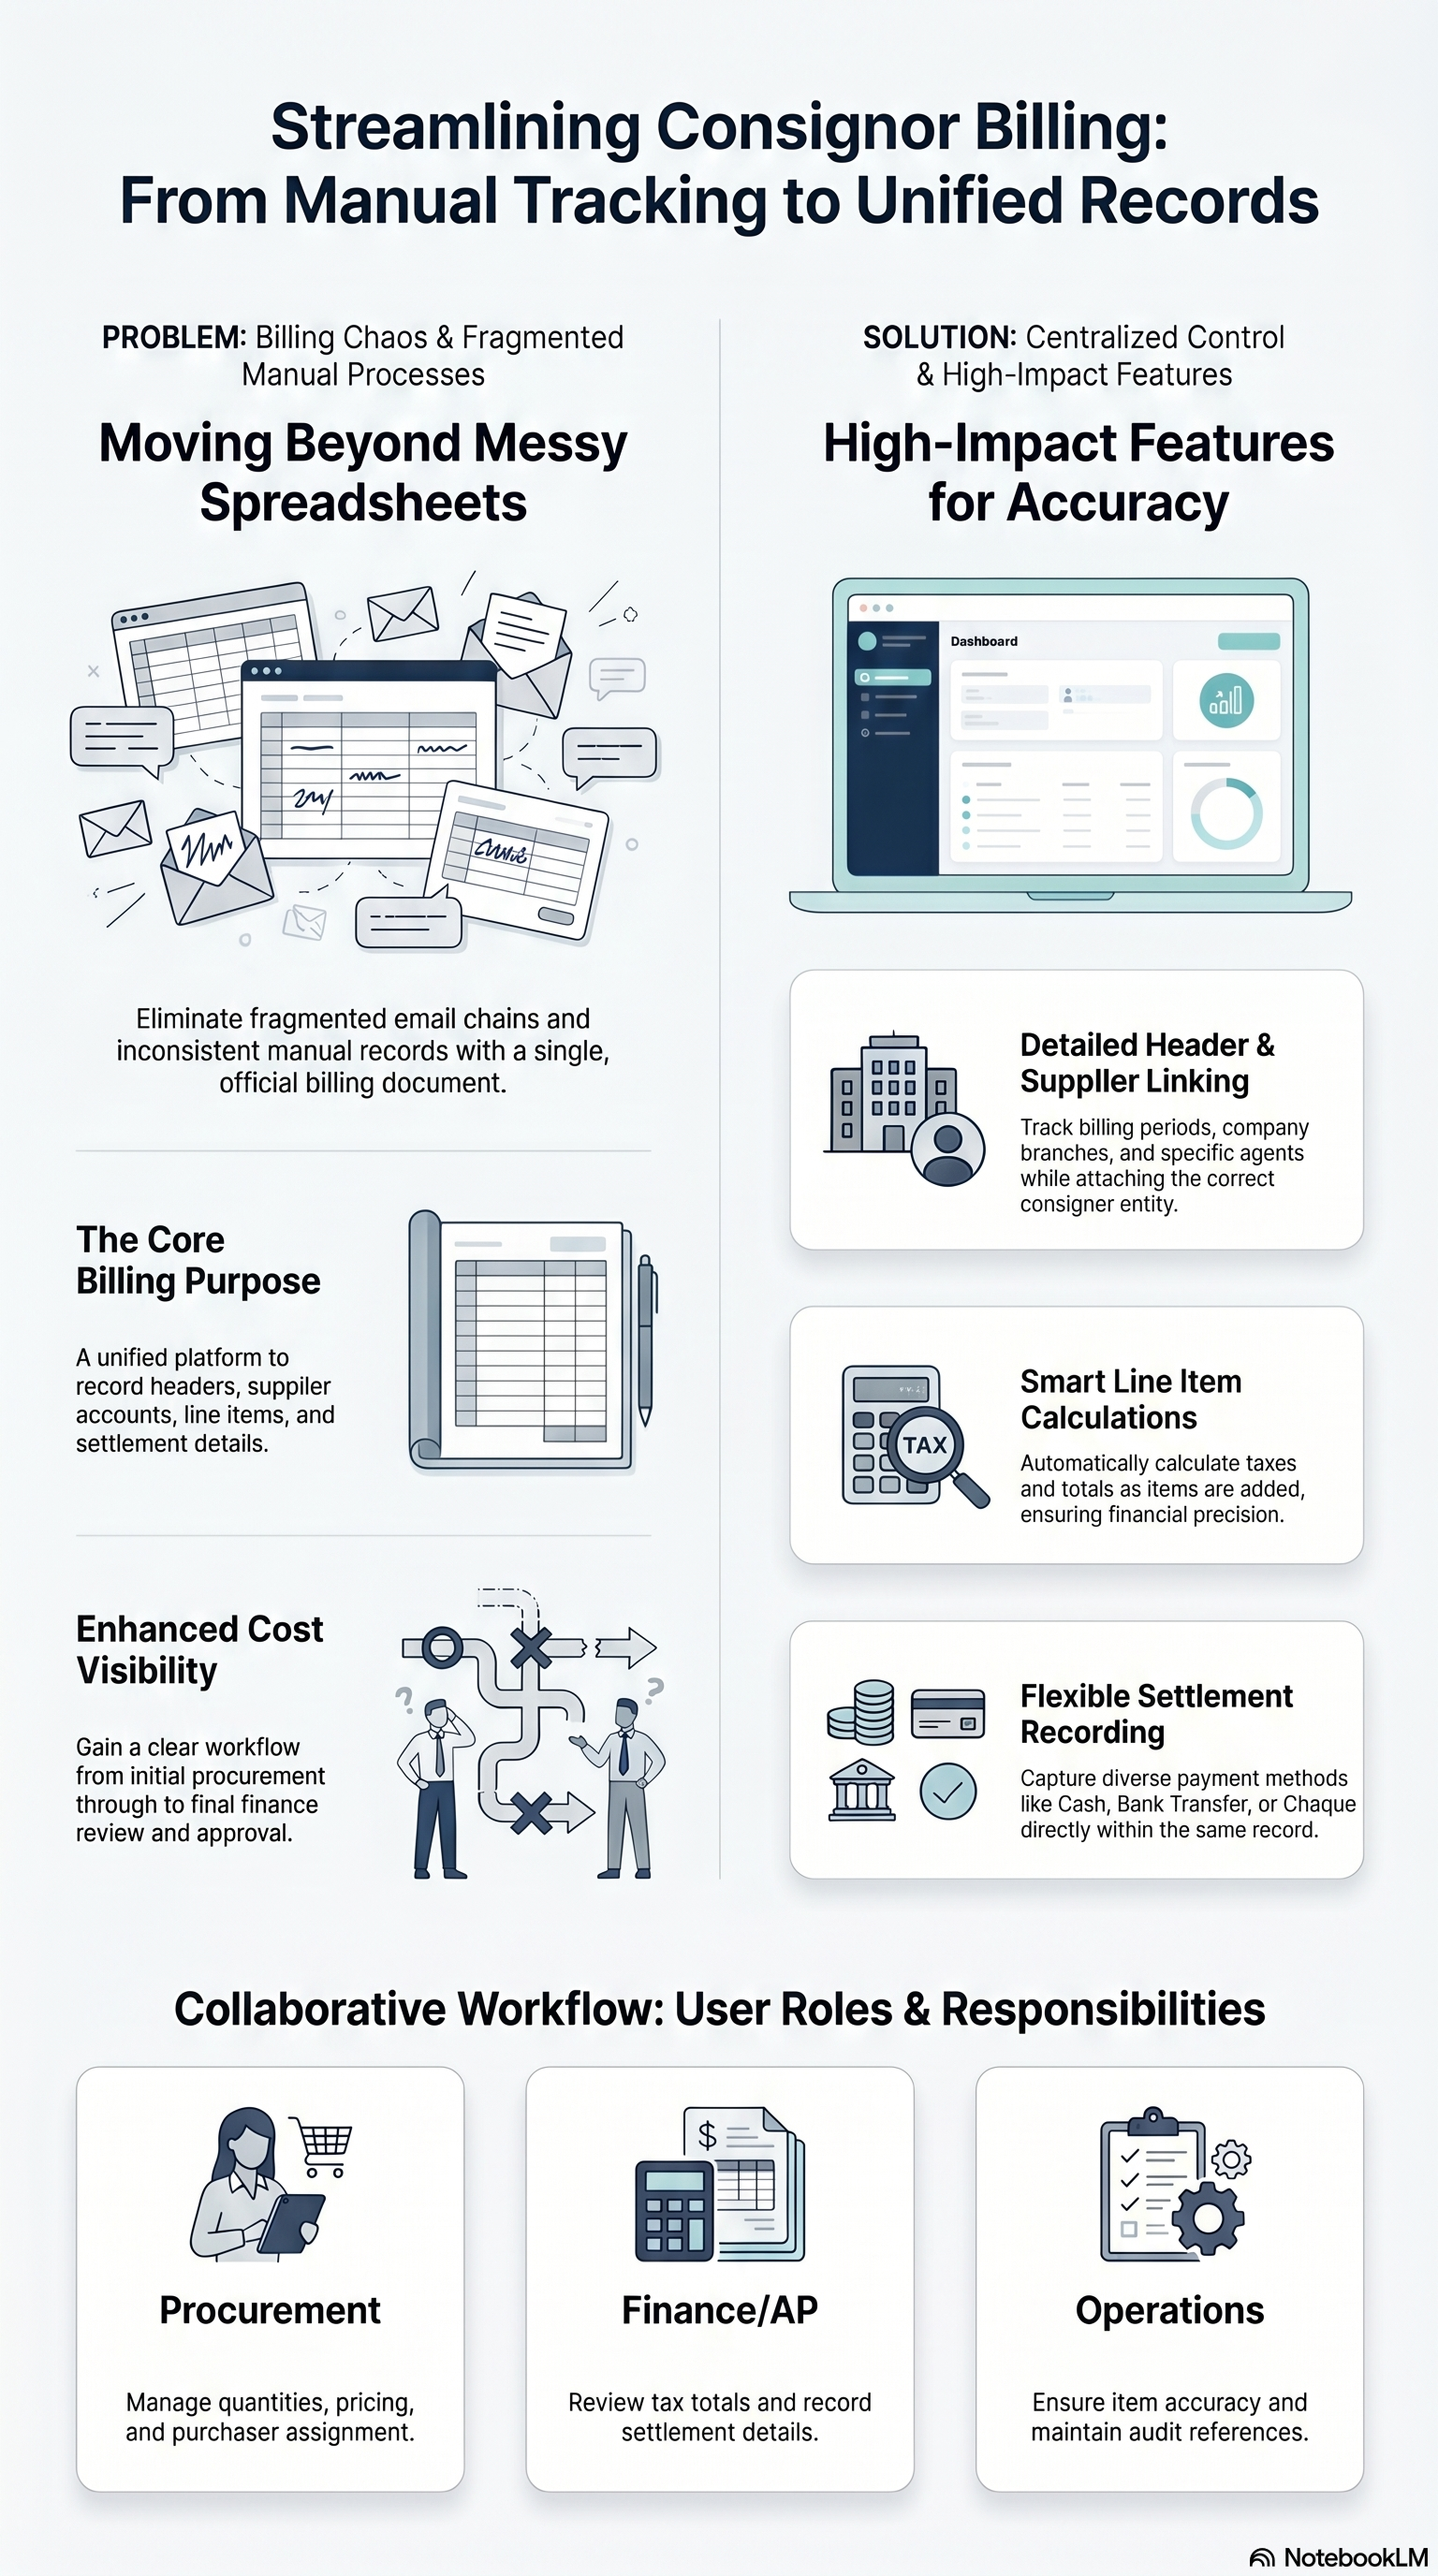
Internal Consignor Purchase Billing is where you build and maintain consignor purchase billing documents: a header (company, branch, location, dates, purchaser, status, references) plus a consignor (supplier) account, line items with quantities and money/tax, and optional payment lines that describe how settlement is recorded. The applet window title is Consignor Purchase Billing Applet; the sidebar entry is Internal Consignor Purchase Billing.
It is not the same as Consignment Billing (Internal) (sales-side billing to your customer for consigned stock used). It is not a Purchase Order (Internal)—those are standard PO documents in a different flow.
Problems this applet helps solve
- One official billing record instead of spreadsheets or email for consignor-side purchase billing.
- Lines with amounts and tax visible on the Line Item tab (totals and tax roll up above the grid).
- Optional payment lines when finance records settlement method, amount, and supporting details on the same document.
Where to work in the menu
- Internal Consignor Purchase Billing — listing, create, edit (CREATE / SAVE), line and payment subflows.
- Settings and Personalization (when your shell shows them for this applet) — defaults, fields, formats, webhooks, visibility, permissions, sidebar.
Where this applet fits (consignment context)
| Stage | What happens | Where to read more |
|---|---|---|
| Goods in / consignment receipts | Record receipt of consigned goods | Internal Consignment GRN |
| Stock with consignee | Track or move stock at the consignee | Customer Consignment |
| Consignor purchase billing (this applet) | Record billing for the consignor purchase side with lines and money | This guide |
| Bill the consignee for usage | Sales-side consignment invoice/billing | Consignment Billing (Internal) |
| Standard purchase orders | PO lifecycle | Purchase Order (Internal) |
How this billing ties to GRNs or other documents in your organisation is a business rule; use the table above plus your finance and operations policy.
Before you begin
- You need permission to use Internal Consignor Purchase Billing (create/open/edit as defined for your role).
- Company, branch, and location (store) must be valid in master data. Branch and location are required on the document before you can save a new record.
- You must complete Account (consignor / supplier entity) so the account form is valid—CREATE and SAVE stay disabled until this is true.
- You must add at least one line item before CREATE or SAVE—the applet enforces a non-empty Line Item grid.
- Items you add on lines must exist and be selectable from Search Item (and your pricing/UOM rules must allow the line to be completed).
- Optional: agree who enters payment lines (often finance) and whether they are required before or after first save—payment is not part of the CREATE enable rule; lines and account are.
Who uses this applet
| Role | Main responsibility |
|---|---|
| Procurement / buying | Create billing records, choose purchaser and consignor, add lines with correct quantities and prices. |
| Finance / AP | Review Txn Amount, tax, and Payment lines; add or correct settlement lines when your policy requires. |
| Inventory / operations | Support correct item and quantity context on lines; may own Reference / Remarks for traceability. |
| Admin | Settings / Personalization: defaults, printable formats, field visibility, webhooks, permissions. |
Key features
Quick start: procurement / buying
Goal: Create a first consignor purchase billing that the system will accept when you click CREATE.
- Open Internal Consignor Purchase Billing (title Consignor Purchase Billing Applet).
- On Consignor Purchase Billing Listing, click Create (
+). - Main details — Set Start Date and End Date to the billing period you are recording (for example the month or range you are charging for). Choose Company, Branch, and Location; set Status to ACTIVE unless you are intentionally creating an inactive record. Set Reference / Remarks if your team uses them for case numbers or audit text. Click the Purchaser Agent field to open Main Select Purchaser Listing and pick the internal purchaser who owns this billing case.
- Account — Open the Account tab and select the consignor (supplier) entity for this billing. Use the consignor / supplier pickers and maintenance screens if you must create or fix master data (addresses, tax, and so on).
- Line Item — Click Create (
+) on the line grid. In Select Line Item, use the Search Item tab, find the product, then complete Add Item — Item Details (quantities, UOM, unit and net amounts, tax) and use ADD to attach the line. Repeat if you need more than one item. The line grid shows Total and Tax for line Txn Amount in the document currency shown on the tab. - Payment (optional before first save) — If finance needs a payment line on create, open Payment, add a line, choose settlement method, and complete the fields; click ADD to attach.
- Click CREATE when it is enabled.
What happens next
- A success notification is shown and the UI returns to the listing so you can see the new row (or refresh search).
- The new document appears in Consignor Purchase Billing Listing with columns such as Company Name, Branch, Consignor, Consignor Name, Start Date, End Date, Status.
Quick start: finance / AP
Goal: Review money on an existing billing or add payment lines.
- Open a row from Consignor Purchase Billing Listing (Edit Consignor Purchase Billing).
- Check Line Item totals (Total, Tax) against Txn Amount and tax columns on lines (SST/VAT/GST, Txn Amount).
- Open Payment. Choose settlement method (for example CASH, BANK_TRANSFER, CHEQUE, CREDIT_CARD, VOUCHER, CASH_BACK, MEMBERSHIP_POINT_CURRENCY—whatever your master lists). Complete Date, Amount, and method-specific fields (Transaction No, Cheque No, card fields, and so on). Use ADD to save that payment line.
- Click SAVE when enabled.
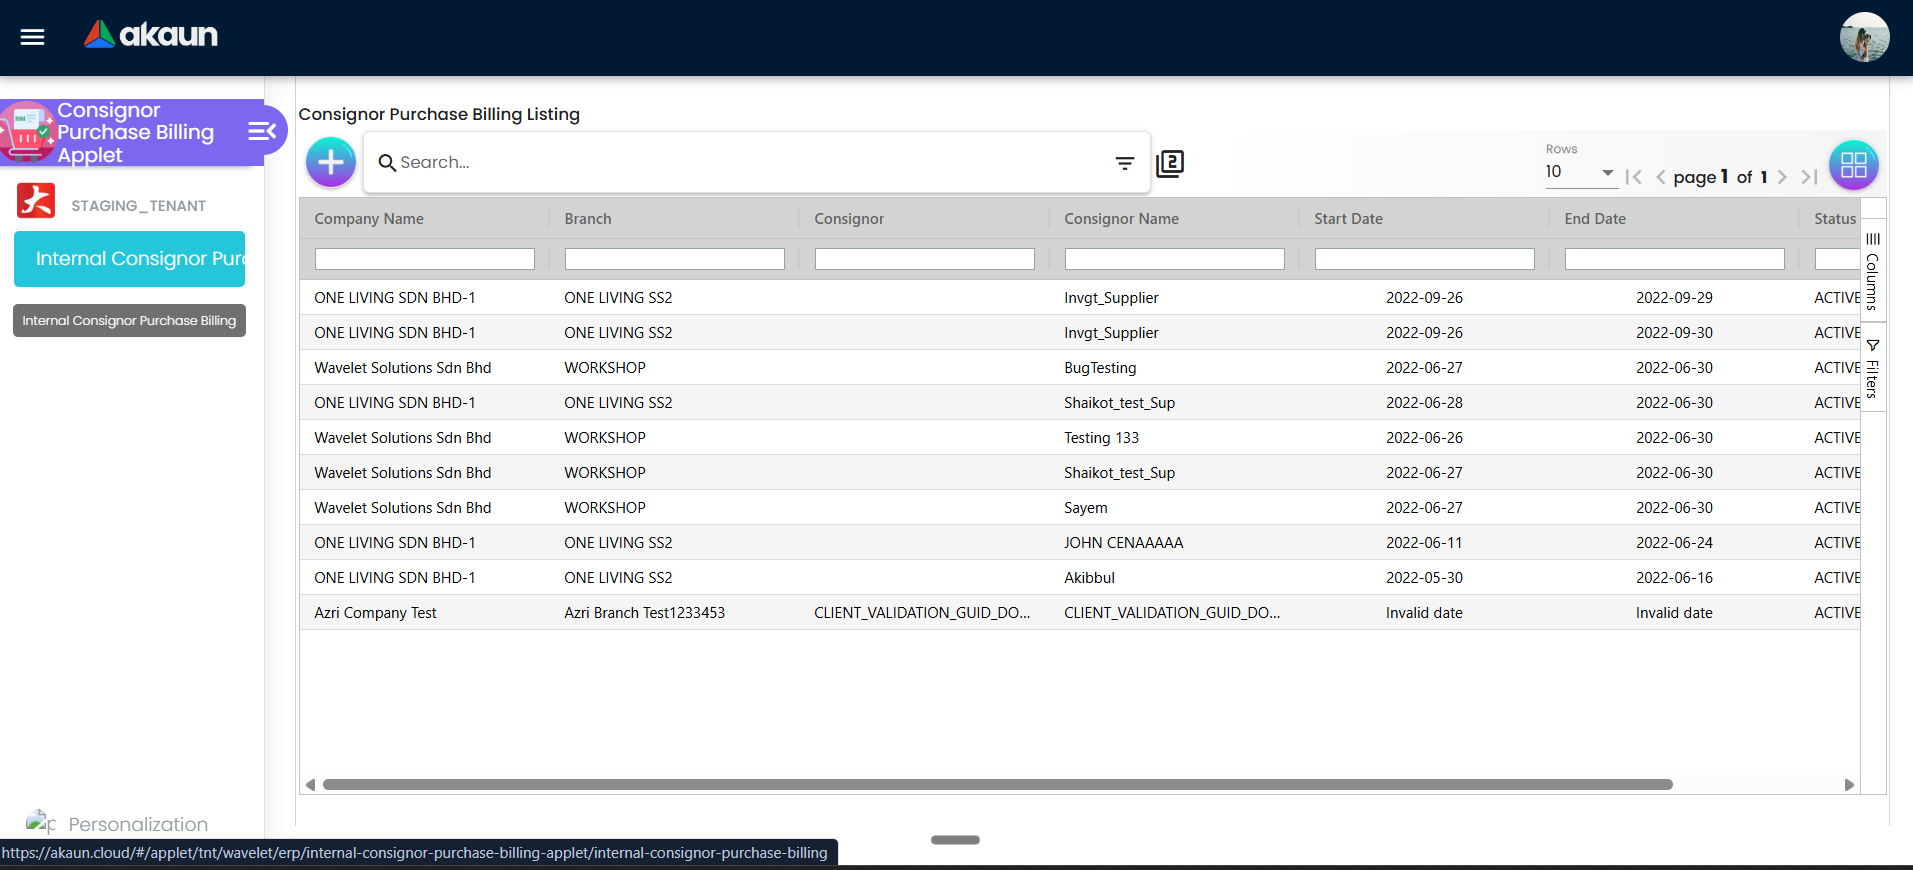
Consignor Purchase Billing Listing
Who: Anyone working documents day to day.
Use Consignor Purchase Billing Listing to:
- Start Create (
+). - Use advanced search (purchase-style search model) to narrow rows.
- Click a row to open Edit Consignor Purchase Billing.
- Work with the grid (pagination, columns, filters): columns include Company Name, Branch, Consignor, Consignor Name, Start Date, End Date, Status.
Create Consignor Purchase Billing
Screen title: Create Consignor Purchase Billing.
Buttons
- CREATE — First save of a new billing. Enabled only when Main Details is valid, Account entity form is valid, and there is at least one line on the Line Item tab.
Tabs: Main Details, Account, Line Item, Payment.
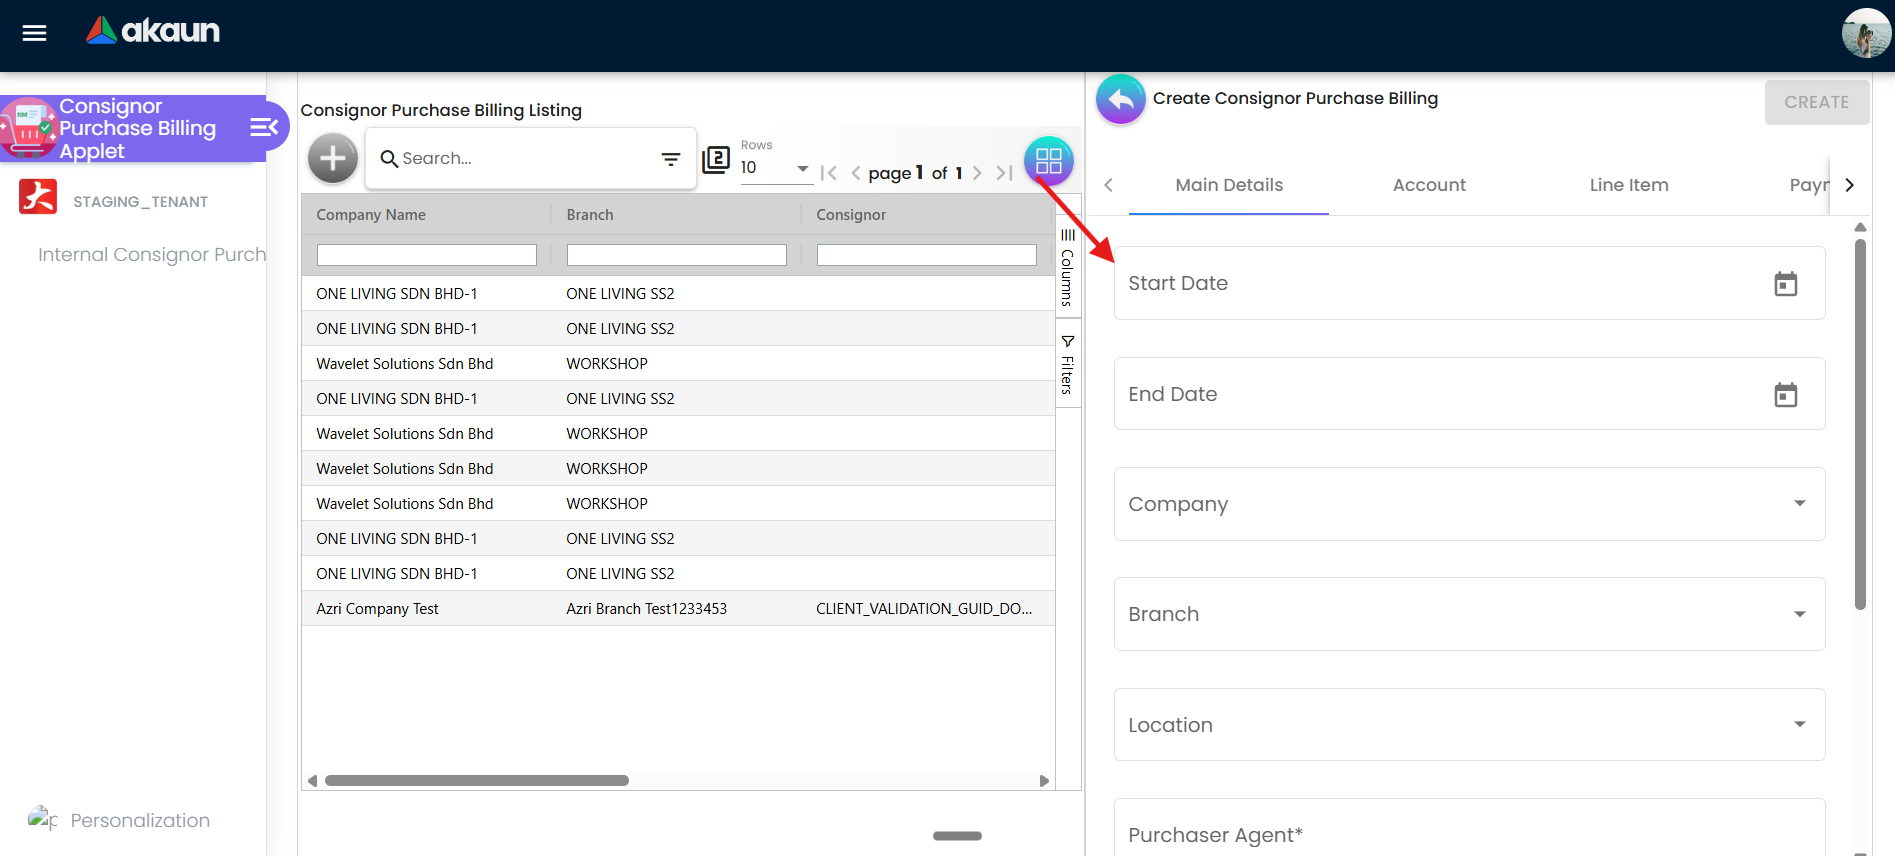
Main Details — what each field is for
| Field | Purpose (why it matters) | How to fill |
|---|---|---|
| Start Date / End Date | Defines the billing period or reporting window for this record—not arbitrary decoration. | Pick dates that match the cycle your finance team bills on. |
| Company | Which legal entity owns this billing. | Select from the company control. |
| Branch | Which branch owns or processes this billing. Required. | Select branch after company as needed. |
| Location | Store / location context for the billing. Required. | Select location for the chosen branch. |
| Purchaser Agent* | Which internal purchaser is accountable for this billing case (ownership and follow-up). | Create: click the field to open Main Select Purchaser Listing. Edit: the field uses the same Main Details form but picker navigation is not wired on the edit screen—use policy or admin guidance if purchaser must change after save. |
| Status | ACTIVE or INACTIVE for whether this billing header is treated as live or inactive in your workflow. Required. | Choose ACTIVE for normal work. |
| Reference | Your external or internal reference (supplier memo, case ID, cycle id)—whatever your team agreed for tracing this billing. | Free text. |
| Remarks | Longer narrative (negotiations, exclusions, footnotes for auditors). | Optional; character count shown in the UI. |
Account — select the consignor
Purpose: Attach the consignor (supplier) entity that this billing is for. Without a valid account selection, CREATE / SAVE stay disabled.
Open Account. Use select entity / consignor actions to open Select Consignor Listing, choose or create the supplier, and complete entity maintenance (Supplier Create, Supplier Edit, addresses, tax, contacts, branches, categories, item pricing, companies, and related screens) when your role allows.
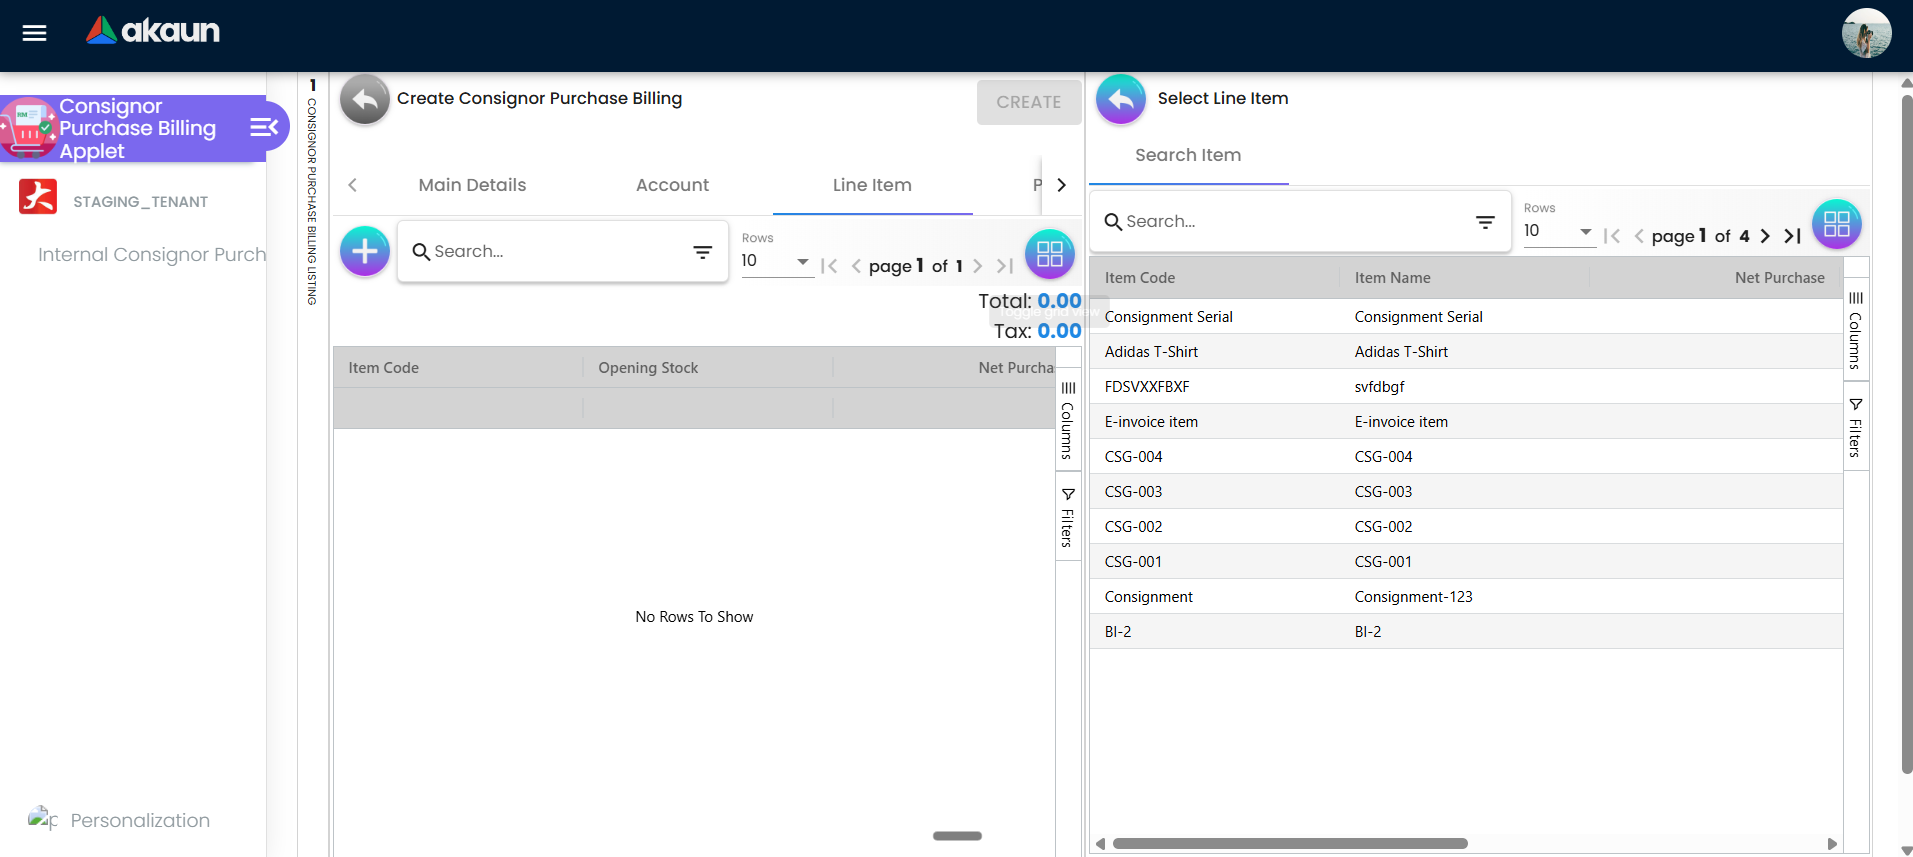
Line items — Search Item and Add Item
Purpose: Lines carry items, quantities, discounts, tax, and Txn Amount—that is how money enters this document.
Path from the document
- On Create / Edit, open the Line Item tab.
- Click Create (
+) on the line toolbar — opens Select Line Item. - Use the Search Item tab to find the stock item.
- Open Add Item — title Add Item — with tabs Item Details and Calculations.
- Complete Item Details (item code/name from selection, pricing scheme / UOM, unit prices, Quantity Base / Quantity by UOM, discounts, Amount Net, SST/GST/VAT, WHT, Txn Amount, Remarks, and related calculated fields).
- Click ADD on Add Item to attach the line to the draft.
What you see back on the Line Item tab
The grid lists lines (ACTIVE lines only in the draft store) with columns including Item Code, Opening Stock, Net Purchase, Closing Stock, Quantity To Bill, SST/VAT/GST, and Txn Amount. Above the grid, Total and Tax summarise line Txn Amount and tax in the document currency.
Payment tab — settlement and fields
Purpose: Record how payment or settlement is represented (settlement method, amount, dates, references)—not to replace your general ledger training, but to capture the structured payment lines your tenant expects on this billing.
- Open Payment and start Add Payment (Add Payment screen).
- Choose a settlement method from the settlement selector at the top of Add Payment. The form then shows fields depending on type, including:
- CASH — Date, Amount, Remarks.
- CASH_BACK — Date, Cash Back, Amount, Cash Back for Settlement (read-only), Remarks.
- CREDIT_CARD — Date, Amount, Remarks, Card No, Name on Card, Card Issuer, Type, Card Expiry, CVV.
- VOUCHER — Voucher #, Amount, Remarks.
- BANK_TRANSFER — Date, Amount, Transaction No, Remarks.
- MEMBERSHIP_POINT_CURRENCY — Date, Point CCY, Amount, Point Currency for Settlement, Remarks.
- CHEQUE — Date, Amount, Cheque No, Remarks.
- Click ADD when the form validates (amount and required fields for the chosen method).
CREATE does not require payment lines—only header validity, account validity, and at least one line item. Add payments when your finance process says they belong on this document.
Edit Consignor Purchase Billing
Screen title: Edit Consignor Purchase Billing.
- SAVE — Same enable rule as CREATE: valid Main Details, valid Account, at least one line.
- RESET — Reloads draft state for the edit session (discard unsaved changes on the current flow).
- Tabs: Main Details, Account, Line Item, Payment, Export (export exists on edit only—use when your tenant exposes export actions here).
Posting and FINAL in this applet
Unlike Consignment GRN (Internal), this applet’s create/edit screens do not show a FINAL or VOID button in the client code reviewed for this guide. Day-to-day actions are CREATE (first save), SAVE (updates), and RESET.
Do not assume the same DRAFT / FINAL / VOID posting lifecycle as GRN unless your administrator confirms extra steps elsewhere (another menu, batch job, or server-side posting).
Status reference
Header status (Main Details)
| Value | Meaning | Typical use |
|---|---|---|
| ACTIVE | Billing header is live for processing. | Normal documents. |
| INACTIVE | Billing header marked inactive. | Retired or superseded cycles—confirm meaning with finance. |
Listing Status column
The listing shows status from the billing header (same ACTIVE / INACTIVE family as above). Sort and filter using the grid as needed.
Worked example (illustrative)
Your codes will differ; this shows order of operations only.
- Create — Company HQ, Branch KL, Location Main DC. Period 2026-04-01 to 2026-04-30. Reference
CSG-PB-2026-04. Purchaser Agent = buyer Jane. Status ACTIVE. - Account — Consignor SUP-001 / Vendor Alpha.
- Line Item — Search Item → finish Add Item with Quantity Base
24, pricing until Txn Amount shows MYR 1,200.00 (and tax as applicable). ADD. - CREATE — Listing refreshes; you see a new row with Consignor SUP-001, dates April, Status ACTIVE.
If something is wrong
| Symptom | Likely cause | What to do |
|---|---|---|
| CREATE stays disabled | Missing branch / location, invalid Account, or no lines. | Complete required Main Details, fix Account selection, add at least one line on Line Item. |
| SAVE stays disabled on edit | Same as CREATE rule. | Complete required fields and keep at least one line. |
| Success message appears but wording looks generic | Known toast copy in some builds may reuse generic purchase wording. | Confirm in listing that the row exists; report misleading toast to support if needed. |
| Cannot find item in Search Item | Item inactive or not visible to your role. | Ask admin to check item master and visibility. |
| Payment ADD disabled | Settlement method not chosen or invalid amount/mandatory fields. | Pick method first; ensure Amount ≥ minimum and required fields for that method. |
| Purchaser Agent cannot be changed on edit | Edit template does not wire the purchaser picker. | Align with policy or admin for corrections. |
Configuration and settings
Use the shell to open applet Settings and Personalization (labels may vary slightly).
Settings (typical)
- Default Selection — Defaults for new documents.
- Printable Format Settings — Print layouts.
- Field Settings — Which fields appear and whether they are mandatory.
- Webhook — Integrations.
- Feature Visibility — Which features users see.
- Permission Set, User, Team, Role listings — Who can create, edit, or see pricing.
Personalization (typical)
- Field Settings, Default Selection under system configuration.
- Sidebar — Sidebar layout when available.
Permissions
- If Create is missing or CREATE / SAVE never enables, your role may lack permission or Feature visibility may hide functions.
- Administrators adjust Permission listings and Field settings for your tenant.
Related documentation
- Internal Consignment GRN
- Customer Consignment
- Consignment Billing (Internal)
- Consignment Return (Internal)
- Purchase Order (Internal)
Frequently asked questions
What is the minimum I must complete before CREATE?
Valid Main Details (including required branch, location, and status), a valid Account (consignor) selection, and at least one line item. Payment lines are optional for enabling CREATE.
What happens after I click CREATE?
The applet saves the billing to the server, shows a success notification, and returns you to the listing so you can open the record again for SAVE or further lines/payments.
How is this different from Consignment Billing (Internal)?
Consignment Billing (Internal) bills your customer for consignment consumption (sales). This applet records consignor purchase billing with supplier/consignor context and purchase-style lines.
Is this a purchase order?
No. Use Purchase Order (Internal) for POs. This applet is Consignor Purchase Billing.
Where is FINAL?
There is no FINAL action on these screens in the applet code underlying this guide. Use CREATE and SAVE as described in Posting and FINAL in this applet.
Do I need a payment line before CREATE?
No—payment is optional for the CREATE button. Add payments when your finance policy requires them on the document.
How do lines get money and tax?
On Add Item → Item Details, enter quantities and pricing; the form calculates Amount Net, Tax Amount, Txn Amount, and related fields. The Line Item tab shows Txn Amount and tax per line and Total / Tax summaries.
Why can’t I change Purchaser Agent on edit?
The create screen wires the purchaser picker; the edit screen uses the same Main Details component without that picker hook—if you must change purchaser after save, ask your administrator for the approved correction path.
Glossary
- Consignor purchase billing — The document type handled in this applet (consignor-side billing with lines and optional payments).
- Consignor — Supplier-side entity selected on Account for this billing.
- Purchaser Agent — Internal buyer or owner of the billing case on the header.
- Txn Amount — Transaction amount on a line (and payment), in document currency context on listings.
- Search Item — Tab used to pick stock items before Add Item.