Purchase Credit Note (Internal)
Top up what you owe a supplier after the invoice, for a charge that arrived later, without raising a second invoice. Mind the direction: this note sits on the same side as a purchase invoice and increases your payable. To reduce what you owe, use a Purchase Debit Note, or a Purchase Return when goods go back.
Overview
The Purchase Credit Note (Internal) applet records a credit note on the purchase side: a document that credits the supplier’s account in your books. It carries the same sign as a purchase invoice and moves no stock, so finalising one posts Dr Purchase / Cr Creditor and increases what you owe. Accounts-payable staff use it for a supplier’s additional charge that arrives after the invoice, or wherever a posted purchase invoice must be topped up without raising a second invoice.
The document carries amounts only; stock never moves. It can be keyed manually, built from open lines on a purchase order, purchase GRN or supplier delivery order (KO For), uploaded from a CSV (File Import), or generated by intercompany processing when a related company in the tenant finalises a Sales Credit Note (Internal).
Where it fits
| Position | Document / applet | Why |
|---|---|---|
| Module | Purchasing, Financial Accounting, E-Invoice | Posts to the General Ledger; the type is in the platform’s e-Invoice purchase document set, which is the set that only ever submits as self-billed. |
| Upstream (knock-off) | Purchase Order (Internal), Purchase GRN (Internal), Supplier Delivery Order | The create screen’s KO For tab imports open lines from these three types and records which of the three each line came from, so a later report can tell the sources apart. |
| Upstream (reference) | Purchase Invoice (Internal) | The invoice the credit note relates to. There is no Search Document tab in this applet, so Doc Link is the only place the relationship is recorded. |
| Upstream (intercompany) | Sales Credit Note (Internal) | Intercompany processing turns a sibling company’s finalised sales credit note into this document type. The seller’s note lowers what you owe it; this type raises what you owe — so the counterpart moves your payable the wrong way. See the caution under The background jobs behind it. |
| Downstream | Payment Voucher (Internal) | A FINAL credit note carries a negative ARAP balance, like an invoice, and is settled or contra’d by payment vouchers and purchase debit notes. |
| Downstream | Creditor Report | Where the outstanding balance appears against the supplier. |
| Downstream | My E-Invoice Admin | The submission queue. It can turn a stored note self-billed, as can this applet’s own SELF-BILLED button, and that flag decides whether the note is ever submitted at all. |
| External | Purchase Credit Note Supplier Access (Internal) | The supplier-facing view of the same document type. |
| Siblings | Purchase Debit Note (Internal), Purchase Return (Internal), Purchase Refund Note (Internal) | The other purchase adjustment documents. |
Screens and menus
Six menus: the listing (with create and edit), Line Items, File Import, Audit Trail, Settings and Personalization. File Import is hidden when HIDE_FILE_IMPORT_MENU is on unless the user holds SHOW_FILE_IMPORT_MENU — and that setting has no switch on this applet’s settings screens (see Read here, with no switch for this applet below).
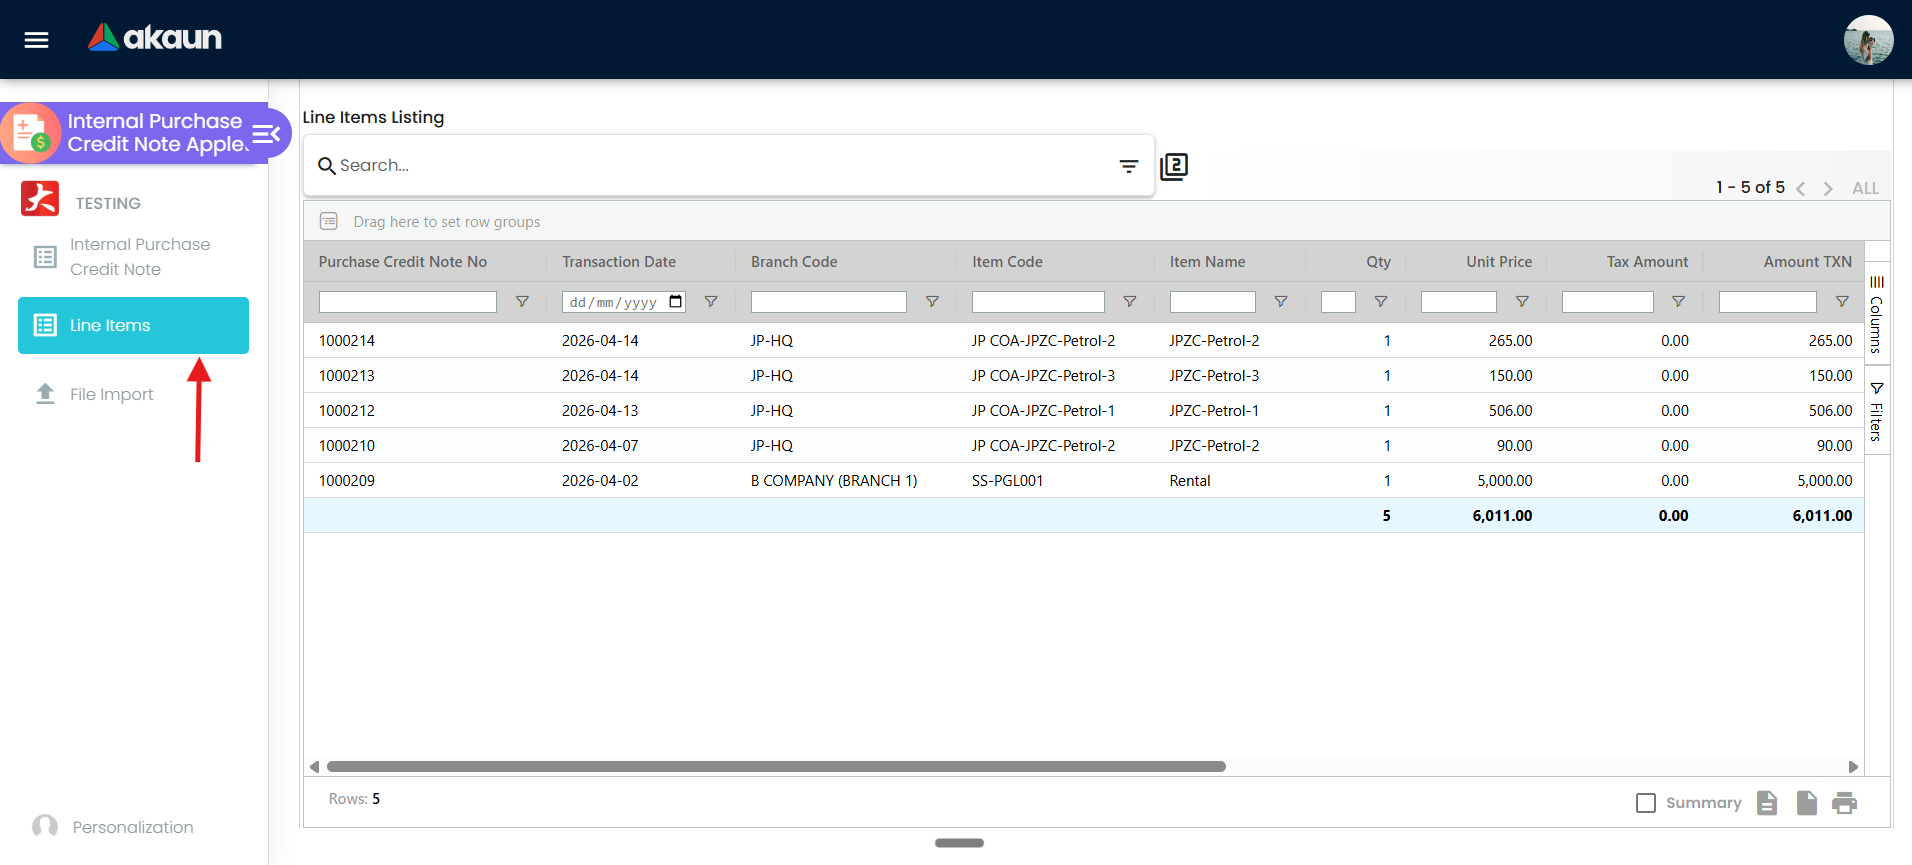
Line Items is not a second copy of the Lines tab — it is a cross-document grid of every credit-note line in the tenant, and its Edit Item panel is where Costing Details, Issue Link and the serial, batch and bin sub-tabs live. Use it to answer “which credit notes touched this item”: a single document’s own tabs show only that document’s lines.
Listing
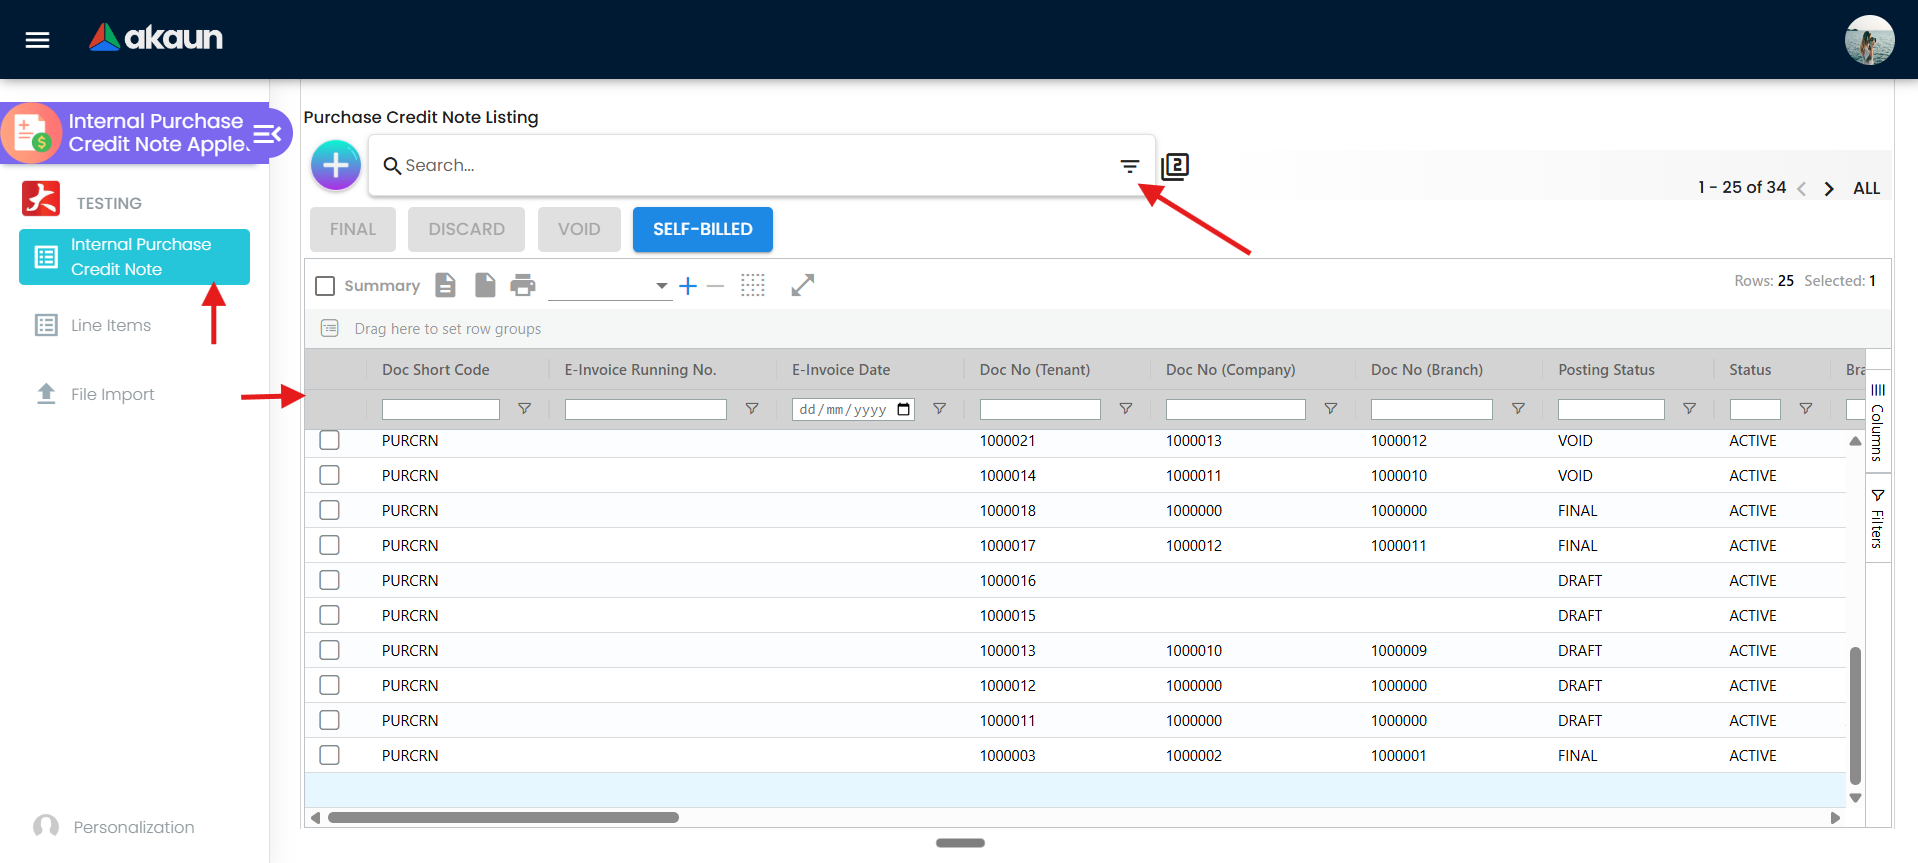
The grid carries the three document numbers, external references, posting status, branch, currency, Self Billed ?, supplier code and name, purchaser, reference, amount, the five ARAP figures, dates, e-Invoice billing period, client documents and the four accounting dimensions. Four things about it are worth knowing before you trust what you see:
| What you are looking at | What is behind it |
|---|---|
| Custom Document No. (hidden by default) | Not a number you can set. It is filled only for a small, fixed set of branch codes built into the applet, and only on FINAL documents; the same applies to the Custom Document Number box on Main Details. Switching SHOW_CUSTOM_DOC_NO on at any other branch shows a permanently empty field. |
| Self Billed ? | The value copied off the supplier’s entity record at the moment the supplier was chosen, not a property of the note. Change the supplier’s setting later and existing documents keep the old value. A CSV import with no EINVOICE_SELF_BILLED column stores the literal string NOT SPECIFIED, which the submission gate reads as not self-billed. |
| FINAL / DISCARD / VOID | DISCARD and VOID open a confirmation dialog; FINAL does not. It filters the selection to rows that are not already FINAL and fires one posting call per row immediately. The button is disabled unless every selected row is DRAFT, so the filter rarely bites — but there is no second chance once it is pressed. |
| The rows that load at all | DEFAULT_POSTING_STATUS, DEFAULT_STATUS and DEFAULT_TRANSACTION_DATE pre-filter the first fetch, and DISABLE_GEN_DOC_LISTING stops it loading anything until you search. A listing that looks empty is usually one of those four, not an empty tenant. |
There is no bulk print and no send-email action in this applet. There is a SELF-BILLED button: it converts the ticked notes to self-billed. On a DRAFT it only sets the flag; on a FINAL it also takes the note out of the purchase-document matching queue and queues it for e-Invoice submission, and it is refused while the company’s e-Invoice status is not Enabled or the note is already queued. The button shows for everyone, but the server lets it through only for a user who holds the e-Invoice update permission.
Create screen
Screenshot withdrawn; a recapture from a demo tenant is on the list.
The create screen has seven tabs — Main Details, Account, Line Items, Payment, Department Hdr, Contra, and KO For (hidden by HIDE_KO_FOR_TAB), whose three sub-tabs search purchase GRNs, purchase orders and supplier delivery orders and import their open lines.
Pressing Create posts a document to the server before you have typed anything. The listing creates a document with status TEMP at once. It is promoted to ACTIVE automatically — not by pressing anything — the moment branch, location, currency, a supplier and at least one line are all present. Two consequences follow. A document you abandon halfway stays TEMP, and where your tenant schedules the clean-up job, a TEMP document older than three hours is permanently deleted — so whether an abandoned draft survives lunch is a fact about your own scheduler, not a property of this applet. And ENABLE_EMPLOYEE_LOGIN_AUTO_DETECTION fills the purchaser only while the status is still TEMP, so it never fires on a document you re-open.
Edit screen
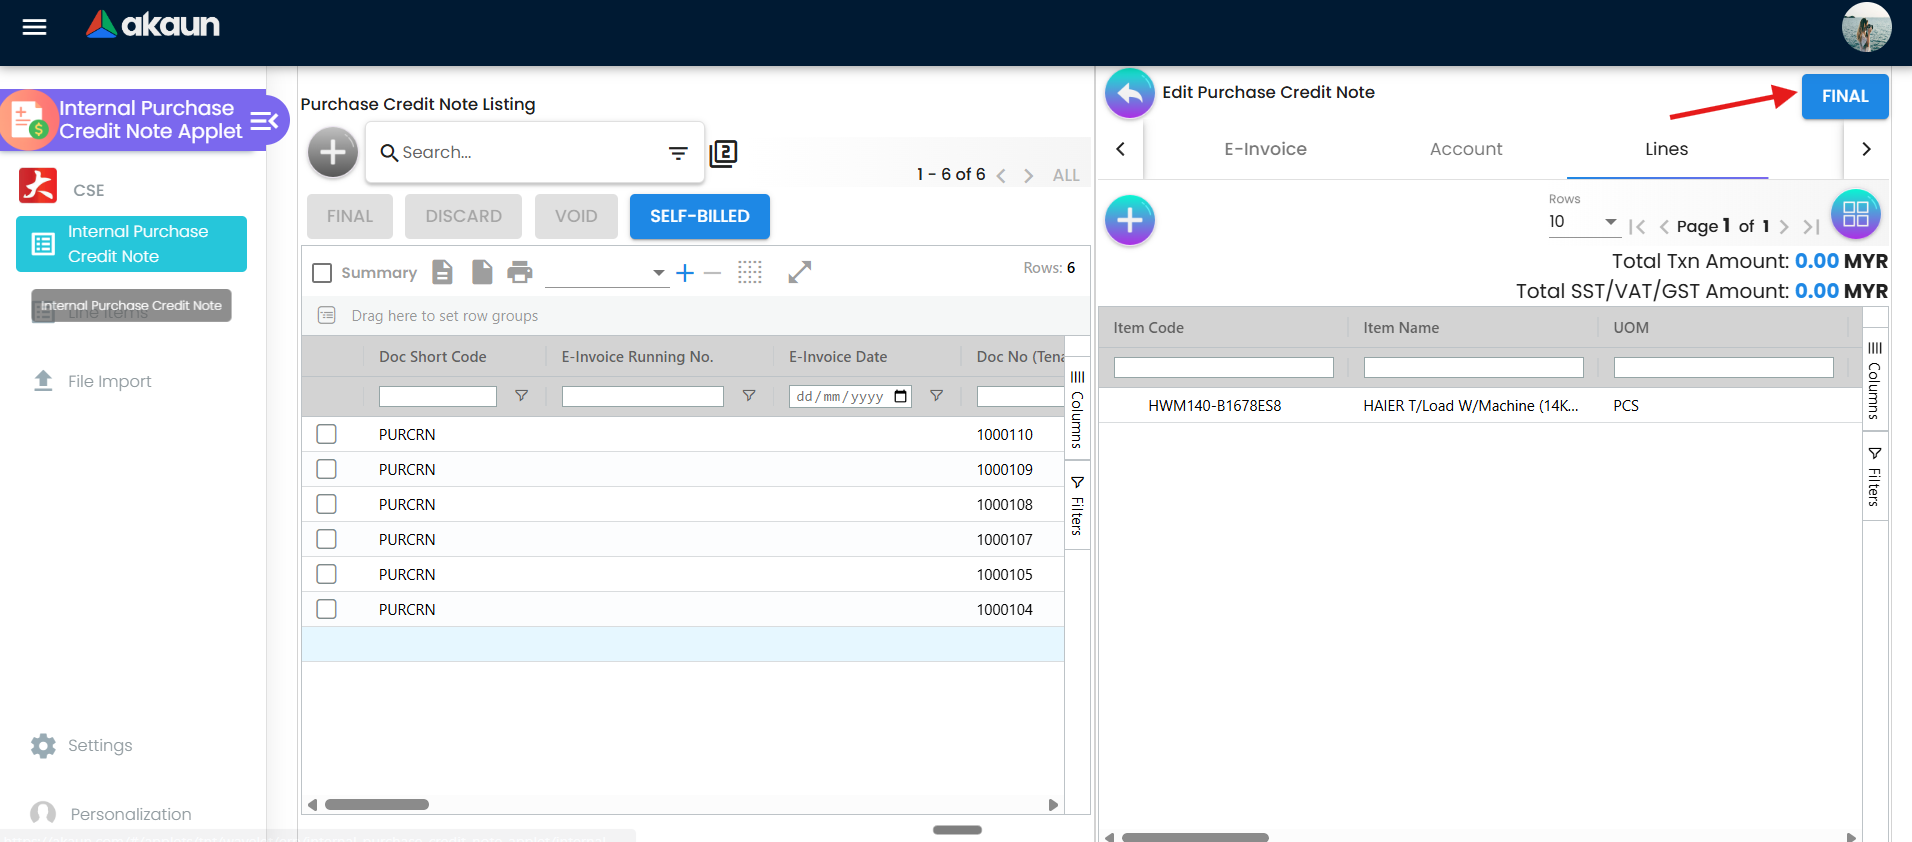
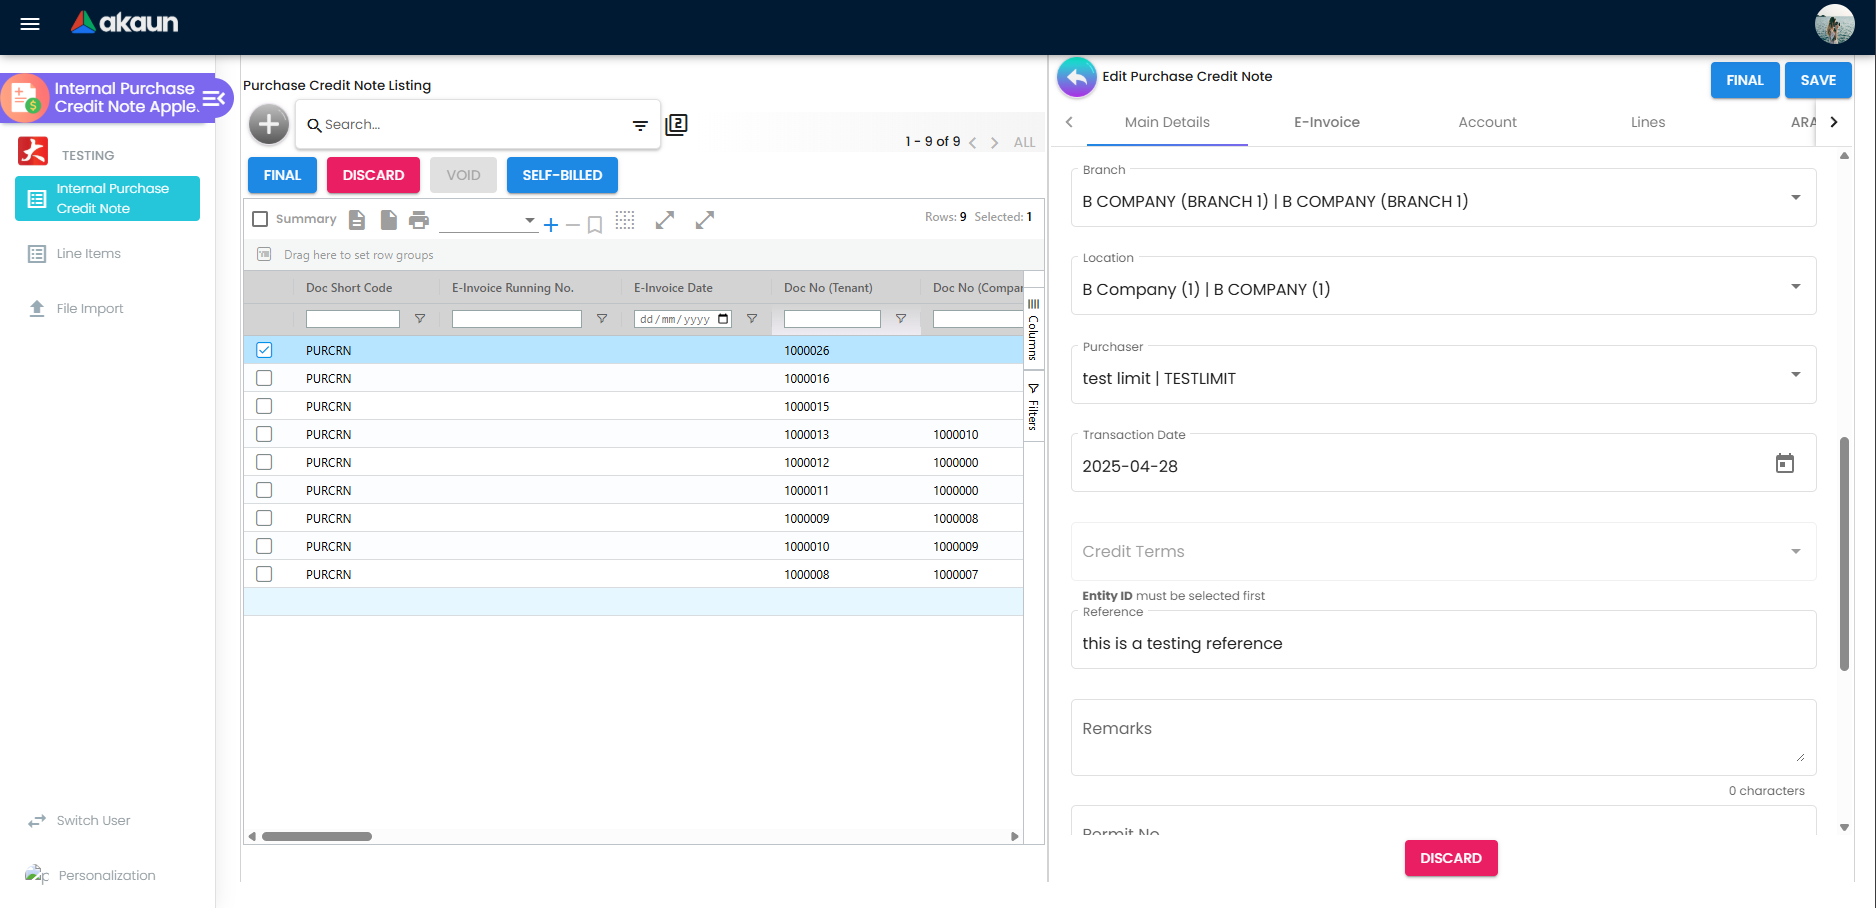
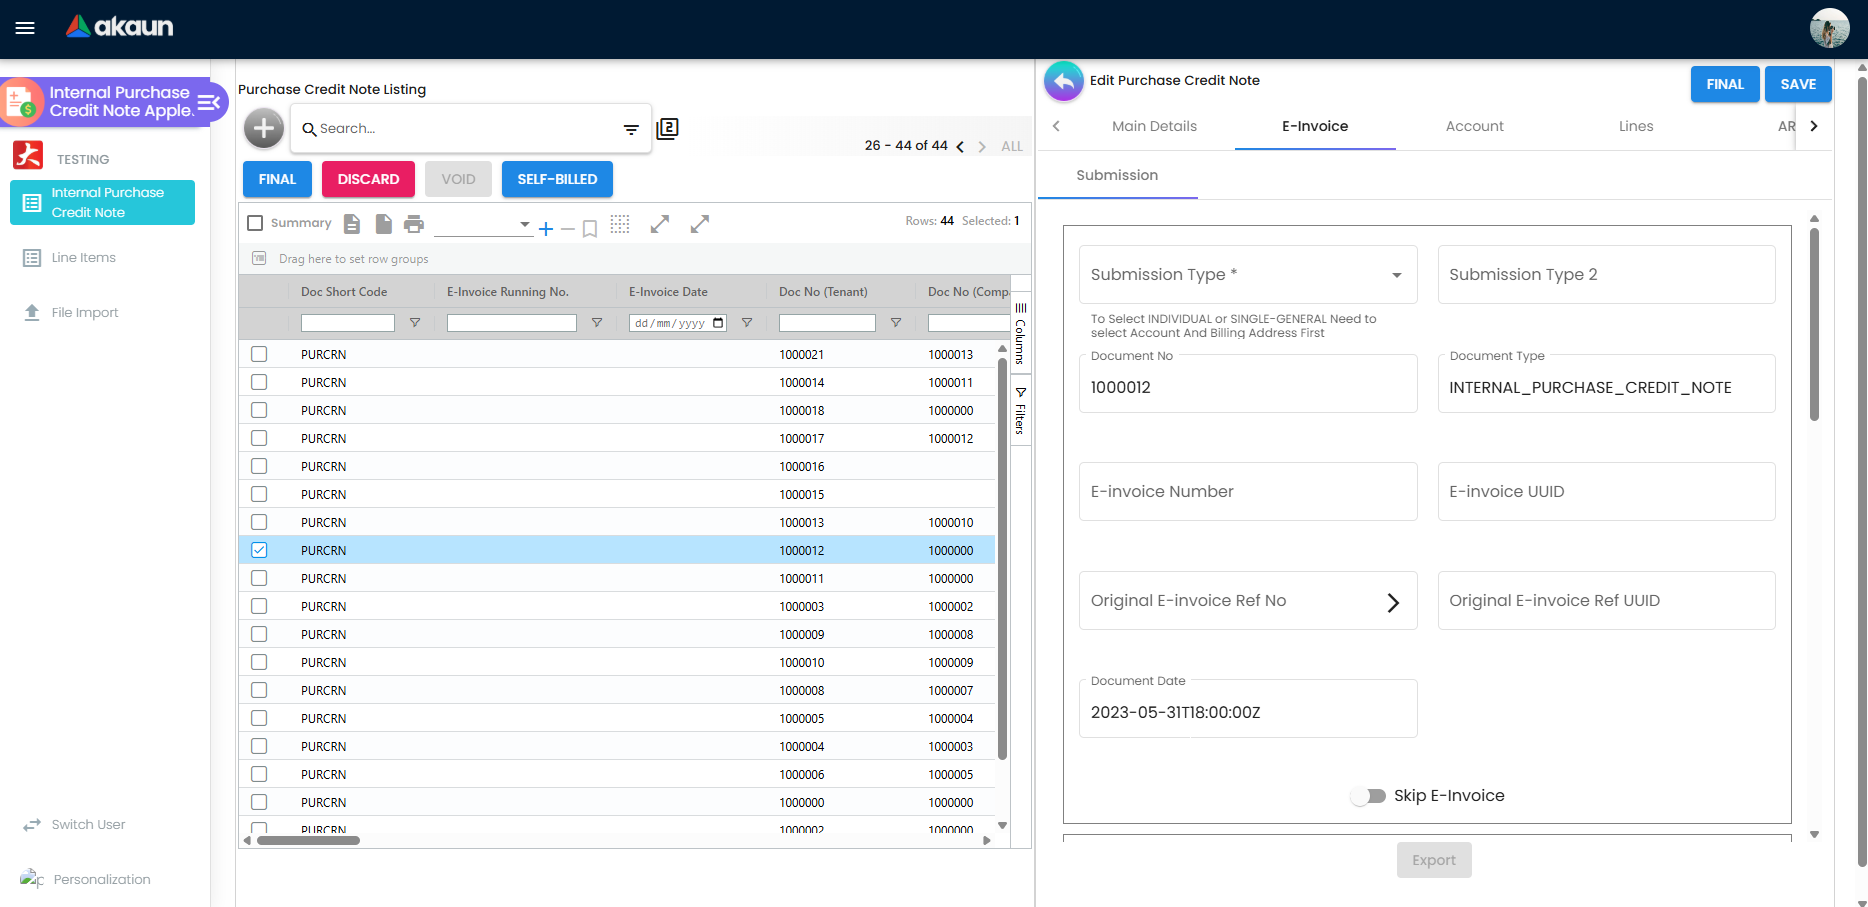
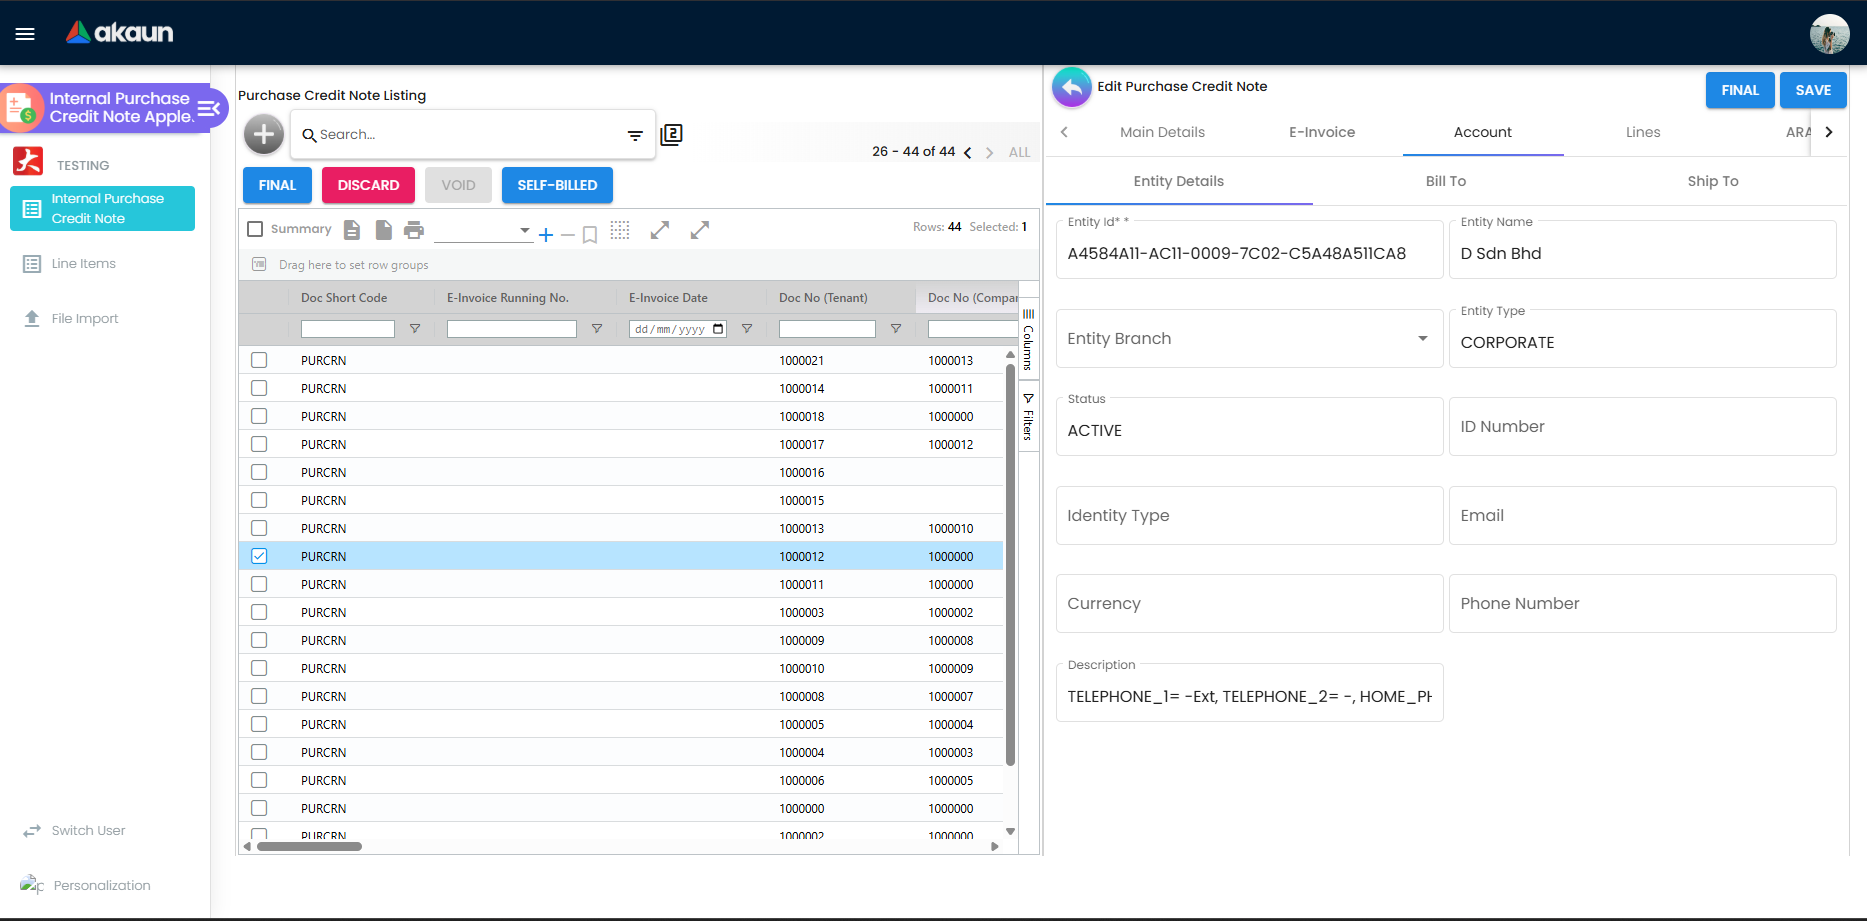
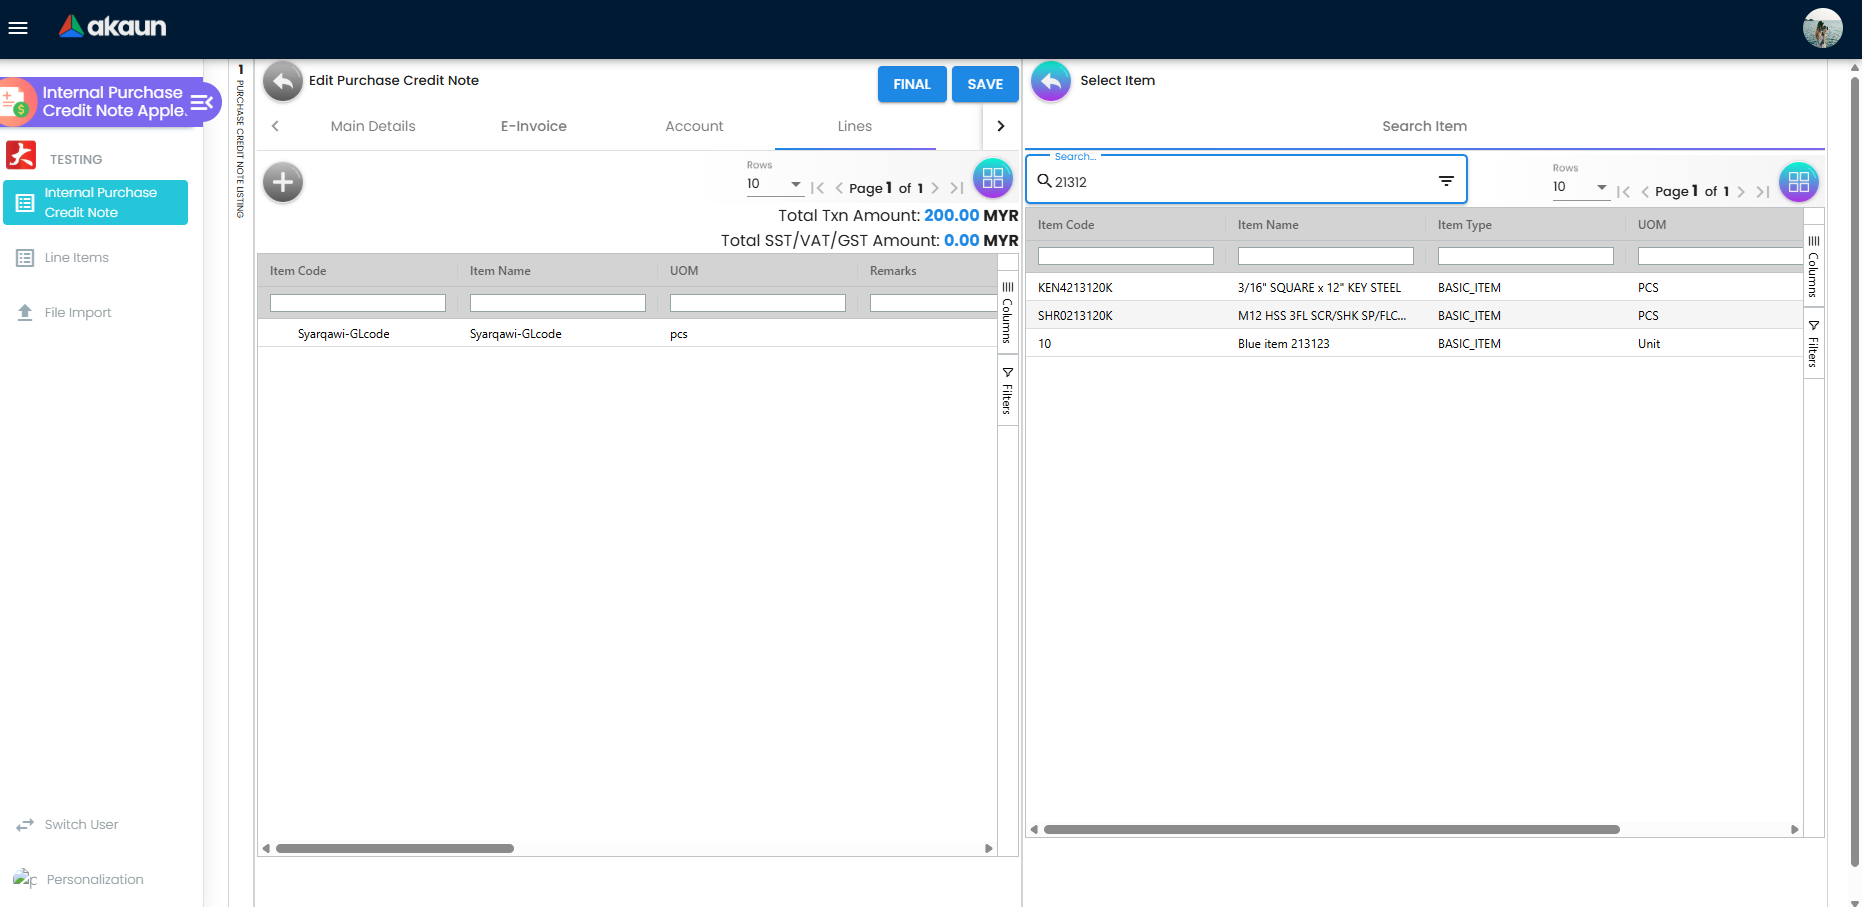
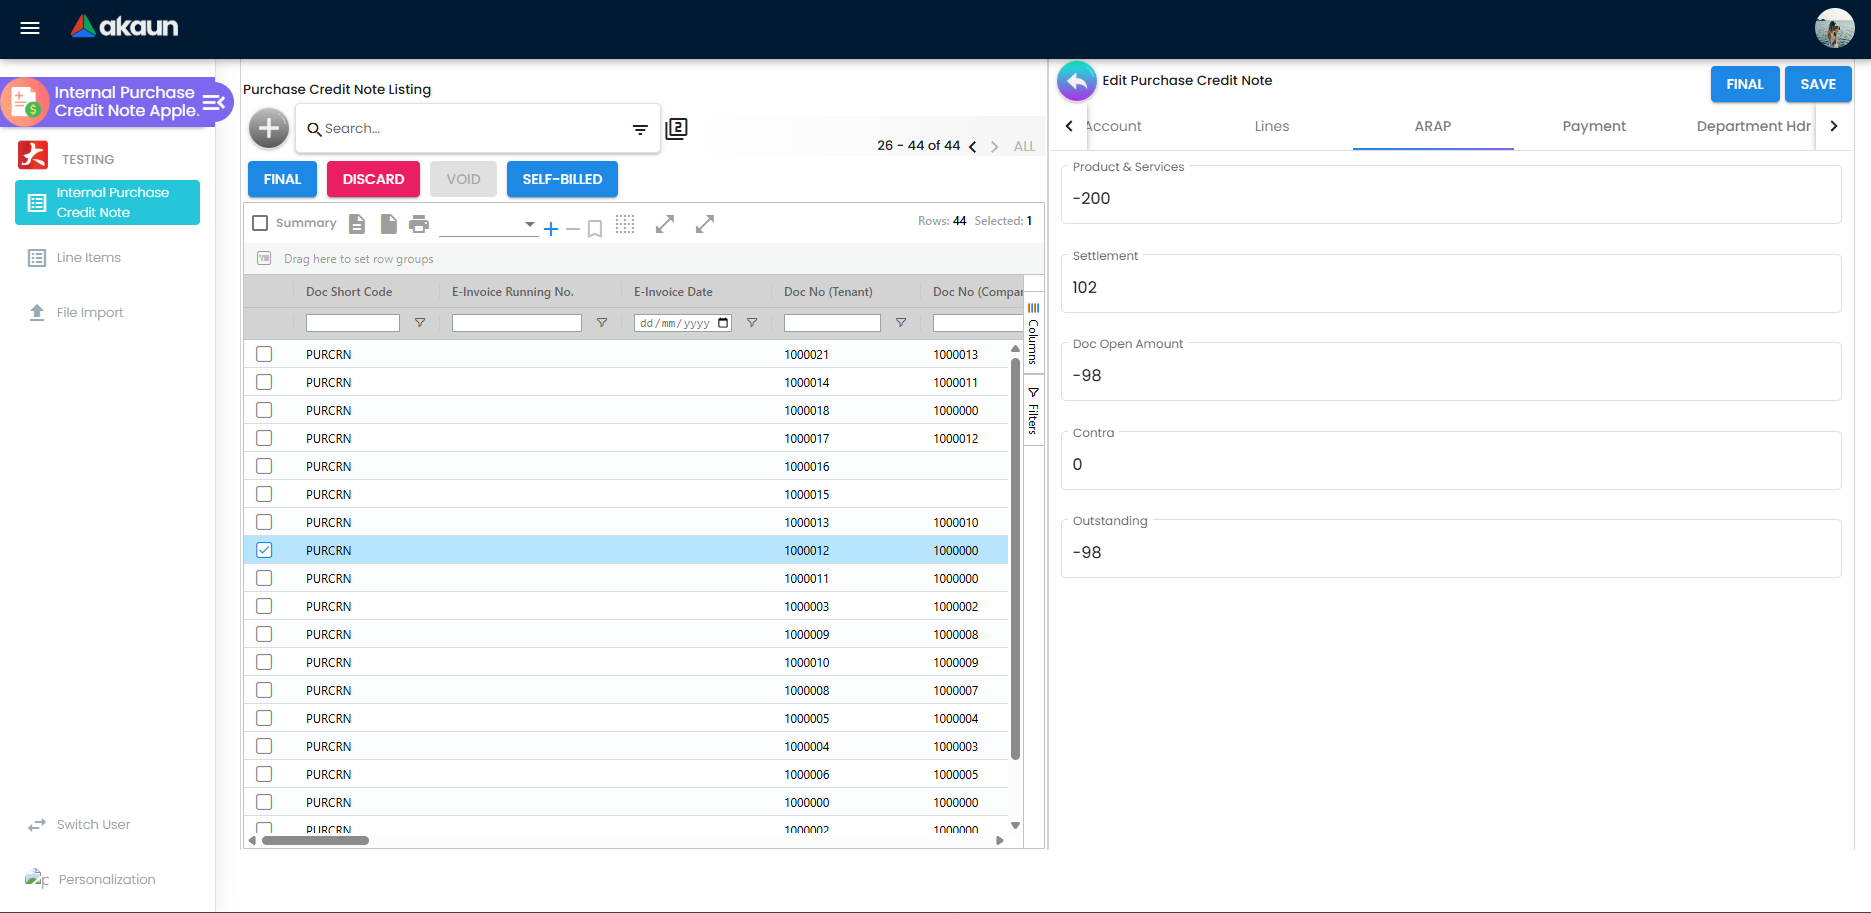
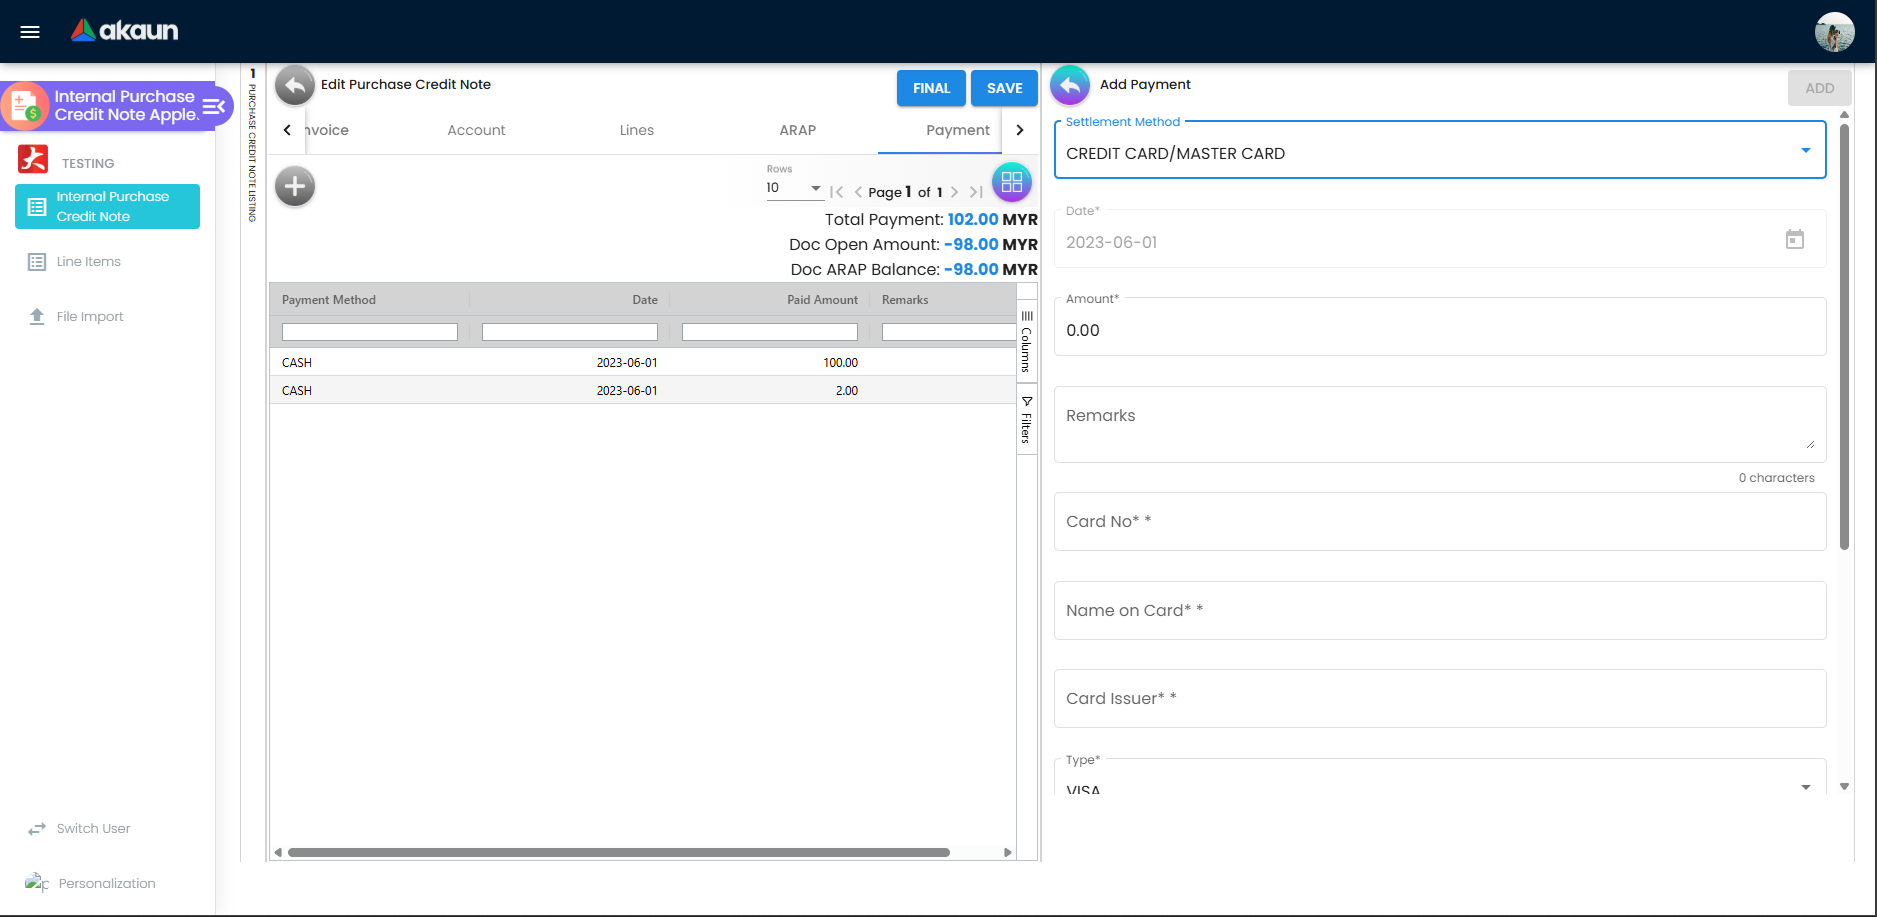
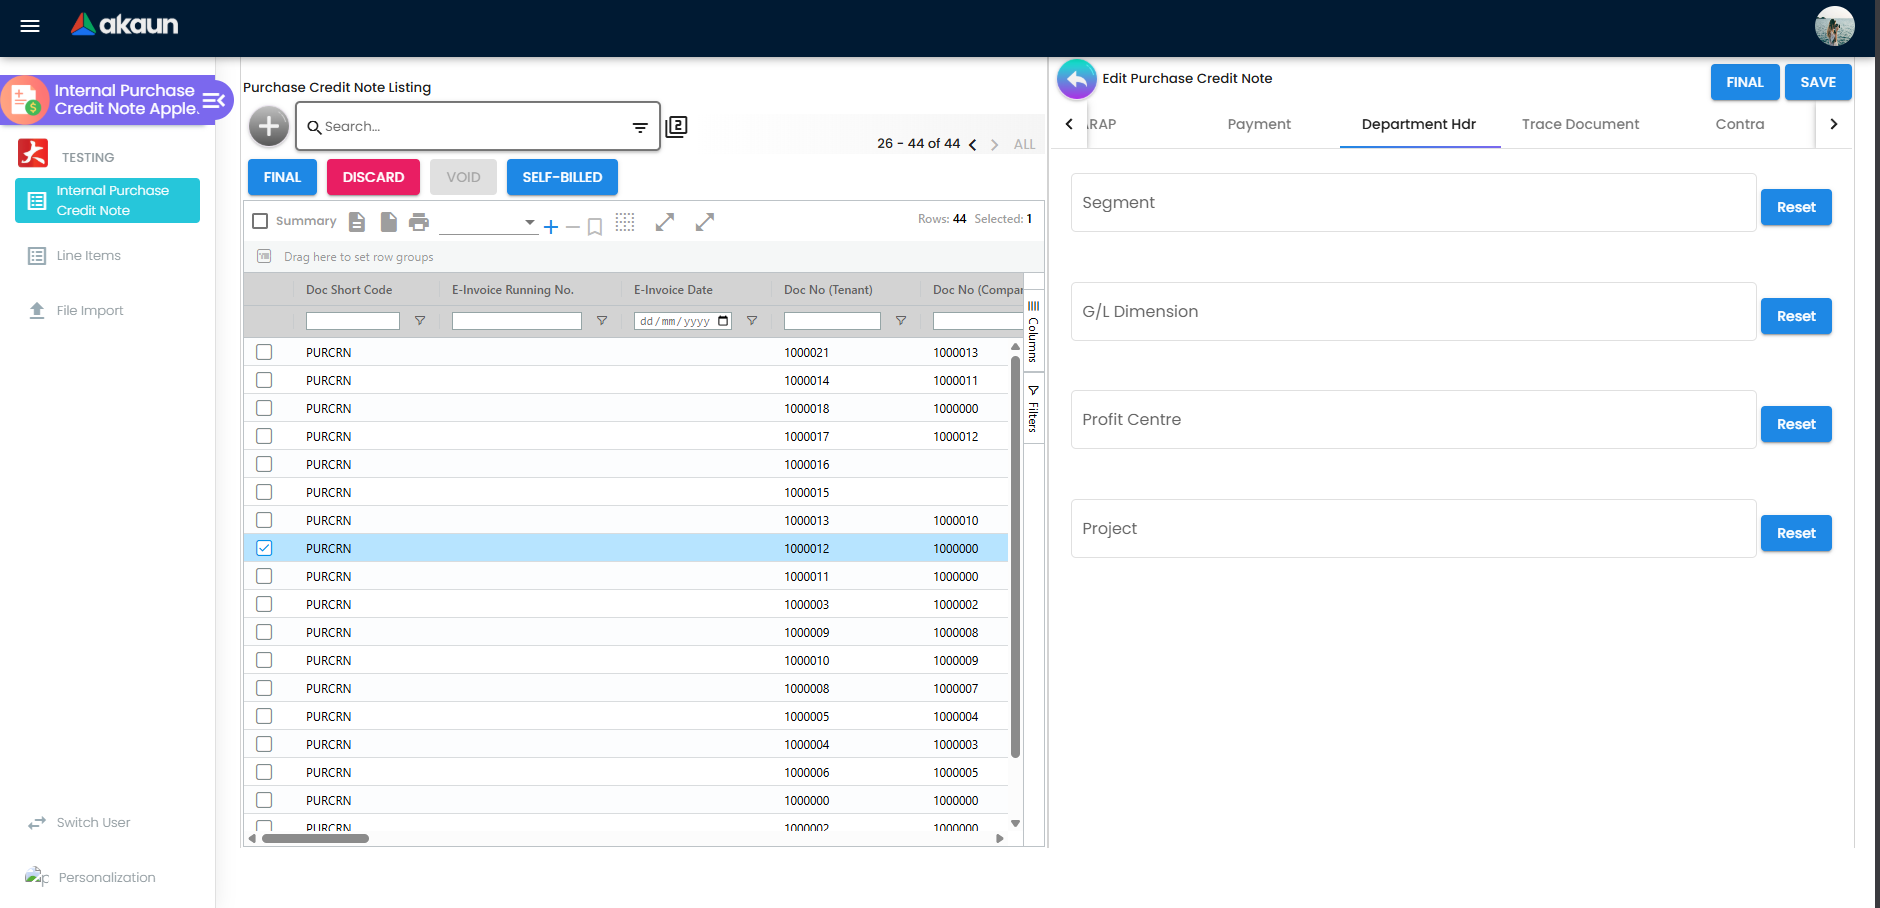
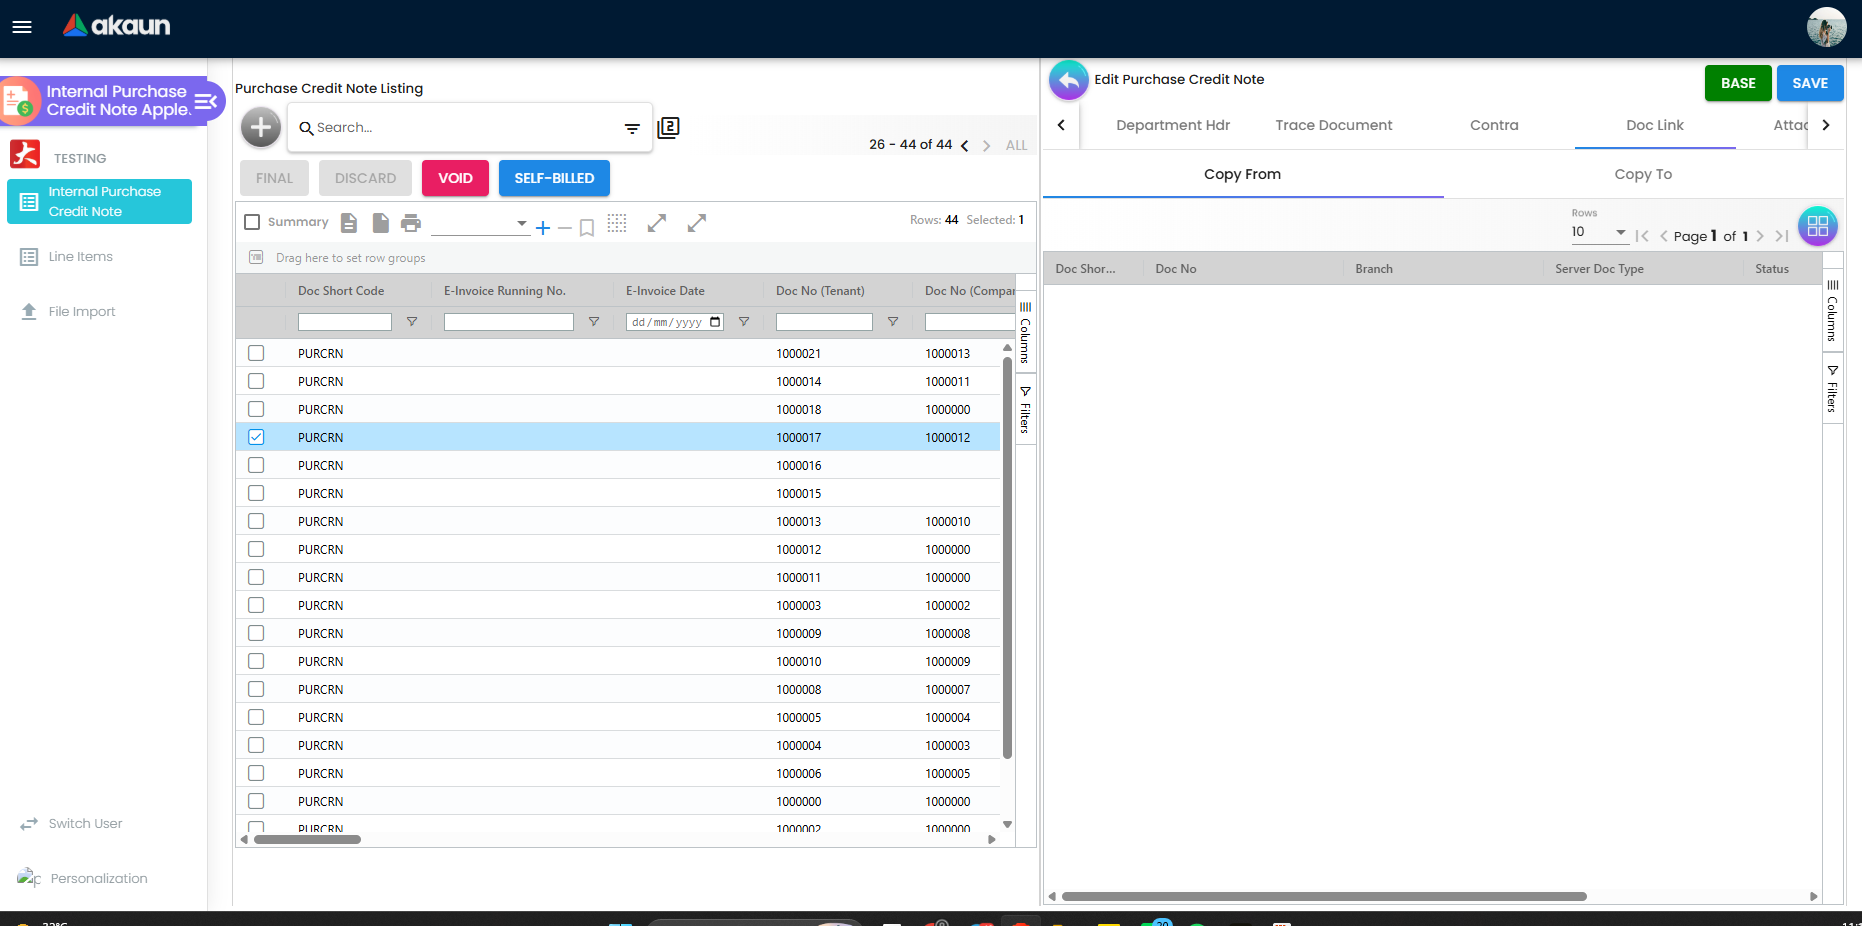
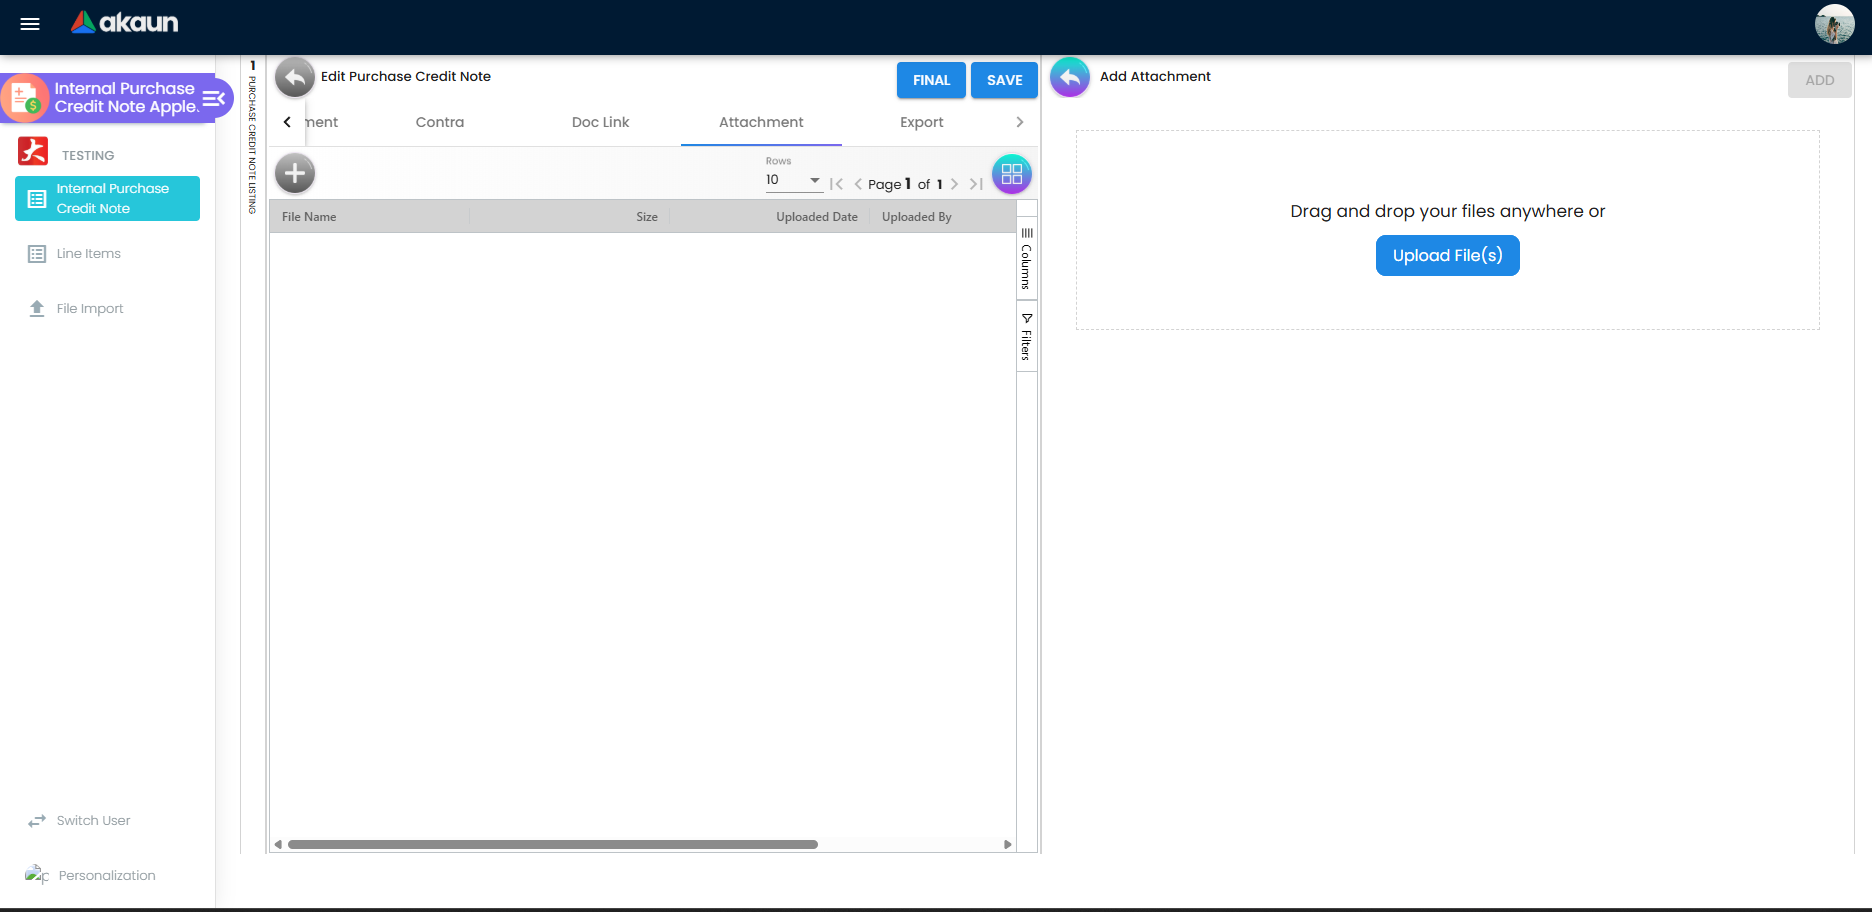
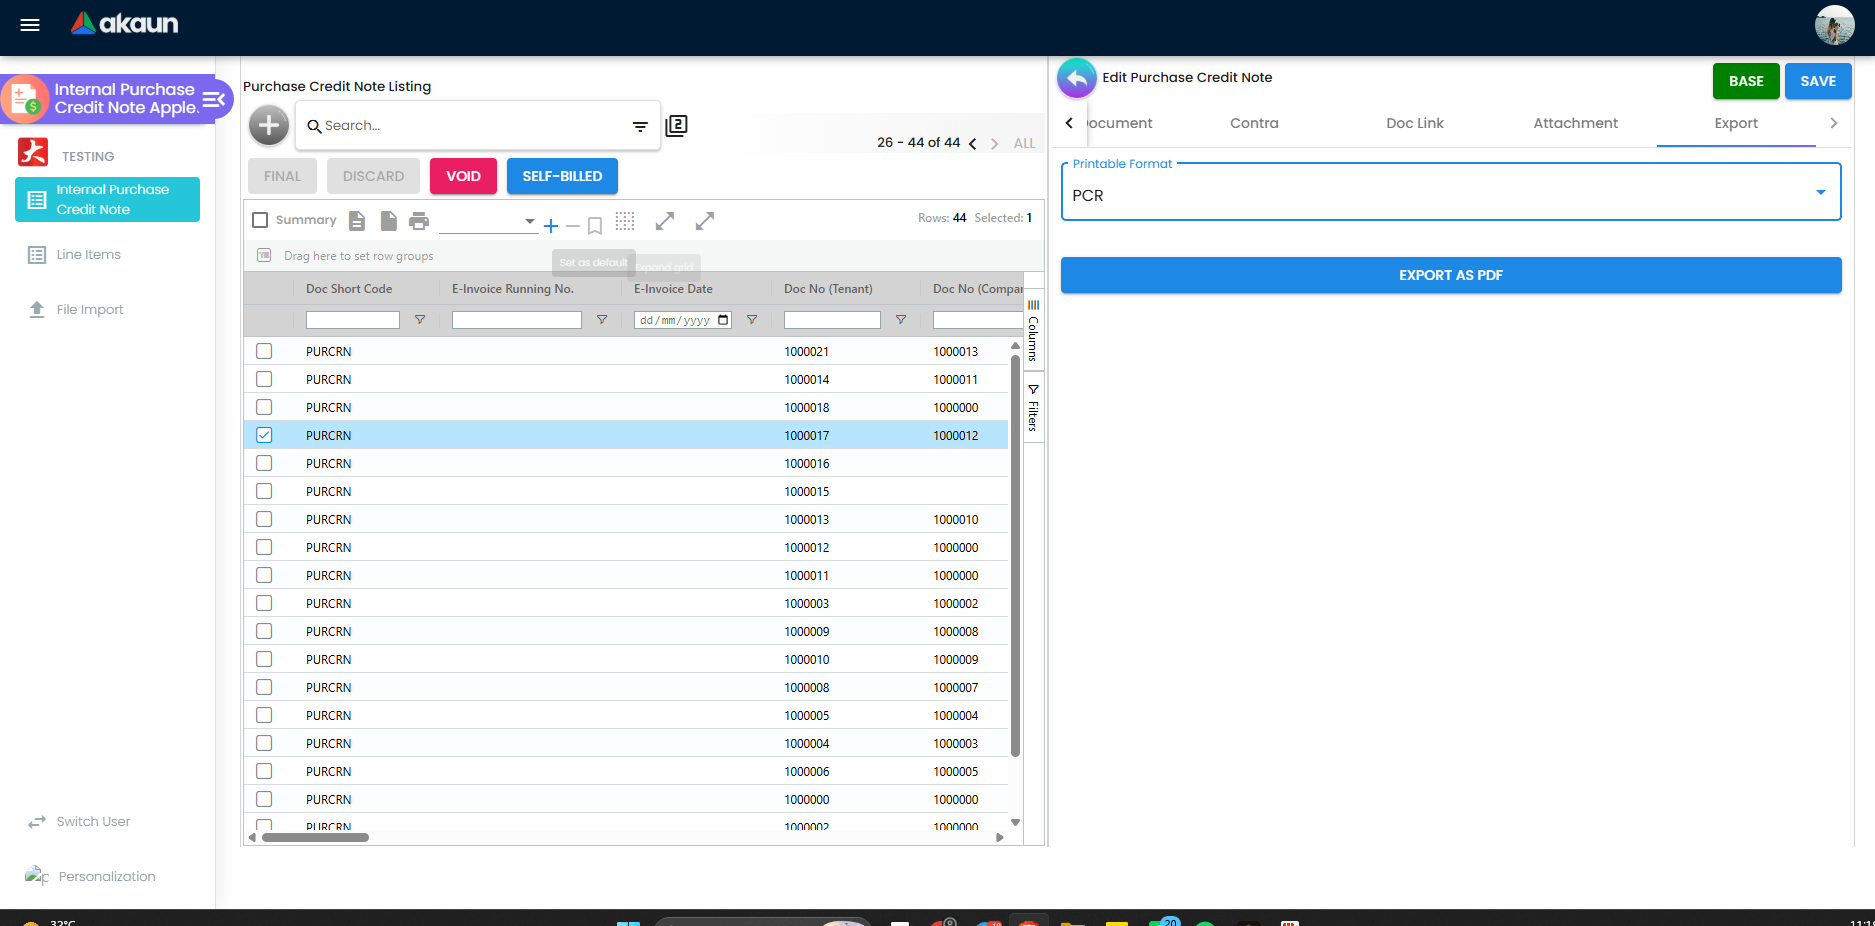
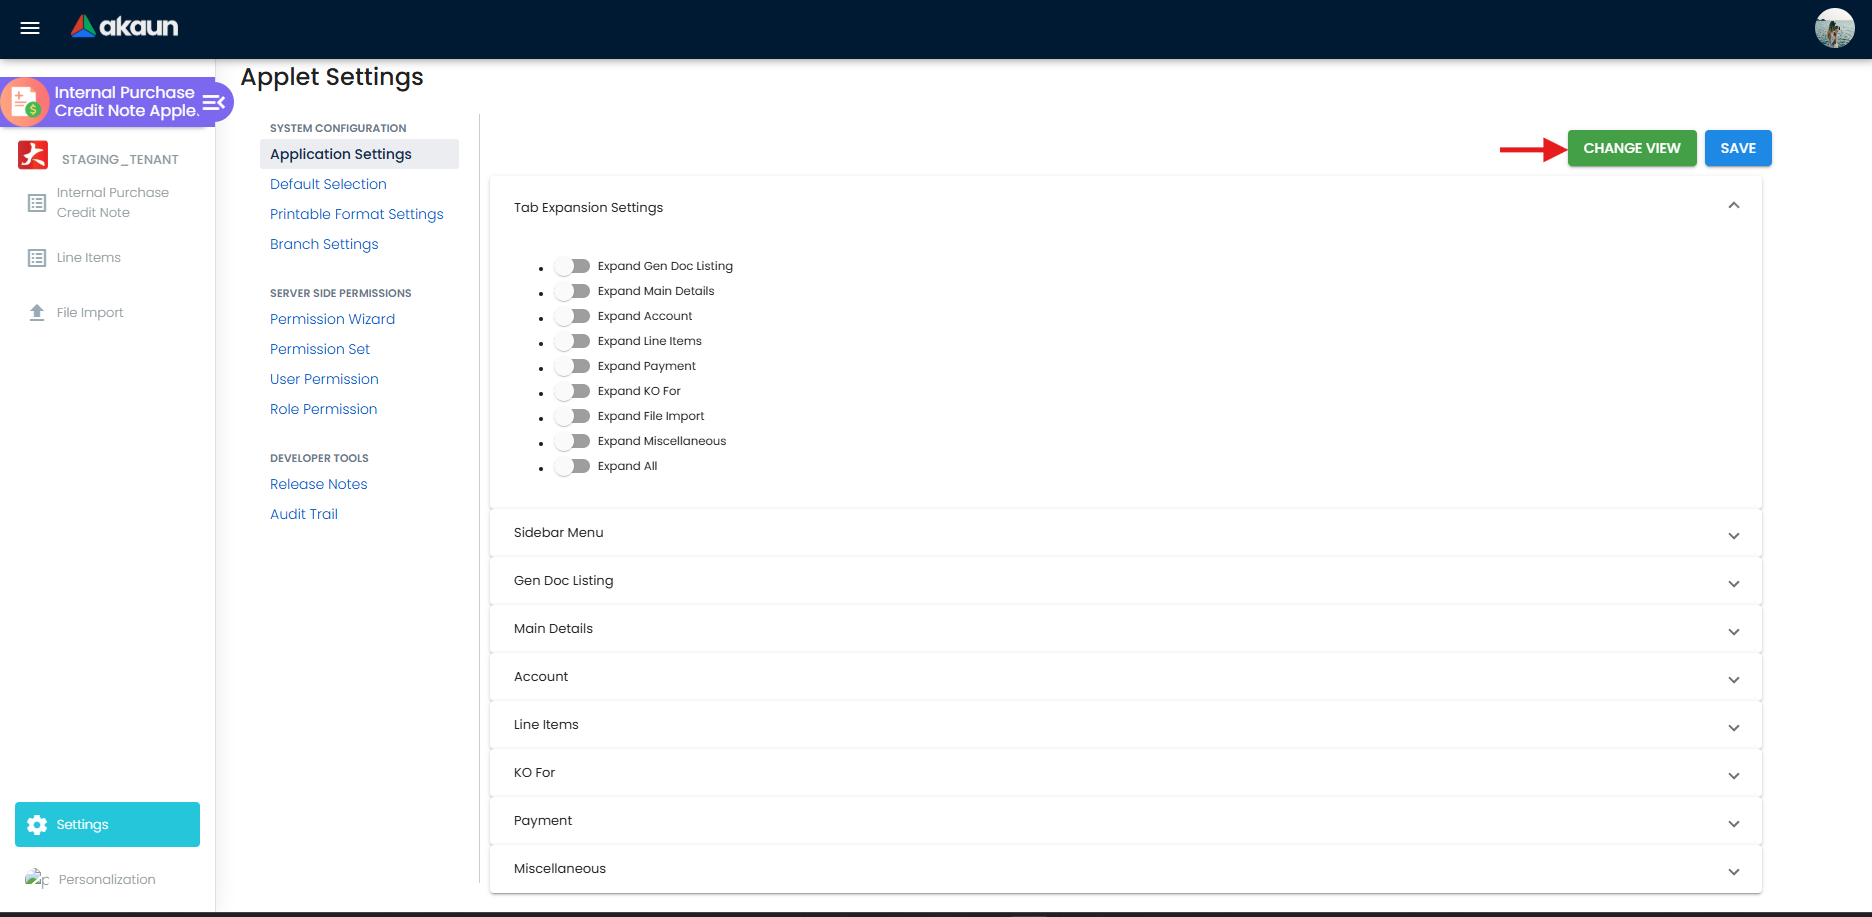
Twelve panels, in this order unless the tenant has re-ordered them: Main Details, E-Invoice, Account, Lines, ARAP, Payment, Department Hdr, TraceDocument, Contra, Doc Link, Attachment, Export. CHANGE VIEW switches between tabs and stacked expansion panels for the current user; VERTICAL_ORIENTATION and DEFAULT_ORIENTATION set the starting shape for everyone.
Most of the panels do what their name says and you can see them. These four do not:
| Panel | What it does that the tab label does not say |
|---|---|
| E-Invoice | Its Submission, Progress, Notification, Cancellation and Matched History sub-tabs describe a submission that will not happen unless the header’s self-billed flag reads true — the submission check requires a purchase document to be self-billed and not skipped, where a sales document only has to be not skipped. The flag arrives from the supplier record and is changed afterwards from the listing’s SELF-BILLED button or from My E-Invoice Admin; the server takes a different path for a DRAFT than for a FINAL. The Skip E-Invoice switch here suppresses submission; nothing here turns it on. |
| ARAP | Five figures — PNS, settlement, document-open, contra, balance — each of which can be hidden individually by its own setting, so two users at the same tenant can be looking at different subsets of the same document’s money. The balance is negative for a FINAL note, in the same sense as a purchase invoice. |
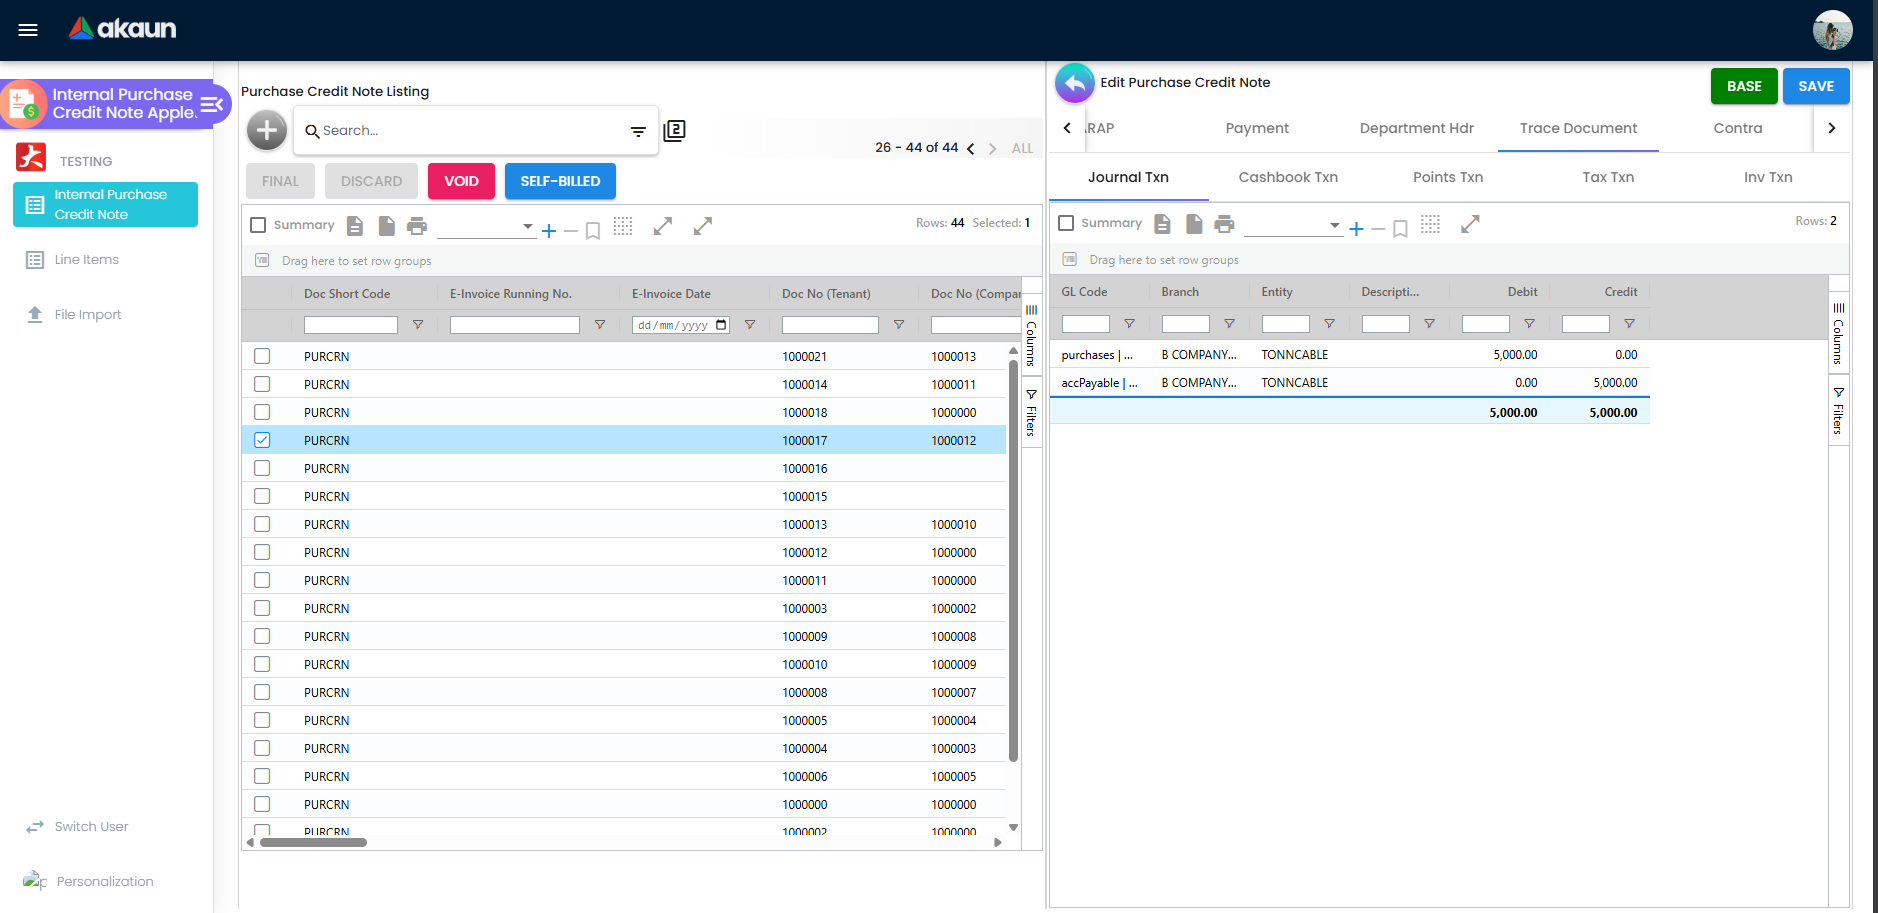
| TraceDocument | The journal, cashbook, tax and inventory rows the posting job actually wrote. This is the screen that tells you whether the journal exists, and an empty Journal Txn list on a FINAL note is the symptom of every posting failure in Common mistakes below. It is hidden by HIDE_TRACE_DOCUMENT_TAB; hiding it removes the only in-applet evidence that a posting succeeded. |
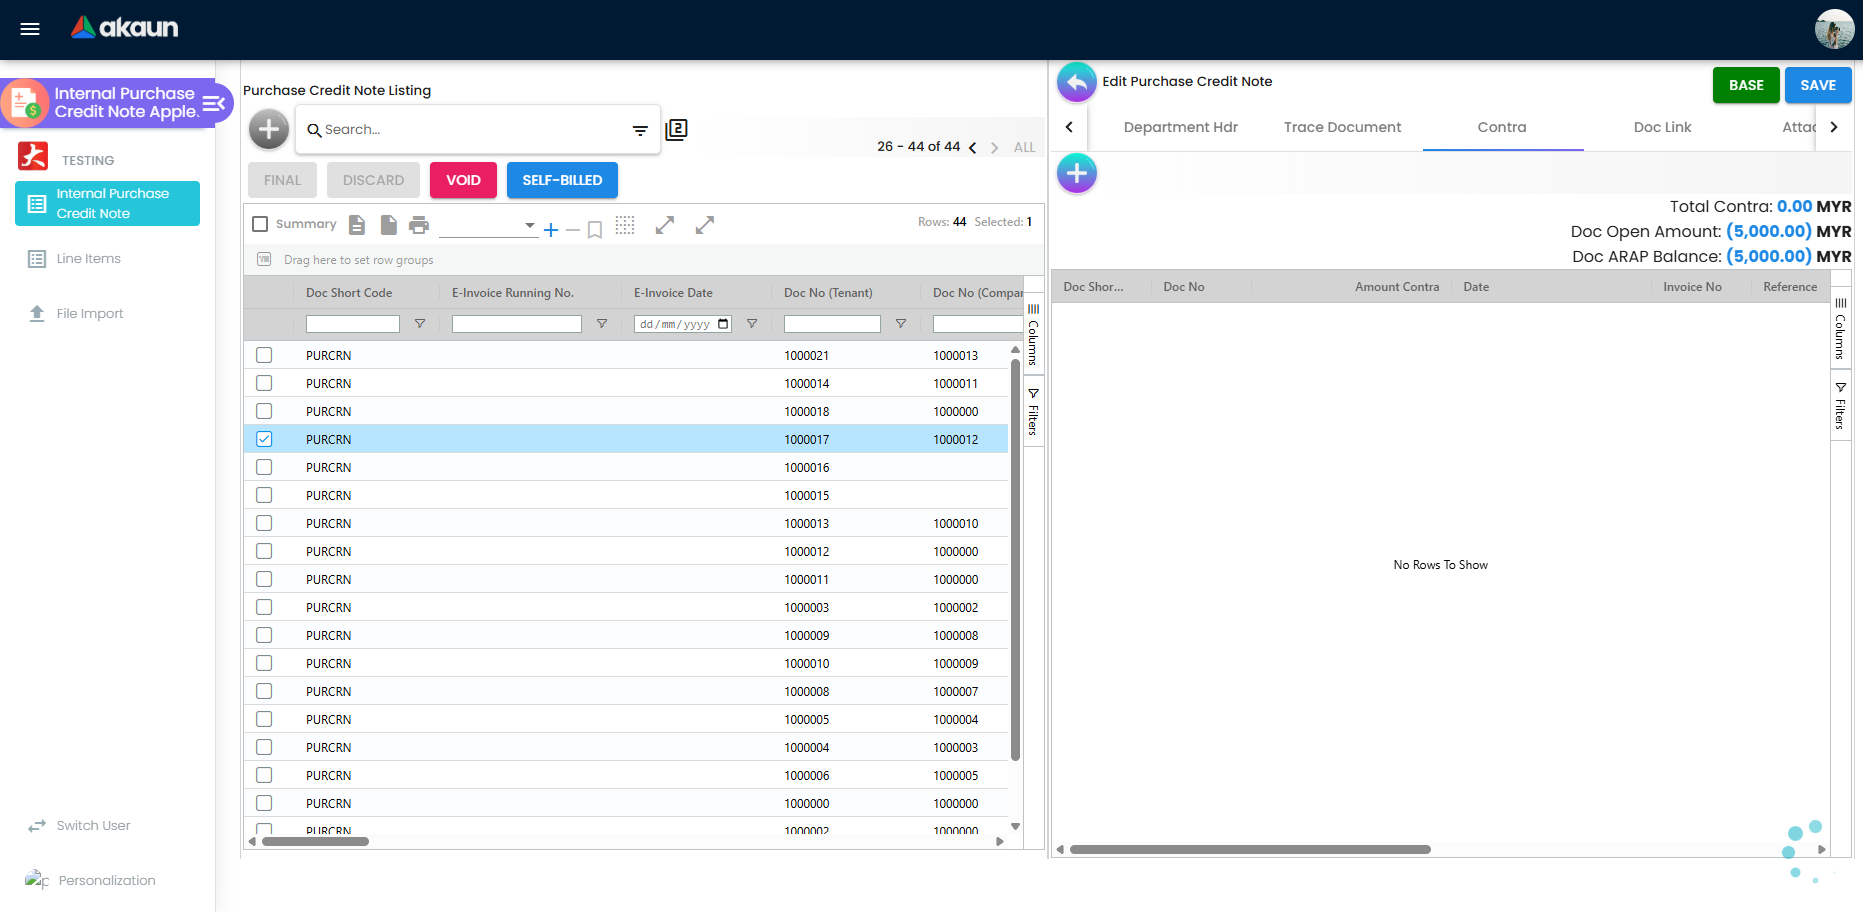
| Contra | Offsets this note against the supplier’s open documents of the opposite sign. Because a purchase credit note is on the invoice side, the documents it contras against are purchase debit notes and payment vouchers — not other credit notes. |
File Import
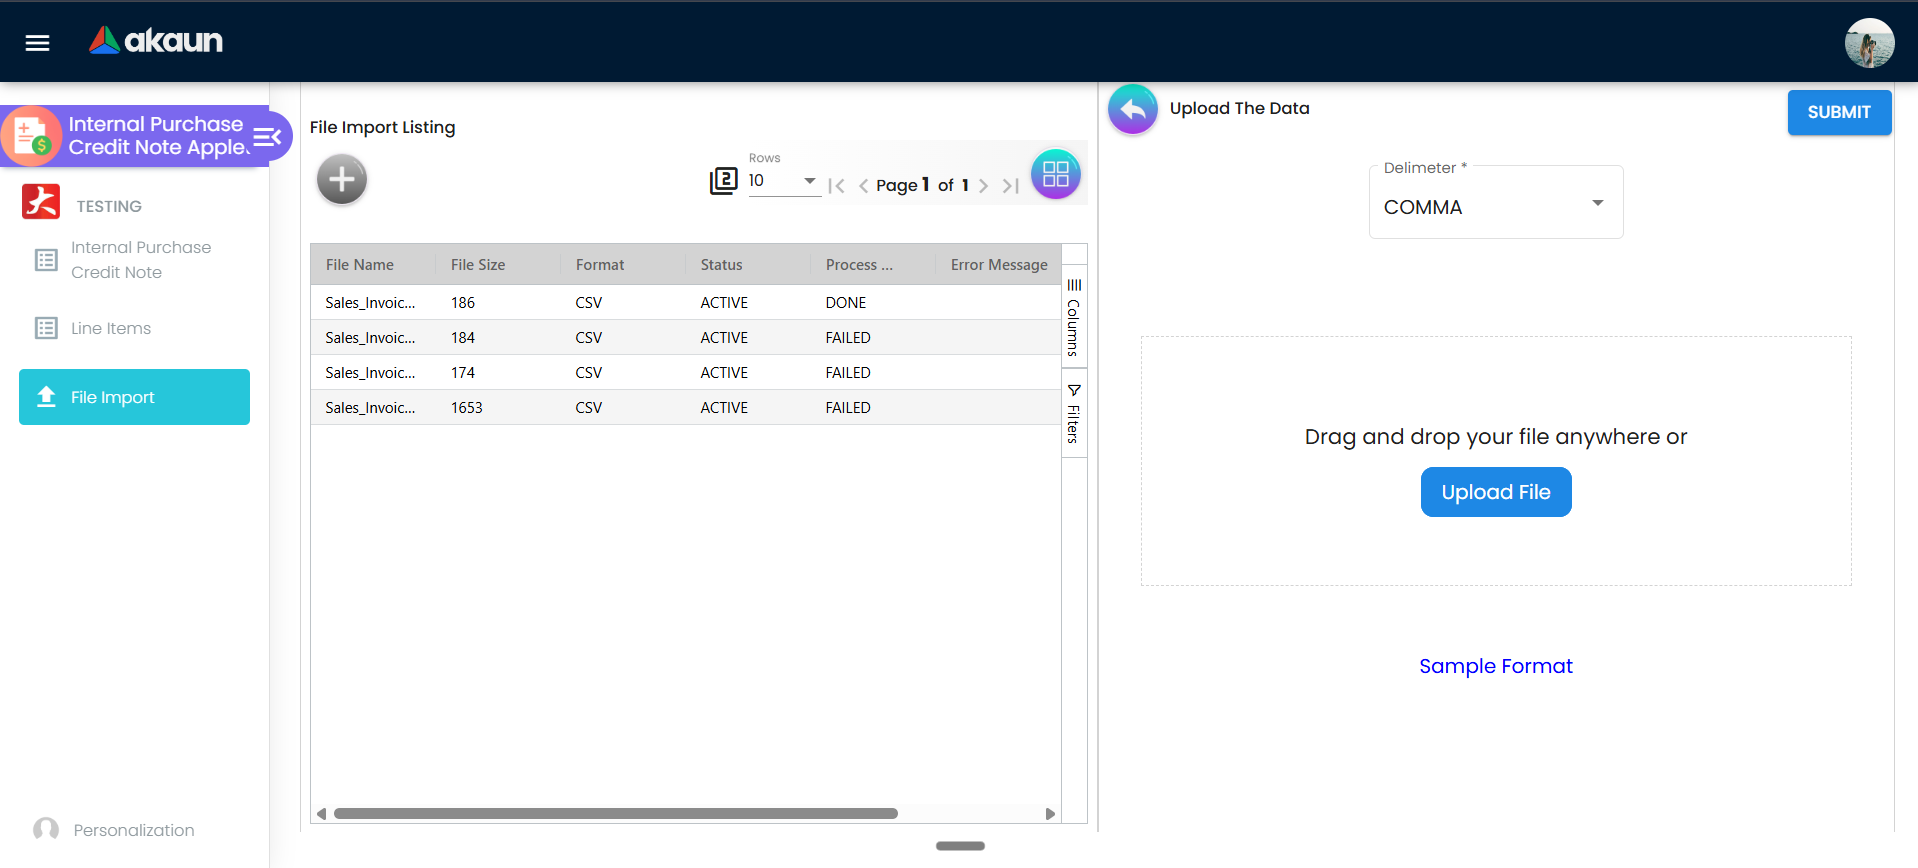
The import creates purchase credit notes — every document it builds is of this type.
The single most important thing about this importer is that it does not read your file’s heading row. The header names are the list your browser sent from the Sample Format picker, applied to the file’s columns in the picker’s order, with the file’s own first row skipped unconditionally. Re-order the columns in your spreadsheet and every value lands in a different field, silently and with no validation error — the amounts will import, against the wrong things.
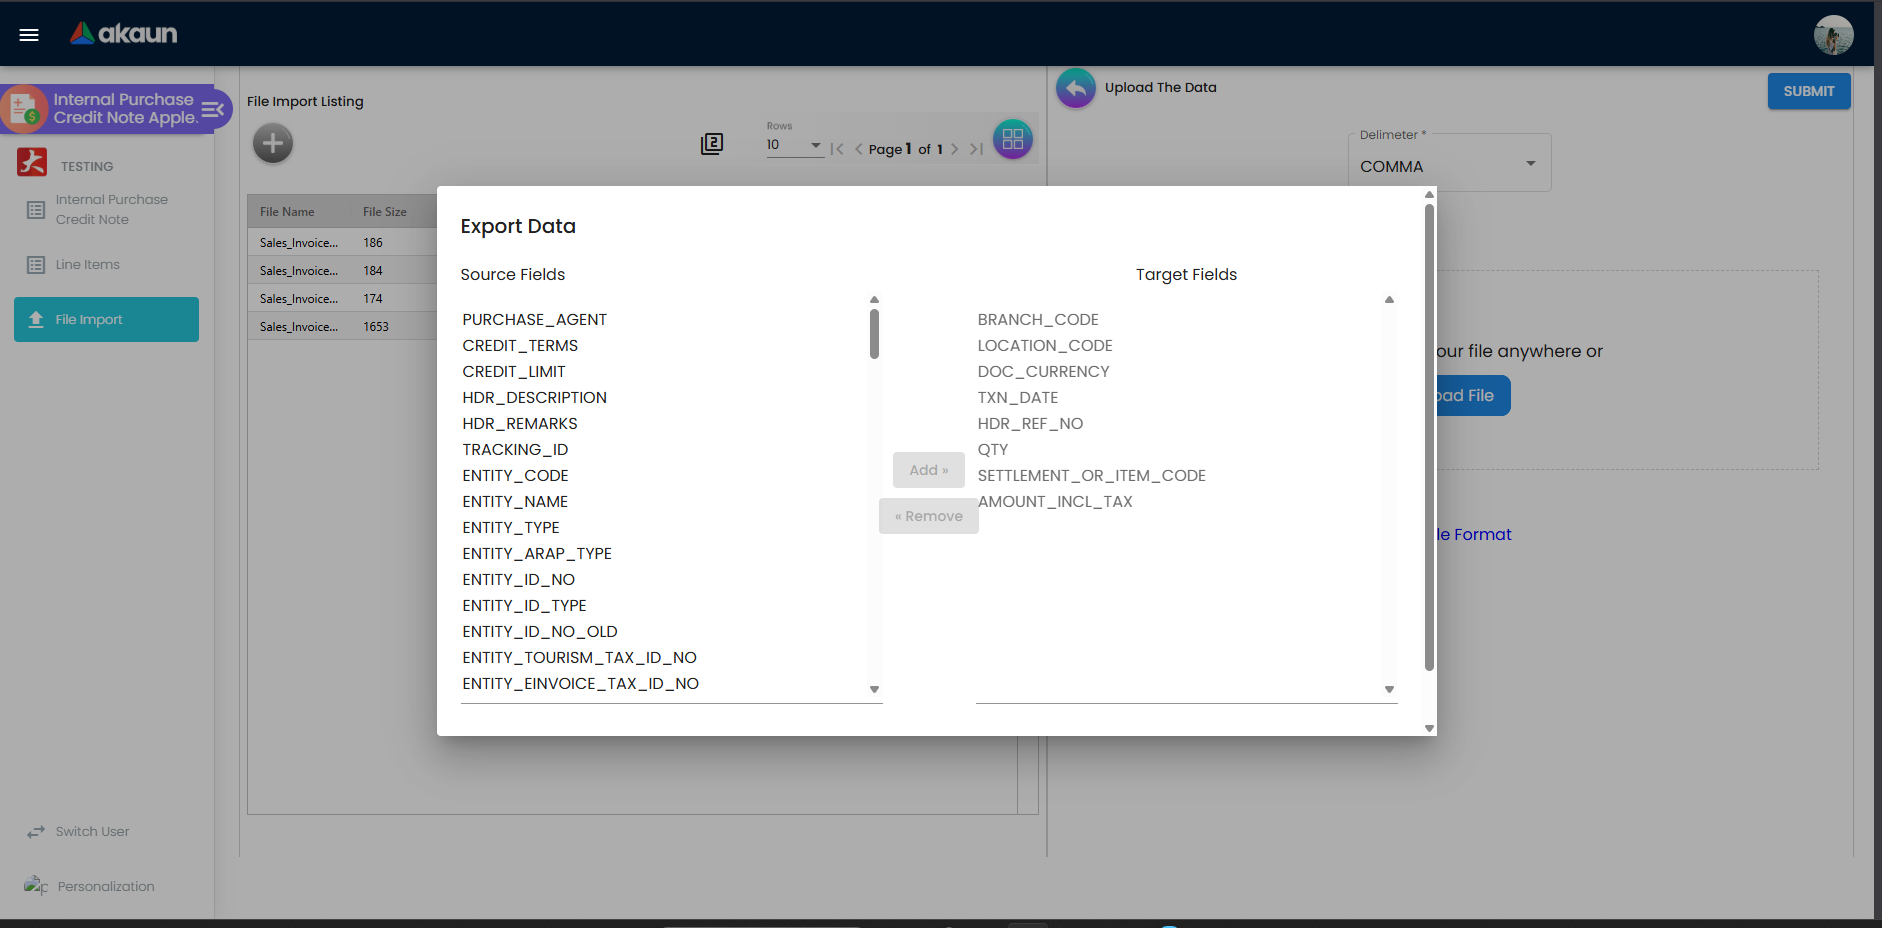
Eight columns are mandatory and cannot be unticked in the picker: BRANCH_CODE, LOCATION_CODE, DOC_CURRENCY, TXN_DATE, HDR_REF_NO, QTY, SETTLEMENT_OR_ITEM_CODE, AMOUNT_INCL_TAX. Everything else is optional. What that list tells you matters more than the list itself:
| Fact | Why it matters on the day |
|---|---|
There is no unit-price column and no discount column. The importer has no UNIT_PRICE_INCL_TAX, DISCOUNT_AMOUNT, TAX_CODE, TAX_AMOUNT or TXN_TYPE_PNS_STL_MTHD. | A line’s value comes from AMOUNT_INCL_TAX alone; unit price, discount and the net amount are derived afterwards by the recalculation pass. The Sample Format picker nevertheless offers all five of those columns, and the backend never reads them — tick them and the data is dropped without an error. |
Tax columns are named for GST. TAX_GST_CODE, TAX_GST_PCT, AMOUNT_TAX_GST, with TAX_WHT_CODE / TAX_WHT_PCT for withholding. | A template built from the applet’s own labels (“Tax code”, “Tax amount”) will not map. Download the current Sample Format and use its spellings. |
ENTITY_CODE is optional. | A file that lost its supplier column still imports. The documents are created, carry no supplier, and post nothing — you find them in the listing with a blank supplier name. |
POSTING_STATUS is read from the first row of each document group only, and defaults to DRAFT. | An import you expected to post arrives as drafts if the first row of the group is blank. The import finalises the same way the screen does, so a correctly-stamped FINAL import does post journals. |
EINVOICE_SELF_BILLED absent stores the string NOT SPECIFIED. | Not false, not null. The submission gate tests for TRUE case-insensitively, so the document is never submitted — and the listing’s Self Billed ? column shows that literal string rather than a tick or a cross. |
The picker’s Client Doc Type and Client Doc 1–5 are written with spaces; the importer spells them CLIENT_DOC_TYPE, CLIENT_DOC_1…5. | Another five columns that the picker offers and the importer cannot see. |
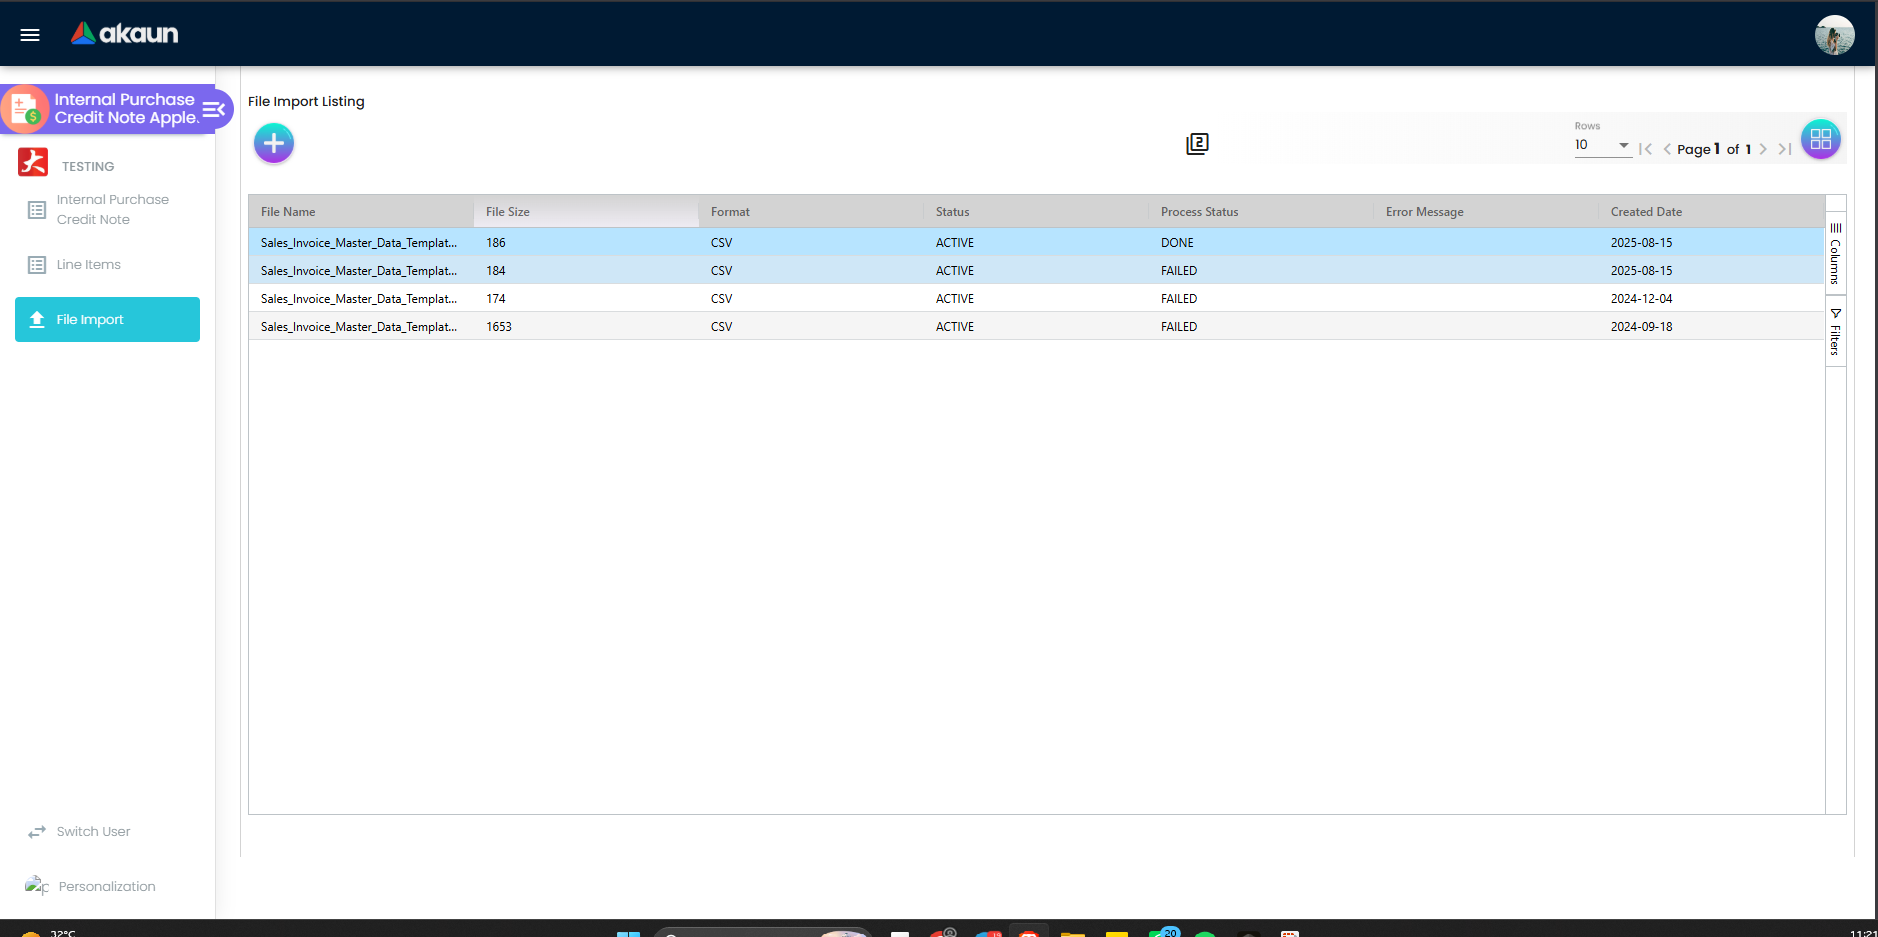
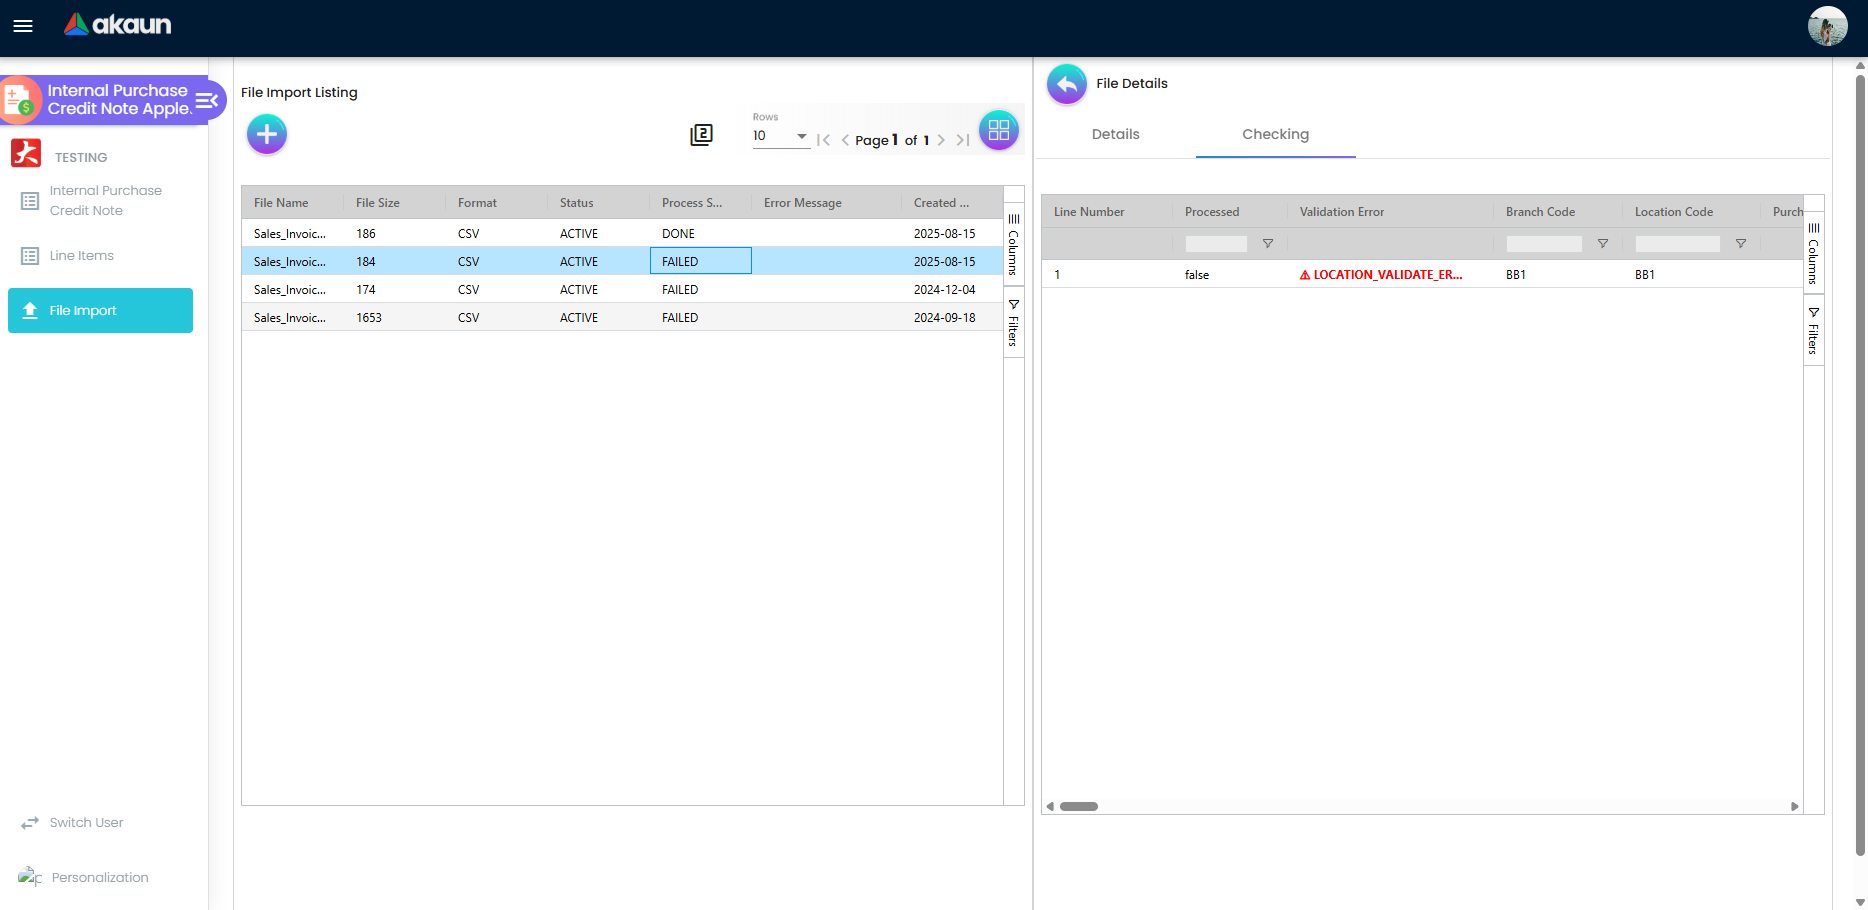
After SUBMIT, the import listing shows file metadata, Process Status (DONE / FAILED) and an error message; opening a record gives you a Checking tab with one row per CSV line, its Processed flag and its validation error. Rows are processed in batches of 2,000, and a batch that fails to be recorded marks the whole import FAILED.
Configuration
Before you can use it
| Prerequisite | Where | Why, and what happens without it |
|---|---|---|
| Company, branch, location | Organisation | All three are required on the header. Picking a branch fills the location from that branch’s MAIN_LOCATION extension row and overwrites the currency and base currency with the branch’s, resetting the rate to 1. Pick the branch before you set the currency, not after. |
| Supplier entity | Supplier | The entity’s AR/AP object type selects CREDITOR or CREDITOR_NON_TRADE, which decides the credit side of every journal. Selecting a supplier also copies its currency onto the header and, when they differ, sets the exchange rate to 0 — which then blocks SAVE until you refresh the rate. |
| Company default GL codes | Chart of Account → company GL-code links | CREDITOR / CREDITOR_NON_TRADE are mandatory; PURCHASE covers lines with no GL code of their own; INPUT_TAX covers tax. A missing creditor link throws MISSING_DEFAULT_GL_CODE inside the posting job, after FINAL has already succeeded — the note stays FINAL with no journal. |
| Items with a purchase GL code | Doc Item Maintenance | Resolution order is line GL code → header GL code → item-company link → company default for the transaction code. Only the last of the four is a tenant-wide setting; the other three are per document and per item. |
| Tax codes | Tax Configuration | GST/SST and withholding on lines. Tax posts to the company’s INPUT_TAX code, never to a per-item one. |
| Cashbook / settlement methods | Cashbook | Only if you use the Payment tab. A settlement item with no cashbook and no GL code throws MISSING_CASHBOOK or MISSING_GL_CODE: STL_MTHD [code] in the posting job after FINAL, with the same “FINAL but no journal” result. |
| Fiscal period open | Ledger And Journal | FINAL is refused in a LOCK_ALL or LOCK_TXN period. This one fails before the status changes, so it is the safe failure. |
| Forex rates | Forex | A foreign-currency note must carry a non-zero rate: SAVE is refused client-side with The currency rate cannot be ZERO or negative, and a foreign-currency FINAL also creates a base-currency shadow document alongside the original. |
| e-Invoice self-billed status | My E-Invoice Admin | Only if the note must reach the tax authority. The listing’s SELF-BILLED button turns a stored note self-billed (see Listing above); the company’s e-Invoice status must be Enabled for a FINAL one. |
| Permissions | Settings → Permission Wizard / Client Side Permission | Server-side create / read / update / delete on INTERNAL_PURCHASE_CREDIT_NOTE with a target, plus the client-side codes below. |
Applet settings
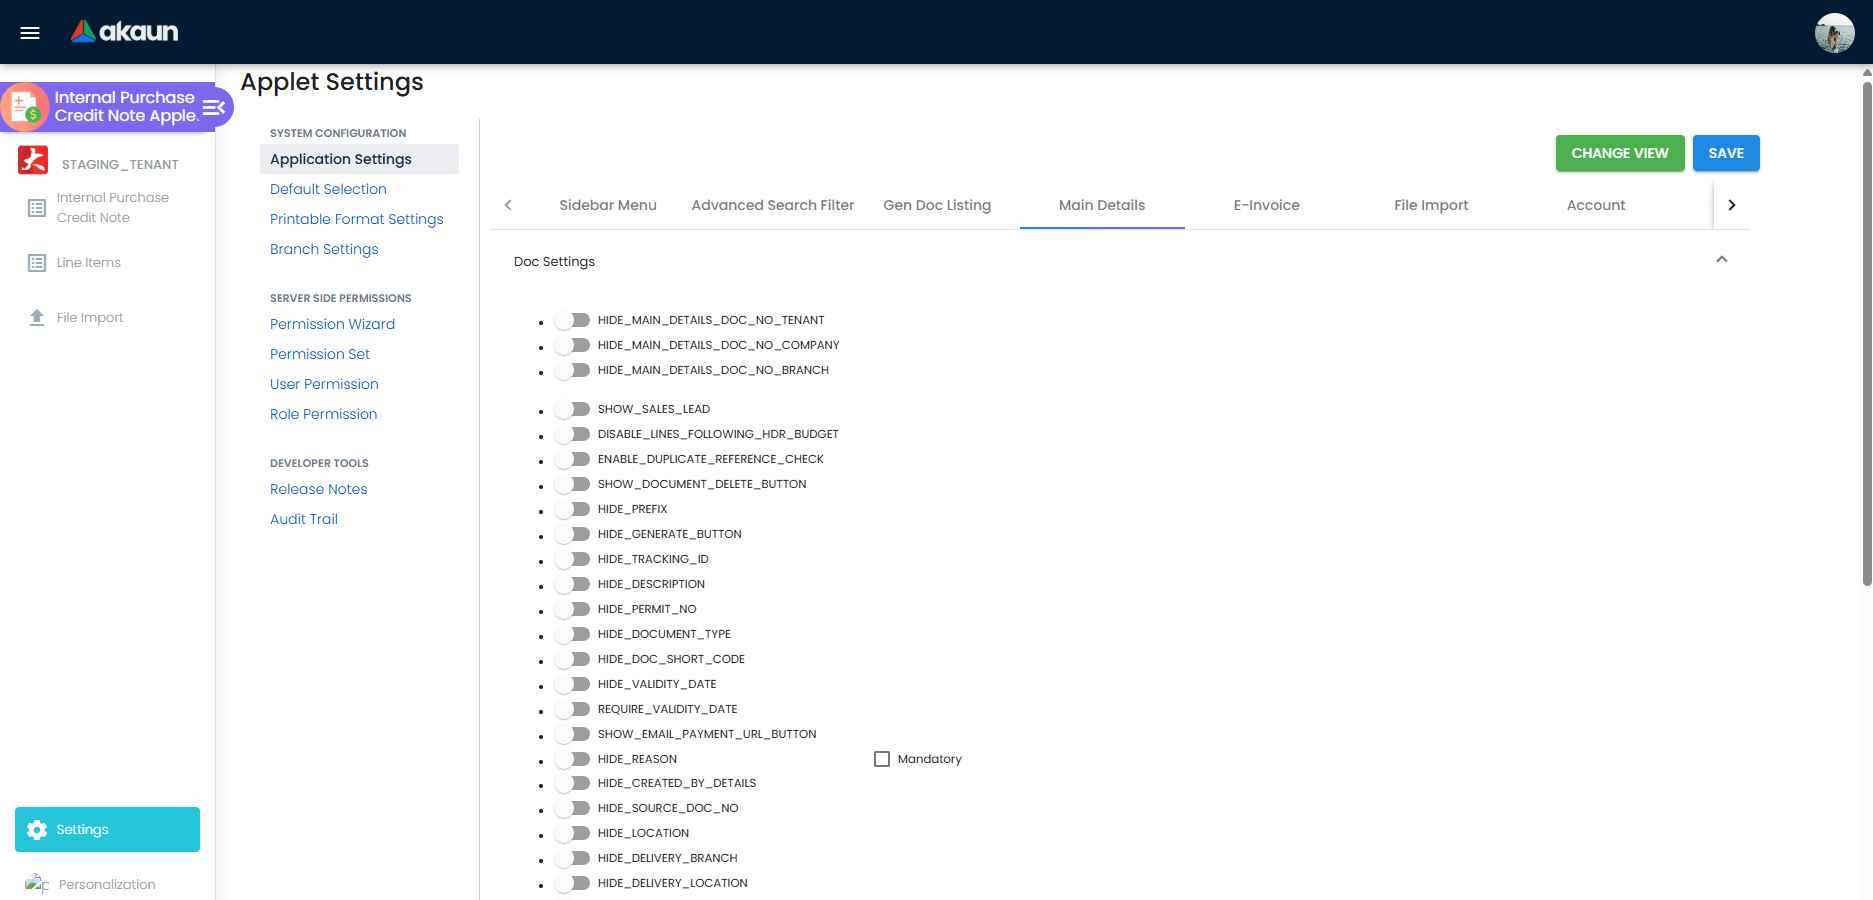
The mechanism — where a setting is stored, why absent is not the same as off, how the personal layer merges over the tenant layer, and how a setting differs from a client-side permission — is described once in Settings and permissions. This section documents only what that page cannot: the keys whose consequence you cannot see on this screen.
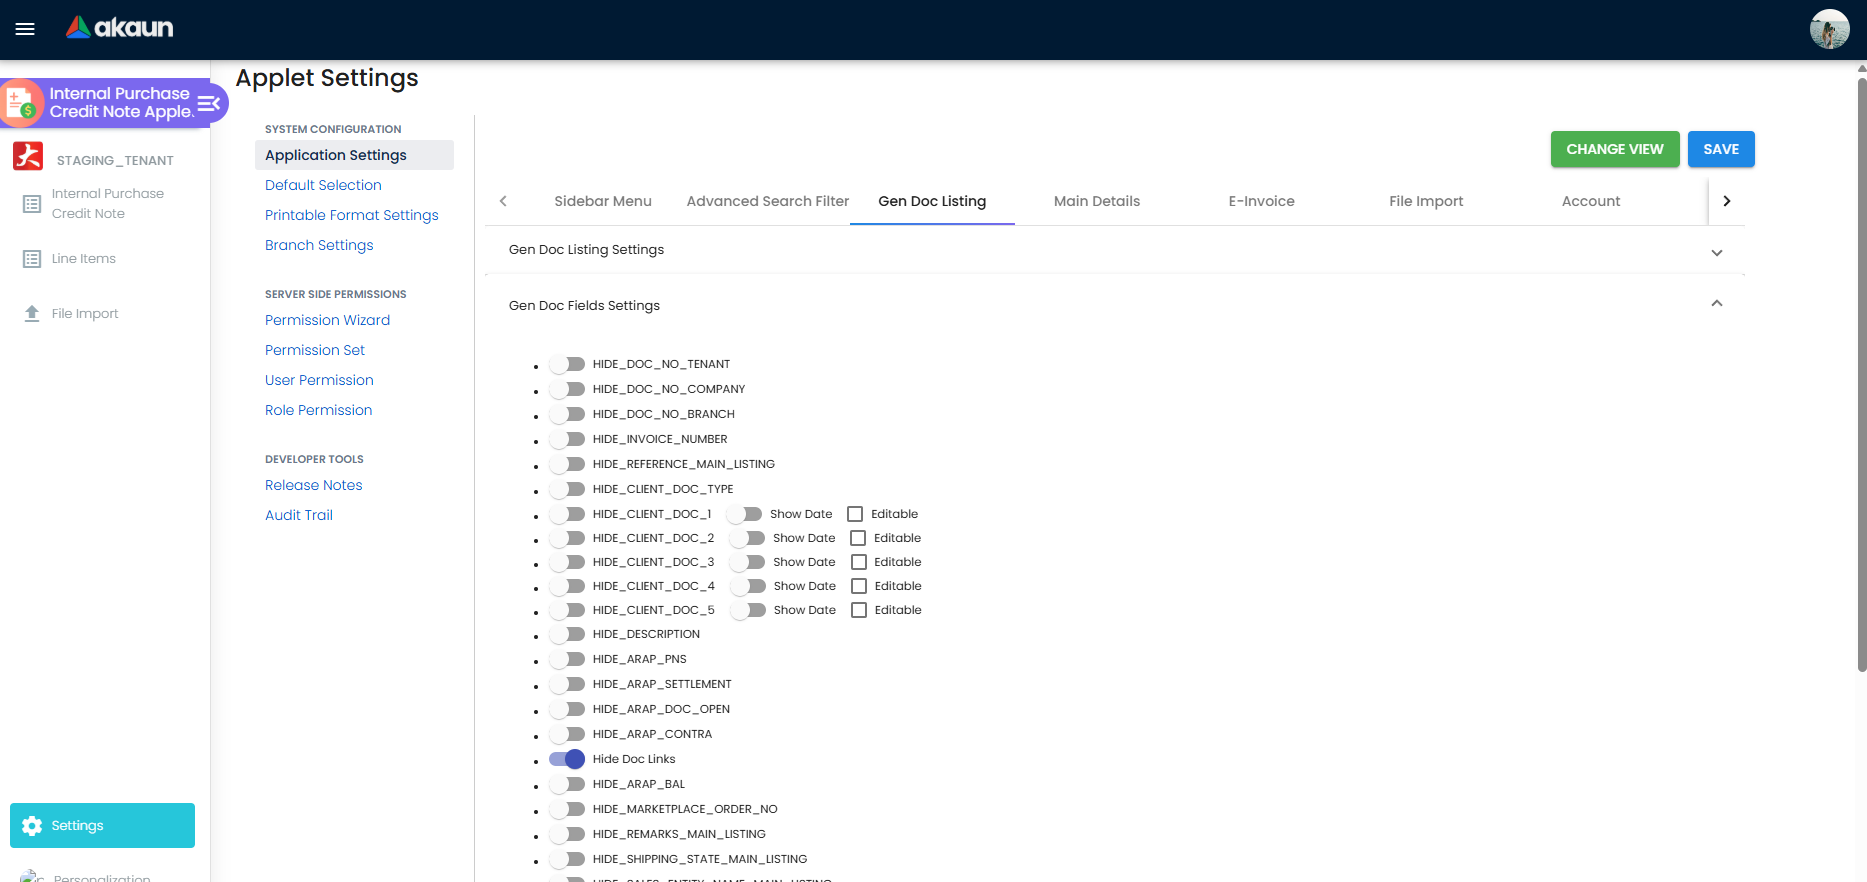
This applet has over 250 settings. The large majority are HIDE_* and EXPAND_* toggles that switch one field, column, tab, button or menu item off, plus the panel-expansion pairs — flip one and the result is in front of you within a second. Two are worth stating in a sentence rather than a row: HIDE_MAIN_PAYMENT_TAB and HIDE_SETTLEMENT_TAB both hide the Payment panel, so switching one off may not bring it back; and HIDE_TRACE_DOCUMENT_TAB removes the only screen in the applet that shows whether the journal was written.
These eight carry a consequence you cannot see from the screen they govern:
| Setting | Consequence beyond the screen |
|---|---|
ENABLE_EMPLOYEE_LOGIN_AUTO_DETECTION | Fills Purchaser from the signed-in user’s employee record — but only while the document is still TEMP, so it never fires on a re-opened draft, and the field stays blank for ever on documents created before the setting was switched on. |
ENABLE_DUPLICATE_REFERENCE_CHECK | Turns Reference into a server search across every purchase credit note in the tenant, ignoring company and branch, and shows an inline warning. It does not stop the save: SAVE is gated only on form validity, lines and the document lock. |
CANNOT_EDIT_CURRENCY_RATE | Disables the rate box permanently, including on a document whose supplier selection has just reset the rate to 0 — which leaves SAVE refused with no way to fix it from this screen. Pair it with a forex data source. |
DISABLE_GEN_DOC_LISTING | The listing fetches nothing until you search. Intended for large tenants; its side effect is that a user who does not know it is on reports “my documents have disappeared”. |
ENABLE_EDIT_PAYMENT_DATE | When off, editing the header transaction date rewrites the date on every settlement line to match, every time you touch the date. When on, the two can diverge and the line keeps whatever you typed. |
ENABLE_AUTO_POPUP | Opens the printable PDF after FINAL, and needs a default printable format (branch or tenant): without one you get No Default Printable Selected instead of a document, at the worst possible moment. |
ENABLE_INLINE_APPLET_CONFIG | Adds a gear icon to the edit screen that opens an Applet Configuration panel — master settings, personal settings and client-side permission assignment, saved without leaving the document. The switch and the gear are the shared settings module’s, not this applet’s: the switch sits at the top of Application Settings, and each panel’s gear offers only the keys that panel lists. It is off unless explicitly switched on. |
SHOW_DOCUMENT_DELETE_BUTTON | Has no effect in this applet: no DELETE button is ever shown. Hard-deleting a credit note is an API operation here, not a screen one. |
On the screen and doing nothing
Thirty-one settings do nothing in this applet. Of the ones a reader is most likely to go looking for, two are actually on the screen: Disallow line item edit and Require validity date are offered on this applet’s shared Application Settings and read by nothing here (the Purchase Order, Purchase Invoice and Purchase Requisition honour the first; the Purchase Order, Consignment PO and Purchase GIN honour the second). The rest are not on the screen at all: the SST and WHT enable and include flags, the four Department enable toggles and their include twins, the filter by today’s transactions switch and the fifteen custom-status keys are declared in the model with no control anywhere, and the lock purchaser to current user switch is hidden by the shared screen’s gate for this applet. They are not dead platform-wide — lock purchaser, for one, is live in the Purchase Order applet, which does branch on it — so do not conclude from this list that the key is dead everywhere. It is dead here.
A second, worse class: ENABLE_PRINT_FINAL_GEN_DOC_ONLY, SHOW_ITEM_STOCK_BALANCE, MANDATORY_REMARKS_FIELD and SHOW_BUDGET are offered by the inline gear, so when it is enabled they appear as toggles on the very screen they claim to govern — and nothing reads them. Flipping one saves a tenant setting and changes nothing.
Read here, with no switch for this applet
The opposite problem. Application Settings decides which switches to show by the applet’s code, and for eight settings this applet does read, it checks a different spelling of the code, with hyphens where the platform’s code for this applet has underscores. So the switch never appears: HIDE_FILE_IMPORT_MENU, HIDE_REFERENCE, HIDE_REMARKS, HIDE_CURRENCY, HIDE_BASE_CURRENCY, HIDE_CREDIT_TERMS, ENABLE_IMPORT_EXPORT and SHOW_CUSTOM_DOC_NO. Five of them, the Reference, Remarks, Currency, Base Currency and Credit Terms hides, are on the Main Details gear once ENABLE_INLINE_APPLET_CONFIG is on. The File Import menu, the import and export controls and the Custom Document No. box have no switch anywhere in this applet. A value that is already stored still takes effect, so if one of these is on and you need it off, the client-side permission (where there is one, such as SHOW_FILE_IMPORT_MENU) is the lever you have.
Who can change what
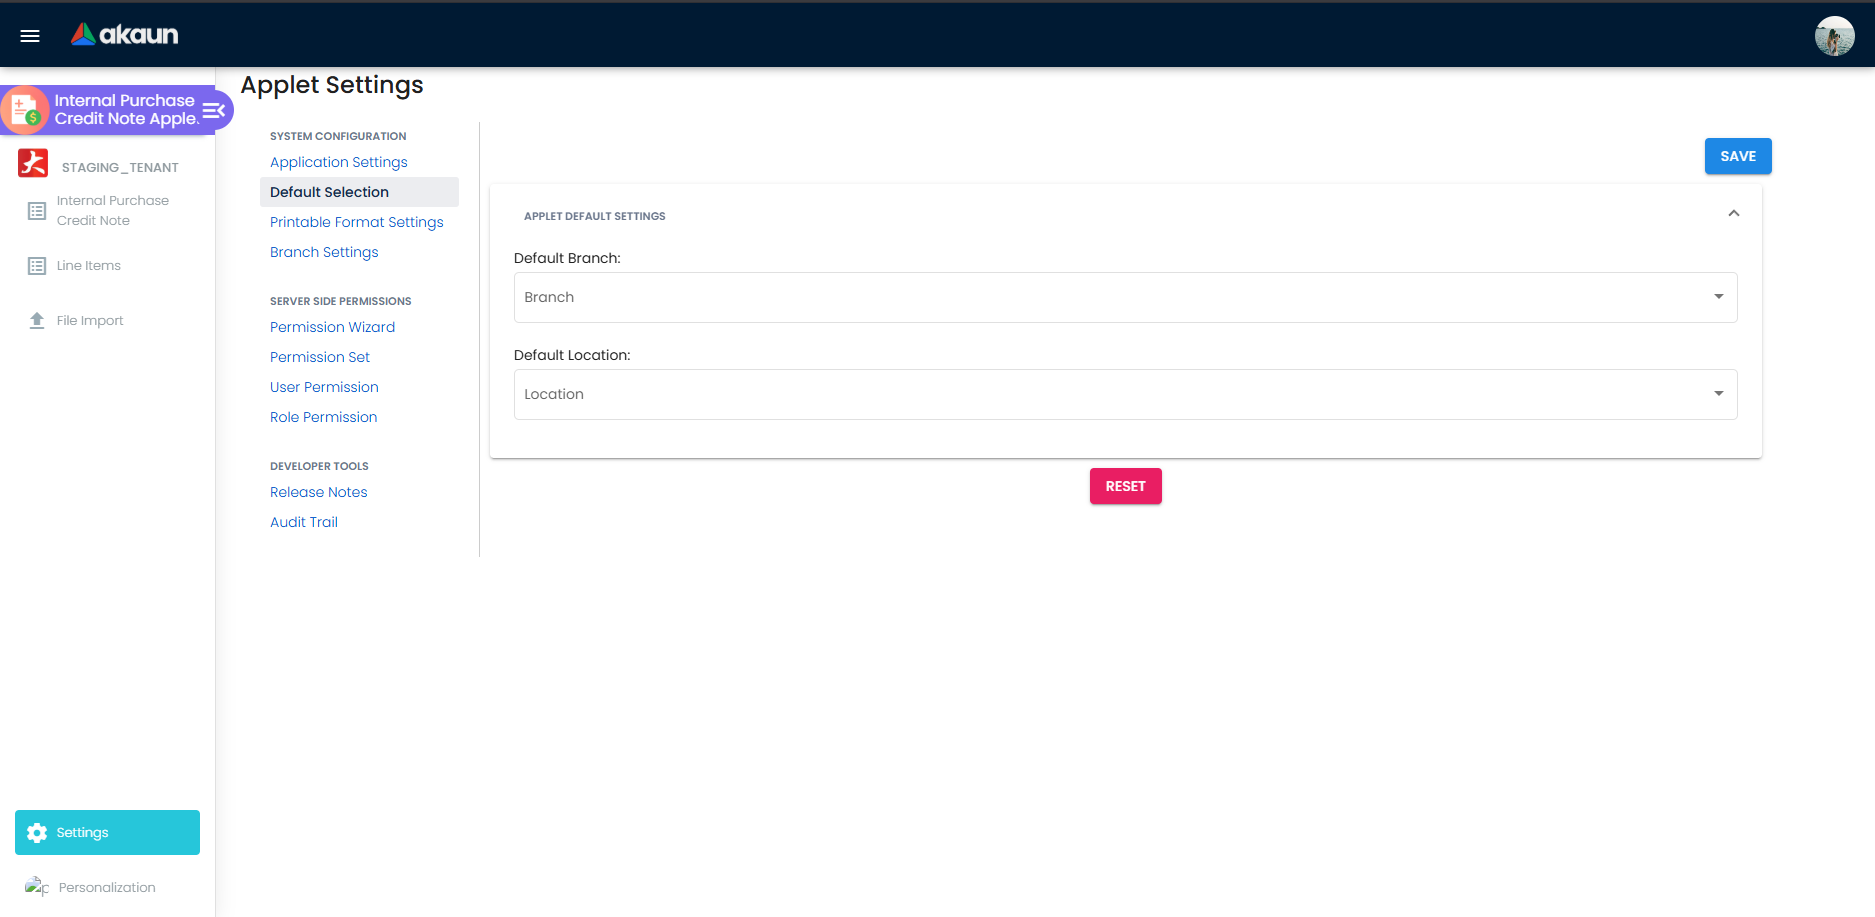
Settings → Default Selection holds DEFAULT_BRANCH, DEFAULT_LOCATION, DEFAULT_COMPANY and the tab order, and is a tenant-wide screen. Personalization → Default Selection overrides the branch and location for one user, within that user’s permitted branches. Two behaviours of the tenant screen are not visible on it:
- Its RESET button nulls the three defaults but re-saves the tab order currently on screen. If you have dragged a tab and then pressed RESET expecting to undo it, you have just saved the drag.
- Its drag list offers thirteen tabs, the first of which is Search Document; the edit panel has twelve and has no such tab. The extra entry is silently ignored rather than breaking anything — but the screen shows you a tab you will never see.
With no DEFAULT_BRANCH set and none chosen, the applet takes the default branch from the signed-in user’s own active employee record. That is a capability worth using deliberately: set each user’s employee record’s default branch, and every user’s new documents open at their own branch without a personalization row each.
Branch settings
Settings → Branch Settings has six sub-tabs, and three of them change what the document does rather than how it looks. Branch Details sets the branch’s default purchaser (labelled Sales Agent even on the purchase side), a Rounding Five Cent item and a Group Discount Item — the last two are item codes the engine inserts as extra lines, and a rounding item with no GL code fails the posting job in exactly the way a settlement item does. Item Category Filter restricts which item categories the line picker offers at that branch, which is the usual explanation for “the item exists but I cannot find it here”. Printable Format overrides the tenant default for that branch, and is what ENABLE_AUTO_POPUP looks for. The other three — Default Settlement Method, Menu List, Pricing Scheme — pre-select, hide and price respectively, and their effect is on the screen.
Screenshot withdrawn; a recapture from a demo tenant is on the list.
Permissions
Server-side permission is ordinary targeted CRUD on INTERNAL_PURCHASE_CREDIT_NOTE, granted through Permission Wizard or Permission Set. Client-side permissions are different in kind: each one restores something a HIDE_… setting has removed, for the holders of that permission only. That is the shape to keep in mind — a setting takes a field away from everybody, a permission gives it back to some people.
This applet’s client-side permissions come in three families: the document numbers and transaction date (SHOW_DOC_NO_TENANT, SHOW_DOC_NO_COMPANY, SHOW_DOC_NO_BRANCH, SHOW_TRANSACTION_DATE, SHOW_CLIENT_DOC_TYPE, SHOW_CLIENT_DOC_1…5); the line money columns (the nine SHOW_UNIT_PRICE_*, three SHOW_*_DISCOUNT*, three SHOW_AMOUNT_*, SHOW_QTY_BASE, SHOW_QTY_UOM, SHOW_UOM_TO_BASE_RATIO, SHOW_TAX_CONFIG_SELECTION, SHOW_WHT_CONFIG_SELECTION, SHOW_COSTING_DETAILS, INTERNAL_PURCHASE_CREDIT_NOTE_DISPLAY_PRICING and SHOW_DISABLE_EDITING_AMOUNT_TXN_SETTING); and one that works the other way round, IPCN_HIDE_TRACKING_ID_AND_PERMIT_NO, which removes Tracking ID and Permit No from its holders.
The applet also checks SHOW_GENDOC_FINAL_BUTTON, SHOW_GENDOC_DISCARD_BUTTON, SHOW_GENDOC_VOID_BUTTON, SHOW_CLONE_BUTTON, SHOW_FILE_IMPORT_MENU, SHOW_LAST_PURCHASE_PRICE and the five SHOW_ARAP_* codes — and none of them is registered for this applet. A permission code that does not exist can never be granted, so the corresponding HIDE_… setting is absolute here until BigLedger adds the code to this applet’s permission list. Client Side Permission only grants codes already on that list, so the fix is a request to BigLedger, not a setting; the failure mode without it is an administrator hiding the FINAL button “for most users” and discovering it is hidden for all of them.
The supplier on this note is a copy, not a link
When you issue the note, BigLedger copies the supplier’s details onto the document — the identity block, the addresses, the tax identifiers — instead of pointing at the supplier record and reading through it. The copy belongs to that one transaction.
That is the point of it. Issue a note in 2022 while the supplier is at their old address, let them move in 2024, and the note you stored in 2022 still holds the 2022 details — nothing on the ordinary save path ever refreshes them, because the server fills that block only when it arrives empty. A document that read through to the supplier record would quietly restate today’s details on a transaction that happened under the old ones.
What a reprint shows is a separate question, and it depends on your template. The standard Jasper
print service — the one you get unless a printable format names another — hands the layout both: entityName, entityId, description and creditTerms come from
the note’s stored snapshot, while customerName,
supplierCode, customerID, customerGST, customerEmail, customerIDNo and the receiver name
are looked up live from the supplier record at the moment you press print. A layout built on the second set will print today’s details on a 2022 note. If a reprint
has to match the original, build it on the snapshot fields.
Two consequences follow, and neither is visible on the screen:
- Editing the supplier’s details on this note changes this note only. Correcting an address here does not correct the supplier record, and the next document starts from the master data again. Pushing the correction back to the supplier record is a separate action you take deliberately.
- Extracts read from the snapshot, not from the supplier. A column on a stored note holds what was true when it was issued. If you are reconciling against today’s supplier master, expect old documents to differ, and treat that as correct rather than as drift to clean up.
Fields
Main Details carries the owning company, branch and location; the purchaser; the document short code and the tenant, company and branch running numbers; the transaction date; credit terms; reference and remarks; permit number and tracking id; currency, base currency, rate and forex source; the client document type and five client document references; five external document references with their dates; and the posting status and status. Account carries the supplier and its name, type, status, identity number and type, e-mail, phone and currency, with Bill To and Ship To names, contacts and addresses. A line carries the item, quantity, unit of measure and ratio, the standard, net and transaction unit prices in and excluding tax, unit and multi discounts, tax and withholding code, percentage and amount, its own branch, the four accounting dimensions, its own GL code, serial, batch, bin and tracking references, the e-Invoice classification, tax type, unit of measure, tariff code and country of origin, and a remarks line. All of that is on the screen and labelled. What follows is what is not.
Where the header numbers come from. The document numbers are assigned server-side on save and re-fetched immediately before FINAL, so anything you type into them is overwritten. The currency arrives from the branch when you pick the branch, and again from the supplier when you pick the supplier — and when the supplier’s currency differs from the base currency, the rate is deliberately set to 0, not to a looked-up rate, which is what makes SAVE refuse until you refresh it. The branch, when you have set no default and chosen none, arrives from your own employee record.
Where the line numbers come from, and which one becomes the journal. For a normal item line the journal takes the net amount; for a header adjustment, group discount or member-point discount line it takes the transaction amount. The side is then decided arithmetically — the document’s sign times the amount — so a line you key with a negative amount on a credit note lands on the opposite side from its neighbours. Nothing on the screen warns you; the Dr/Cr you get is the product of two signs.
| Field | What it does beyond what it says |
|---|---|
| Permit No | Stored only when Credit Terms has a value, and Credit Terms is disabled unless the supplier carries credit-terms rows — so on most suppliers it is discarded silently. See the warning at the top of this page. |
| Credit Terms | Two columns are written from this one control. When the box is empty, the applet copies the supplier’s snapshot — the identity block taken from the supplier record at the moment the note was issued — into the credit-terms field. That is why most stored notes hold a name, e-mail and GL code in the credit-terms column rather than a payment term. Reading credit terms off the note is unreliable; read them from the supplier record. |
| Reference | The only field the duplicate check looks at, and the check is tenant-wide and advisory. It is also what HDR_REF_NO fills on import — and on import it is the value that groups CSV rows into documents, so two different notes sharing a reference become one imported document. |
| Currency Rate | Refused at zero or below on SAVE, and validated again against the forex source on FINAL. A foreign-currency FINAL creates a second, base-currency shadow document; the Trace Document tab of the original will not show you the shadow’s journal. |
| Quantity (line) | Required and validated to at least 1, and it moves no stock: every line is forced to move no stock on create. Quantity exists to carry a count onto the printable and the e-Invoice, not to carry stock. |
| Branch (line) and the four dimensions | Each journal line takes its branch, segment, dimension, profit centre and project from the line when the line has one and from the header when it does not. A header dimension is therefore a default, not a rule: one line with its own profit centre and the rest without will split the note across two profit centres, and nothing on the header says so. |
| GL code (line) | First in the resolution order, ahead of the header code, the item-company link and the company default. Setting it on one line silently overrides every other source for that line only. |
| Serial / batch / bin | Validated at FINAL against the line quantity even though no stock moves, so a mismatch refuses the posting on a document that was never going to touch inventory. |
| Skip E-Invoice | Recomputed by the backend on every FINAL from the document, branch and supplier flags and written back onto the header — so the stored value after posting may not be the one you saw before pressing FINAL. |
What FINAL actually does
From inside the document, FINAL is two calls, and only the second one posts. The button saves first — the header, lines and settlements, with the document numbers re-read from the server beforehand — and only on success sends the finalise. From the listing, the bulk FINAL button sends only the finalise, one per selected row. Two things follow: unsaved edits are never lost by pressing FINAL from inside the document, and a failure between the two calls leaves a saved, unposted DRAFT — which is exactly what you want and is worth knowing when a posting error appears after the success toast for the save.
The backend then, in order: recomputes and stores the skip-e-Invoice flag, validates the document (forex rate, serial/batch/bin quantities against line quantity, fiscal period), writes the status, assigns any outstanding running numbers, posts the journal, and queues the posting and message-template jobs. The webhook and sales-contract jobs are queued only for sales invoices — this document type raises no webhook on FINAL, whatever the Webhook settings screen suggests.
| Account | Dr | Cr | Where the GL code comes from |
|---|---|---|---|
| Purchase / expense | Line net amount | Line GL code, else header GL code, else the item-company PURCHASE link, else the company default PURCHASE — first match wins, and a missing last resort throws MISSING_DEFAULT_GL_CODE after the status has already changed. | |
| Input tax | Line tax amount | The company default INPUT_TAX. There is no per-item override. | |
| Creditor | Net of all lines | The company default for the supplier’s AR/AP object type — CREDITOR or CREDITOR_NON_TRADE. Mandatory: no link, no journal. | |
| Settlement method | Payment amount | The cashbook of the settlement item on the Payment tab; failing that its GL code; failing both, the posting job throws. |
Stock: none, on every path.
On VOID the reverse journal is posted (including the shadow document’s), the note is removed from the e-Invoice queue and from historical aging, and the reason is stored. A FINAL note that other documents link from cannot be voided — void the downstream document first. VOID and DISCARD both confirm before acting; FINAL does not.
The background jobs behind it
Finalising queues the posting job, which writes the journal, and a message-template job, which sends whatever notifications your templates define. Voiding queues the tax-reversal job, which runs for every voided document, not only this type. The intercompany job looks at every posted document and acts only when intercompany is configured — that is how a sibling company’s Sales Credit Note becomes a Purchase Credit Note here.
An intercompany credit note arrives here pointing the wrong way. When a sister company finalises a Sales Credit Note to you, it lowers what you owe it. The note generated here copies its amount into a Purchase Credit Note, which in this platform credits the supplier — so finalising it posts Cr Creditor and you owe the sister company more. The two companies’ books then differ by twice the note, and the intercompany balance will not eliminate. This has been reported to BigLedger as a defect.
The note is created as a draft unless your intercompany setting finalises it automatically. Until the pairing changes, do not finalise it: discard it and record the reduction yourself with a Purchase Debit Note (Internal) against the same supplier. If one was already finalised, void it first. You know it is right when the sister company’s balance on your Creditor Report and your balance on its Debtor Report moved by the same amount.
The file import runs as a job that is missing from the platform’s processor register, so the
Scheduler applet’s Select Processor list does not include it. Follow an import on this applet’s own
File Import listing instead: it shows each file’s Status, Process Status and Error Message. And a clean-up job, where your tenant schedules it,
permanently deletes TEMP documents older than three hours — which is why an abandoned half-typed
credit note may simply be gone.
What it will not do
- It will not send a purchase credit note to the tax authority on its own. A purchase-side e-Invoice is a self-billed document, and the gate requires the header’s self-billed flag to read true. This applet copies that flag off the supplier record, and sets it afterwards only when someone ticks the note on the listing and presses SELF-BILLED (My E-Invoice Admin can do the same). An imported note with no
EINVOICE_SELF_BILLEDcolumn carries the stringNOT SPECIFIEDand is never submitted. - It will not print your credit terms. The printable’s credit-terms field reads a value that nothing in the platform writes, so the printable’s credit-terms field is empty for every document in the platform, not only this one.
- It will not reduce what you owe a supplier. The supplier balance goes up. Use a Purchase Debit Note or a Purchase Return.
- It will not delete a document from the screen. There is no delete button; deletion is an API operation.
- It will not bulk-print or e-mail. There is no Email Template settings page and no SEND EMAIL action in this applet.
- It will not stop you posting the same note twice under two references. The duplicate-reference check is advisory and does not gate SAVE or FINAL.
Troubleshooting
| Symptom | What is actually happening | What to do |
|---|---|---|
The note is FINAL and Trace Document → Journal Txn is empty. The reason BigLedger support reads is MISSING_DEFAULT_GL_CODE: CREDITOR (or CREDITOR_NON_TRADE); no screen shows it until the posting is re-run: Resolve in Trace Document shows the full reason, and CREATE on Ledger And Journal’s Missing Journal shows only its code | FINAL succeeded and the posting job, which runs afterwards, threw. The status is already changed; nothing rolls back. | Add the company GL-code link in Chart of Account, then Financial Report › Error Checking › Trace Document → Missing Journal → Resolve. Resolve, pressed while the cause is still there, posts nothing and shows the reason in the check’s message, so it doubles as the diagnosis. |
The note is FINAL with an empty Journal Txn grid; the reason BigLedger support reads is MISSING_CASHBOOK or MISSING_GL_CODE: STL_MTHD [code] | A Payment-tab settlement item has no cashbook and no GL code. Same after-the-fact failure. | Map the settlement item, then Missing Journal → Resolve in Financial Report’s Trace Document. Where your company also writes cashbook lines for this document’s payment lines, that line is missing too, and Trace Document does not restore it for this document type: ask BigLedger support. |
| You typed a Permit No, saved, and it is gone | It is only stored when Credit Terms has a value, and Credit Terms is disabled unless the supplier carries credit-terms rows. | Add credit-terms rows to the supplier, or record the permit number in Reference or a client document field instead. |
| The Credit Terms column in an extract holds a supplier’s name, e-mail and GL code | It is the supplier snapshot the note carries, written there when Credit Terms is empty. Nothing is lost or corrupted. | Nothing to do on the document. Read credit terms from the supplier record, not from the note. |
| A CSV import “succeeded” but the amounts are against the wrong fields | The importer ignores your file’s heading row and applies the picker’s column list in the picker’s order. | Download Sample Format, keep its exact column order, and check the Checking tab row by row before finalising. |
| An import created documents with no supplier | ENTITY_CODE is optional. | Add the column; the documents already created cannot post and should be discarded. |
| An import created drafts when you expected postings | POSTING_STATUS is read from the first row of each document group and defaults to DRAFT. | Put FINAL on the first row of every group, exact case. |
| The note never reaches the tax authority | A purchase-side e-Invoice is self-billed only, and the flag is copied off the supplier when the supplier is chosen. An imported note with no column carries NOT SPECIFIED. | Set the supplier’s self-billed flag before creating the note, or tick the stored note on the listing and press SELF-BILLED (or convert it from My E-Invoice Admin). |
| SAVE is greyed out on a foreign-currency note | The rate is zero — usually because choosing a supplier with a different currency reset it — and if CANNOT_EDIT_CURRENCY_RATE is on you cannot fix it here. | Refresh from the forex source, or switch the setting off for the user who has to correct it. |
| The supplier’s balance went up | Expected: a purchase credit note posts Cr Creditor. | Use a Purchase Debit Note or a Purchase Return to reduce a balance. |
| One line landed on the opposite side of the journal | The side is the document’s sign times the line amount; a negative line amount flips it. | Key the amount positive and let the document type carry the sign. |
| The whole note posted to one profit centre except one line | Each journal line takes its dimensions from the line first, the header second. | Clear the line-level dimension, or set it on every line deliberately. |
| A half-typed note disappeared | It was still TEMP, and your tenant schedules the three-hour clean-up of TEMP drafts. | Fill branch, location, currency, supplier and one line — that promotes it to ACTIVE automatically — before leaving it. |
| The Custom Document Number box is always empty | It is filled only for a small fixed set of branch codes, and only on FINAL documents. | Use the branch or company document number instead. |
Turning HIDE_GENDOC_FINAL_BUTTON on hid FINAL from everybody | SHOW_GENDOC_FINAL_BUTTON is not registered for this applet, so nobody can hold it. | Turn the setting off, or ask BigLedger to add the code to this applet’s permission list, then grant it under Client Side Permission. |
| The File Import menu is missing | HIDE_FILE_IMPORT_MENU is stored on and the user has no SHOW_FILE_IMPORT_MENU. | Application Settings shows no switch for this setting in this applet (see Read here, with no switch for this applet), so ask BigLedger to add SHOW_FILE_IMPORT_MENU to this applet’s permission list, then grant it under Client Side Permission. |
| The KO For tab is missing on create | HIDE_KO_FOR_TAB is on. | Switch it off in Application Settings. |
Related applets
- Purchase Debit Note (Internal) — the opposite-sign note (Dr Creditor).
- Purchase Invoice (Internal) — same posting side; link the two on Doc Link.
- Purchase Return (Internal) and Purchase Refund Note (Internal) — the stock-moving and cash-refund adjustments.
- Purchase Order (Internal), Purchase GRN (Internal), Supplier Delivery Order — the three KO For sources.
- Payment Voucher (Internal) — settles or contras the balance.
- Sales Credit Note (Internal) — the intercompany source.
- Purchase Credit Note Supplier Access (Internal) — supplier-facing counterpart.
- Creditor Report — where the balance shows up.
- Chart of Account, Doc Item Maintenance, Tax Configuration, Supplier, Organisation — master data.
- My E-Invoice Admin — the e-Invoice queue, and the other place a note becomes self-billed.
Related documentation
- Settings and permissions — the mechanism behind every setting and client-side permission named on this page
- The generic document and What a void undoes
- Purchasing module and its related applets
- MyInvois setup and e-Invoice validation