Purchase Invoice No Stock In (Internal) Applet
Purpose and Overview
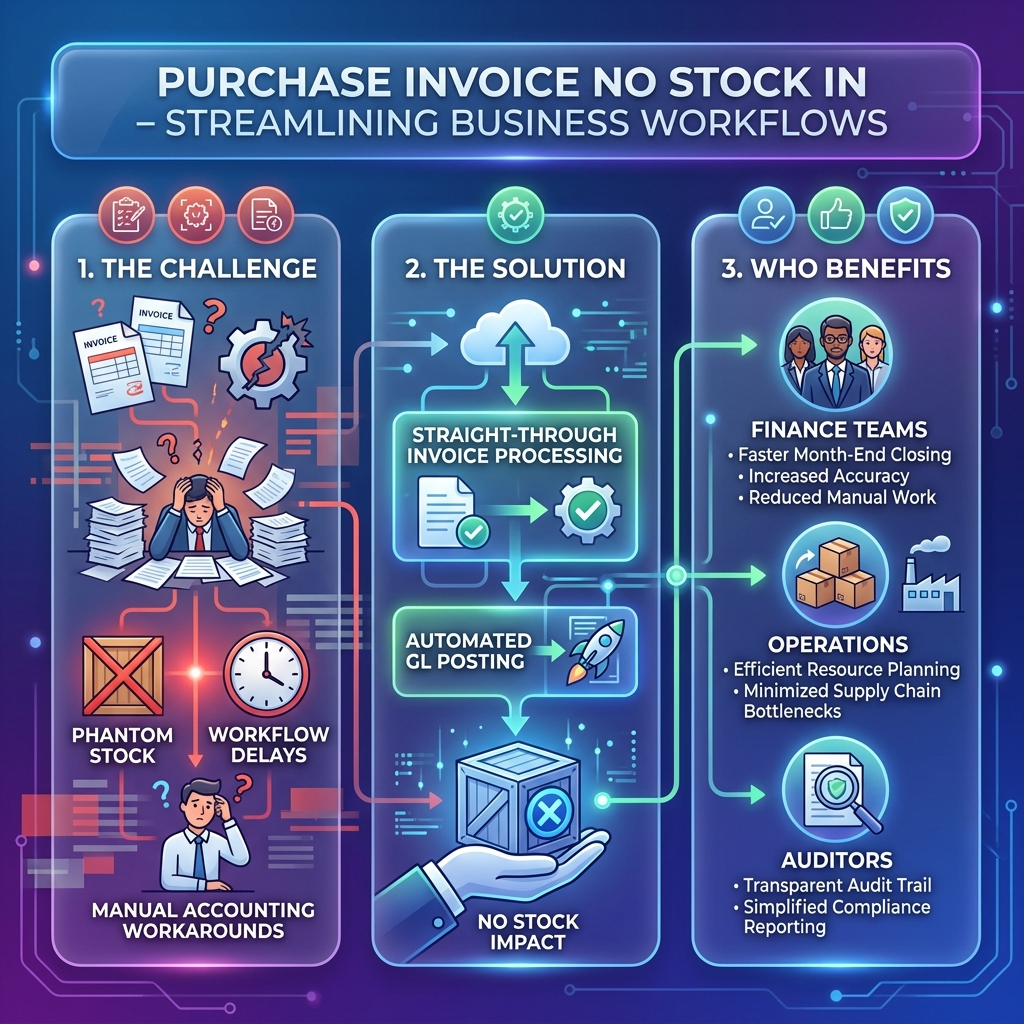
The Purchase Invoice No Stock In Applet enables your finance and procurement teams to record and process purchase invoices for purchases that do not involve physical stock movement. Whether it’s a service contract, rental, professional fee, utility bill, or any other non-inventory expense, this applet ensures accurate accounts payable recording without creating erroneous stock entries.
Applet Value & Benefits
Who Benefits from This Applet?
Finance & Accounts Payable Teams:
- Record supplier invoices for services and overhead costs instantly
- Maintain a clean accounts payable ledger without phantom stock entries
- Automate GL posting to the correct cost accounts
- Manage multi-currency invoices with built-in exchange rate handling
Procurement & Operations Teams:
- Create non-inventory purchase invoices and finalize when ready
- Link invoices back to purchase orders for 3-way matching on services
- Track recurring service costs (e.g. monthly retainer, SaaS subscriptions)
- Attach supporting documents (contracts, statements of work) directly on the invoice
Management & Finance Leads:
- Gain full visibility into non-inventory spend by supplier, department, or cost center
- Control document lifecycle with FINAL, VOID, and DISCARD actions
- Monitor overhead spending against budget in real time
- Drill into invoice lines for granular cost analysis
External Auditors & Compliance:
- Complete audit trail from invoice creation to GL posting
- Tax (SST/GST/VAT) computation recorded per line
- Supporting attachments stored alongside each invoice
What Problems Does This Solve?
The Non-Inventory Invoice Problem:
Many ERP systems force every purchase invoice through a goods receipt process, causing issues for service-based or overhead purchases:
- Stock modules report phantom stock movements for services
- Finance teams create workarounds that break audit trails
- Service invoices are delayed waiting for a GRN that will never exist
- Cost allocation to correct departments is manual and error-prone
The Purchase Invoice No Stock In Solution:
- Straight-through processing — Post service invoices directly to the AP ledger without a GRN
- Flexible cost allocation — Allocate costs to departments, profit centers, and projects on each line
- Tax-ready — Compute SST, GST, or VAT per line automatically
- PO-linked or standalone — Reference a purchase order or record as a standalone invoice
- Document lifecycle control — DRAFT → FINAL → VOID/DISCARD with permission-based access
- Document attachments — Store contracts, delivery confirmations, or statements directly on the invoice
Key Features Overview
Key Concepts
Understanding the Invoice Framework
Every purchase invoice processed through this applet must address three fundamental aspects:
| Aspect | Component | Practical Example |
|---|---|---|
| Who is invoicing? | Supplier / Vendor | Acme Consulting (supplier) |
| What is being charged? | Invoice Line Items & Cost Accounts | Professional Services Fee — RM 5,000 |
| How is it processed? | Document Lifecycle & GL Posting | CREATE (draft) → FINAL (post to AP) → Settlement |
Invoice Hierarchy Structure
Organisation
│
├── Supplier ──→ WHO is billing you?
│   │
│   └── Purchase Invoice (No Stock In) ──→ WHAT is being charged?
│       │
│       ├── Invoice Header ──→ Date, currency, credit terms, reference
│       │
│       └── Invoice Lines ──→ Service description, amount, tax, GL account
│           │
│           └── Cost Allocation ──→ Department, Profit Center, Project
│
└── Document Lifecycle ──→ HOW it gets finalized and posted
    │
    └── DRAFT → FINAL → GL Posting ──→ AP ledger + Cost account + Tax account
Key Distinction: With vs. Without Stock In
| Feature | Purchase GRN / Standard Invoice | Purchase Invoice No Stock In |
|---|---|---|
| Stock movement | ✓ Yes — creates stock entries | ✗ No — no stock impact |
| Requires GRN | ✓ Yes | ✗ No |
| Suitable for | Physical goods, raw materials | Services, overheads, intangibles |
| Examples | Office furniture, spare parts | IT subscriptions, legal fees, rent |
| AP posting | After GRN is posted | Direct upon invoice finalization (FINAL) |
Quick Start Guide
Get up and running quickly with these essential workflows.
For Finance: Create Your First Invoice
Goal: Record a service invoice from a supplier in 5 steps.
- Navigate: Go to Purchase Invoice (No Stock In) from the sidebar
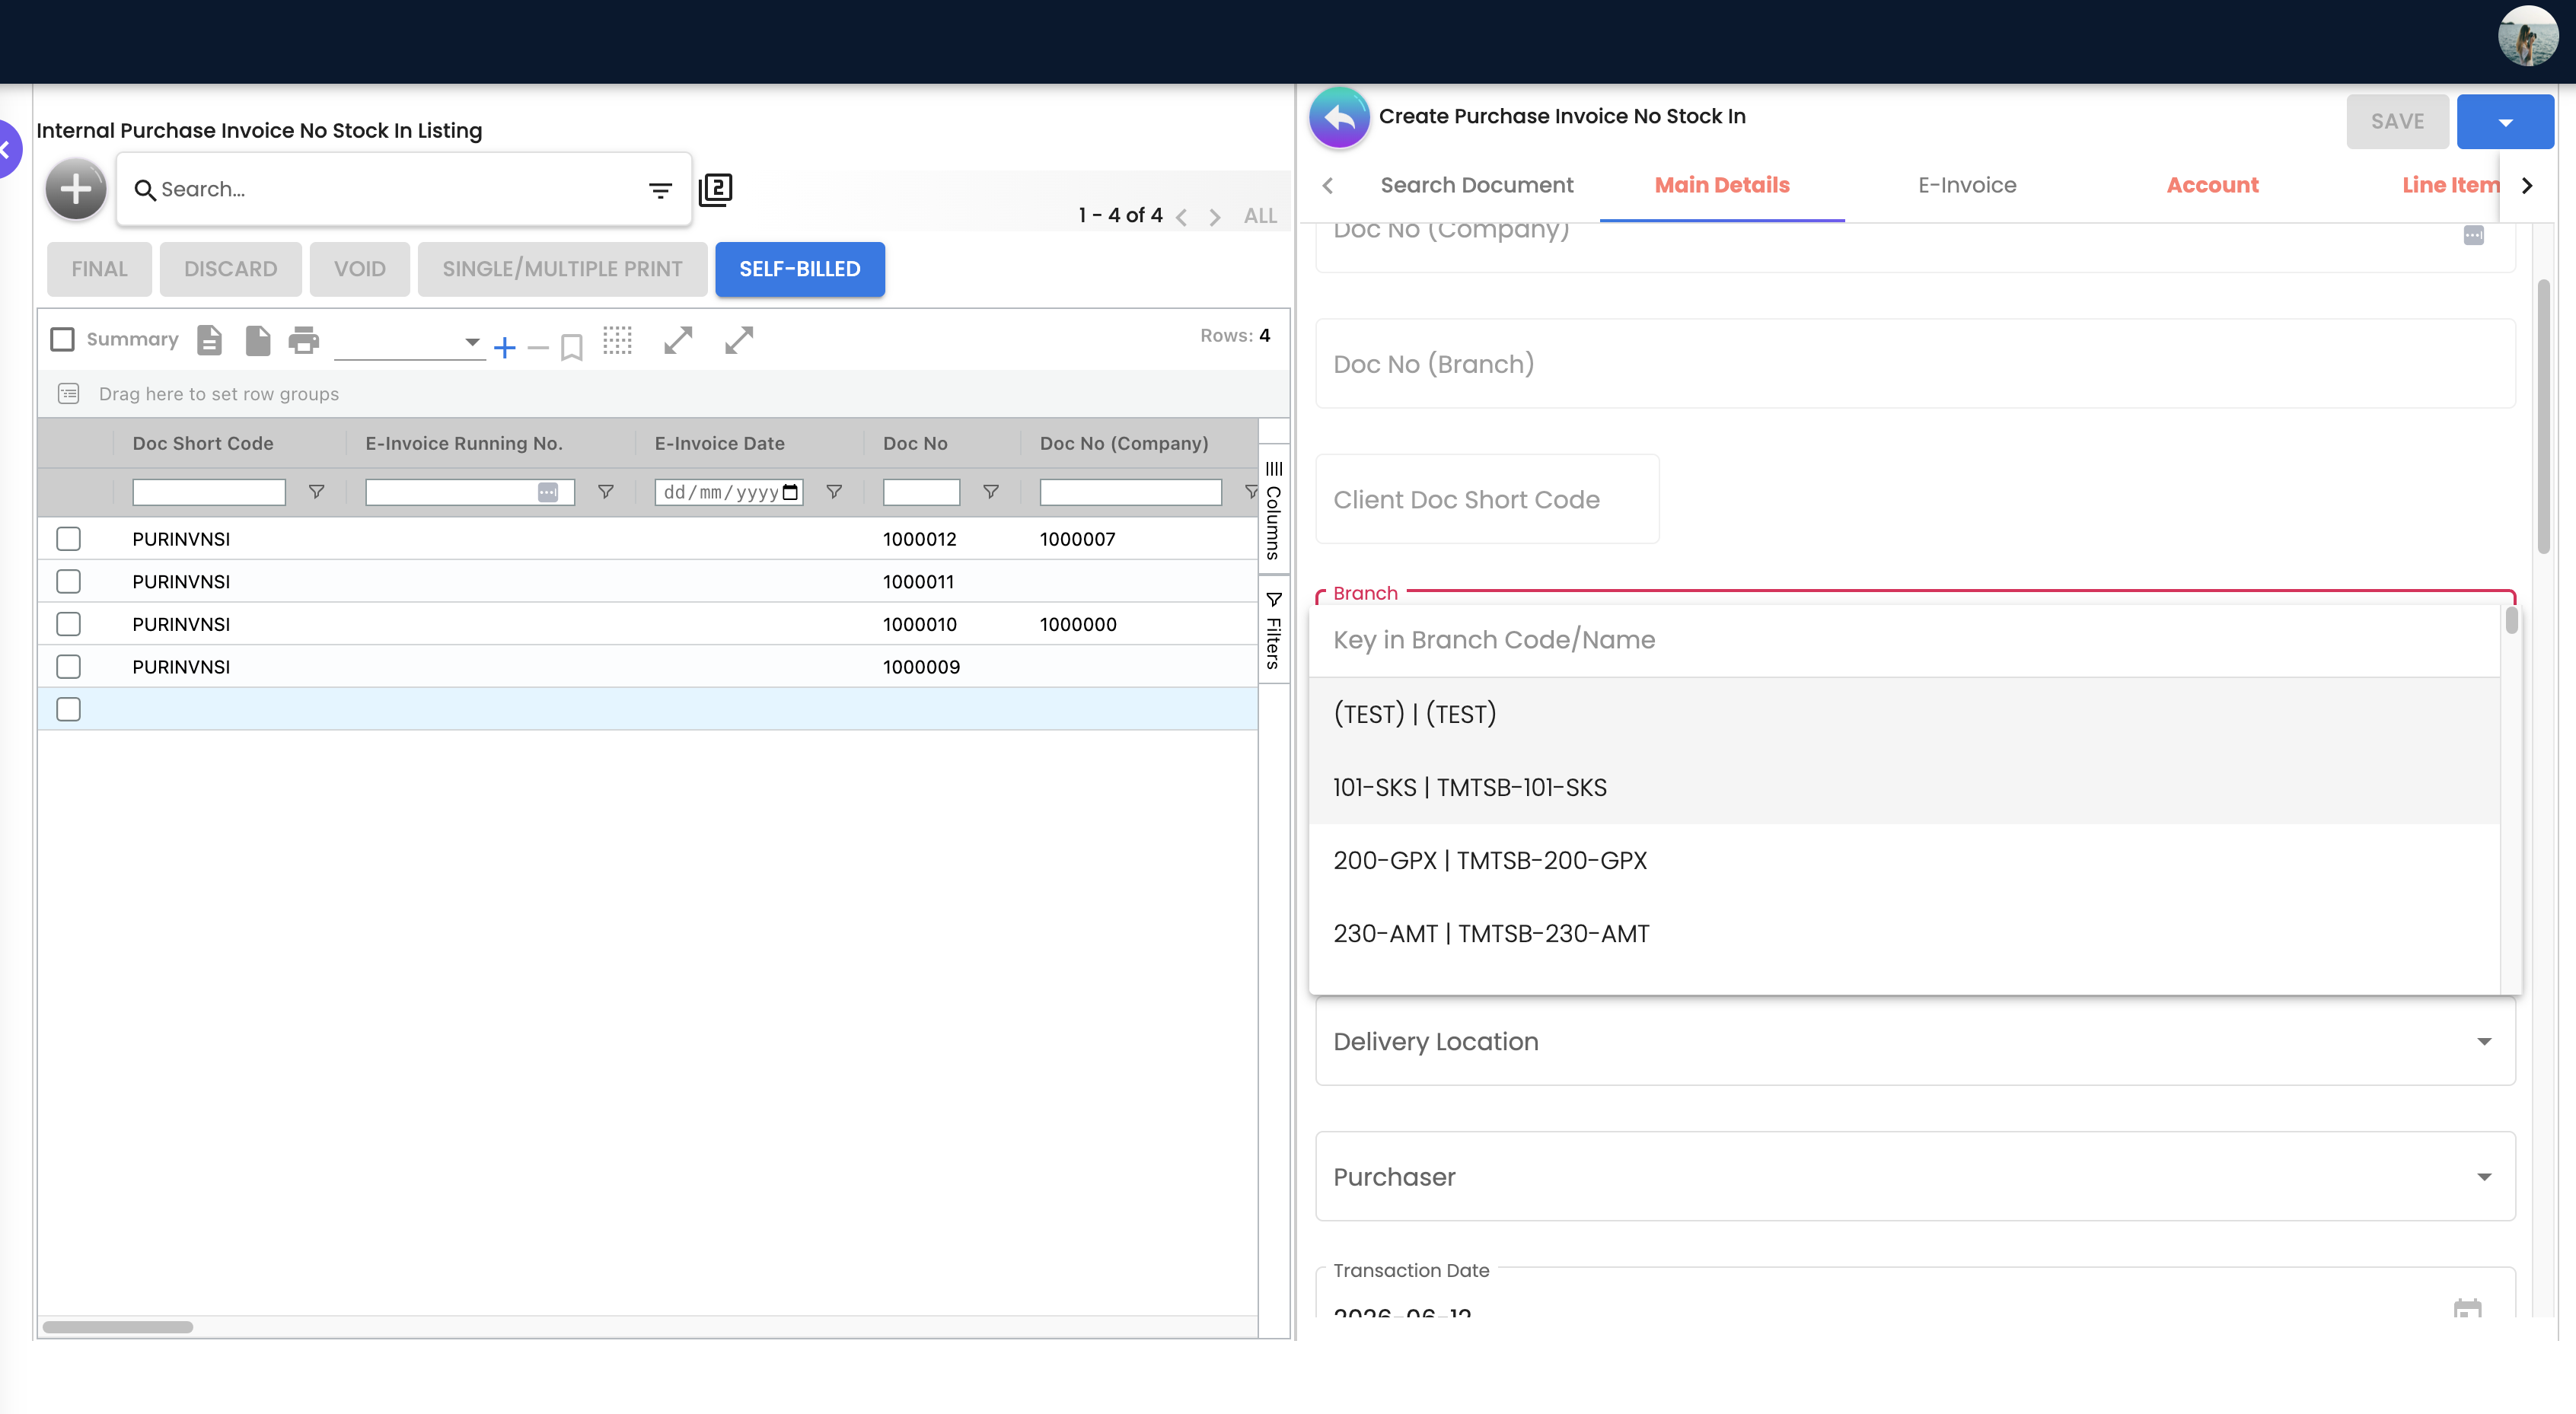
- Create Header: Click "+" → Fill in:
- Supplier: Select your vendor (e.g., “Acme Consulting Sdn Bhd”)
- Transaction Date: Date on the supplier’s invoice
- Credit Terms: Net 30, Net 60, or as agreed
- Reference No: The supplier’s invoice number (for reconciliation)
- Currency: MYR or foreign currency (system will apply exchange rate)
- Branch / Location: Your company branch receiving the service
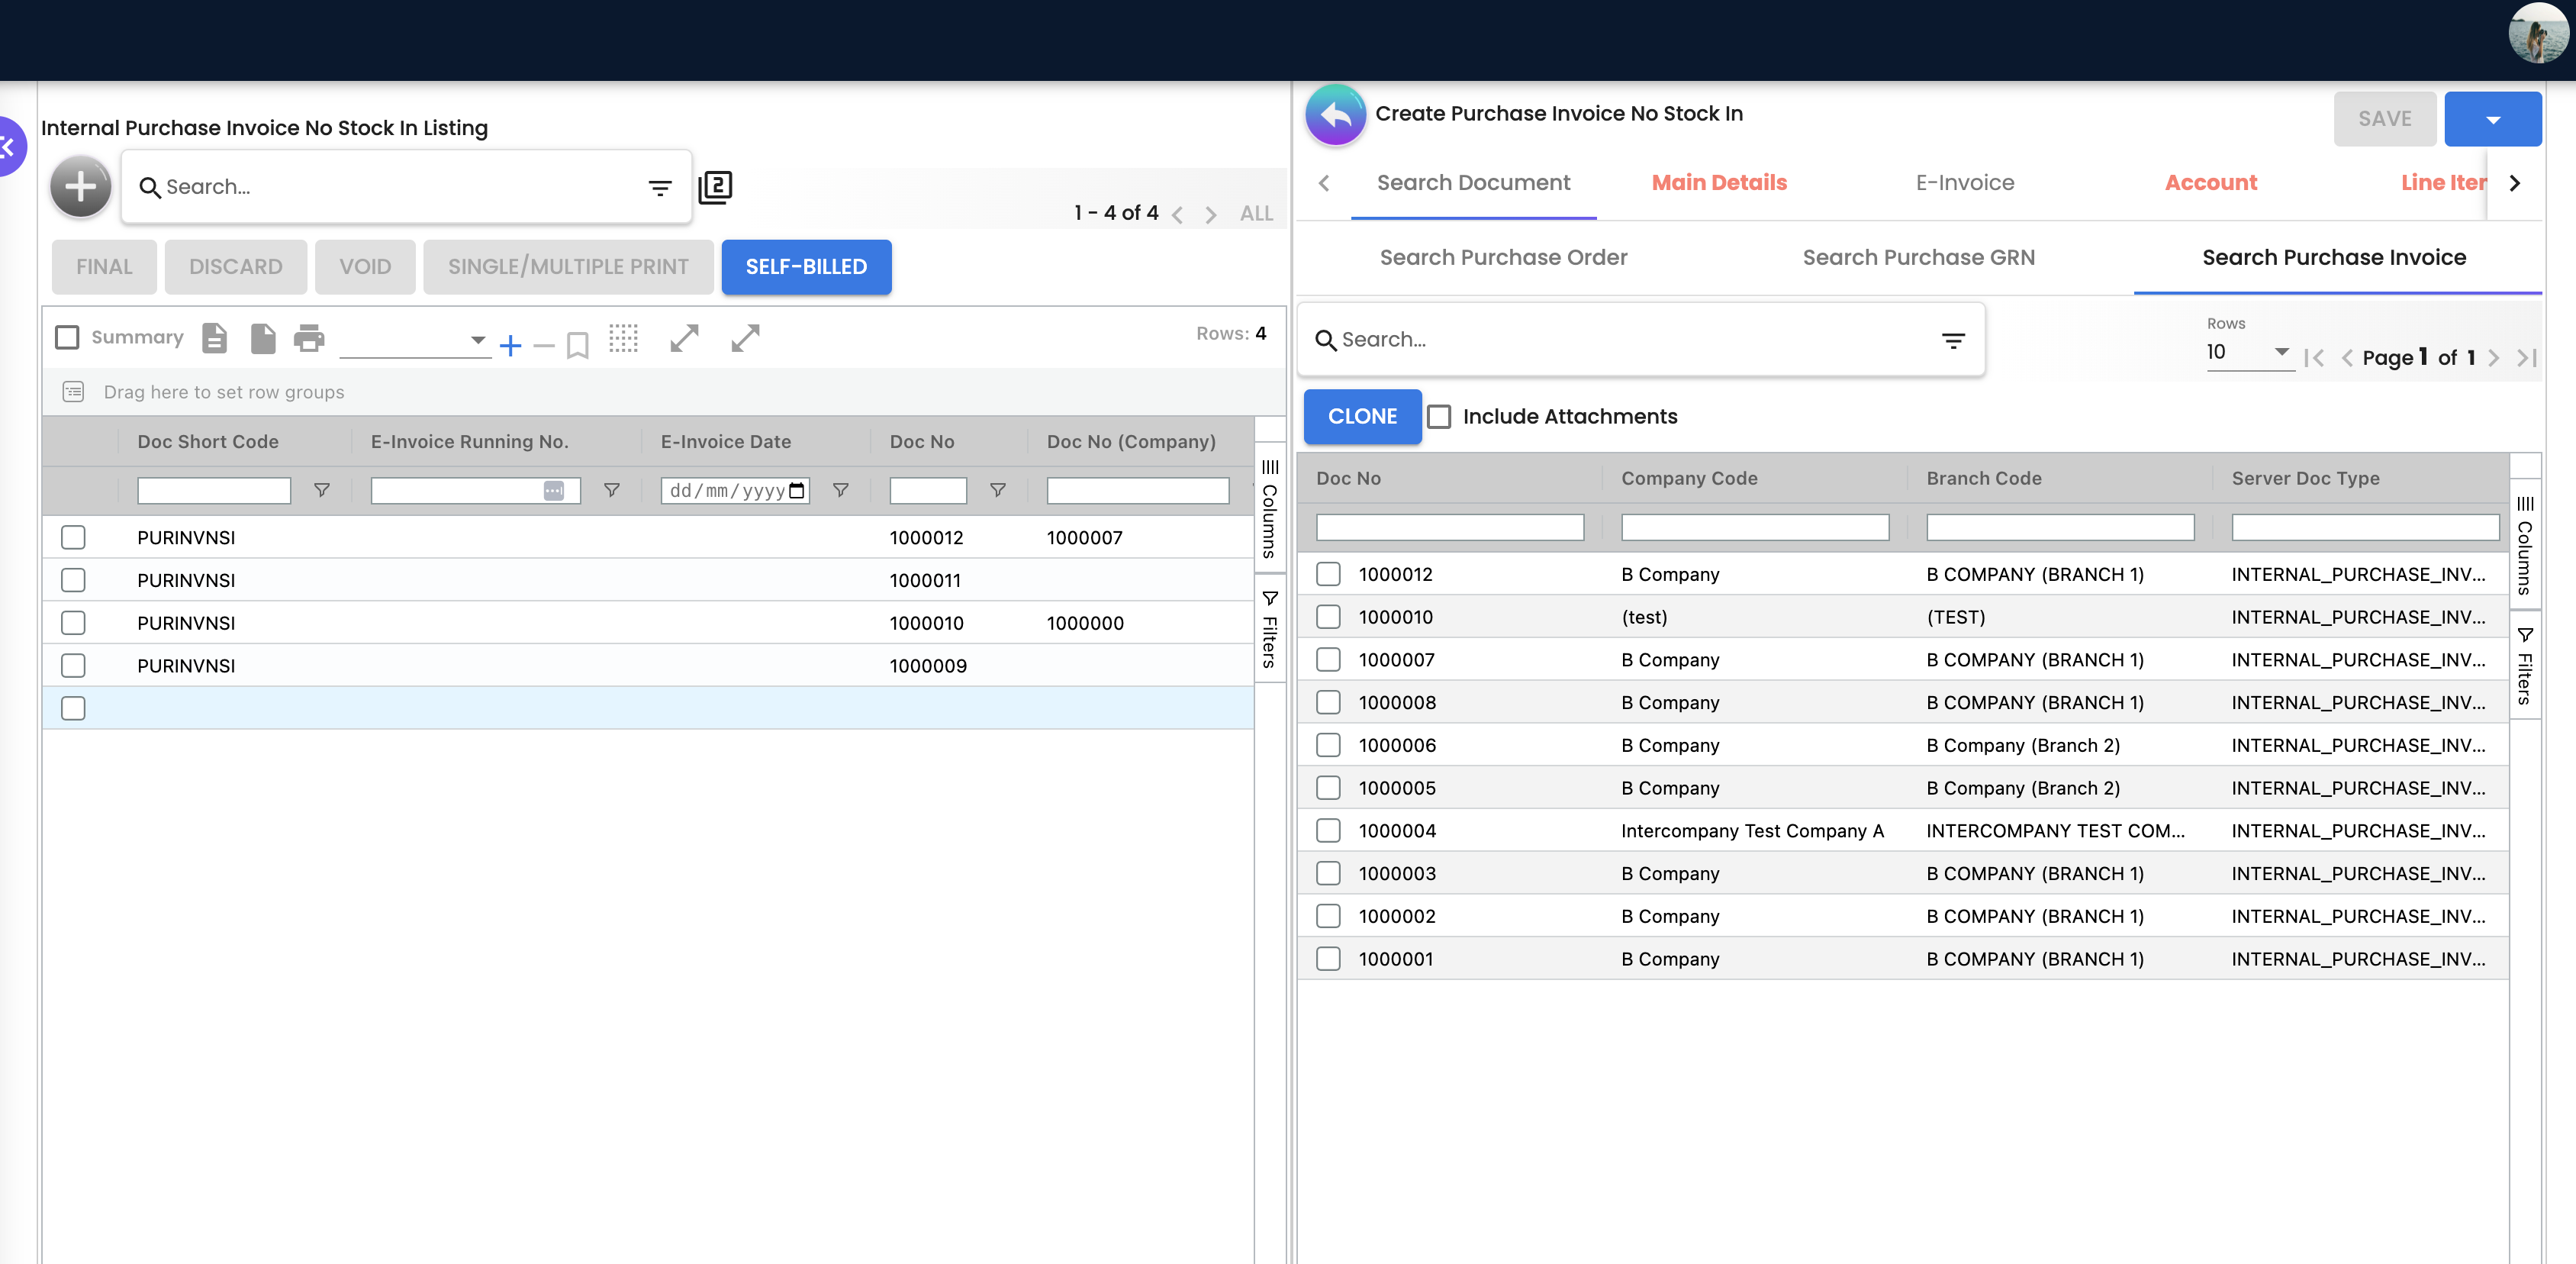
The Search Document tab allows you to search and clone from an existing Purchase Invoice, Purchase Order, or Purchase GRN.
- Add Lines: Click “Add Line” for each expense:
- Description: What the service is (e.g., “Monthly SaaS Subscription – April”)
- Account: GL cost account (e.g., “IT Expenses”)
- Quantity & Unit Price: e.g., 1 × RM 2,500
- Tax Code: Select SST/GST/VAT code if applicable
- Department / Profit Center / Project: Cost allocation
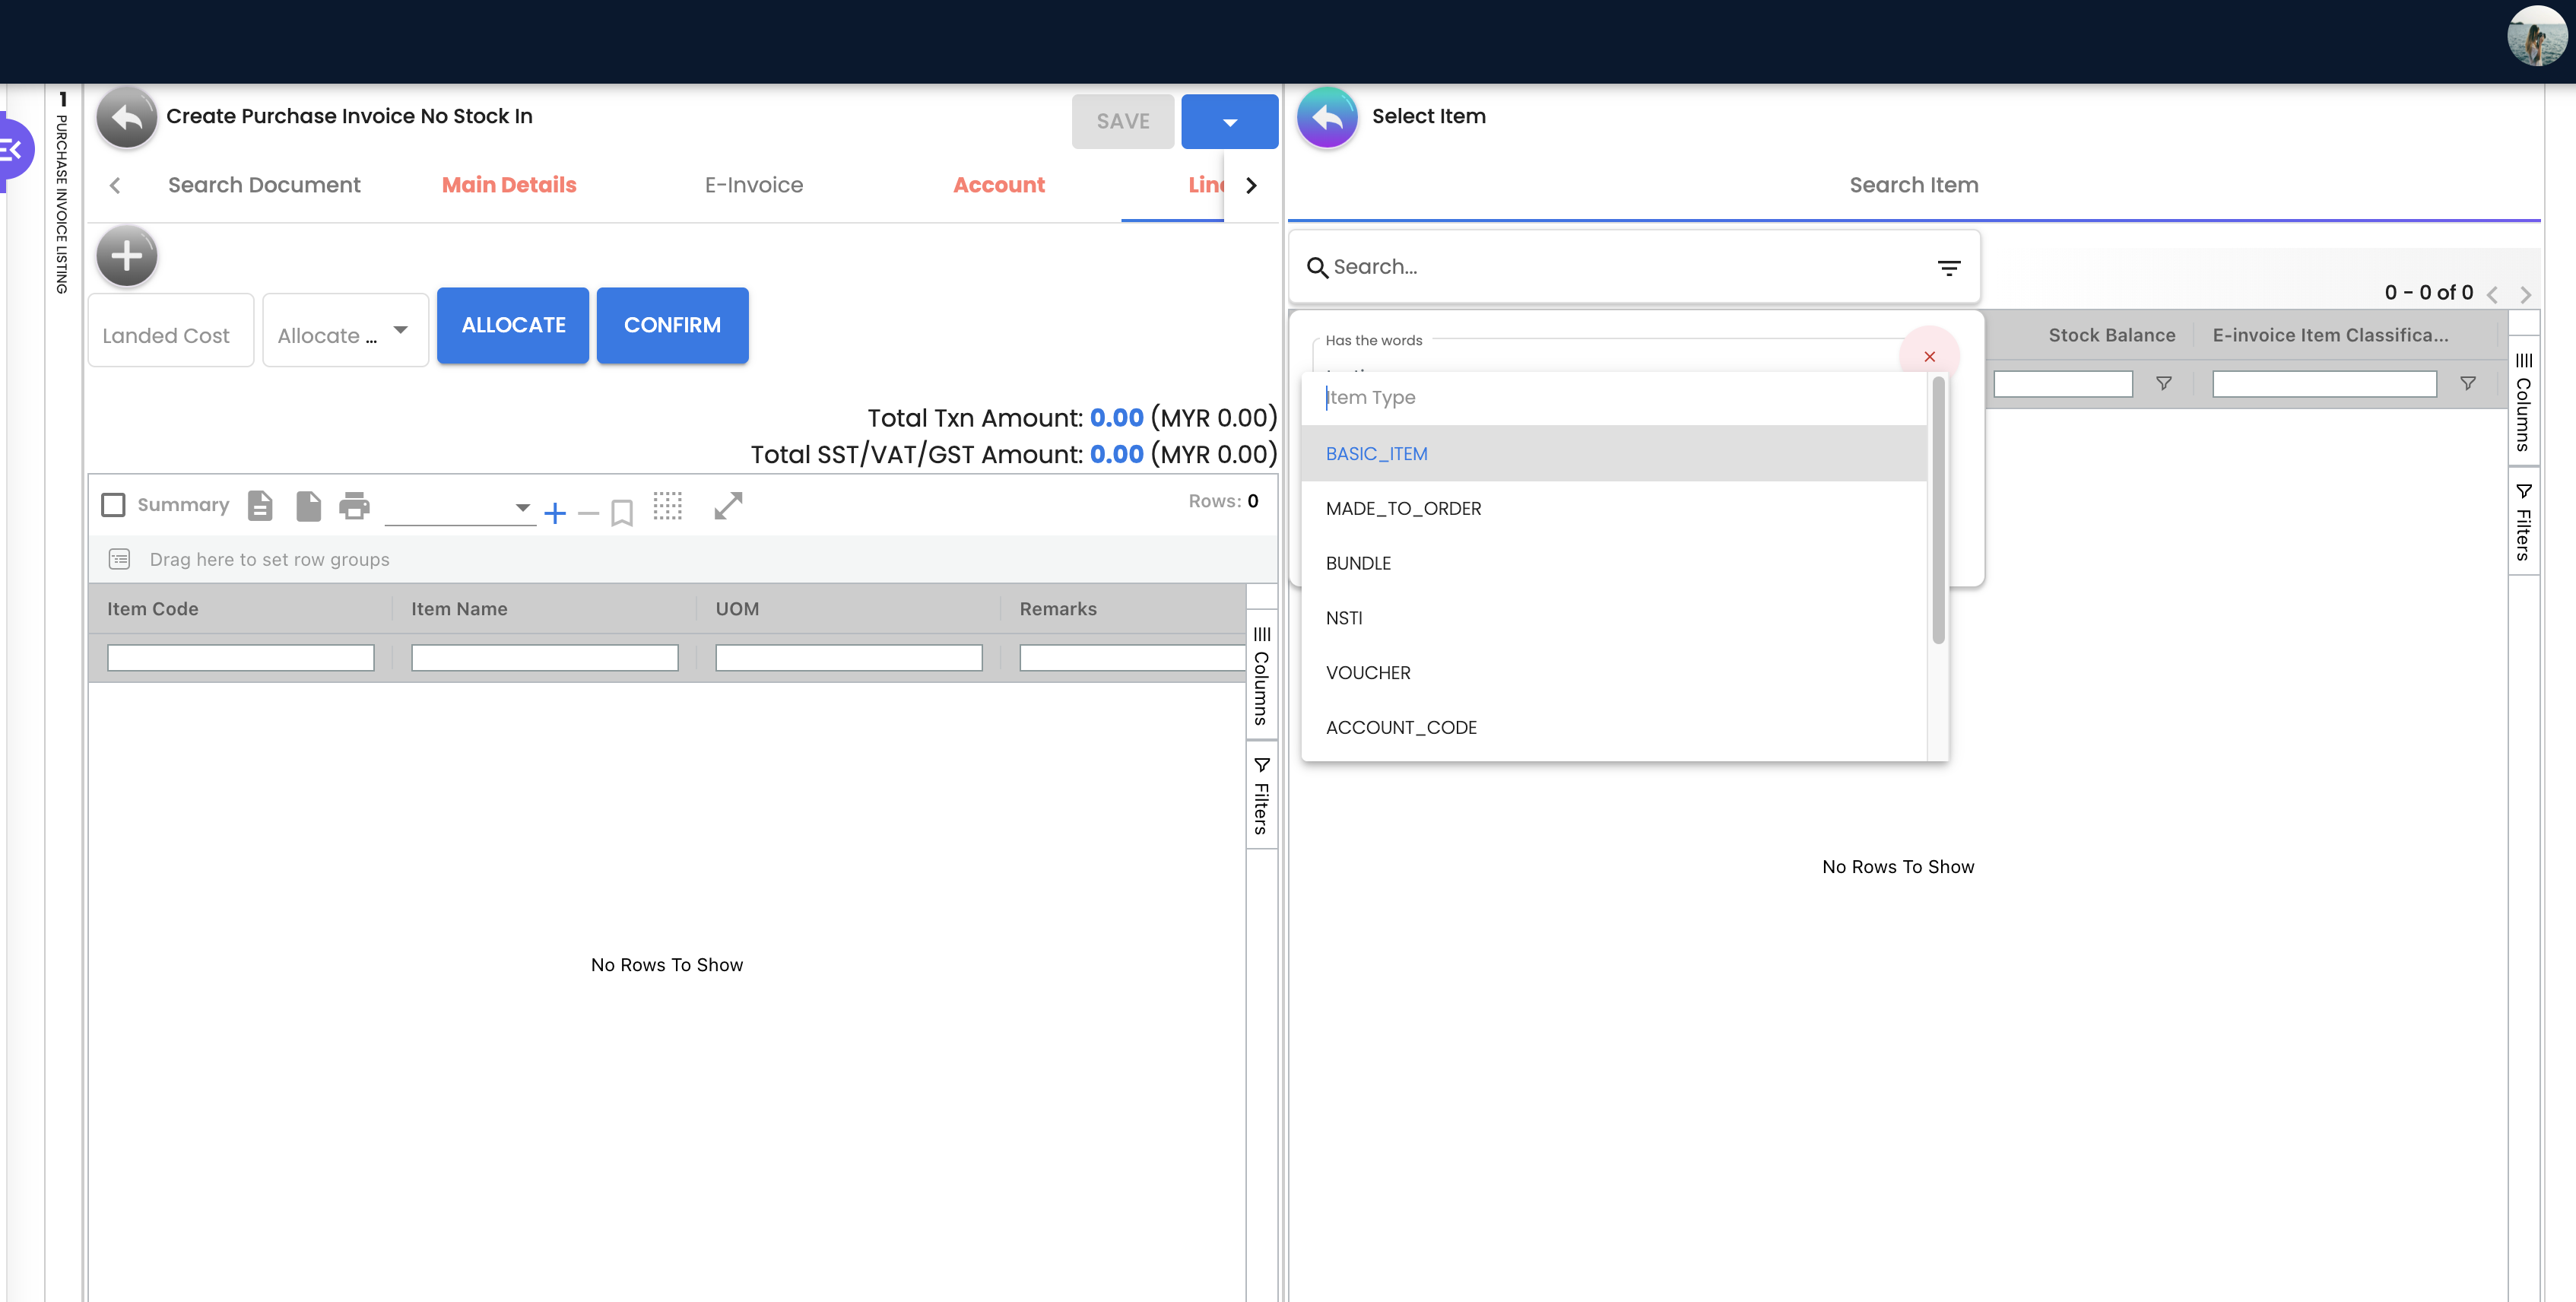
The Line Items tab showing the Select Item dialog with Item Type filter options: BASIC_ITEM, MADE_TO_ORDER, BUNDLE, NSTI, VOUCHER, and ACCOUNT_CODE.
- Attach Supporting Docs: Upload the supplier’s invoice PDF or any contract
- Verify Tax & Totals: Ensure the calculated tax amount matches the physical supplier invoice.
- Create: Click CREATE to save the invoice as a DRAFT.
- Finalize: When ready, click FINAL from the listing or edit screen to finalize the invoice and post to the AP ledger. You can also use SAVE to update a draft without finalizing.
What happens next? Once finalized (FINAL), the invoice is posted to the AP ledger and cost accounts automatically. Use VOID to reverse a finalized invoice, or DISCARD to remove a draft.
For Operations: Import Invoices via File
Goal: Bulk create multiple invoices without manual entry.
- Navigate: Go to File Import from the sidebar
- Download Template: Download the sample template (
Purchase_Invoice_Master_Data_Template.csv) - Choose Delimiter: Select PIPE or COMMA as the CSV delimiter
- Prepare Data:
- Fill in Supplier, Date, Reference No, Currency, Branch
- Add line item details (Description, Amount, Tax, GL Account)
- Upload: Select your completed CSV file and click Upload
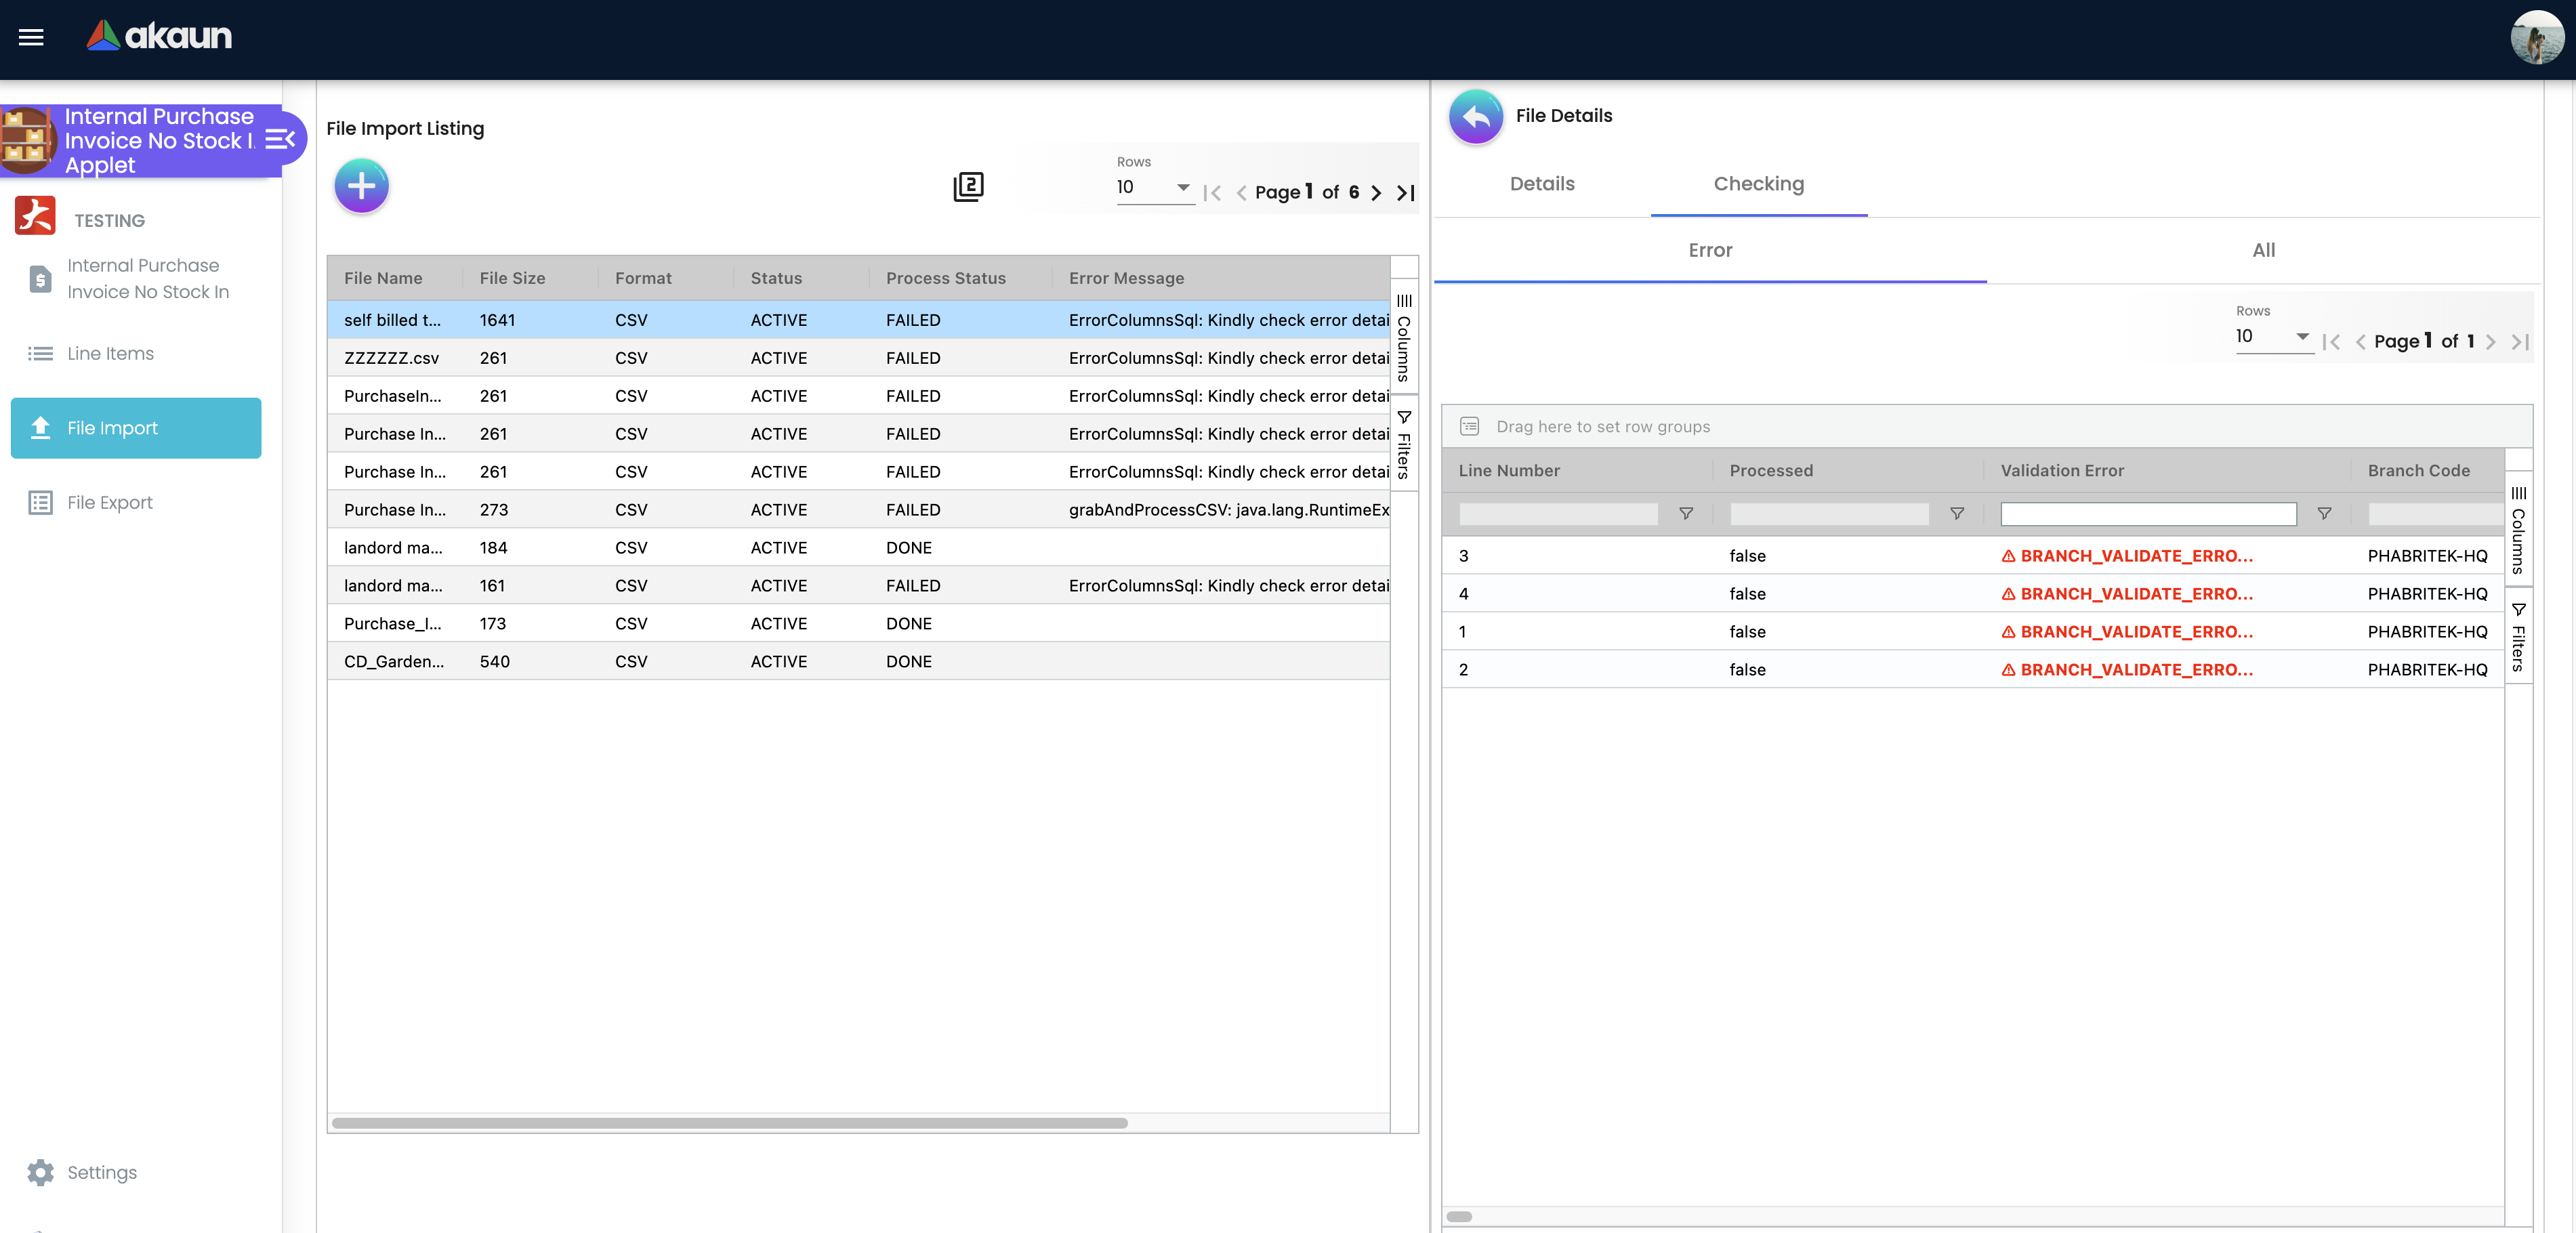
- Check Validation: Click the uploaded file → go to the Checking tab to review validation results. The Error grid shows lines with issues; the All grid shows every line and its status
- Process: Once all lines pass validation, click Process Import to create the invoices
SHOW_FILE_IMPORT_MENU permission. Contact your admin if you cannot see it.For Admins: Initial System Setup
Goal: Configure the applet before Finance starts processing invoices.
Step 1: Application Settings (Settings > Application Settings)
- Make required fields mandatory (e.g., Reference No, Cost Account)
- Hide fields irrelevant to your business (e.g., Permit No)
Step 2: Default Selections (Settings > Default Selection)
- Pre-fill Branch and Location to speed up data entry
- Set Floating Point Precision (2–4 decimal places)
- Configure Transaction Date Logic and Details Tab Ordering
Step 3: Printable Format (Settings > Printable Format Settings)
- Configure the invoice print layout for internal voucher printing
Step 4: Branch Settings (Settings > Branch Settings)
- Configure per-branch settings: Item Category Filter, Pricing Scheme, Default Settlement Method
Step 5: Permissions (via platform settings)
- Assign create/edit rights to Finance team
- Control visibility of FINAL, VOID, DISCARD, CLONE actions per role
- Configure file import/export menu visibility
Step 6: Knock Off Settings (Settings > Knock Off Settings, if used)
- Configure knock-off preferences for how invoices match and settle against payments or credit notes
Step 7: Test
- Create a test invoice, finalize it (FINAL), and verify the GL posting is correct
New to the applet? Start here:
- Finance — Create a test invoice using a dummy supplier to get familiar with the line entry
- Finance Leads — Practice the FINAL, VOID, and DISCARD actions on a test document
- Admins — Review Configuration & Settings below before going live
Document Status & Actions
Every invoice follows a defined lifecycle. Understanding the status flow and available actions is essential for daily use.
Status Flow
CREATE → DRAFT (status: TEMP during edit)
           │
           ├── SAVE ──→ Update draft (stays DRAFT)
           ├── FINAL ──→ Finalized (GL posted, AP recorded)
           │               │
           │               └── VOID ──→ Reversed (GL entries reversed)
           │
           └── DISCARD ──→ Removed (draft deleted)
Action Reference
| Action | Available On | What It Does |
|---|---|---|
| CREATE | New invoice | Saves a new invoice as DRAFT |
| SAVE | DRAFT invoices | Updates the draft without finalizing |
| FINAL | DRAFT invoices | Finalizes the invoice and posts GL entries to the AP ledger. Available from the listing (bulk) or the edit screen (single) |
| VOID | FINAL invoices | Reverses a finalized invoice and its GL entries. Blocked if the invoice is linked to a purchase return or if e-invoice is enabled on edit |
| DISCARD | DRAFT invoices | Permanently removes a draft invoice. Available from the listing (bulk) or the edit screen (single) |
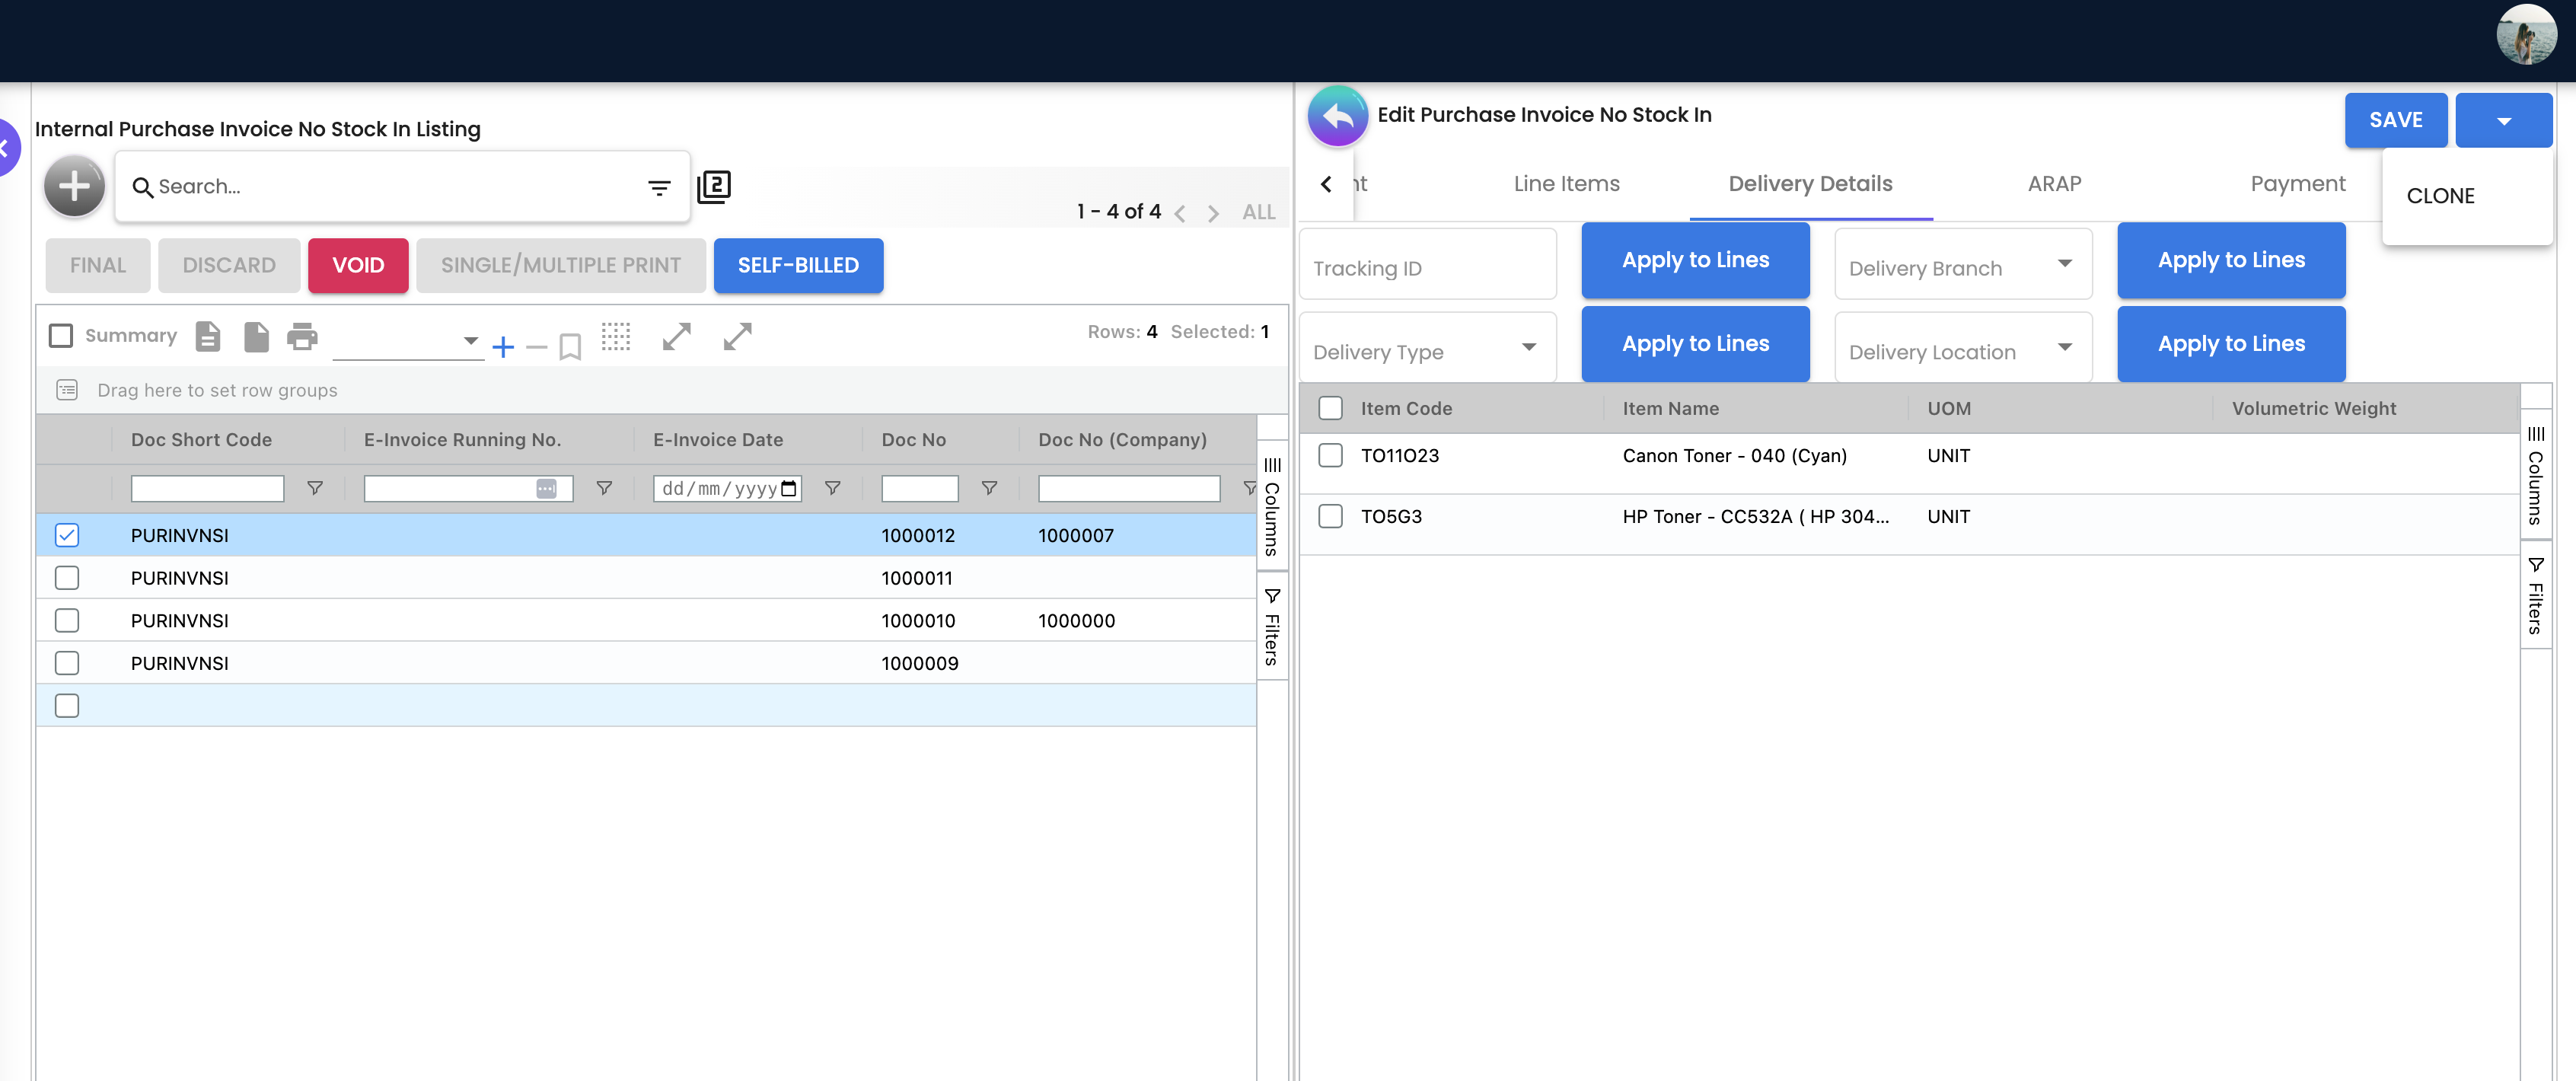
| CLONE | Edit screen | Duplicates the invoice as a new draft (from the edit screen dropdown menu) |
Document Locking
When a user opens an invoice for editing, the document is locked. Other users viewing the same invoice will see it as read-only until the editing user saves or exits.
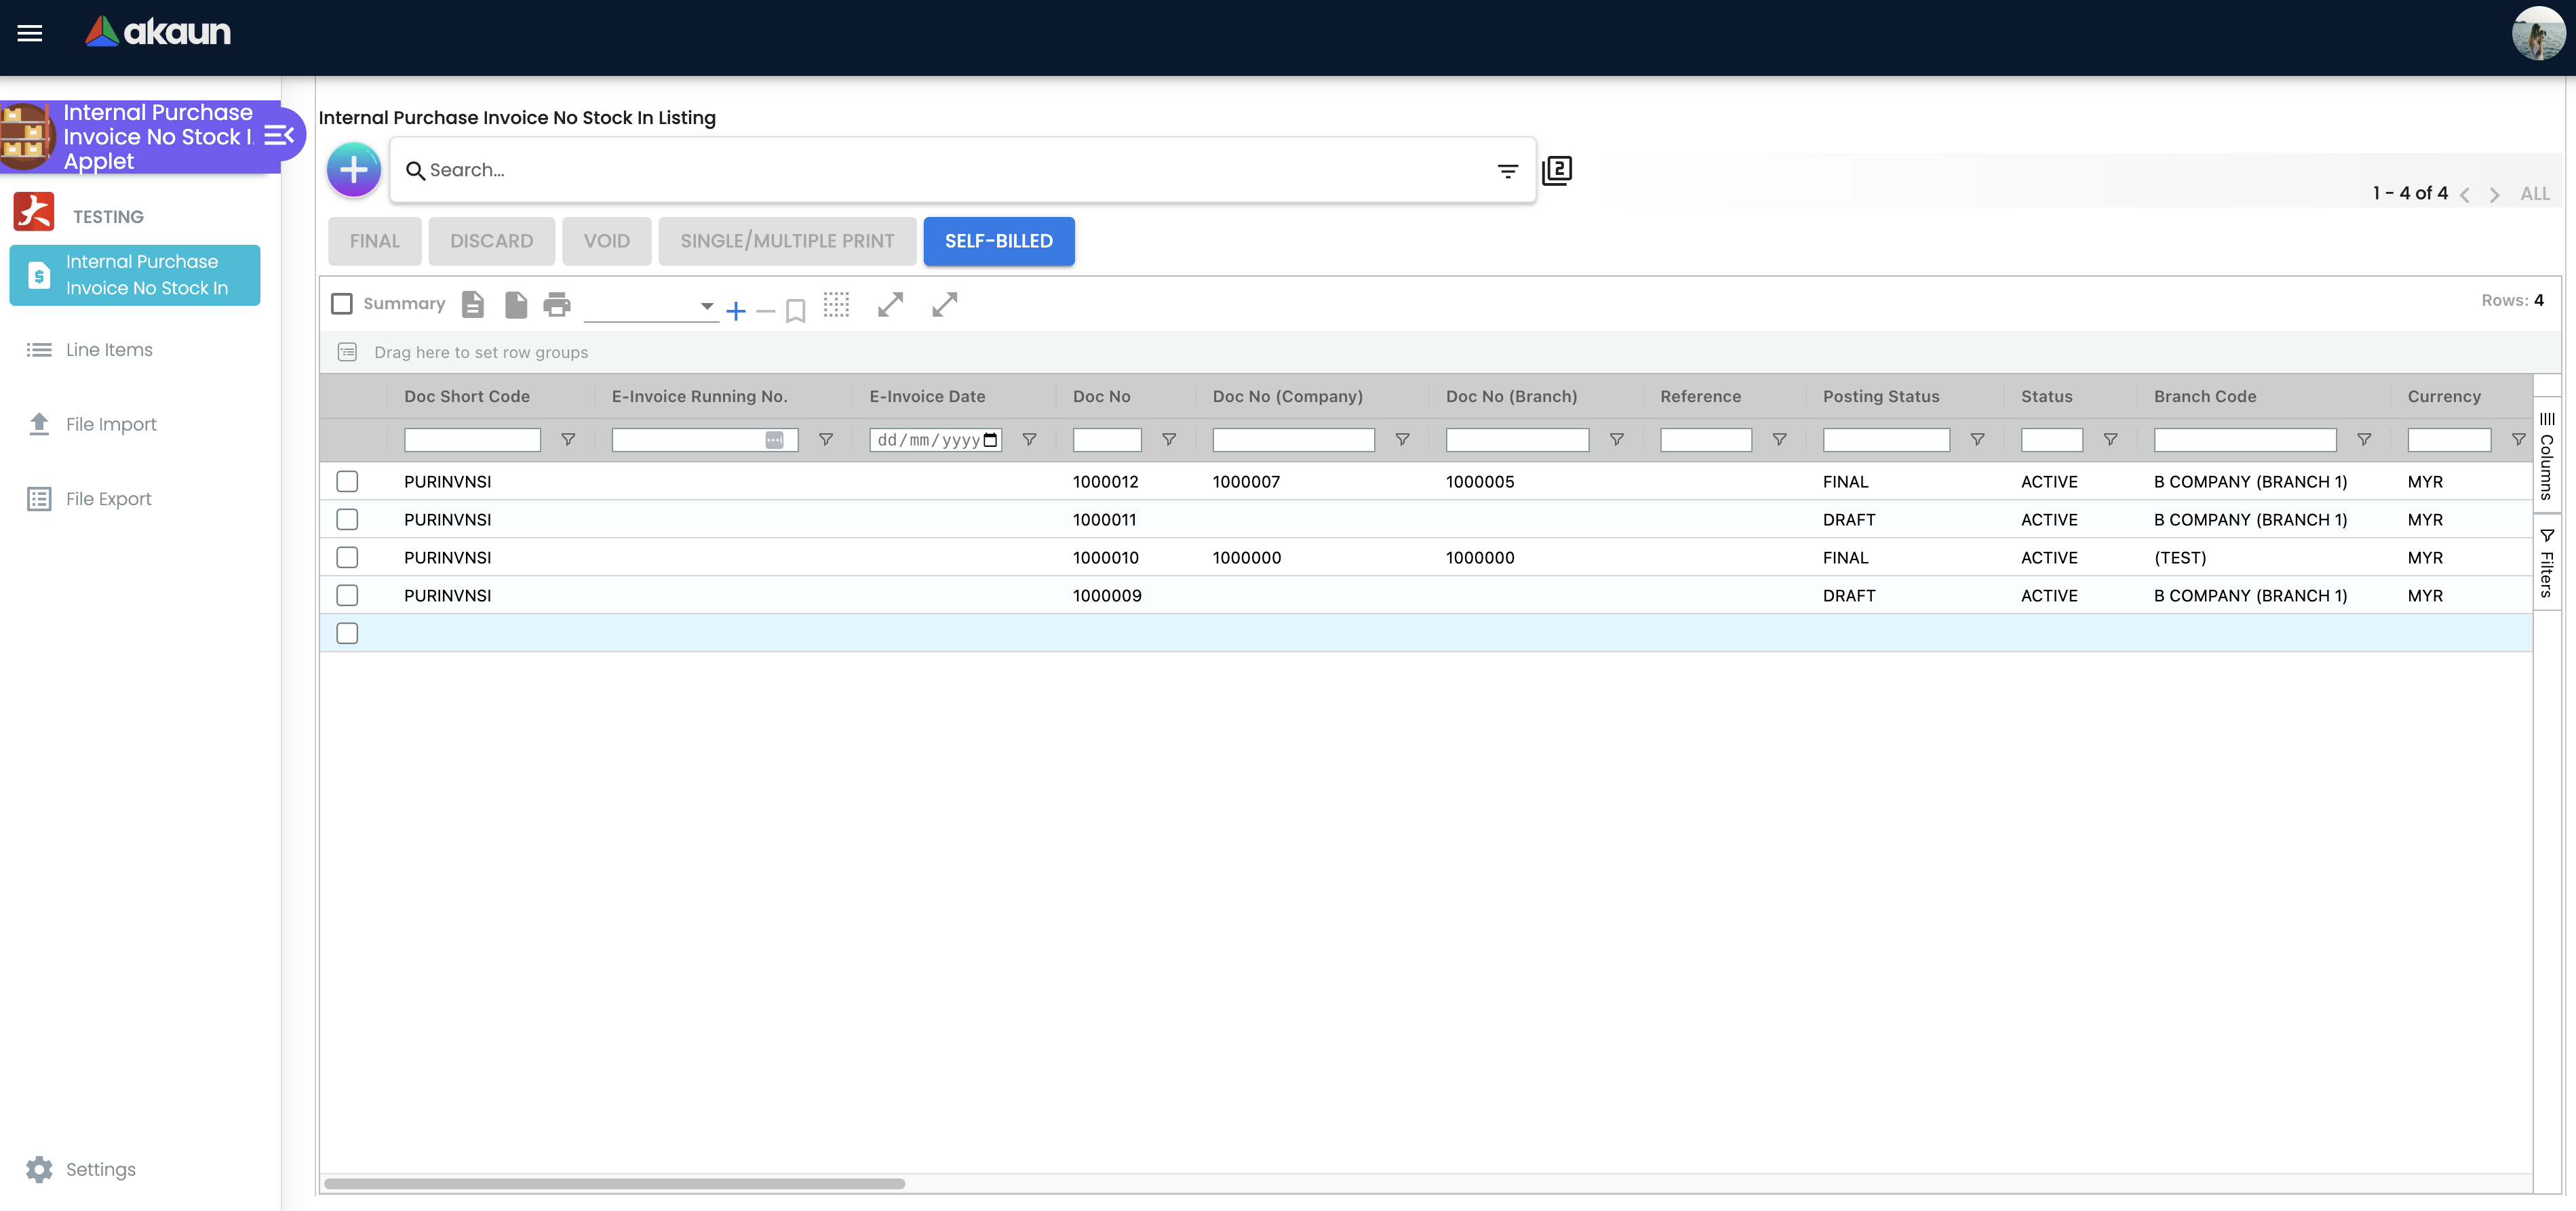
Invoice Listing
The main landing view shows all non-stock purchase invoices your user has access to, with server-side pagination and advanced search.
Typical columns:
- Invoice No
- Supplier Name
- Transaction Date
- Total Amount
- Currency
- Document Status (DRAFT / FINAL / VOID / DISCARDED)
- Created By
- Updated Date
Additional listing columns (visibility controlled by permissions):
- ARAP columns: ARAP PNS, Settlement, Doc Open, Contra, Balance
- E-Invoice columns: E-Invoice Running No., E-Invoice Date, Billing Frequency/Period, Self Billed?
Listing features:
- Fuzzy keyword search — type 3+ characters to search across document fields
- Bulk actions — select multiple invoices to FINAL, DISCARD, or SELF-BILLED
- Printing — SINGLE or MULTIPLE PRINT from listing (requires printable format configured)
- Row grouping and column toggle (SINGLE/DOUBLE layout)
- Filter persistence — filters are retained between sessions
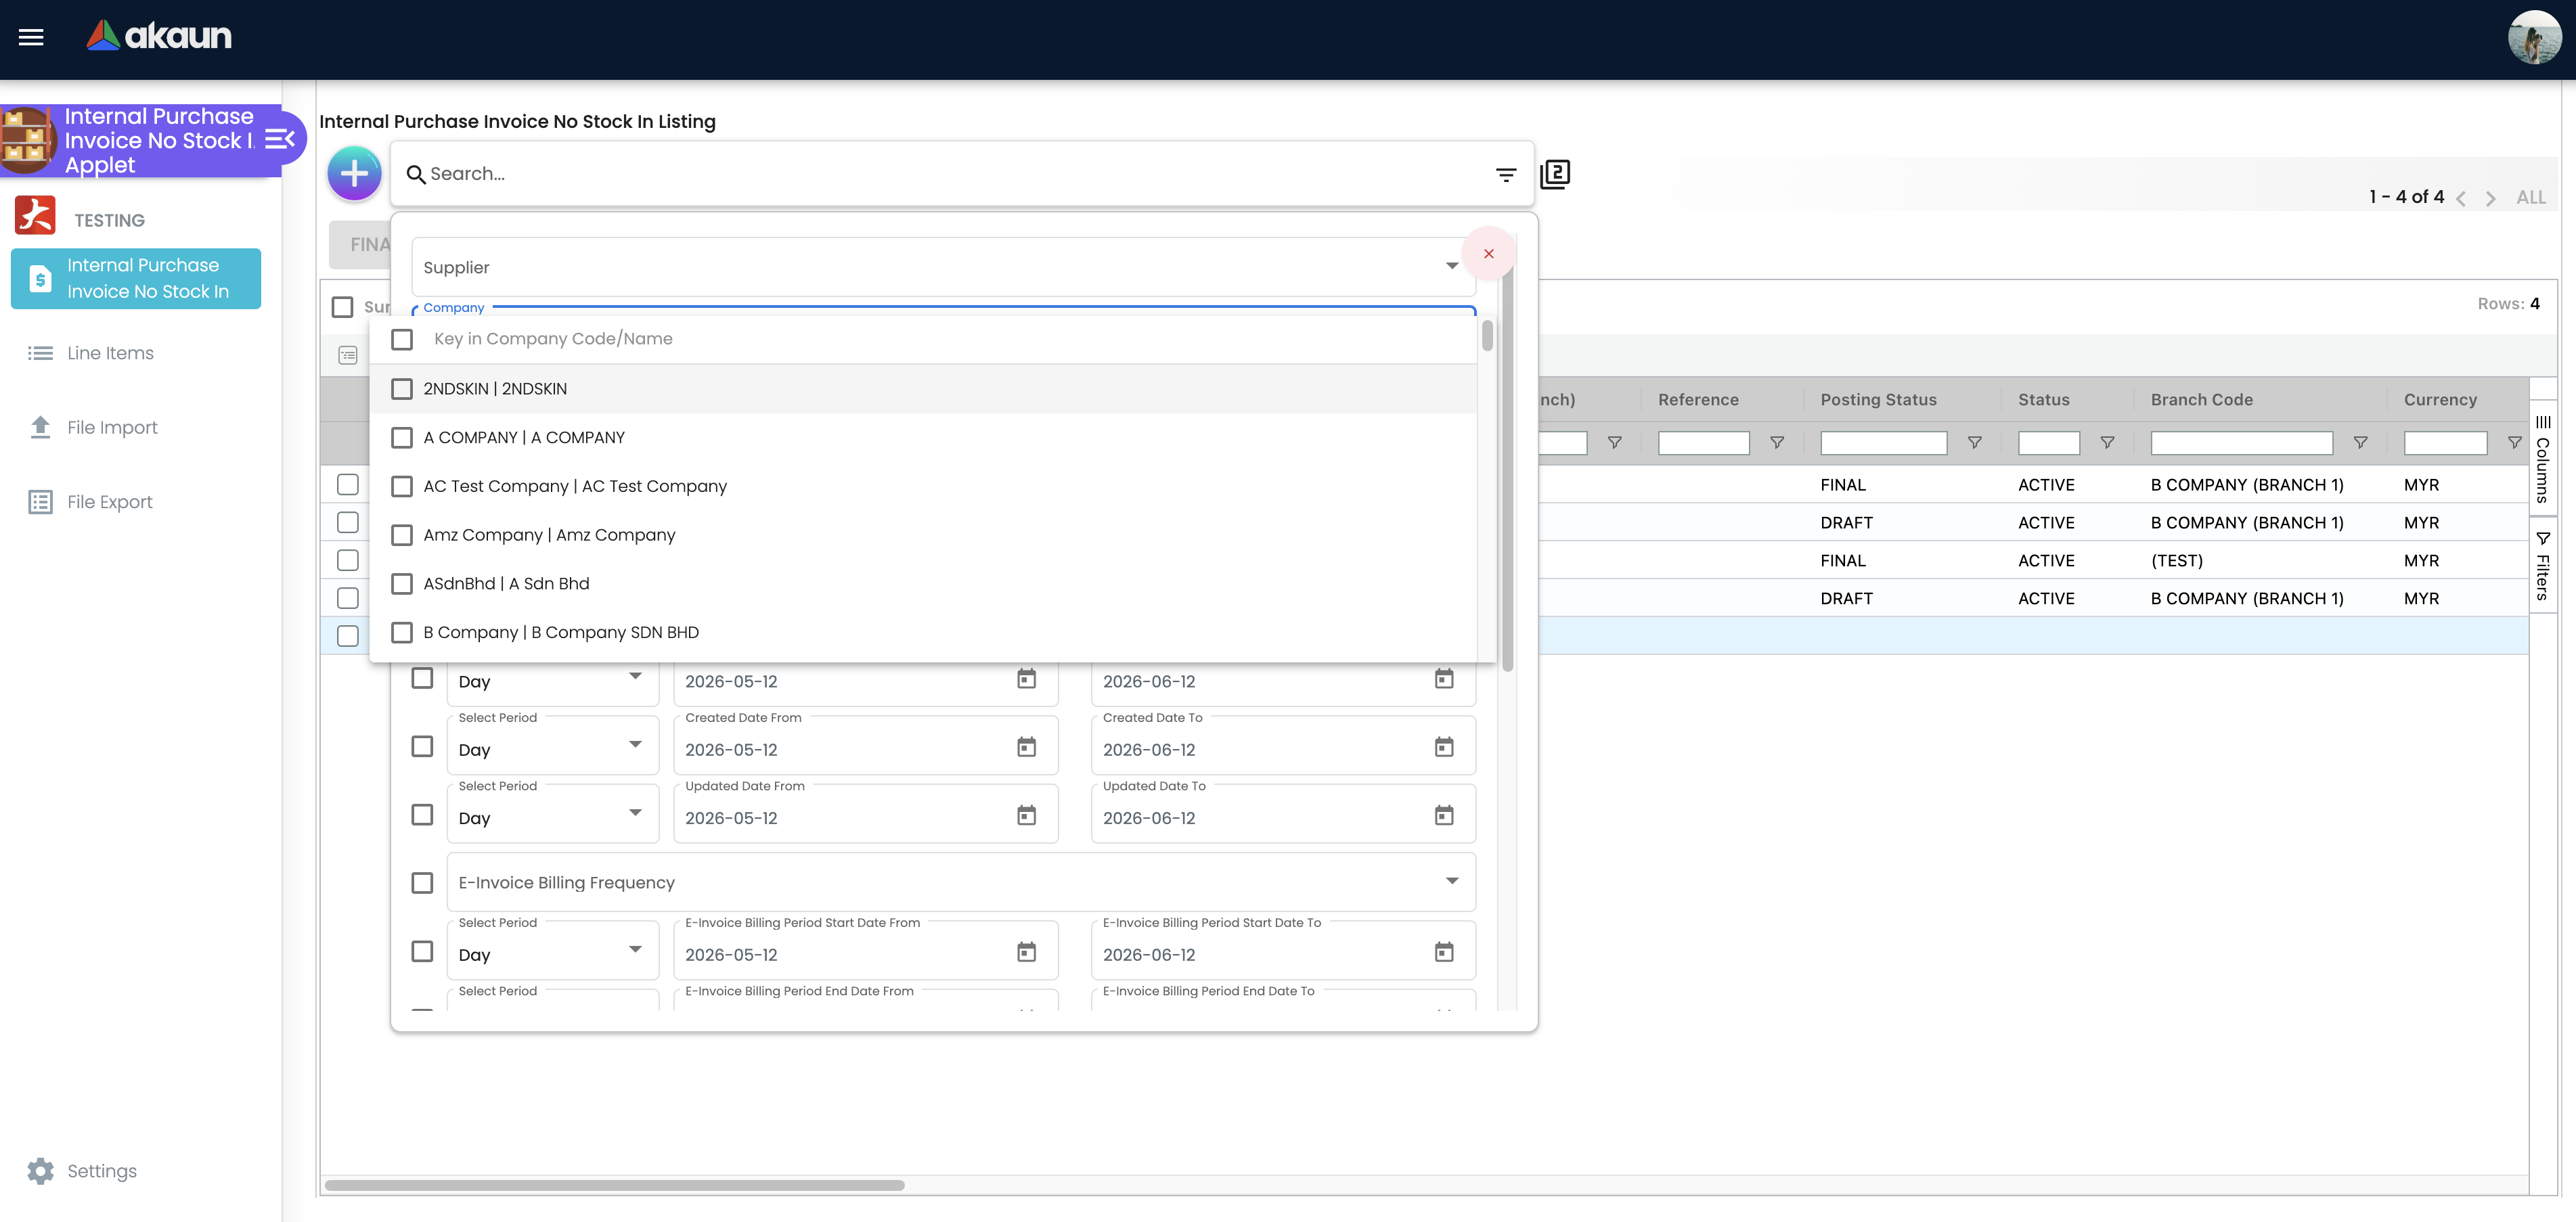
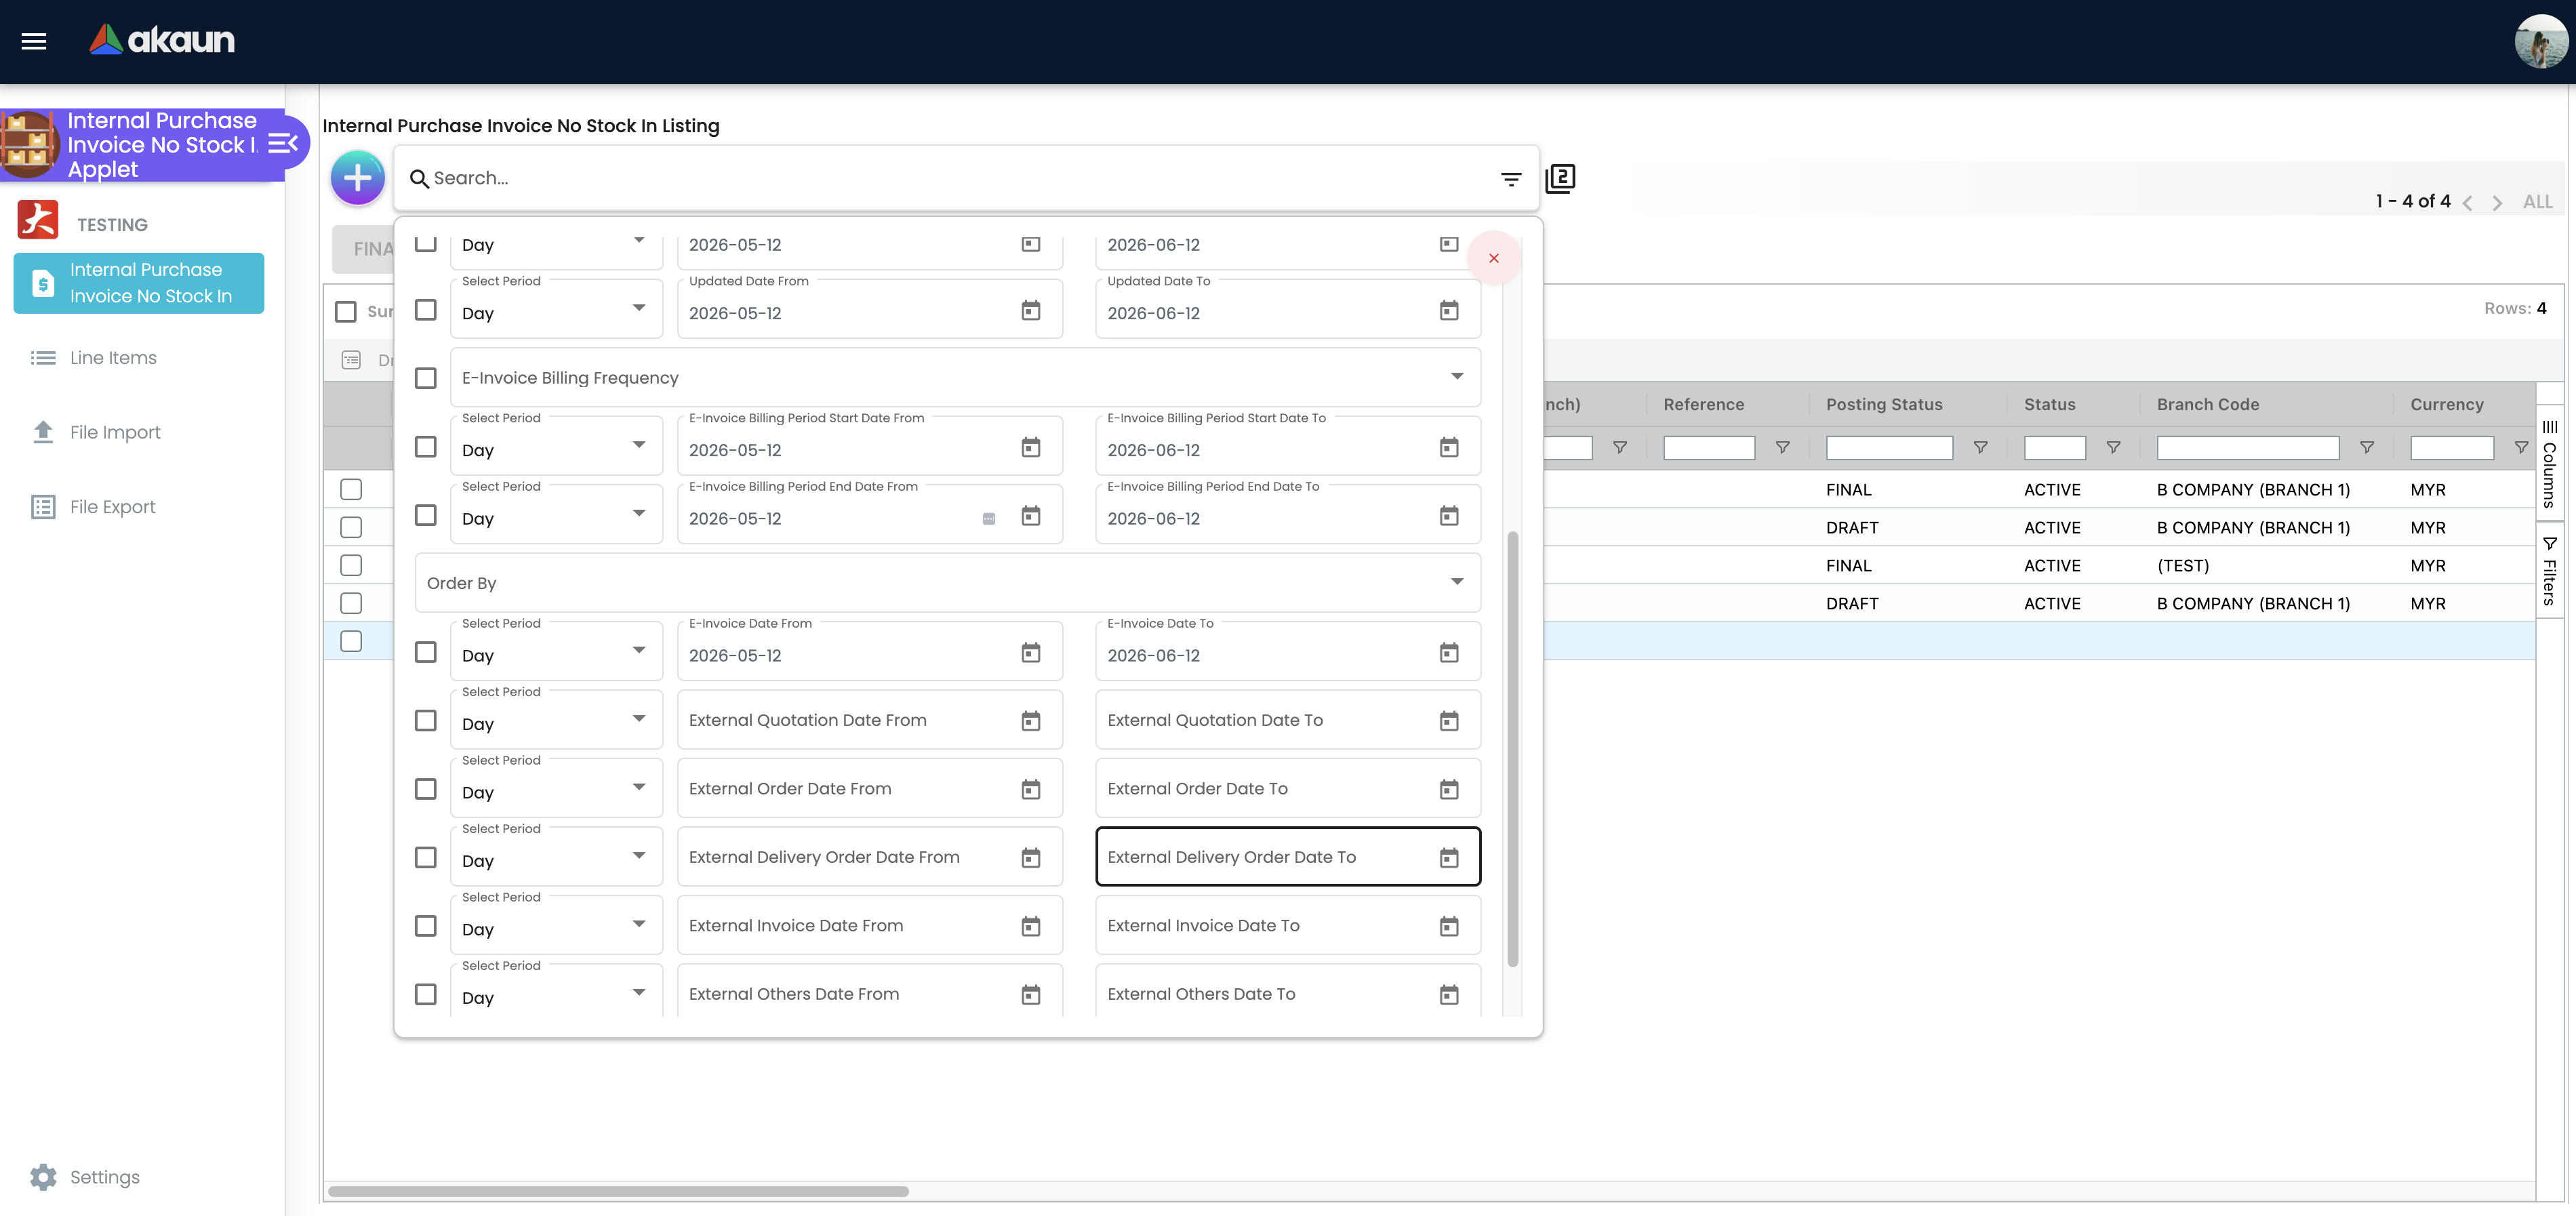
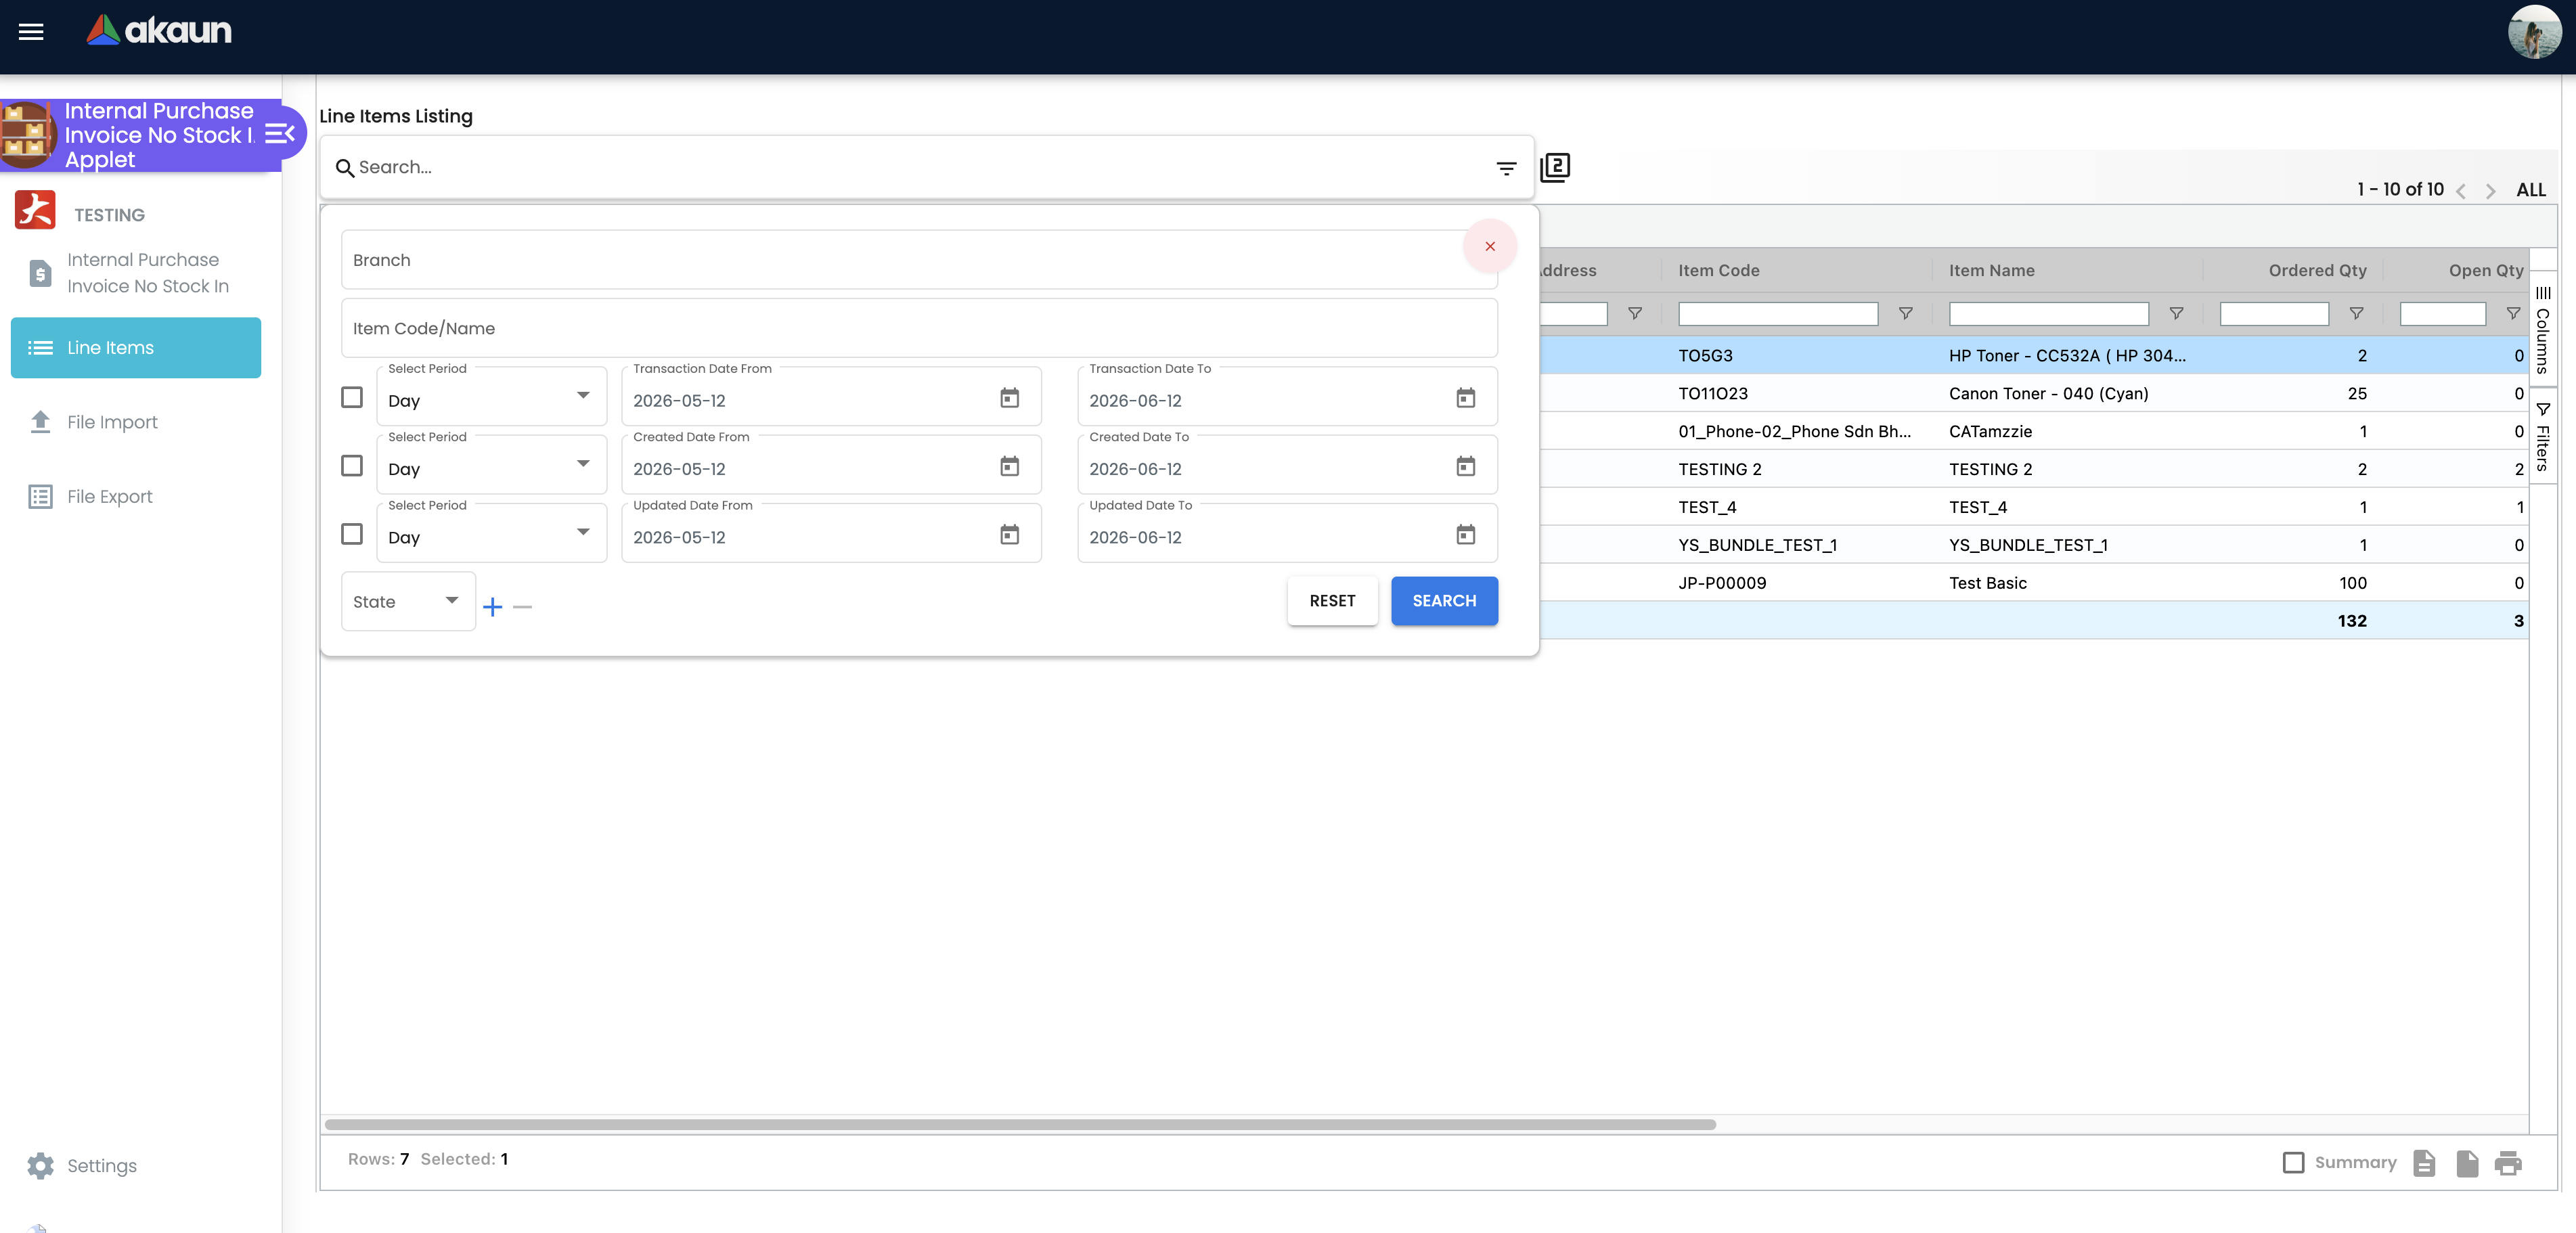
Advanced search criteria: Supplier, Branch, Date range (Transaction Date, Created Date), Document Status, Reference No, Amount range, GL Dimension, Profit Center, Project.
Viewing & Editing Invoices
Below are screenshots of an existing invoice showing the completed tabs.

Tab Reference
The create and edit screens show different tabs. This reference clarifies which tabs are available in each context.
Create Screen Tabs
| Tab | Purpose |
|---|---|
| Main Details | Branch, Location, Delivery Branch, Purchaser, Transaction Date, Credit Terms, Reference No |
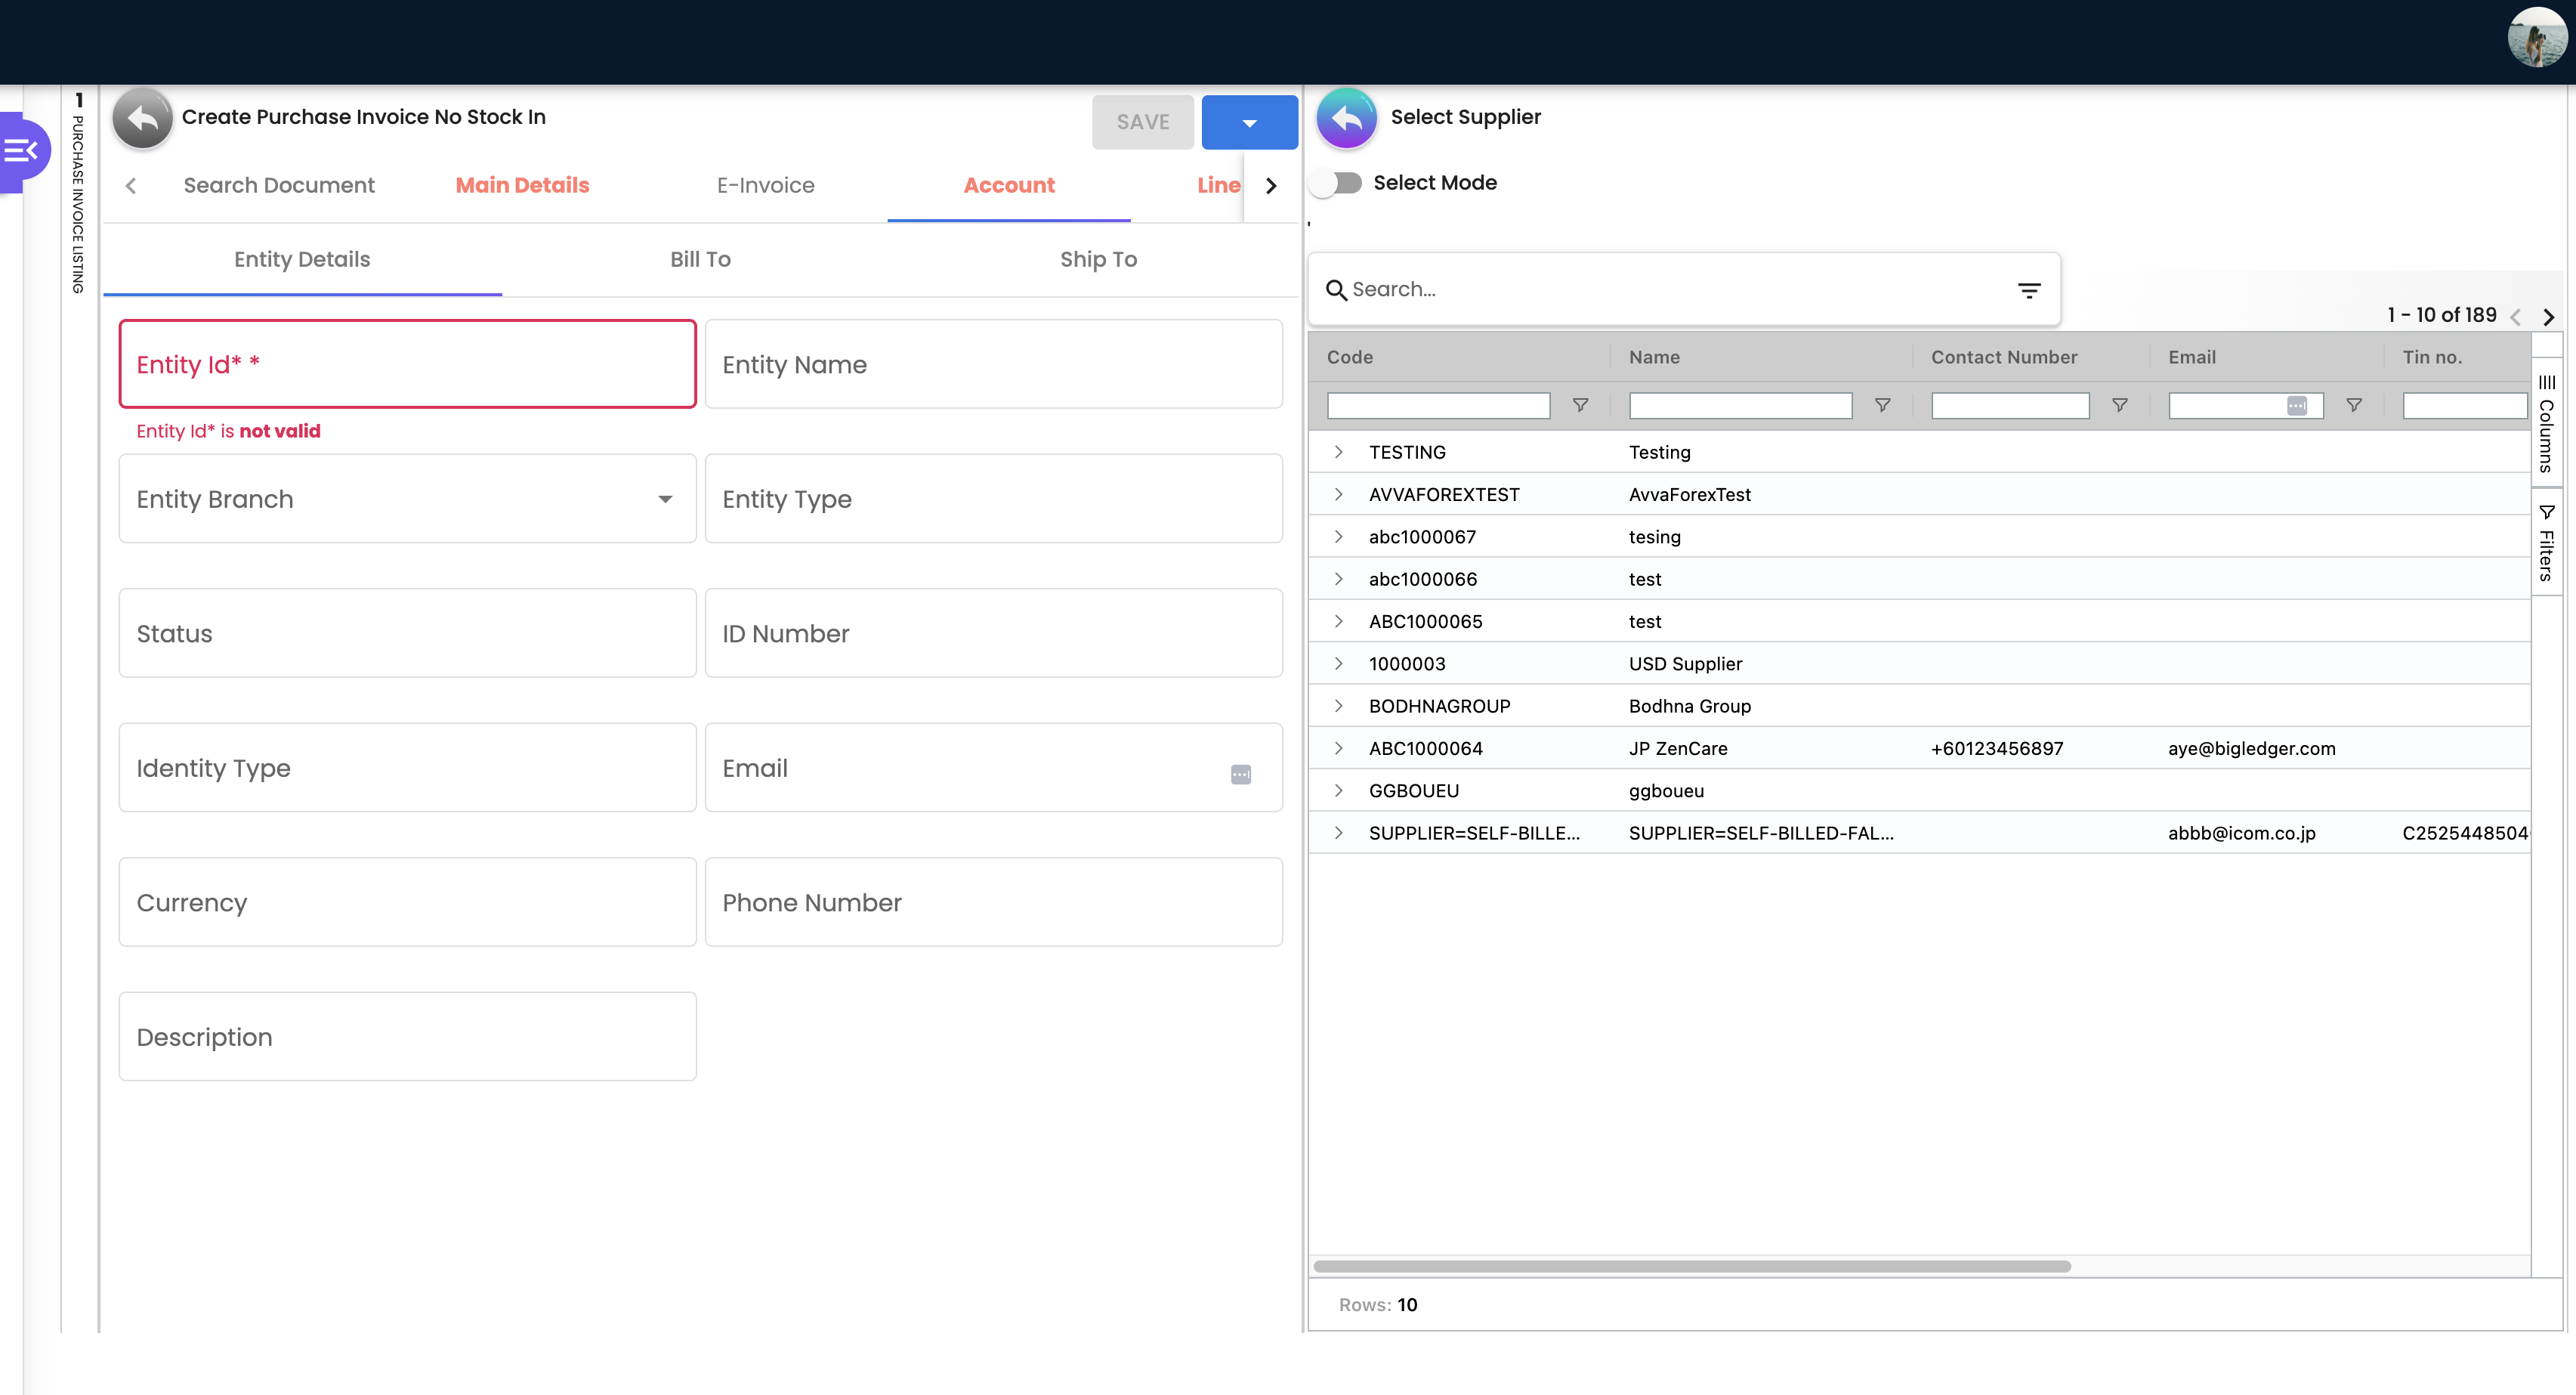
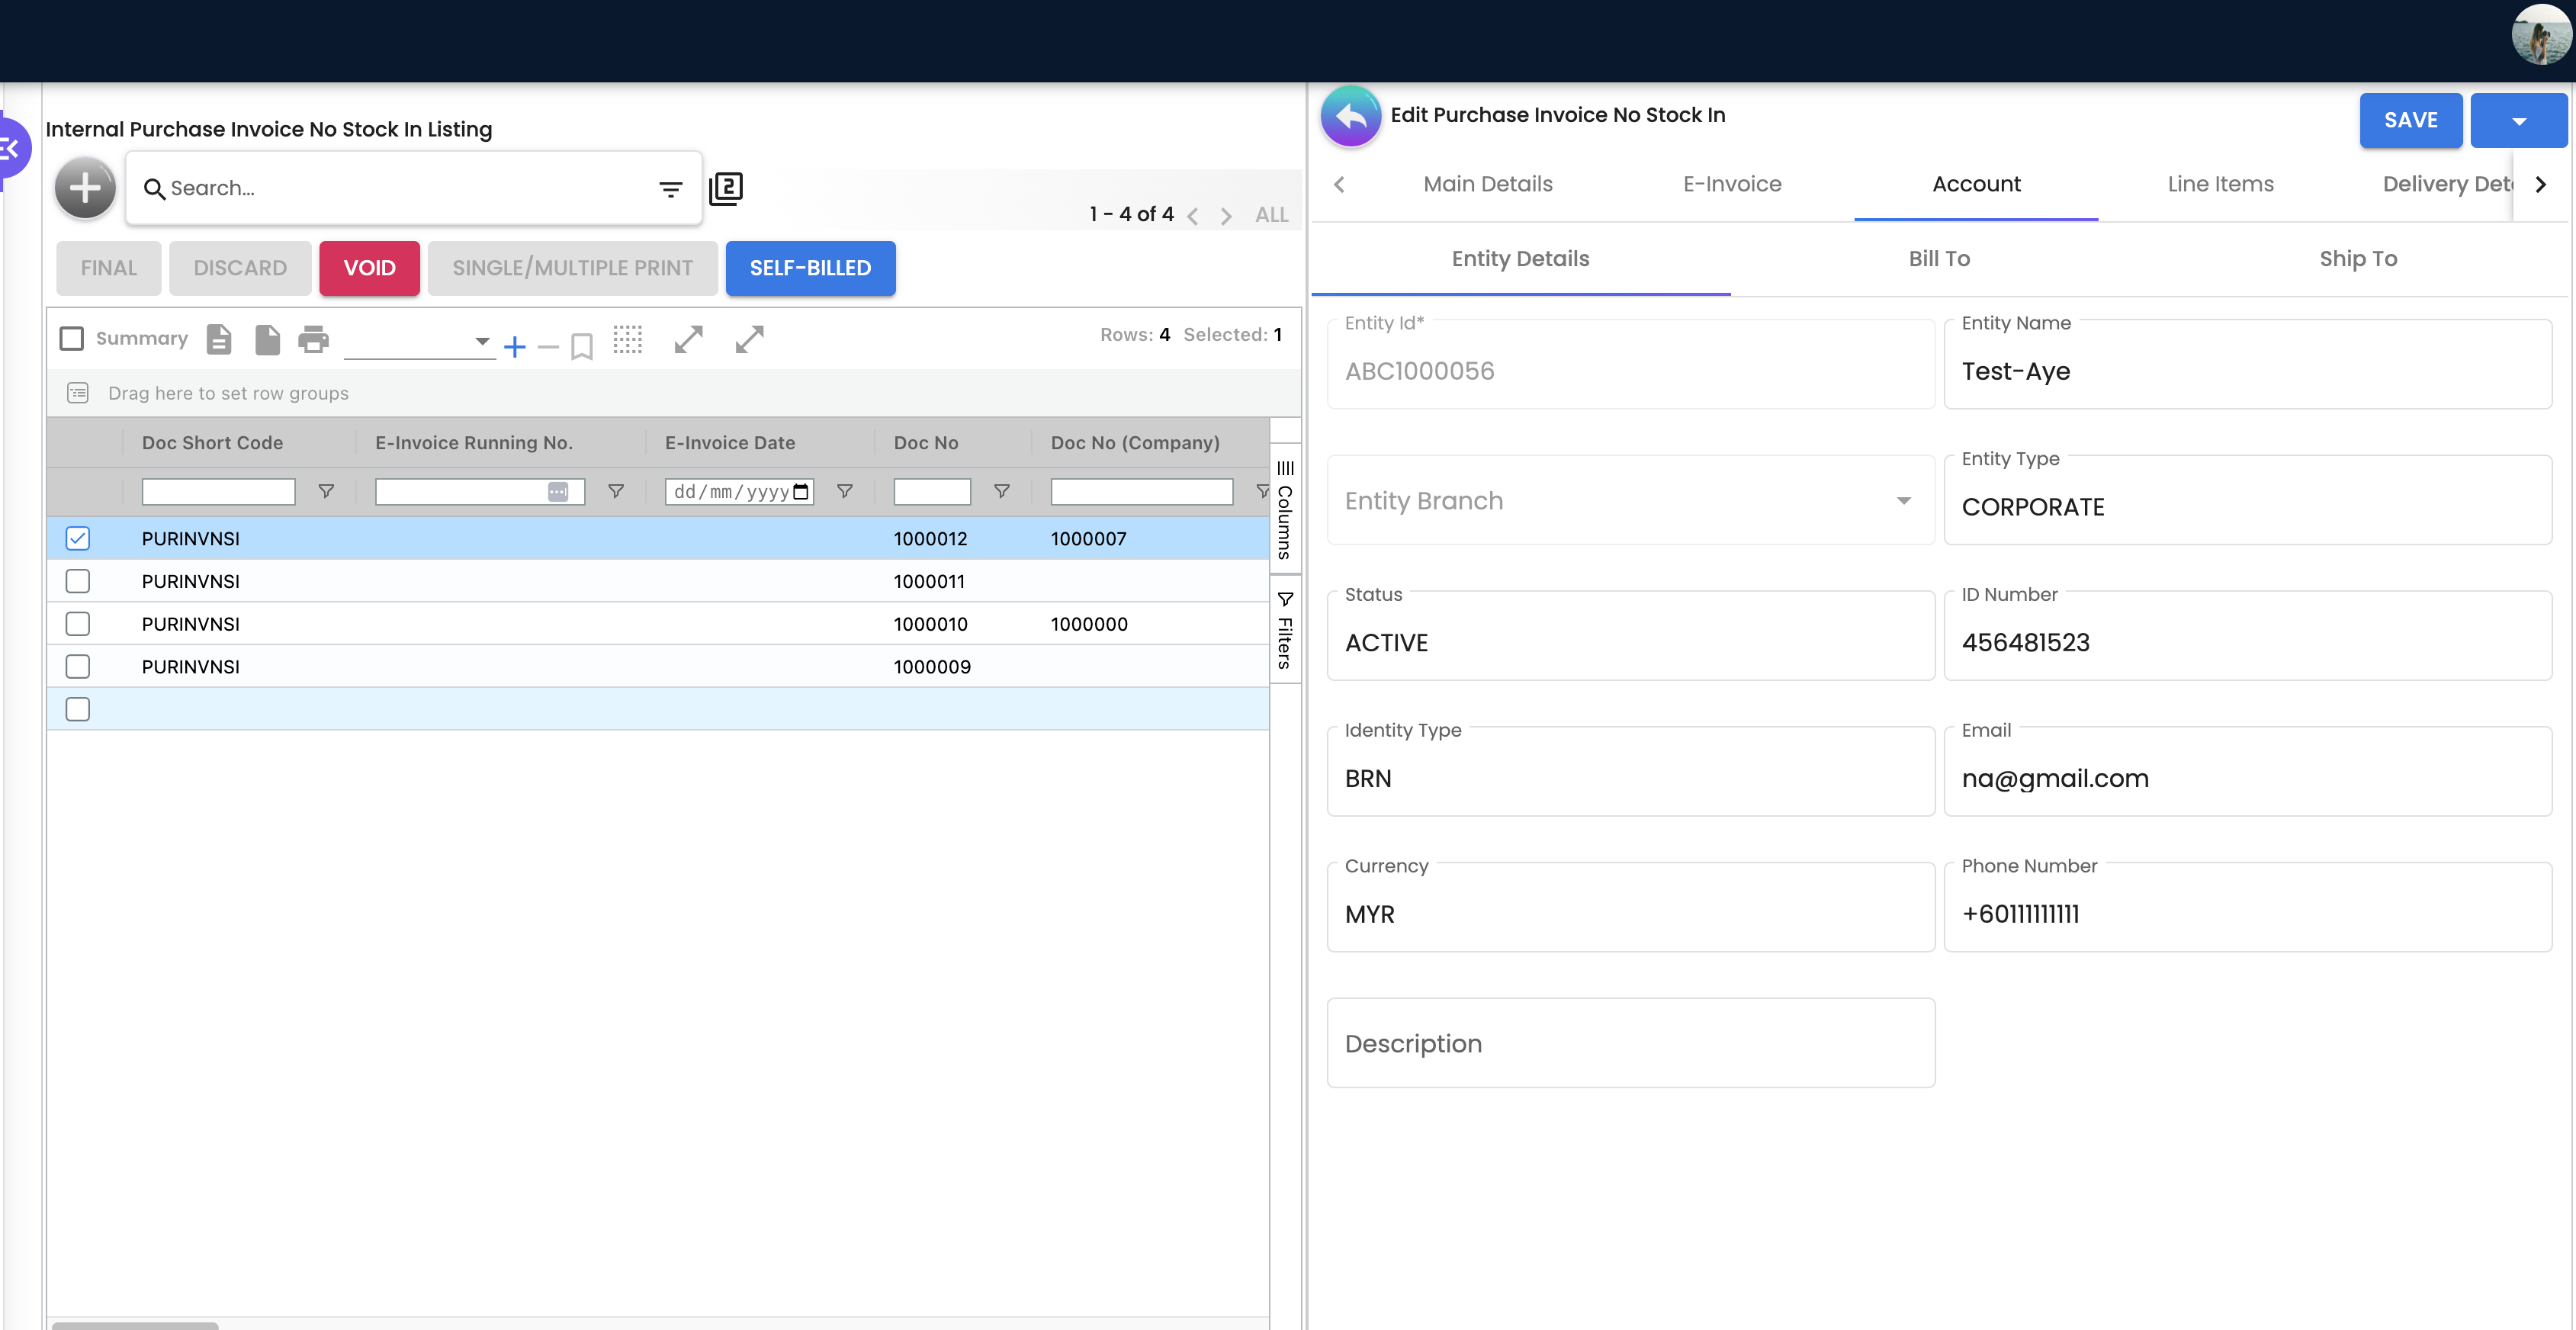
| Account | Select Supplier — Entity Details, Bill To, Ship To sub-tabs |
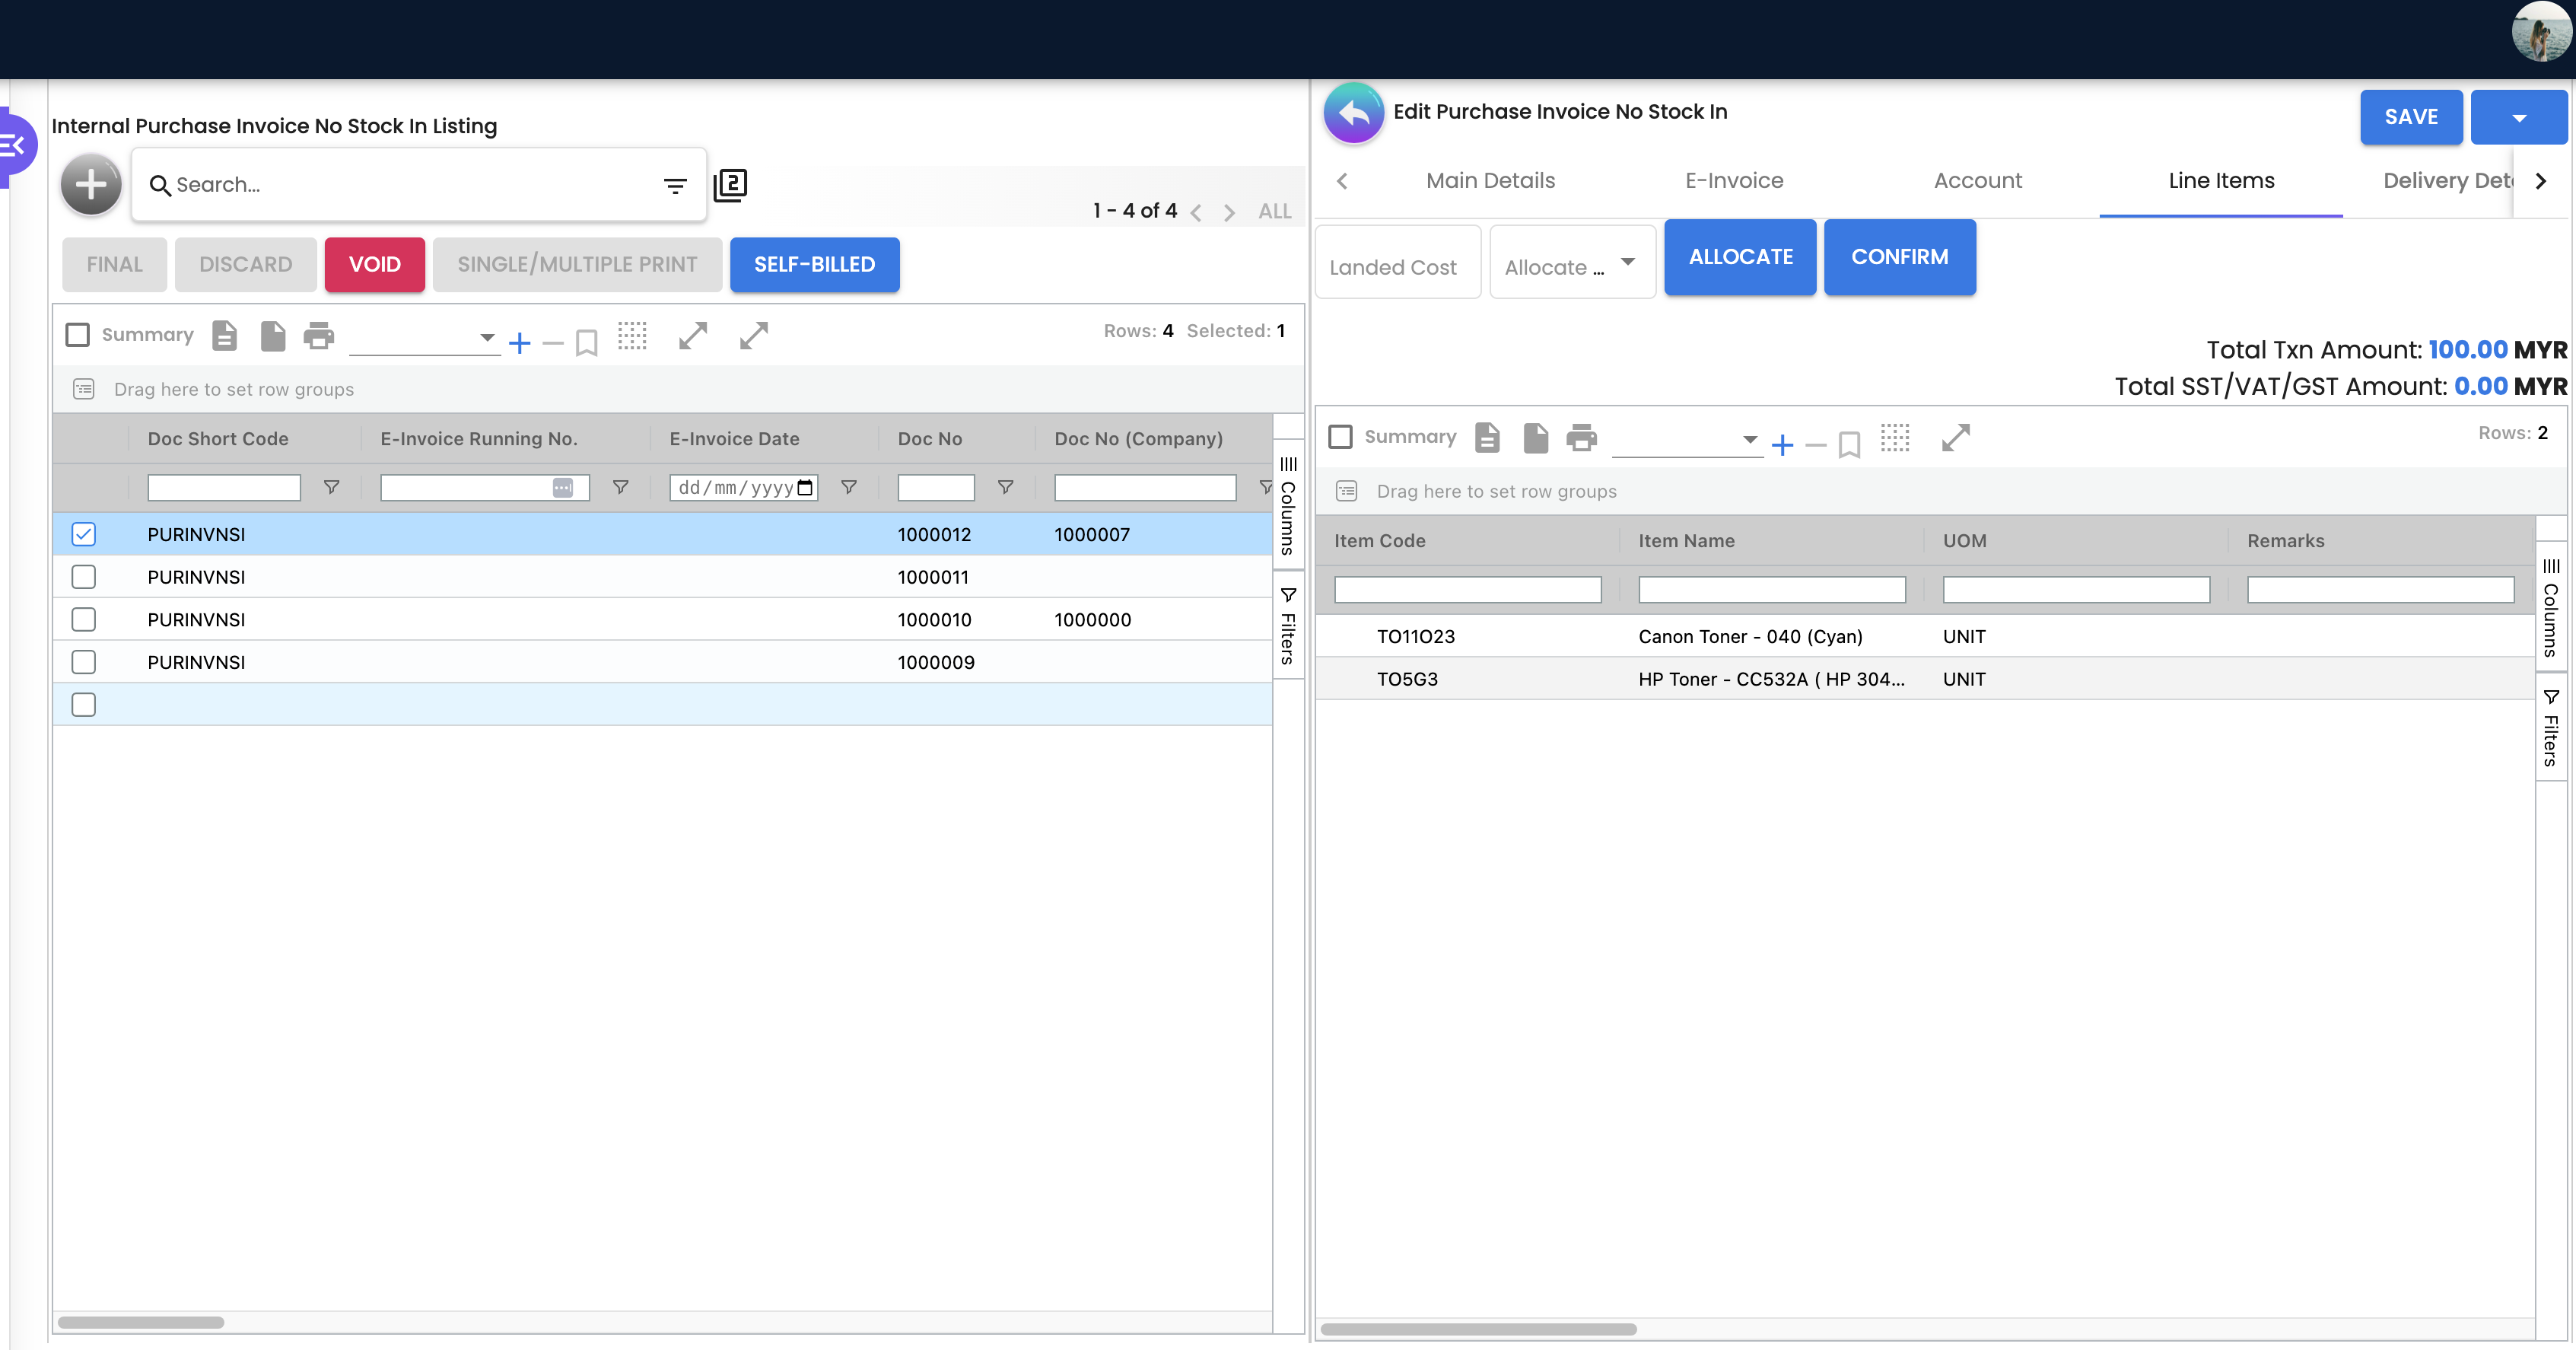
| Line Items | Add line items with Search Item and KO For sub-tabs |
| Delivery Details | Tracking ID, Delivery Type, apply-to-lines bulk assignment |
| Payment | Add/edit settlement details, card fields (Card No, Issuer, Expiry, Approval Code) |
| KO For | Knock off against Purchase GRN, Purchase GRN Stock In, or Purchase Order |
| Department Hdr | Header-level Segment, Dimension, Profit Center, Project allocation |
Edit/View Screen Tabs
All Create tabs plus the following (only visible after the invoice is saved):
| Tab | Purpose |
|---|---|
| Search Document | Search and copy from existing Purchase Invoice, Purchase Order, or Purchase GRN. Only visible when document status is TEMP (during edit) |
| E-Invoice | Self-billed e-invoice details — Submission Type, Document No, UUID, Billing Frequency/Period, validation URL/QR |
| ARAP | Doc Open Amount, Settlement, Contra, Balance — tracks payment status |
| Posting | GL posting trace — view the accounting entries generated |
| TraceDocument | Document trace — full lifecycle audit trail |
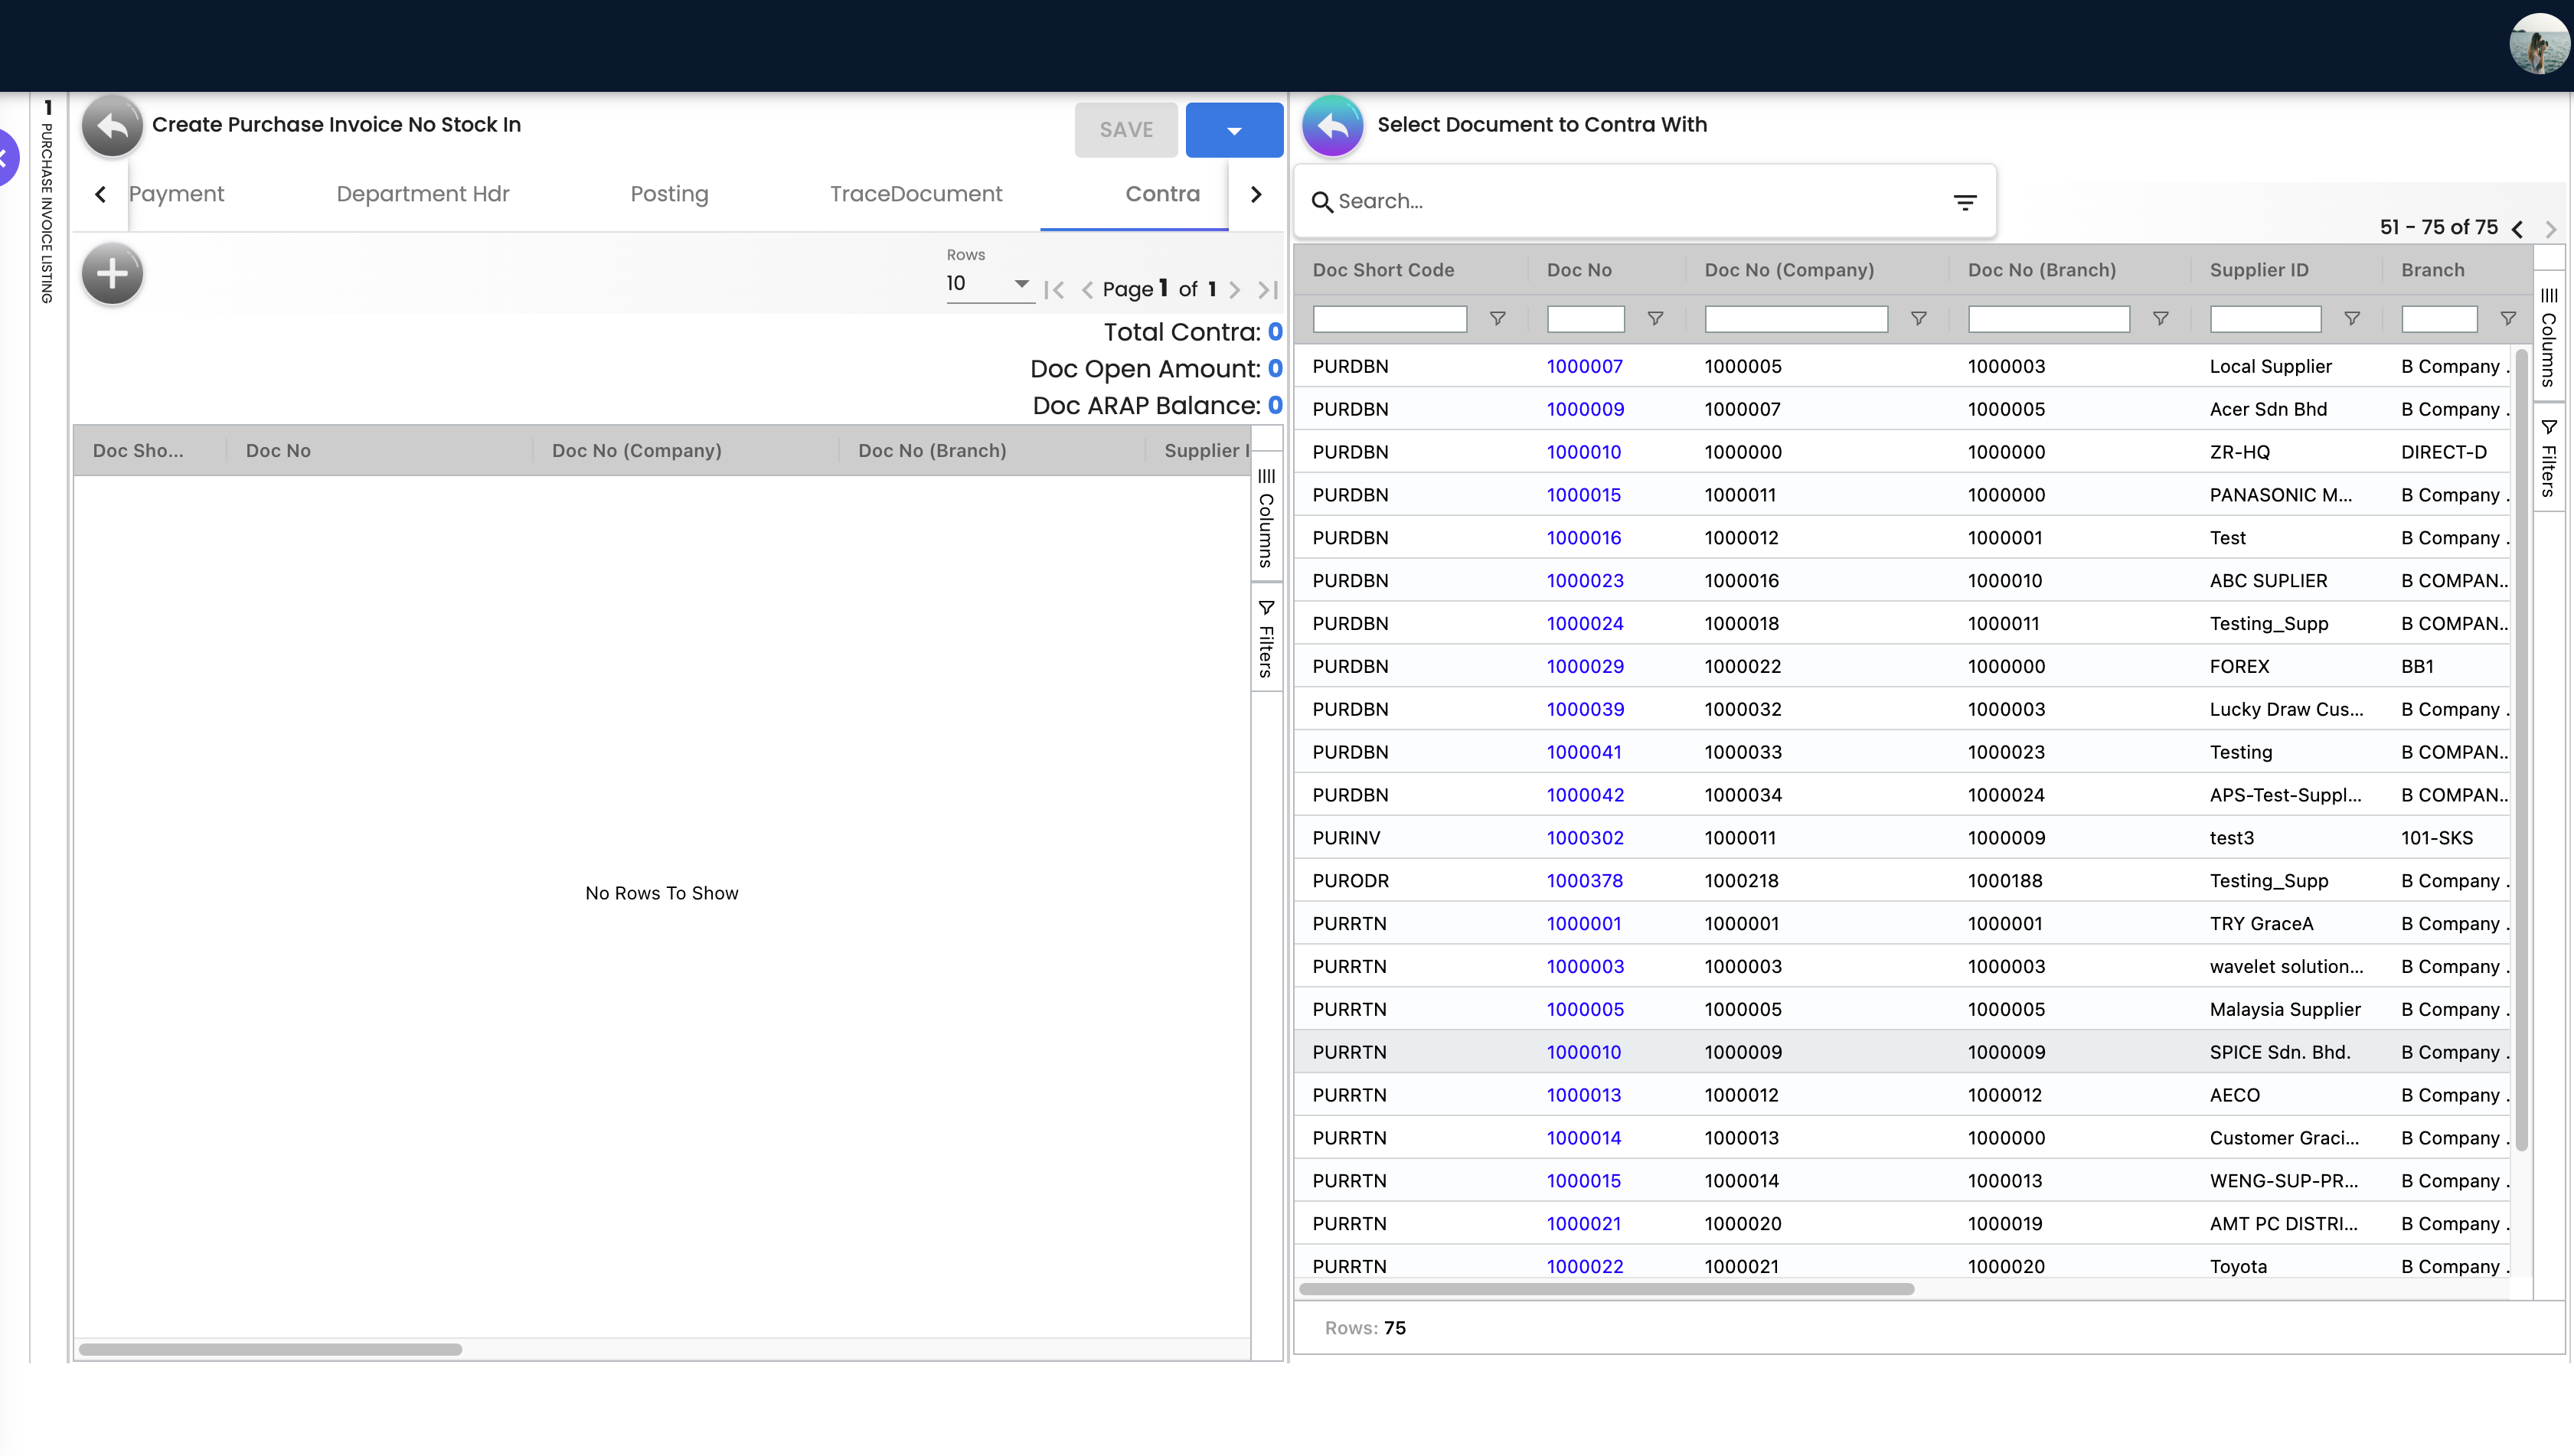
| Contra | Offset against other purchase invoices; shows Total Contra, Doc Open Amount, Doc ARAP Balance |
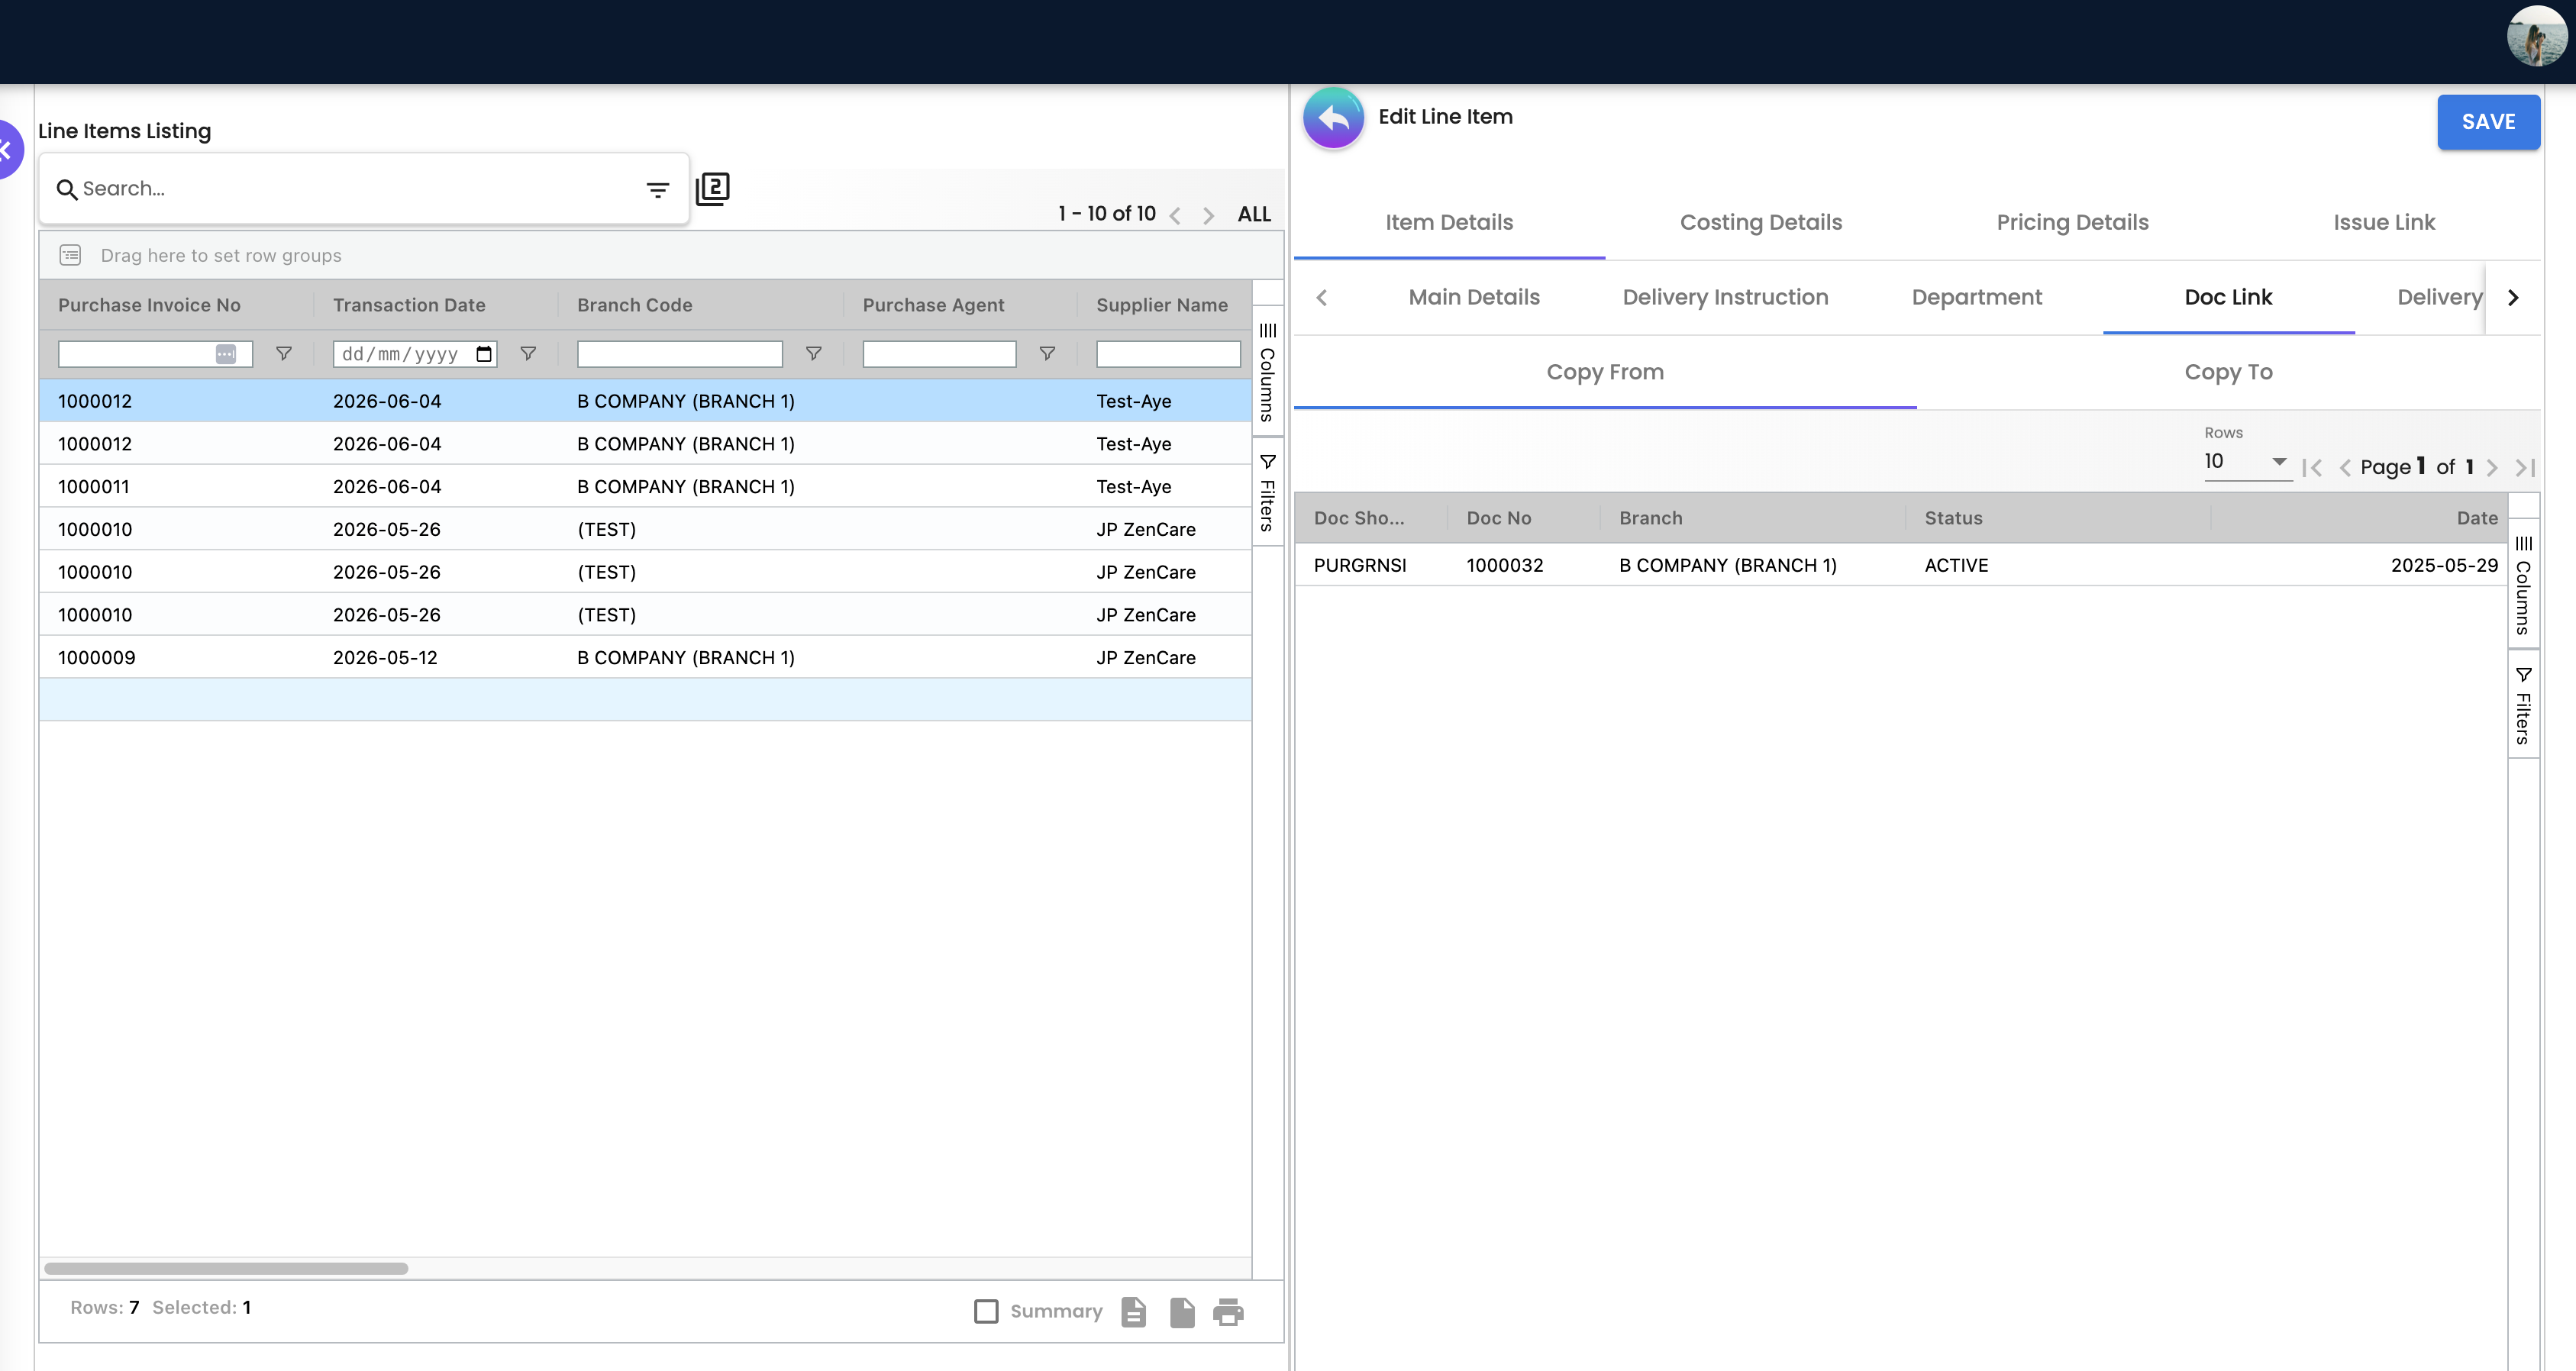
| Doc Link | Copy From / Copy To at header level; shows linked documents |
| Attachment | Upload and view supporting documents (PDFs, contracts, SOWs) |
| Export | Generate PDF using configured printable format |
Line Item Management
Each invoice can have multiple lines. Each line captures:
| Field | Description |
|---|---|
| Description | Narrative of the service or expense |
| GL Account | Cost account the expense is charged to |
| Quantity | Number of units (often 1 for services) |
| Unit Price | Price per unit |
| Unit Price (Inclusive of Tax) | Price including tax (auto-calculates exclusive price) |
| Tax Code | SST/GST/VAT code (auto-computes tax amount) |
| Taxable Amount | Pre-tax subtotal |
| Tax Amount | Computed tax |
| Total Amount | Taxable + Tax |
| Department | Cost centre allocation |
| Profit Center | P&L segment |
| Project | Project code for project-based costing |
| Segment | GL dimension for segment reporting |
| Rebate Price | Rebate amount per line (v1.14+) |
Adding Line Items
When adding a line item, two sub-tabs are available:
- Search Item — search and select from your item master by Item Code, Item Name, or Item Type (BASIC_ITEM, MADE_TO_ORDER, BUNDLE, NSTI, VOUCHER, ACCOUNT_CODE)
- KO For — knock off against Purchase GRN, Purchase Order, Purchase Requisition, or Supplier Delivery Order at the line level
Line Item Sub-Tabs (Edit)
When editing a line item, the following sub-tabs are available:
| Sub-tab | Purpose |
|---|---|
| Item Details | Main item fields — contains further sub-tabs: Main Details, Child Items, Department, Doc Link, Delivery Details |
| Grouped Item | Grouped/bundled item breakdown |
| Serial Number | Serial number tracking — supports Scan and Import |
| Batch Number | Batch number assignment |
| Bin Number | Warehouse bin location assignment |
| Costing Details | Landed costs and costing breakdown |
| Issue Link | Jira-style issue tracking — Details, Planning, Attachment, Comment, Subtasks, Linked Issues, Worklogs, Activity |
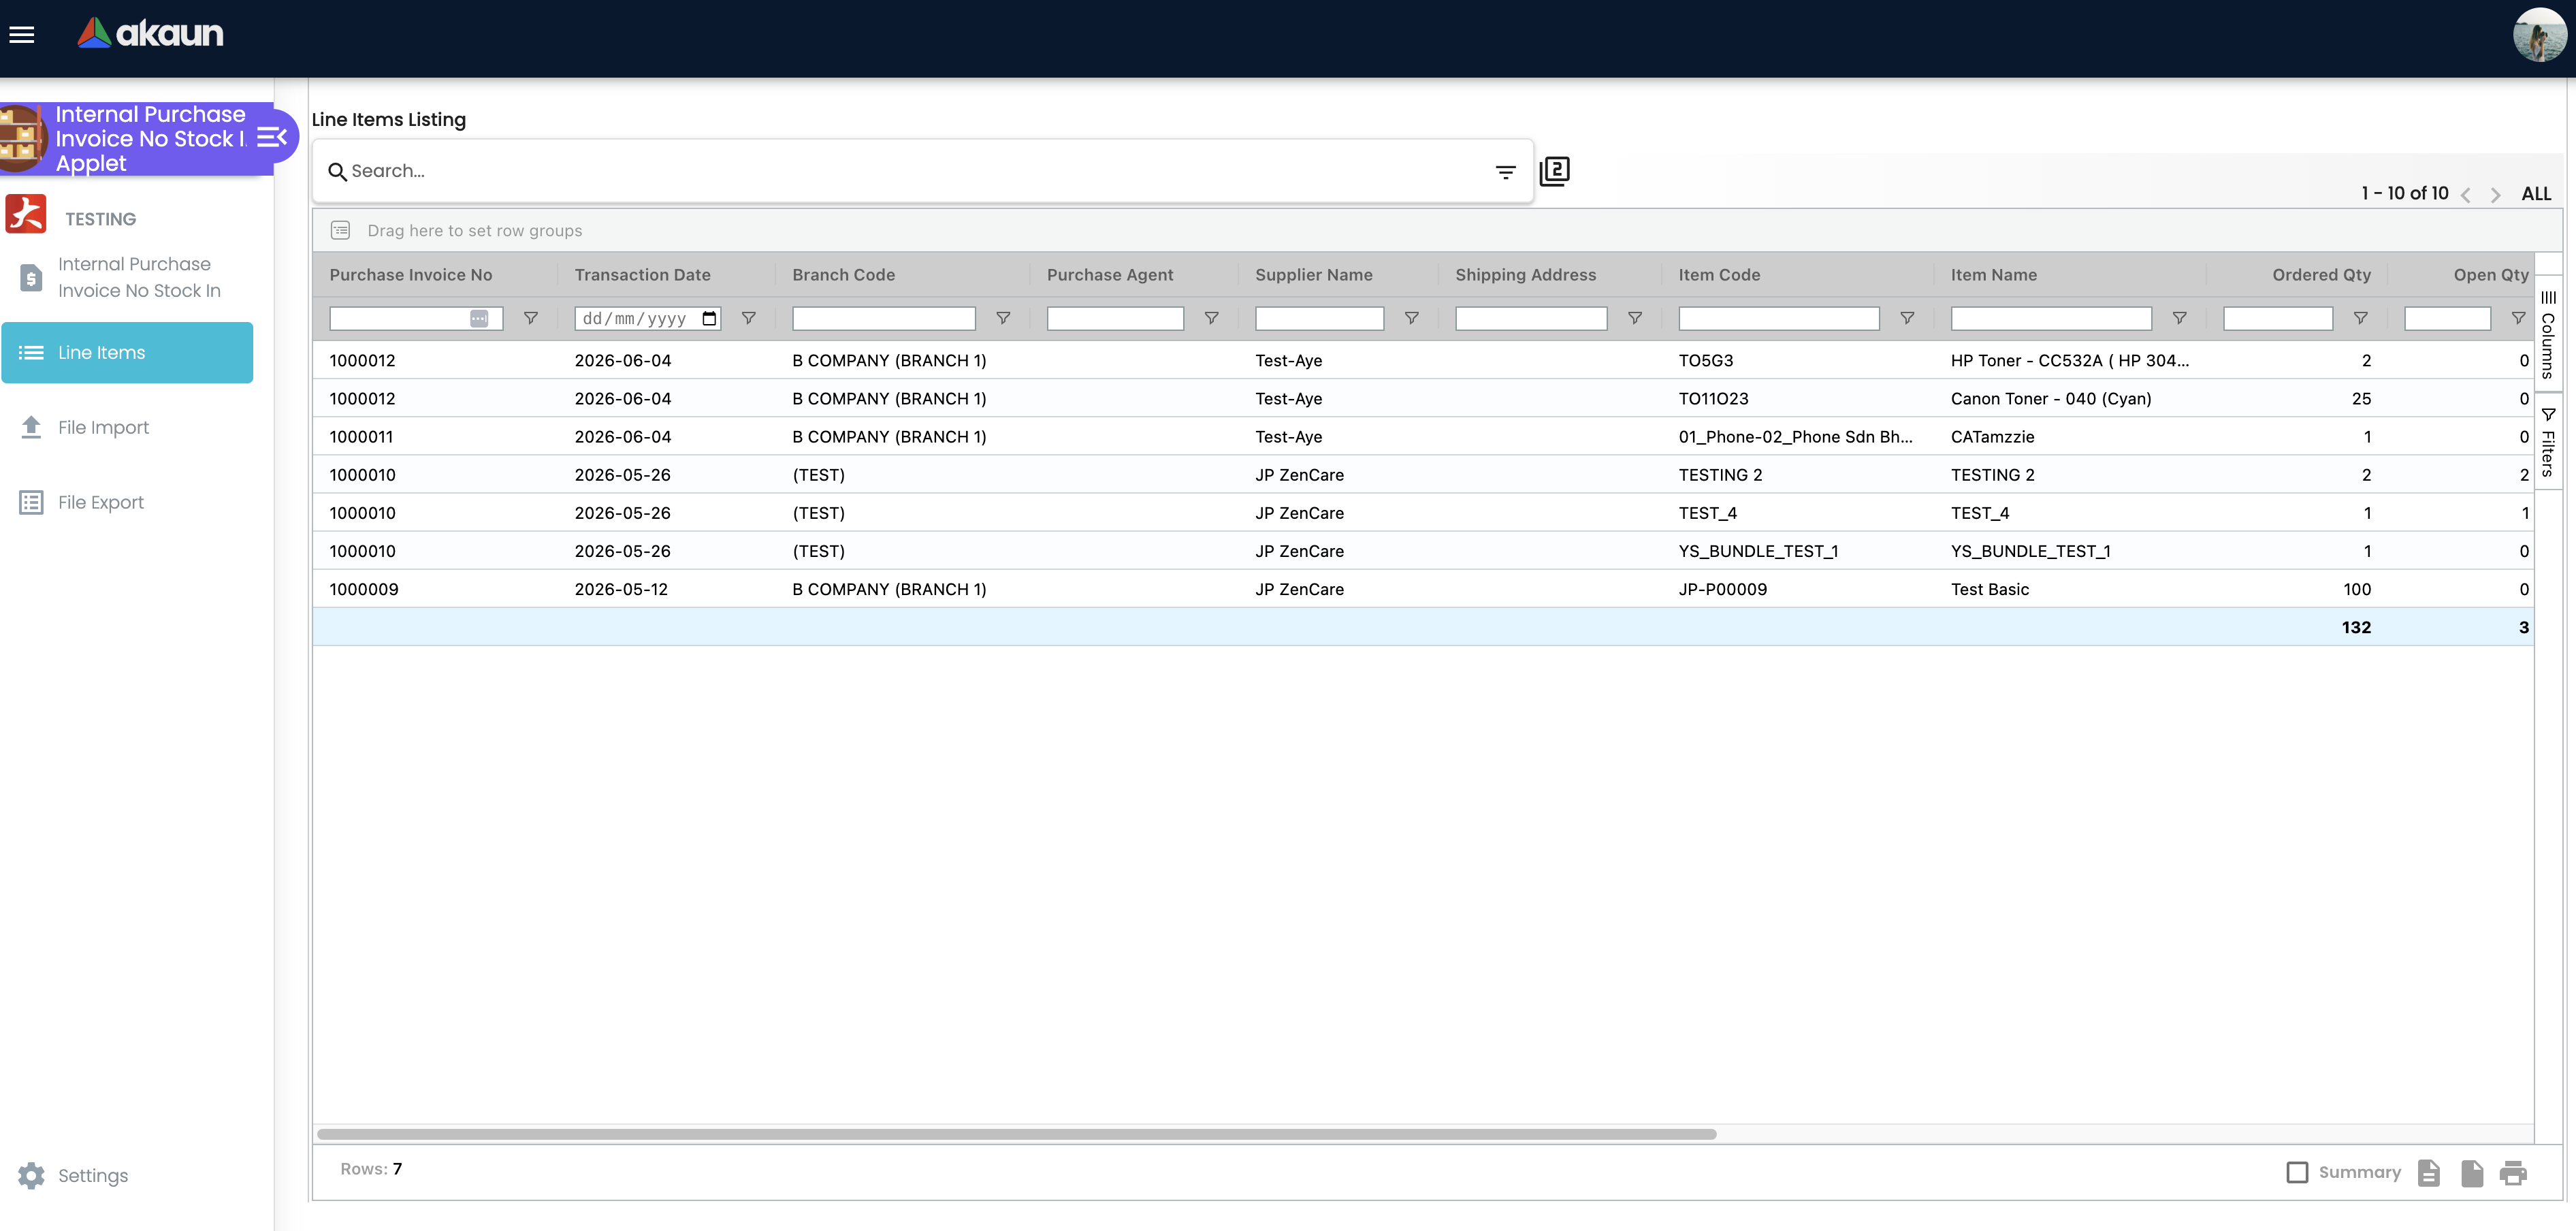
Line Items Listing
The Line Items sidebar route provides a flat grid of all invoice line items across all invoices, making it easy to search and analyse costs by item, supplier, or branch.
File Import & Export
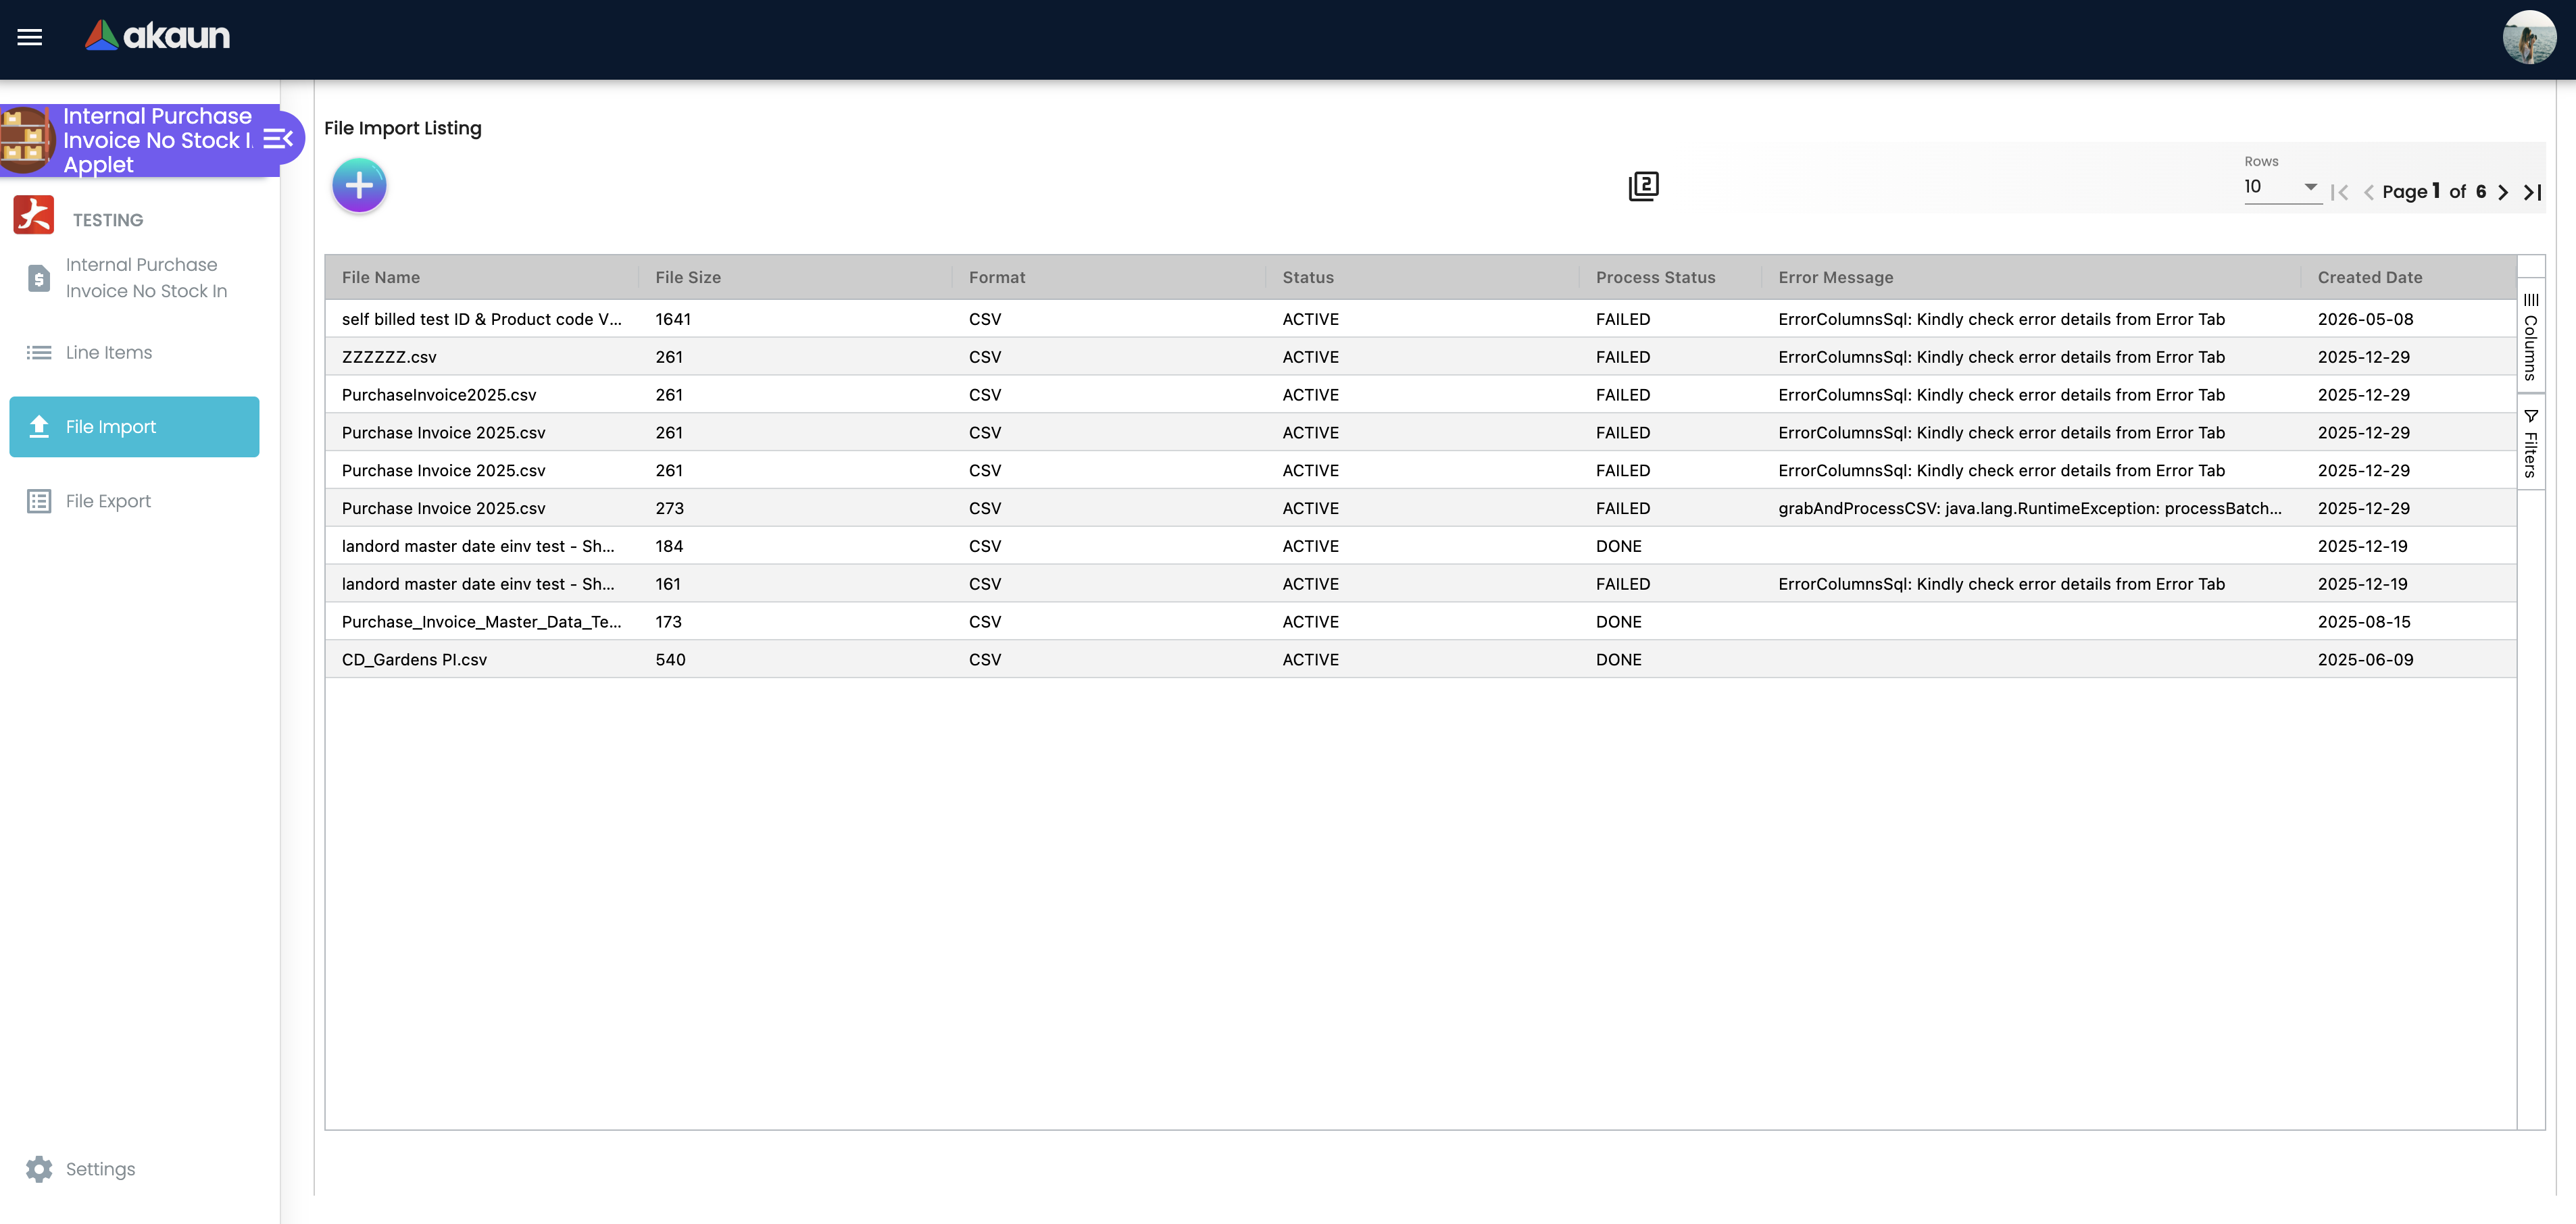
File Import
Import invoices in bulk using CSV files. Accessible from the File Import sidebar menu (requires SHOW_FILE_IMPORT_MENU permission).
| Detail | Value |
|---|---|
| Supported format | CSV only |
| Delimiter options | PIPE (` |
| Sample template | Purchase_Invoice_Master_Data_Template.csv |
Import workflow:
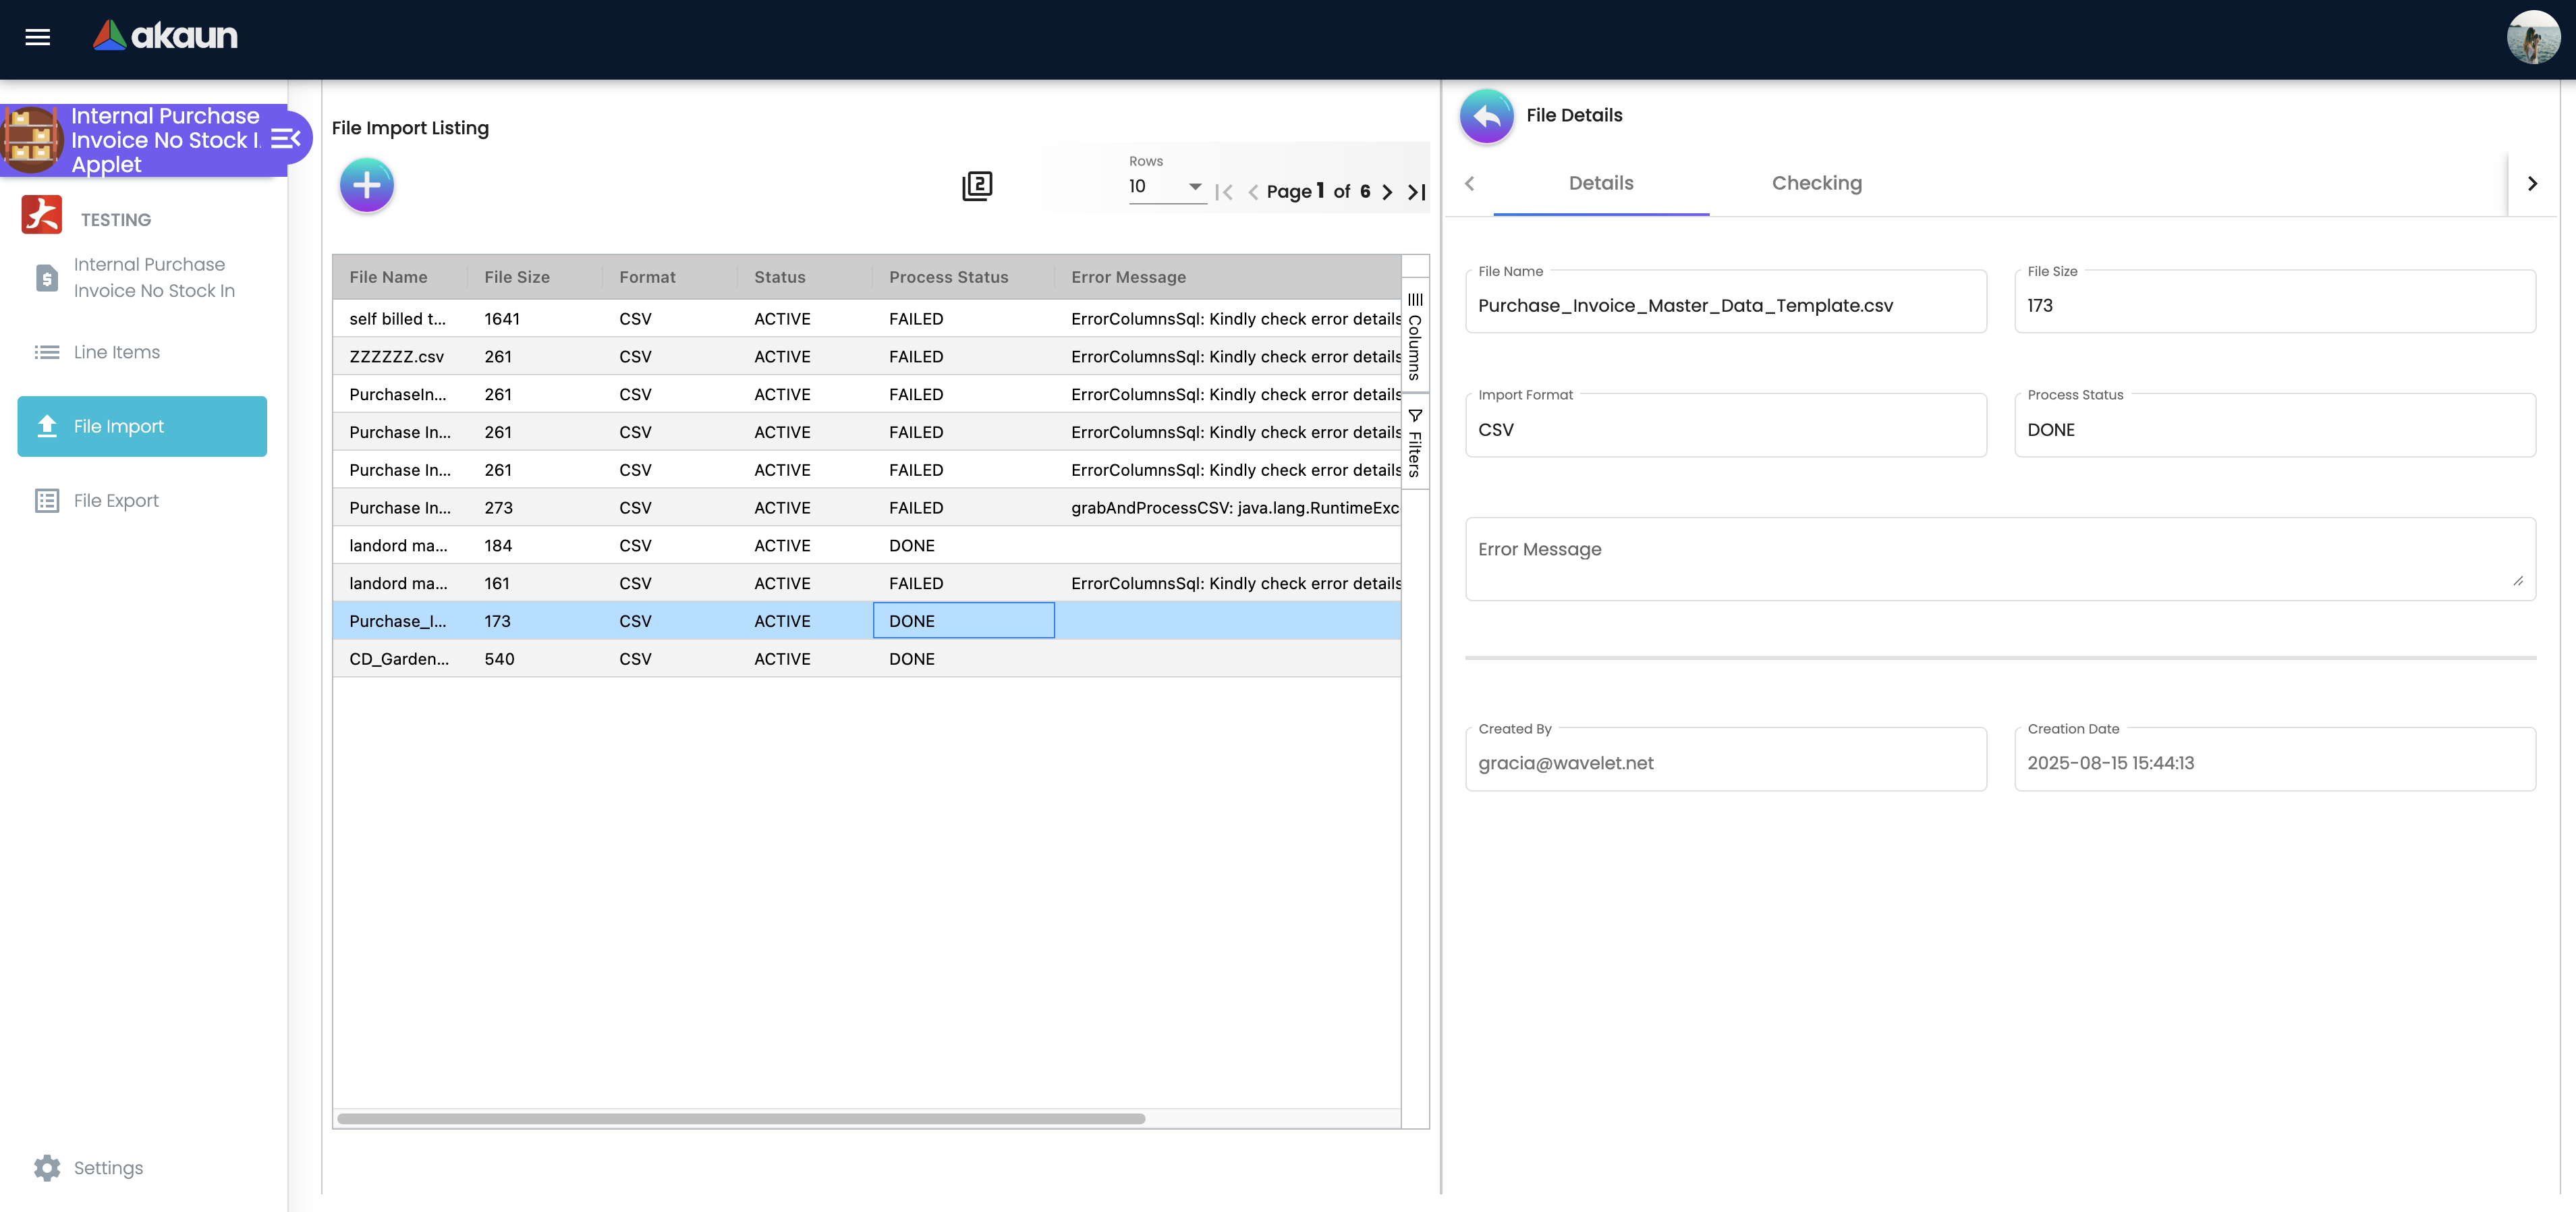
- Upload CSV → file appears in the File Import listing
- Click the file → Details tab shows file metadata and process status
- Checking tab shows validation results — Error grid for lines with issues, All grid for every line
- Fix errors in your CSV and re-upload, or proceed if all lines pass
- Click Process Import to create invoices from valid lines
File Export
Export invoice data as CSV files for offline analysis. Accessible from the File Export sidebar menu (requires SHOW_FILE_EXPORT_MENU permission).
- Set the transaction date range
- Click Generate — the export job runs asynchronously
- Check the File Export listing for completed files
- Click Download to save the CSV, or Delete to remove
Document Attachments
Supporting documents can be attached directly to each invoice:
- PDF invoices from the supplier
- Contracts or SOWs for service-based purchases
- Email correspondence
- Delivery confirmations (proof of service rendered)
Navigate to the Attachment tab on any invoice to upload or view files. Each attachment is logged with the uploader’s name and timestamp for audit purposes.
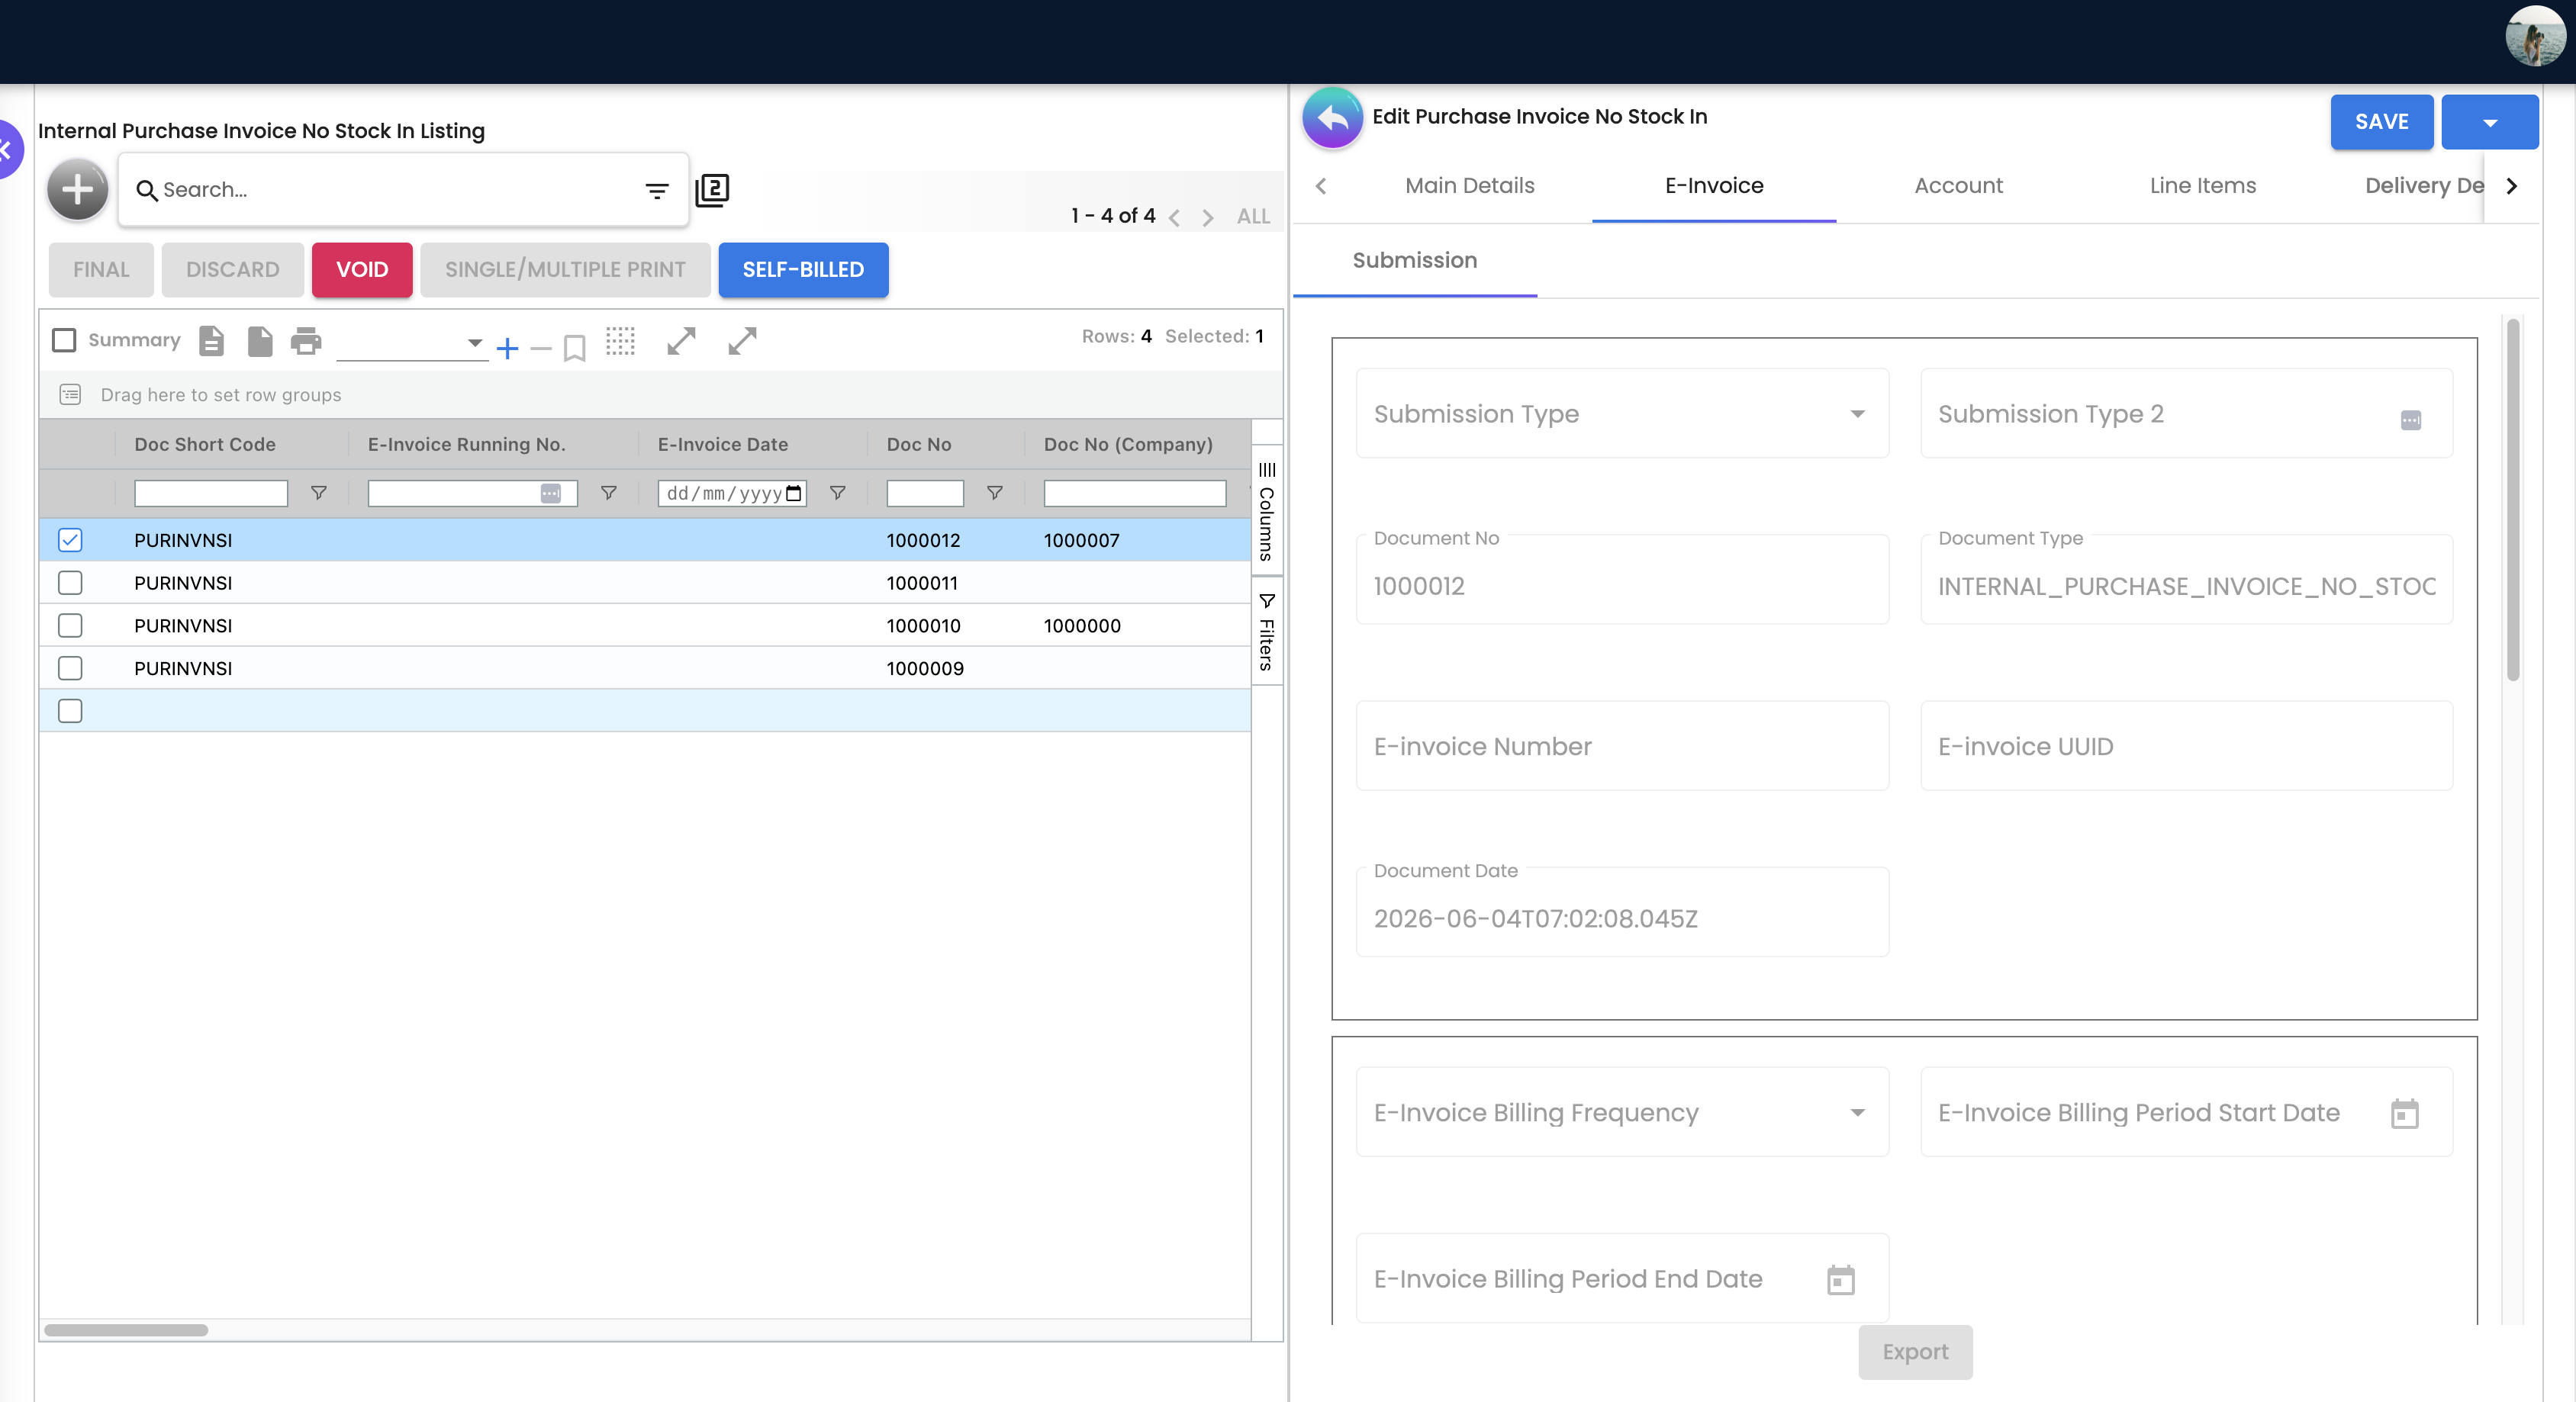
E-Invoice (Self-Billed)
This applet supports self-billed e-invoice submission to LHDN. The E-Invoice tab (visible on the edit screen) manages the full submission lifecycle.
Submission Types
| Type | Description |
|---|---|
| INDIVIDUAL | Submit a single invoice as an individual e-invoice |
| CONSOLIDATED | Group multiple invoices into a single consolidated submission |
| SINGLE-GENERAL | Submit as a single general pool e-invoice |
E-Invoice Fields
The E-Invoice tab captures: Submission Type, Document No, Document Type, E-Invoice Number, UUID, Document Date, Billing Frequency, Billing Period, supplier identity details, validation URL/QR code.
Submission Progress
Pending In Posting Queue → In Batch Pool → In Internal Submission Queue → Submitted to IRBE-Invoice Sub-Sections
| Section | Purpose |
|---|---|
| Submission | Configure and submit e-invoice to LHDN |
| Progress | Track submission status through the pipeline |
| Notification | View notification queue for submission events |
| Cancellation | Request cancellation and track approval status |
| Matched History | View matched e-invoice records |
Listing Bulk Action
From the invoice listing, select documents and click SELF-BILLED to initiate self-billed e-invoice submission for the selected invoices.
Knock-Off (KO For)
Knock-off links invoices to upstream purchase documents for matching and settlement tracking.
Header-Level KO For
The KO For tab on the create/edit screen allows you to pull from:
- Purchase GRN — match against goods received
- Purchase GRN Stock In — match against stock-in receipts
- Purchase Order — match against original purchase orders
The available KO sources depend on your company flow configuration.
Line-Level KO For
When adding a line item, the KO For sub-tab allows per-line knock-off against:
- Purchase GRN
- Purchase Order
- Purchase Requisition
- Supplier Delivery Order
Knock Off Settings
Configure KO BY / KO FOR per document type under Settings > Knock Off Settings. This controls which document types can be knocked off against each other.
ARAP, Payment & Contra
ARAP Tab
The ARAP tab (visible on edit screen) tracks the payment lifecycle of a finalized invoice:
| Field | Description |
|---|---|
| Doc Open Amount | Original invoice amount still outstanding |
| Settlement | Total amount settled via payments |
| Contra | Total amount offset via contra documents |
| Balance | Remaining amount = Doc Open − Settlement − Contra |
Payment Tab
The Payment tab allows adding and editing settlement records:
- Settlement amount and date
- Payment method
- Card details (Card No, Issuer, Expiry Date, Approval Code) for card payments
- Reference numbers
Contra Tab
The Contra tab offsets this invoice against other purchase invoices:
- Select documents to contra with from the dialog
- View: Total Contra, Doc Open Amount, Doc ARAP Balance
- Contra entries reduce the outstanding amount without a cash payment
ARAP Listing Columns
The invoice listing includes ARAP columns (visibility controlled by permissions):
| Column | Description |
|---|---|
| ARAP PNS | Payment & Settlement indicator |
| Settlement | Total settled amount |
| Doc Open | Outstanding amount |
| Contra | Contra offset amount |
| Bal | Remaining balance |
Forex / Multi-Currency
Each invoice supports a single currency set at the header level.
Key Features
- Exchange rate — system applies the rate on the transaction date; can be manually overridden
- Reverse currency rate — toggle to use inverse rate (v1.16+)
- Forex button — on the edit screen for shadow/forex-linked documents
- Orange row highlight — forex-linked documents are highlighted in the listing for easy identification
- Exchange gain/loss — posted automatically upon payment settlement
Restrictions
- Cannot contra, knock-off, or edit shadow documents created from forex operations
- Currency rate editing can be restricted via
Cannot Edit Currency Ratesetting - Forex Data Source visibility controlled by
Show Forex Data Sourcesetting
GL Posting & Tax
Upon invoice finalization (FINAL), the system automatically generates the following accounting entries:
DR  Cost Account (e.g., IT Expenses)         RM 3,500.00
DR  Tax Account (Input Tax / Claimable SST)     RM 210.00
CR AP Control Account (Supplier Payable) RM 3,710.00- Multi-currency: Foreign currency invoices are converted using the rate on the transaction date. Exchange gain/loss is posted automatically upon payment.
- Tax compliance: Each tax code maps to a dedicated input tax GL account, ensuring SST/GST returns are accurate.
- Document status: Invoices remain in DRAFT until finalized. Only FINAL invoices generate GL entries.
Configuration & Settings
Access Settings from the sidebar to configure applet behaviour.
Default Selection (Settings > Default Selection)
- Branch: Default branch pre-filled when creating a new invoice
- Location: Default location
- Floating Point Precision: Decimal places (2–4)
- Transaction Date Logic: Finalized / Created / Updated / Transaction Date
- Details Tab Ordering: Drag-and-drop reorder of invoice tabs
Application Settings (Settings > Application Settings)
Control which fields are mandatory, optional, or hidden for your users. For example:
- Make Reference No mandatory to ensure supplier invoice numbers are always recorded
- Hide Permit No if not relevant to your business
Branch Settings (Settings > Branch Settings)
Per-branch configuration for invoice processing:
- Branch Details — branch-specific metadata
- Item Category Filter — restrict which item categories are available per branch
- Pricing Scheme — create and edit pricing schemes per branch
- Printable Format — branch-specific print layouts
- Default Settlement Method — pre-set the payment method for invoices created under this branch
Knock Off Settings (Settings > Knock Off Settings)
Configure KO BY / KO FOR rules per document type — controls which upstream documents (Purchase GRN, PO, Requisition) can be knocked off against invoices. See Knock-Off (KO For) for details.
Printable Format Settings (Settings > Printable Format Settings)
Define the layout and fields for printed or exported payment vouchers and invoice documents.
Feature Visibility
Control which features are accessible to which user roles. For example, restrict the ability to void invoices to Finance Managers only.
Permissions
- Client-Side Permission Listing — Configure component-level visibility (show/hide FINAL, VOID, DISCARD, CLONE, file import/export menus, ARAP columns, etc.)
- Permission Wizard Listing — Fast role permission assignments
- Permission Set Listing — Define role-based permission sets
- User / Team / Role Permission Listing — Assign permissions at the user, team, or role level
Release Notes
View version release notes (v1.00–v1.17) for version-specific behaviour changes.
Webhook (Settings > Webhook)
Configure outbound webhooks to notify external systems (e.g., ERP, expense management) on invoice events such as creation, finalization, or voiding.
Personalization
Default Selection (Personalization > Default Selection)
Individual users can set their own preferences:
- Default Branch / Location — pre-filled when creating a new invoice
- Default Toggle Column — SINGLE or DOUBLE column layout
- Default Item Search Item Type — pre-select which item types appear in search
- Default Tab Orientation — HORIZONTAL or VERTICAL tab layout
Sidebar (Personalization > Sidebar)
Reorder or hide sidebar items to match your preferred workflow.
Reporting & Audit
This applet does not have a dedicated Reports menu. Instead, use the following built-in tools for reporting and analysis:
Invoice Listing Export
Use the main Invoice Listing grid to filter invoices by supplier, date range, status, or branch, then export the results to Excel/CSV for AP reconciliation.
Line Items Listing
The Line Items sidebar route provides a flat grid of all invoice line items across all invoices. Filter by GL Account, Supplier, Date range, Department, Profit Center, or Project — then export for cost analysis.
File Export
Use File Export from the sidebar to generate CSV exports by transaction date range. Downloads are processed asynchronously — check the listing for completed files.
Per-Invoice Export
On any individual invoice, use the Export tab to generate a PDF using your configured printable format.
Audit Trail
Every action on an invoice is logged:
- Date & time of creation, edit, finalization, voiding
- User who performed each action
- Before/after values for any field changes
This ensures full traceability for internal audits and external compliance reviews.
FAQ
Q: When should I use this applet instead of the standard Purchase Invoice? A: Use this applet whenever the purchase does not involve receiving physical stock into your warehouse. Common examples: professional fees, SaaS subscriptions, utilities, rent, insurance, advertising, and training. If physical goods are involved, use the standard Purchase Invoice (with GRN) instead.
Q: Can I link a non-stock invoice to a Purchase Order? A: Yes. In the invoice header, use the Doc Link or Reference field to reference the originating Purchase Order. This maintains a full procurement paper trail even for service purchases and supports 2-way matching (PO vs. Invoice).
Q: What happens if I entered the wrong GL account after the invoice is posted? A: Posted invoices cannot be edited directly. You will need to raise a Purchase Credit Note to reverse the incorrect entry, then create a new invoice with the correct GL account. Contact your Finance Manager if you are unsure of the process.
Q: Can one invoice have multiple currencies? A: No. Each invoice is in a single currency (set at the header level). If a supplier bills you in multiple currencies in the same invoice, split it into separate invoices per currency.
Q: How do I handle recurring monthly service invoices (e.g., monthly office rental)? A: You can use the Clone function (from the edit screen dropdown menu) to duplicate last month’s invoice, update the date and reference number, and finalize. This avoids re-entering the same line items each month.
Q: Where can I see all invoices pending payment? A: Use the Invoice Listing and check the ARAP columns (Doc Open Amount, Settlement, Balance). Invoices with a remaining Doc Open Amount are still pending payment. You can sort or filter by these columns for AP aging review.
Q: Can I attach multiple files to a single invoice? A: Yes. The Attachments tab supports multiple file uploads per invoice. There is no strict file count limit, though large files should be compressed before uploading to maintain system performance.
Q: Who can void a finalized invoice? A: Voiding a FINAL invoice requires permission that is typically restricted to Finance Managers or System Admins. Note: VOID is blocked if the invoice is linked to a purchase return or if e-invoice is enabled on edit. This action is logged in the audit trail.