Purchase Requisition (Internal) Applet
Purpose and Overview
A purchase requisition is your company’s formal way of saying “we need to buy this.” Before any money is spent or a supplier is contacted, someone fills in a purchase requisition to record exactly what is needed, how much of it, and from where. A manager or approver then reviews and signs off on it. Only after that approval does purchasing move forward — typically by raising a purchase order in the Purchase Order (Internal) Applet.
Think of it like a pre-approved shopping list: you specify what you need, your manager checks it makes sense and fits the budget, and then it gets handed off to procurement to place the actual order. The purchase requisition is the internal request; the purchase order is the formal commitment sent to the supplier.
The Purchase Requisition (Internal) Applet is where your team creates, tracks, approves, and manages those requisitions — from the first draft all the way through to approval and any follow-up your company requires.
Video Overview
This video is a walkthrough of the workflows in the Internal Purchase Requisition Applet.
Who Uses This Applet?
Purchasers, procurement staff, and requesters create and submit purchase requisitions. They fill in details, add line items, attach supporting documents, and track whether their requests have been approved.
Approvers and managers use the Approval Request menu to approve or reject pending requisitions, and Approval History to review past decisions.
Controllers and operations staff use the Line Items view to see what items are being requested across the company without opening each requisition individually, and the Line Items Queue to approve individual lines in bulk when your company uses that step.
Administrators configure which fields appear, who can do what, how approvals route, and how documents print — all from Settings.
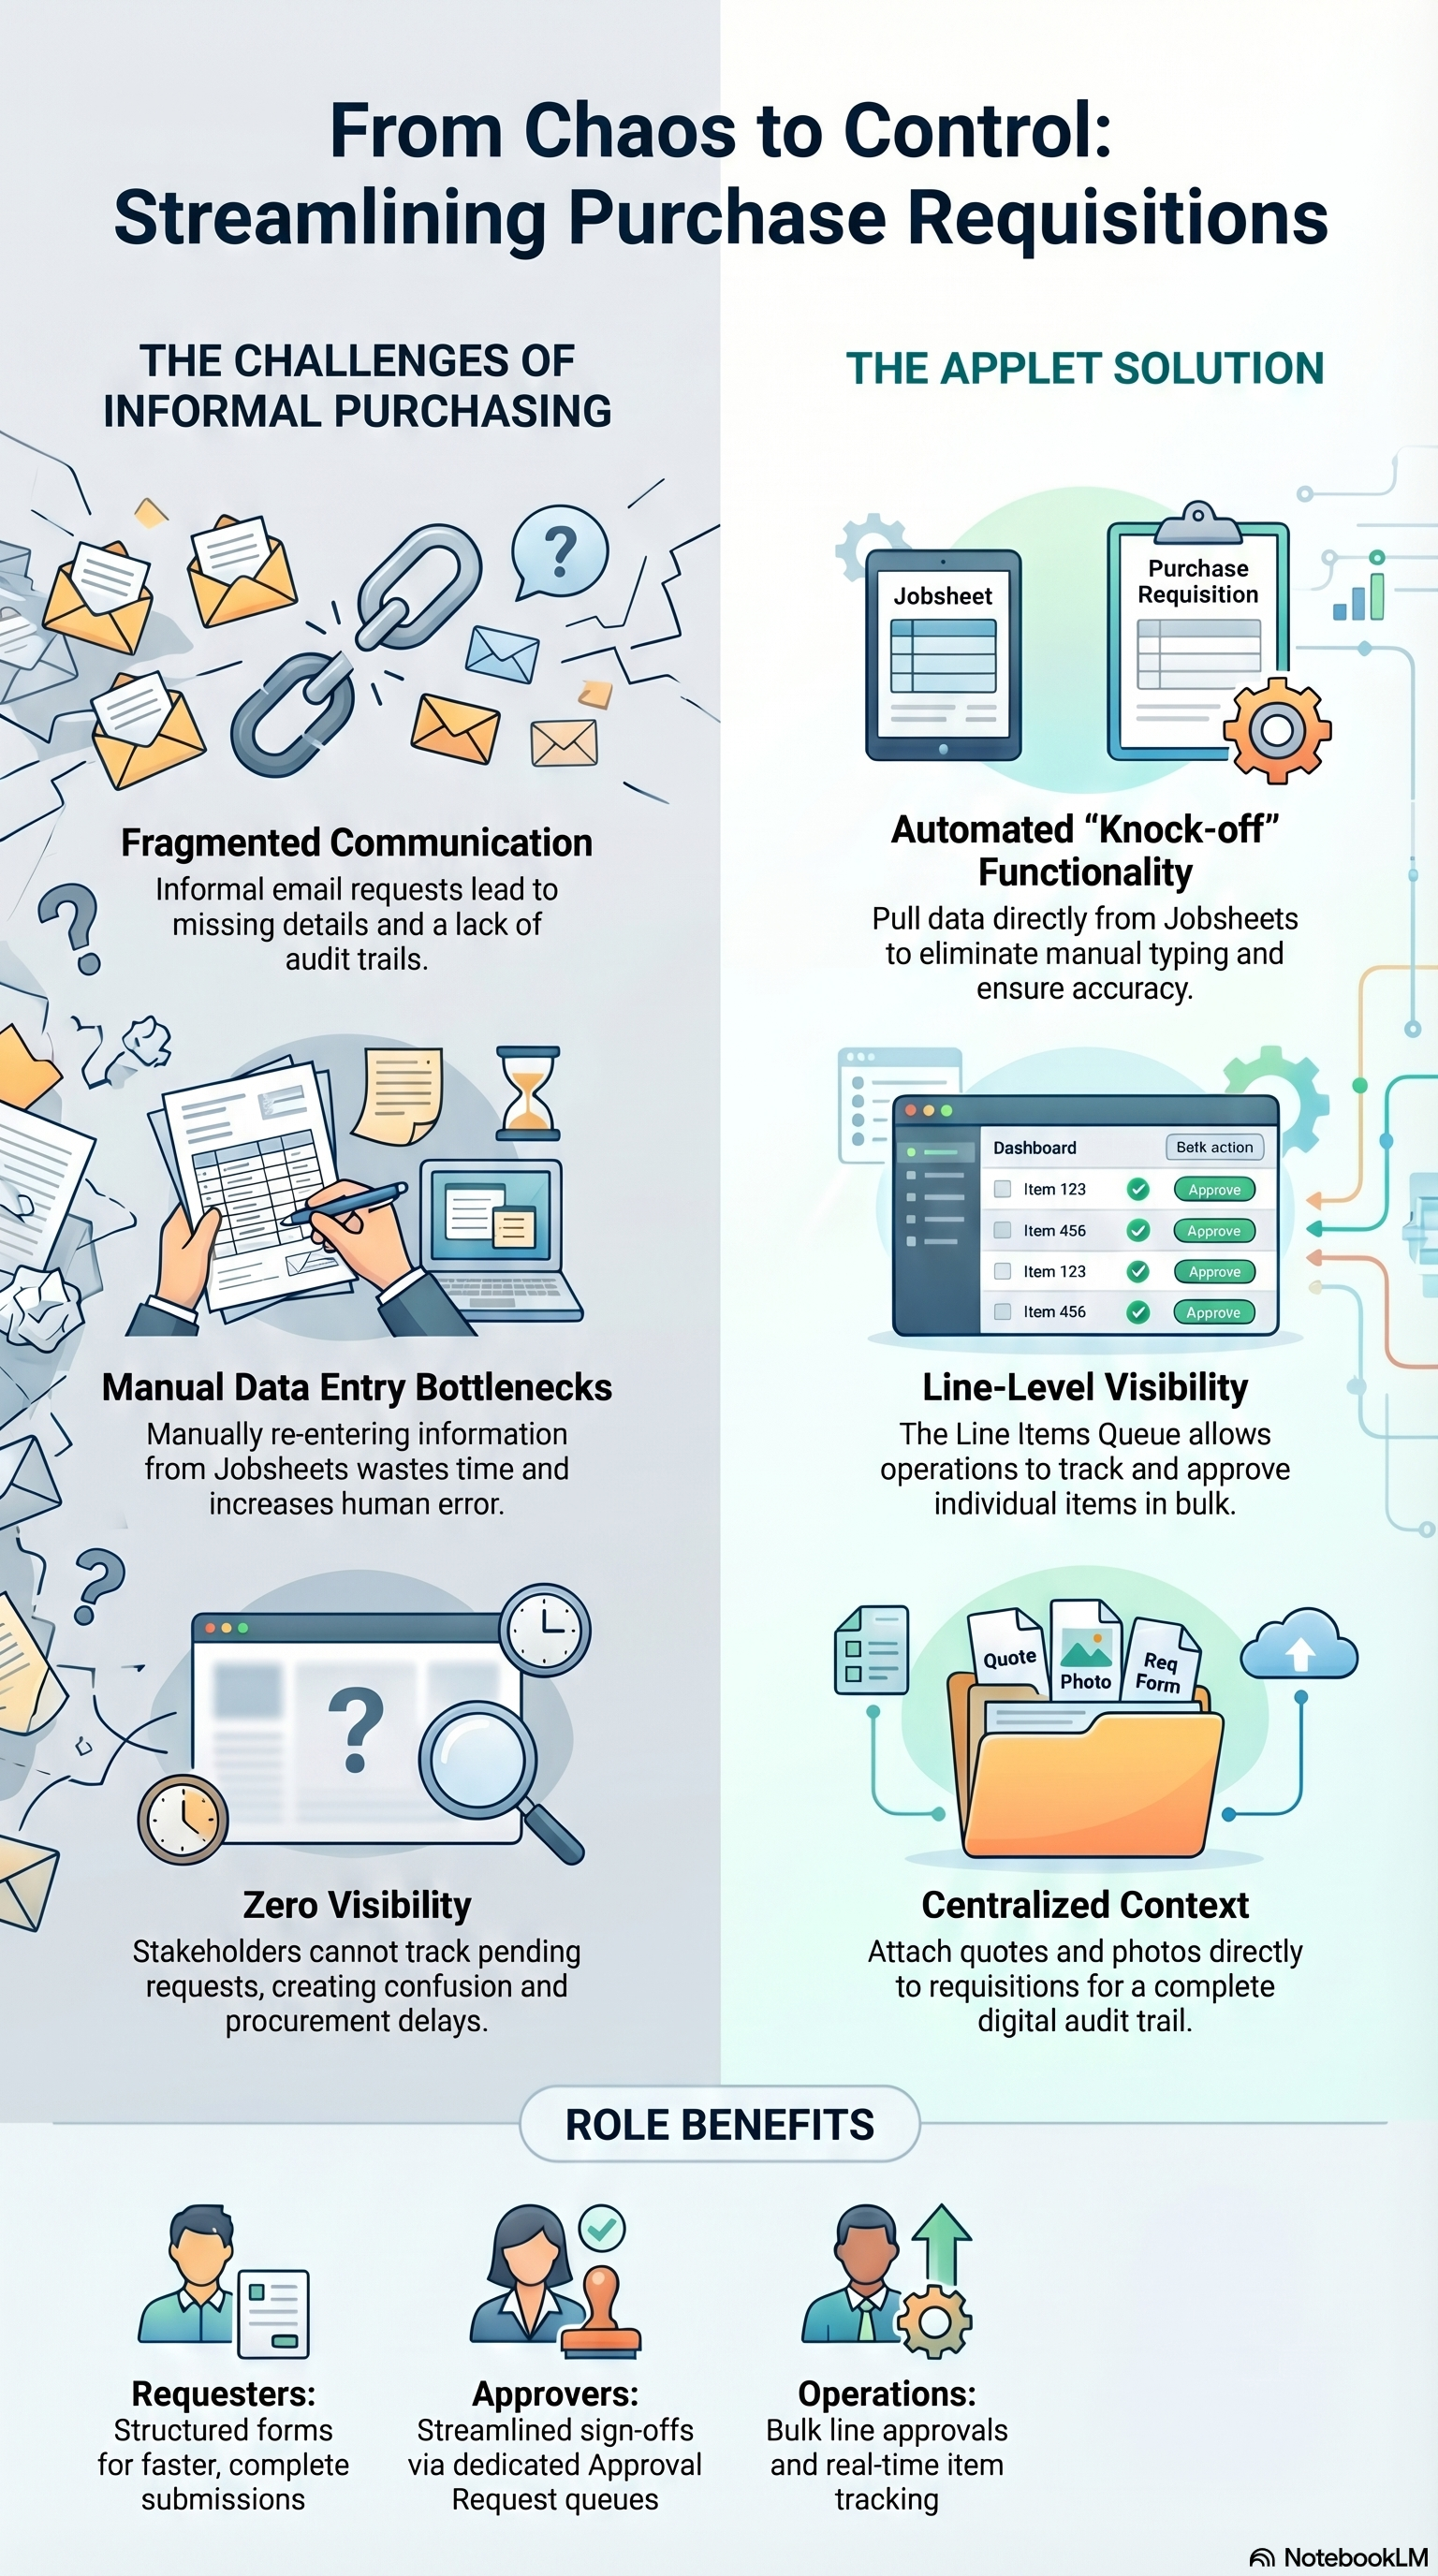
What Problems Does This Solve?
Without a structured process, purchase requests often happen over email or through informal conversations. That leads to missing details, no clear audit trail, and no way to see what is still waiting for action.
This applet brings everything into one place:
- One structured form for the document header (top-level details like date and reference), account information (who is buying and where it gets delivered), supplier, and the list of items being requested
- Clear document stages — draft, final, void, or discard — so everyone knows where a requisition stands at any time
- A formal approval path through Approval Request and Approval History, instead of sign-off by email
- Line-level visibility through Line Items and Line Items Queue for operations teams who need to review or approve individual items
- Attachments and linked documents so quotes, photos, or related files stay with the requisition — making it easy to check the full picture later
- Knock-off from Jobsheet so you can pull relevant details from an existing Jobsheet directly into the requisition without retyping
Before You Start
Having the right information ready before you begin will make the process faster and avoid interruptions.
For requesters:
- The name or description of what you need to buy
- Quantity and unit of measure (e.g. 10 units, 5 boxes)
- Estimated price or budget amount (if your company requires it)
- Preferred supplier name, if known
- Your department or cost centre code (your department’s internal billing or budget reference — ask your finance team if you are unsure)
- Delivery address or branch (if different from your default)
For administrators setting up the applet for the first time:
- Which fields should be mandatory on a requisition form
- Who approves requisitions — one person, or a chain of approvers?
- Should approvals route by branch, department, or amount?
- Do you need line-level queue approval (Line Items Queue), or standard document-level approval only?
- What print format should be used for printed requisitions?
Feature Navigation
Key Concepts
Words we use
| Term | Meaning |
|---|---|
| Purchase requisition | The internal buy request you raise in this applet. |
| Requisition | Short form of purchase requisition. |
| Document | The same record on the list—use this when talking about Final, Void, print, or posting status. |
Knock-off and KO mean the same thing. KO is the short form used on the KO For tab.
To send a draft for approval, use Submit for approval or Generic Doc Approval on the saved document. Your tenant shows one label or the other. Both start the approval workflow. Approvers work from the Approval Request menu, not from that button.
How a Requisition Moves Through Your Company
A purchase requisition follows a lifecycle from creation to completion. The exact steps depend on your company’s settings, but the general flow looks like this:

Status and Posting Status
You will see two status fields on a requisition. They mean different things:
| Field | What it tells you | Example values |
|---|---|---|
| Status | The general working state of the record | Active, Inactive |
| Posting Status | Whether the document is still open for editing or locked | Draft, Final |
Once a requisition reaches Final posting status, you generally cannot edit it. If a correction is needed, your process may require voiding it and raising a new one—check with your administrator first.
Depending on your company’s configuration, the edit screen may show sections as horizontal tabs or as expandable panels down the page. Both contain the same information.
Quick Start Guide
For Requesters: Create Your First Purchase Requisition
Goal: Save a new purchase requisition ready for approval.
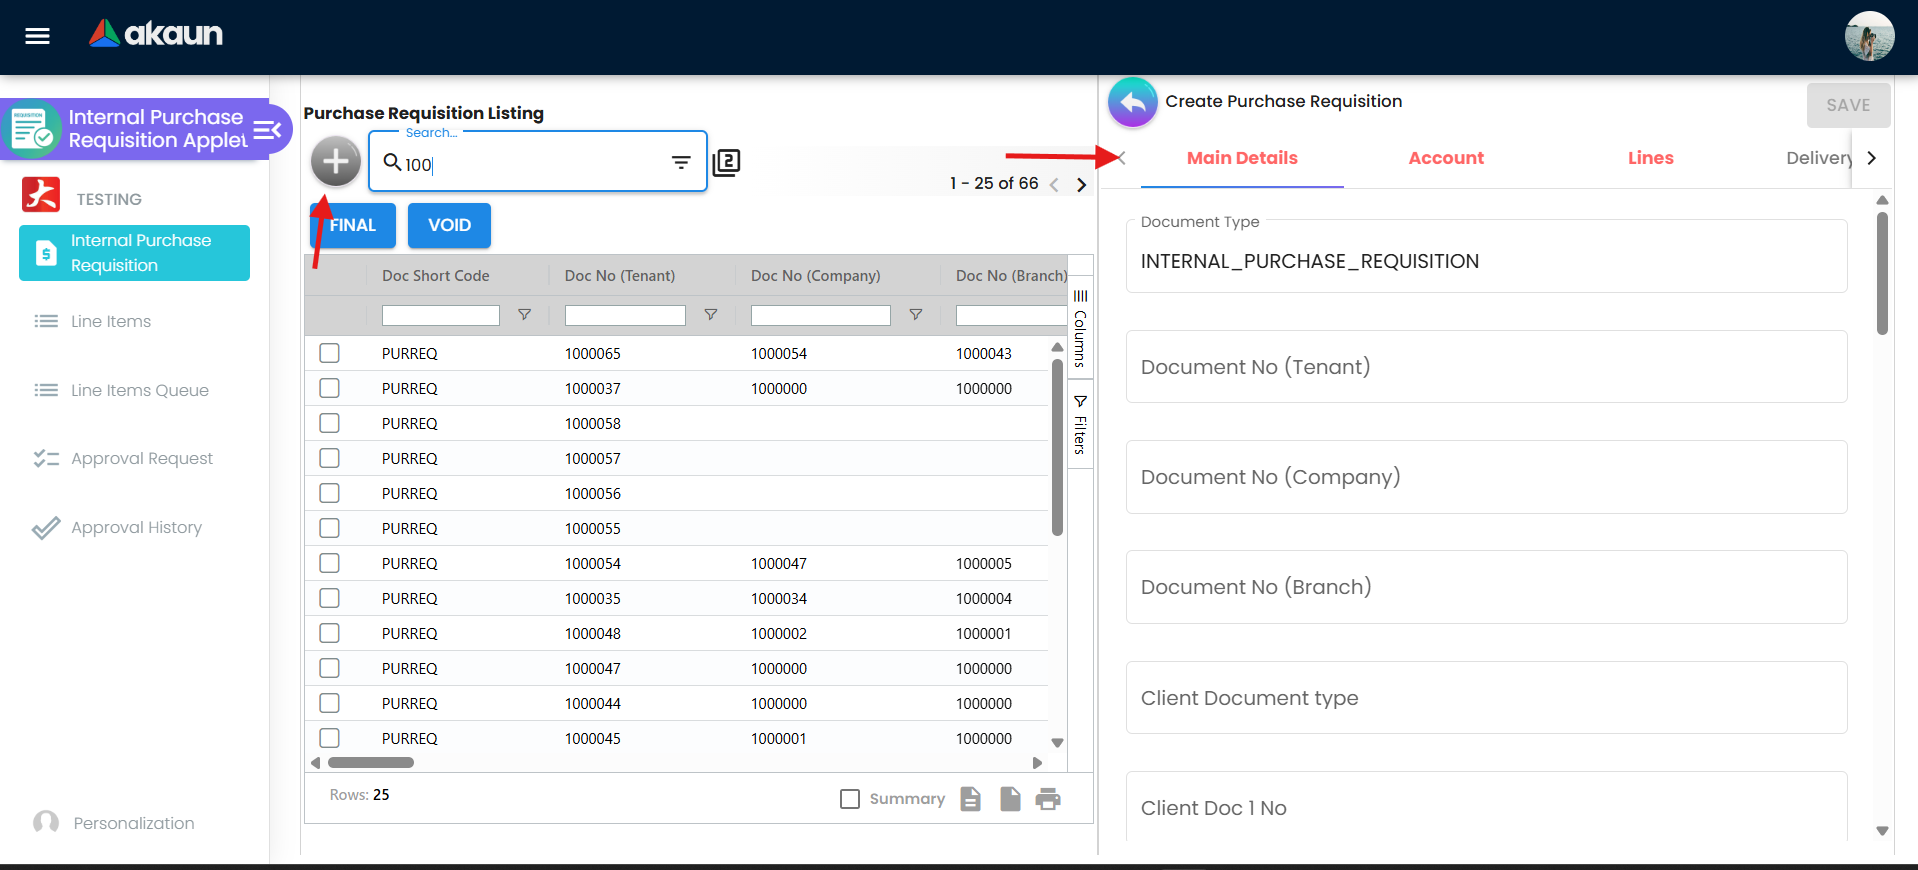
- Open Internal Purchase Requisition from the left menu.
- Click Create (the + icon, usually at the top left).
- On the Main Details tab, fill in:
- Transaction Date — the date you are raising the request
- Reference or document number (if your company auto-generates this, it may already be filled in)
- Any other required header fields shown on your screen, such as company or branch
- Open the Account tab and complete:
- Entity Details — the company or branch making the request
- Bill To — where the invoice should be addressed
- Ship To — where the goods or services should be delivered
- Open the Line Items tab. Click Add (or the + icon within the tab) for each item you need:
- Select or type the Item name or code
- Enter the Quantity
- Enter the Unit Price if required
- Add any notes or references for that line
- If your company uses them and the tabs are visible, complete Delivery Details, Payment, or Department Header.
- If KO For appears and you have a Jobsheet to reference, open that tab, find your Jobsheet in the list, and select it — the relevant details will be brought into your requisition automatically.
- Click Create to save the requisition.
What happens next? The requisition stays in draft until your process moves it forward—often Final on the list and/or submit for approval on the document. Follow your internal purchasing process.
For Approvers: Review and Action a Requisition
Goal: Approve or reject a purchase requisition in the approval queue.
- Open Approval Request from the left menu (the approver inbox—not the submit button on the document).
- Click on a record to open it. Review the top section (dates, reference number, who raised it, and which branch or department it is for), the line items, the total amounts, and any attachments or remarks the requester added.
- When you are ready to decide:
- Click Approve if the requisition is correct, complete, and within your company’s spending guidelines.
- Click Reject if changes are needed. Add a remark explaining what needs to be corrected — the requester will see this when the document is returned to them.
- The record will move out of your queue automatically. Use Approval History to confirm your decisions and see a full record of past actions.
For Operations: Line Views and Printing
Goal: Review items being requested across requisitions, work through a line queue if your company uses one, and print documents when needed.
- Open Line Items from the left menu to see a single list of all lines from many requisitions. Use the filters and search to narrow by item, date, branch, or other criteria.
- If your company uses Line Items Queue, open it to see lines waiting for queue-level approval. Tick the line or lines you want, then click APPROVE.
- To print, open Internal Purchase Requisition, select the document or documents you need, and use Single print or Multiple print when those actions appear.
For Administrators: First-Time Setup Checklist
Complete these steps in order when setting up the applet for the first time.
- Step 1: Open Settings → Feature Visibility and turn on the menus and actions each role needs. Disable anything that is not relevant to your company’s purchasing process.
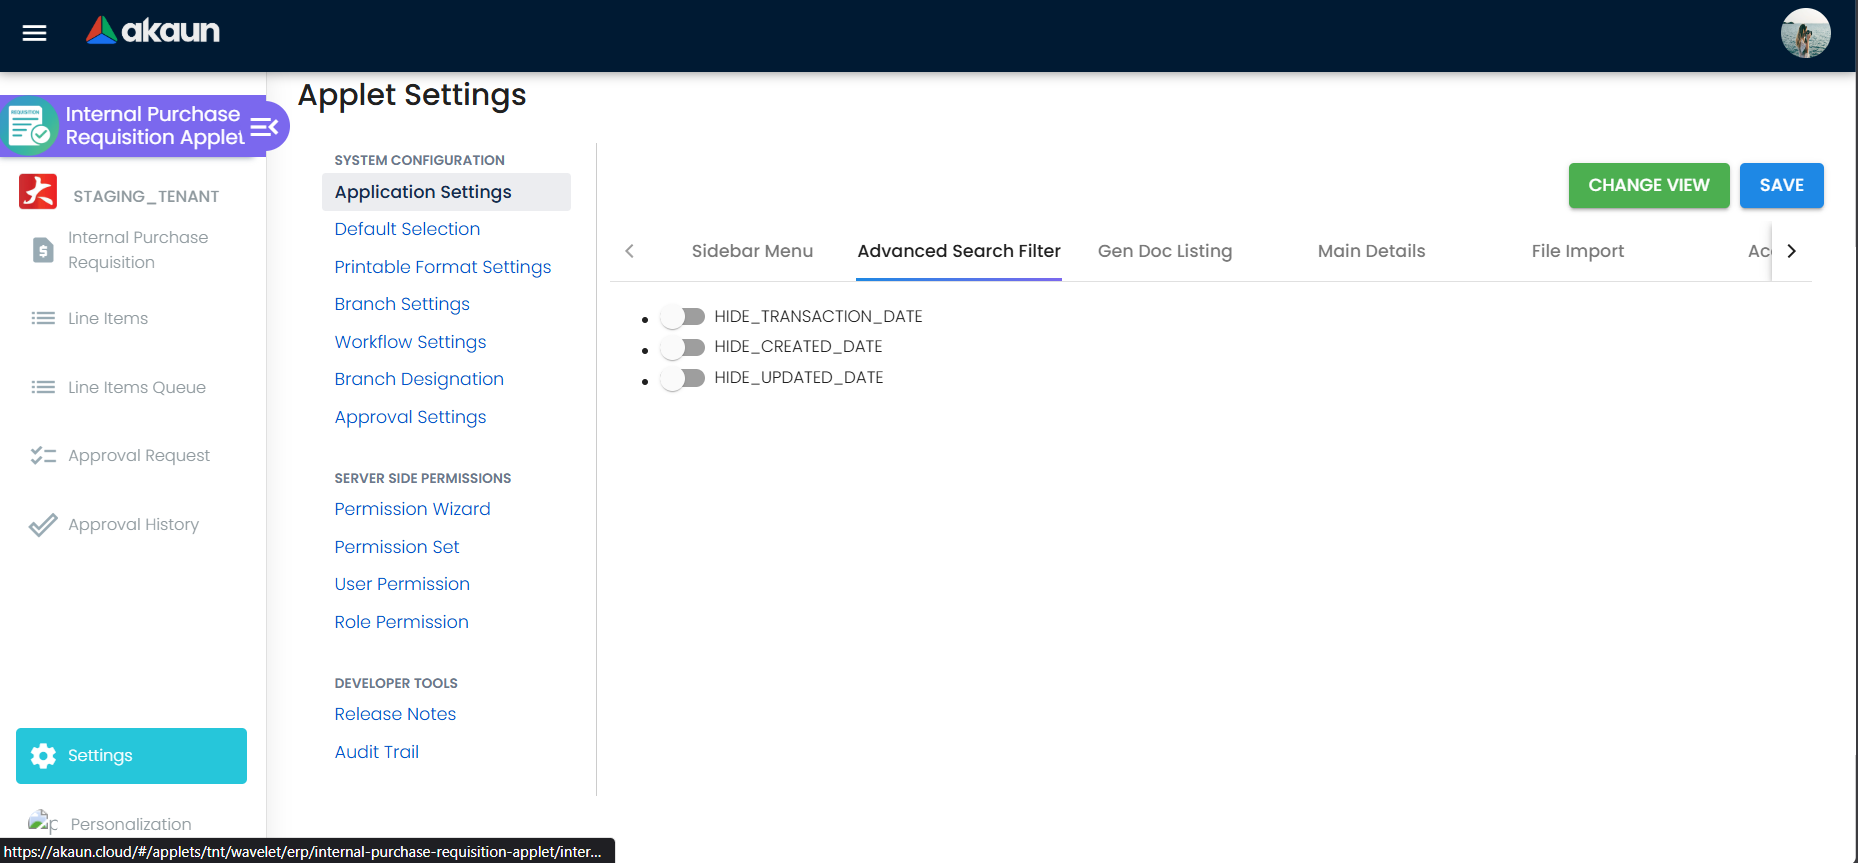
- Step 2: Open Settings → Application Settings and configure which fields are visible and required on the requisition form.
- Step 3: Set Default Selection so the correct company, branch, and location pre-fill for users when they create a new requisition.
- Step 4: Configure Branch Designation (the setting that links users and approval routing to specific branches) if different branches have different approval rules or defaults.
- Step 5: Set up Printable Format Settings so printed requisitions match your company’s layout.
- Step 6: Configure Workflow Settings and Approval Settings — define who approves, in what order, and what conditions (such as document amount or department) determine which approval level applies.
- Step 7: Set Permissions so each role (requester, approver, controller) can only see and do what they should.
- Step 8: Create a test requisition, submit it, approve it, and confirm the full flow works before going live.
Estimated time for basic setup: 1–2 hours.
Purchase Requisition
Open Internal Purchase Requisition from the left menu.
List view
You see all requisitions your role can access. From the list you can start a new requisition with Create (+), use Final or Void on a selected document when those actions are available, print with Single print or Multiple print when enabled, and search or filter the grid. Columns typically include document number, company, branch, posting status, status, transaction date, and amounts.

Create screen
The first save uses a focused set of tabs:
| Tab | Purpose |
|---|---|
| Main Details | Header—dates, references, company, branch, requester fields |
| Account | Entity details, bill-to, ship-to |
| Line Items | Items or services being requested |
| Delivery Details | Delivery instructions (when enabled) |
| Payment | Payment terms (when enabled) |
| Department Header | Department header for cost allocation (when enabled) |
| KO For | Pull details from a Jobsheet (when enabled) |
Click Create to save the requisition as a draft.
Edit screen
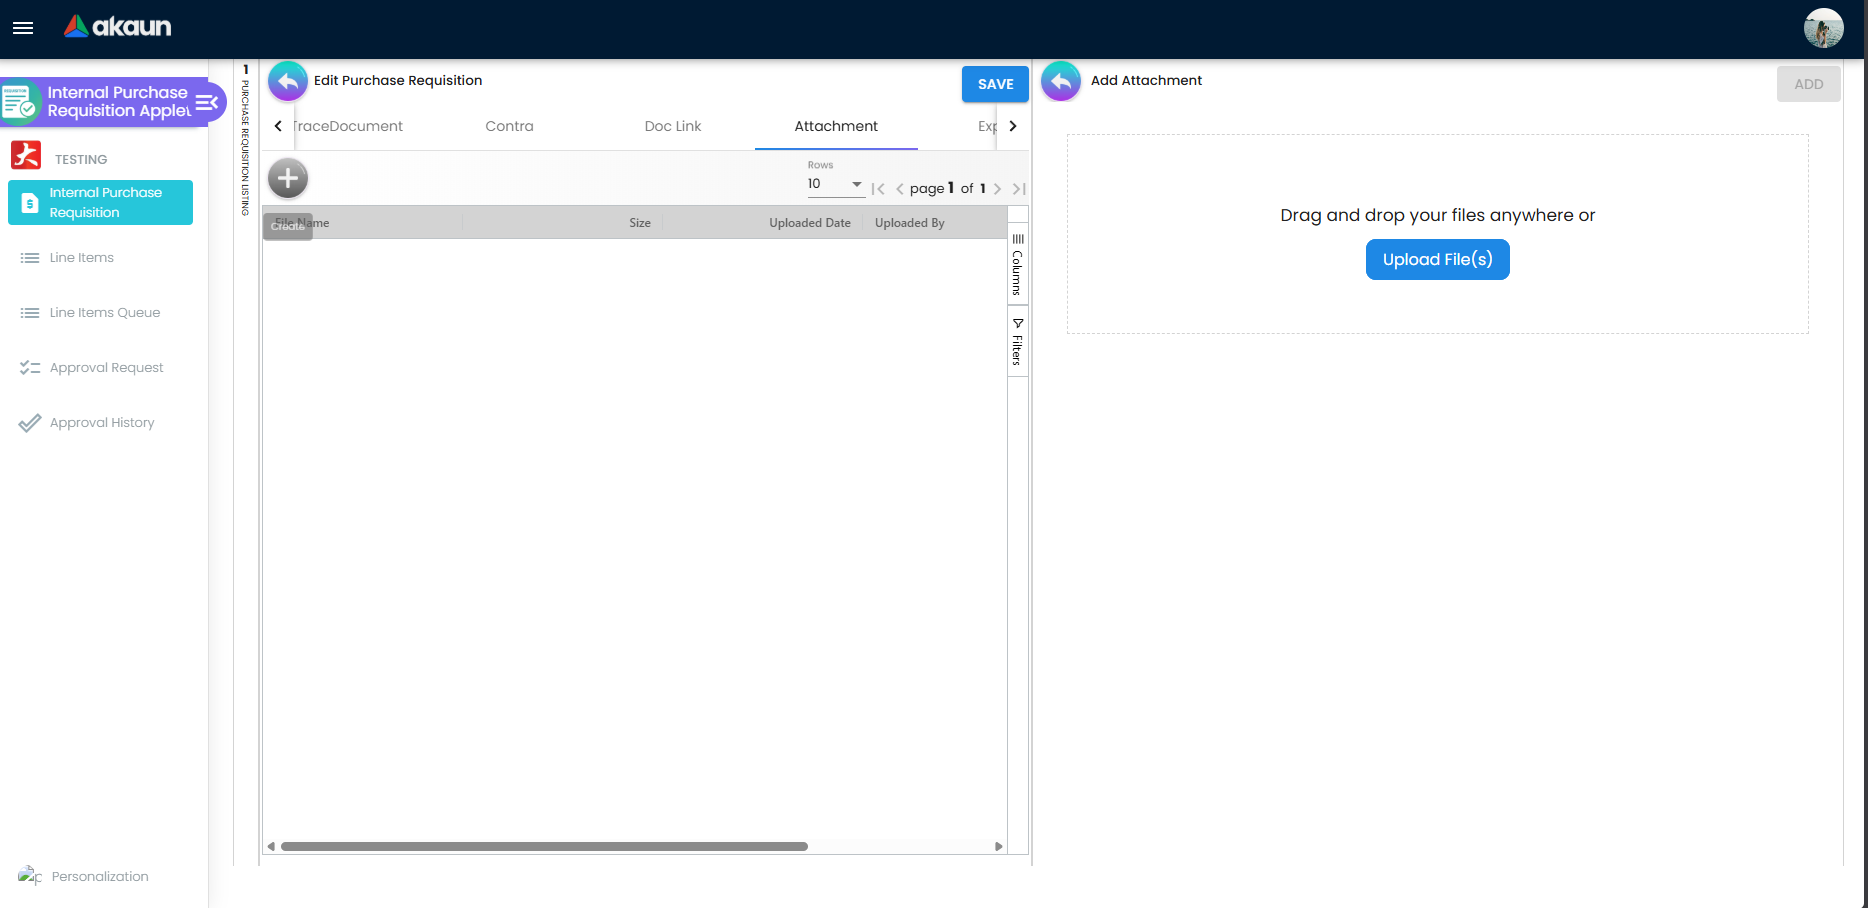
After the first save, opening the document again shows extra sections such as Attachments, Doc Link, Trace Document / Posting, and Generic Doc Approval. These do not appear on the initial create screen.
| Section | Purpose |
|---|---|
| ARAP | Finance account links |
| Trace Document / Posting | Links to follow-on documents such as purchase orders |
| Contra | Offset or balance against another document |
| Doc Link | Related document references |
| Attachments | Quotes, photos, supporting files |
| Export | Export to PDF or Excel |
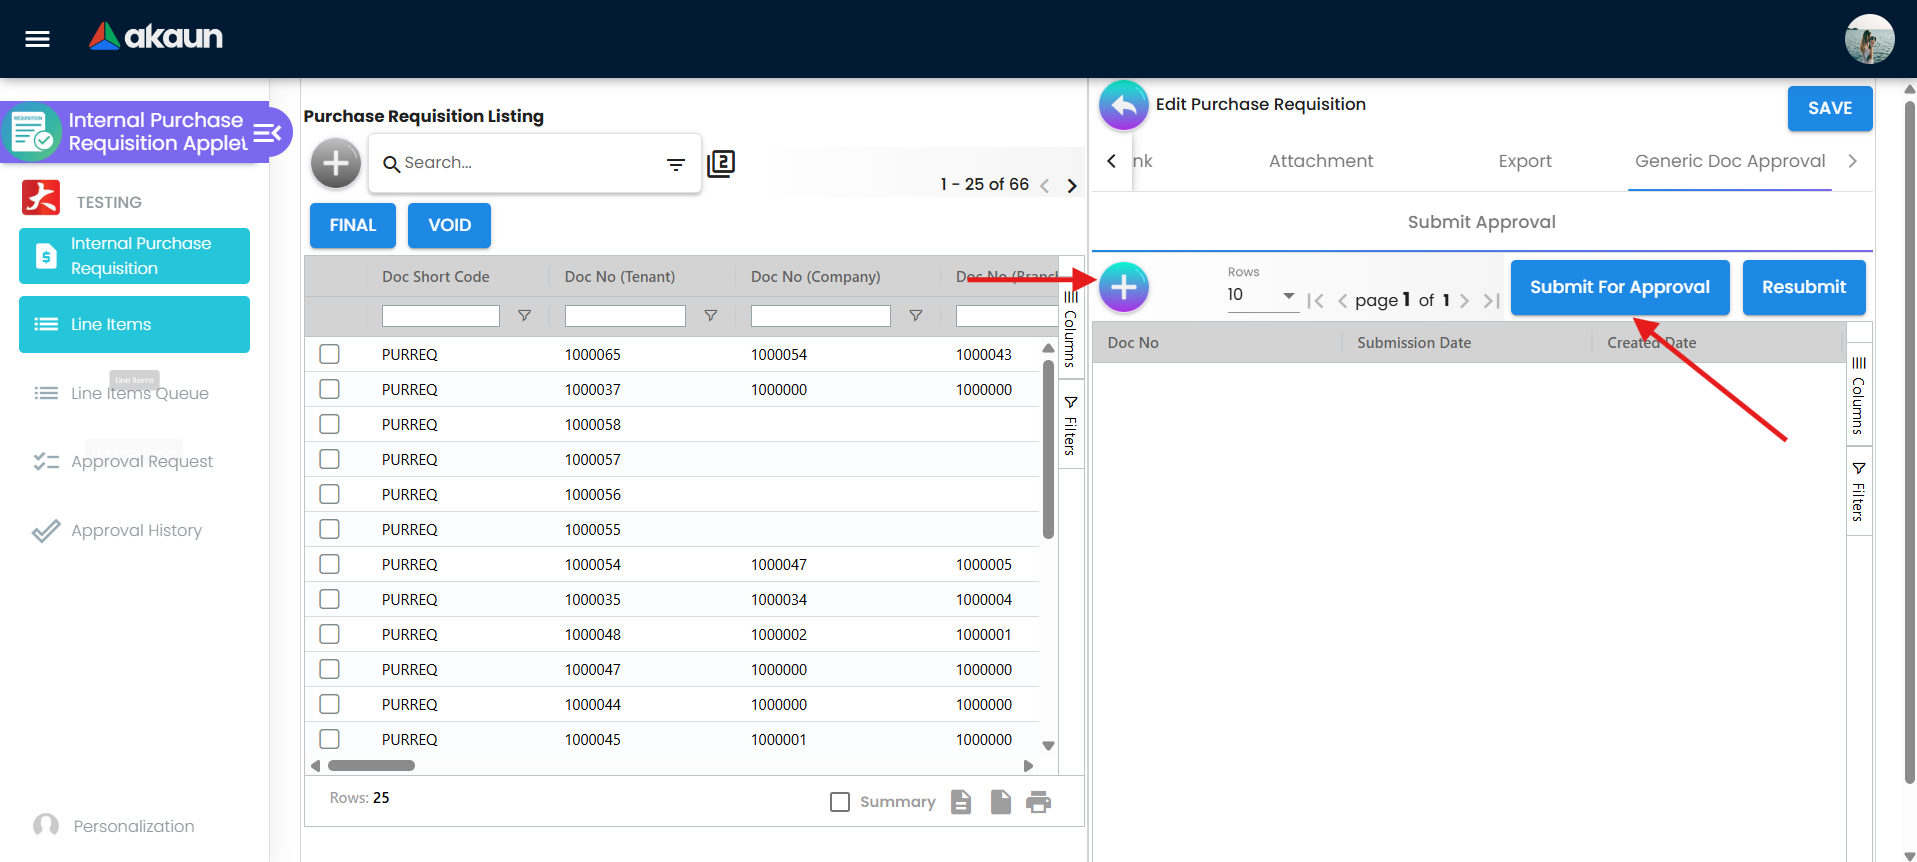
| Generic Doc Approval | Start or track approval on this document |
Discard may appear on drafts that were never submitted. Unlike Void, it removes the draft without a formal cancellation record.
Send for approval
When the draft is complete, use Submit for approval or Generic Doc Approval on the document—your setup shows one label. Both start the approval workflow. Your company may also require Final from the list before approvers see the task. Approvers then work from the Approval Request menu.
Lines and Knock-Off
KO For
Knock-off pulls data from another document into your requisition so you do not retype it. KO is the short form used on the KO For tab. In this applet, knock-off is from Jobsheet only. Select a Jobsheet on the KO For tab (create screen) or tab when enabled, and matching details fill into the requisition.
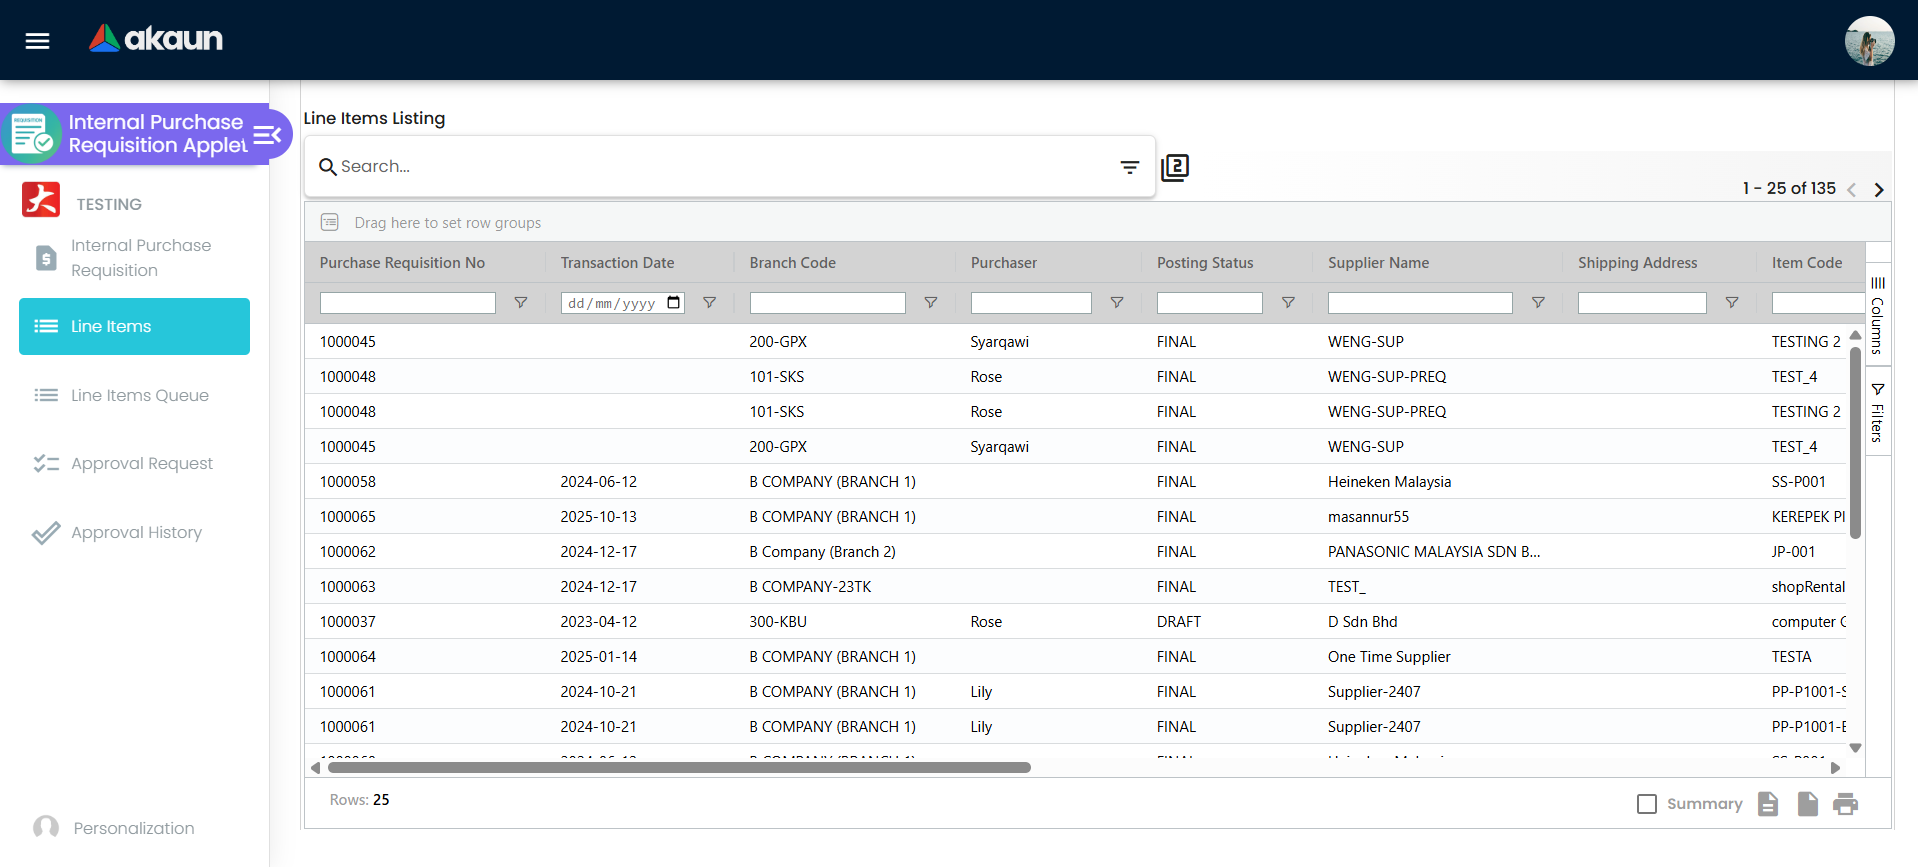
Line Items menu
The Line Items left menu lists lines from many requisitions in one grid. Use filters and search by item, date, or branch. This is not the same as the Line Items tab inside one requisition—that tab is for adding lines on a single document only.
Line Items Queue
When enabled, individual lines wait here for line-level approval before or alongside full document approval. Open Line Items Queue from the left menu, tick the line or lines you want, then click APPROVE.

Approvals
Approval Request is the left-menu screen where approvers review pending requisitions. It is not the same as submit for approval on the document—that action is what the requester uses to send a draft into the workflow.
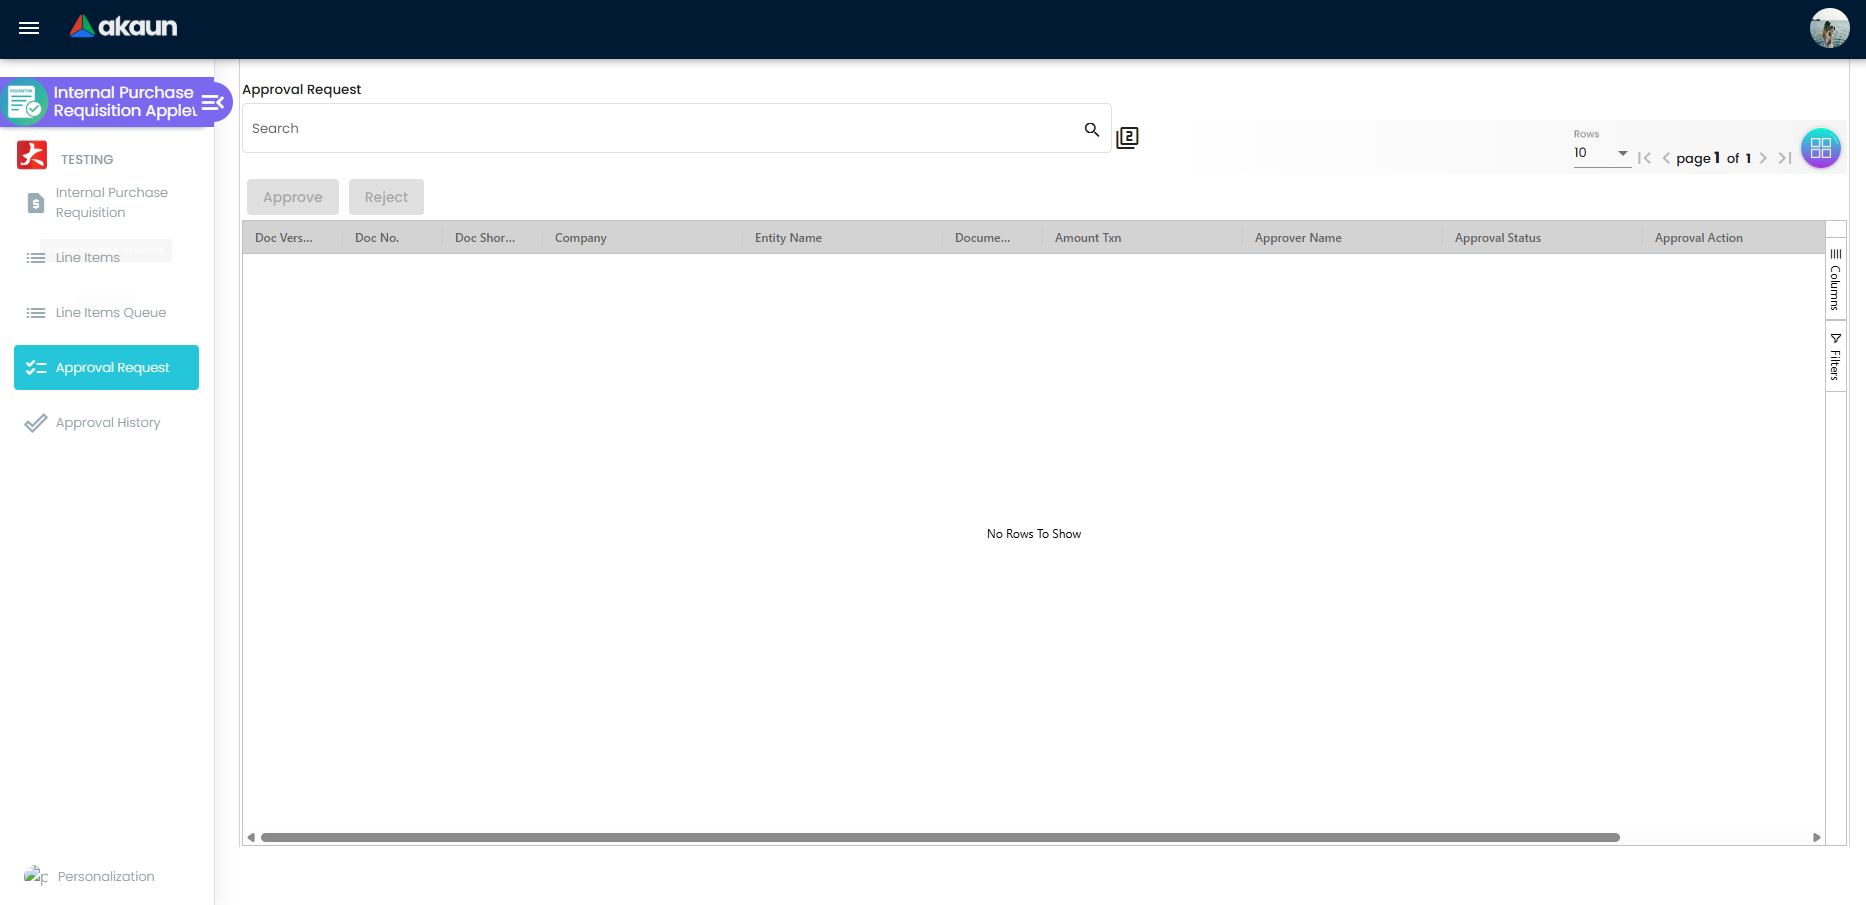
Approval Request
Open Approval Request from the left menu. The list shows requisitions assigned to you. Open a record, review lines, amounts, and attachments, then Approve or Reject. Add remarks on reject so the requester knows what to fix. Approved items leave your queue; rejected items return to the requester for correction.
Approval History
Open Approval History from the left menu for a record of past decisions—who approved or rejected, when, and any remarks. Use it to trace a decision or confirm a requisition completed the correct steps.
Configuration & Settings
Open Settings from the left menu. The areas available depend on your company’s configuration and your own access level.
| Area | What it controls |
|---|---|
| Application Settings | Which fields appear on the form and whether they are required |
| Default Selection | Pre-filled defaults for company, branch, and location |
| Printable Format Settings | How requisitions look when printed |
| Workflow Settings | How the document moves between stages and what features are active |
| Approval Settings | Who approves, in what order, and what conditions trigger each level |
| Branch Designation / Branch Settings | Approval rules and defaults specific to each branch |
| Feature Visibility and Integrations | Which menus and actions are visible to each role; connections to external systems |
| Permissions | What each user, team, or role can see and do |
| Release Notes / Change Log | A record of recent updates and changes made to this applet |
Personalization
Personalization lets you set your own defaults — for example, so that your branch is pre-selected every time you create a new requisition — without changing the shared settings for everyone else.
Related Applets
Purchase requisitions are part of a broader purchasing workflow in BigLedger. Depending on how your company works, a requisition is often the first step before other documents are raised.
| Applet | How it relates |
|---|---|
| Purchase Order (Internal) Applet | The typical next step after a requisition is approved — a purchase order is raised to formally commit the purchase with the supplier |
| Purchase Quotation (Internal) Applet | Some companies request a quote from suppliers before or alongside raising a requisition |
| Purchase GRN (Internal) Applet | Once goods are delivered, a Goods Received Note (GRN) is raised to confirm receipt against the purchase order |
| Purchase Invoice (Internal) Applet | Records the supplier invoice for payment after goods or services are received |
| Purchase Report Applet | Reporting across the full purchase workflow, including requisitions and orders |
Glossary
| Term | What it means |
|---|---|
| ARAP | Short for Accounts Receivable / Accounts Payable. Used by finance to link the requisition to the right accounts. Most requesters do not need to use this section. |
| Branch | A location, office, or division in your company. Bill To, Ship To, and many defaults are tied to branch; yours may be pre-filled from your user profile. |
| Branch Designation | Configuration that links users and approval routing to branches (for example, Branch A requests route to the Branch A approver). |
| Contra | Links this document to another to offset or balance an amount (for example, netting against an earlier requisition). |
| Cost Centre | Your department’s budget or billing code for this purchase. Ask finance or your manager if you do not know the code. |
| Discard | Removes a draft that was never properly completed. Unlike Void, it does not leave a formal cancellation record on the books. |
| Doc Link | Links this requisition to other BigLedger documents so they stay easy to find together (for example after a purchase order is created from the requisition). |
| Draft | The requisition can still be edited; it is not locked. Approval tasks may not exist until your process moves it forward from Draft. |
| Export | Download the requisition (for example PDF or Excel) for sharing or filing outside the system. |
| Final | Posting status that locks the document so header and lines usually cannot be changed. Often set when your process finalizes the requisition before or with approval. |
| Generic Doc Approval | On a saved document: start or check the approval workflow and see who must act next. |
| Jobsheet | A job or service document (for example maintenance work). In this applet it can be a knock-off source into a requisition when enabled. |
| Knock-Off (KO) | Pulls data from another document (such as a Jobsheet) into the requisition so you do not retype lines and details. |
| Line Items Queue | Line-level approval: individual lines wait here until approved, which can be required before or alongside full document approval. |
| Posting Status | Draft vs Final (and similar): whether the document is still open for editing or locked. |
| Status | The record’s general state (for example Active). Separate from Posting Status. |
| Trace Document / Posting | Shows how this requisition connects to follow-on documents (purchase order, invoice, and so on). |
| Void | Formal cancellation with an audit trail in reports. Use for a real requisition you must cancel; not the same as Discard. |
FAQ
Why can’t I see the Create button? Your account may not have permission to create purchase requisitions, or the button may have been hidden for your role by an administrator. Contact your administrator and ask them to check your Permissions and Feature Visibility settings.
Why are Final, Void, or Print missing from the list? These actions apply to rows you select on the Purchase Requisition list. Final and Void usually appear when the requisition is still in Draft (posting) and your role is allowed to use them. Print also needs a print format to be set up and enabled for your role. If you expect Print on a Final document, ask your administrator—visibility can depend on settings.
Why don’t I see the Delivery Details, Payment, Department Header, or KO For tabs? Those tabs are optional and can be hidden by your administrator through Application Settings or Feature Visibility. If you need one of those tabs and cannot see it, ask your administrator to enable it.
What is the difference between Void and Discard? Both cancel a requisition, but they work differently. Void creates a formal cancellation record that is visible in reports and leaves a clear audit trail — use this for requisitions that were properly created and need to be cancelled. Discard is for drafts that were never properly completed and removes the document without leaving a cancellation record. If you are unsure which to use, ask your finance team or administrator before taking action.
Why can’t I Void my requisition (the action is missing or blocked)? Often the requisition was already converted to a purchase order or is linked to downstream documents your rules will not break. Open Trace Document / Posting or Doc Link to see related POs. Follow your company process to adjust or cancel the downstream document first, or ask your administrator.
I saved my requisition—why hasn’t it gone to my approver? Create only saves the draft. Your company may still require Final on the list and/or submit for approval (or Generic Doc Approval) on the document before a task appears in the Approval Request menu. Check Generic Doc Approval and posting status on the document.
My purchase requisition is not showing up in Approval Request — why? Common causes: still in Draft and not submitted for approval; routing sent it to another approver; or line items still waiting in Line Items Queue. Open the document, check Generic Doc Approval, and contact your administrator if needed.
I submitted a requisition for approval but the approver says they cannot see it. What should I check? Ask your administrator to check the Approval Settings and confirm that the routing is pointing to the correct approver. Also confirm the document has left Draft status — if it is still Draft, the approval task may not have been created yet. Check Line Items Queue if line approval runs before the approver’s queue.
What do I do if my purchase requisition is rejected? When a requisition is rejected, the approver should have left a remark explaining what needs to change. Open the document, read the rejection reason, make the corrections, and resubmit it for approval. If no reason was given, contact the approver directly to ask what needs to be fixed.
Can I attach a supplier quote or supporting document to my requisition? Yes — once the requisition is saved, open it for editing and go to the Attachments section. From there you can upload files such as quotes, images, or emails. The Attachments section only appears in the edit view, not during initial creation.
How do I find an old purchase requisition? Open Internal Purchase Requisition from the left menu and use search and filters. If a document is missing, it may be outside your access rights—ask your administrator.
Can I copy a previous purchase requisition instead of starting from scratch? This depends on whether your company’s configuration includes a duplicate or copy function. If you do not see that option, raise a new requisition manually. Your administrator can confirm whether copying is supported in your setup.
Line Items Queue is empty or the menu is missing — why? If the menu is missing, the feature may be disabled in Settings or your role may not include access to it. If the menu is visible but the queue is empty, there may simply be no lines waiting at this time, or your current filters may be hiding them. Try clearing your filters or contact your administrator.
Can I edit a purchase requisition after it has been set to Final? Once a document reaches Final, header and line editing are usually locked. You may still add Attachments or reprint where your product allows. If a correction is needed, your process may require Void and a new requisition. Check with your administrator or finance team before voiding, especially if a purchase order was already raised from this requisition.
Where do purchase requisitions go after they are approved? Purchasing usually continues in the Purchase Order (Internal) Applet — for example by creating a new PO and searching by purchase requisition so Final requisitions appear. That step is not always automatic; it depends on your workflow and configuration. If nothing happens after approval, confirm your internal SOP and settings with your administrator.
I’m raising a PO—why doesn’t my requisition appear when I search for it? Typical causes: the requisition is not Final yet, filters (company, branch, supplier) do not match, or the requisition was already fully used on another PO. Open the requisition and check Trace Document / Posting and Doc Link for existing links.
The screen shows red fields or I cannot save—what am I missing? Red or highlighted fields are usually required. Check every tab (Main Details, Account, Line Items, and optional tabs your company uses) and ensure each line has item, quantity, and any mandatory pricing or dimensions.
I cannot find “create new supplier” or I picked the wrong supplier on Account. Use the Select vs Create (or edit) mode on the Account tab: in Select mode you pick an existing supplier; in Create / edit supplier mode your administrator may allow a + to add a new supplier. If the toggle is missing, your role may be restricted—ask your administrator.
My Jobsheet does not appear under KO For—why? The Jobsheet may not be in the right status, may be outside your branch filter, or KO For / document types may be disabled in Settings. Confirm with your administrator which sources are enabled for knock-off.
First approver approved—where did the requisition go? It may be waiting on the next approver in the chain. Open Generic Doc Approval on the document and use Approval History to see who has acted and who is next.
Print is missing, blank, or looks wrong. Confirm a print format exists in Printable Format Settings, that Feature Visibility allows print for your role, and that you are using Single print / Multiple print from the list when supported.
Why does my document number or reference still look “temporary”? Many companies only assign the official document number (or fill certain reference fields) when the requisition reaches Final or when numbering rules run at that step. If it stays blank unexpectedly, ask your administrator about numbering setup.
I rejected a requisition by mistake—can I undo it? There is not always an “undo” button. Your administrator or finance team may need to reverse the decision or restart approval according to your policy. Do not assume the requester can resubmit without guidance.