Purchase Return (Internal)
Send goods back to a supplier. Finalising takes the quantity out of stock and lowers the supplier’s balance, but it leaves a balance that finance still has to close, by contra against the supplier’s invoices or by a settlement when the supplier refunds cash.
Overview
The Purchase Return (Internal) applet records goods going back to a supplier. Finalising one does three things at once: it takes the returned quantity out of stock at the chosen location, posts Dr Creditor / Cr Purchase Return so the supplier’s balance falls, and leaves a positive ARAP balance that finance closes by contra against the supplier’s invoices or by a settlement when the supplier refunds cash. Warehouse and procurement staff create it, usually by pulling lines from the original purchase invoice or GRN; finance closes it.
Engine document type INTERNAL_PURCHASE_RETURN, amount signum +1, quantity signum −1. It is the stock-moving counterpart of the Purchase Debit Note (Internal), which has the same amount sign but never touches stock.
Where it fits
| Position | Document / applet | Why |
|---|---|---|
| Module | Purchasing, Inventory, Financial Accounting, E-Invoice | Stock out, GL posting, and an e-Invoice purchase document type. |
| Upstream | Purchase Invoice (Internal), Purchase Invoice No Stock In (Internal), Purchase GRN (Internal) | The Search tab (Search By Supplier / By Invoice / By GRN / By Purchase Invoice No Stock In) copies their lines, links the documents, and — with WARN_EXCESS_RETURN_QUANTITY on — caps the return quantity at the source line. |
| Upstream (knock-off) | Purchase Order (Internal) | The create screen’s KO For tab. |
| Downstream | Payment Voucher (Internal), the Contra and Settlement tabs | Close the return’s ARAP balance. |
| Downstream | Purchase Refund Note (Internal) | Cash refund from the supplier recorded as its own document. |
| Downstream | Creditor Report | Shows the return’s balance against the supplier. |
| Downstream | My E-Invoice Admin | INTERNAL_PURCHASE_RETURN is in the e-Invoice purchase-document set. |
| Intercompany | Sales Return (Internal) | Intercompany processing pairs INTERNAL_PURCHASE_RETURN → INTERNAL_SALES_RETURN (and the reverse); the Intercompany menu is the manual confirmation queue. |
| External | Purchase Return Supplier Access (Internal) | Supplier-facing view. |
Screens and menus
| Menu | Route | What it is |
|---|---|---|
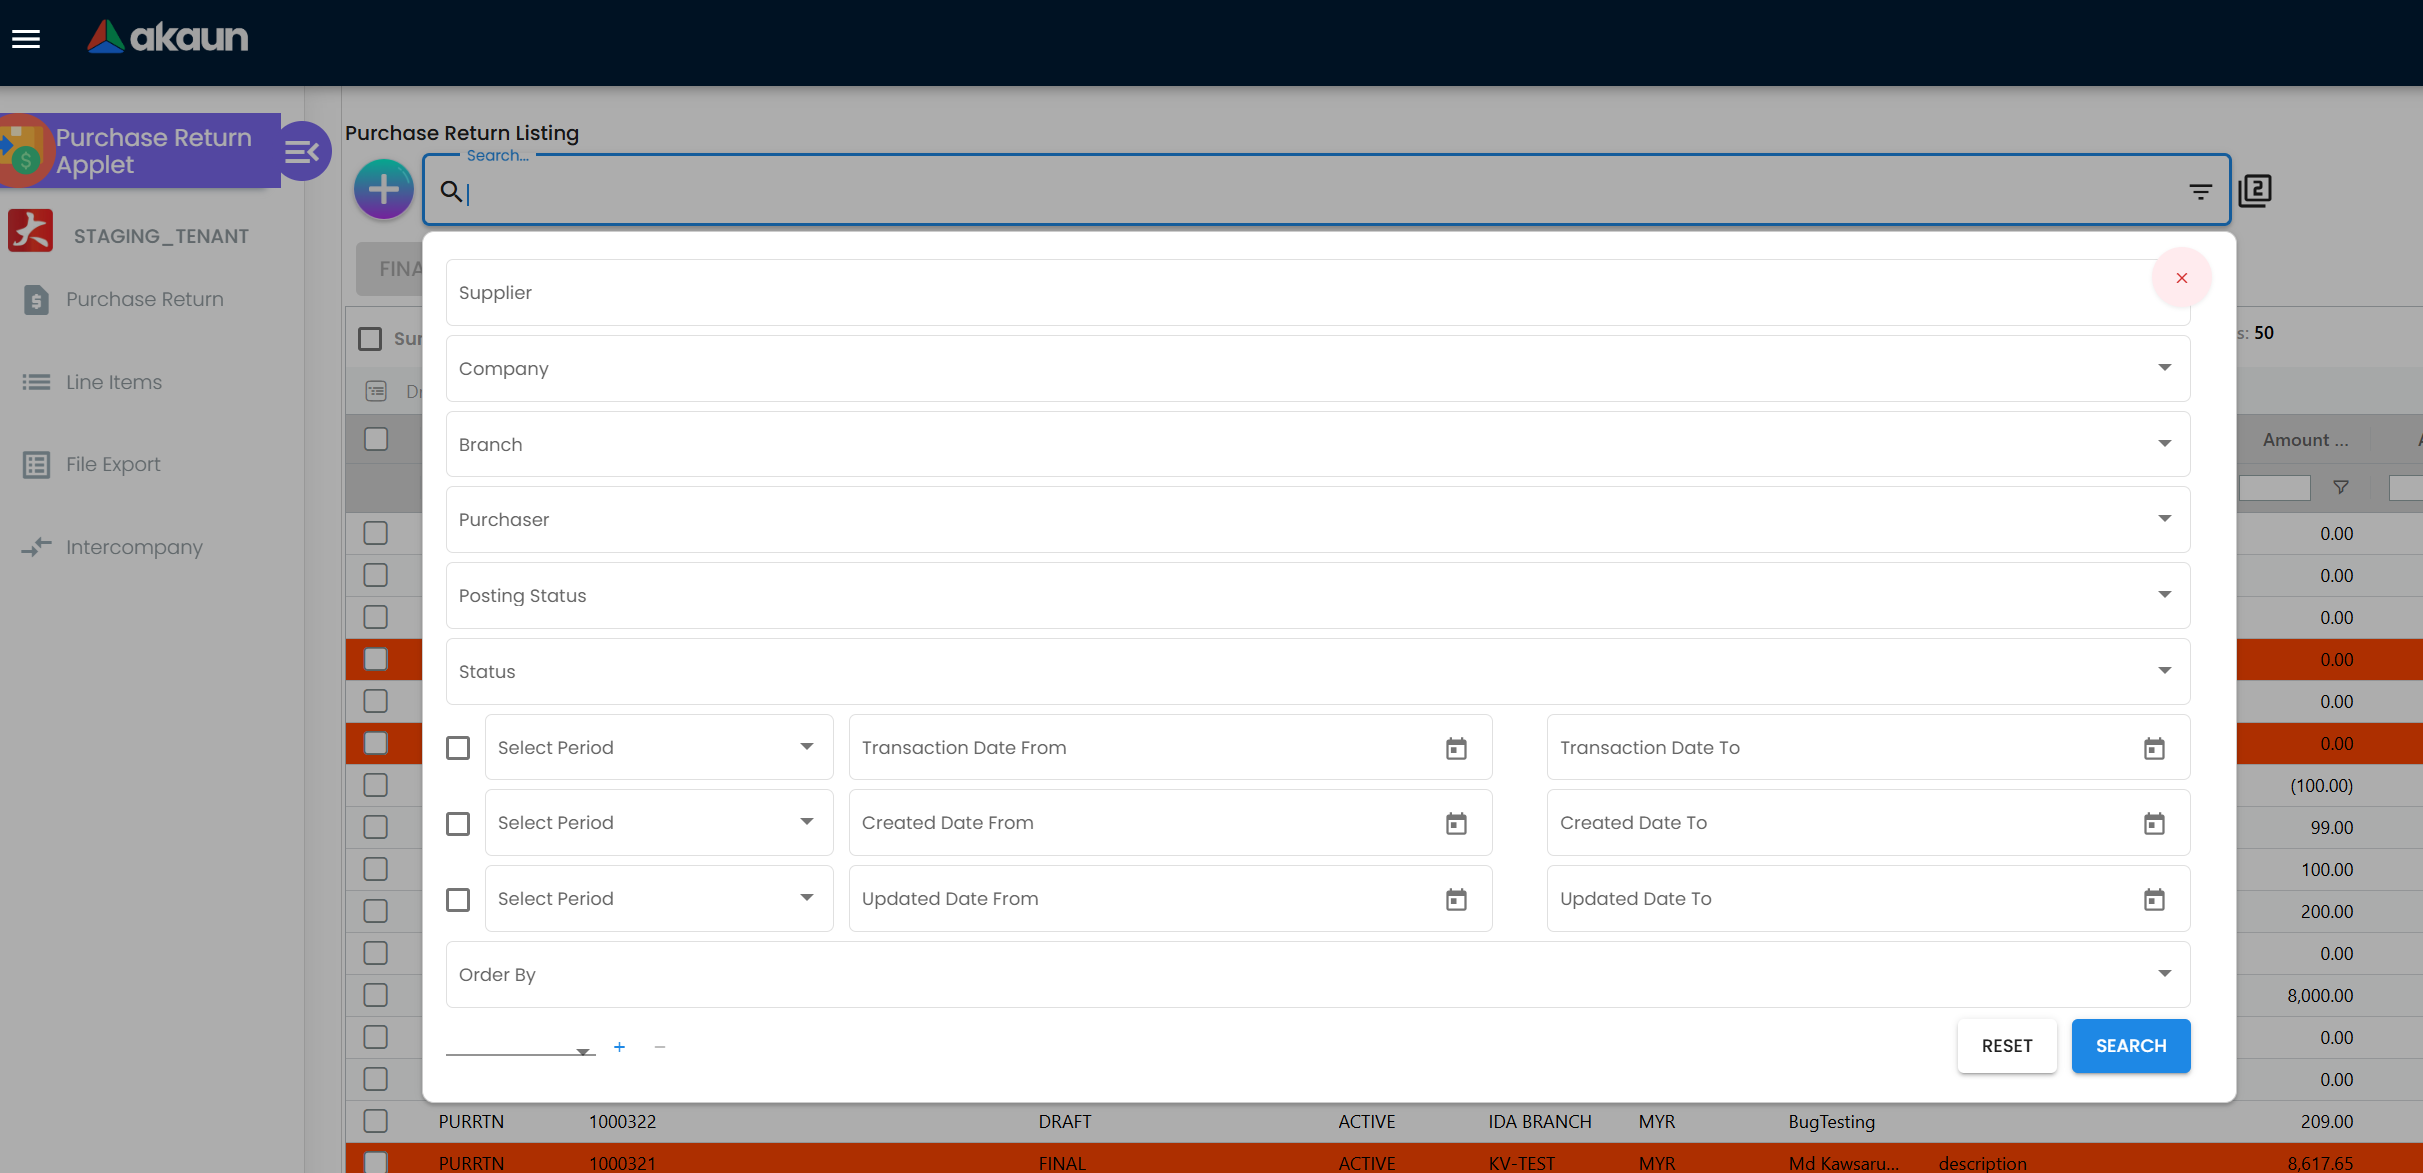
| Purchase Return | purchase-return | Listing, create, edit. Bulk FINAL, DISCARD, VOID, SINGLE/MULTIPLE PRINT and SELF-BILLED (sets einvoice_self_billed). |
| Line Items | line-items | Cross-document line grid (Edit Item with Item Details, Costing Details, Issue Link, Related Documents). |
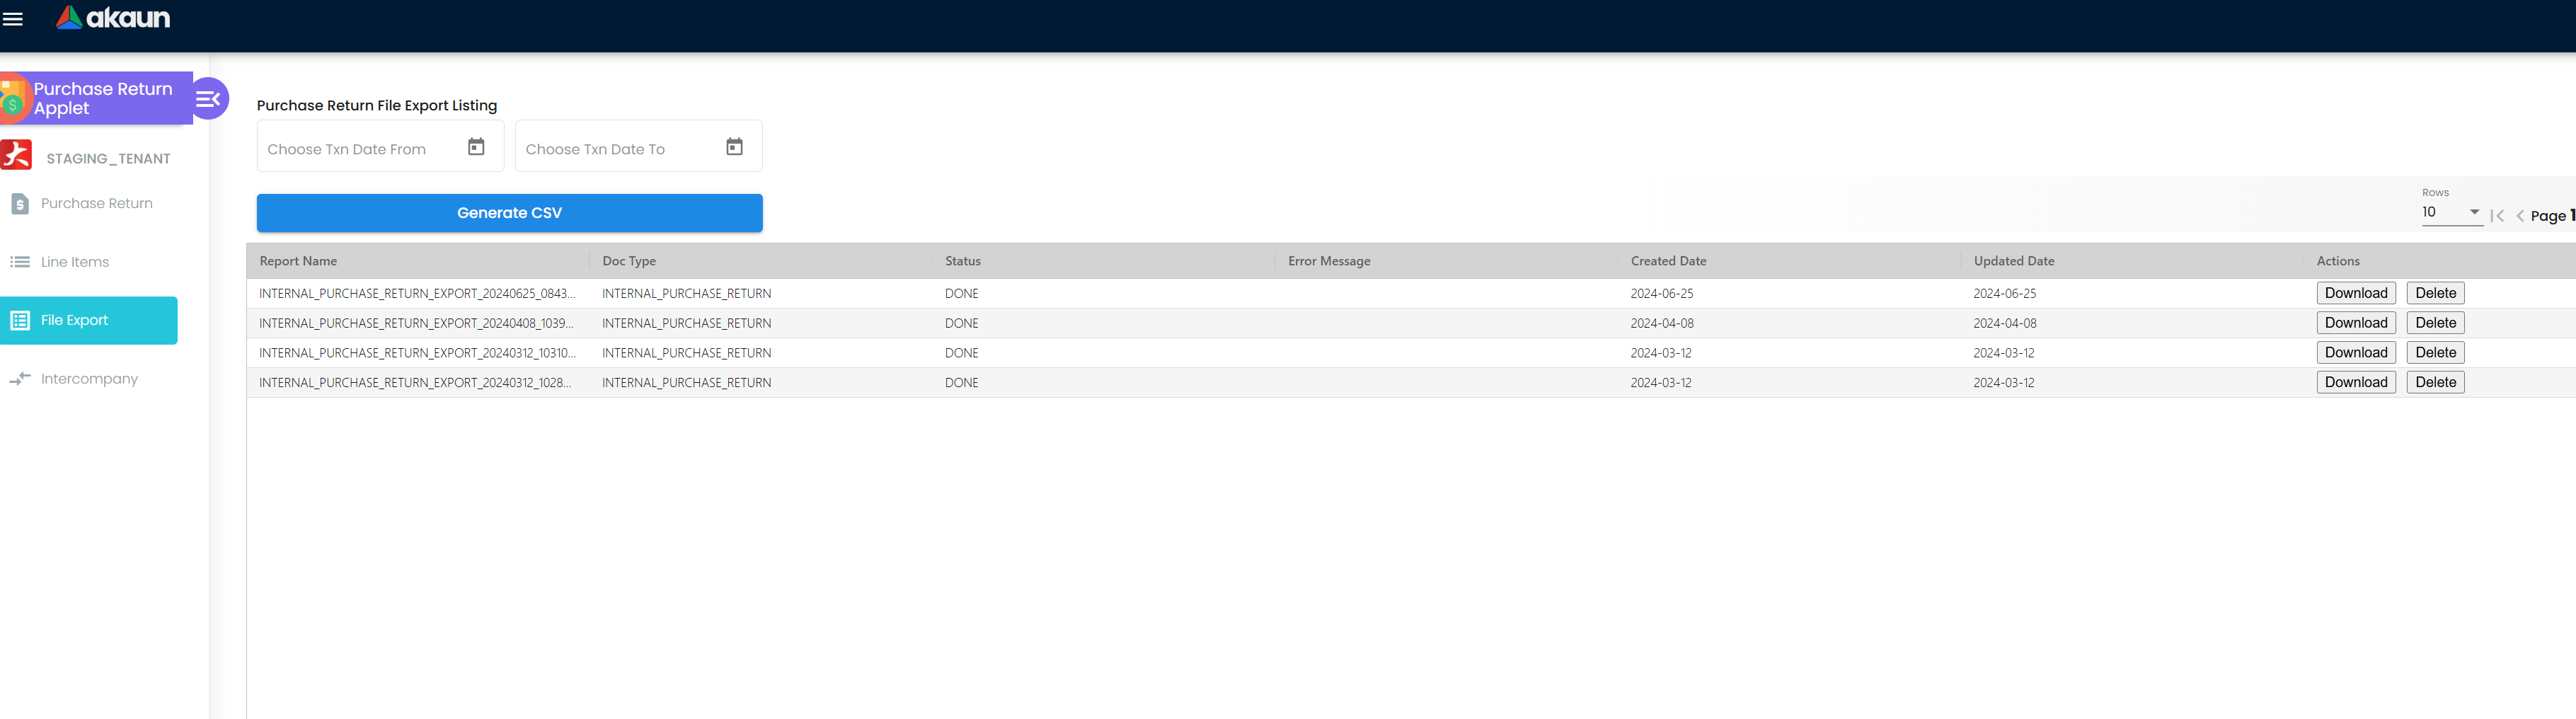
| File Export | file-export | Download the filtered listing. Hidden when HIDE_FILE_EXPORT_MENU is on and the user lacks SHOW_FILE_EXPORT_MENU — but no screen of this applet offers that switch (see Applet settings), so in practice the menu is governed by the permission alone. |
| Intercompany | intercompany | Manual intercompany transaction queue. |
| Audit Trail | audit-trail | Change log. |
| Settings | settings/… | Application Settings, Default Selection, Printable Format Settings, Return Reasons Settings, Branch Settings, Workflow Settings, Webhook, Feature Visibility, Client Side Permission, Role Pricing Scheme Link, Permission Wizard / Set / User / Team / Role Permission, Release Notes, Applet Log. |
| Personalization | personalization/… | Per-user Default Selection and Sidebar. |
There is no File Import menu in this applet (the backend importer exists; the UI does not expose it).
Create screen
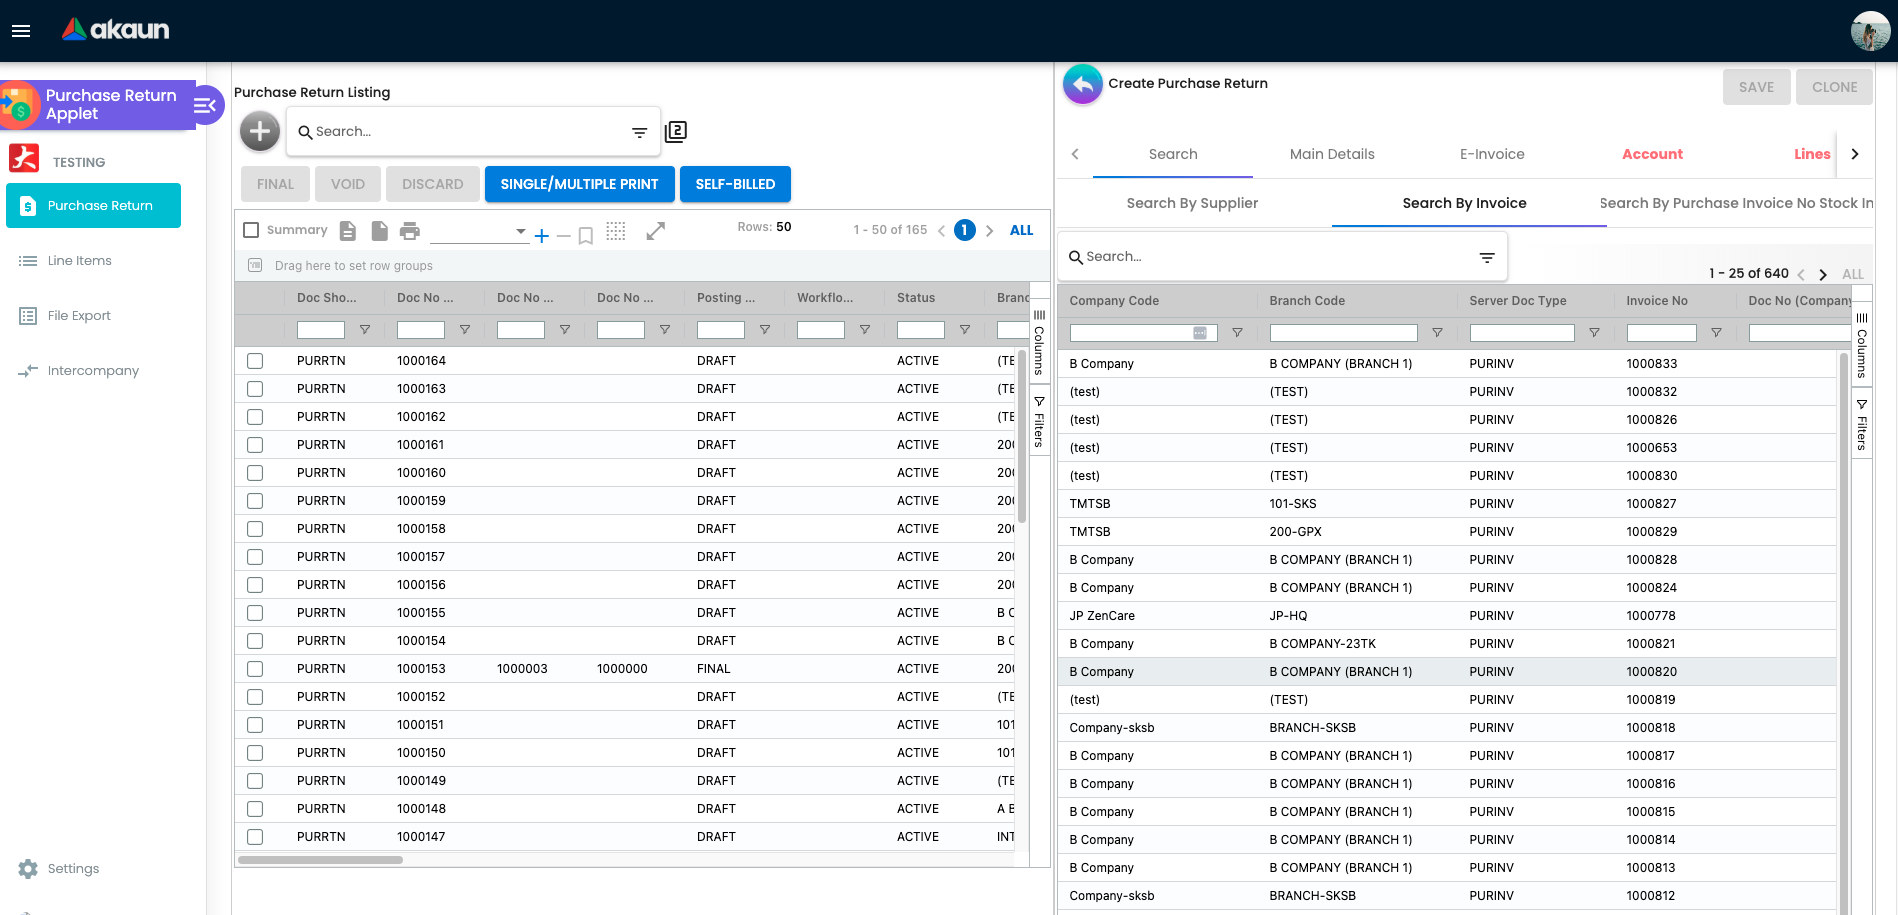
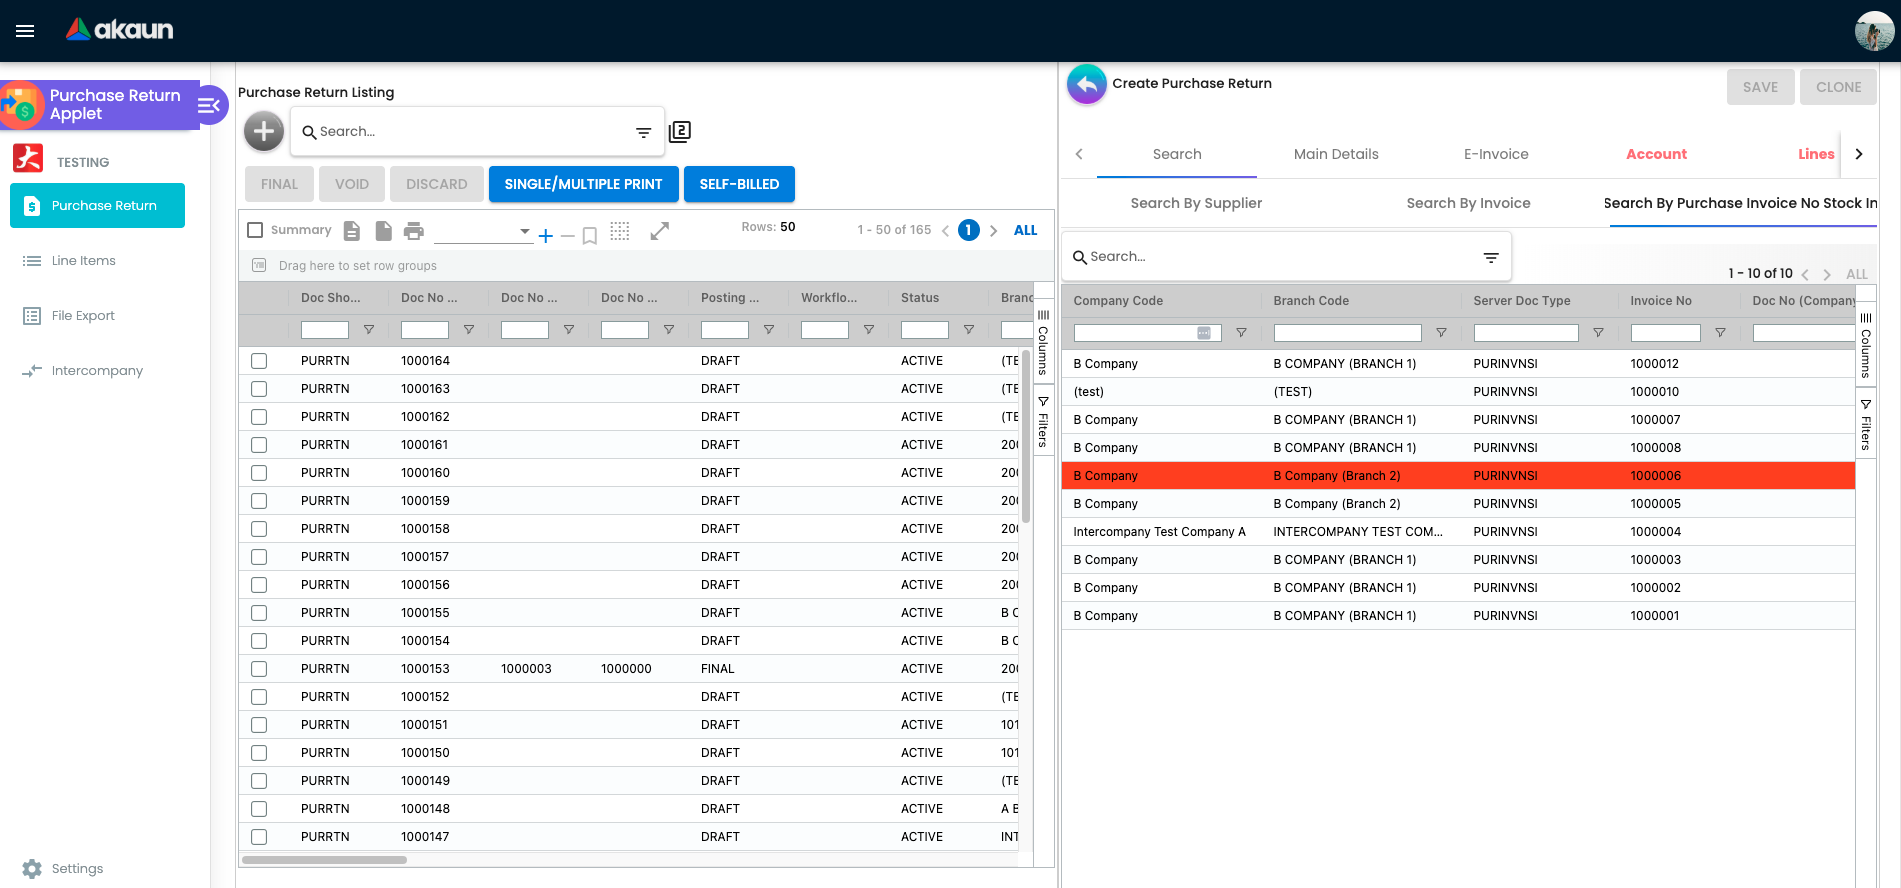
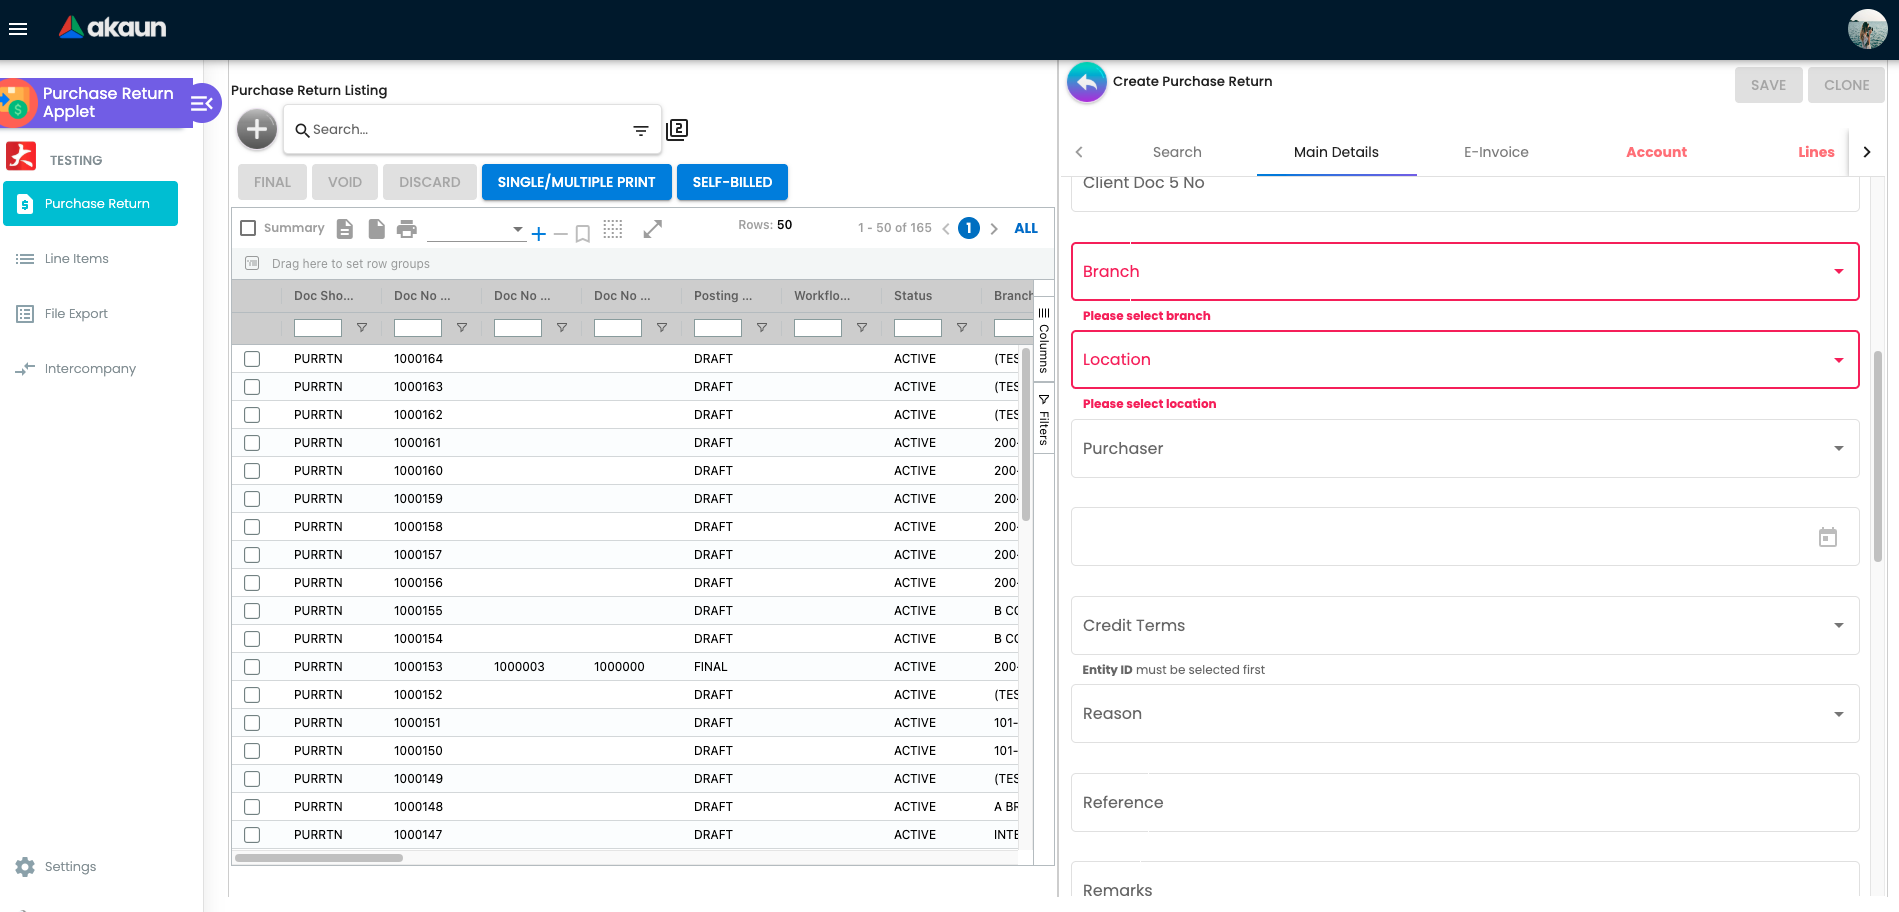
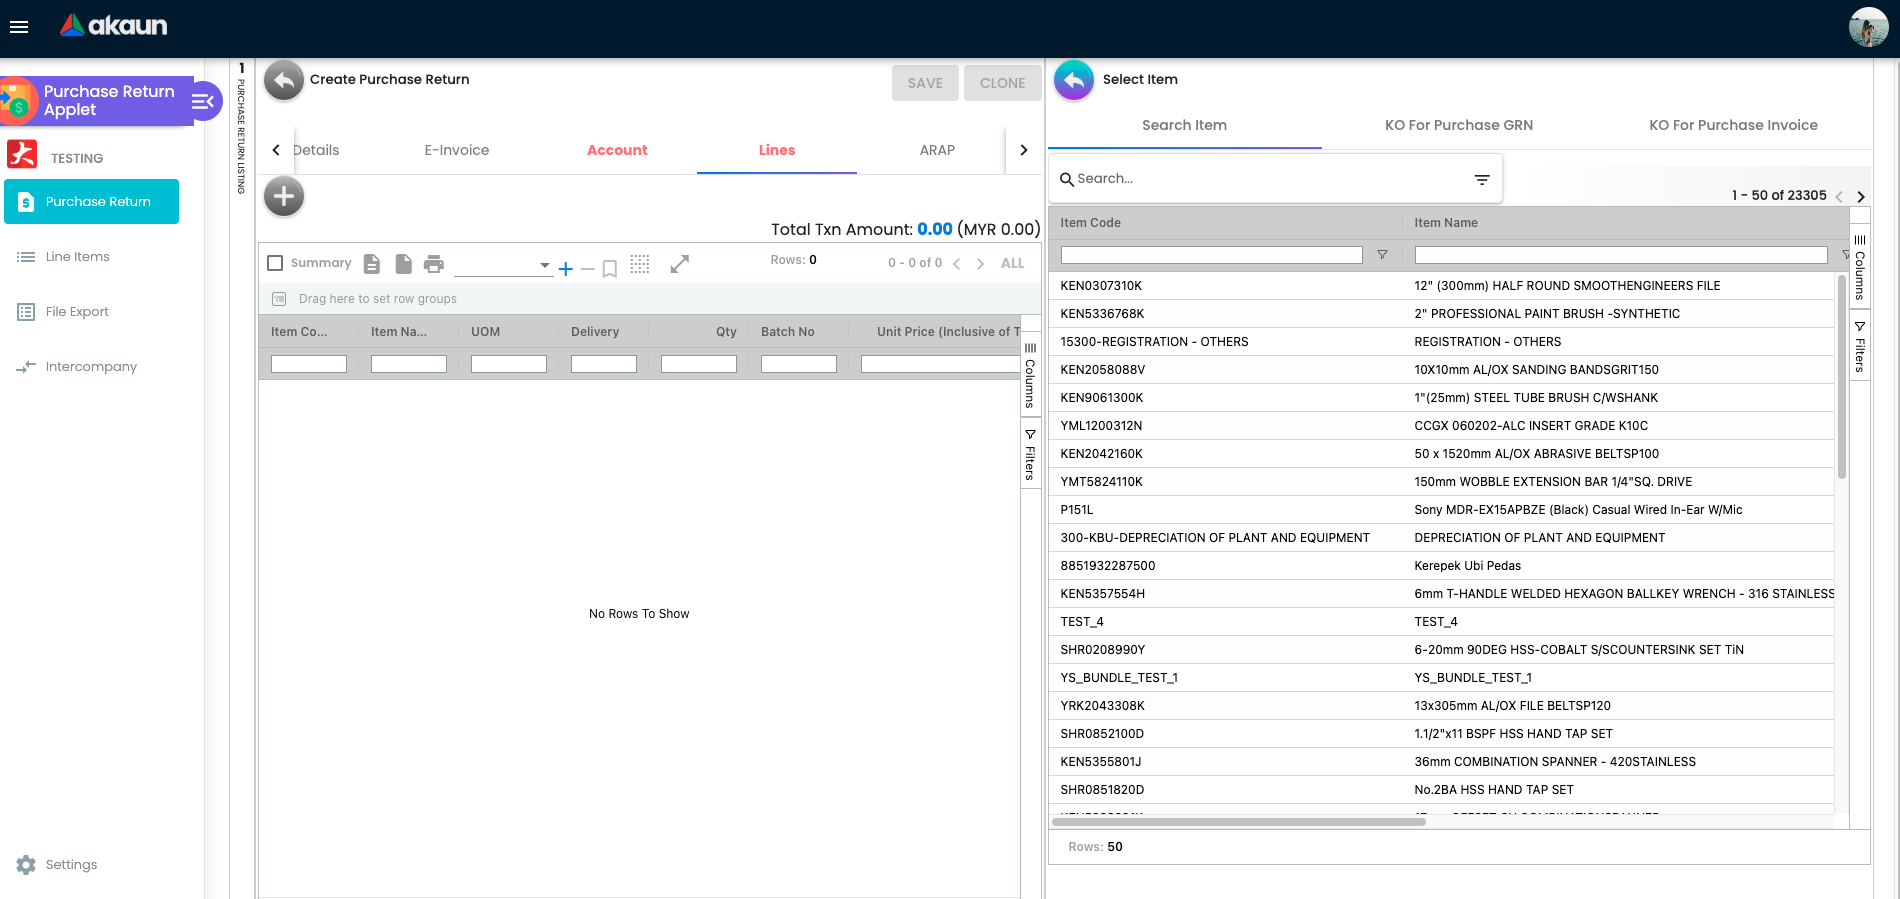
Tabs: Search, Main Details, Account, Lines, KO For (hidden by HIDE_KO_FOR_TAB), Delivery Details, Settlement, Department Hdr, Contra. CREATE saves a DRAFT.
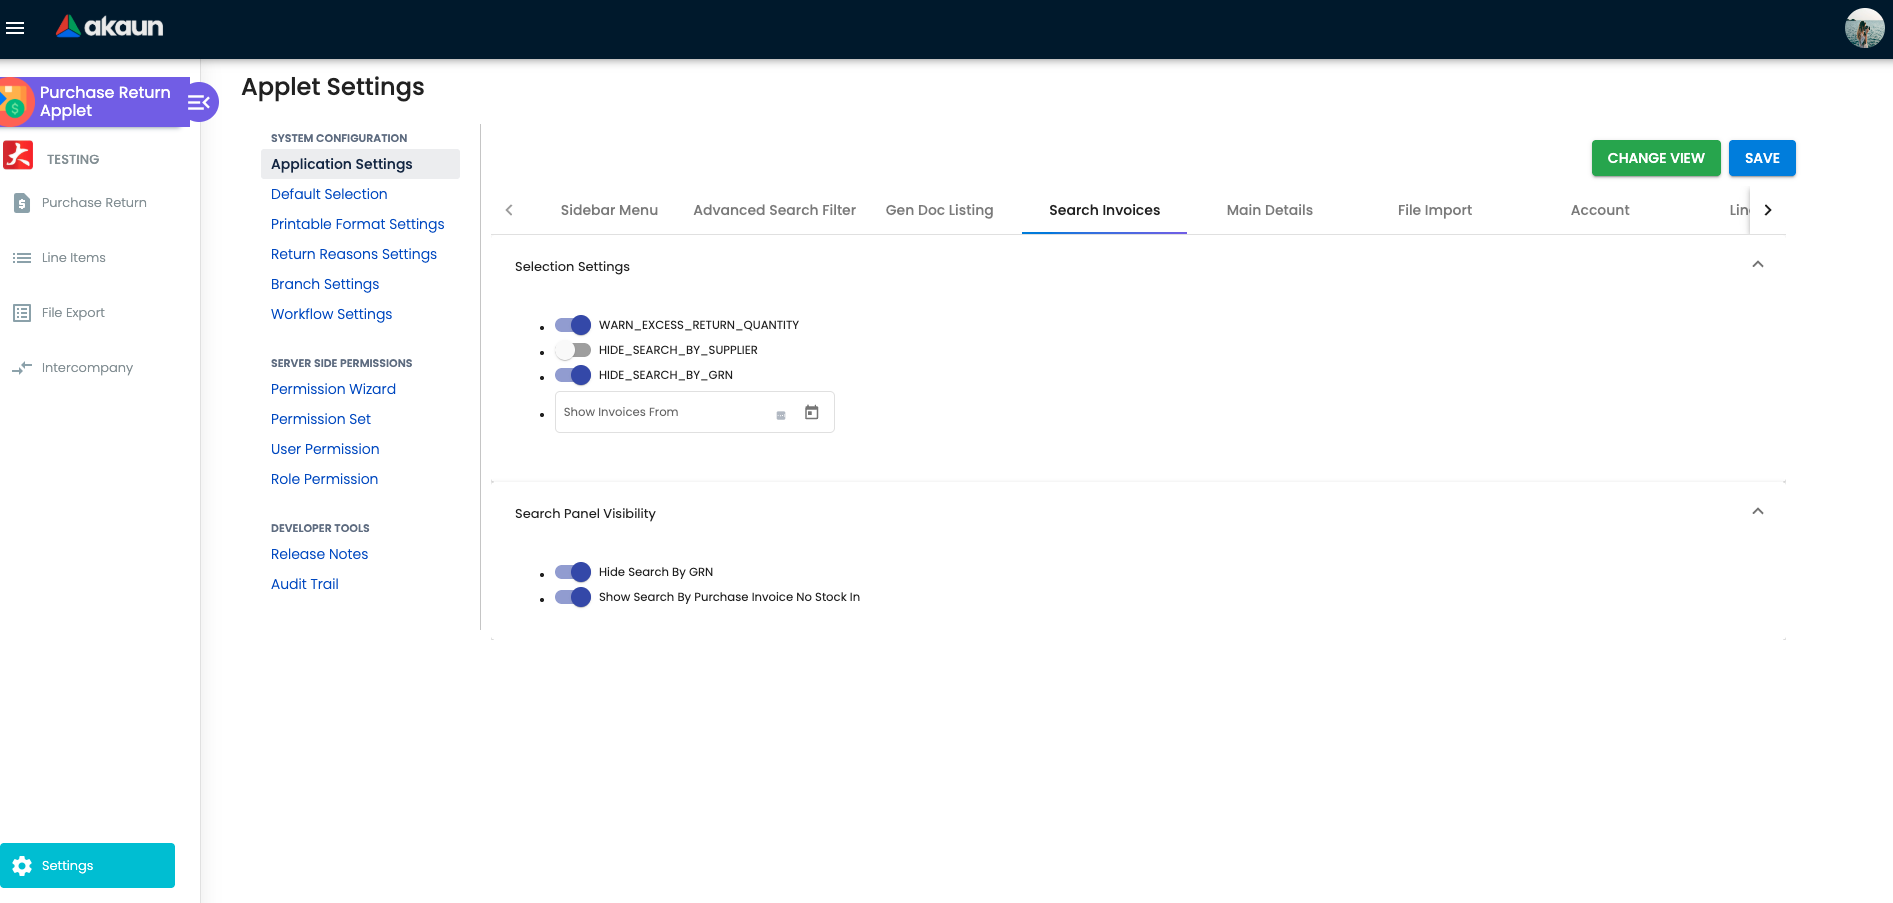
The Search tab is the recommended starting point. Its sub-tabs are Search By Supplier, Search By Invoice, Search By GRN (HIDE_SEARCH_BY_GRN), Search By Purchase Invoice No Stock In (shown only with SHOW_SEARCH_BY_PURCHASE_INVOICE_NO_STOCK_IN). There is no Search By Serial Number: it was taken out of the build, so find a serialised unit’s invoice first and search by that. Selecting a source line copies it, creates a document link and — with WARN_EXCESS_RETURN_QUANTITY — refuses a return quantity above the source line’s quantity (Total return quantity is greater that the invoice qty). With the switch off the screen lets a line exceed what was received on the source line, so leave it on unless you deliberately return goods beyond one invoice. Add All returns every remaining line.
A line pulled from an invoice or GRN also brings that source line’s delivery branch and location — where the goods were received. That is where the return takes them out of stock, whatever the header’s Location says (see Lifecycle and effects).
Screenshot withdrawn; a recapture from a demo tenant is on the list.
Screenshot withdrawn; a recapture from a demo tenant is on the list.
Edit screen
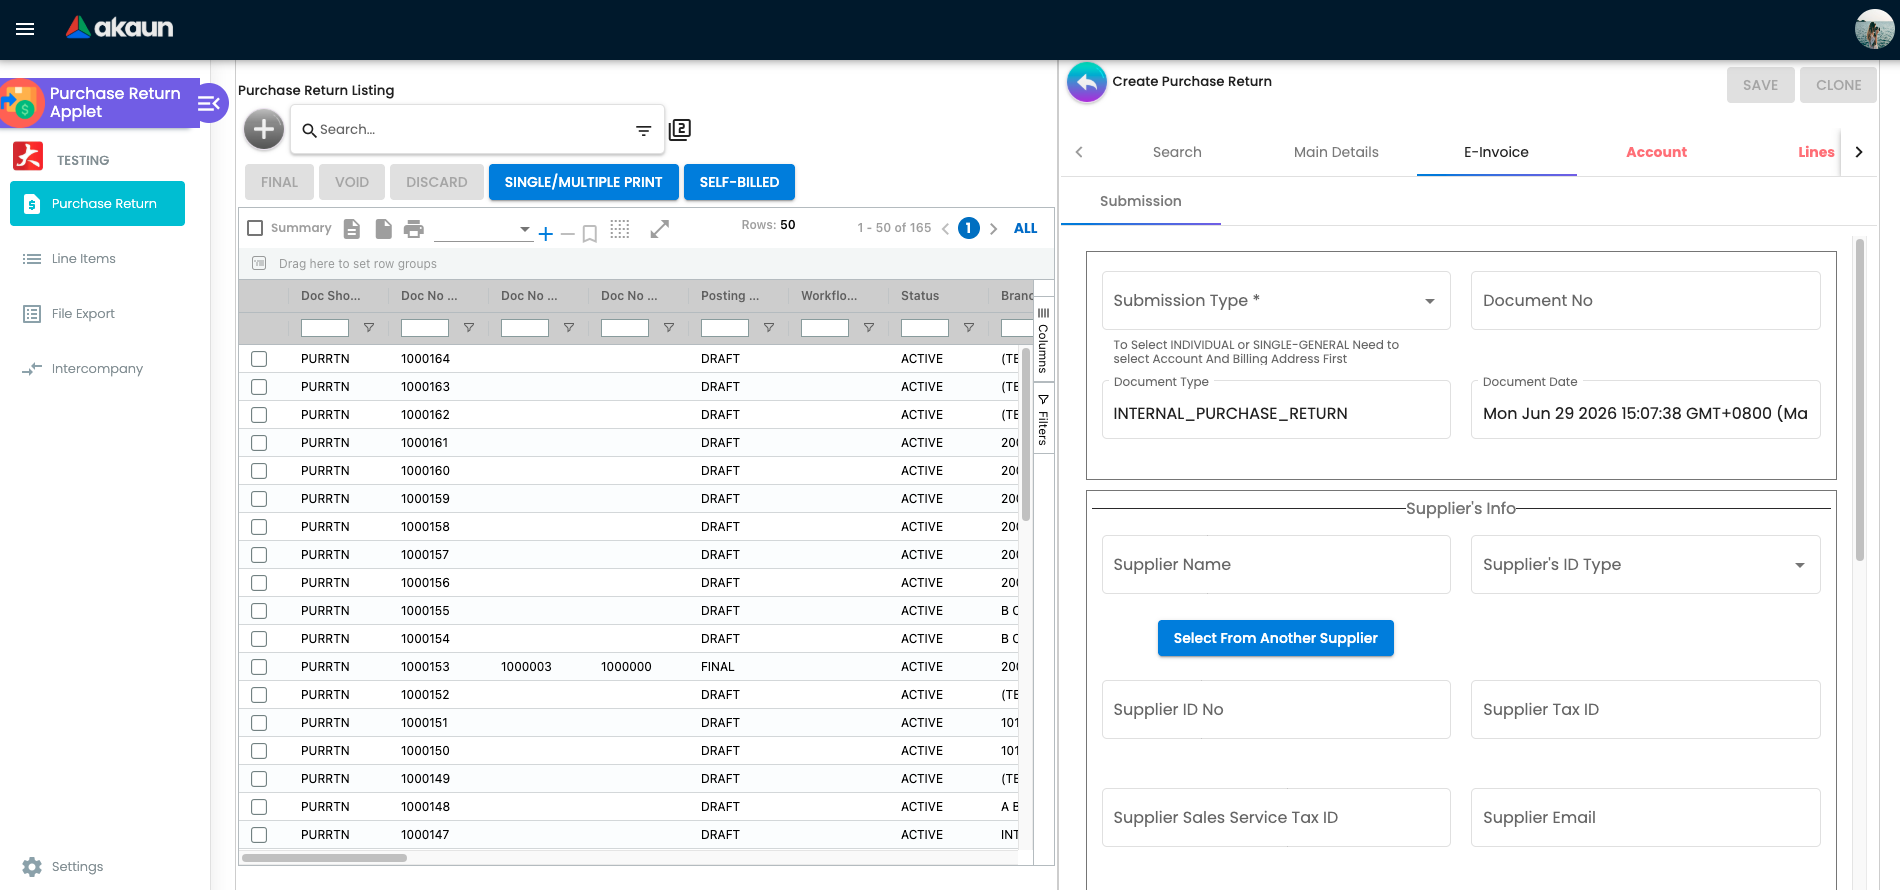
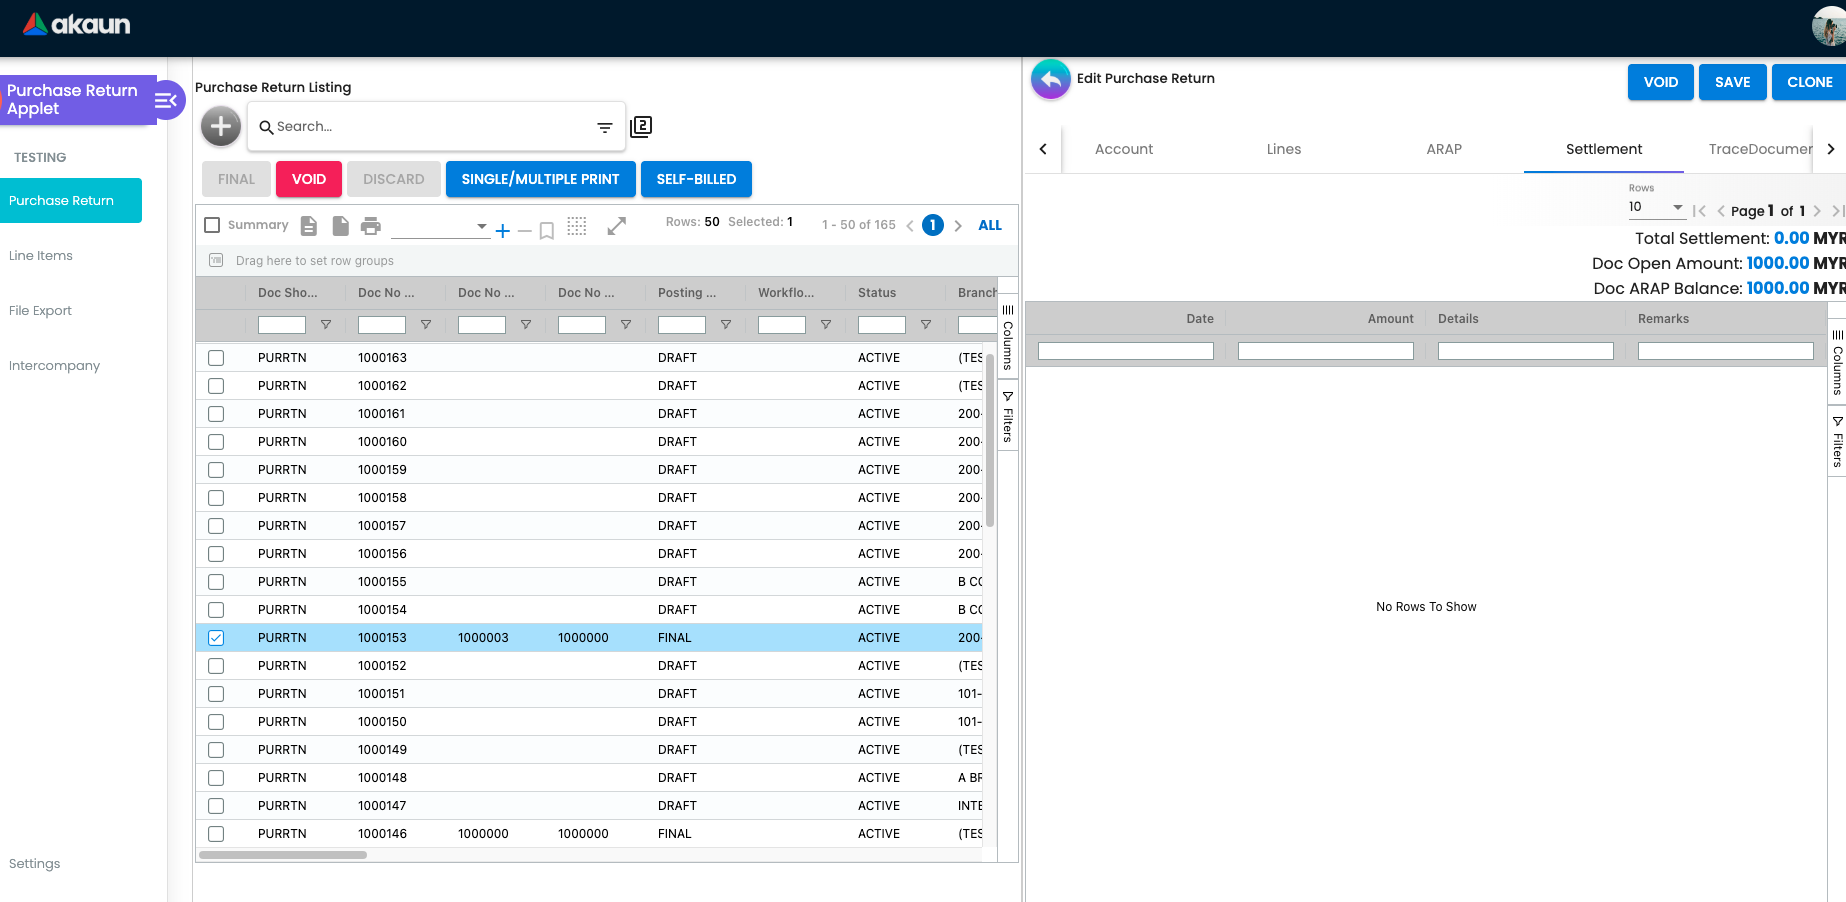
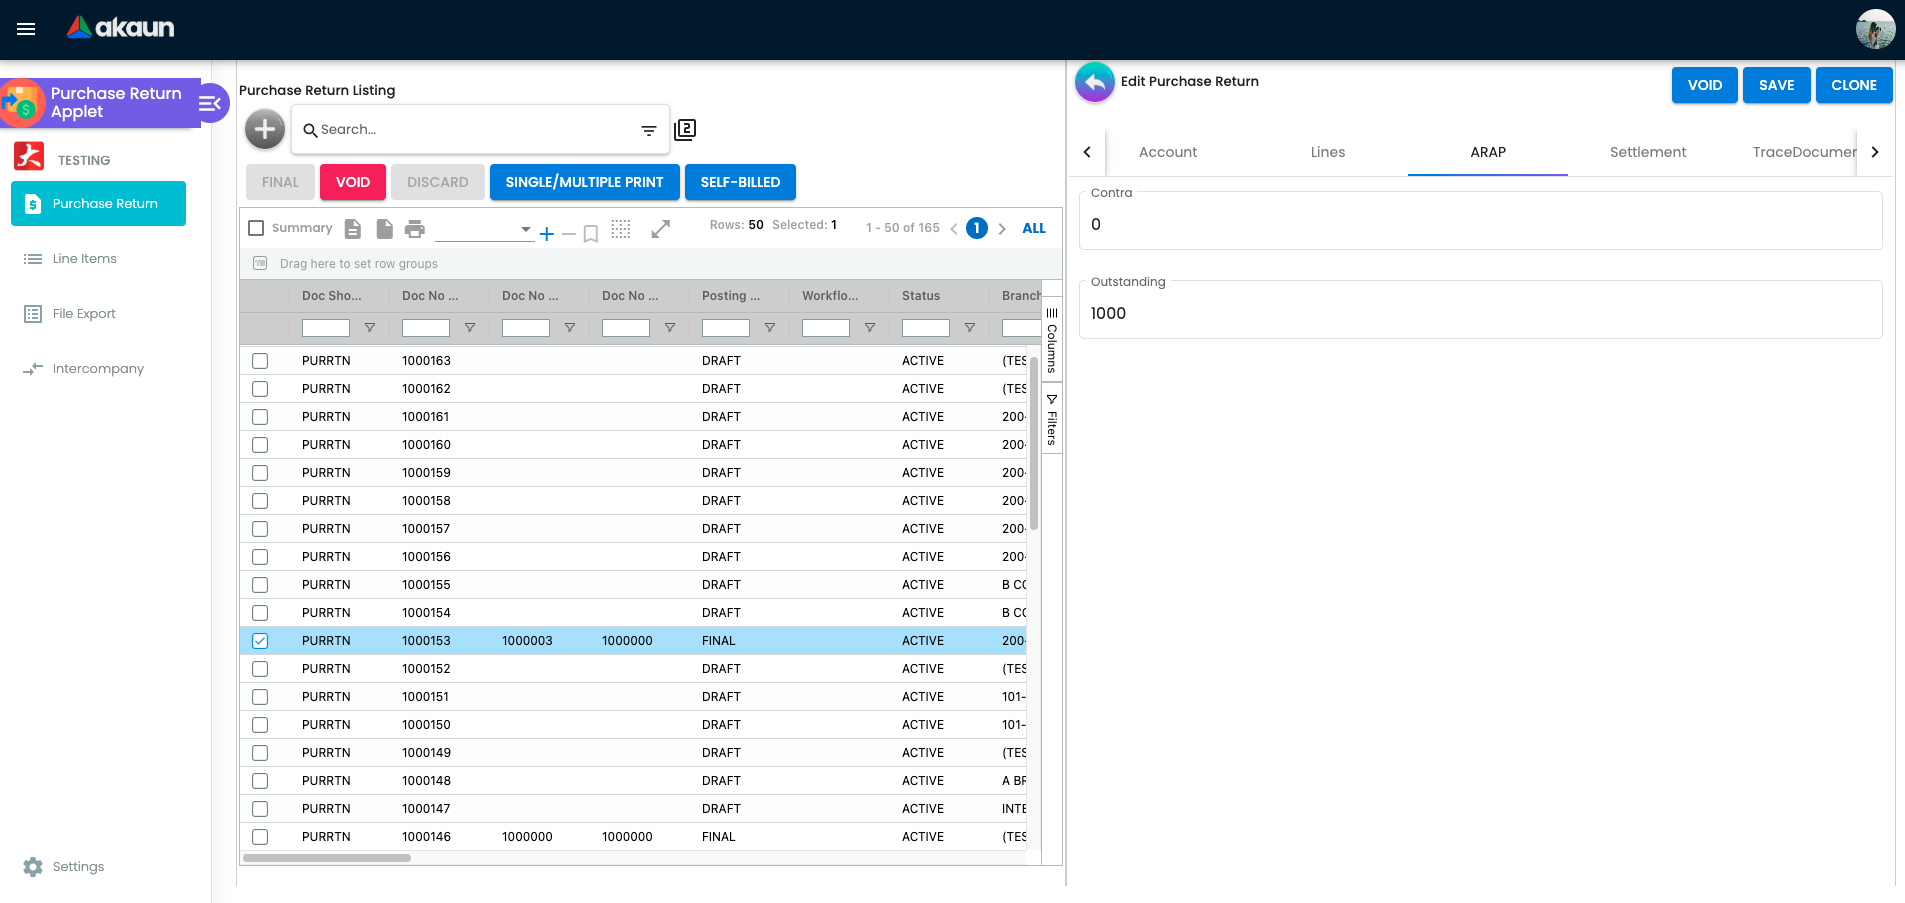
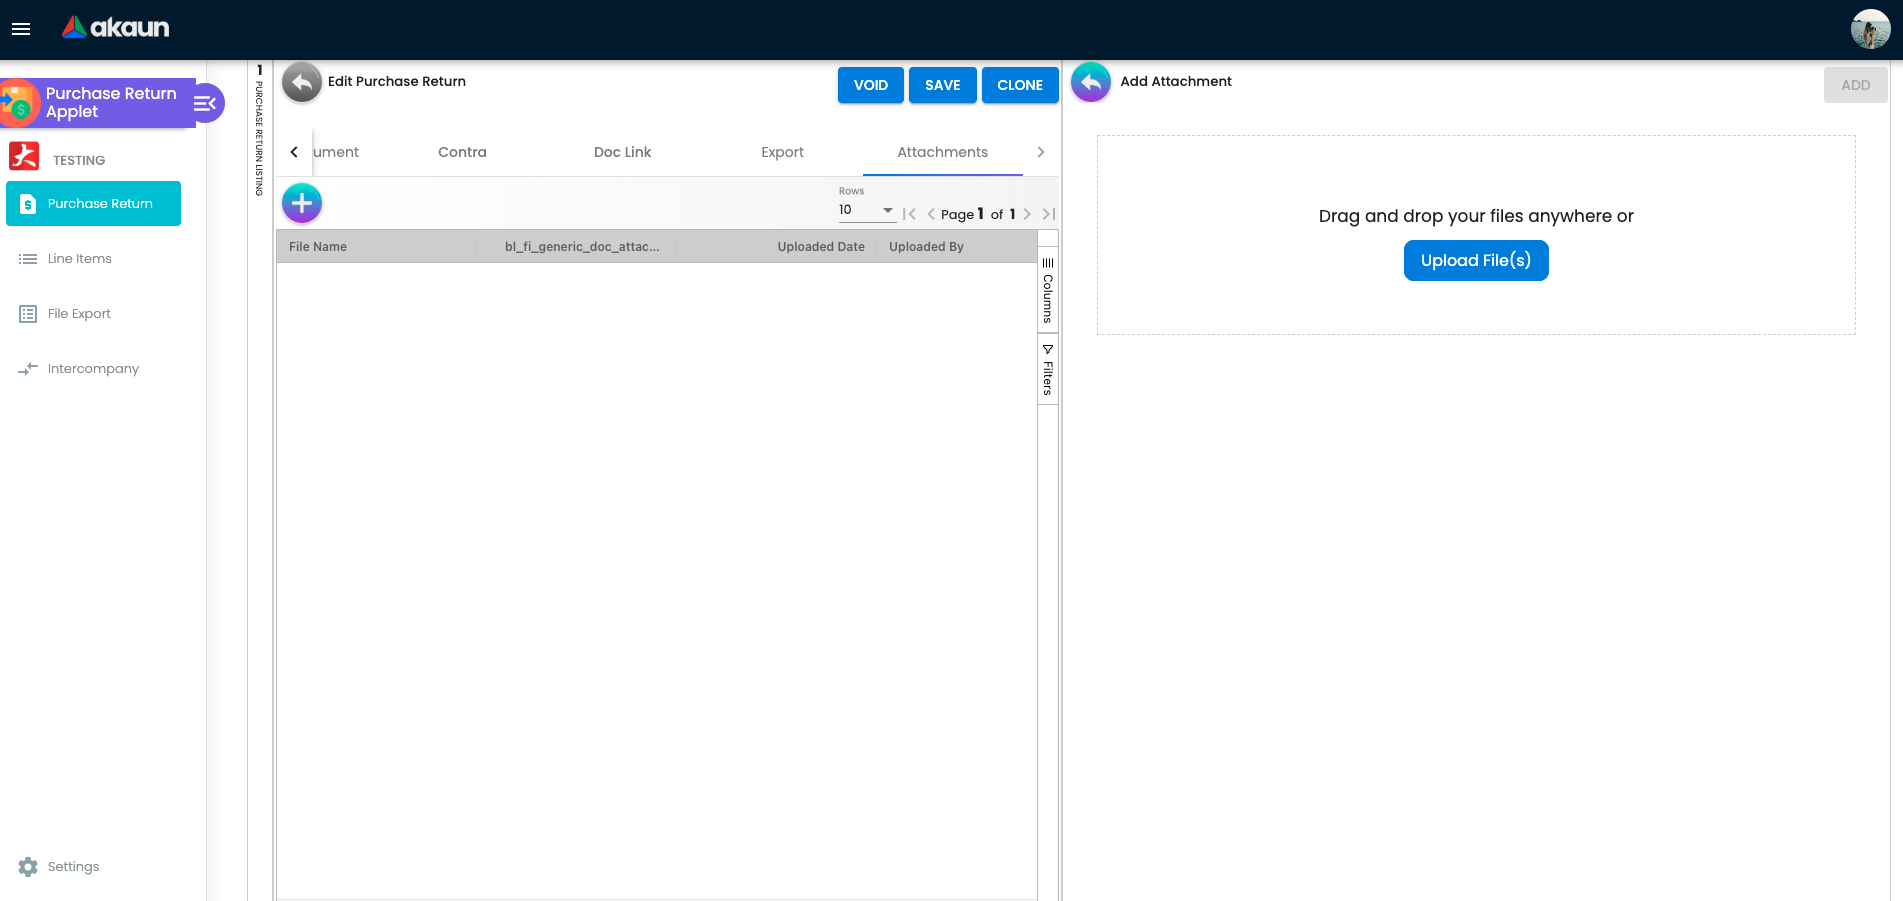
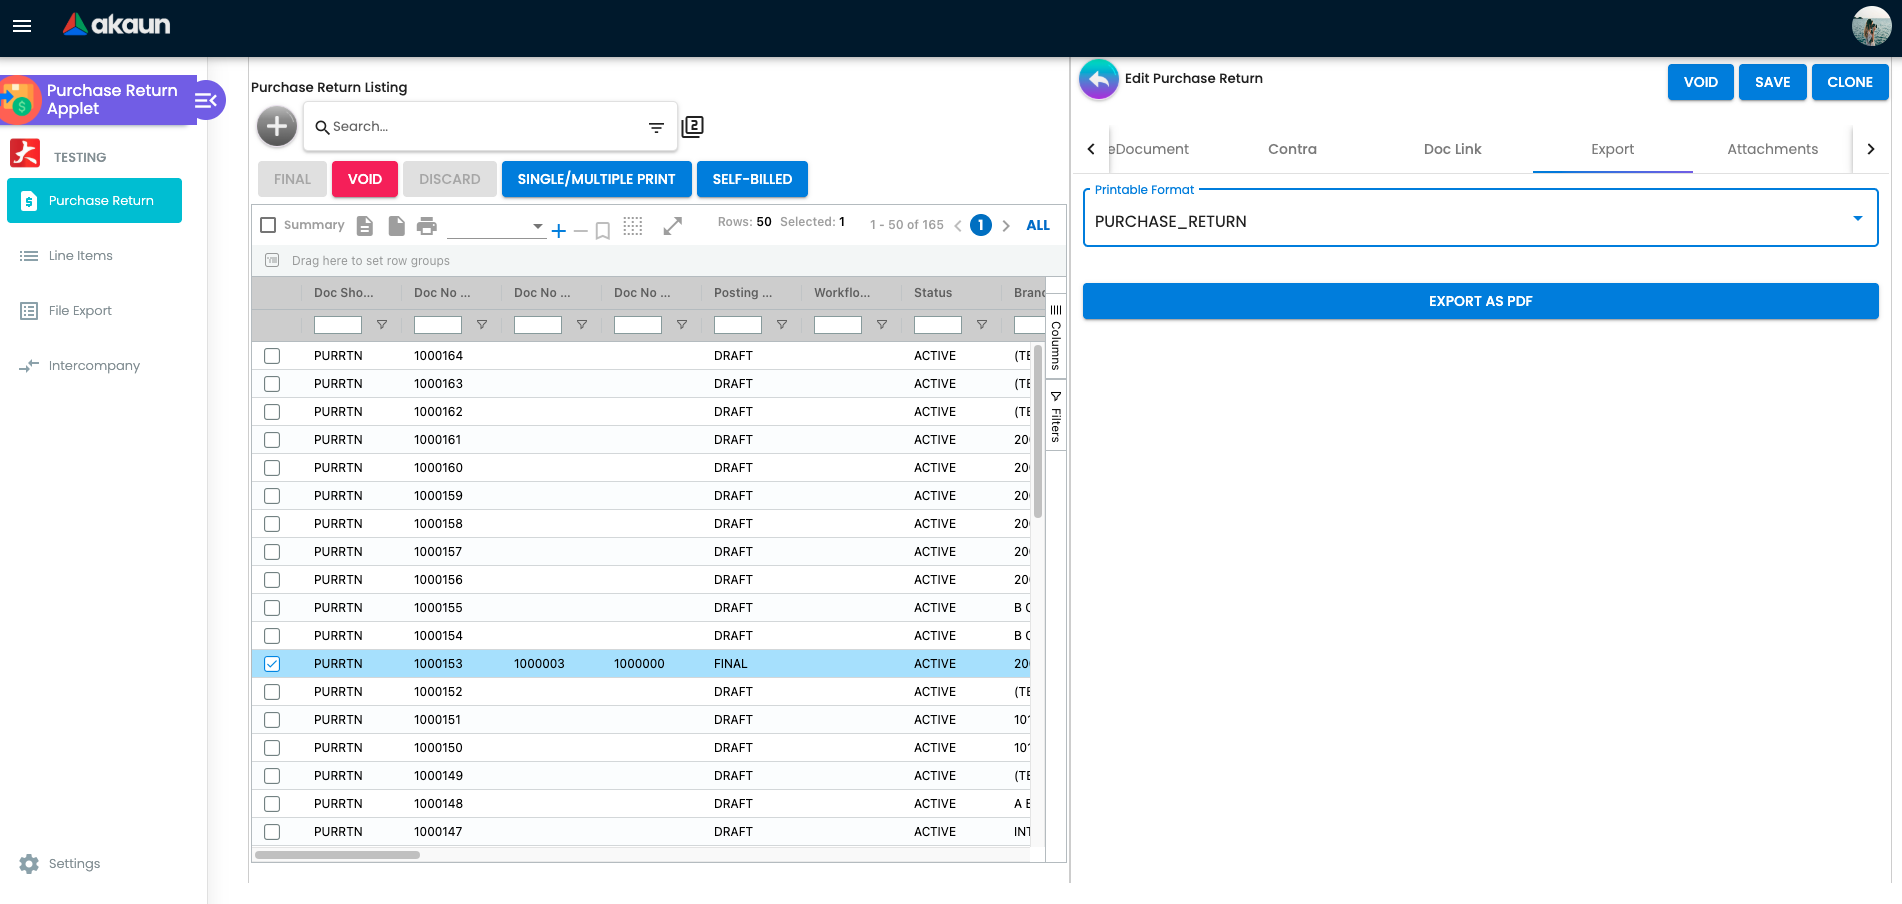
Header buttons SAVE, FINAL, DISCARD, VOID, and CLONE, which is always shown (HIDE_CLONE_BUTTON is read but nothing applies it) and creates a new draft from this return, waiting up to about six seconds for it to appear. Tabs, ordered by Default Selection → Details Tab Ordering: Search, Main Details, E-Invoice, Account, Lines, ARAP, Delivery Details, Settlement, Department Hdr, Trace Document, Contra, Doc Link, Export, Attachments.
Configuration
Before you can use it
| Prerequisite | Where | Why |
|---|---|---|
| Company, branch, location | Organisation | Branch and location are required. Stock is deducted at each line’s delivery location when it has one, otherwise at the line’s location; lines pulled from an invoice or GRN carry the source line’s delivery location. Use a dedicated returns location if you want returned stock separated, and set it as the return’s Delivery Location so every line follows it. |
| Supplier entity | Supplier | The AR/AP object type selects CREDITOR or CREDITOR_NON_TRADE. A supplier not linked to the branch is rejected (Supplier not linked to branch) when ENABLE_BRANCH_FILTER is on. |
| Stock on hand at the location | Inventory Item Maintenance and the receiving documents | FINAL validates stock balance per item, batch, bin and serial at the location each line takes stock from (its delivery location when set); There’s not enough stock for item … stops it. |
| Company default GL codes | Chart of Account → company GL-code links | CREDITOR / CREDITOR_NON_TRADE (mandatory), PURCHASE_RETURN for lines without their own GL code, INPUT_TAX. |
| Items with purchase-return GL links | Doc Item Maintenance | Line GL code: header GL code → item-company PURCHASE_RETURN link → company default. |
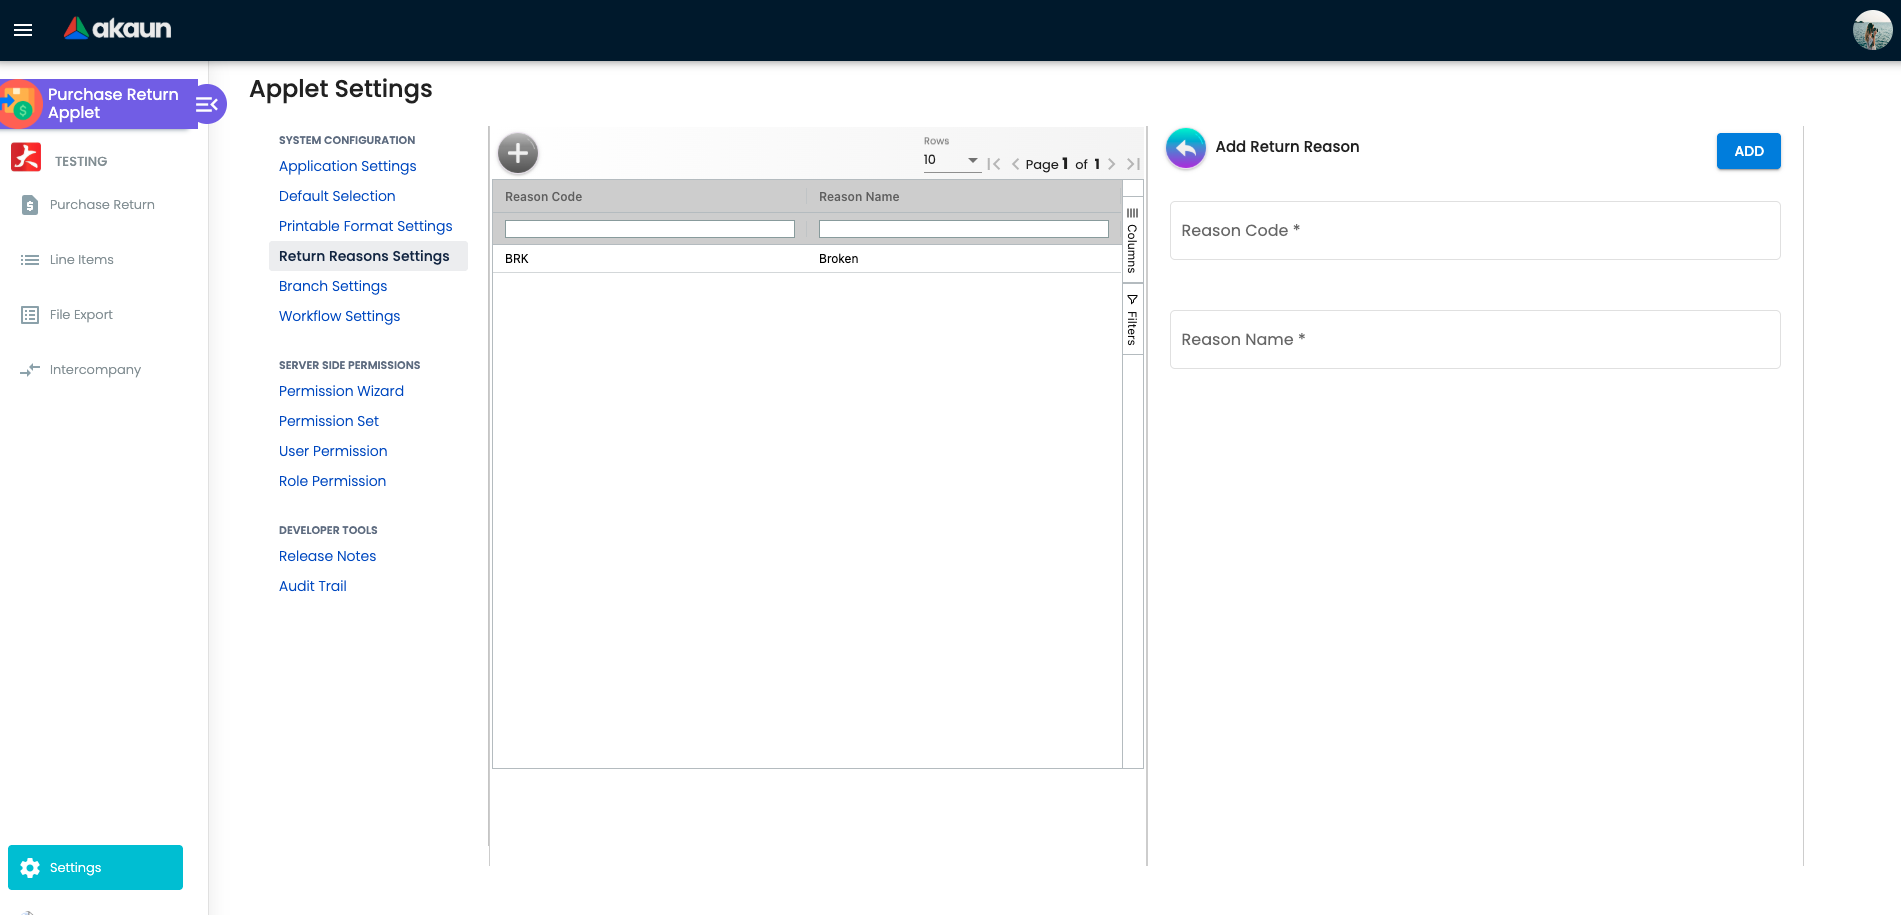
| Return reasons | This applet → Settings → Return Reasons Settings (Reason Code, Reason Name) | The Reason field on Main Details. |
| Tax codes | Tax Configuration | Line tax and WHT. |
| Cashbook / settlement methods | Cashbook | Only for Settlement-tab refunds. A settlement method with no cashbook, or a cashbook with no GL code, does not stop FINAL: the journal posting that runs after it fails (MISSING_CASHBOOK / MISSING_GL_CODE: STL_MTHD) and the return is FINAL with no journal. |
| Fiscal period open | Ledger And Journal | FINAL refused in a locked period. |
| Workflow (optional) | Settings → Workflow Settings (Process Code, Server Doc Type, Company) and WORKFLOW_PROCESS_GUID | Attaches a workflow process and status to new documents. |
| e-Invoice setup | My E-Invoice Admin | Only if returns must be submitted; skip flags on document, branch or supplier bypass it. |
| Permissions | Permission Wizard / Set, Client Side Permission | Server-side create / read / update / delete on INTERNAL_PURCHASE_RETURN with targets. |
Applet settings
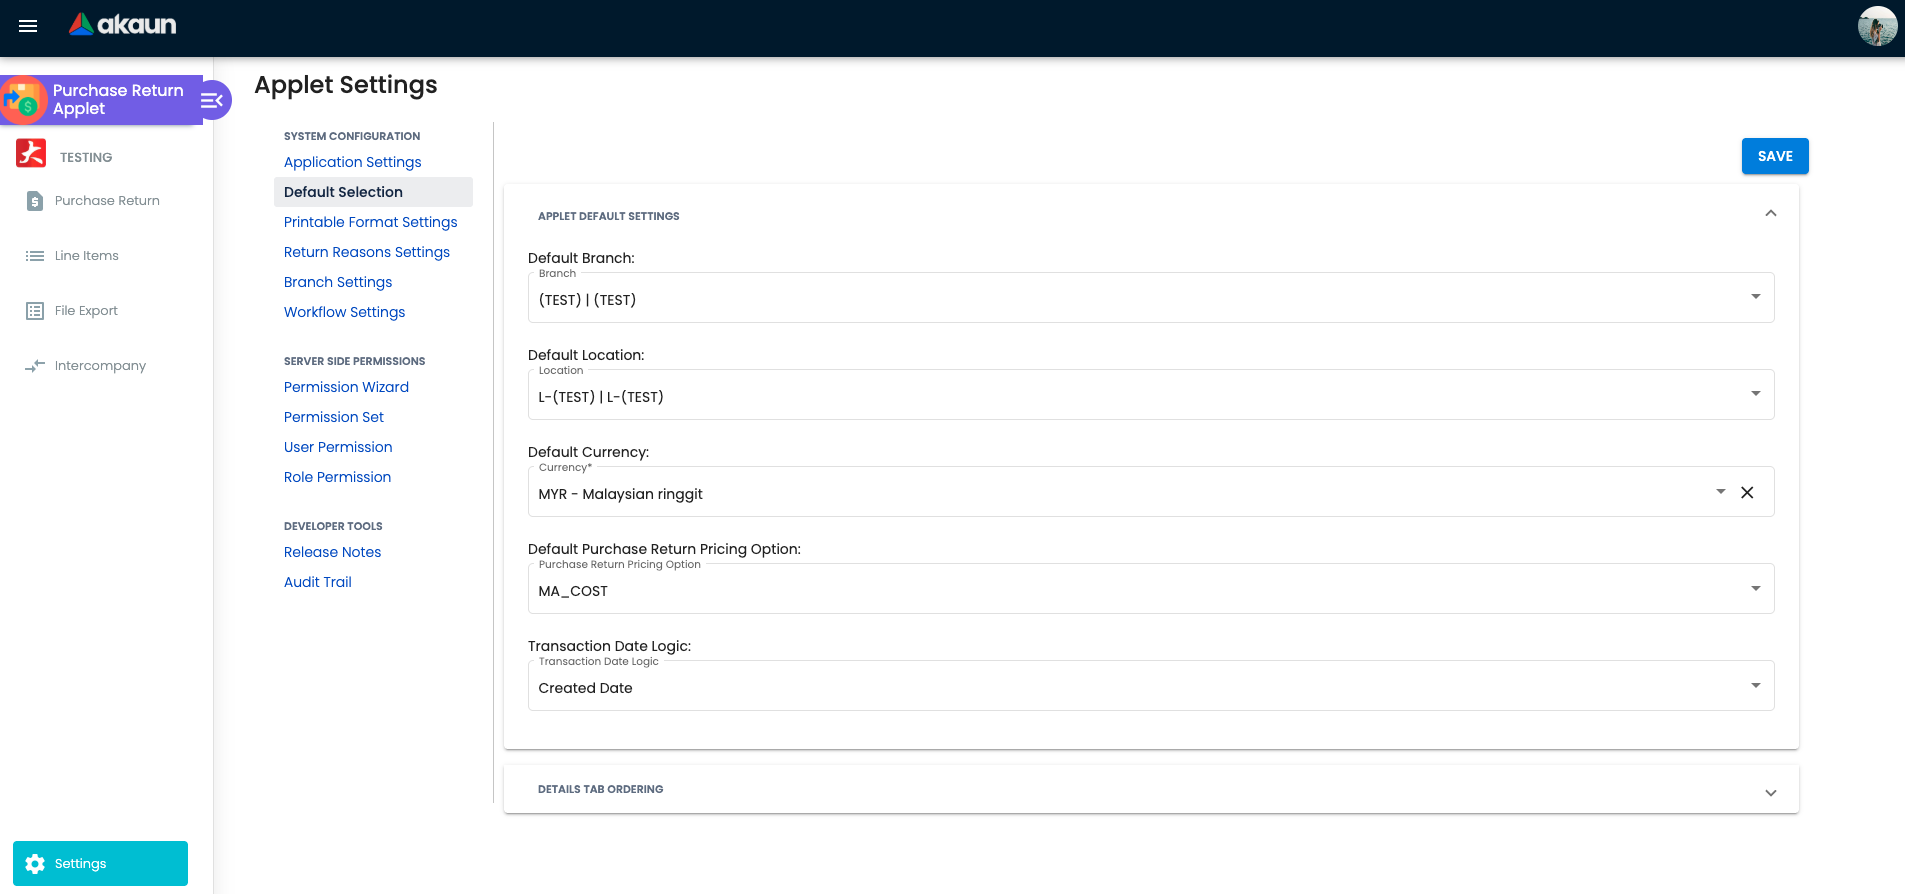
Settings → Default Selection:
| Setting | What it controls | Default | Effect when changed | Who can change it |
|---|---|---|---|---|
DEFAULT_BRANCH, DEFAULT_LOCATION (derived DEFAULT_COMPANY) | Branch and location pre-selected on new returns. | none | New returns open with them; personal defaults override. | Tenant admin with the applet’s Settings menu |
DEFAULT_PURCHASE_RETURN_PRICING_OPTION — “Purchase Return Pricing Option” | The price a line added by hand starts with: LAST_PURCHASE_PRICE (the net unit price on this company’s latest purchase invoice line for the item, by transaction date — the lookup does not check the invoice’s posting status, so a later draft or voided invoice can supply the price; read the pre-filled price before you save), MA_COST (the moving-average cost recorded on that same invoice line) or PURCHASE_INVOICE_PRICE. None does not mean the user chooses per line: it hands the decision to the supplier’s own return-pricing option, then the company’s, and falls back to LAST_PURCHASE_PRICE if neither is set. | none | Applies only when a line is first added by hand; editing a line never re-prices it, and the price stays editable. If no purchase invoice for the item is found, nothing is filled and you type the price. PURCHASE_INVOICE_PRICE fills nothing on this path, because a hand-added line has no invoice to take a price from. Lines brought in through the invoice search ignore this setting and carry the invoice line’s own price. | Same |
PURCHASE_RETURN_PRICE_FILTER_BY_SUPPLIER | When looking up the last purchase price or moving-average cost for a hand-added line, restrict to invoices of the same supplier. | on (unset = filter) | Off: any supplier’s last price is used. | Same |
DATE_TXN_LOGIC — “Transaction Date Logic” | Which date becomes the transaction date at FINAL: USE_FINAL (Finalized Date), USE_CREATED, USE_UPDATED, USE_DATE_TXN (keep the keyed date). | ADJUSTED (stored default; behaves as keyed date) | Sent with the FINAL request; only applies when the header’s use transaction date flag is off. | Same |
PURCHASE_RETURN_DETAILS_TAB_ORDER | Drag-and-drop order of the 14 edit tabs. | code order | Re-orders for everyone. | Same |
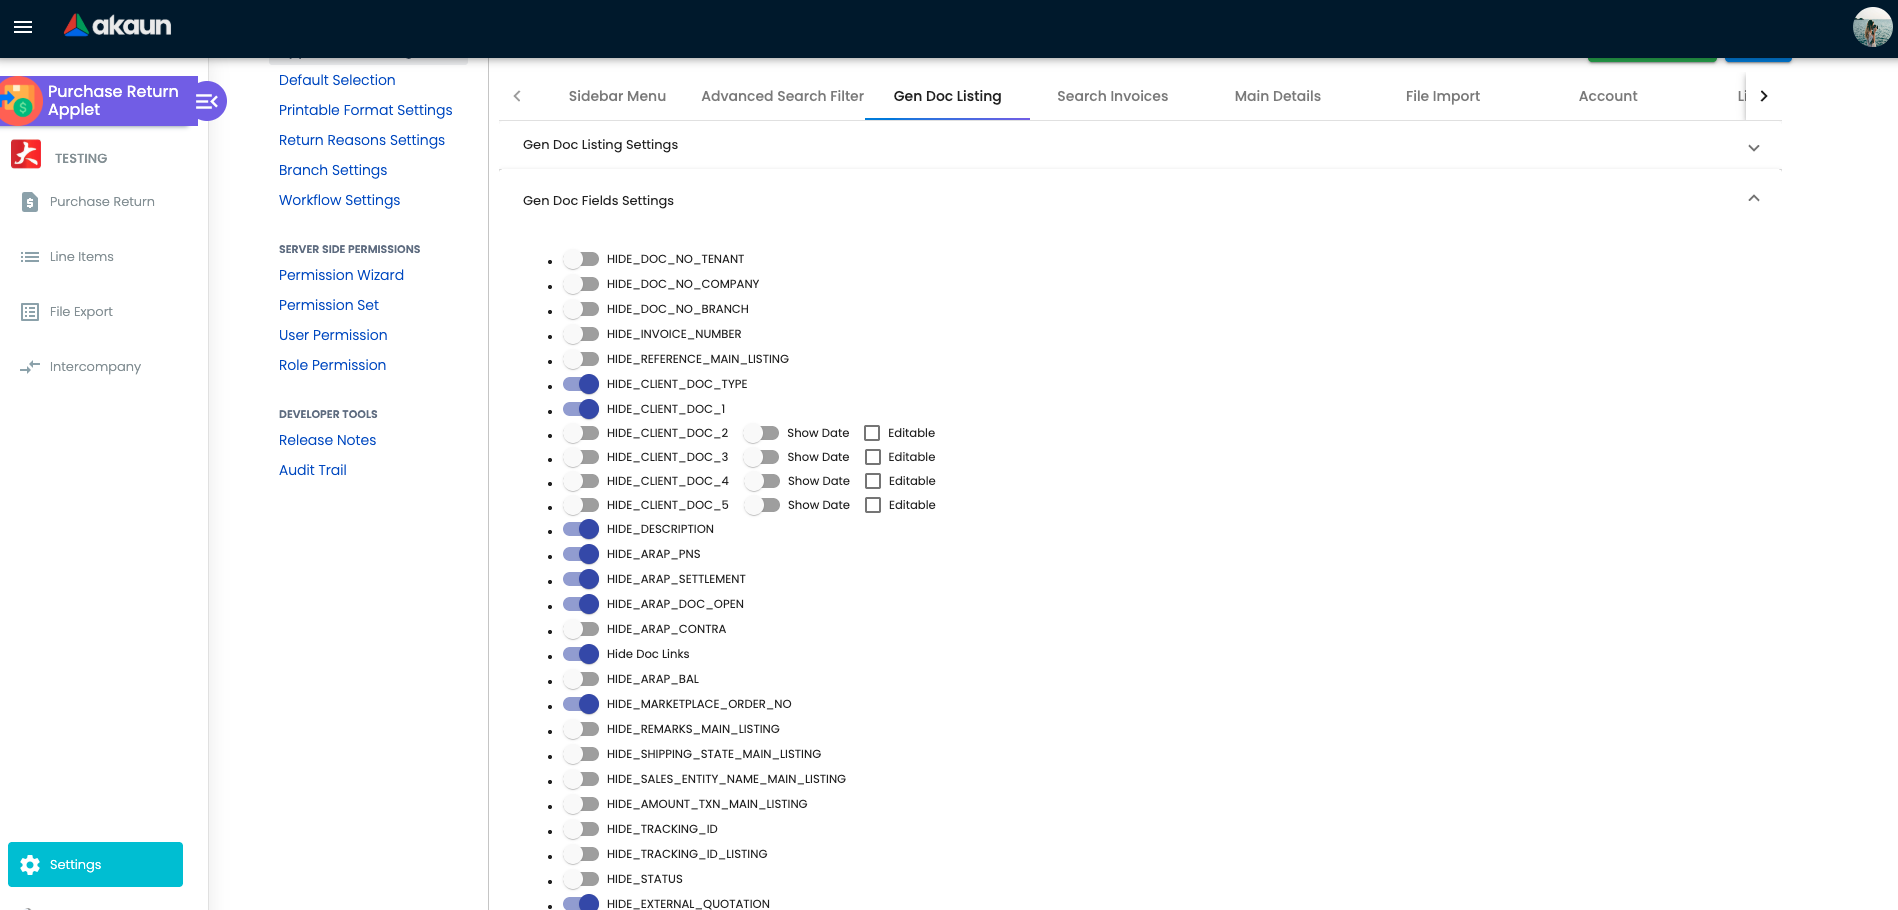
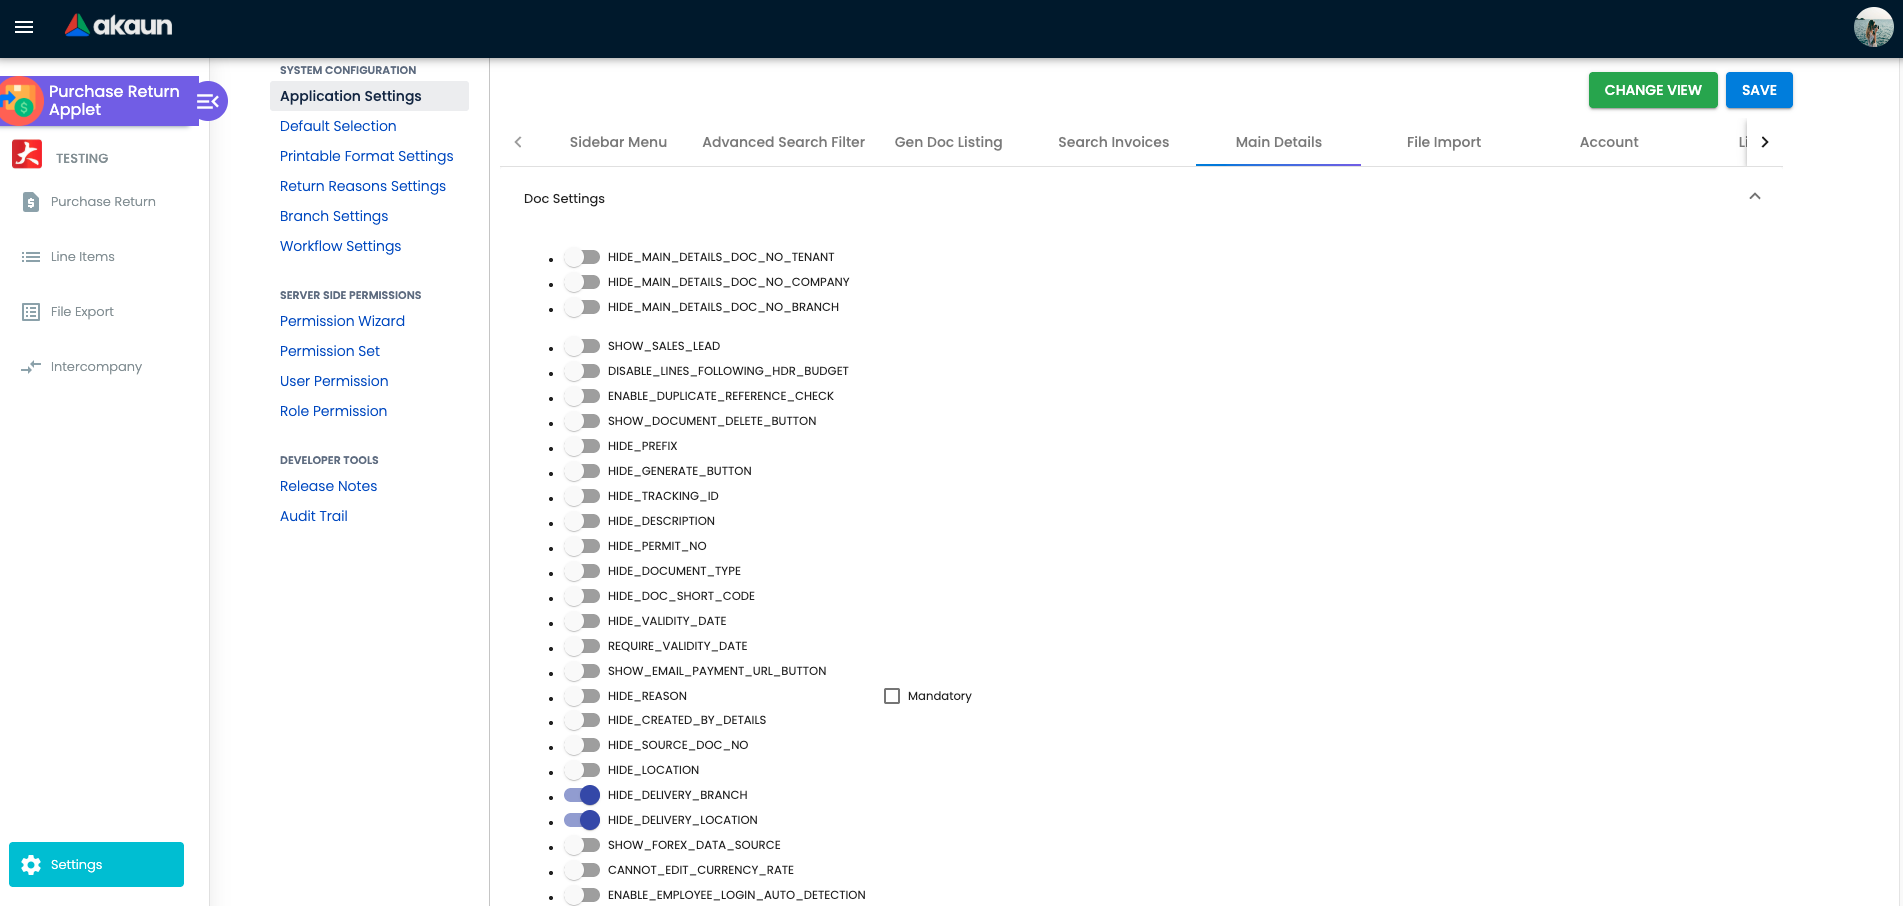
Settings → Application Settings (shared field-configuration screen; toggles labelled by key, default off). Keys this applet reads:
Nine of them have no switch on that screen for this applet: HIDE_FILE_EXPORT_MENU, HIDE_CURRENCY, HIDE_BASE_CURRENCY, HIDE_CREDIT_TERMS, HIDE_REFERENCE, HIDE_REMARKS, MANDATORY_REMARKS_FIELD, and the two price-column hides on the source-line grids, HIDE_PRICE_LISTING and HIDE_RETURN_PRICE_LISTING. The first seven’s switches are drawn only for a differently spelled applet code that no installed applet carries; the two price hides sit in the screen’s Search section, which it does not draw for this applet at all. So you will look for them in vain. Five of the nine — the currency, base currency, credit terms, reference and remarks hides — can still be set from the gear on Main Details, which appears once Enable Inline Applet Config is on (an owner or admin changes the tenant-wide value there). HIDE_FILE_EXPORT_MENU, MANDATORY_REMARKS_FIELD and the two price hides cannot be set from this applet at all: control File Export with the SHOW_FILE_EXPORT_MENU permission, make remarks a working rule rather than a field rule, and accept that the source-line grids show prices to anyone who can open the search — no gear on those grids offers the hides either.
| Group | Keys | What they control |
|---|---|---|
| Listing | DEFAULT_POSTING_STATUS, DEFAULT_STATUS, DEFAULT_TRANSACTION_DATE, SORT_ORDER, FUZZY_SEARCH_COLUMNS, DISABLE_GEN_DOC_LISTING, PRINTABLE, ENABLE_AUTO_POPUP | Default filters, sort, fuzzy search, default printable format, PDF pop-up on FINAL. In the document the pop-up opens when the save that precedes the posting succeeds, so it can open even when FINAL is then refused — check the posting status, not the PDF. |
| Menus and buttons | HIDE_FILE_EXPORT_MENU, HIDE_GENDOC_FINAL_BUTTON, HIDE_GENDOC_VOID_BUTTON, HIDE_GENDOC_DISCARD_BUTTON, HIDE_GENDOC_SAVE_BUTTON | Restored per user by SHOW_FILE_EXPORT_MENU, SHOW_GENDOC_FINAL_BUTTON, SHOW_GENDOC_VOID_BUTTON, SHOW_GENDOC_DISCARD_BUTTON. |
| Search tab | HIDE_SEARCH_BY_SUPPLIER, HIDE_SEARCH_BY_GRN, SHOW_SEARCH_BY_PURCHASE_INVOICE_NO_STOCK_IN, SHOW_INVOICES_FROM, HIDE_PRICE_LISTING, HIDE_RETURN_PRICE_LISTING, WARN_EXCESS_RETURN_QUANTITY | Which search sub-tabs appear, how far back invoices are listed, whether price columns show in the source-line grids (the two price hides have no switch in this applet — see above), and whether over-returning is blocked. |
| Header fields | HIDE_SERVER_DOC_1..3, HIDE_CLIENT_DOC_TYPE, HIDE_CLIENT_DOC_1..5, HIDE_LOCATION, HIDE_CREDIT_TERMS, HIDE_REASON, HIDE_REFERENCE, HIDE_REMARKS, MANDATORY_REMARKS_FIELD, HIDE_CURRENCY, HIDE_BASE_CURRENCY, SHOW_FOREX_DATA_SOURCE, CANNOT_EDIT_CURRENCY_RATE, HIDE_CREATED_BY_DETAILS, HIDE_EXTERNAL_QUOTATION, HIDE_EXTERNAL_ORDER, HIDE_EXTERNAL_DELIVERY_ORDER, HIDE_EXTERNAL_INVOICE, HIDE_EXTERNAL_OTHERS, ENABLE_EMPLOYEE_LOGIN_AUTO_DETECTION, WORKFLOW_PROCESS_GUID, DEFAULT_CURRENCY, DEFAULT_DECIMAL_PRECISION | Main Details visibility; mandatory remarks; purchaser auto-fill; workflow attached to new documents. HIDE_SERVER_DOC_1..3 act on Main Details only: the listing names them in its code but never applies them, so its Doc No (Tenant / Company / Branch) columns stay visible whatever they are set to. |
| Account tab | ENABLE_SELECT_MODE, ENABLE_BRANCH_FILTER, HIDE_SUPPLIER_CODE, HIDE_PHONE_NUMBER, HIDE_EMAIL, HIDE_SIC_CODE_AND_BUSINESS_ACTIVITY_DESCRIPTION, HIDE_E_INVOICE_TAB | Supplier picker (create/edit inline needs ALLOW_TO_CREATE_EDIT_ACCOUNT) and supplier sub-tabs. |
| Lines | HIDE_QTY_BASE, HIDE_QTY_UOM, HIDE_UOM_TO_BASE_RATIO, HIDE_UNIT_PRICE_STD_*, HIDE_UNIT_PRICE_NET_*, HIDE_UNIT_PRICE_TXN, HIDE_UNIT_PRICE_TXN_UOM_INCL_TAX, HIDE_UNIT_DISCOUNT, HIDE_UNIT_DISCOUNT_UOM_EXCL_TAX, HIDE_AMOUNT_STD_EXCL_TAX, HIDE_DISCOUNT_AMOUNT_EXCL_TAX, HIDE_AMOUNT_NET_EXCL_TAX, HIDE_AMOUNT_TXN, HIDE_SST_VAT_GST_AMOUNT, HIDE_TOTAL_SST_VAT_GST_AMOUNT, HIDE_TOTAL_TXN_AMOUNT, HIDE_TAX_CONFIG_SELECTION, HIDE_WHT_CONFIG_SELECTION, HIDE_COSTING_DETAILS, HIDE_PRICING_DETAILS, HIDE_DELIVERY_DETAILS, HIDE_DELIVERY_INSTRUCTION, HIDE_ISSUE_LINK, HIDE_RELATED_DOCUMENTS, HIDE_BATCH_NUMBER, HIDE_BATCH_EXPIRY_DATE, HIDE_BATCH_ISSUE_DATE, HIDE_BIN_NUMBER, HIDE_SERIAL_NUMBER, HIDE_DEPARTMENT, ENABLE_EDITING_UNIT_PRICE_STD, DISABLE_EDITING_AMOUNT_TXN, ENABLE_ITEM_NAME_MAX_LIMIT + ITEM_NAME_MAX_LIMIT, DISABLE_ITEM_LISTING, SHOW_ITEM_STOCK_BALANCE | Line grid columns and sub-panels; stock balance column in the item picker. |
| Delivery / settlement / tabs | HIDE_DELIVERY_DETAILS_TAB, HIDE_DELIVERY_BRANCH, HIDE_DELIVERY_LOCATION, HIDE_SETTLEMENT_TAB, ENABLE_EDIT_SETTLEMENT_DATE, HIDE_KO_FOR_TAB, HIDE_DEPARTMENT_HDR_TAB, HIDE_ARAP_PNS, HIDE_ARAP_SETTLEMENT, HIDE_ARAP_DOC_OPEN, HIDE_ARAP_CONTRA, HIDE_ARAP_BAL | Tab and ARAP-figure visibility; settlement date editable. |
| Layout | VERTICAL_ORIENTATION, DEFAULT_ORIENTATION | Tabs vs stacked panels. |
Document behaviour settings
| Behaviour | Where it is set | Notes |
|---|---|---|
| Return pricing | DEFAULT_PURCHASE_RETURN_PRICING_OPTION, PURCHASE_RETURN_PRICE_FILTER_BY_SUPPLIER. | Lines pulled from an invoice carry the invoice price; a known rounding case (unit price × quantity ≠ invoice line amount) can make Add All post a few sen less than the invoice — check the total against the source. |
| Over-return guard | WARN_EXCESS_RETURN_QUANTITY. | Blocks a return line whose quantity (plus serials already selected) exceeds the source line, on the Search tab’s listings. Off, nothing on the screen caps the quantity. |
| Transaction date | DATE_TXN_LOGIC. | See Default Selection. |
| Return reasons | Settings → Return Reasons Settings — Reason Code, Reason Name. | Feeds the Reason field; hide with HIDE_REASON. The list is the tenant’s shared service return-reason list, not one kept for this applet, so editing or removing a reason here changes it for every screen that uses that list. |
| Printables | Printable Format Settings; PRINTABLE; Branch Settings → Printable Format. | The Export tab and bulk print; the usual layout is a debit note to the supplier. |
| Workflow | Workflow Settings + WORKFLOW_PROCESS_GUID. | New documents get the process; status and resolution shown on Main Details. |
| e-Invoice | E-Invoice tab; SELF-BILLED bulk action; skip flags. | A purchase return is submitted to LHDN only as a Self-billed Credit Note (type 12), and only when its self-billed flag is set; without the flag it maps to no e-Invoice type. SELF-BILLED on a DRAFT only sets the flag; on a FINAL return it also queues the return for submission and is refused unless the company’s e-Invoice status is Enabled. Use it when the supplier does not issue e-Invoices. (Its success message says Self Billed Invoice.) |
| Email templates | Not available in this applet (no Email Template settings page). | |
| File import | Not exposed in this applet’s UI. | |
| Webhooks | Settings → Webhook. |
Screenshot withdrawn; a recapture from a demo tenant is on the list.
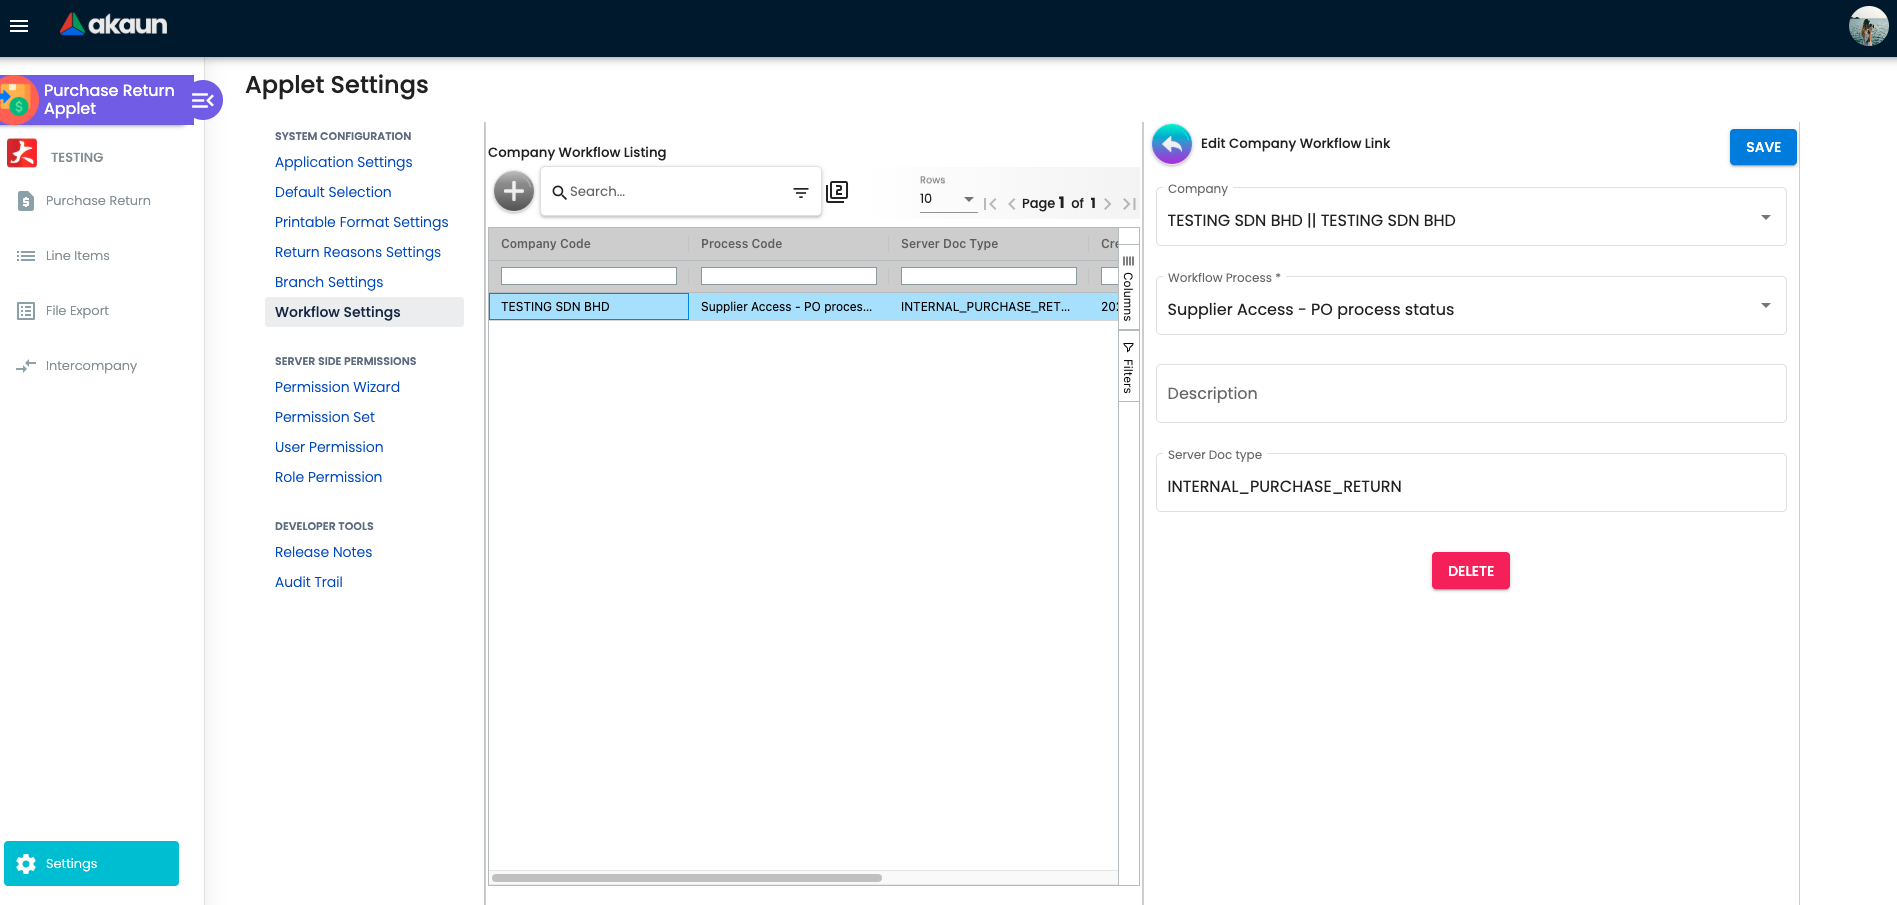
Branch settings
| Sub-tab | What it controls |
|---|---|
| Branch Details | Read-only Branch Name / Code / Company; Sales Agent (default purchaser); Rounding Five Cent + rounding item; Group Discount Item. |
| Default Settlement Method | Pre-selected settlement method on the Settlement tab. |
| Item Category Filter | Item categories offered at this branch. |
| Menu List | Sidebar menus per branch. |
| Pricing Scheme | Branch pricing schemes. |
| Printable Format | Branch default printable format. |
Feature visibility / permissions
Server-side: INTERNAL_PURCHASE_RETURN create / read / update / delete with targets. A role scoped to one branch must also carry the branch target, or the listing filter shows every branch (a 2026 support case).
Client-side permissions seeded for this applet:
| Group | Permission codes |
|---|---|
| Buttons / menus | SHOW_GENDOC_FINAL_BUTTON (seeded); SHOW_GENDOC_DISCARD_BUTTON, SHOW_GENDOC_VOID_BUTTON, SHOW_FILE_EXPORT_MENU are checked in code but not seeded — ask BigLedger to add them to this applet’s permission list if you need them; Client Side Permission only grants codes already on it. |
| Header | SHOW_DOC_NO_TENANT, SHOW_DOC_NO_COMPANY, SHOW_DOC_NO_BRANCH, SHOW_TRANSACTION_DATE, SHOW_CLIENT_DOC_TYPE, SHOW_CLIENT_DOC_1..5 |
| Lines and pricing | SHOW_QTY_BASE, SHOW_QTY_UOM, SHOW_UOM_TO_BASE_RATIO, the SHOW_UNIT_PRICE_* set, SHOW_UNIT_DISCOUNT, SHOW_UNIT_DISCOUNT_UOM_EXCL_TAX, SHOW_DISCOUNT_AMOUNT_EXCL_TAX, SHOW_AMOUNT_STD_EXCL_TAX, SHOW_AMOUNT_NET_EXCL_TAX, SHOW_AMOUNT_TXN, SHOW_AMOUNT_TXN_MAIN_LISTING, SHOW_TOTAL_TXN_AMOUNT, SHOW_TOTAL_SST_VAT_GST_AMOUNT, SHOW_TAX_CONFIG_SELECTION, SHOW_WHT_CONFIG_SELECTION, SHOW_LAST_PURCHASE_PRICE, SHOW_COSTING_DETAILS |
| Account | ALLOW_TO_CREATE_EDIT_ACCOUNT |
| Also checked in code, not seeded | SHOW_SERIAL_NUMBER, SHOW_ARAP_PNS, SHOW_ARAP_SETTLEMENT, SHOW_ARAP_DOC_OPEN, SHOW_ARAP_CONTRA, SHOW_ARAP_BAL, EXCLUDE_ACCOUNT_CODE_ITEM_TYPE_AT_ITEM_SEARCH |
Fields
Main Details
| Field | Meaning | Required | Notes / validation |
|---|---|---|---|
| Branch, Location | Branch and the header location. | Yes | A line takes stock out of its own delivery location when it has one, and only otherwise out of this location; stock balance is validated where the stock actually leaves. |
| Company | Owning company. | System | Follows the branch you pick, and changes with it. It decides whose company running number the return draws at FINAL, so a return raised under the wrong branch lands in the wrong company’s sequence. |
| Purchaser | Responsible employee. | No | Auto-fill with ENABLE_EMPLOYEE_LOGIN_AUTO_DETECTION; branch default Sales Agent. |
| Doc No (Tenant / Company / Branch) | Running numbers. | System | Not given at the same moment. The tenant number is drawn when the return is first saved; the company and branch numbers only when it is made FINAL, from the company and branch it has then. A draft therefore has a tenant number and blank company and branch numbers — that is expected, not a fault. Which of the three show is per SHOW_DOC_NO_*. |
| Transaction Date | Return date. | Yes | May be replaced at FINAL per DATE_TXN_LOGIC; must be in an open fiscal period. |
| Credit Terms | Supplier terms. | No | The list is the supplier’s own credit terms from its record, and the field stays locked for a supplier that has none. The choice is stored on the return’s copy of the supplier details. |
| Reason | Return reason from Return Reasons Settings. | No | HIDE_REASON. |
| Reference, Remarks | Free text. | Remarks with MANDATORY_REMARKS_FIELD | |
| Currency, Base Currency, Currency Rate, Forex Source | Document currency. | Currency yes | Returns keep the source invoice’s currency; rate locked by CANNOT_EDIT_CURRENCY_RATE. |
| Client Doc Type, Client Doc 1–5; External Quotation / Order / Delivery Order / Invoice / Others | References. | No | Client Doc Type and Client Doc 1–5 are read-only on this screen and appear only on a return you open, not on a new one; saving keeps whatever is already stored. The five External references are the ones you type. They are hidden until you switch their Hide setting off in Field Settings — the switches start on. |
| Workflow Status, Workflow Resolution | Workflow fields. | System | Shown when a workflow is attached. |
Account
| Field | Meaning | Required | Notes |
|---|---|---|---|
| Supplier | Entity flagged as supplier. | Yes at FINAL | Copied from the source document when the Search tab is used. |
| Entity branch, Bill To, Ship To, e-Invoice identity | Supplier details. | No | A copy of the supplier’s details kept on the return; the server fills it only when it arrives empty and never refreshes it, so editing the supplier afterwards does not change it. If the return is e-invoiced, the supplier block of the e-invoice is built from the supplier record at that moment, not from this copy — so correct identity details on the supplier, not here. |
Lines
| Field | Meaning | Required | Notes / validation |
|---|---|---|---|
| Item | Returned item. | Yes | Copied from the source line with a document link. |
| Quantity (return qty) | Units going back. | Yes | Please Enter a valid Return Qty; capped by the source line with WARN_EXCESS_RETURN_QUANTITY; FINAL checks stock where the line takes it from. |
| Serial number, batch, bin | Stock identifiers. | When the item is serialised / batched | Please Select Serial Number; the batch must exist at the return location. Missing serials are not highlighted in older builds. |
| Unit price, discounts, amounts | Value of the return. | Yes for non-GL items | Priced by the pricing option; standard price editable with ENABLE_EDITING_UNIT_PRICE_STD. |
| Tax code / %, WHT code / % | Taxes. | No | Tax posts to INPUT_TAX. |
| GL code | Line GL override. | No | Wins over every mapping. A line with a GL code posts there. A goods line without one posts to the document’s own GL code if one was set on it, then to the item’s GL code for returns in that company, and failing both to the company’s default for returns. An override does not follow later changes to either mapping. |
A line’s Segment, Dimension, Profit Centre and Project, its delivery details and instruction, and its remarks are optional. On the journal, a line tag left blank takes the header’s value from Department Hdr, and the line’s branch falls back to the header branch the same way — so set a tag on the header when it is true for the whole return, and on a line only where that line differs.
Settlement, Contra, Delivery Details, Department Hdr
| Tab | Fields | Notes |
|---|---|---|
| Settlement | Settlement method (cashbook), amount, date, remarks. | Supplier refund received; date editable with ENABLE_EDIT_SETTLEMENT_DATE; total settlement, document open and ARAP balance shown. |
| Contra | Target purchase invoice, amount, date. | Offsets the return against the supplier’s outstanding invoices. |
| Delivery Details | Delivery branch, delivery location, address. | Once set, the branch and location can be replaced but not cleared — a blank keeps the previous value. |
| Department Hdr | Segment, Dimension, Profit Centre, Project. | Header defaults for the journal. |
Lifecycle and effects
| Status | Meaning | Allowed next |
|---|---|---|
| DRAFT | Editable; no stock, journal or ARAP. | FINAL, DISCARDED |
| FINAL | Posted; stock out, journal written, ARAP open. | VOID |
| VOID | Reversed; stock restored, reverse journal, void_reason stored. | none |
| DISCARDED | Abandoned draft. | none |
On FINAL the backend refuses an already-FINAL document; validates the forex rate; validates serial, batch and bin quantities and the stock balance at each line’s delivery location, or its location when it has none (There’s not enough stock for item …); refuses a locked fiscal period; applies DATE_TXN_LOGIC; creates a base-currency shadow for foreign-currency returns; posts stock out (quantity signum −1, valued at the line amount); fills ARAP (arap_pns_amount = +amount); writes the journal; and queues the generic-document, message-template and (unless skipped) e-Invoice processors. Intercompany rules may queue a mirror Sales Return for manual confirmation.
Journal per line (amount signum +1, PURCHASE handler, return lines use PNS_RETURN):
| Account | Dr | Cr | Source of GL code |
|---|---|---|---|
Creditor (CREDITOR / CREDITOR_NON_TRADE) | Net of all lines | Company default for the supplier’s AR/AP type — mandatory. | |
Purchase return (PURCHASE_RETURN) | Line net amount | Header GL code → item-company PURCHASE_RETURN link → company default PURCHASE_RETURN. | |
Input tax (INPUT_TAX) | Line tax amount | Company default INPUT_TAX. | |
| Settlement method (cashbook GL) | Refund amount | Cashbook of the settlement item (Settlement tab). |
Stock: quantity × −1 at each line’s delivery location, else the line’s location, else the header’s; the inventory transaction is visible on Trace Document.
What a return does to the moving average. A purchase return takes its own value out of the item’s moving-average pool, not the current average. Say you hold 10 units at a moving average of RM 100 (RM 1,000). Return 2 at RM 100 each and 8 units remain at RM 100. Return 2 at RM 0 and RM 1,000 is spread over 8 units: the average jumps to RM 125. Return 2 at RM 150 each and RM 700 is left over 8: it falls to RM 87.50. So the return price re-prices the stock you keep. MA_COST is the neutral choice when the average has not moved since the purchase; a zero or guessed price changes the cost of every later sale of that item. FINAL asks you to confirm any zero-priced line for exactly this reason.
On VOID the void processor posts the reverse journal and stock movement, removes the document from the e-Invoice queue and from historical aging. VOID is refused while a later document is linked to this return through an active document link, and the message names it (… already been linked with the following documents: …); void that document first. Contra and settlement entries are not document links, so they are not what this check reads.
Related applets
- Purchase Invoice (Internal), Purchase Invoice No Stock In (Internal), Purchase GRN (Internal) — source documents for the Search tab.
- Purchase Order (Internal) — KO For source.
- Purchase Debit Note (Internal) — same amount sign, no stock movement.
- Purchase Credit Note (Internal) — opposite sign.
- Purchase Refund Note (Internal) — the supplier’s cash refund as a document.
- Payment Voucher (Internal), Creditor Report — settlement and balances.
- Sales Return (Internal) — intercompany mirror.
- Purchase Return Supplier Access (Internal) — supplier portal view.
- Chart of Account, Doc Item Maintenance, Inventory Item Maintenance, Tax Configuration, Supplier, Organisation — master data.
- My E-Invoice Admin — e-Invoice queue.
Troubleshooting
| Symptom | Cause | Fix |
|---|---|---|
| There’s not enough stock for item … on FINAL | The location the line takes stock from — its delivery location, which a line pulled from an invoice copies from that invoice line — holds less than the return quantity, or the batch does not exist there. | Open the line’s Delivery Details and check the location; set it (or the header Delivery Location, which CREATE copies to every line) to where the stock is, or transfer stock first; check batch / bin there. |
| batch number for this item does not exist at this location | Batch chosen from the invoice but stock sits in another location. | Same as above. |
| Return quantity refused: Total return quantity is greater that the invoice qty | WARN_EXCESS_RETURN_QUANTITY and the source line is already partly returned. | Return the remaining quantity only; check earlier returns on Doc Link. |
| Cannot find this year’s invoice or item in Search By Invoice | The listing window (SHOW_INVOICES_FROM) or the supplier filter excludes it; or the invoice is not FINAL. | Widen the window, confirm supplier and status. |
| An item deleted from an earlier draft return does not reappear in Search | Older build kept the link after deletion. | Update the applet (fixed 2026). |
| Location resets after selecting the supplier | Older build. | Update the applet (fixed 2026 to keep the location). |
| Add All total is a few sen below the invoice | Line recomputed as unit price × quantity instead of the invoice line amount (open issue). | Adjust the line amount to the invoice line before FINAL. |
| Serial-number tab not highlighted although serials are missing | Older build. | Update the applet (fixed mid-2026); FINAL still refuses with a serial-quantity error. |
| FINAL asks Are you sure you want to create Purchase Return with 0 price? | A line has a zero unit price or amount, usually because the pricing option found no price. | Cancel and key the price. A zero-priced return leaves the stock’s value behind on fewer units and raises the moving average of what remains (see What a return does to the moving average). |
| Warehouse role sees every branch in the listing filter | Server-side permission target not restricted to the branch. | Fix the role’s target in Permission Set / Wizard. |
| Need to change details after FINAL | FINAL locks the document. | VOID and re-create. |
| Intercompany mirror lands in the wrong location / quantity | Branch intercompany configuration maps to a different location. | Review the branch intercompany rule; a 2026 fix corrected location and quantity mapping. |
| Supplier not linked to branch | ENABLE_BRANCH_FILTER on and the supplier is not assigned to the branch. | Link the supplier to the branch in the Supplier applet. |
MISSING_DEFAULT_GL_CODE: CREDITOR | No company default creditor GL. | Add it in Chart of Account. |
Related documentation
- Purchasing module and its related applets
- MyInvois setup and e-Invoice validation
- Purchase Debit Note (Internal) — the non-stock counterpart