Internal RMA Applet
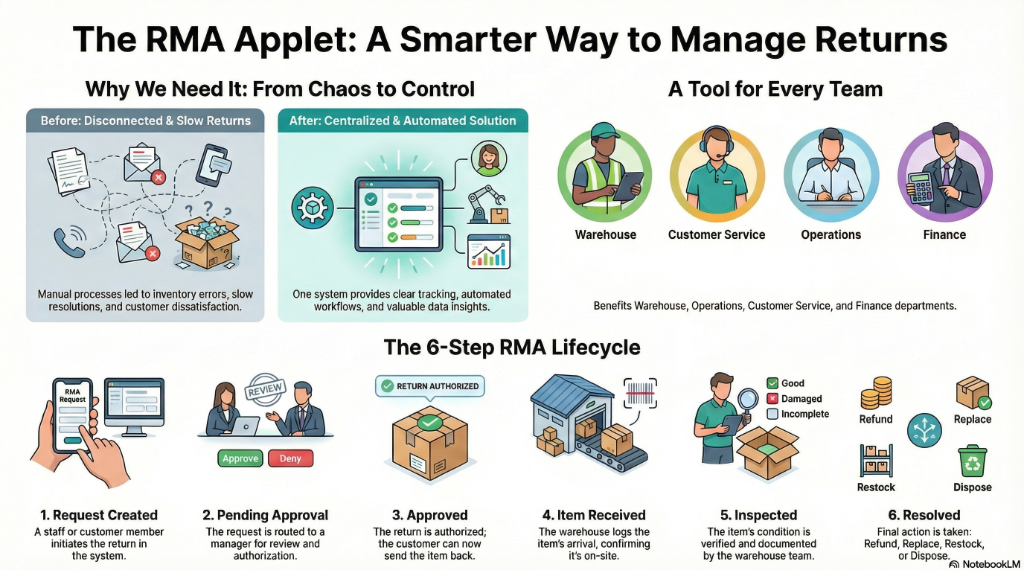
Purpose and Overview
Who Benefits from This Applet?
Warehouse Staff:
- Process incoming returns efficiently
- Track return status and location
- Manage restock or disposal workflows
Operations Managers:
- Monitor return volumes and trends
- Identify product quality issues
- Optimize reverse logistics processes
Customer Service Teams:
- Create RMA requests on behalf of customers
- Track return status for customer inquiries
- Coordinate with warehouse for pickups
Finance Teams:
- Track credits and refunds from returns
- Monitor return-related costs
- Reconcile inventory adjustments
What Problems Does This Solve?
Traditional Return Challenges:
- Untracked returns leading to inventory discrepancies
- Slow processing causing customer dissatisfaction
- No visibility into return reasons for quality improvement
- Manual coordination between departments
The Internal RMA Solution:
- Centralized RMA tracking - All returns in one system
- Automated workflows - Route returns to correct handlers
- Reason tracking - Capture return reasons for analysis
- Inventory integration - Automatic stock adjustments
Key Features Overview
Key Concepts
RMA Lifecycle
Request Created → Pending Approval → Approved → Item Received → Inspected → Resolved
        │               │              │            │           │           │
        │               │              │            │           │           └── Refund/Replace/Restock
        │               │              │            │           └── Quality check
        │               │              │            └── Item at warehouse
        │               │              └── Authorized for return
        │               └── Awaiting manager review
        └── Customer/Staff initiates
Key Terms
| Term | Definition | Example |
|---|---|---|
| RMA Number | Unique identifier for return request | RMA-2024-00123 |
| Return Reason | Why item is being returned | Defective, Wrong item, Changed mind |
| Disposition | What happens after return | Refund, Replace, Restock, Dispose |
| Credit Note | Financial document for refund | CN-2024-00456 |
| RTV | Return to Vendor — sending items back to supplier | Supplier defect claim |
Quick Start Guide
For Warehouse: Process a Return
Goal: Receive and process an incoming RMA item
- Navigate: Go to Service Note from the sidebar
- Find Record: Search by service note number or customer name
- Open Record: Double-click a row to view details
- Receive Item:
- Verify item condition matches description
- Add inspection notes if needed
- Resolve: Select disposition (Refund, Replace, Restock)
For Operations: Create an RMA Request
Goal: Initiate a return authorization
- Navigate: Go to Customer RMA in the sidebar
- Create New: Click "+" to create a new RMA
- Enter Details:
- Select Customer/Source
- Add Item(s) being returned
- Select Return Reason
- Add Notes for context
- Submit: Send for approval if required
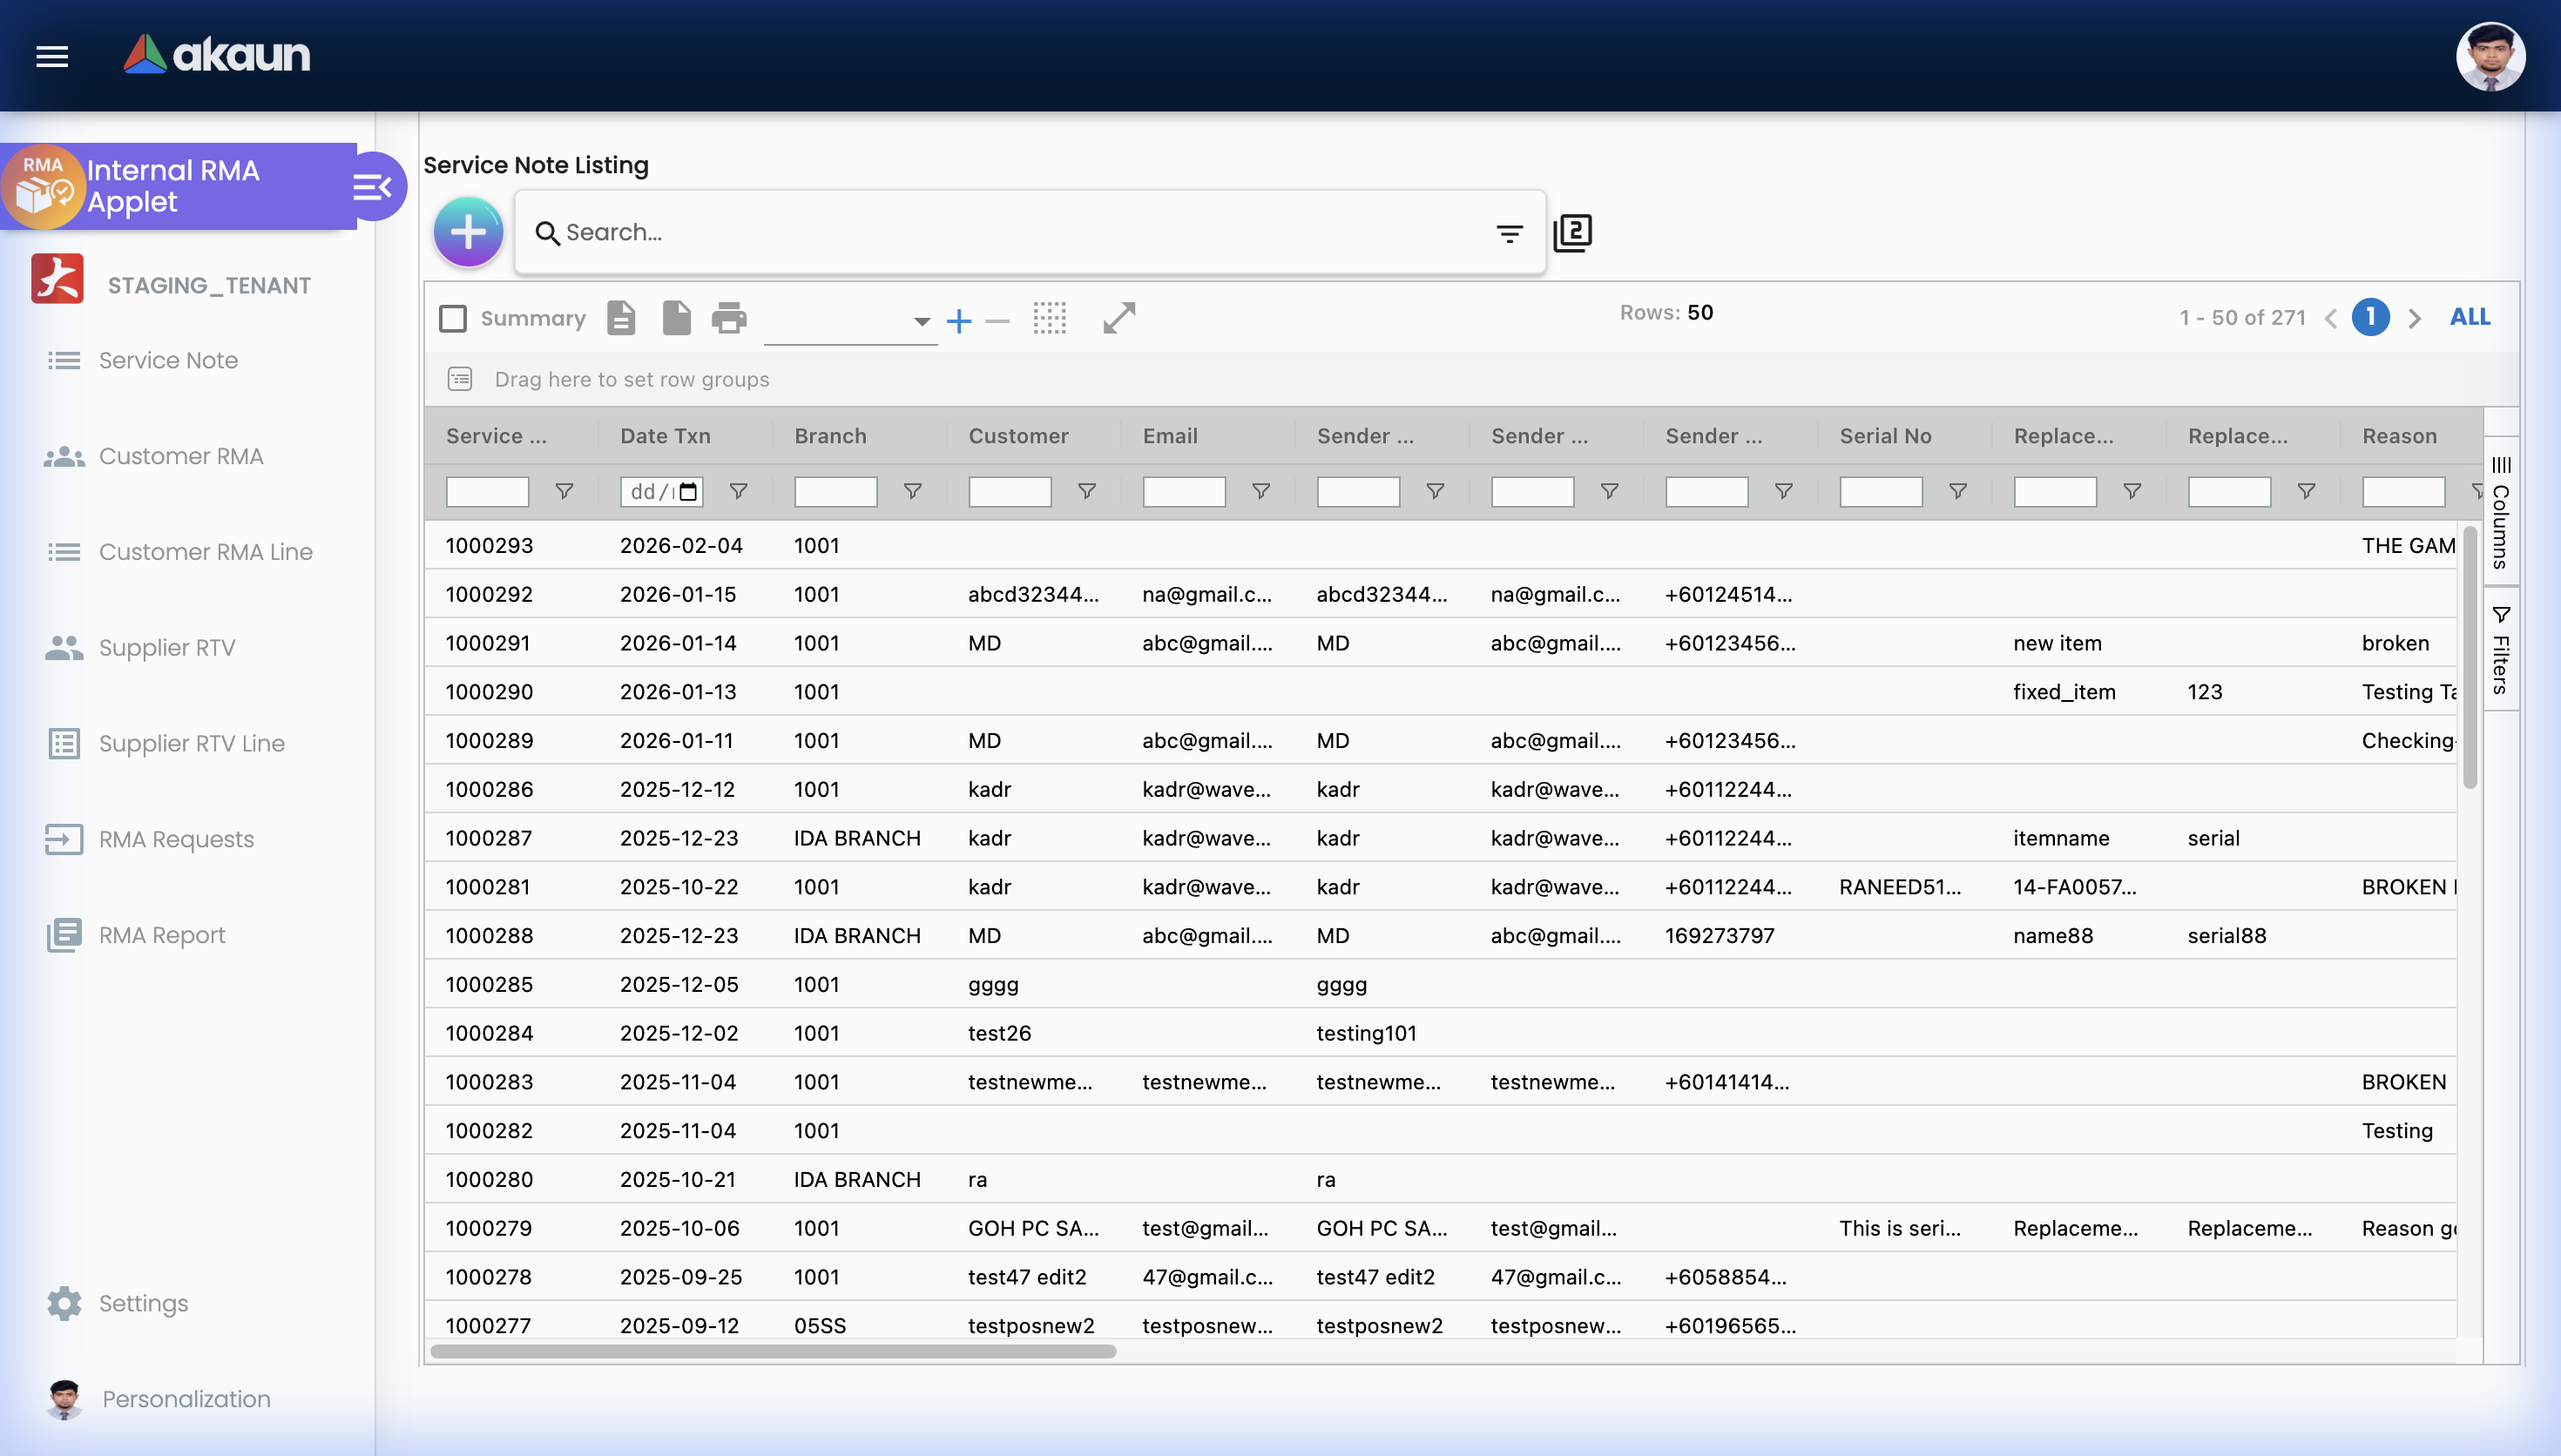
Service Note
The Service Note listing is the main entry point for logging and tracking all customer service-related return requests. Each row represents a service note from a customer.
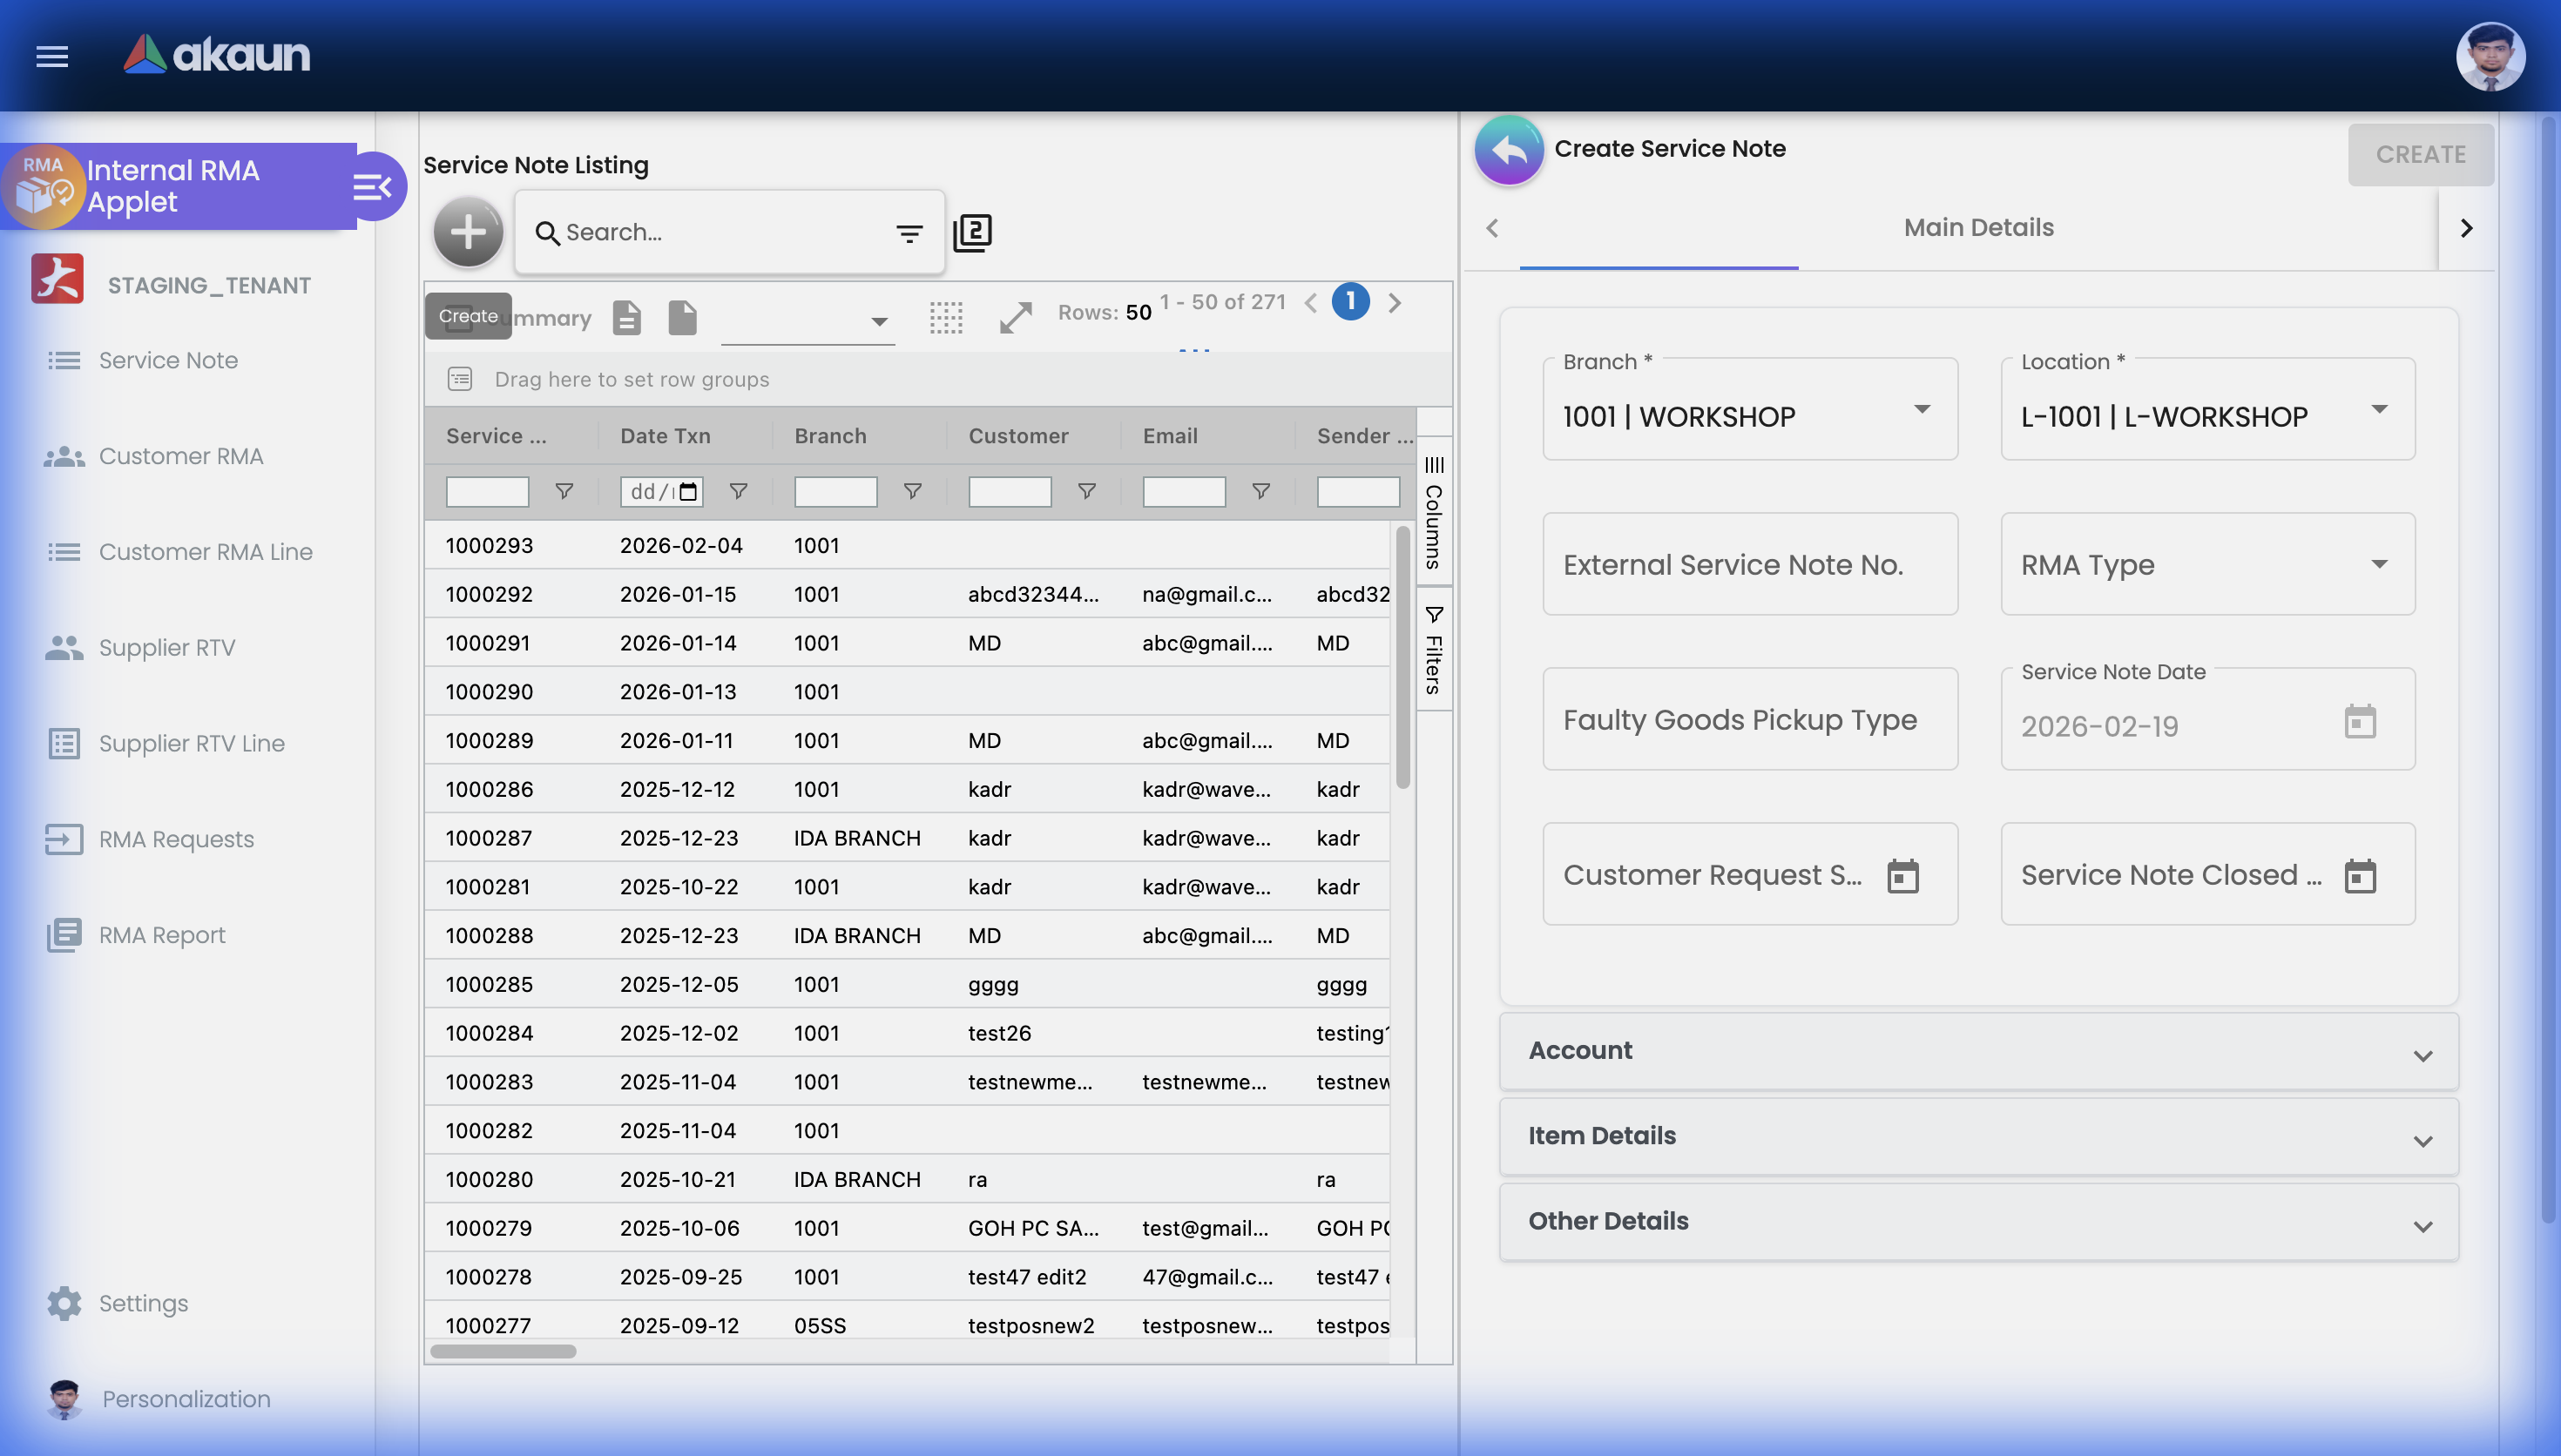
Create Service Note
Click the "+" button to open the Create Service Note panel. Fill in the required details including Branch, Location, RMA Type, and Service Note Date.
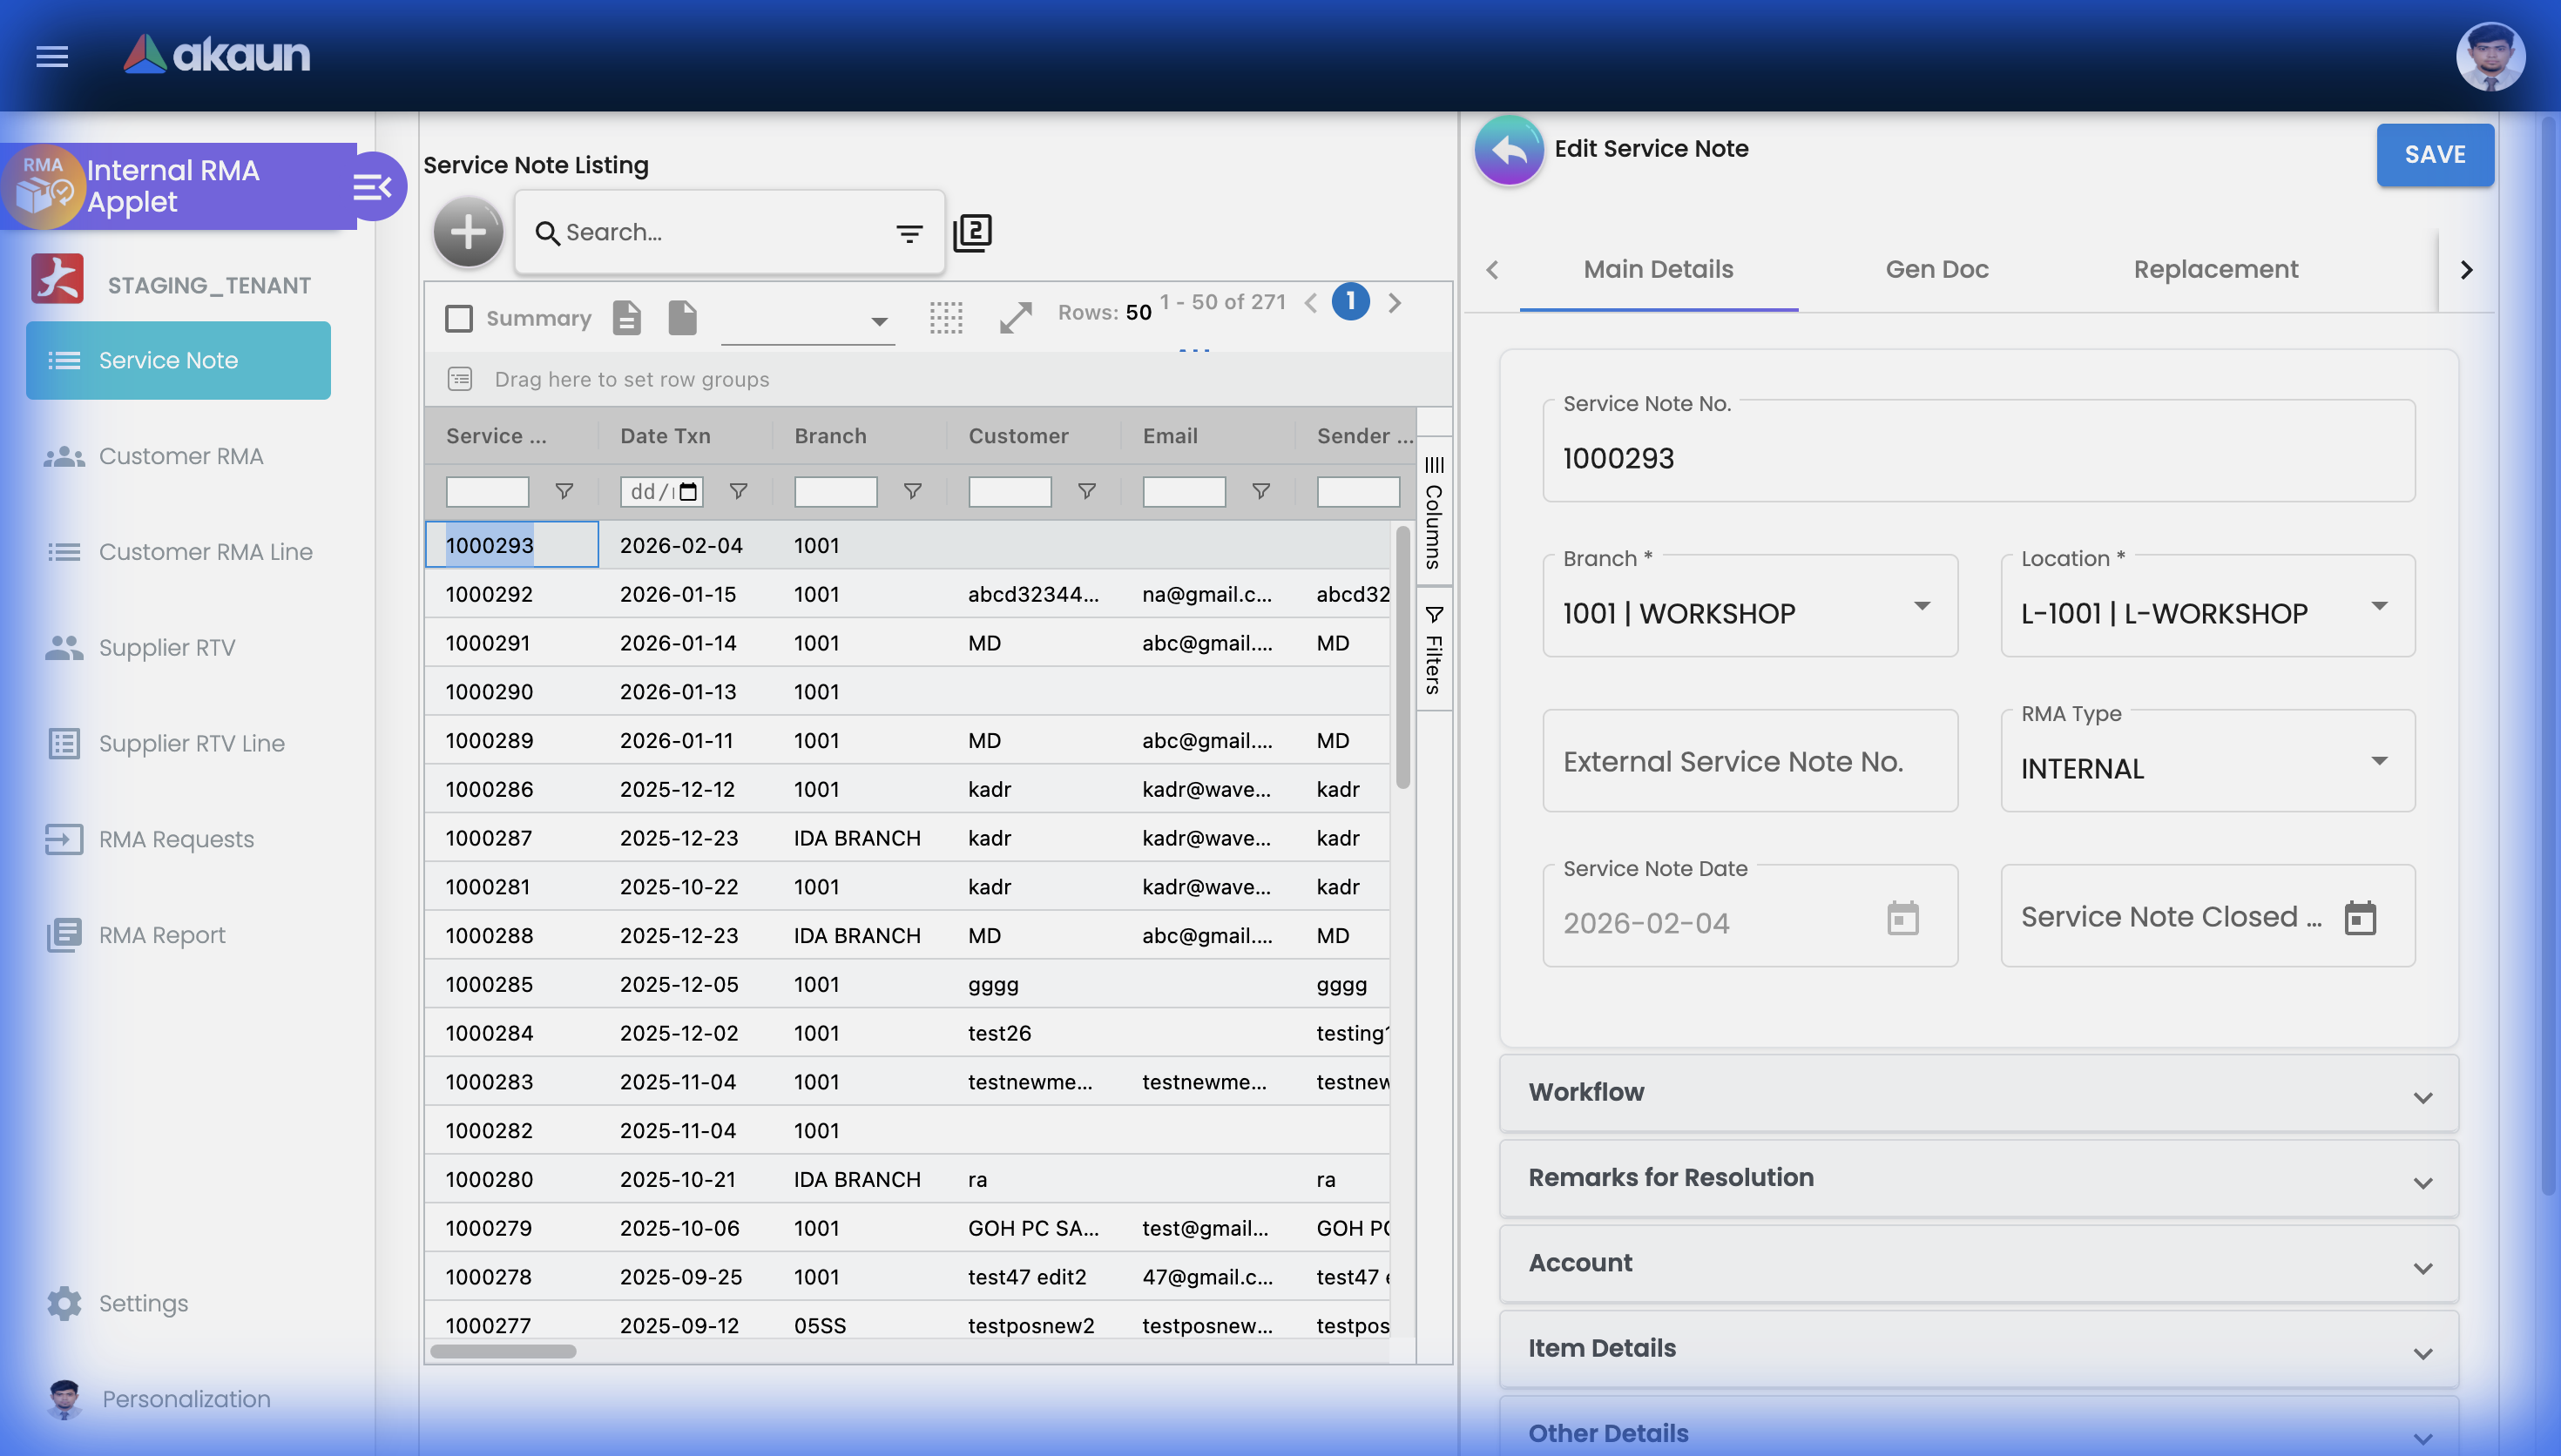
View Service Note
Double-click any row in the listing to open and view the full details of a service note record.
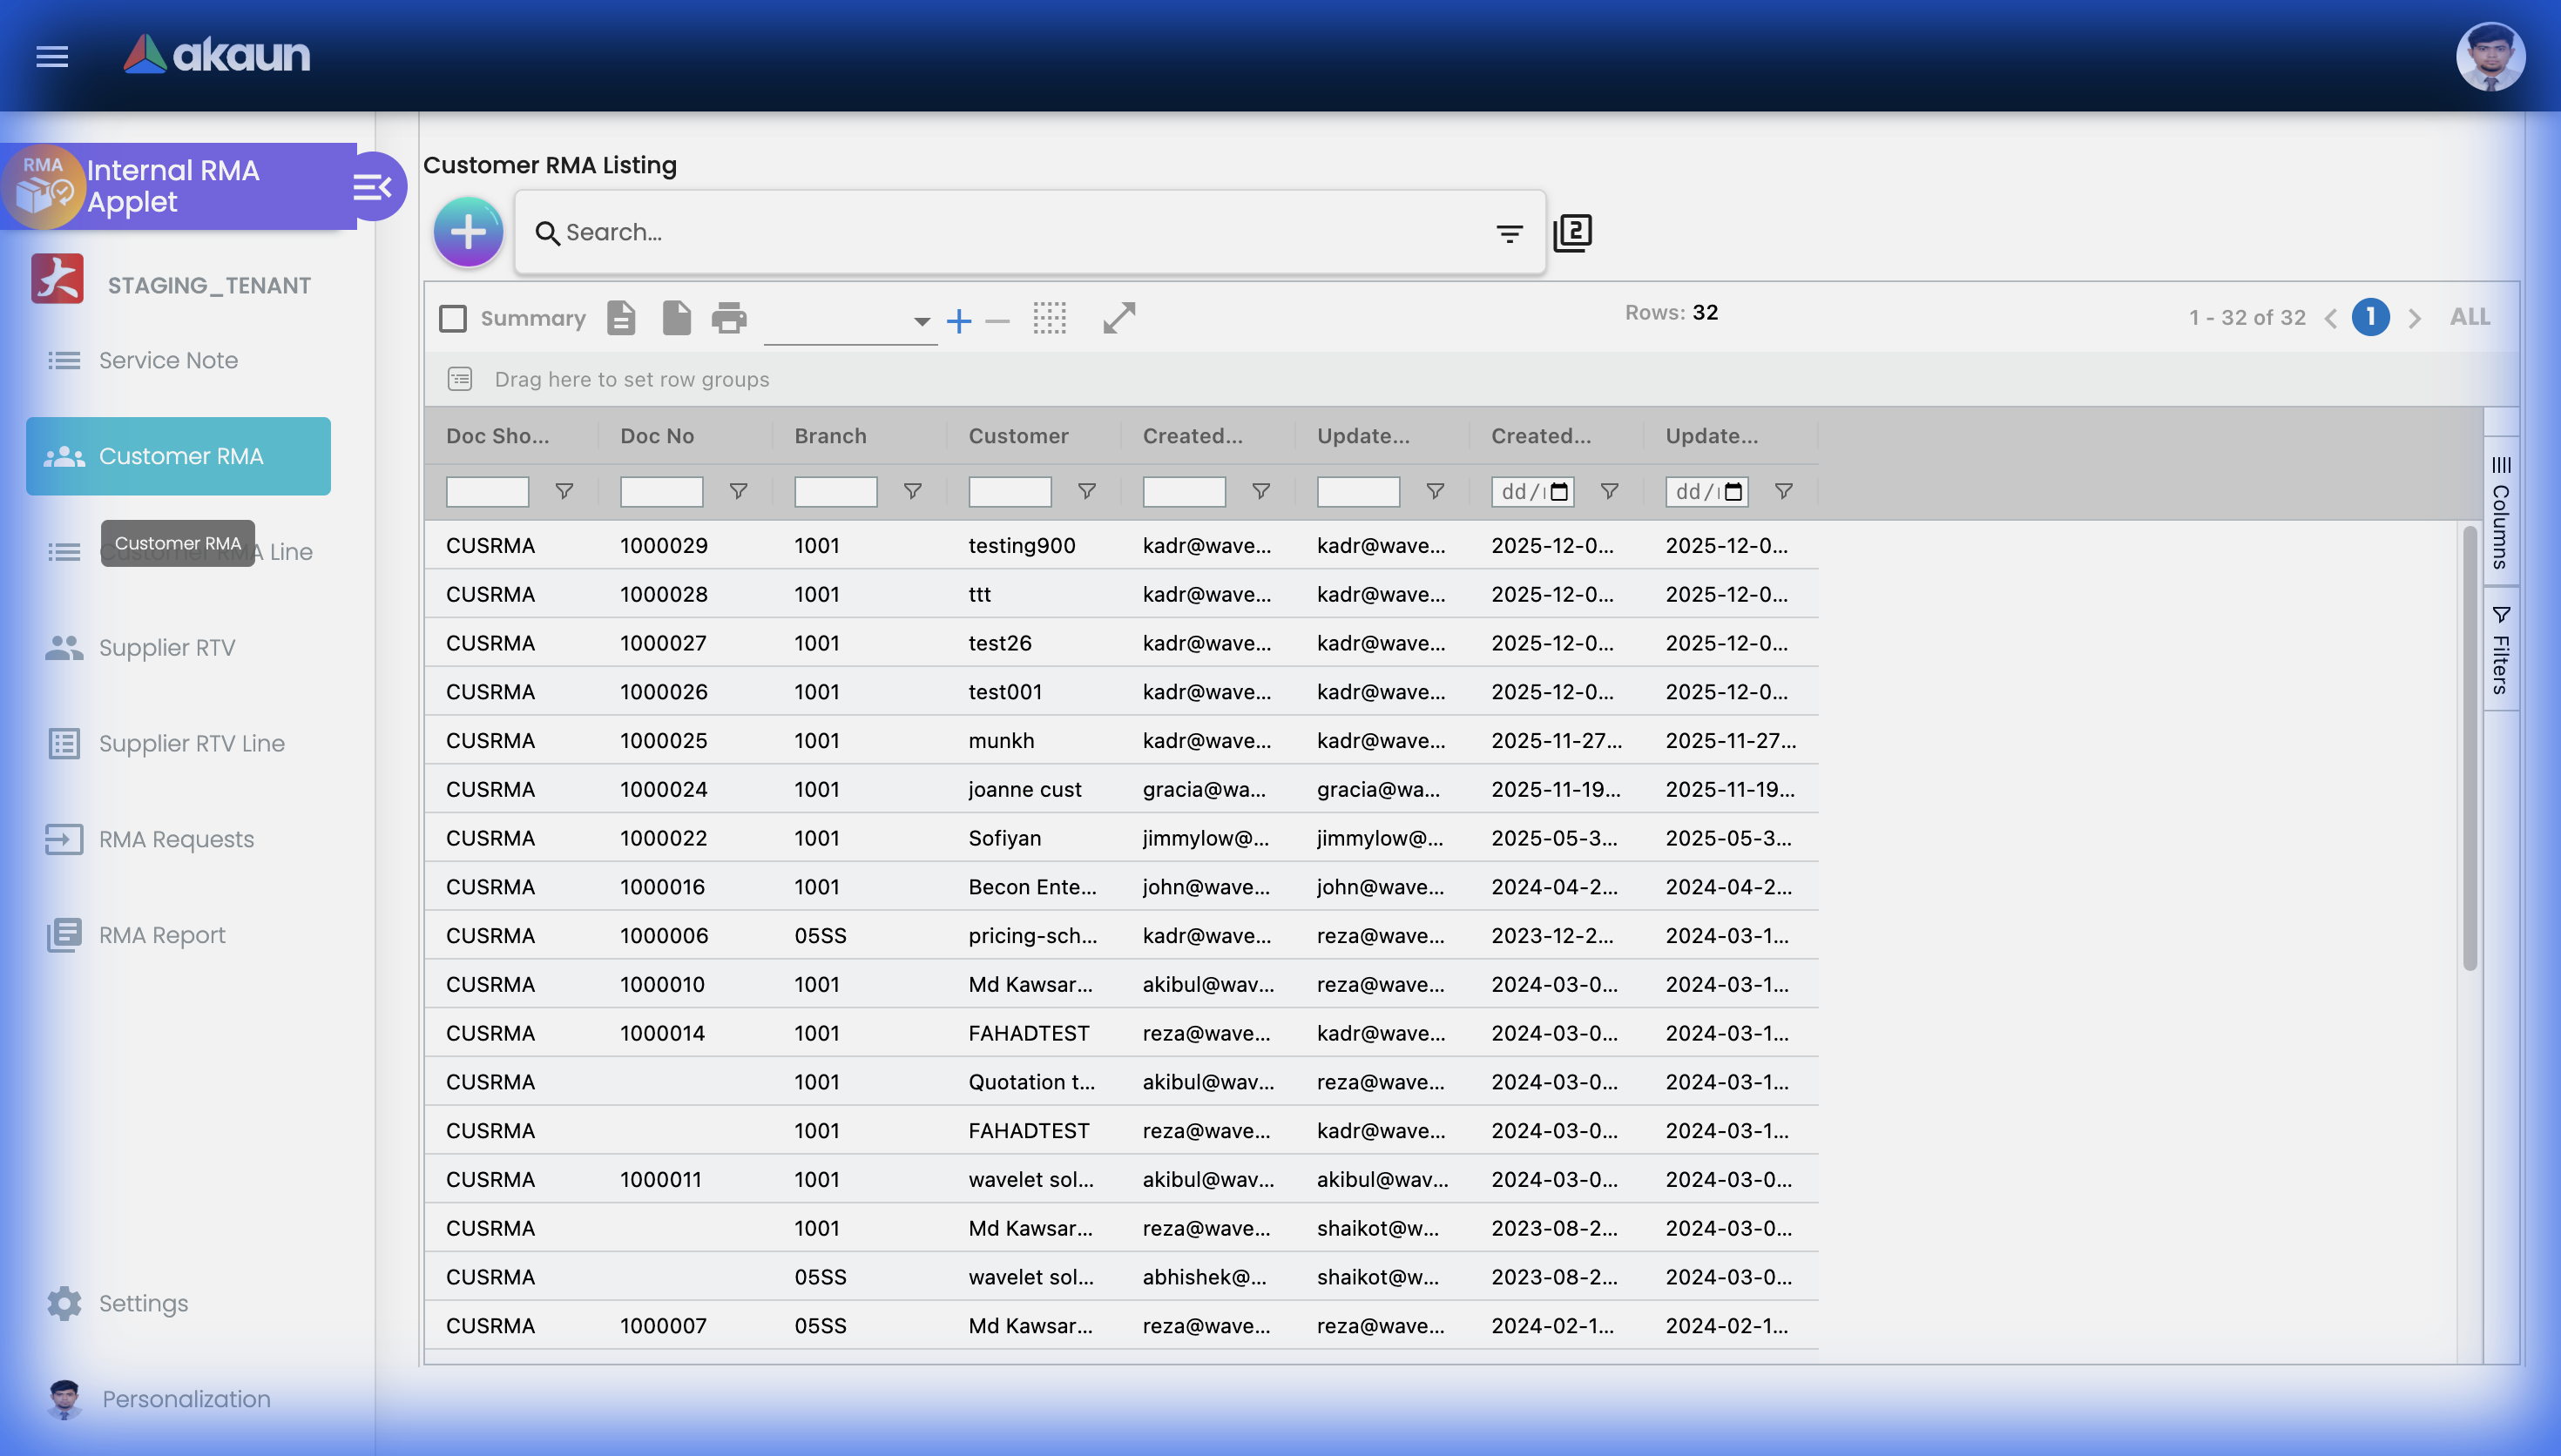
Customer RMA
The Customer RMA section manages all customer-originated Return Merchandise Authorization records. Use this to track what customers are returning and why.
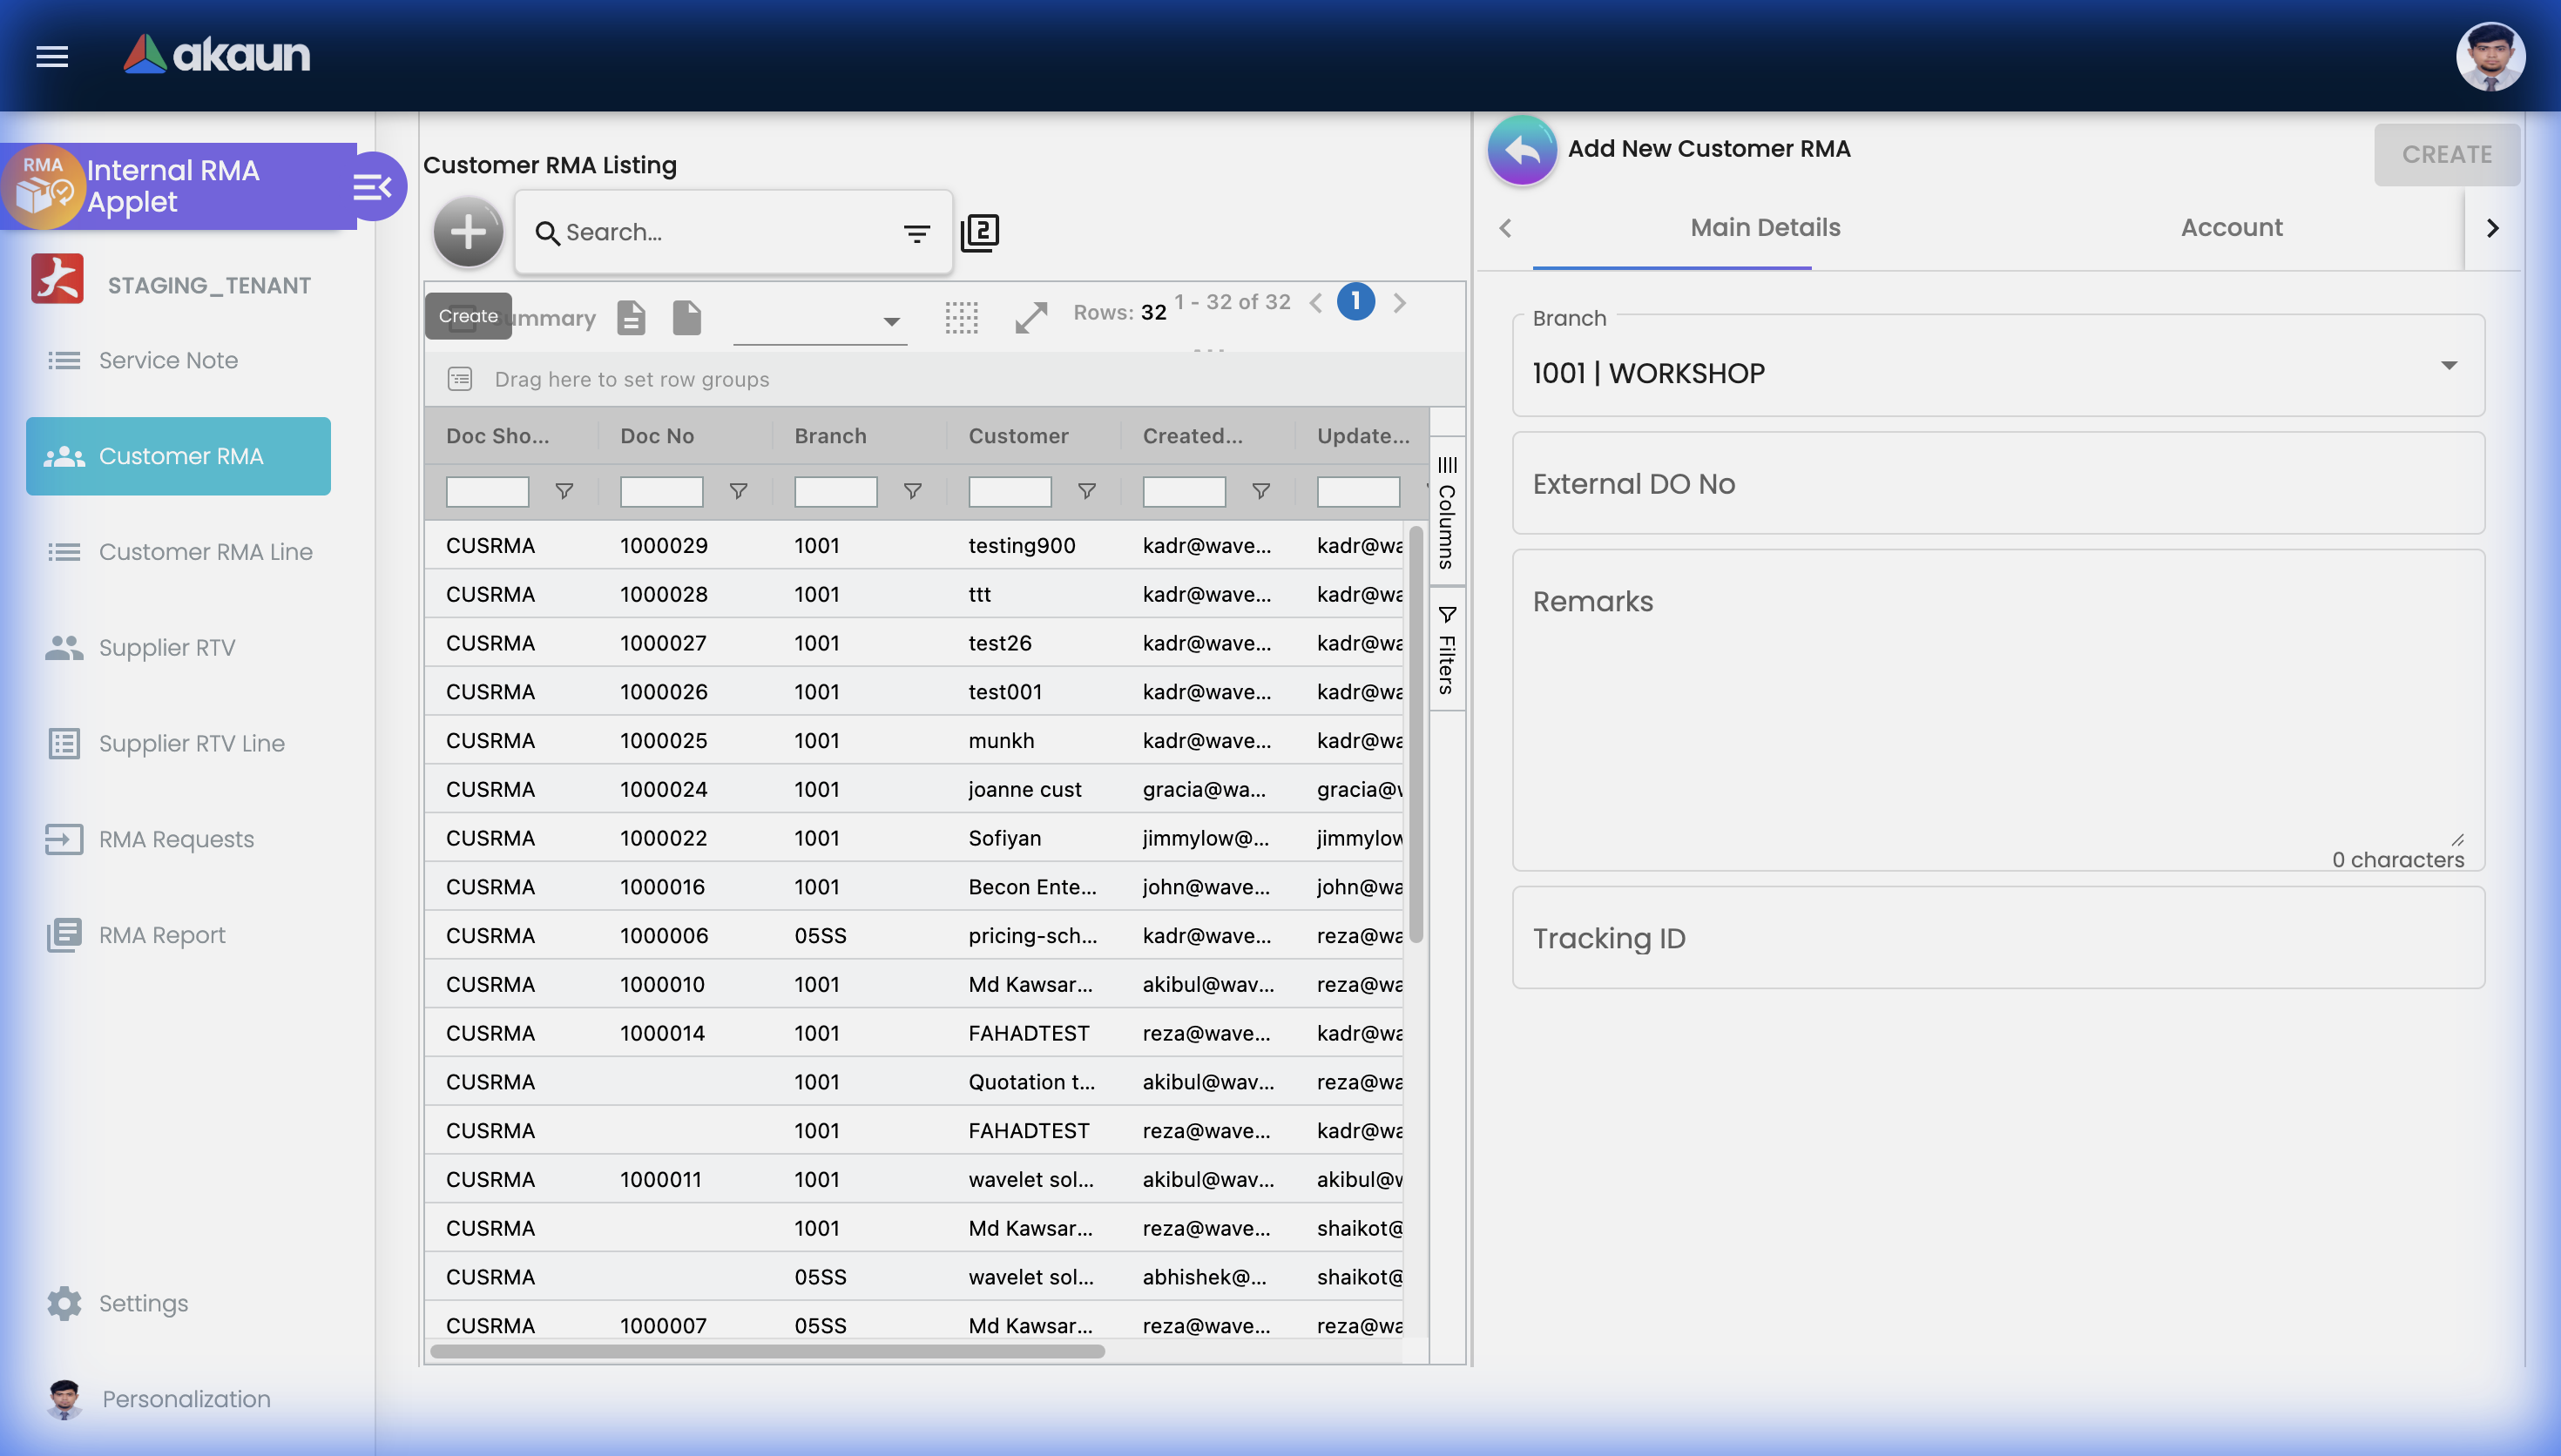
Create Customer RMA
Click "+" to open the Add New Customer RMA panel and fill in the return details.
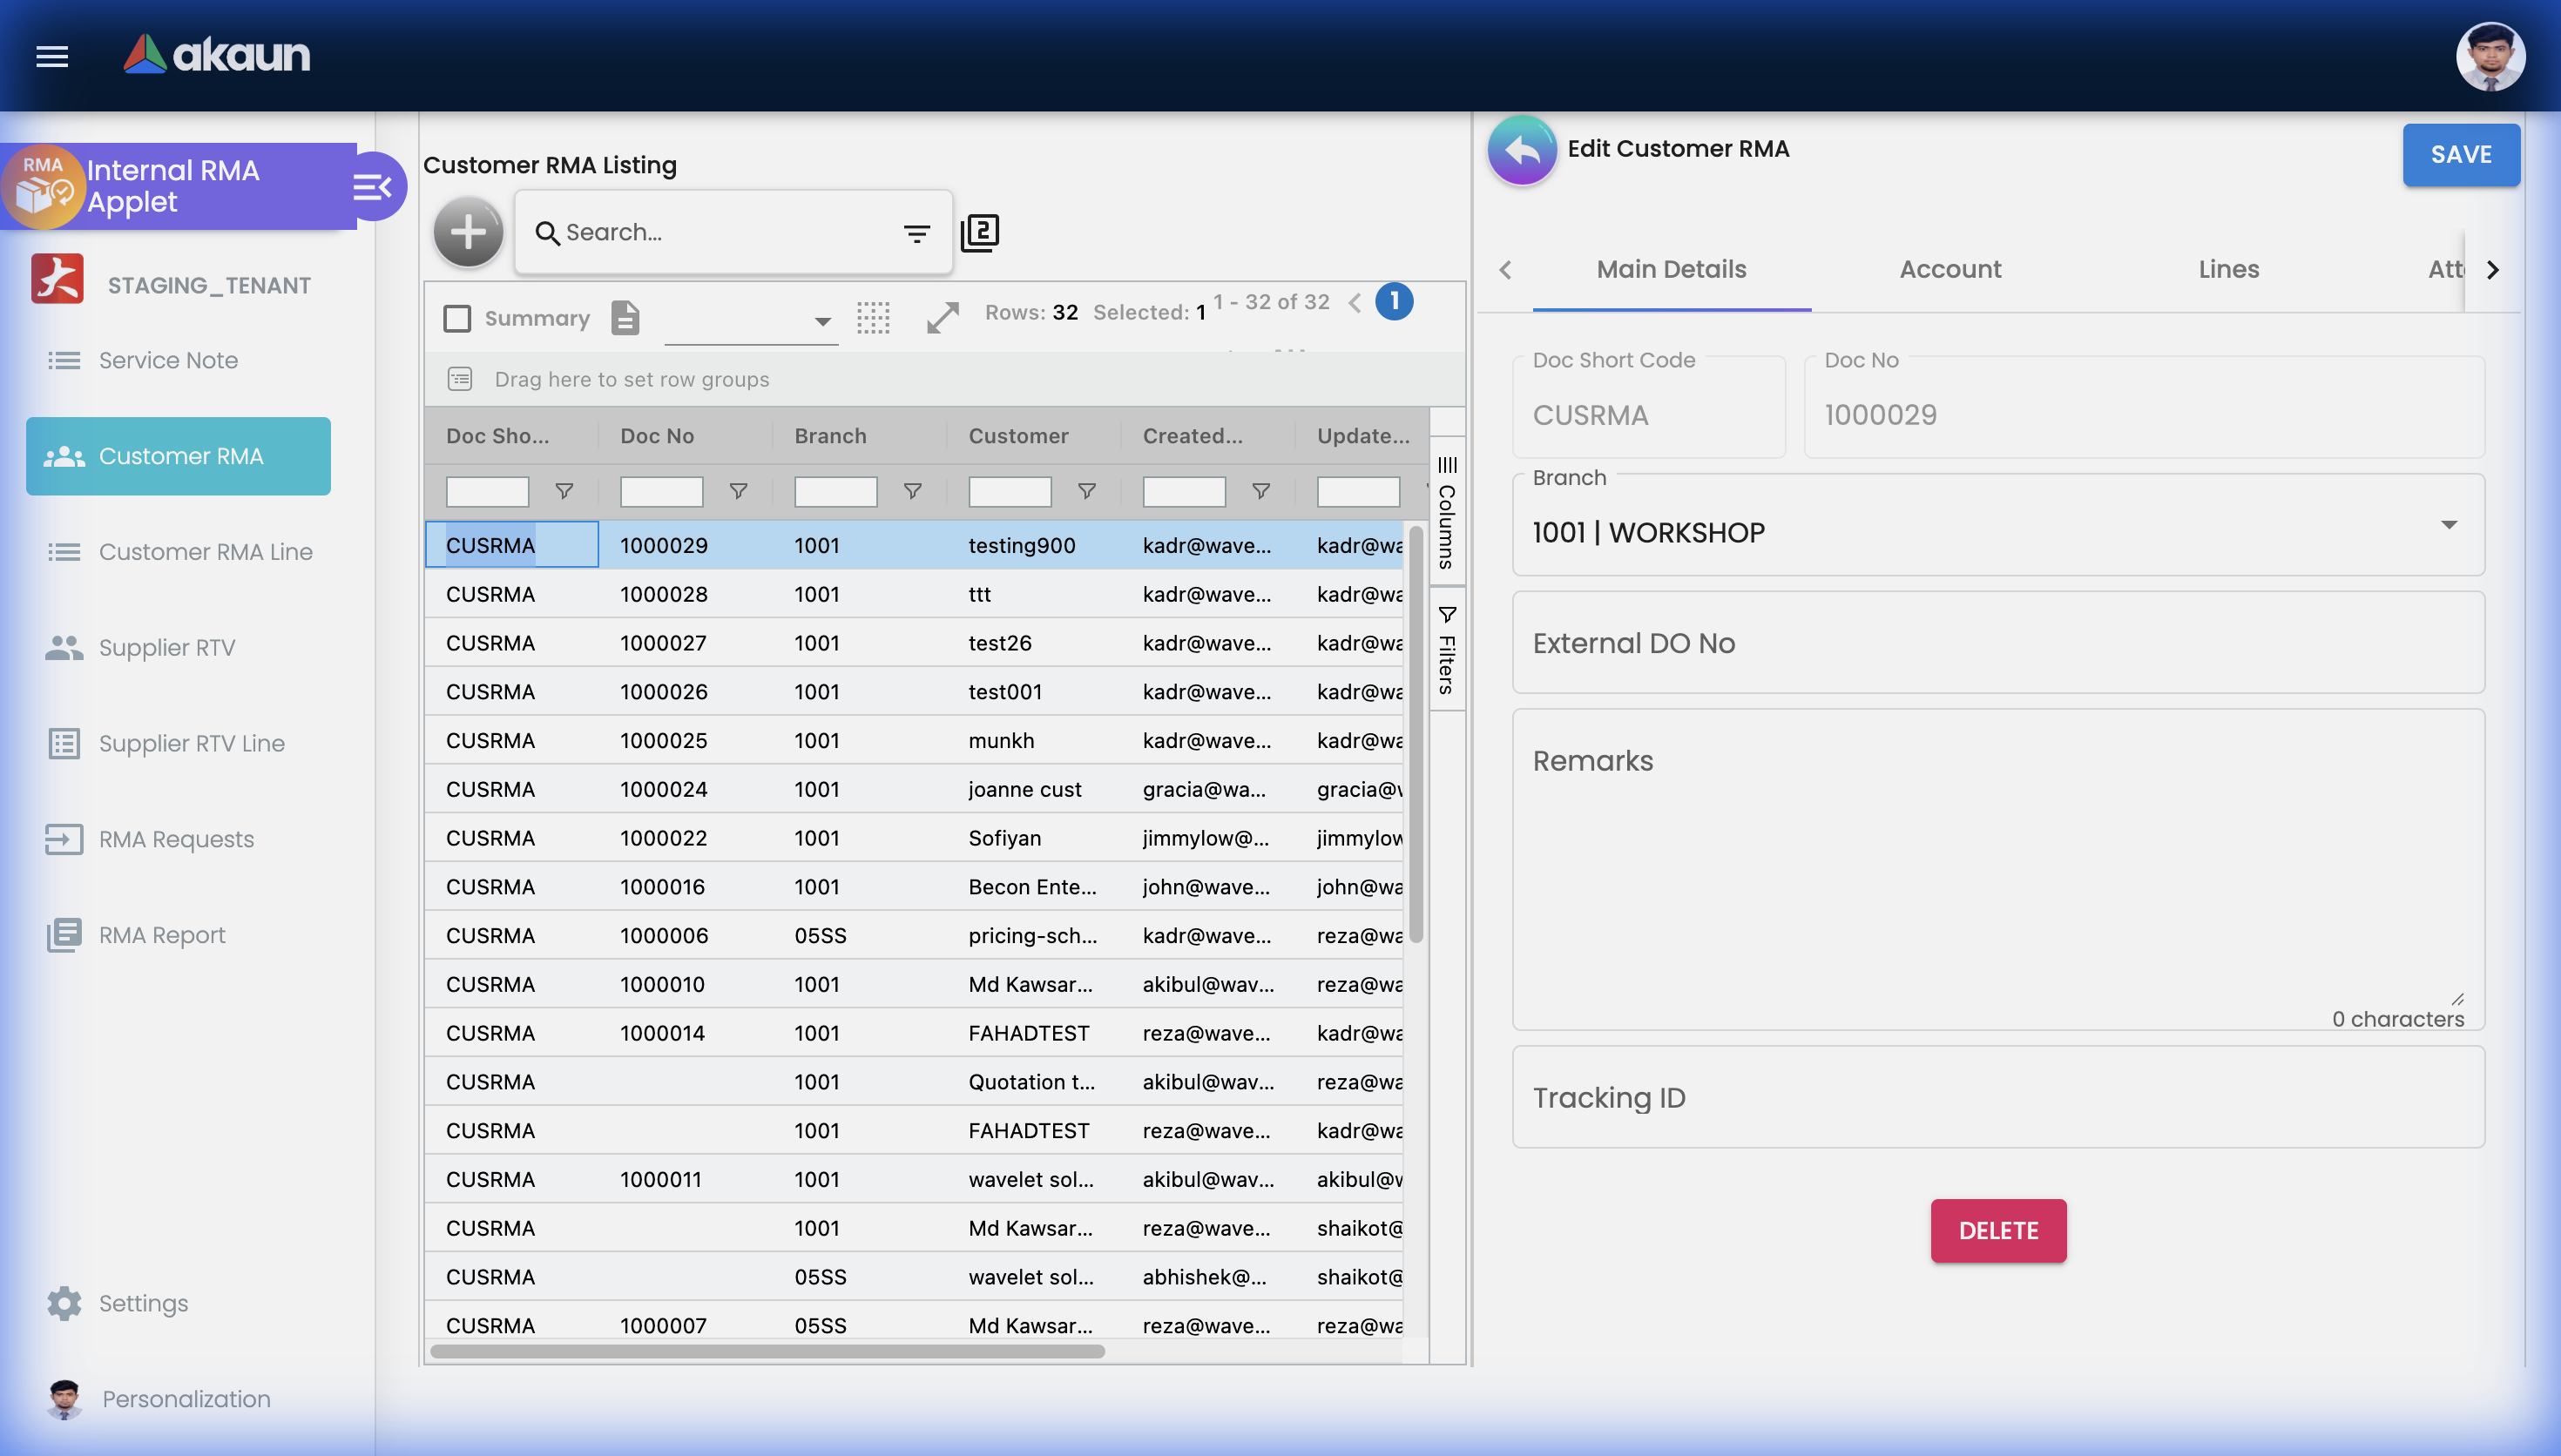
View Customer RMA
Double-click any row to open the full details of a Customer RMA record.
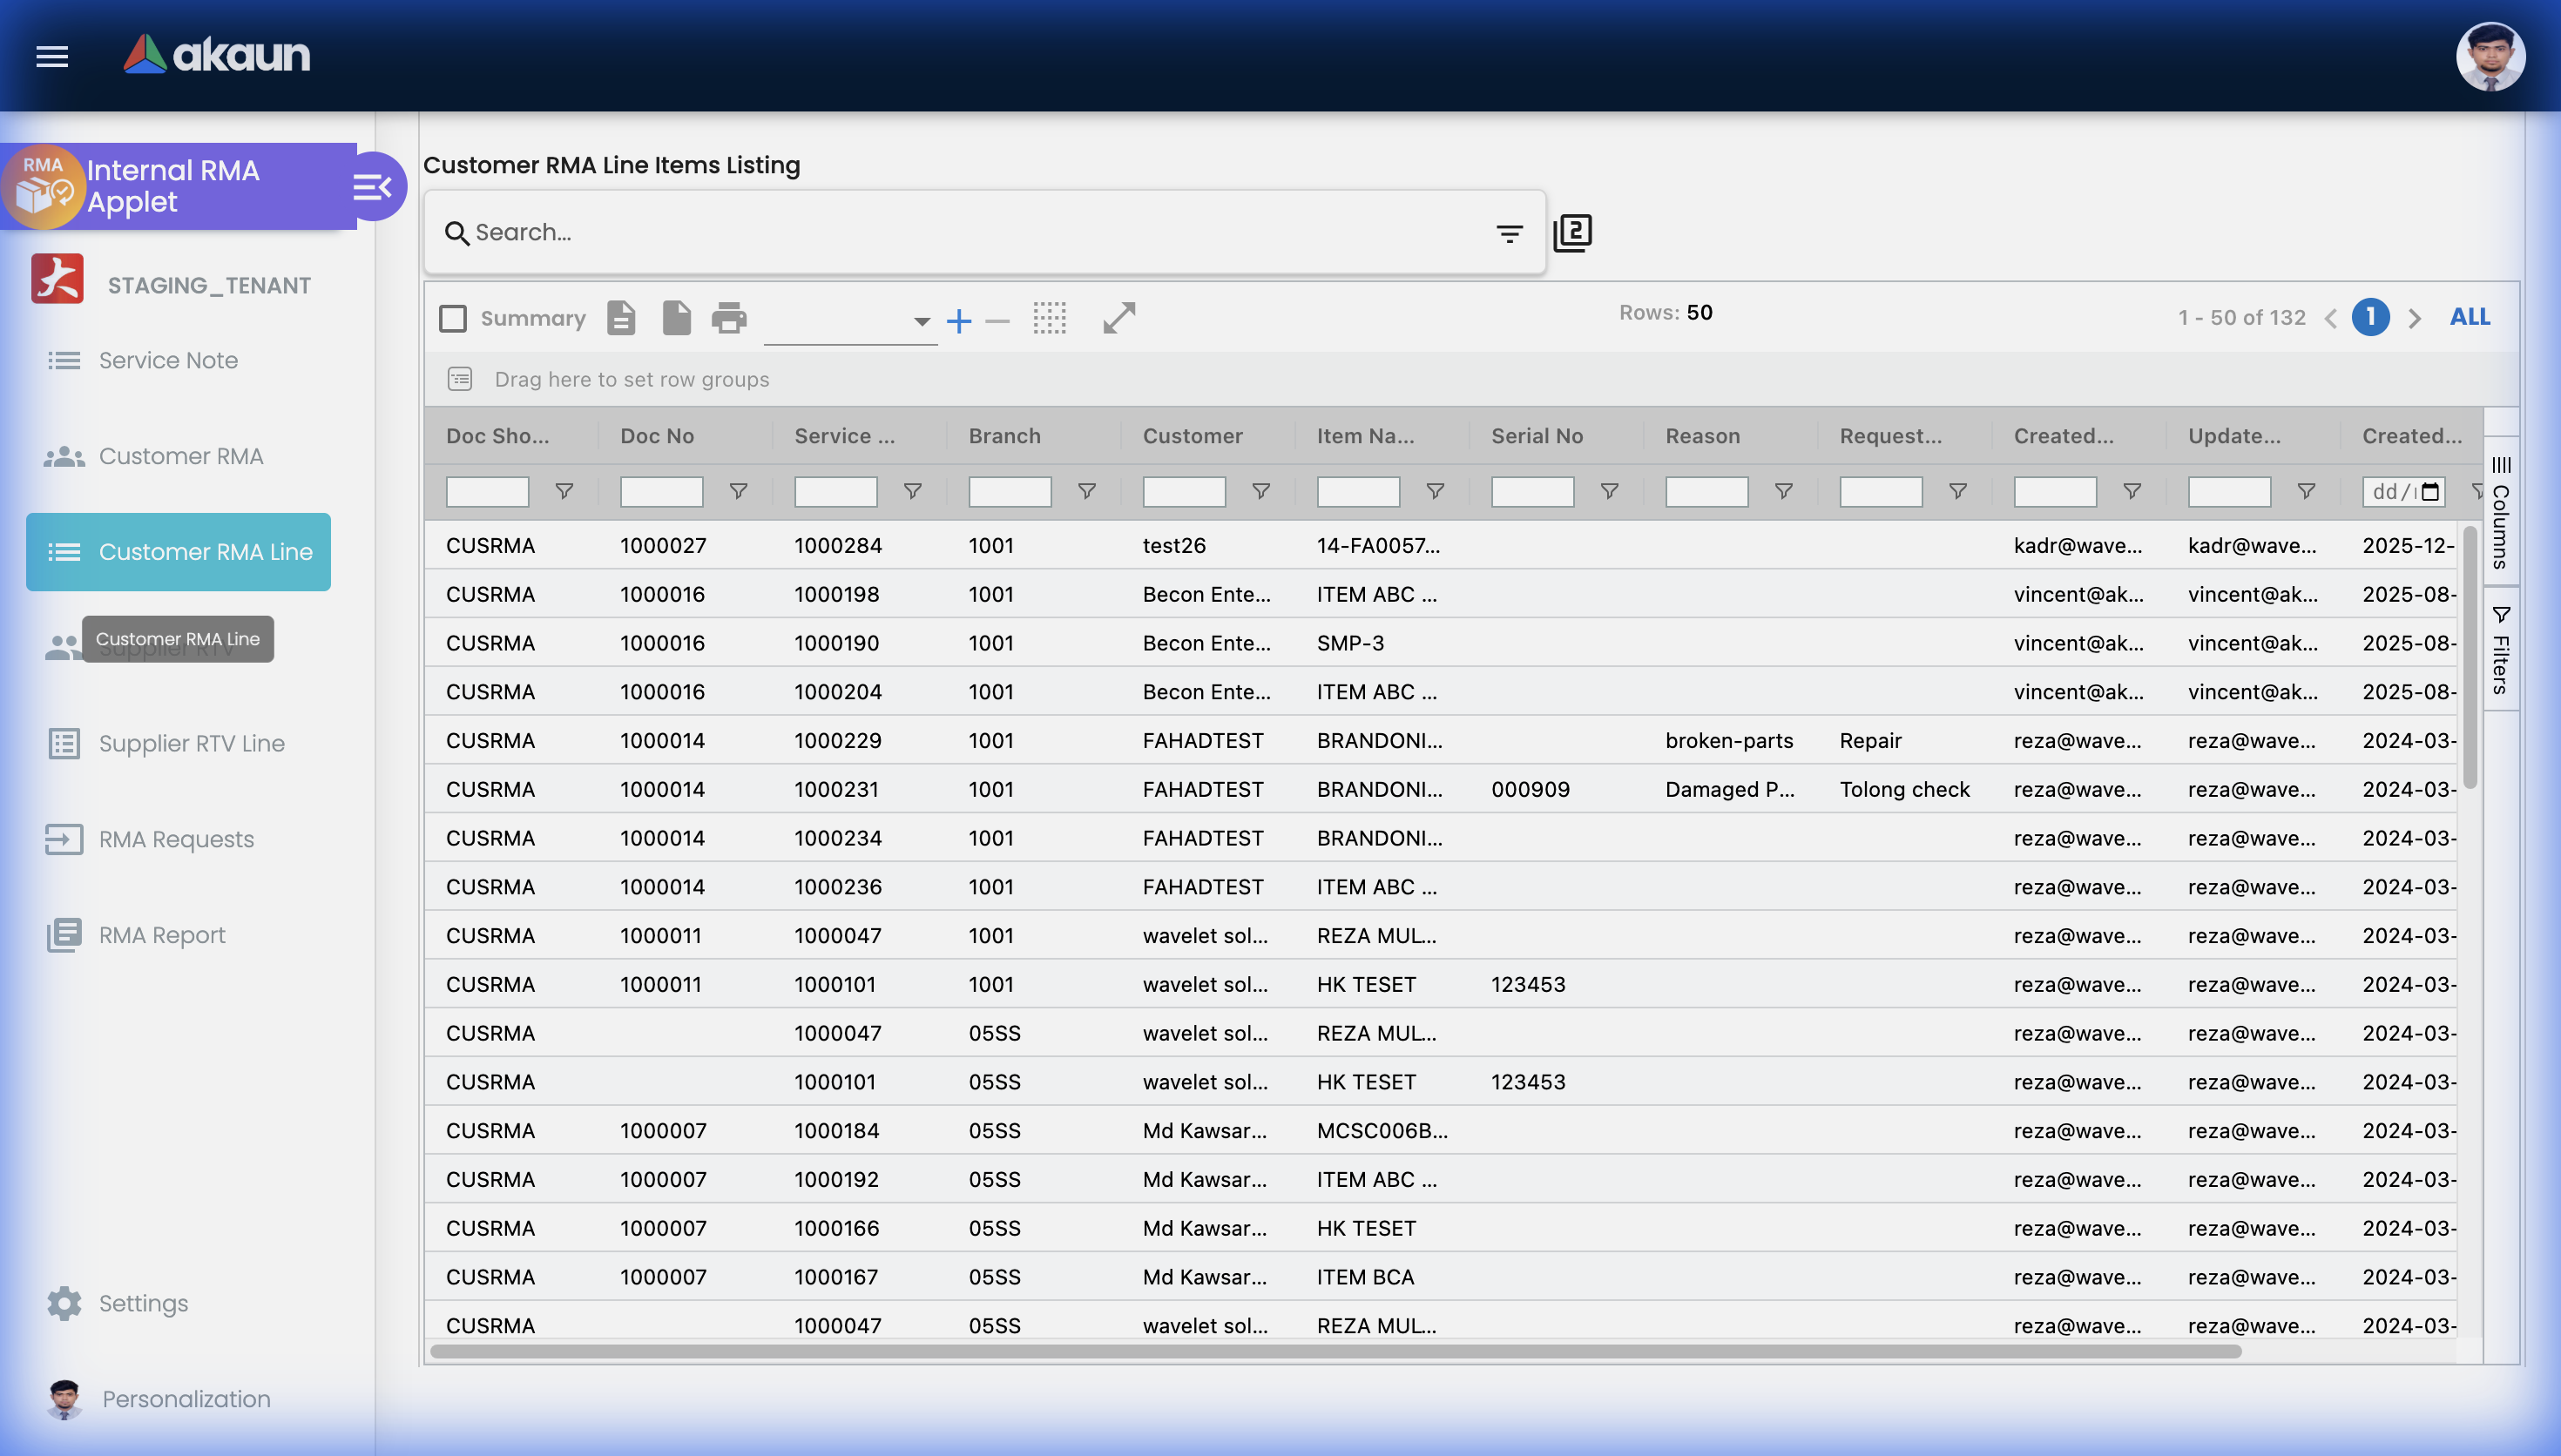
Customer RMA Line
The Customer RMA Line listing provides a flattened view of all individual line items across all Customer RMA records. Useful for bulk analysis of which specific products are being returned most frequently.
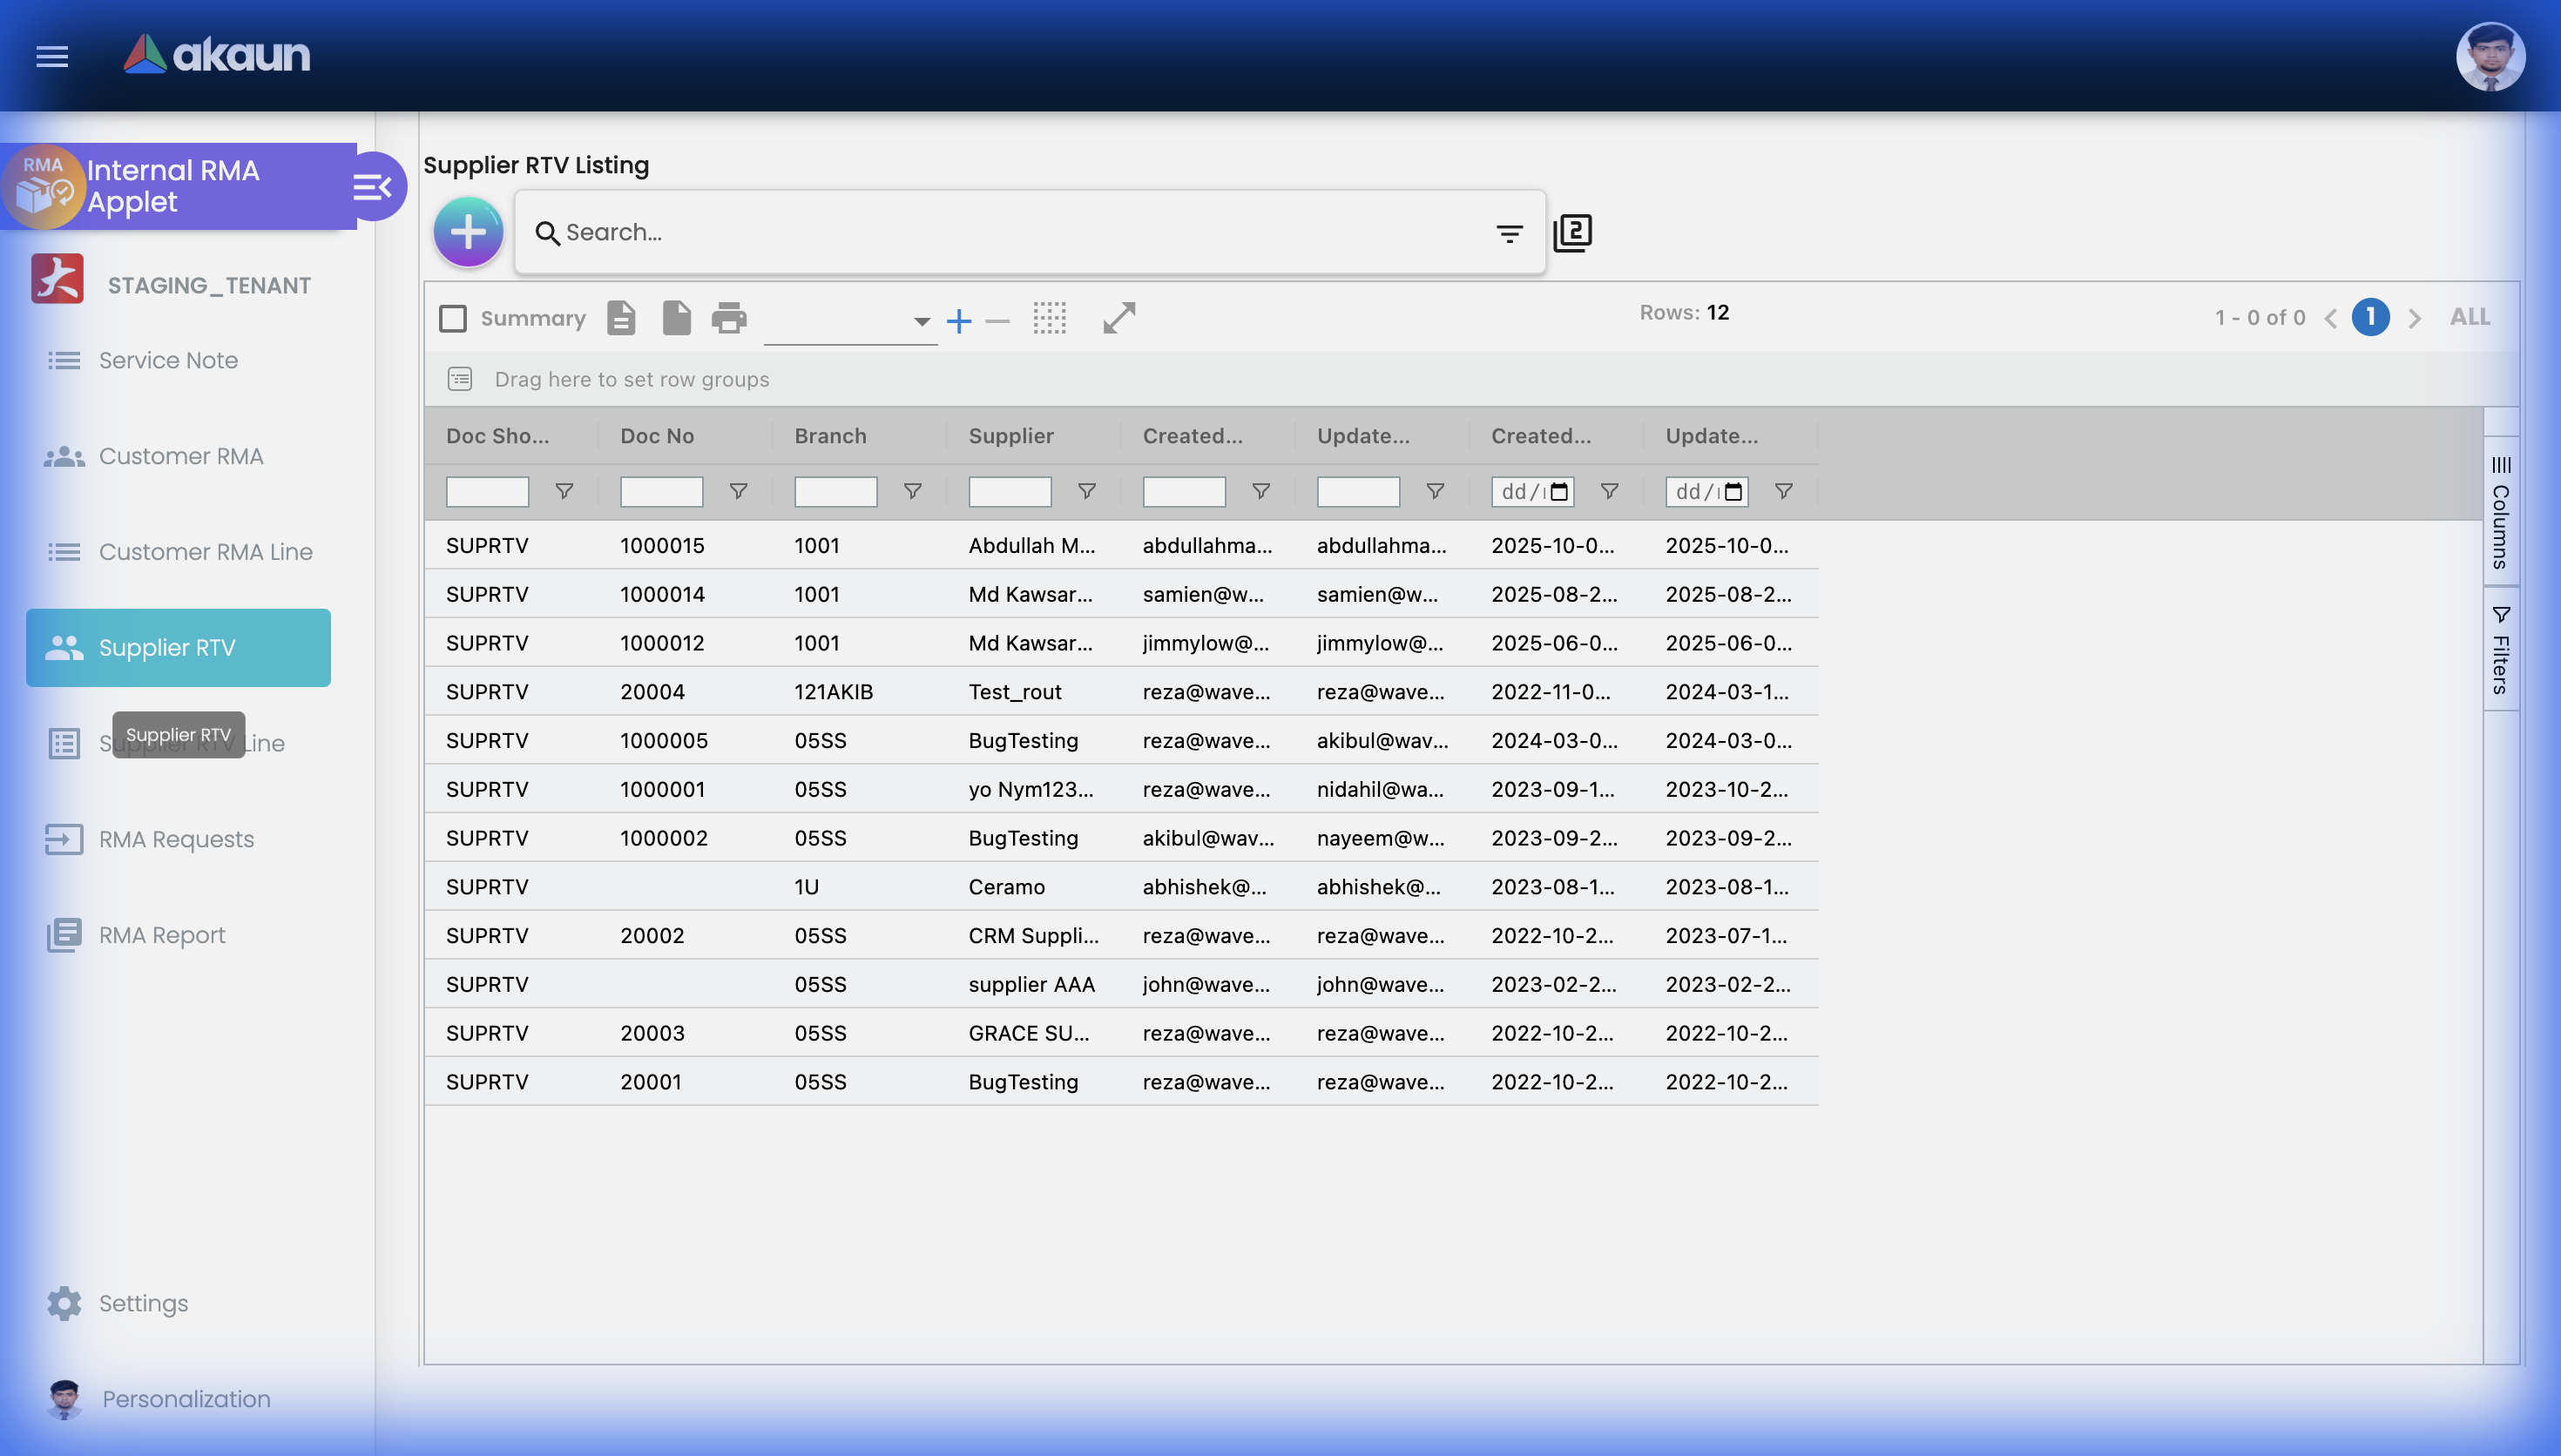
Supplier RTV
Supplier RTV (Return to Vendor) manages returns directed back to your suppliers — for defective goods, warranty claims, or over-supplied items.
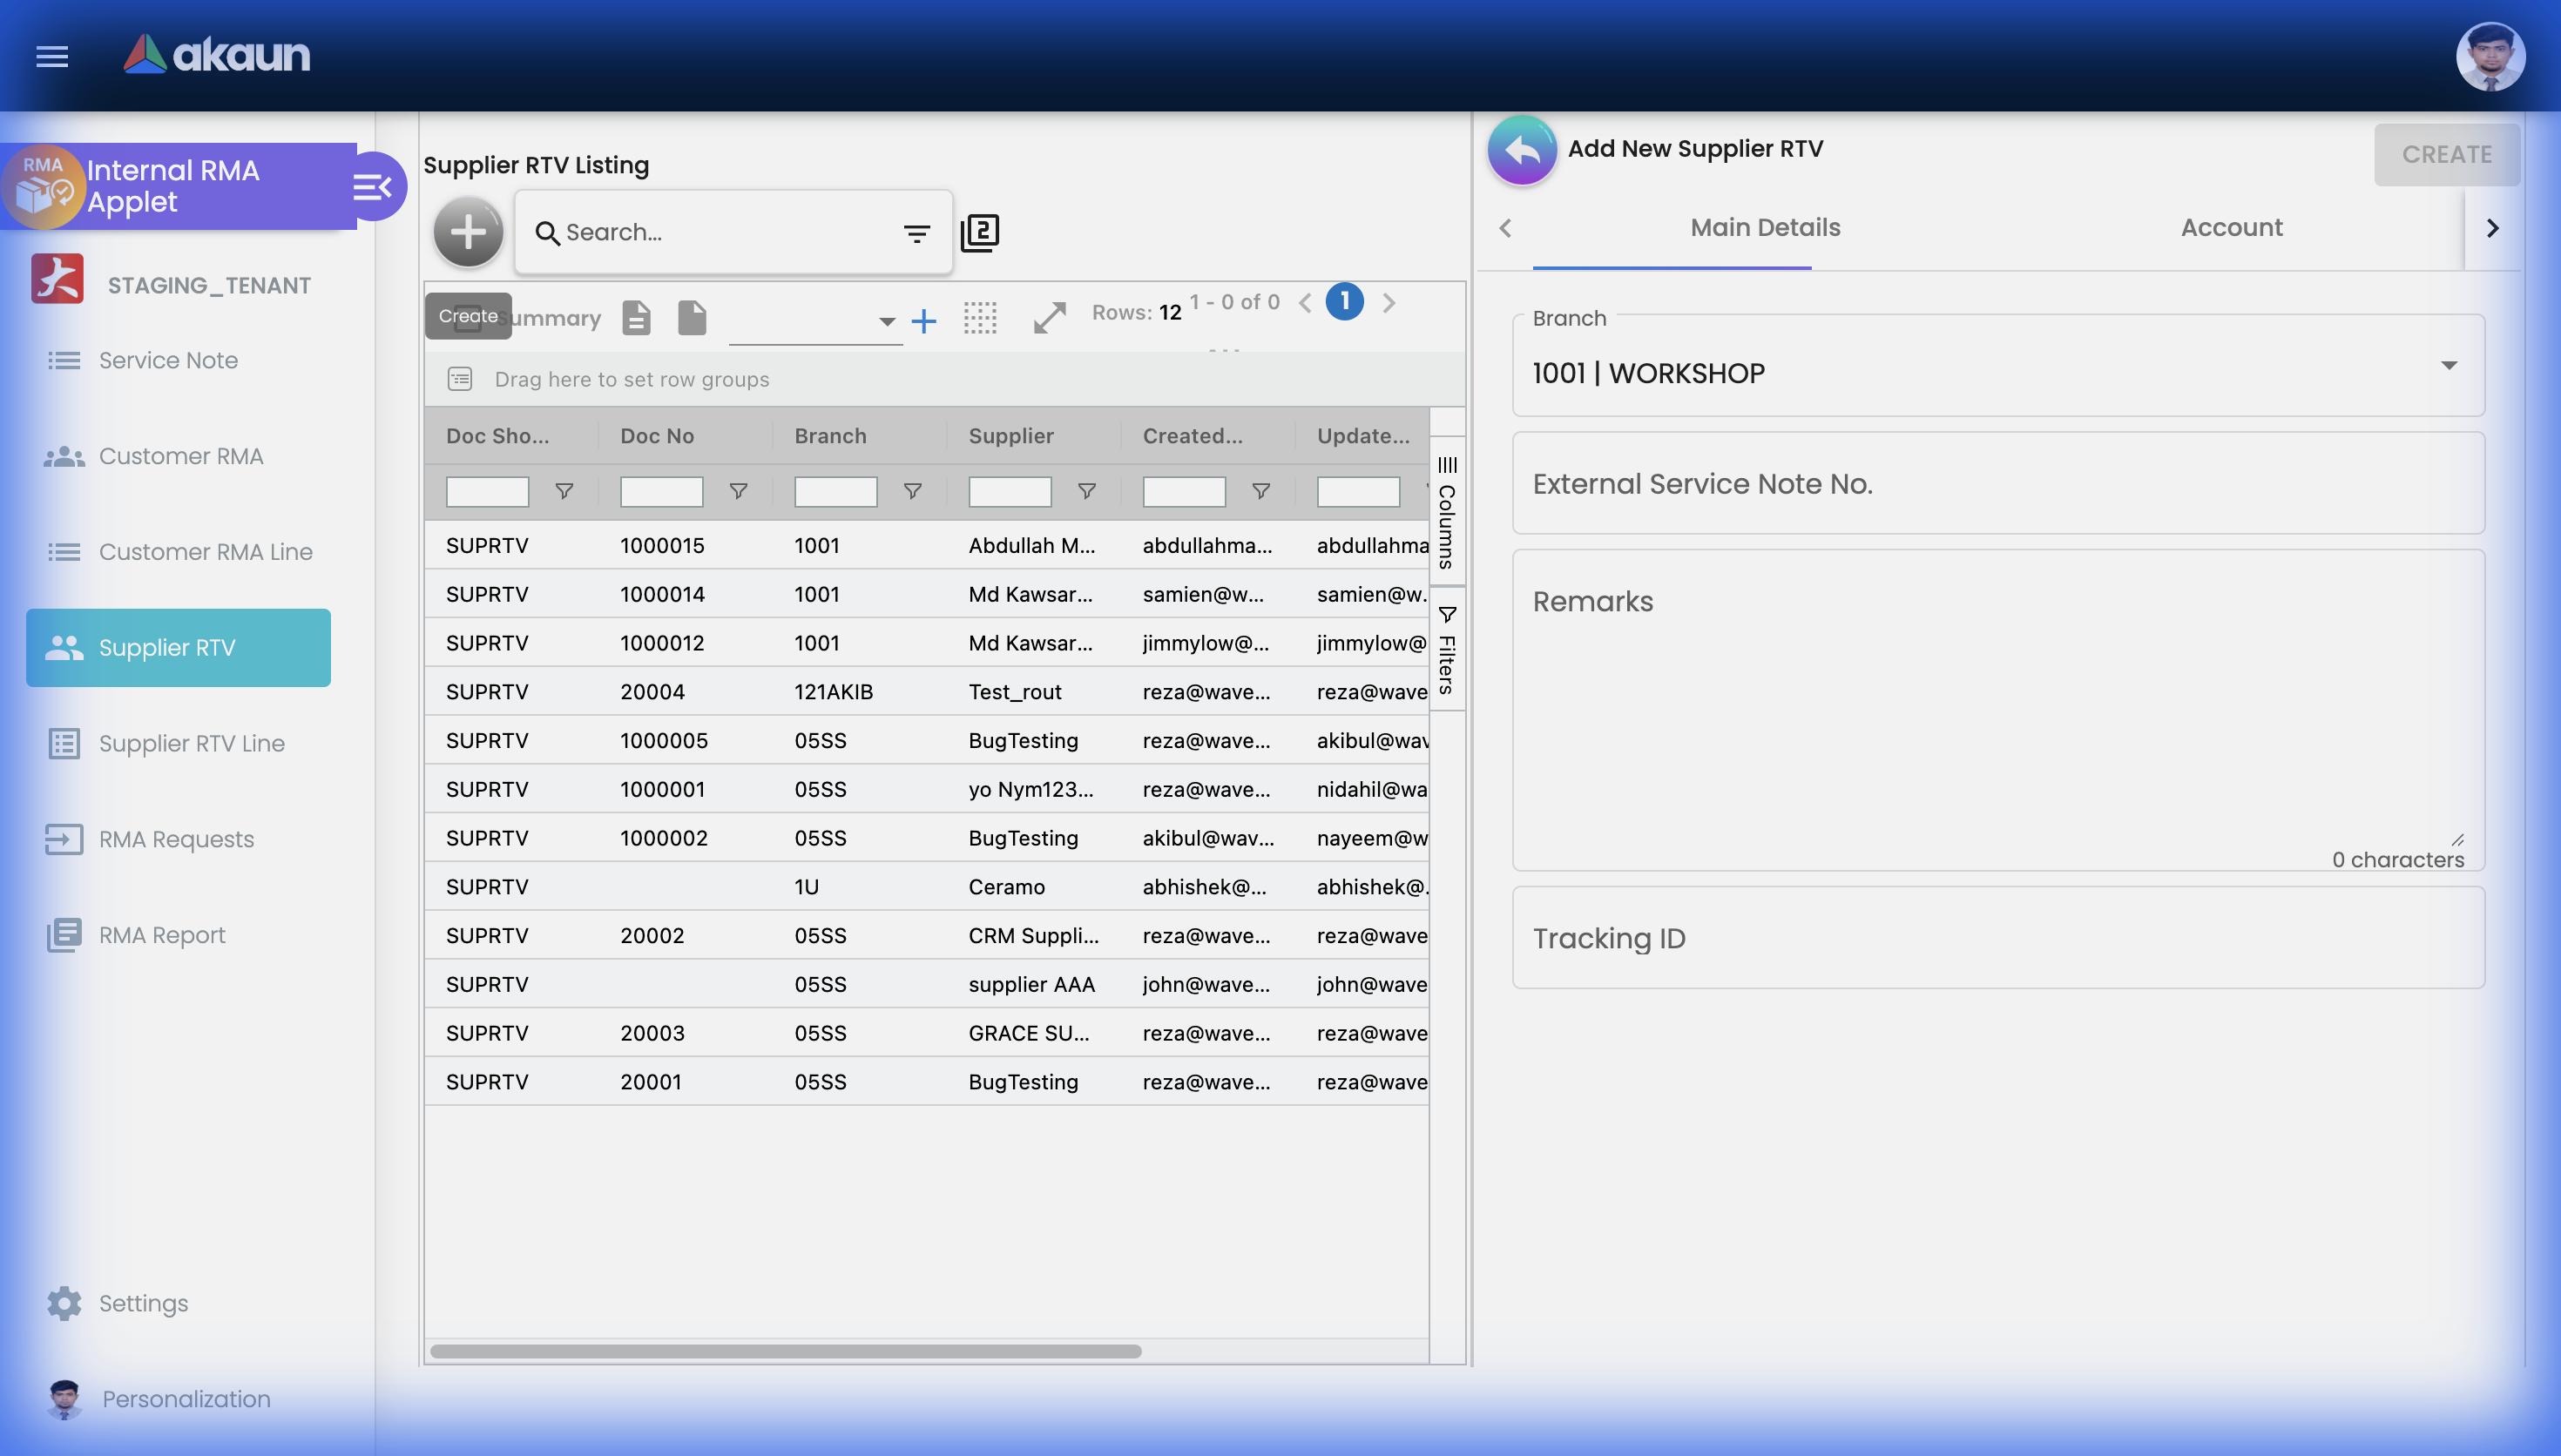
Create Supplier RTV
Click "+" to initiate a new Return to Vendor request against a supplier.
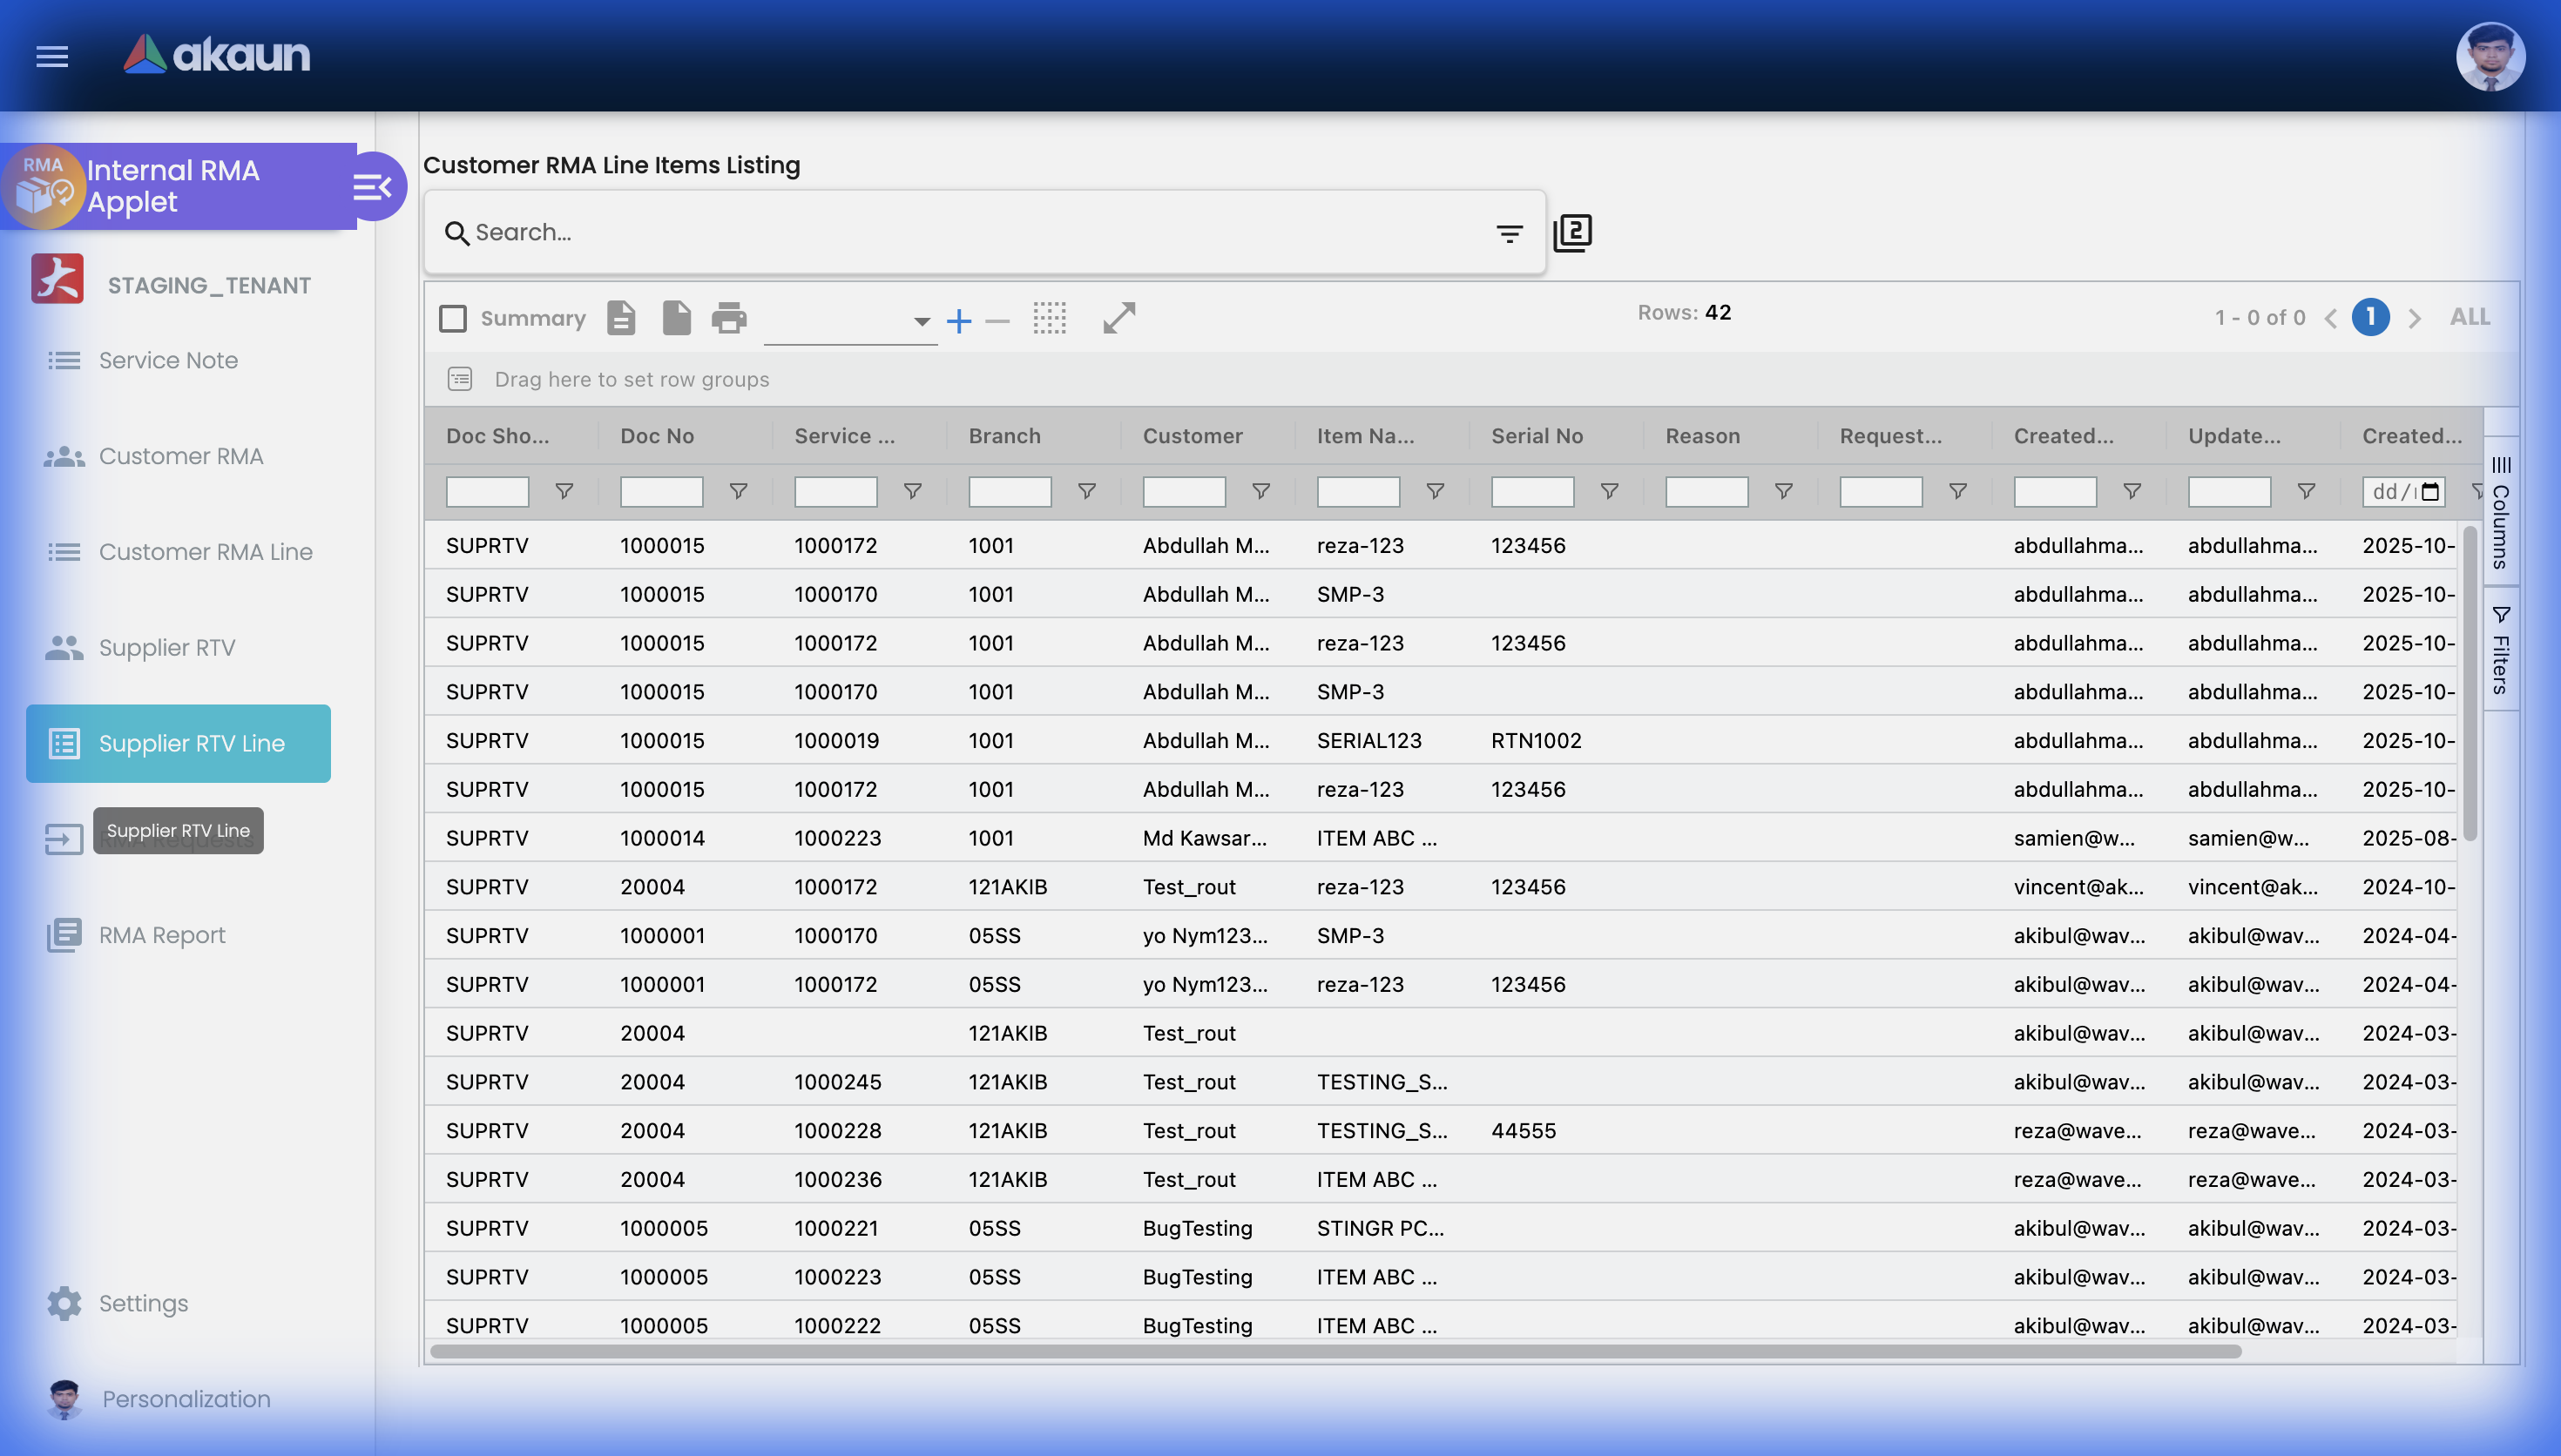
Supplier RTV Line
The Supplier RTV Line listing shows all individual line items across Supplier RTV records, giving a granular view of what products are being returned to vendors.
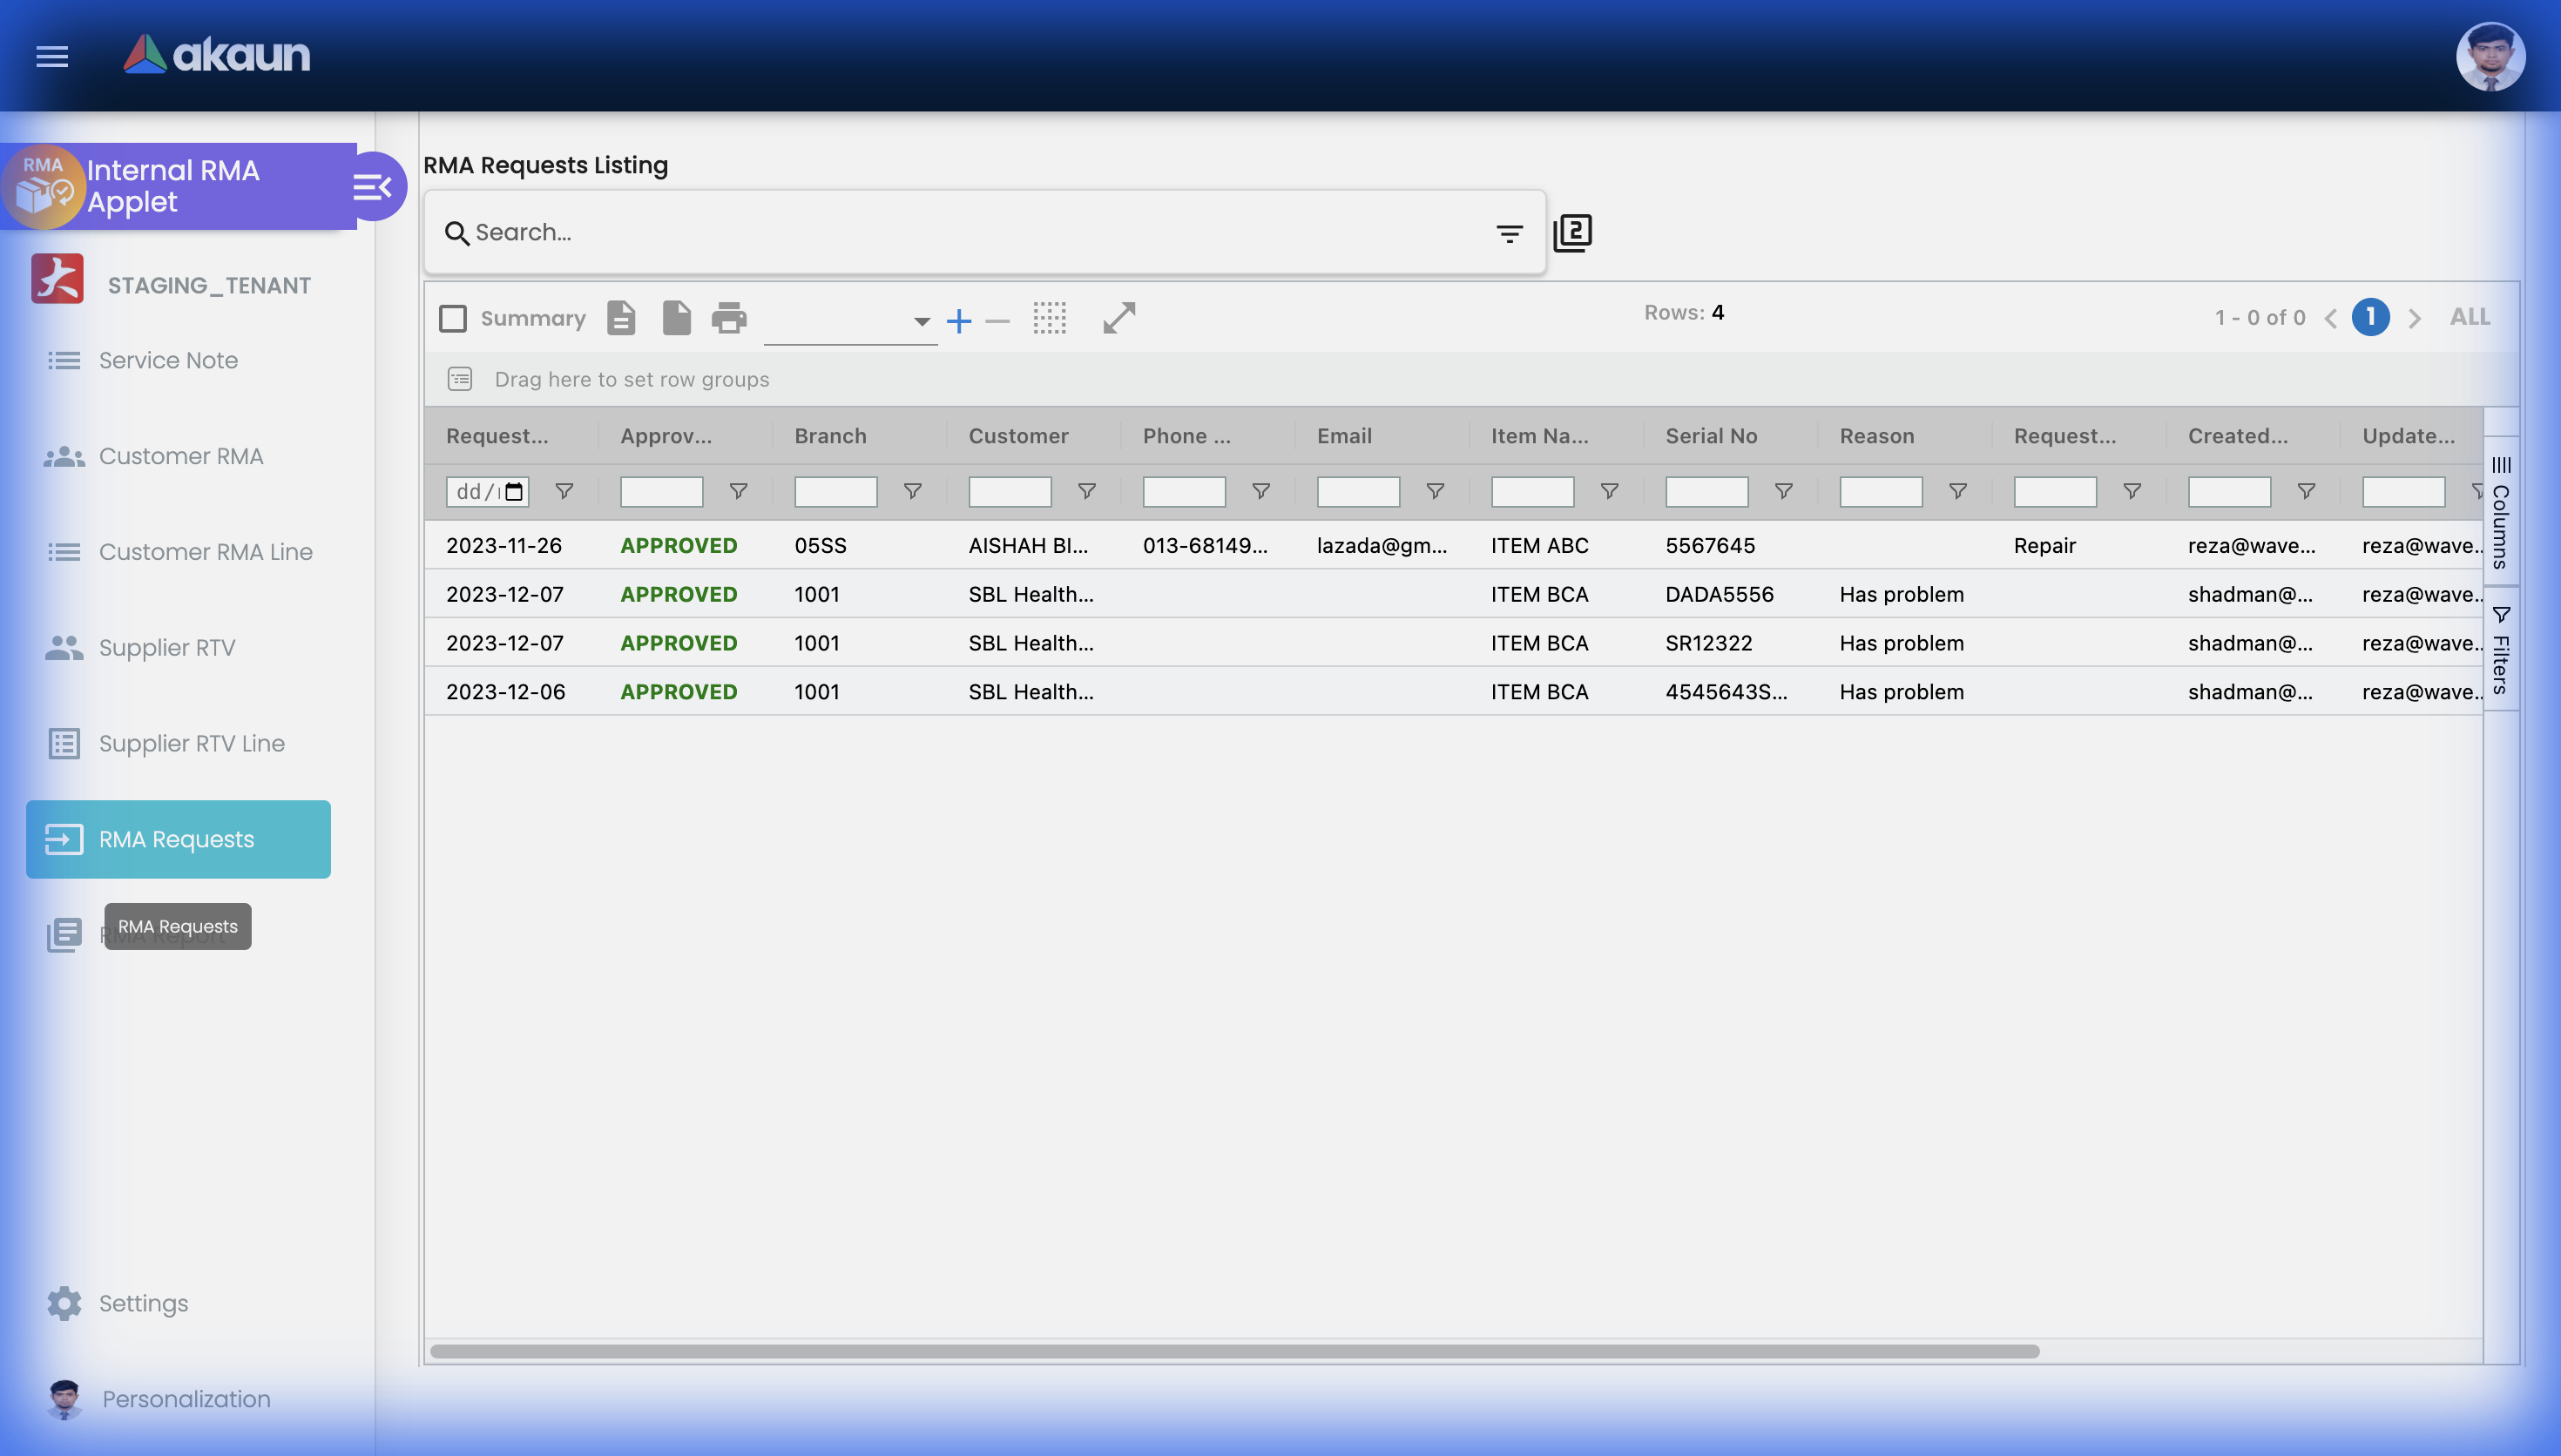
RMA Requests
The RMA Requests page provides a consolidated view of all submitted RMA requests across the system, enabling centralized review and approval management.
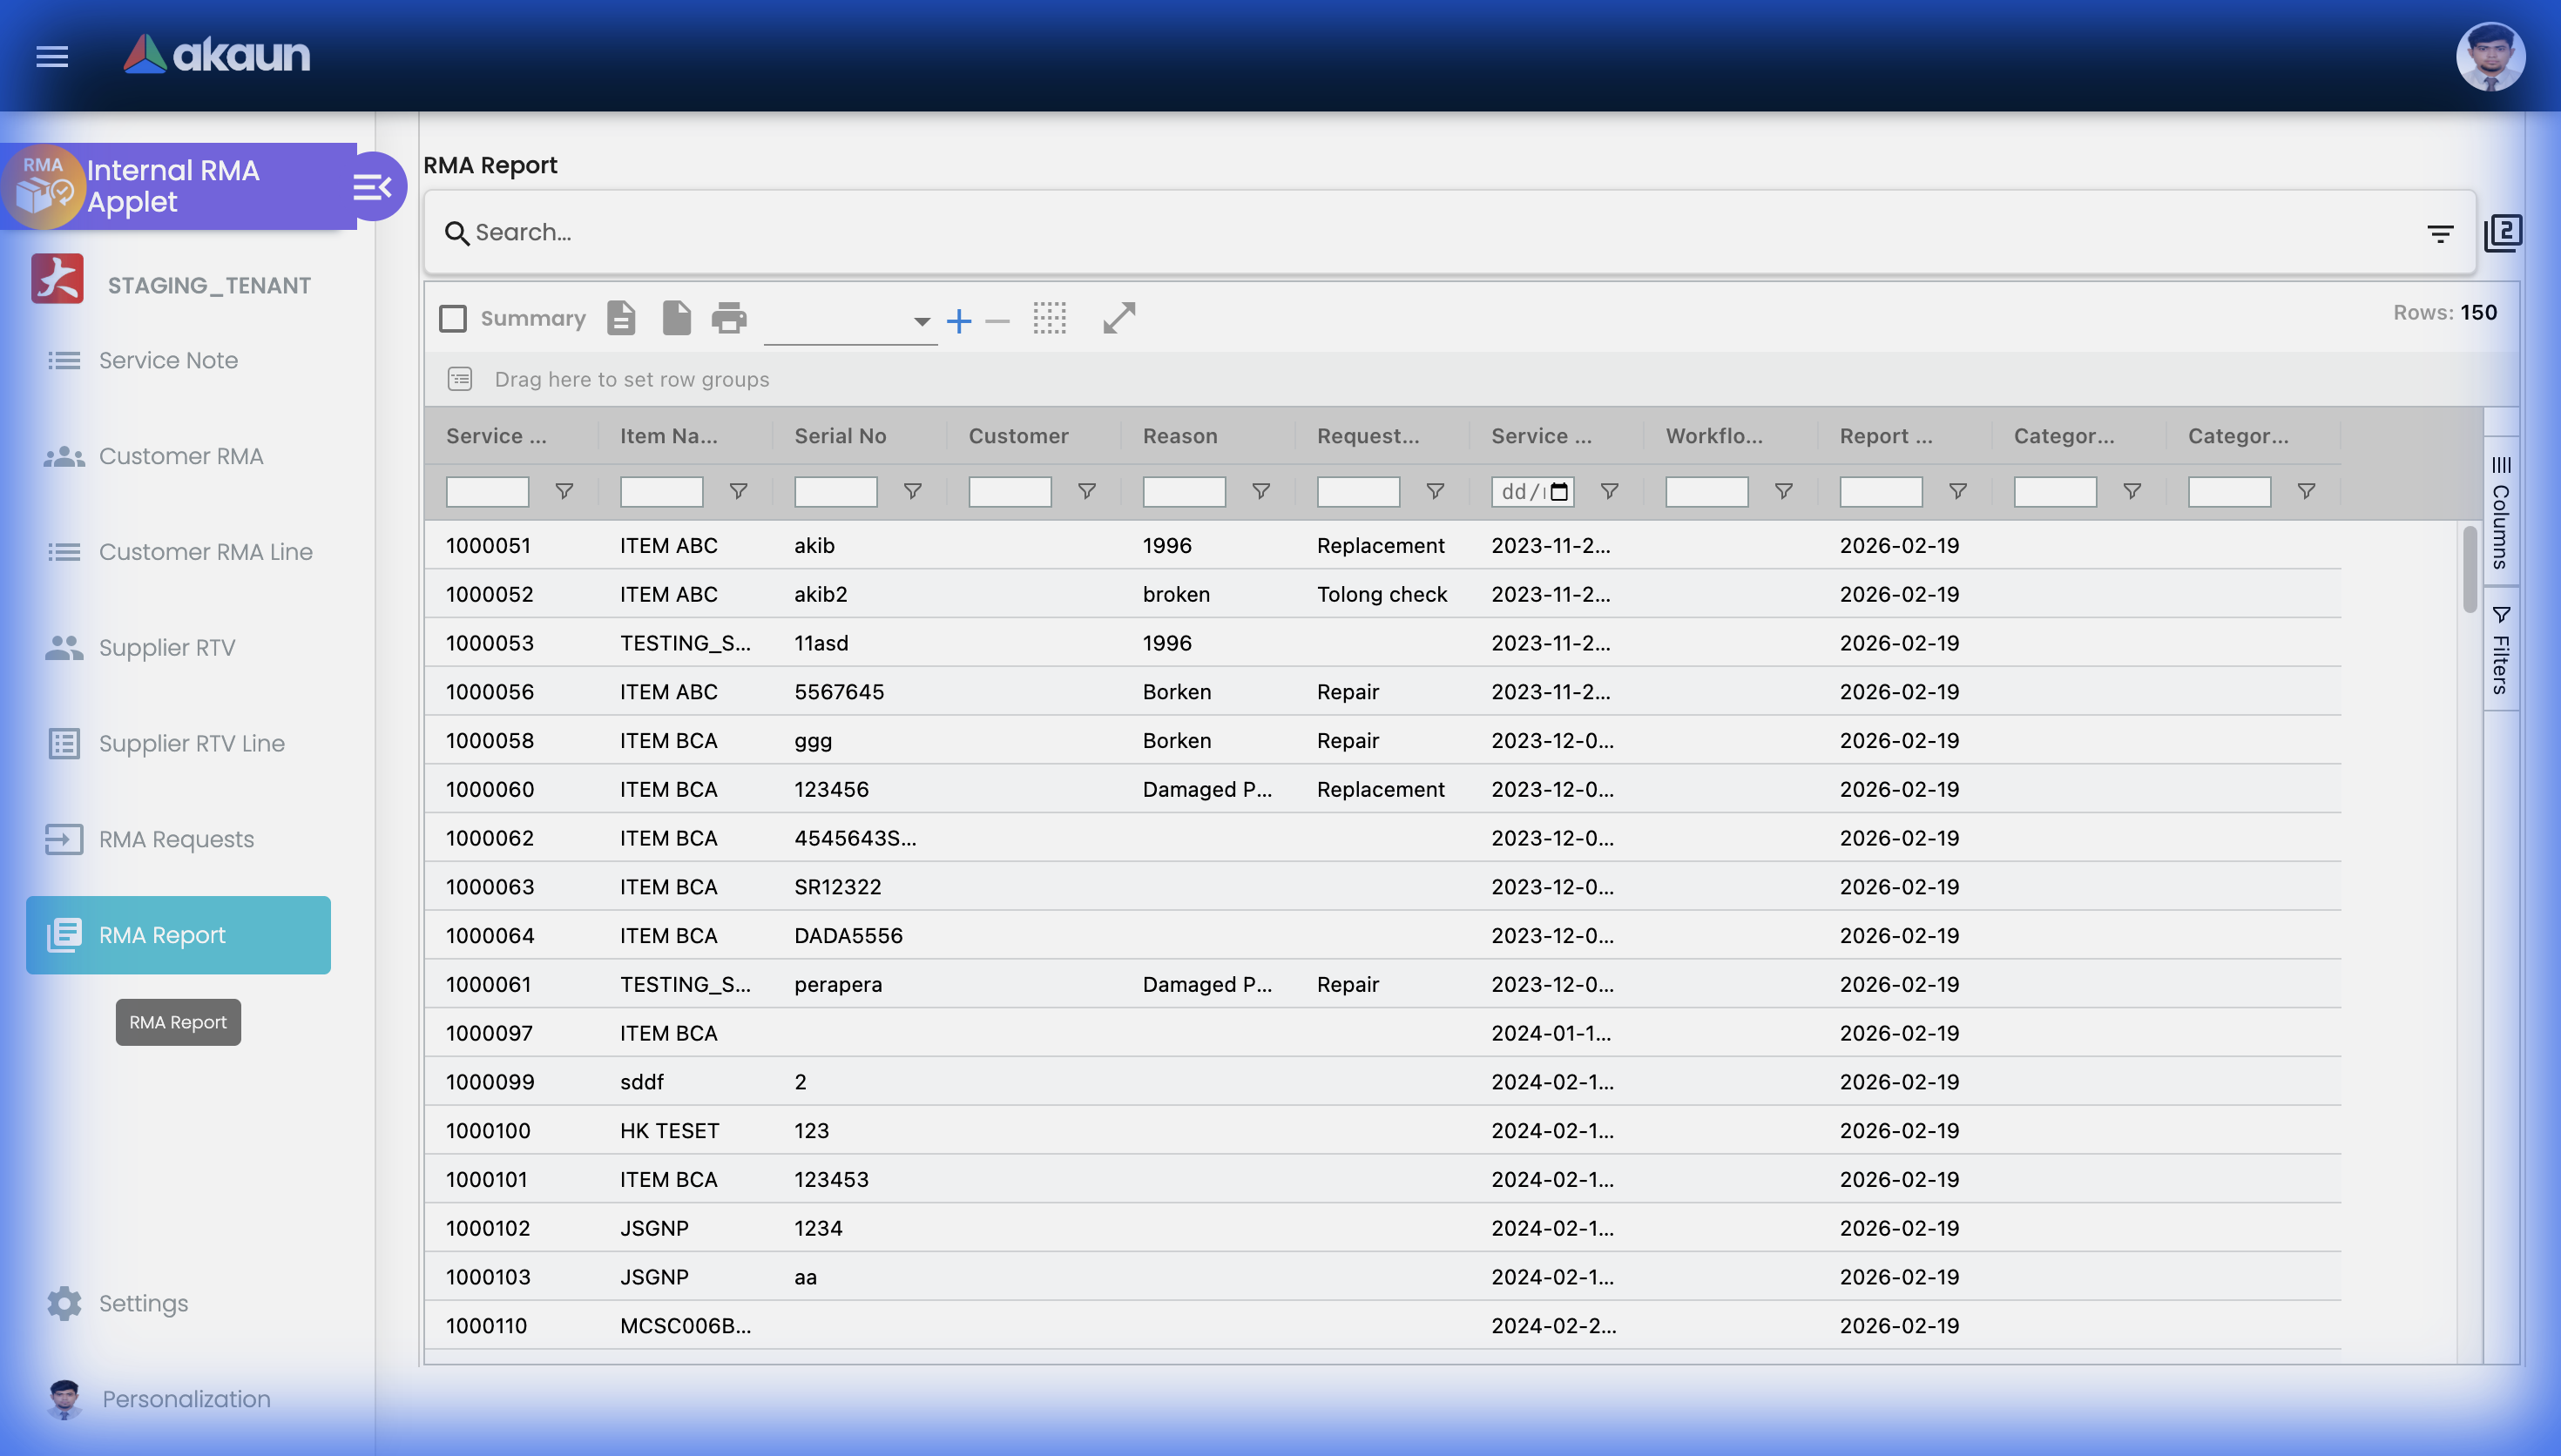
RMA Report
The RMA Report page provides analytics and reporting on return trends, processing times, and return reasons across the organization.
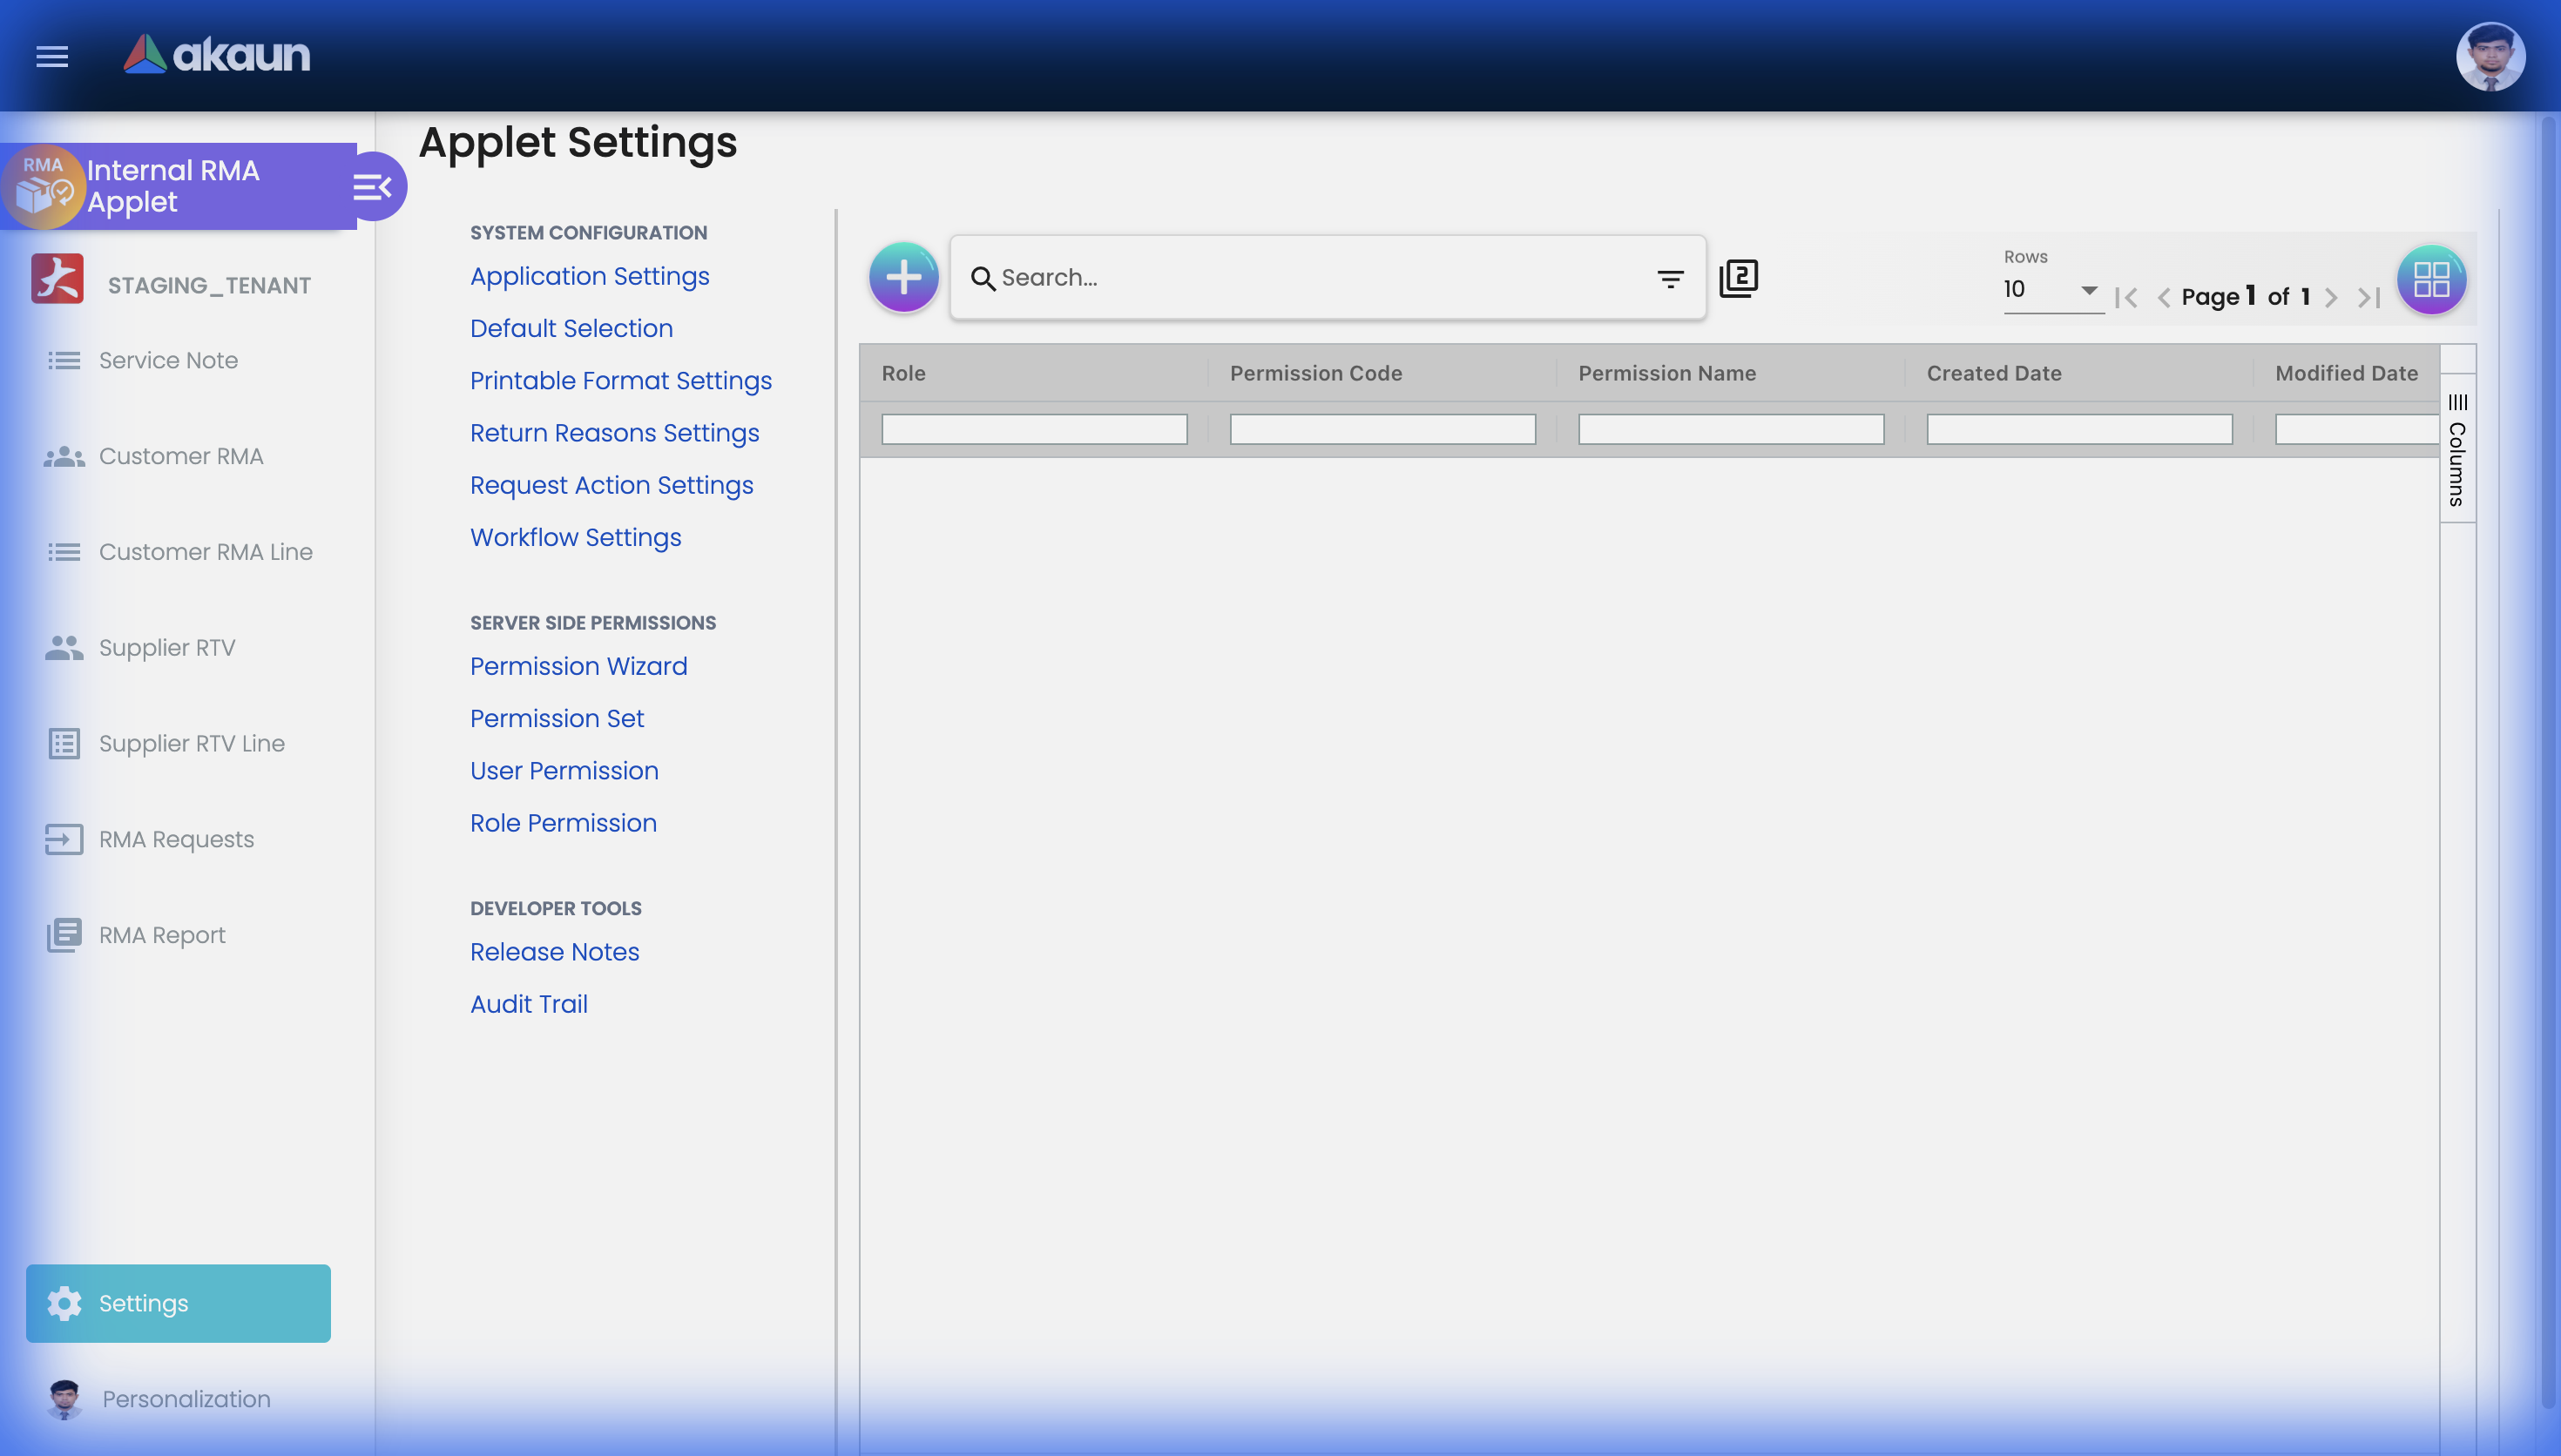
Configuration & Settings
The Settings page provides access to all system configuration options for the Internal RMA Applet, organized into System Configuration, Server Side Permissions, and Developer Tools sections.
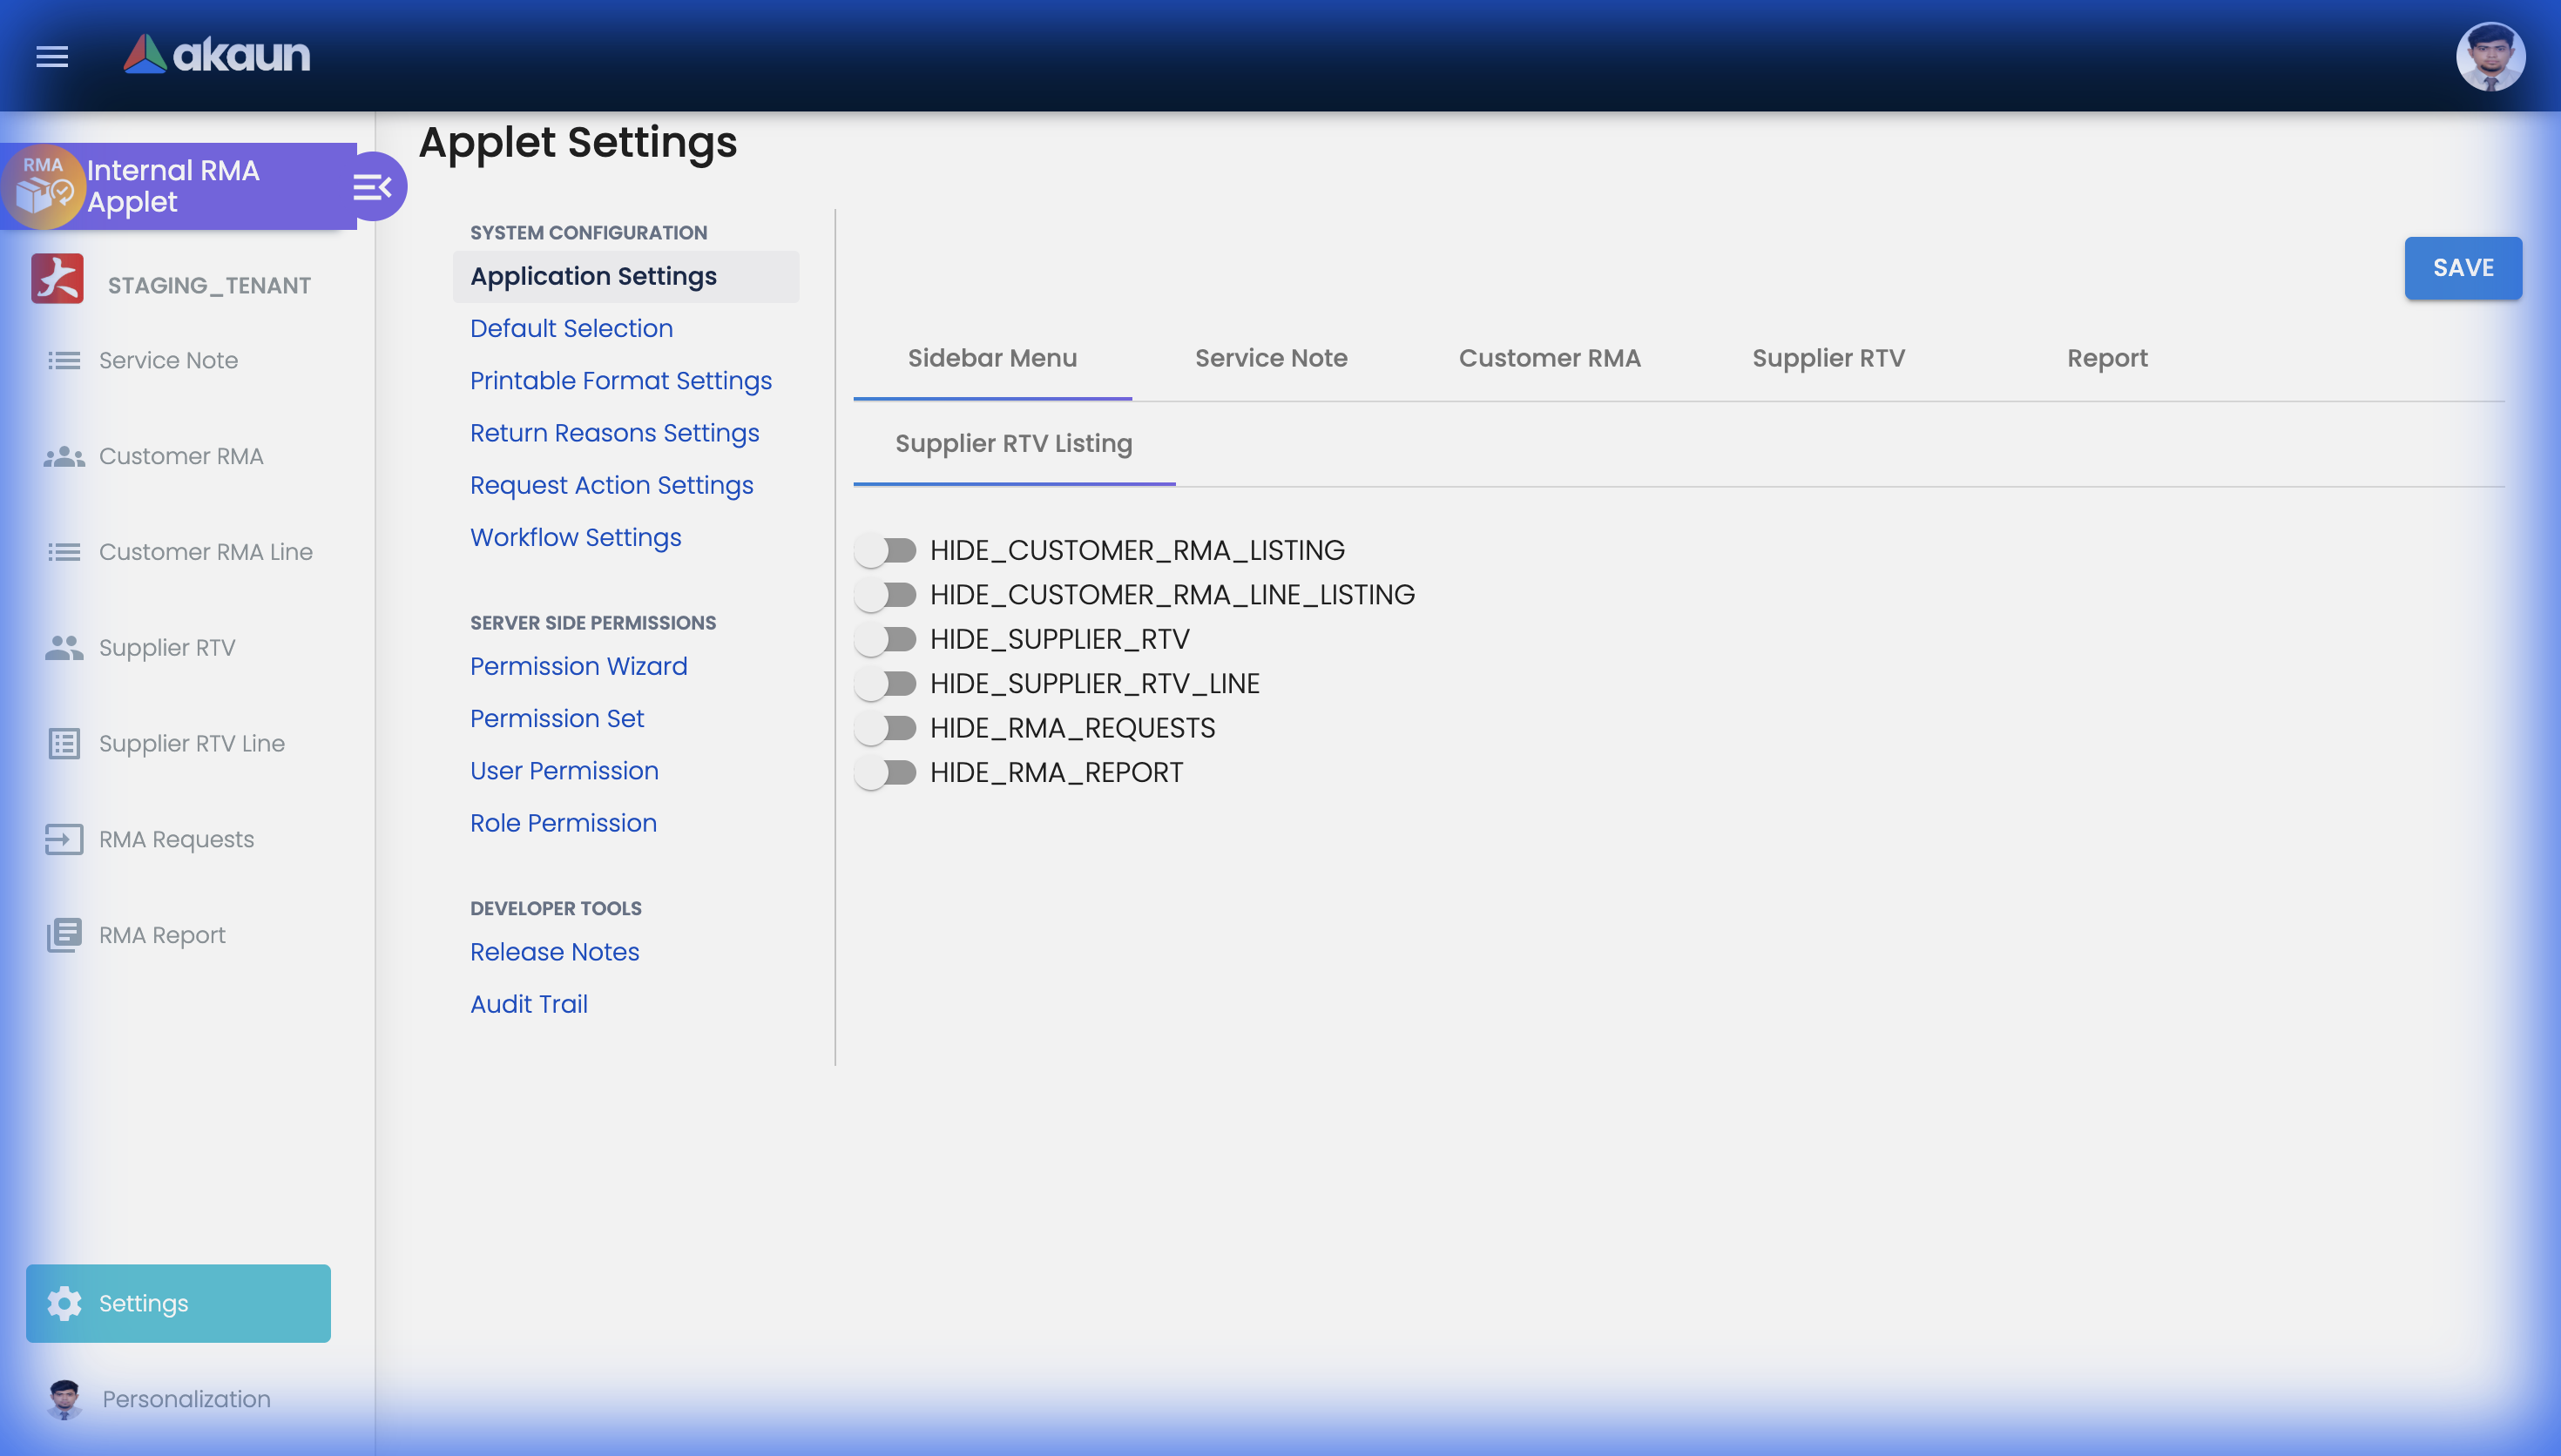
Application Settings
Toggle visibility and access controls for each module within the RMA applet, including sidebar menus and functional areas.
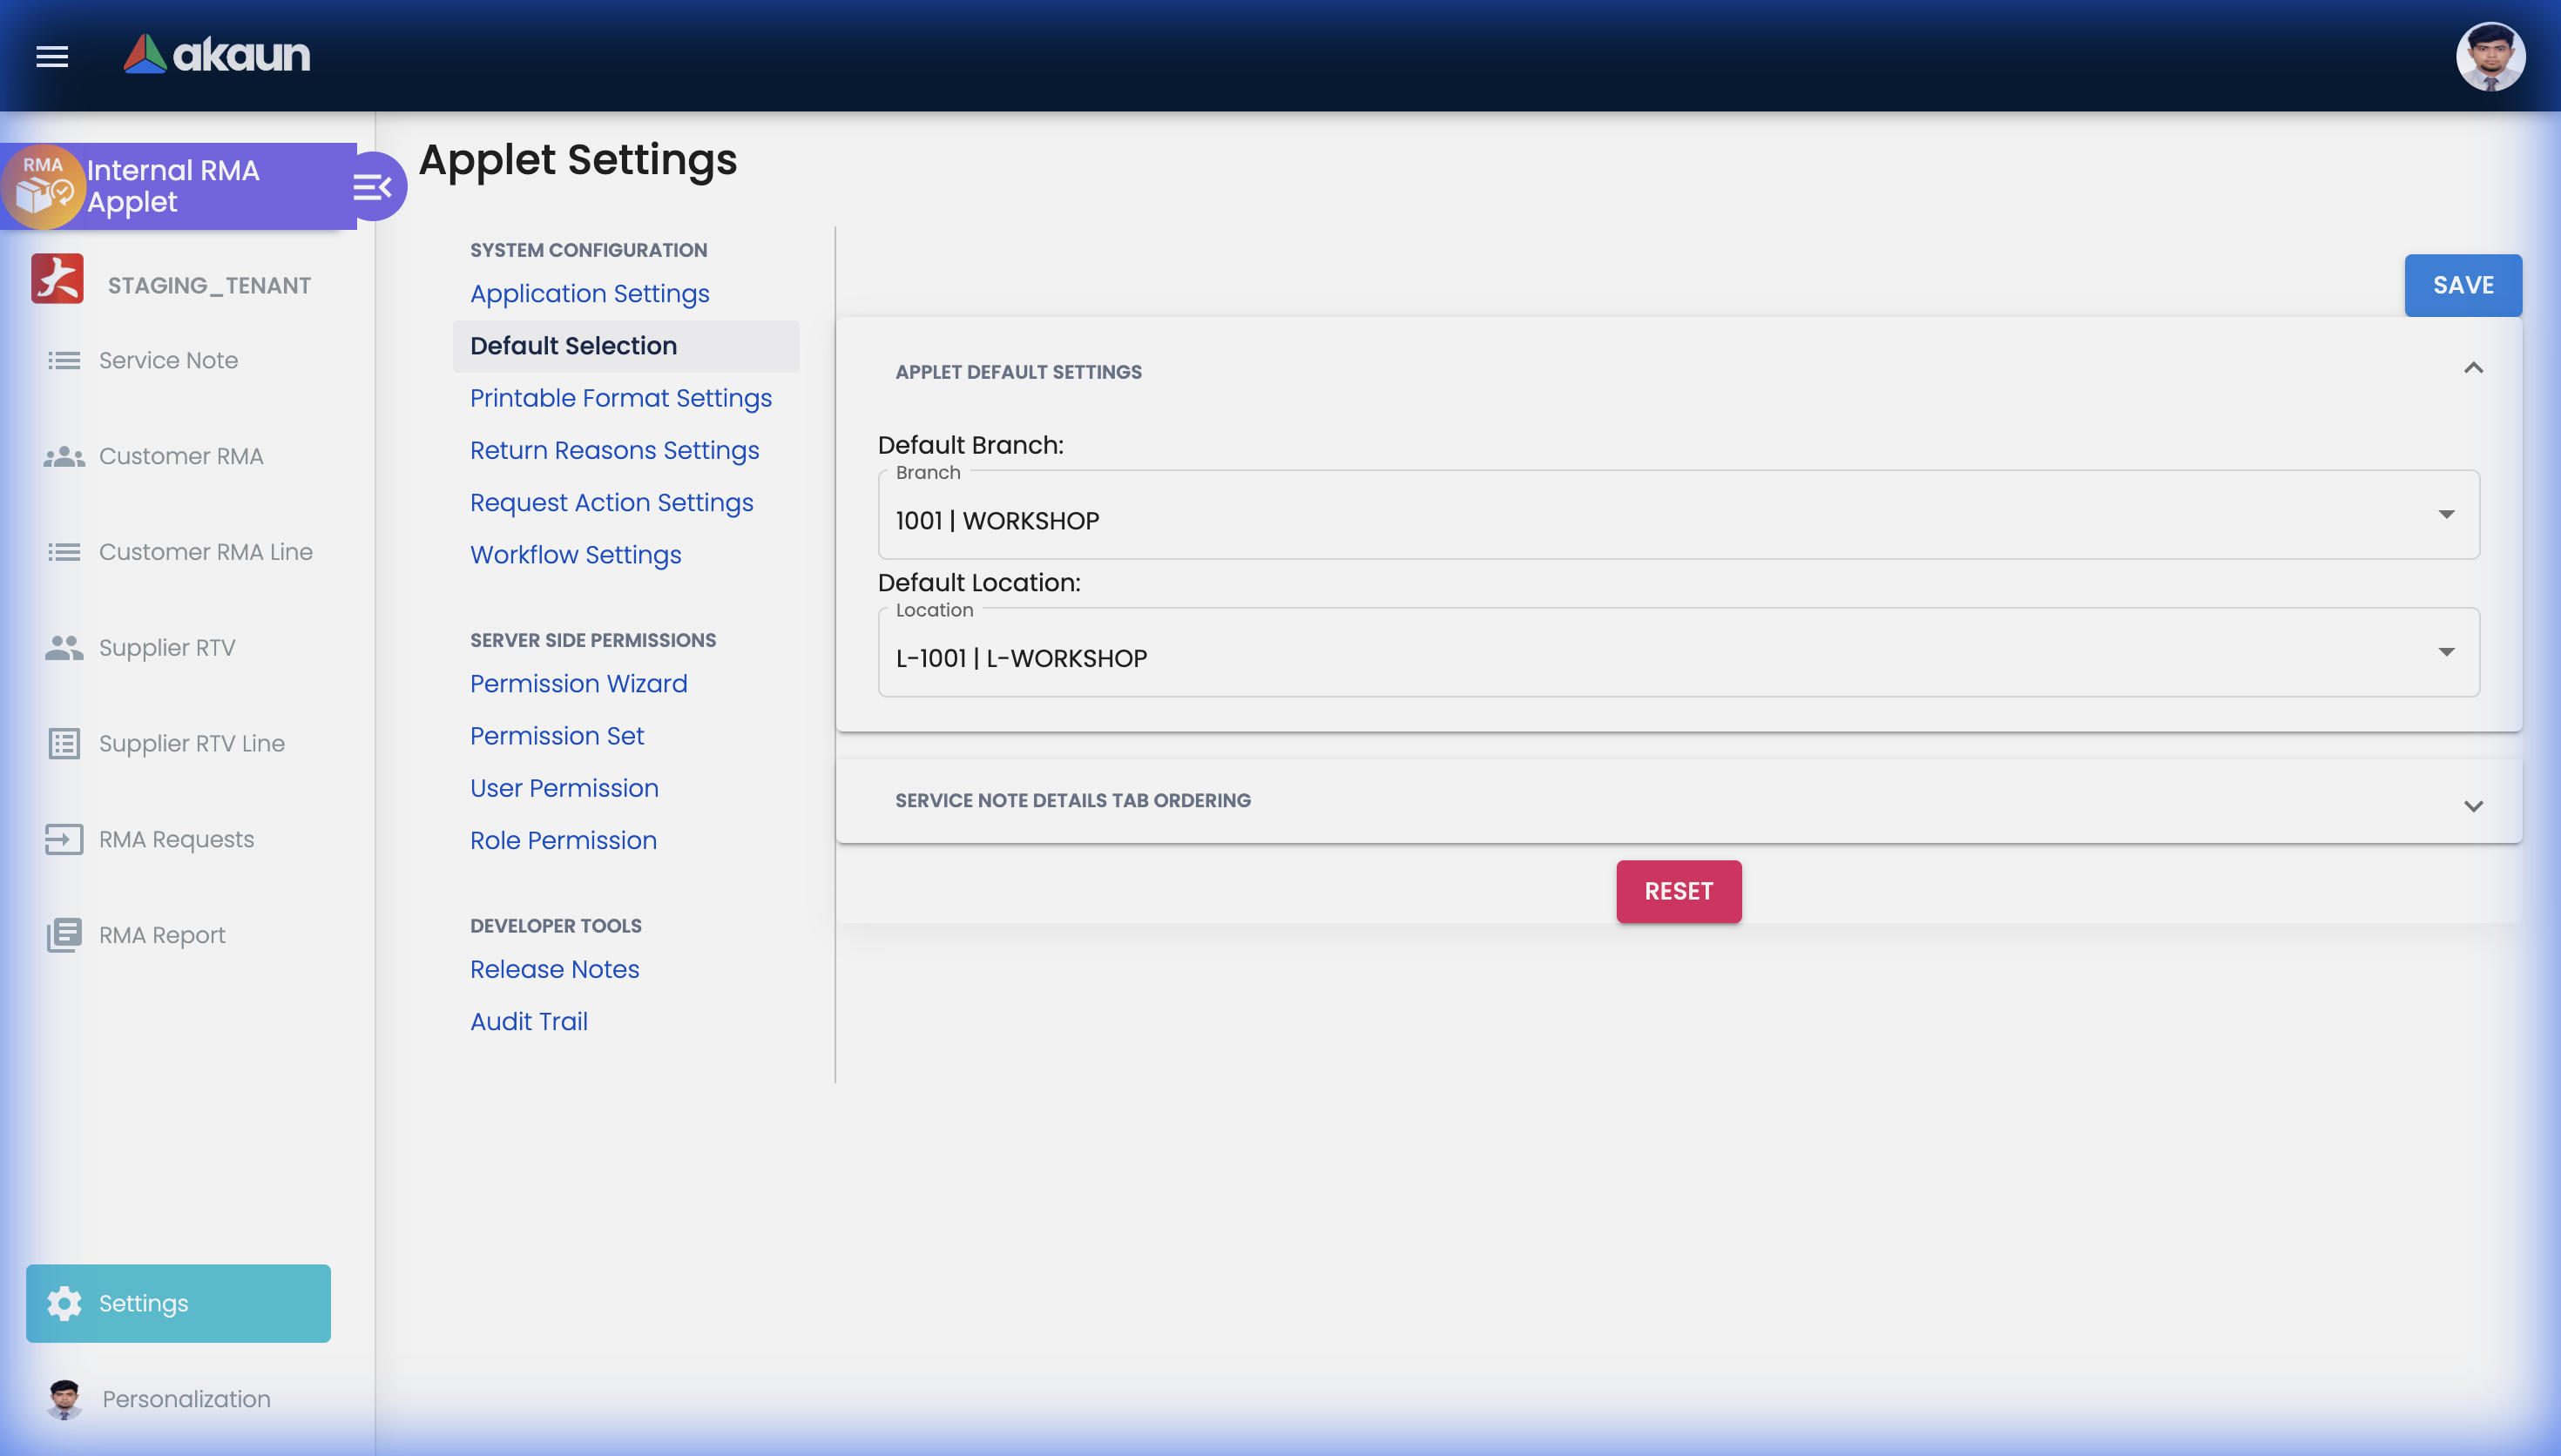
Default Selection
Configure the default Branch and Location values that will be pre-filled when creating new RMA records across the applet.
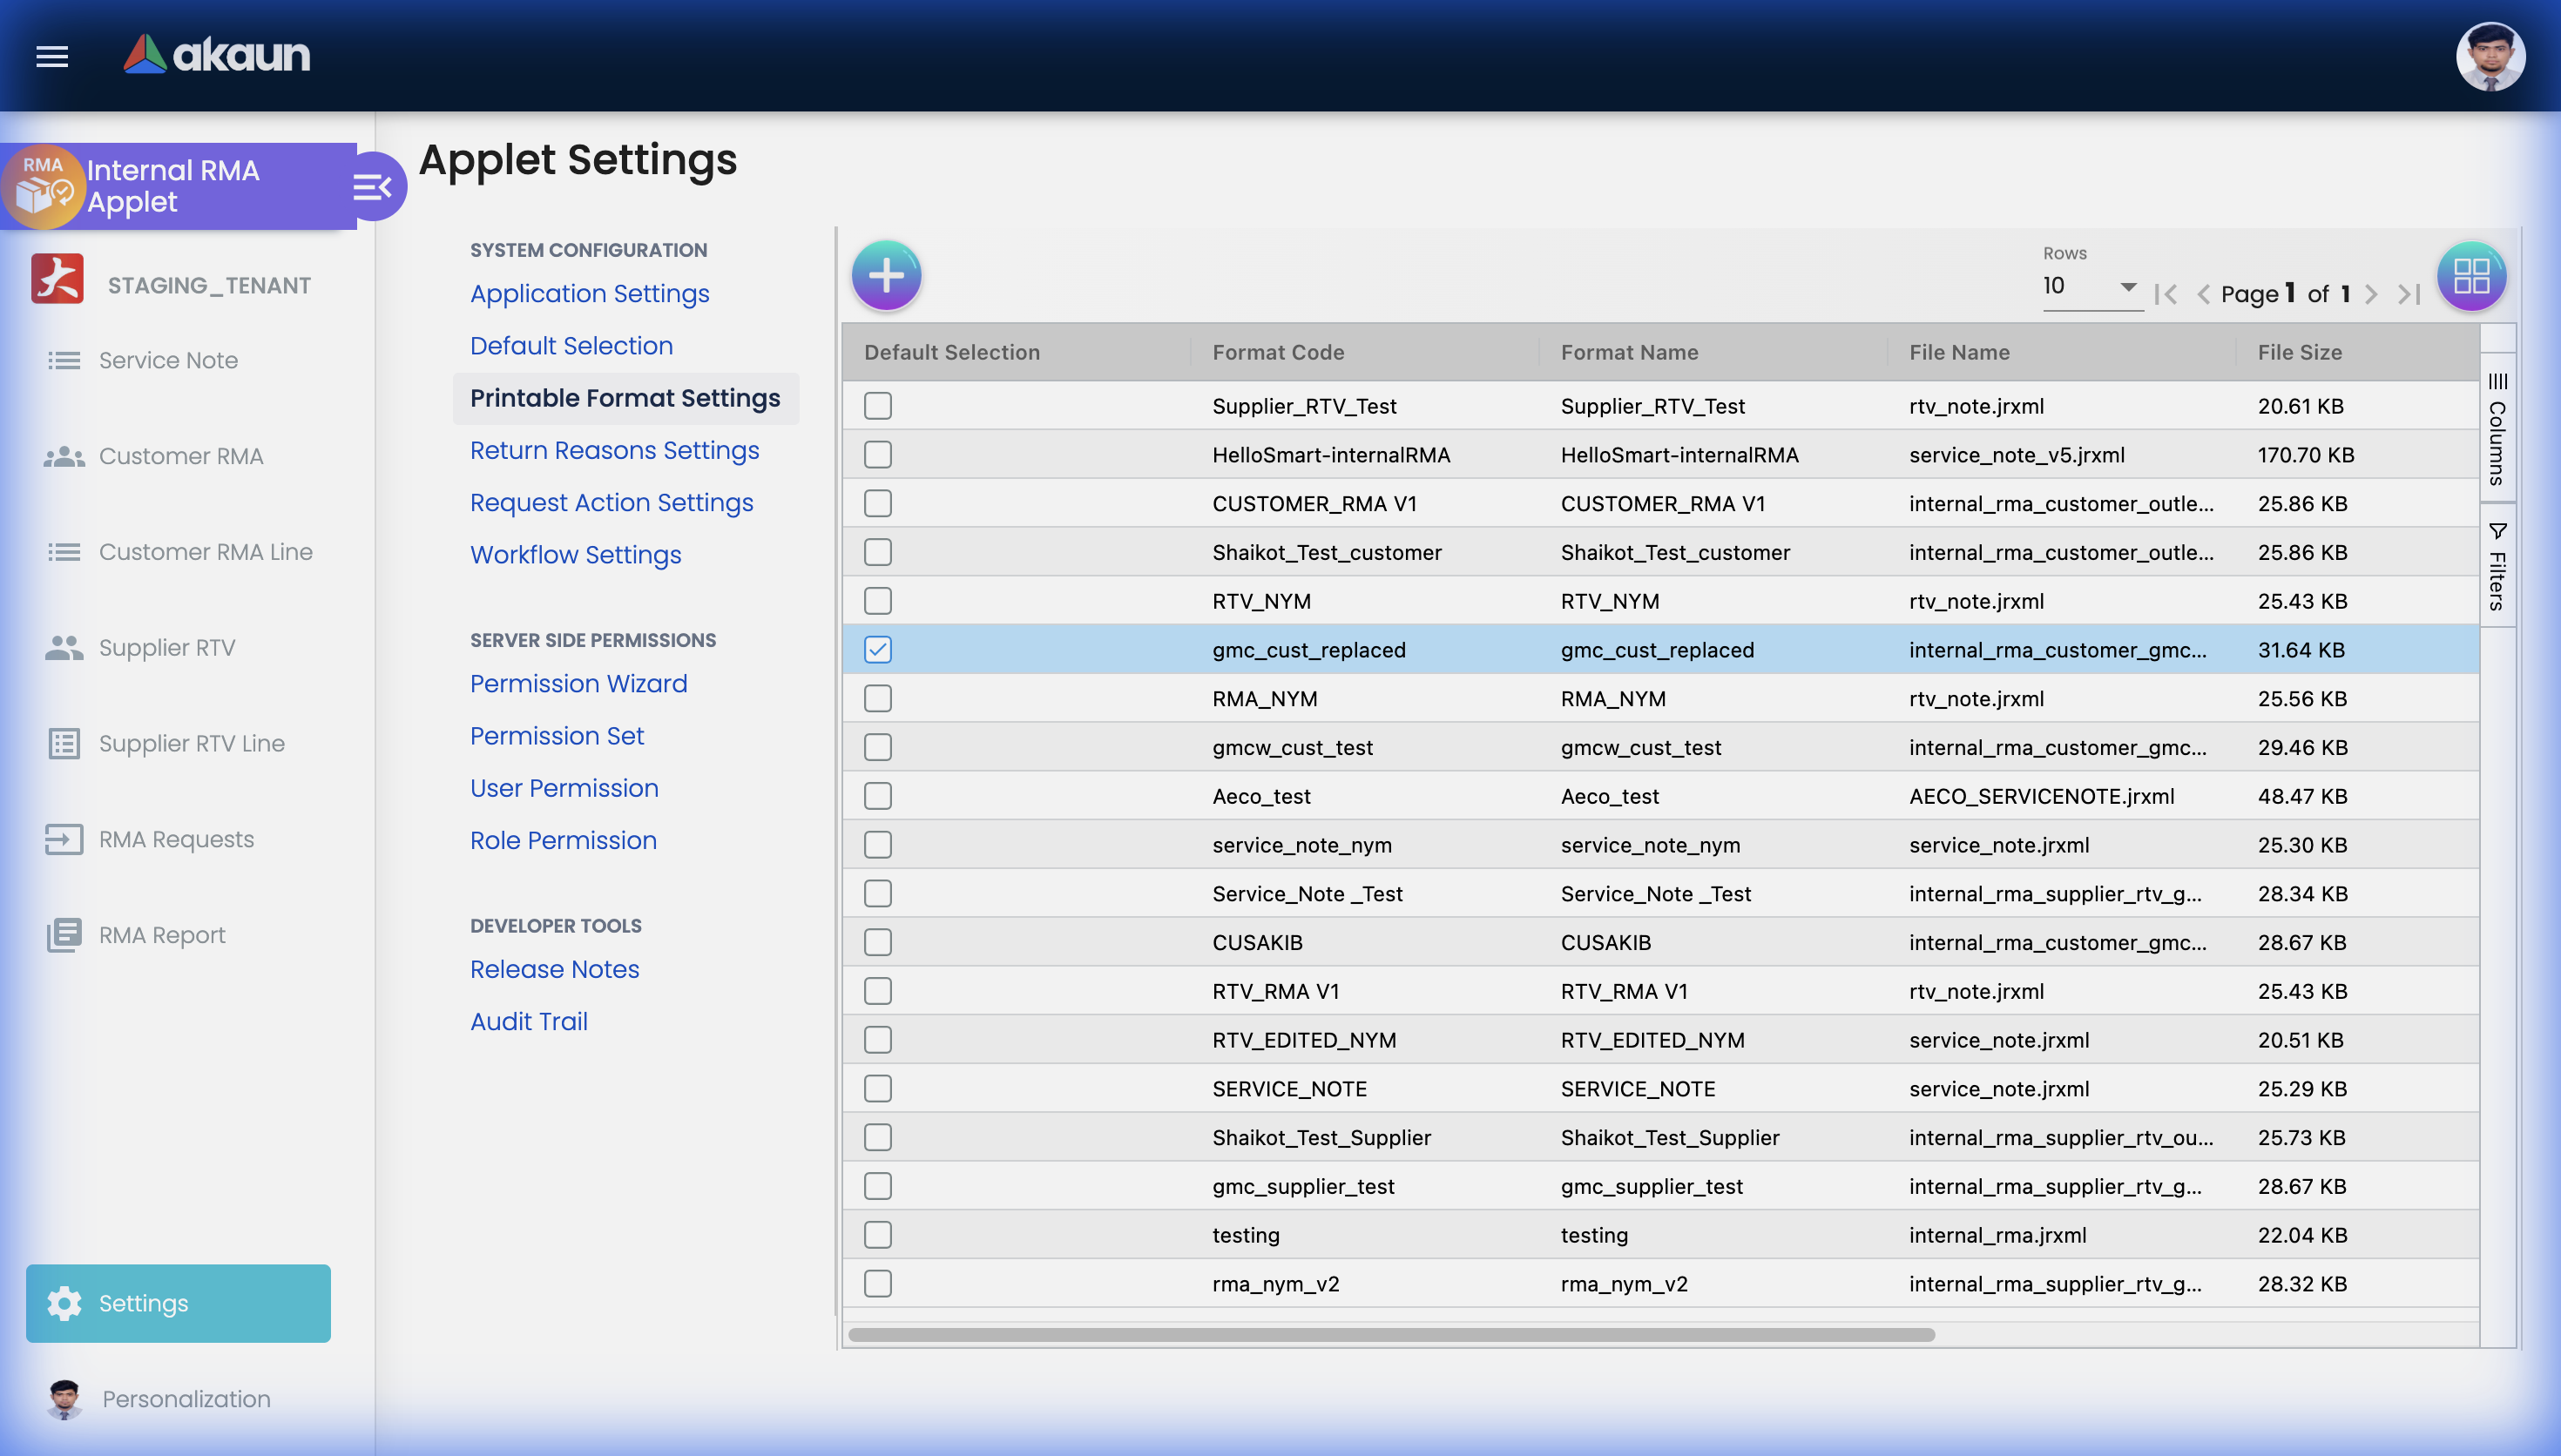
Printable Format Settings
Manage the available Jasper report print formats for RMA documents including Service Notes, Customer RMAs, and Supplier RTVs.
Return Reasons Settings
Define and manage the list of available return reason codes that staff can select when creating RMA records.

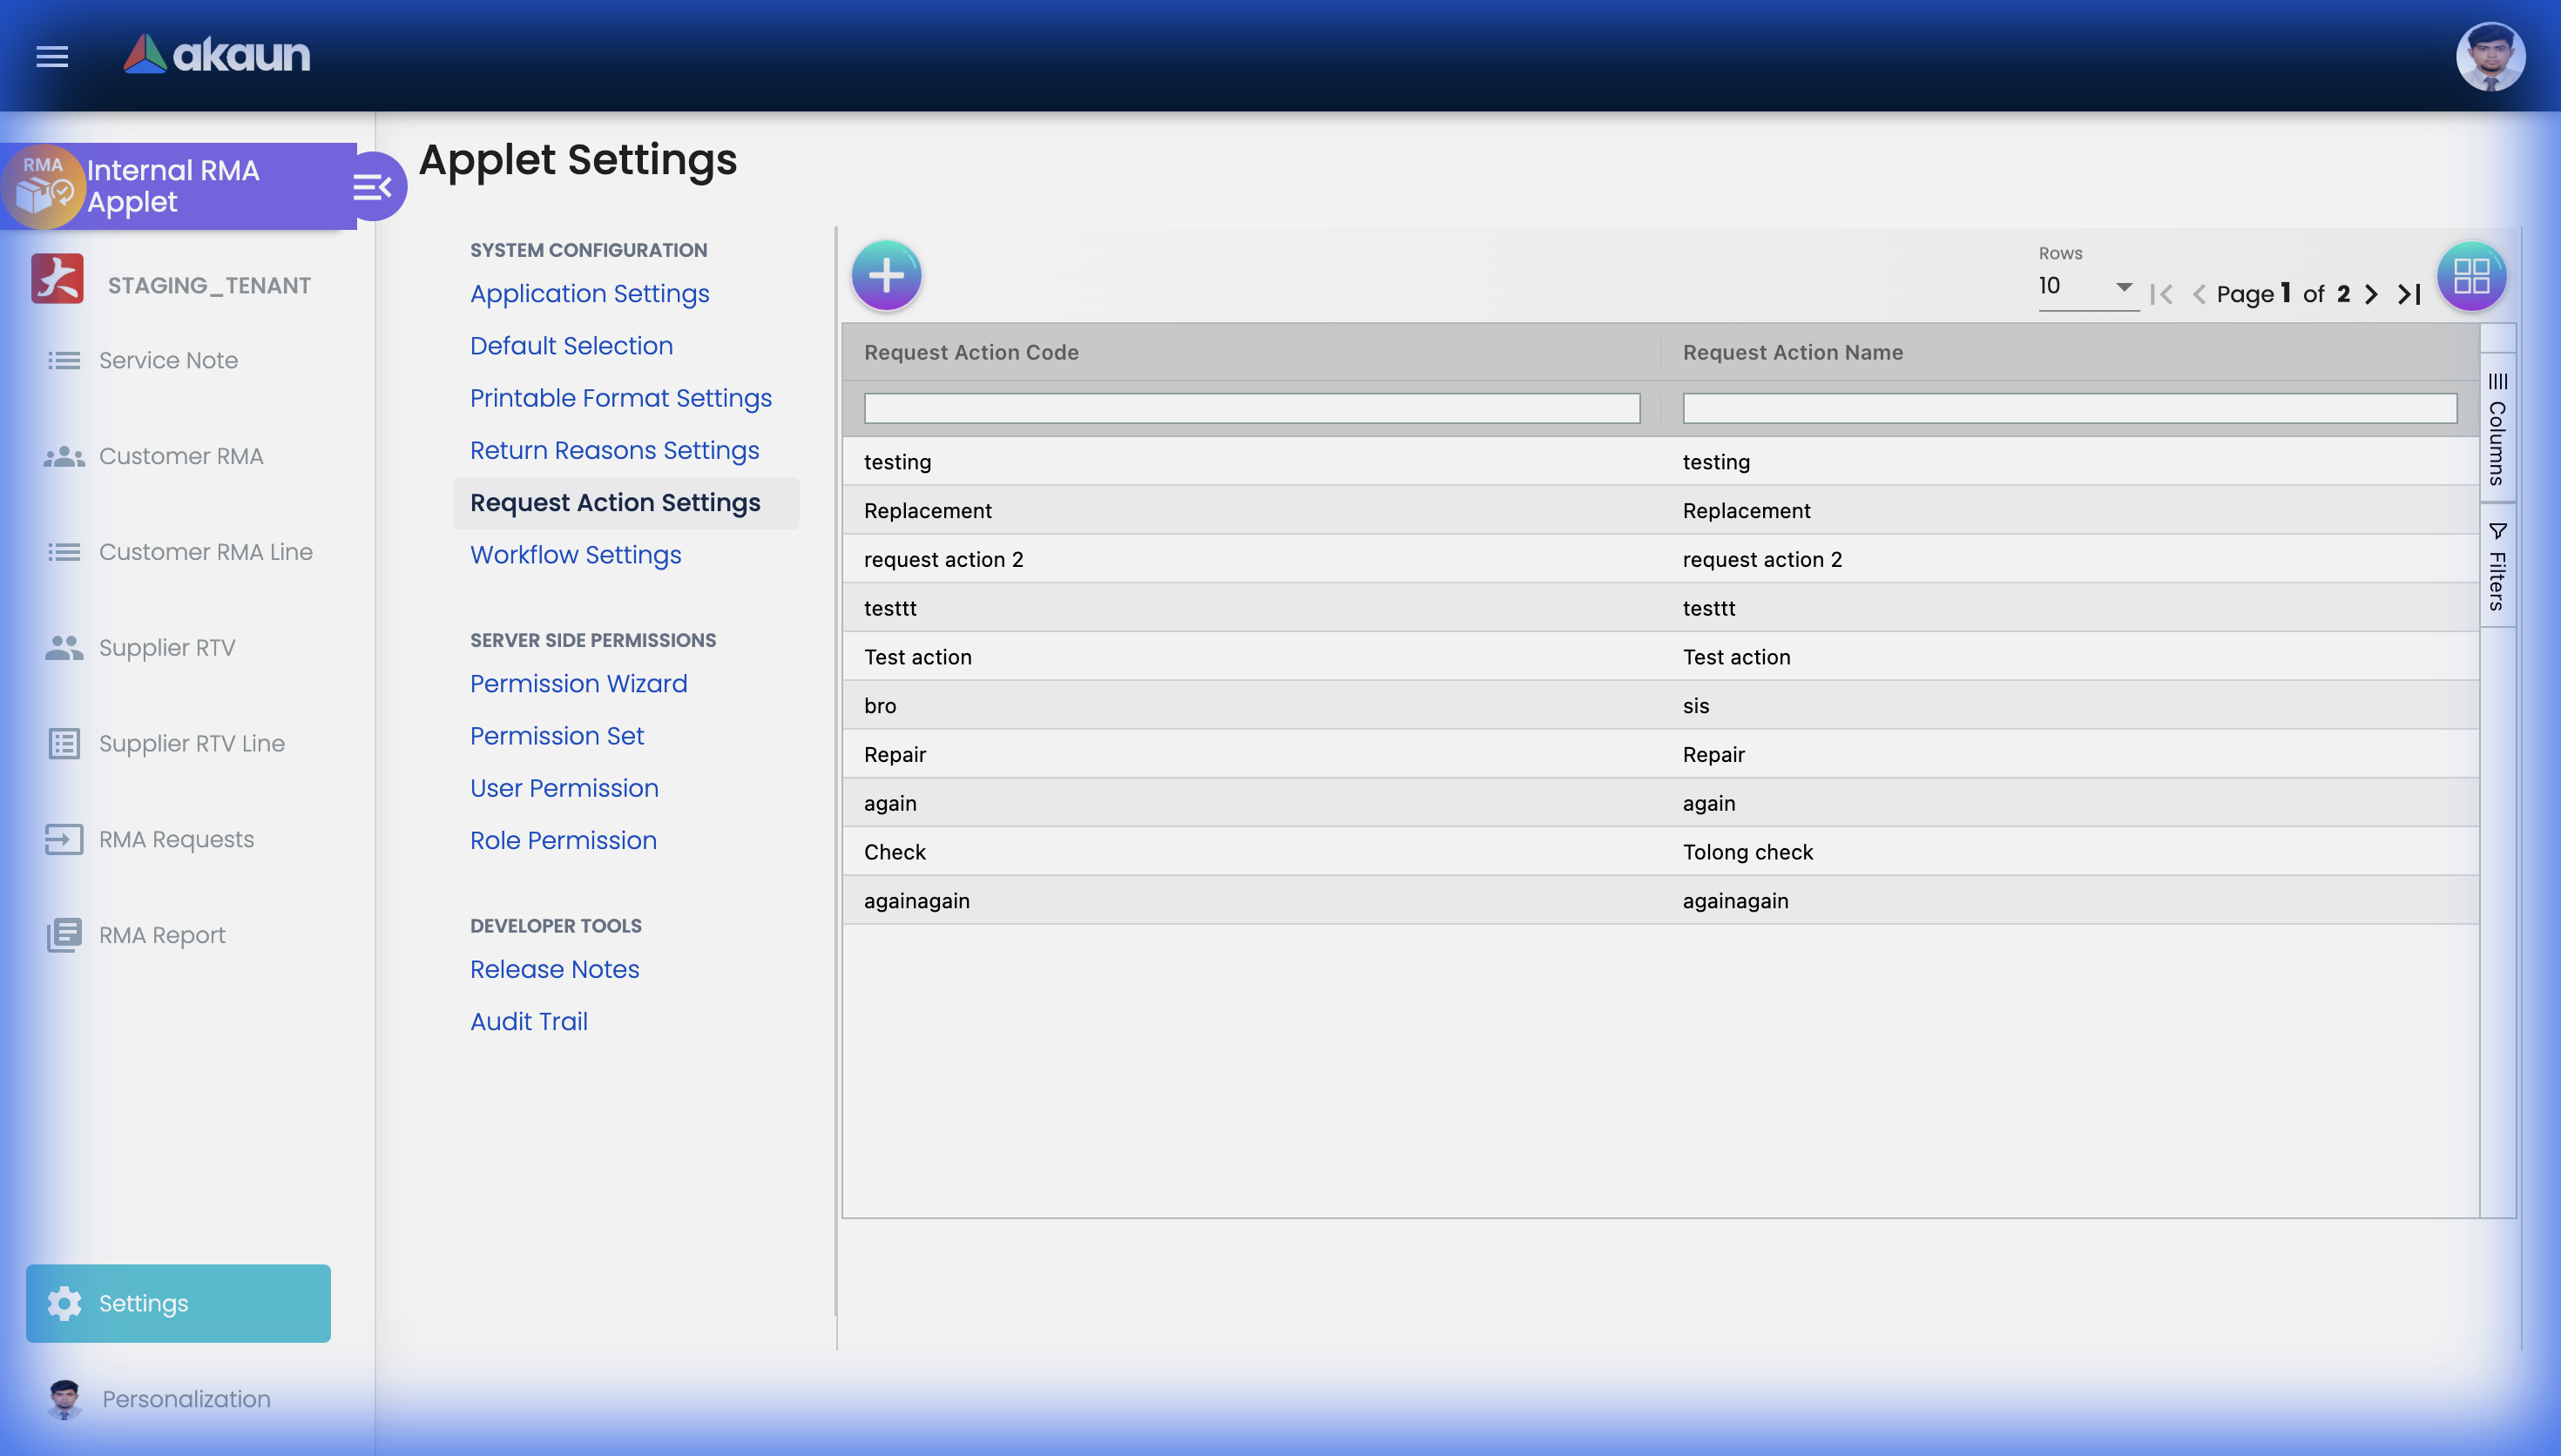
Request Action Settings
Configure the available actions that can be applied to resolved RMA requests, such as Replacement, Repair, or Refund.
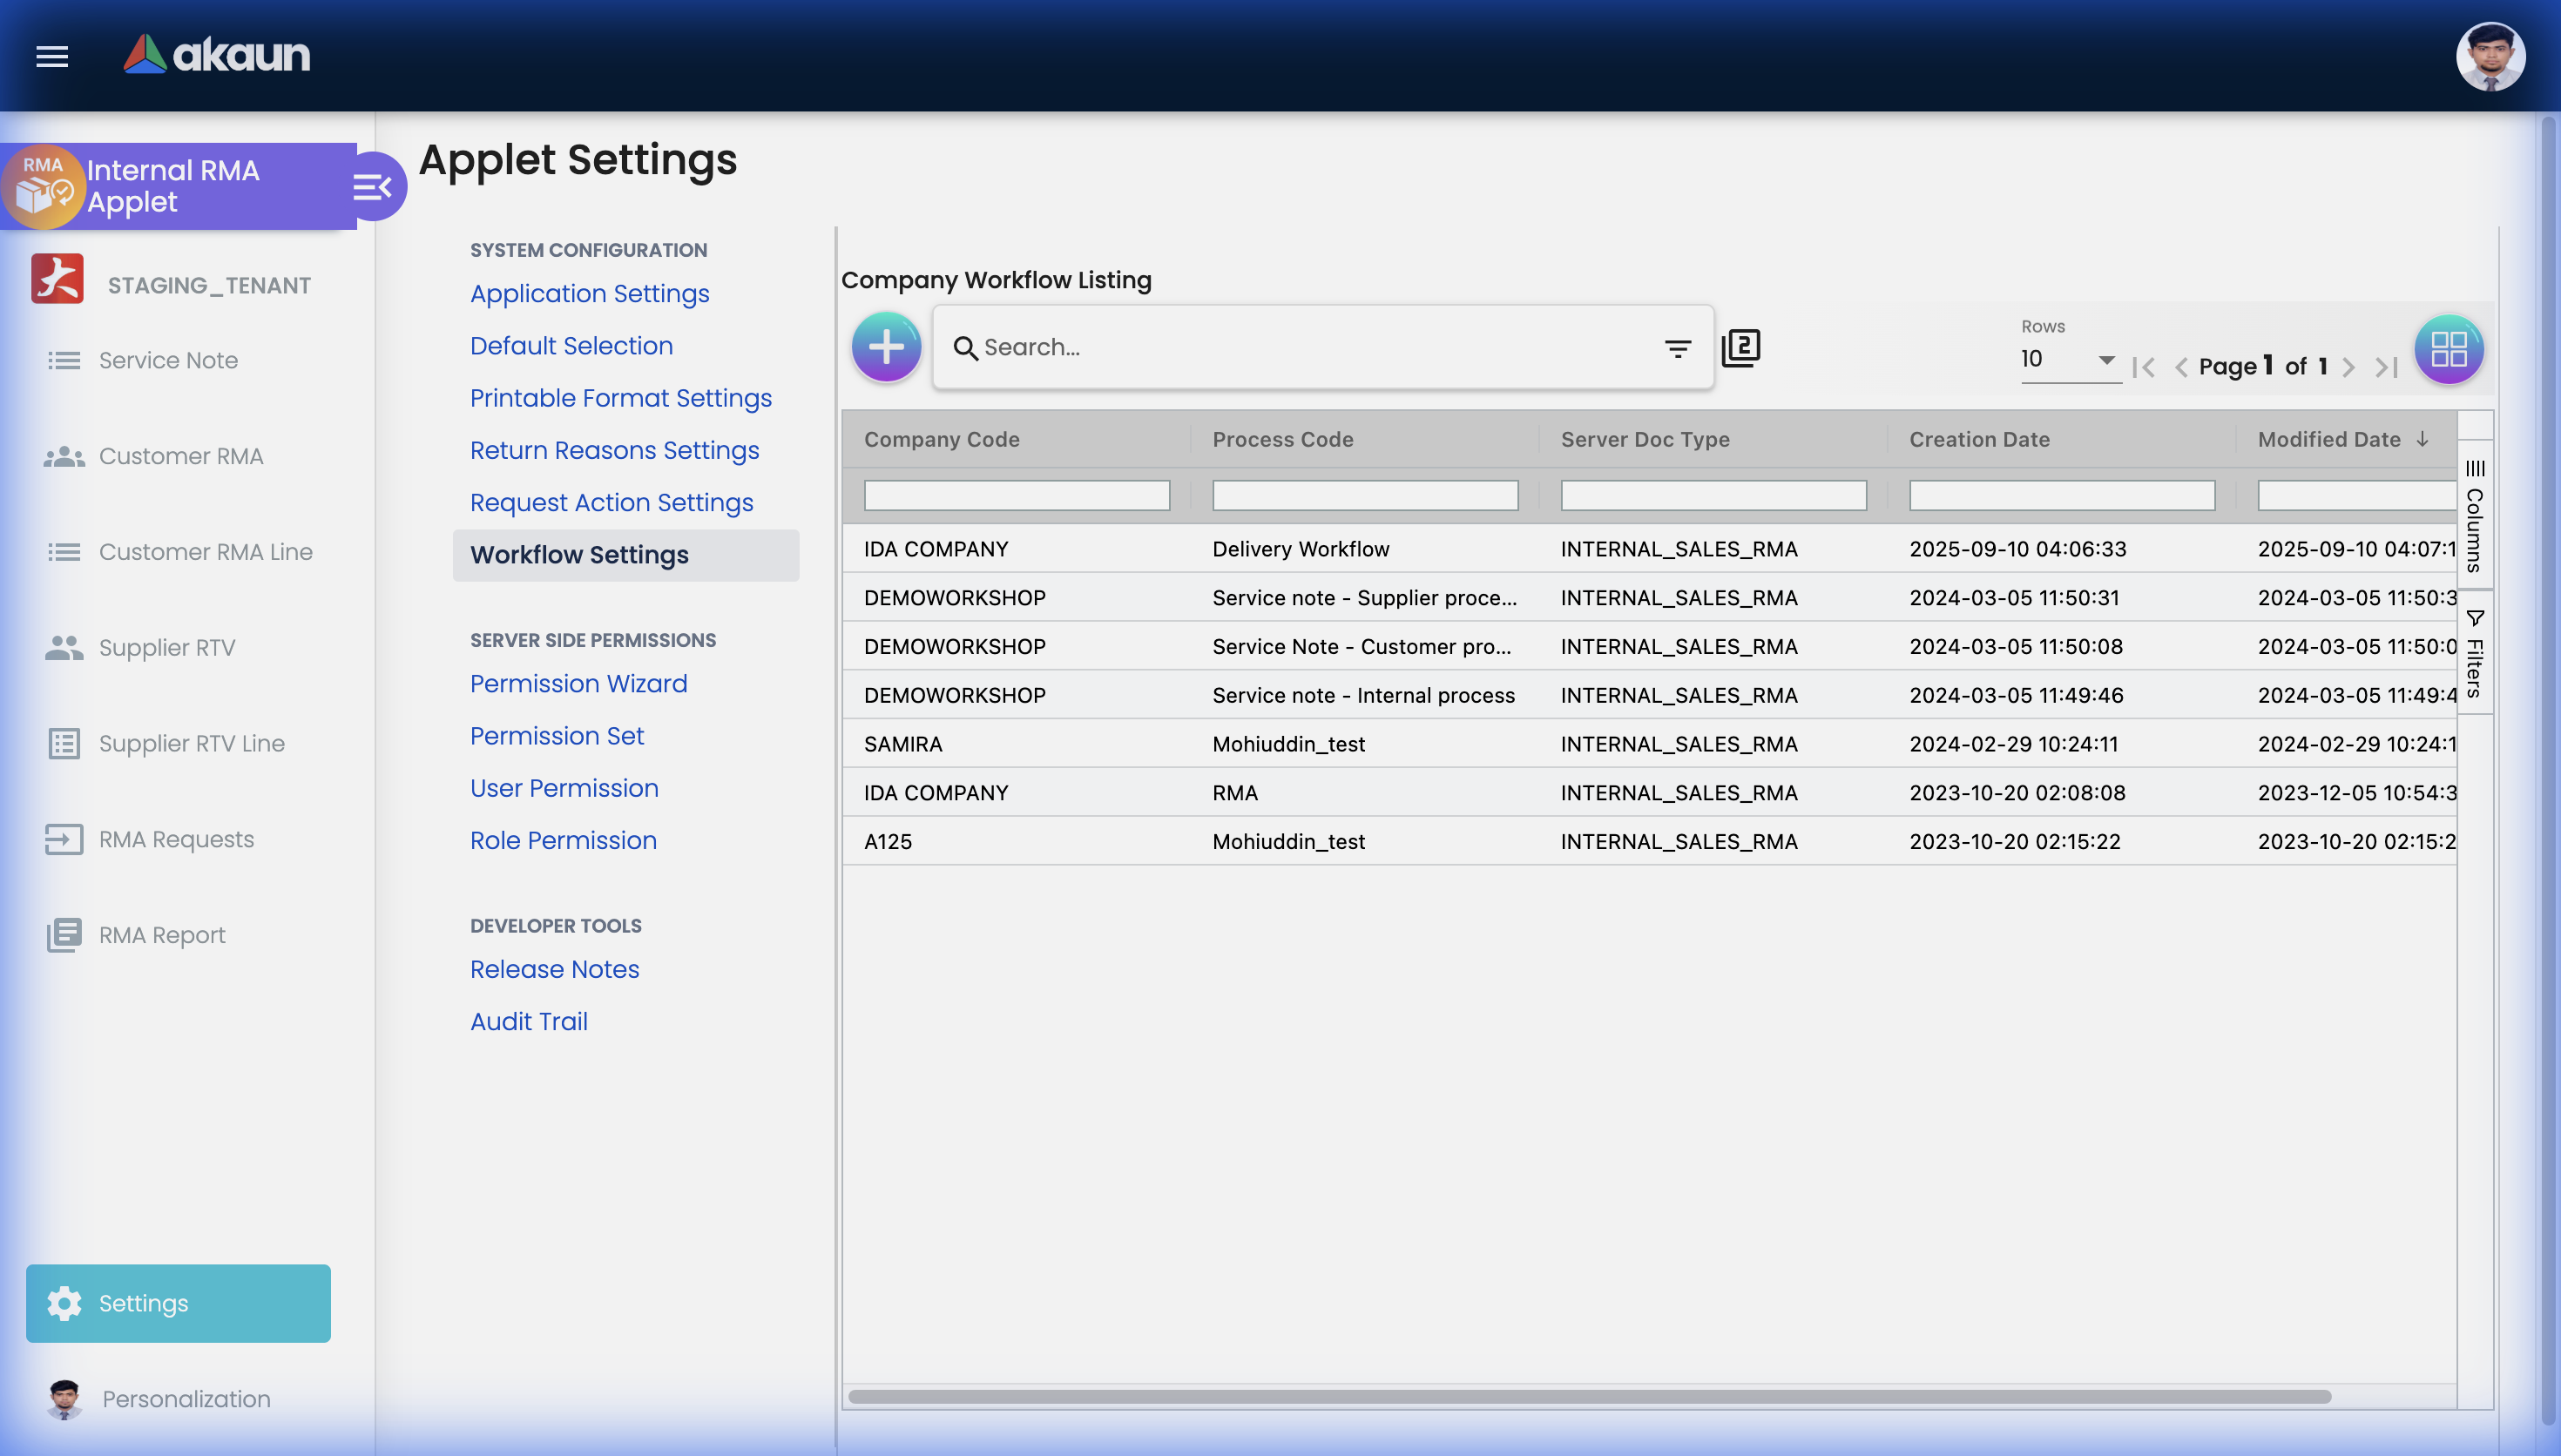
Workflow Settings
Set up company-specific workflow rules and approval routing for different RMA document types.
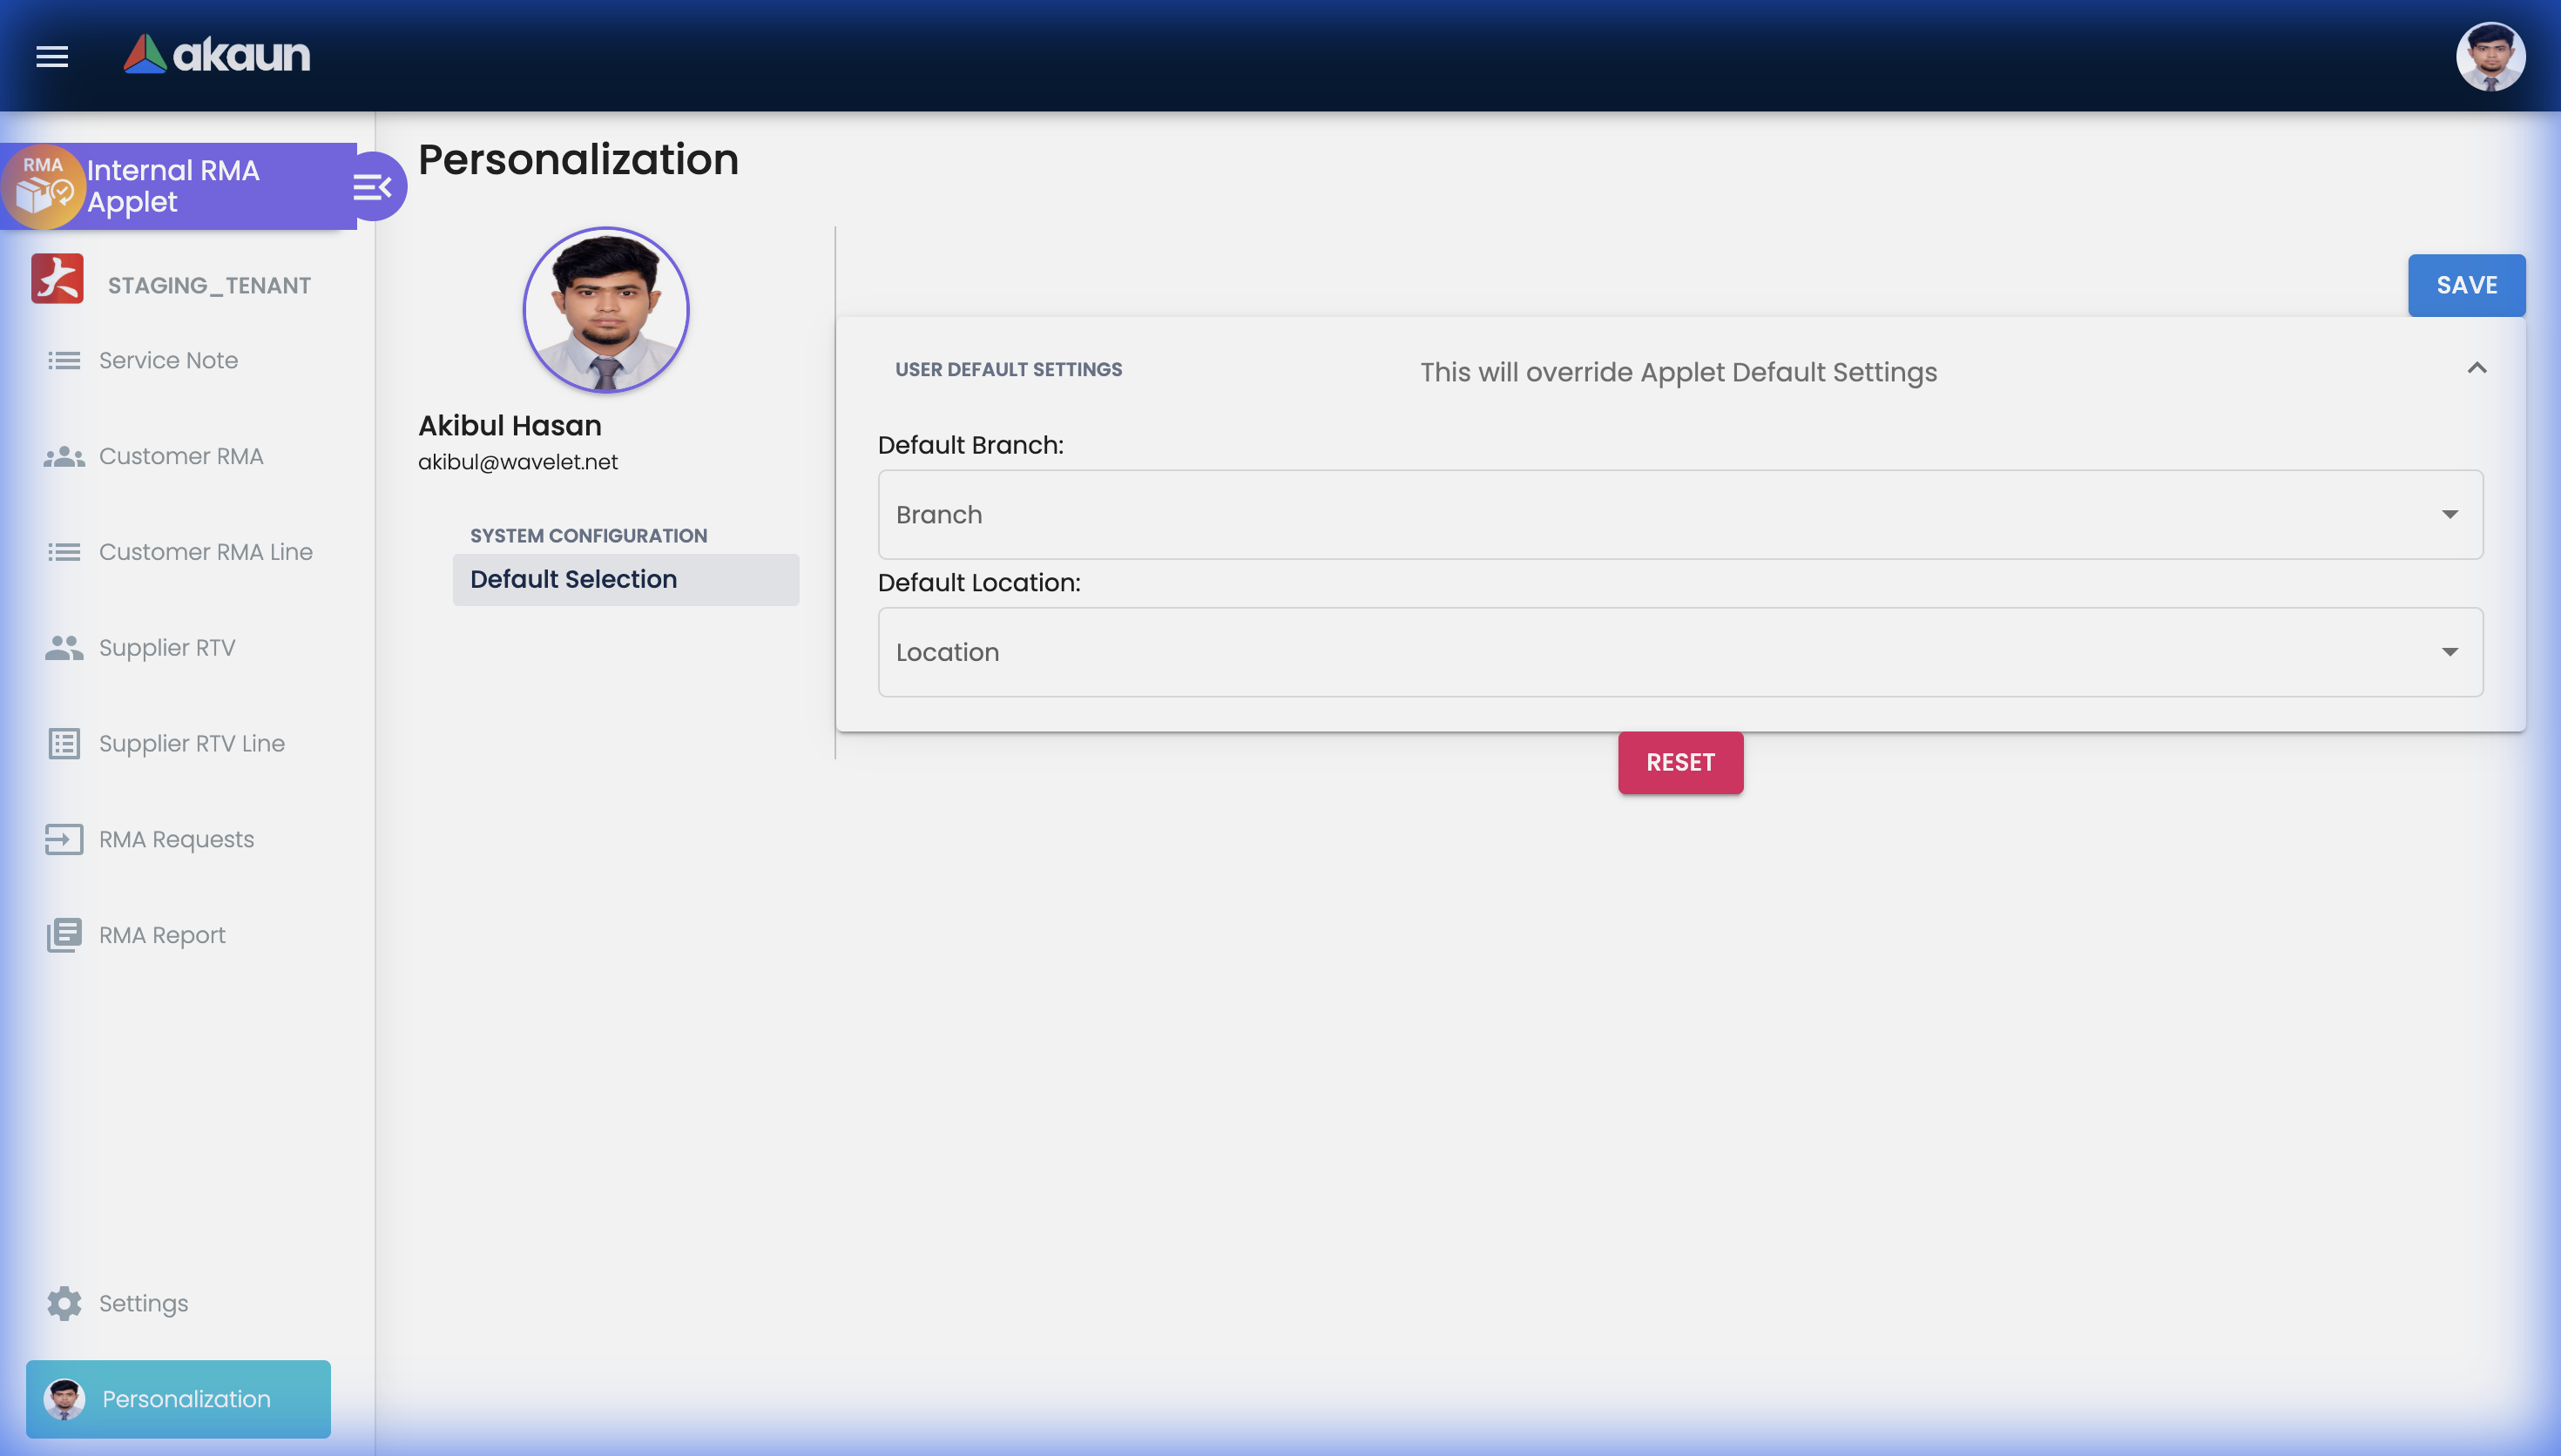
Personalization
The Personalization section lets individual users override applet-wide defaults with their own preferred settings.
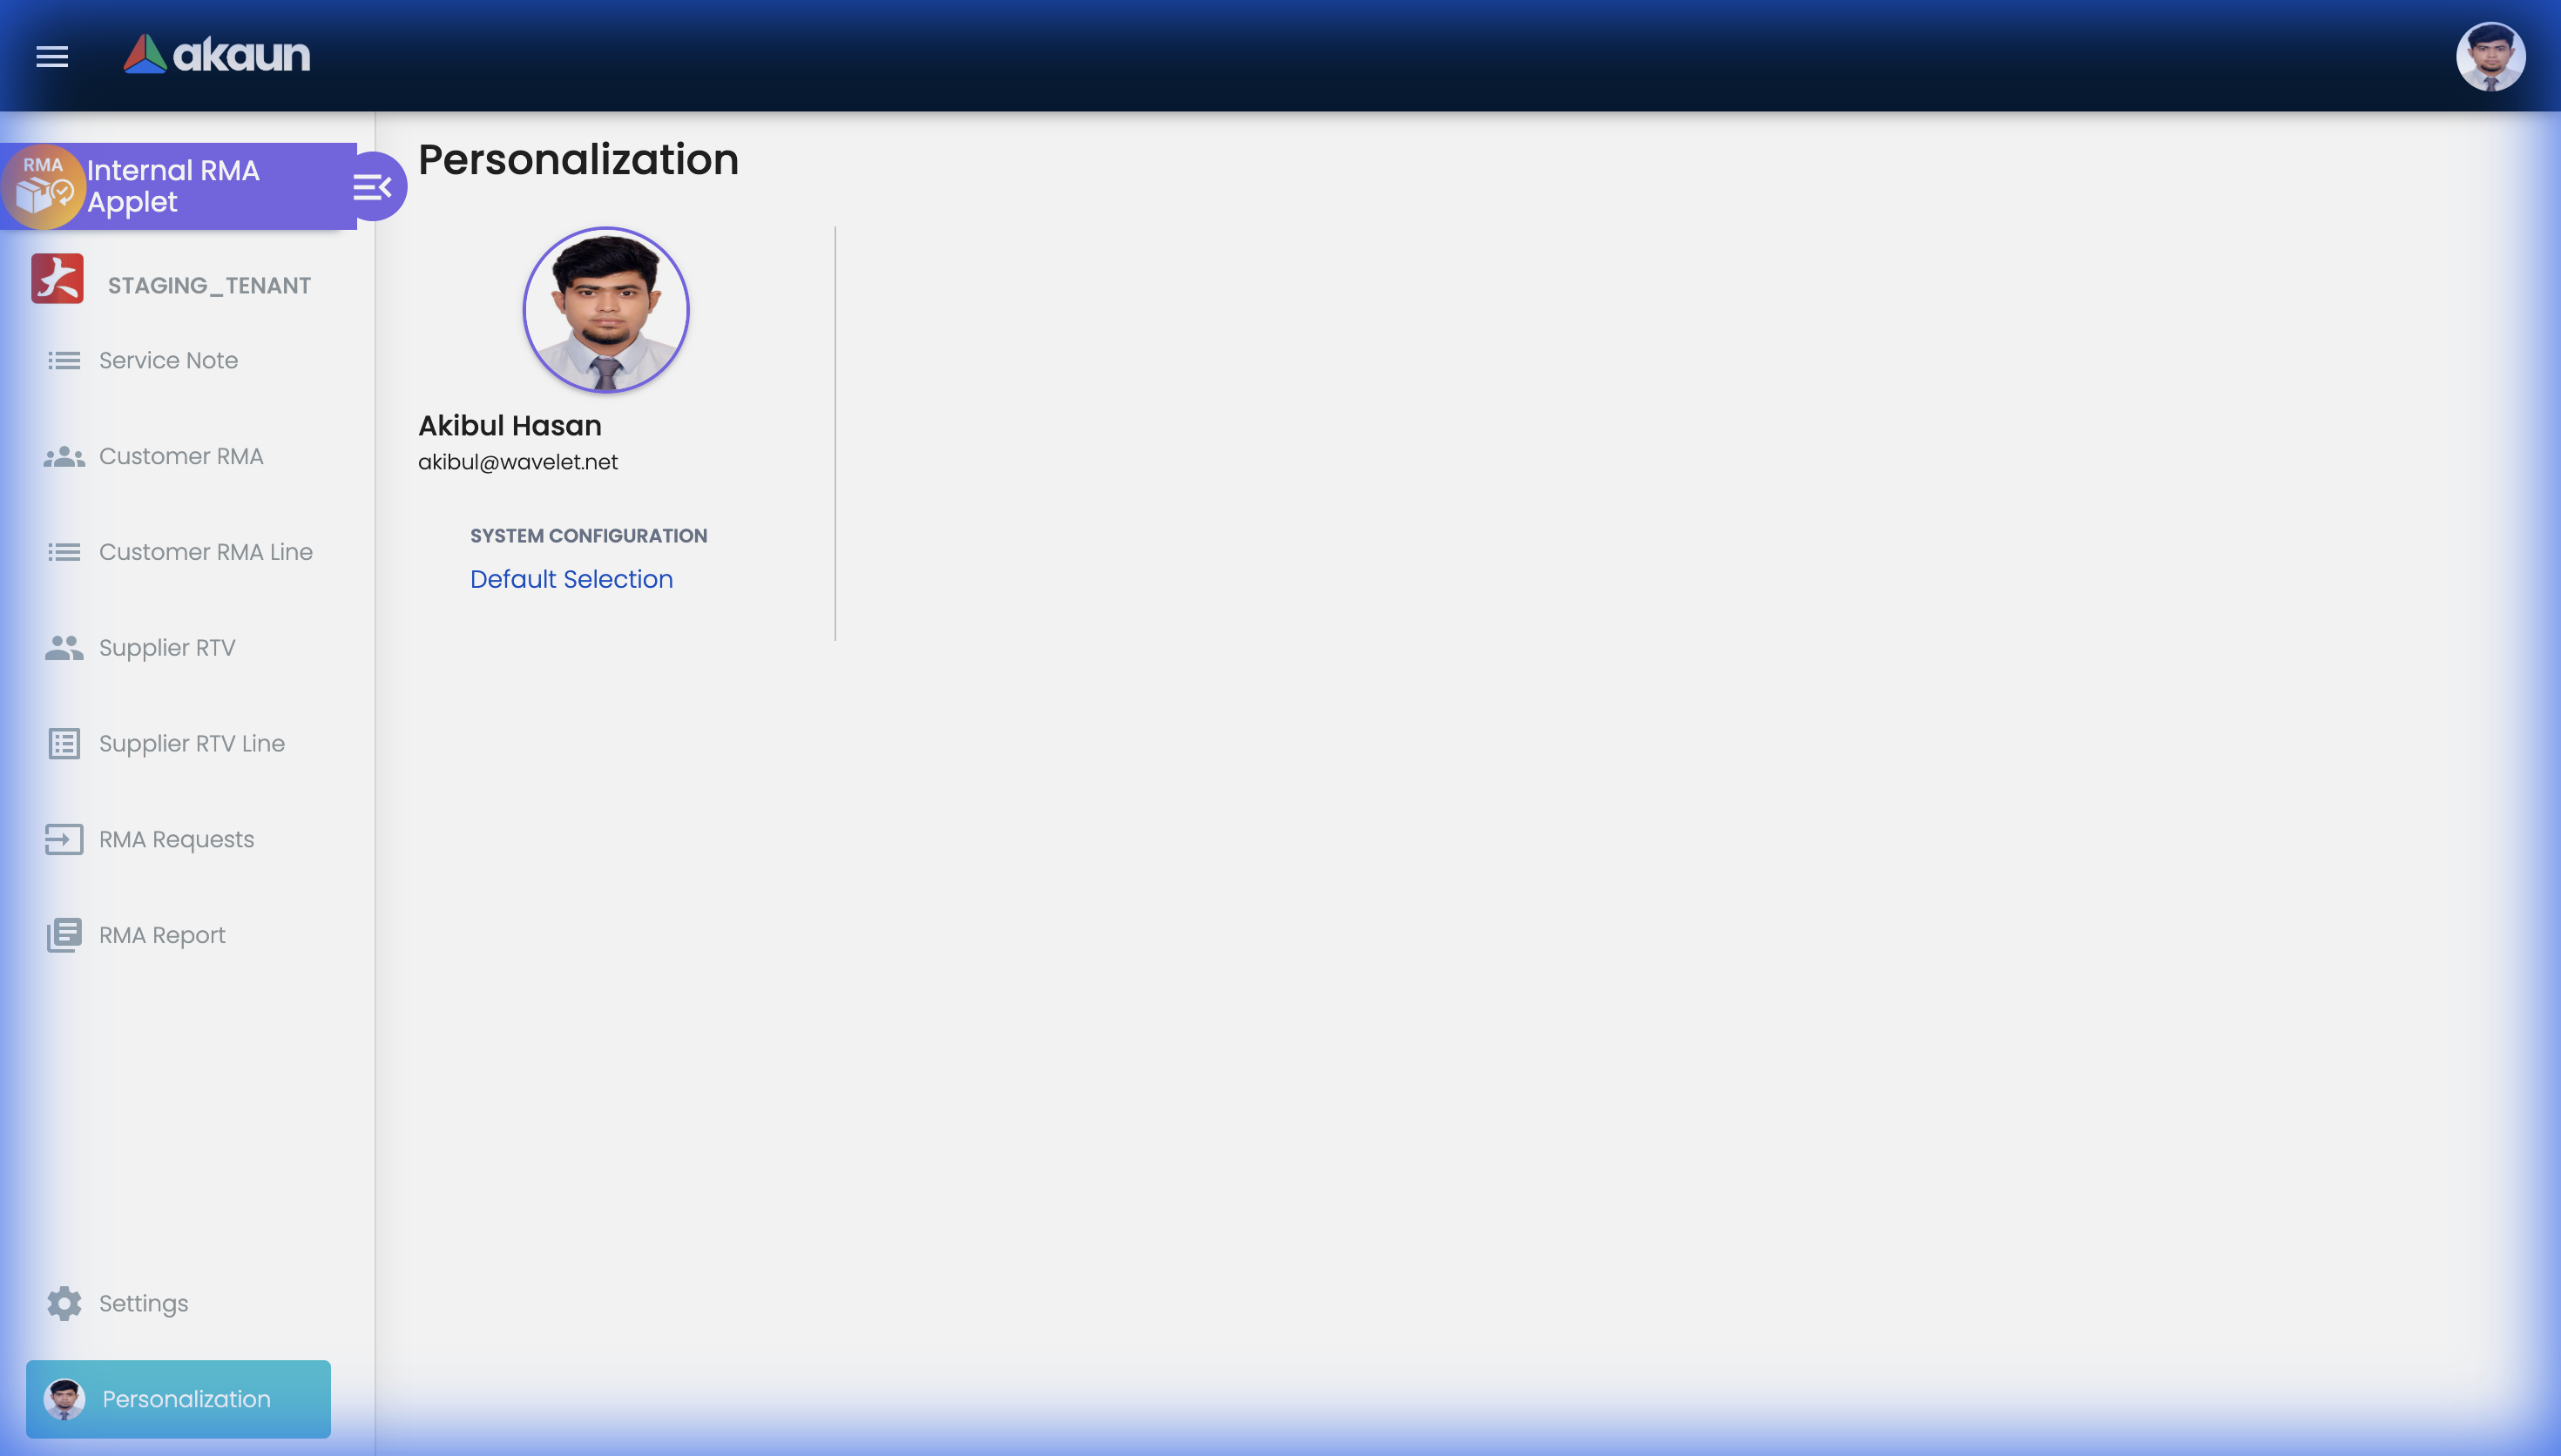
Default Selection
Set your personal default Branch and Location, which will override the system defaults when you create new RMA records.
FAQ
Q: Can I bulk process multiple RMAs? A: Yes, select multiple RMAs from the listing and apply batch actions.
Q: How do I track partial returns? A: Create line items for each product being returned — you can receive them individually.
Q: What is the difference between Customer RMA and Service Note? A: A Service Note is the initial logging of a customer service request (often before the physical item is returned). A Customer RMA is a formal return authorization with tracking for the returned goods and their disposition.
Q: What is Supplier RTV vs Customer RMA? A: Customer RMA manages returns FROM customers TO your company. Supplier RTV (Return to Vendor) manages returns FROM your company BACK TO the supplier — for defective goods or warranty claims.
Q: How are refunds processed? A: After RMA resolution with a refund disposition, a credit note is generated for finance to process the refund.
Q: Can customers initiate their own RMA requests? A: If integrated with a customer portal, yes. Otherwise, staff creates on their behalf via the Service Note or Customer RMA pages.