Sales Debit Note (Internal) Applet
Purpose and Overview
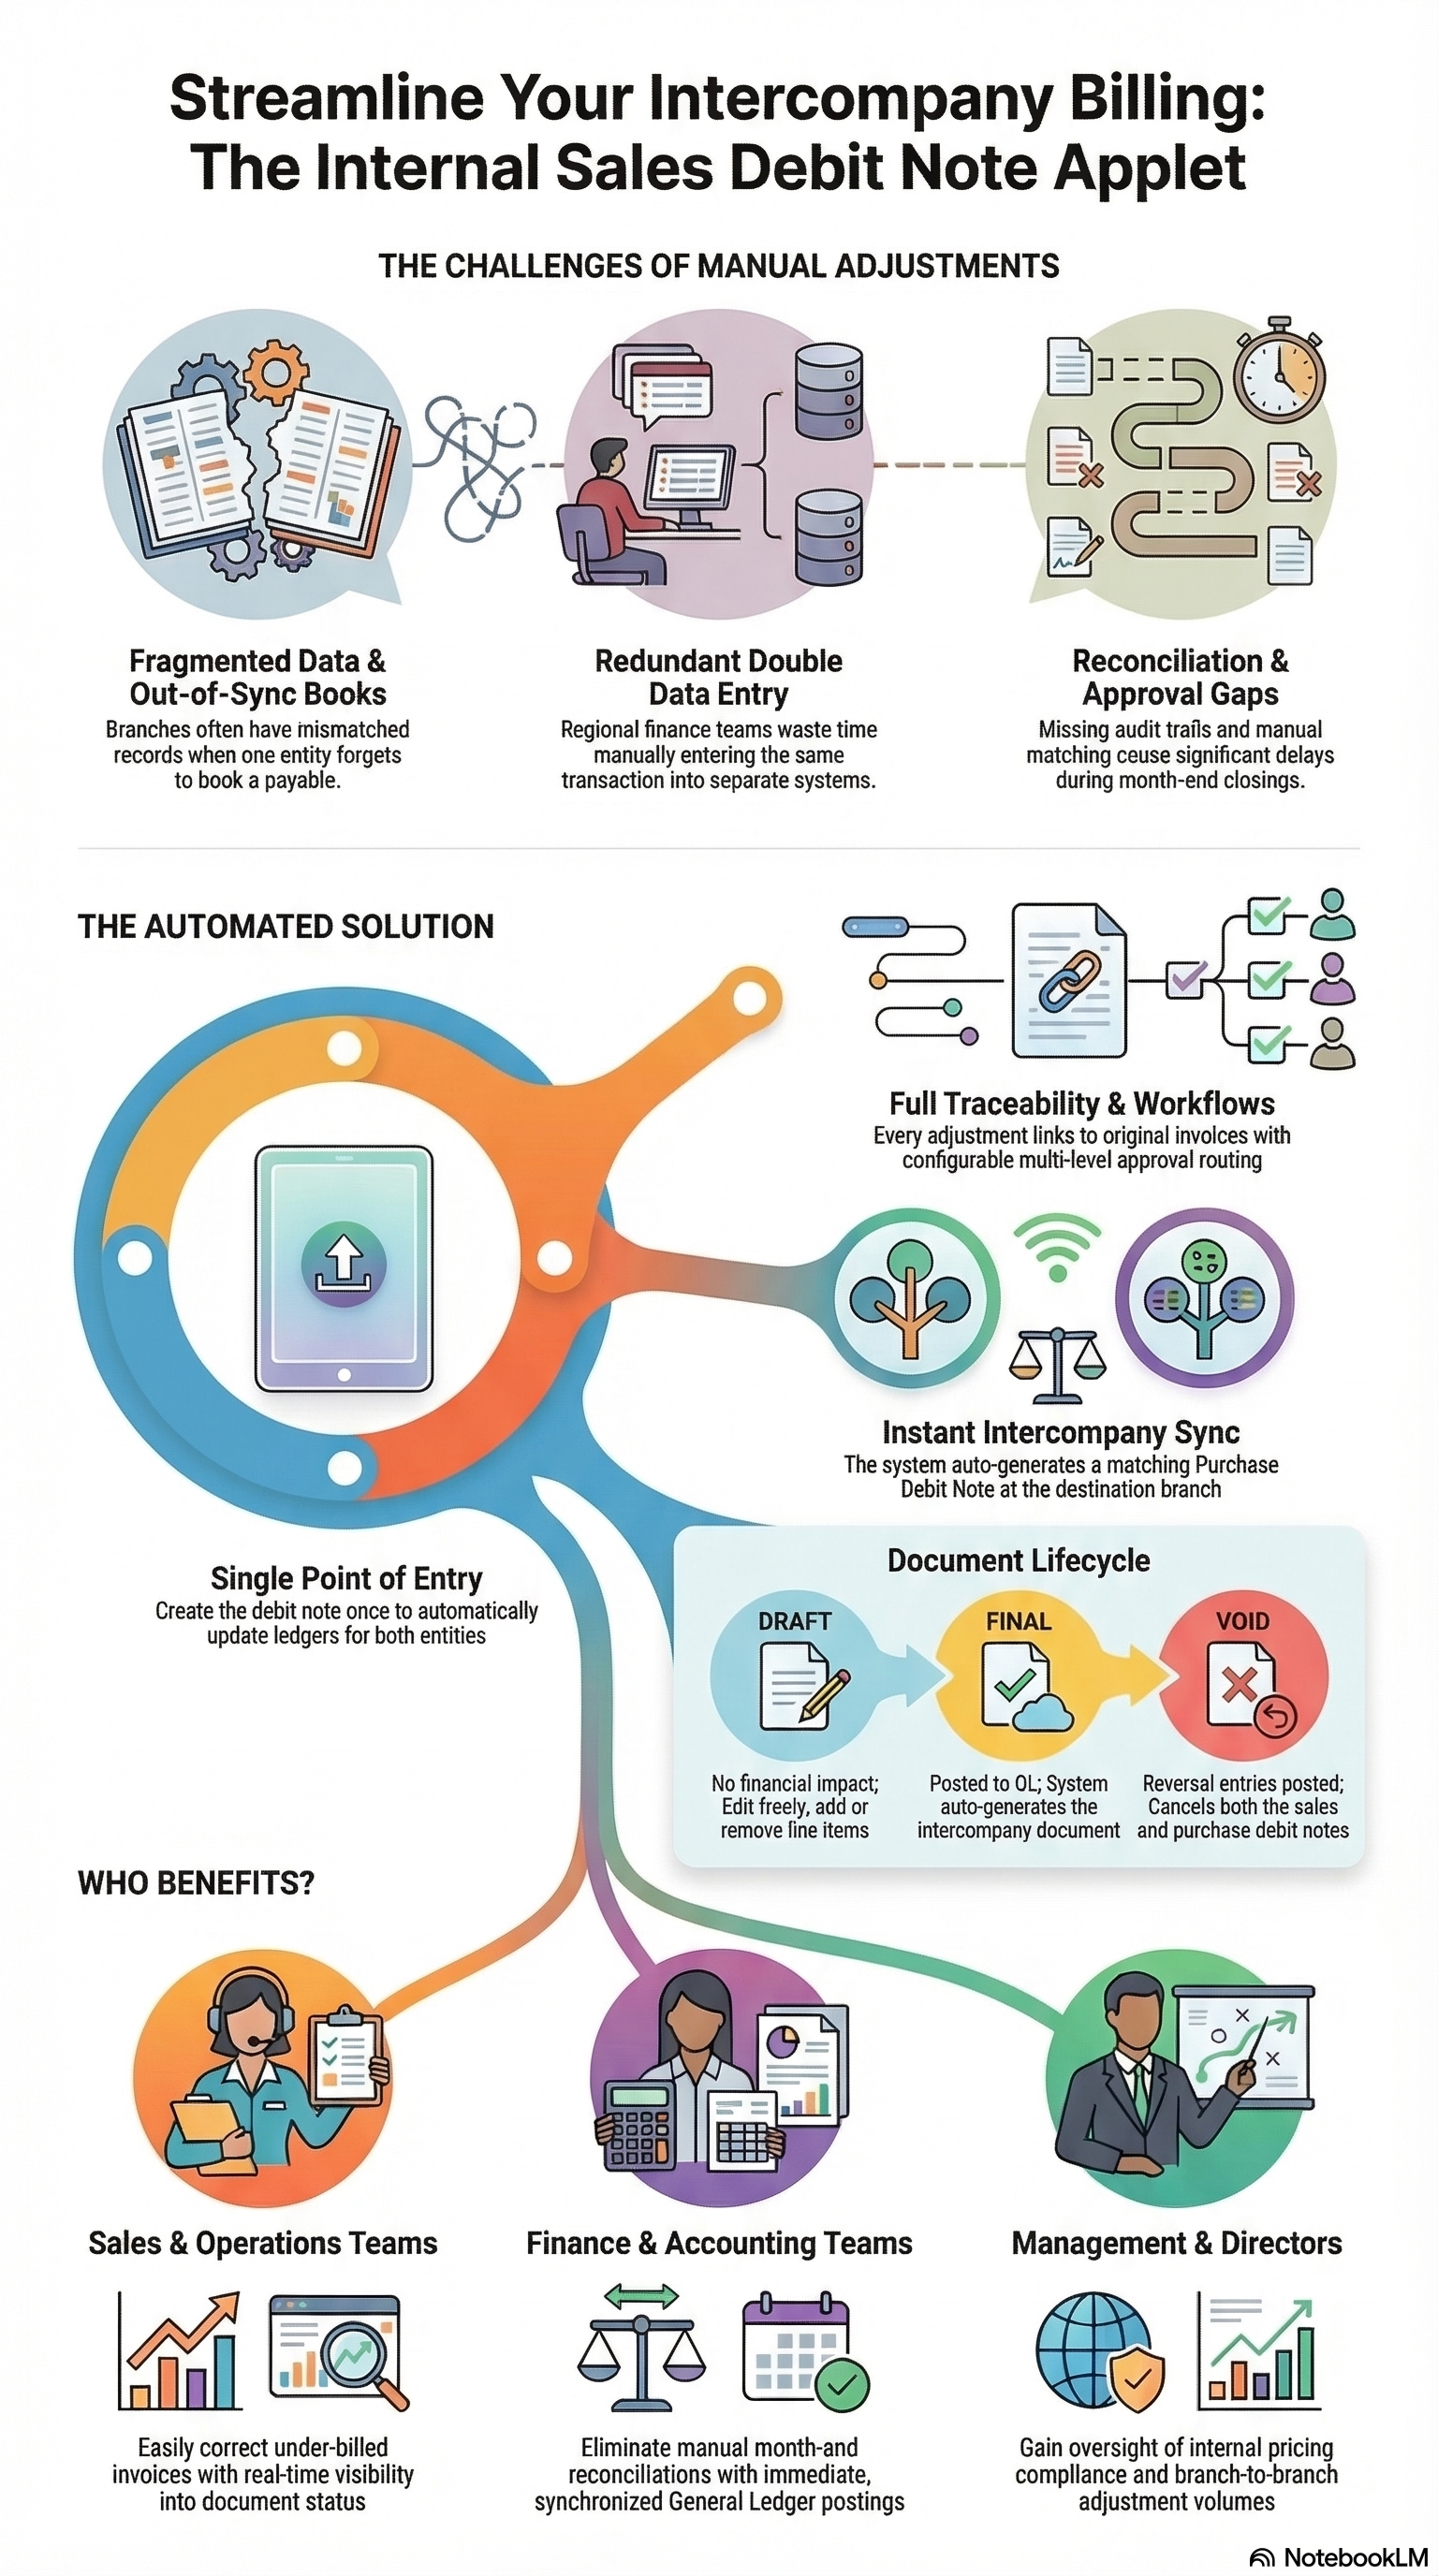
TL;DR: It allows your branch to officially charge another internal branch extra money to correct a past transaction that was under-billed.
The Sales Debit Note (Internal) Applet manages upward revisions to internal sales invoices between branches, subsidiaries, or divisions within your organization. When your branch has under-billed an internal customer, this applet lets you issue a debit note that simultaneously updates both parties’ ledgers through automated intercompany transaction matching.
A Webinar to get to know about the functionalities of the Sales Debit Note (Internal) Applet:
What is the Sales Debit Note (Internal) Applet? (Explained Simply)
Imagine your company has two branches: HQ (in Kuala Lumpur) and Branch A (in Penang).
- HQ sends some laptops to Branch A and bills them RM 5,000.
- Later, HQ realizes they forgot to include the RM 200 delivery fee on that bill.
- HQ needs to tell Branch A, “Hey, you actually owe us an extra RM 200.”
Instead of sending emails back and forth and doing manual data entry twice, HQ uses the Sales Debit Note (Internal) Applet to create an official document for that extra RM 200.
The “Magic” Part: When HQ hits “FINAL” on this document, the system automatically does two things:
- It updates HQ’s records to say they will receive RM 200 (Accounts Receivable).
- It automatically creates a matching document over at Branch A’s system (an Purchase Debit Note (Internal)), telling Branch A they need to pay the extra RM 200 (Accounts Payable).
No one has to type it in twice. It prevents Branch A from forgetting to pay, and it keeps everyone on the exact same page. A “Debit Note” in this context basically means an “Additional Charge” or an “Upward Revision” to a previous invoice.
Relationship to Other Applets
This applet acts as a bridge between several other parts of the system:
- Sales Invoice (Internal) Applet (The Origin): You usually create a Debit Note because an original invoice was incorrect. When creating a debit note, you “tag” or link the original Sales Invoice (Internal) so everyone knows why there is an extra charge.
- Purchase Debit Note (Internal) Applet (The Destination): This is the mirror image. Finalizing a Sales Debit Note here automatically triggers the creation of an Purchase Debit Note (Internal) at the receiving branch’s account.
- General Ledger (Accounting Core): Once approved and finalized, this applet sends the financial data straight to the core accounting system, automatically hitting the Revenue account for the issuing branch and the Expense account for the receiving branch.
- Approval Workflow Applets: If the extra charge is large, the system uses the Workflow rules to pause the document and route it to a manager or director for approval before it can become Final.
Key Features Overview
Who Benefits from This Applet?
Sales & Operations Teams:
- Correct under-billed internal invoices without manual coordination
- Real-time visibility into document statuses (Draft, Final, Void, Discarded)
- Link debit notes directly to originating internal sales invoices
- Attach supporting documents for audit readiness
- Final, discard, void, print, and email selected documents directly from the listing
Finance & Accounting Teams:
- Eliminate manual intercompany reconciliation at month-end
- Immediate GL postings for both issuing and receiving branches
- Complete audit trail from creation through finalization
- Accurate cost-center and profit-center tagging via Department Header
Management & Branch Directors:
- Real-time visibility into branch-to-branch adjustments
- Control over internal pricing compliance via approval workflows
- Consolidated view of all intercompany debit activity
- Data-driven analysis of inter-branch service volumes
What Problems Does This Solve?
The Manual Internal Adjustment Problem:
Traditional intercompany adjustments rely on emails and isolated accounting entries. Common issues include:
- Out-of-sync books between branches (Branch A books a receivable, Branch B forgets to book the payable)
- No traceable link between the original invoice and the adjustment
- Month-end reconciliation delays matching internal debits across entities
- Missing approval trails when internal pricing or quantities change
- Double data entry by separate regional finance teams
The Sales Debit Note (Internal) Applet Solution:
- Single Point of Entry — Create the debit note once; the system automatically updates both entities
- Intercompany Sync — Auto-generates the corresponding Purchase Debit Note (Internal) at the receiving branch
- Complete Traceability — Every adjustment links to an original Sales Invoice (Internal) or account
- Approval Workflows — Configurable routing ensures the right people authorize changes
- Error Reduction — Eliminates out-of-balance intercompany accounts at month-end
Key Features Overview
Key Concepts
Intercompany Transaction Flow
When you finalize an Sales Debit Note (Internal), the system executes an automated two-sided posting:
Issuing Branch (HQ)                          Receiving Branch (Branch A)
─────────────────────                        ───────────────────────────
Creates Internal Sales                       System auto-creates Internal
Debit Note (+RM 500)                         Purchase Debit Note (+RM 500)
     │                                            │
     ▼                                            ▼
Accounts Receivable ▲                        Accounts Payable ▲
(HQ is owed +RM 500) (Branch A owes +RM 500)Key Menu Functions
When utilizing this applet, users have access to several key functions to manage their daily workflows:
1. Sales Debit Note Listing
- The main workspace for searching, opening, creating, and managing Sales Debit Note documents.
- Use the checkbox column to select rows for bulk FINAL, DISCARD, VOID, PRINT, or SEND EMAIL actions.
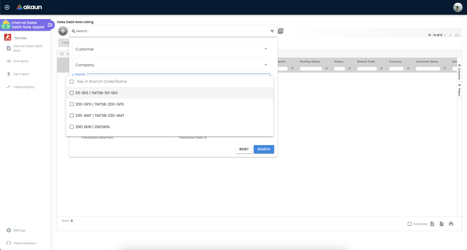
- Use Advanced Search to filter by document details, dates, status, branch, customer, and posting status.
Bulk Actions on the Listing
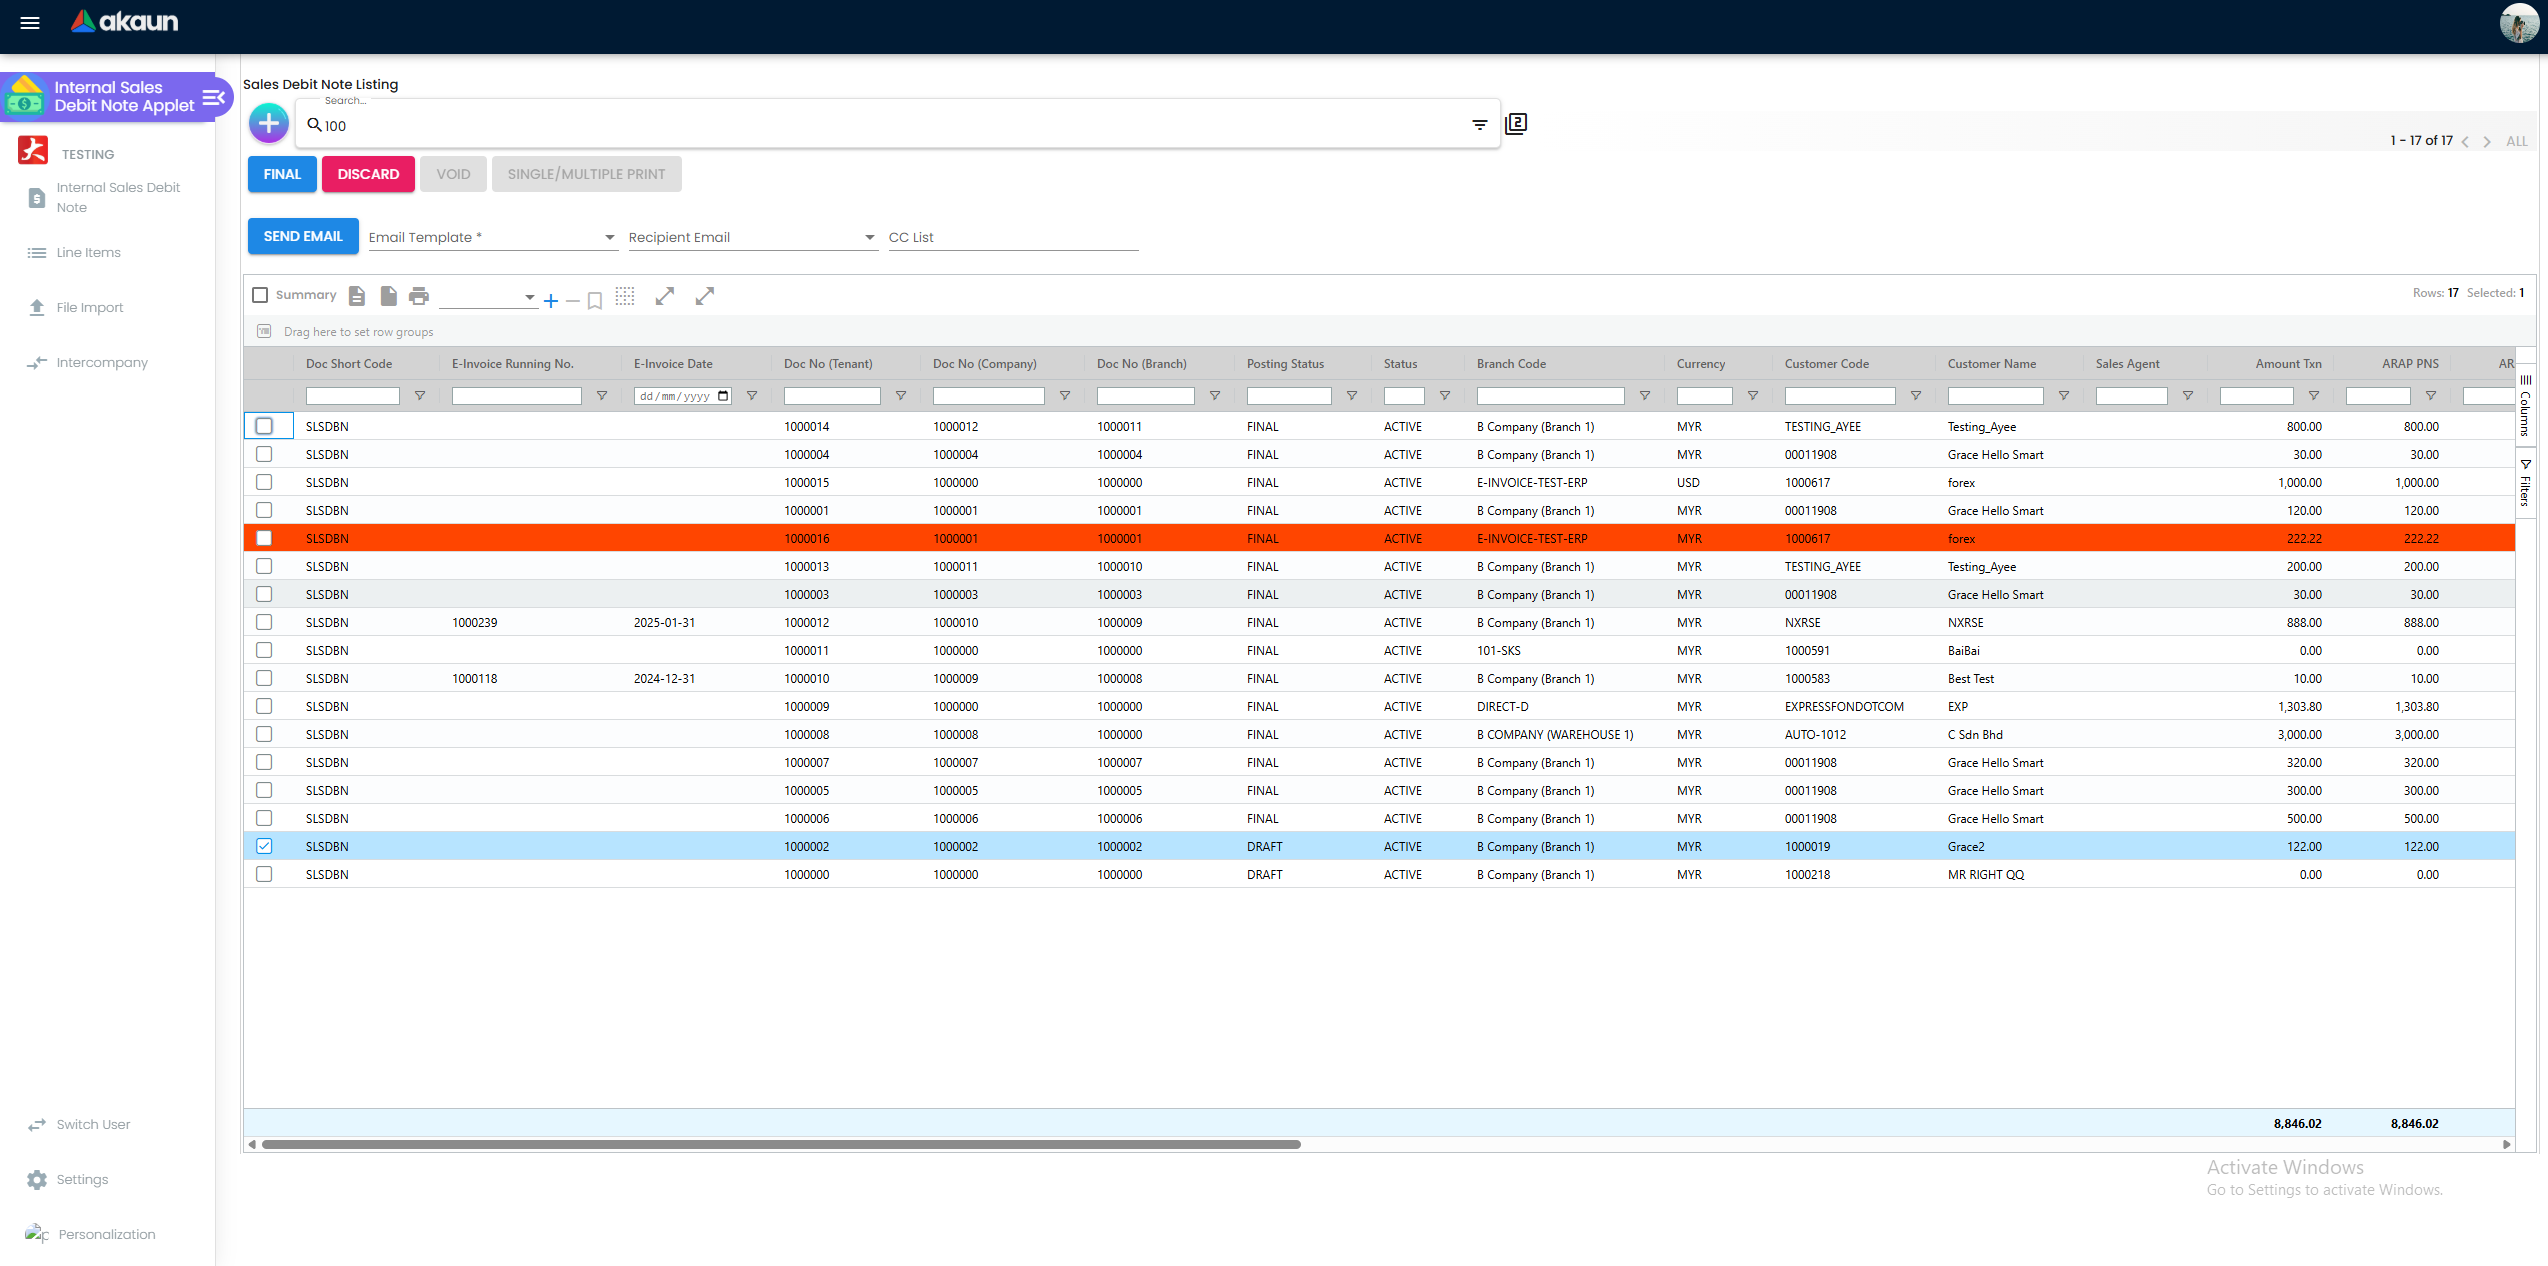
Select one or more rows in the Listing, then use the action buttons above the grid. The applet checks the selected rows before applying the action, so buttons are disabled when the selection is not eligible.
| Button | What It Does | When It Applies |
|---|---|---|
| FINAL | Posts selected DRAFT documents, locks them, writes GL entries, and triggers the intercompany Purchase Debit Note sync. | Selected rows must be DRAFT and ACTIVE. |
| DISCARD | Abandons selected DRAFT documents. Posting Status becomes DISCARDED and no GL entries are created. A confirmation dialog asks: “Are you sure you want to DISCARD selected documents?” | Selected rows must be DRAFT and ACTIVE. |
| VOID | Reverses selected FINAL documents. Reversal entries are posted and the linked intercompany document is also reversed/updated. A confirmation dialog asks: “Are you sure you want to VOID selected documents?” | Selected rows must be FINAL and ACTIVE. |
| SINGLE/MULTIPLE PRINT | Generates printable output for selected documents using the configured Printable Format. | The applet setting PRINTABLE must be configured. |
| SEND EMAIL | Sends PDFs of selected documents using the selected Email Template, Recipient Email option, and CC List. | Hidden when HIDE_SEND_EMAIL_BUTTON is enabled. |
SEND EMAIL form

The SEND EMAIL button sits on the same toolbar row as three fields that feed it: Email Template, Recipient Email, and CC List. All four controls are visible from the start; they appear and disappear together based on the HIDE_SEND_EMAIL_BUTTON setting. Fill the three fields, select your document rows, then click SEND EMAIL to send.
| Field | Purpose | How to fill it in |
|---|---|---|
| Email Template | Picks the template that supplies the email subject and body. The template’s code shows in the dropdown. | Type into the search field (“Search name..”) to filter, then pick a template. The chosen template’s title becomes the email subject and its description becomes the body. |
| Recipient Email | Decides whose email address(es) on each document get the message. | Choose one of: Billing and Shipping Email (sends to both), Billing Email Only, or Shipping Email Only. The system reads the address from each document’s Account > Billing/Shipping details. |
| CC List | Optional CC recipients added to every email. | Type comma-separated addresses, e.g. finance@company.com, manager@company.com. |
After submit, the system groups selected documents by recipient email, attaches each group’s PDFs, and sends the emails. Documents missing the address required by your Recipient Email choice are skipped or reported with an error, so users know which document needs Billing or Shipping email details fixed.
The list in the Email Template dropdown is specific to this applet. Templates you see here will not appear in any other applet’s SEND EMAIL dropdown, and vice versa. To create, edit, or activate a template, go to Settings > Email Template in this applet’s sidebar. See Email Template settings for the full setup notes and gotchas.
2. Create/Edit Document
- Create new additional charges (Debit Notes).
- Select the destination branch, describe why the charge is occurring, and add specific item codes and amounts.
- Tag original internal invoices, department codes, and cost centers.
- Use SAVE to keep a draft, FINAL to post it, DISCARD to abandon an unposted draft, or VOID to reverse a finalized document.
3. Line Items
- View line-level debit note details across documents without opening each header one by one.
- Useful for analysis, reconciliation, and exporting item-level charge information.
4. File Import
- Upload a CSV file containing many Sales Debit Note rows at once.
- Use the sample format, delimiter selector, and Checking view to validate the file before accepting the import. See File Imports for the full CSV reference and Error/All checking workflow.
5. Intercompany Transaction Listing (Manual processing)
- View a dedicated dashboard tracking the status of intercompany syncs.
- Inbound vs Outbound: View transactions originating from your branch (Outbound) and coming to your branch (Inbound).
- Unprocessed vs Processed: Track documents waiting to be automatically synced versus those that have successfully completed the intercompany transfer.
6. Applet Settings
- Configure branch mappings, default accounts, workflow approval chains, printable formats, and knock-off rules.
7. Personal Default Settings
- Save favorite defaults (like preferred branch or currency) to speed up continuous data entry.
Quick Start Guide
Get up and running quickly with these essential workflows.
For Operations: Creating Your First Internal Debit Note
Goal: Issue a debit note to correct an under-billed internal customer.
- Navigate: Go to Sales Debit Note (Internal) from the sidebar
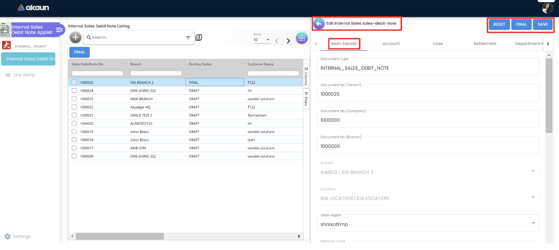
- Create Header: Fill in the Main Details tab:
- Select the internal customer (destination branch)
- Set the document date and currency
- Add a description (e.g., “Additional transport charges for PO-2024-001”)
- Set Account Info: Switch to the Account tab:
- Select or confirm the billing entity
- Verify the billing and shipping addresses
- Add Line Items: Switch to the Lines tab:
- Click “Add Line”
- Select the Item Code or choose an account-based entry
- Enter Quantity and Unit Price (or direct Amount)
- Repeat for each adjustment line
- Tag Department (if visible): Switch to the Department Hdr tab:
- Assign the relevant department and cost center
- Attach Supporting Docs (if visible): Switch to the Attachments tab:
- Upload the original purchase order, correspondence, or any supporting evidence
- Create: Click CREATE → Document is saved in Draft status
What happens next?
Draft → Click FINAL → GL entries posted
                     → Intercompany Purchase Debit Note auto-created at destination branch
You can also RESET the form at any time before creating to clear all fields.
For Managers: Reviewing Internal Adjustments
Goal: Review and authorize debit notes before finalization.
- Open the Document: Navigate to the debit note listing and select the document to review
- Verify Details:
- Main Details: Confirm the internal customer and document description
- Account: Check that the correct billing entity is selected
- Lines: Verify item codes, quantities, and amounts are accurate
- Attachments: Review supporting documentation
- Check Trace Document (if visible): Confirm the debit note links to the correct upstream Sales Invoice (Internal)
- Decide:
- Approve / Finalize: Click FINAL → System posts GL entries and generates the intercompany document
- Return for Correction: Inform the creator of any discrepancies before finalization
- Discard (if still a draft and created in error): Click DISCARD → Document becomes DISCARDED with no GL impact
- Void (if already finalized in error): Click VOID → Reversal entries are posted
For Admins: Initial System Setup
Goal: Configure the applet so your teams can start issuing internal debit notes.
Step 1: Configure Branch Settings (Settings > Branch Settings)
- Map internal customers/suppliers for each branch
- Configure branch-specific default accounts
- Set branch-level defaults such as settlement method, pricing scheme, printable format, and allowed item categories
- Use the permission tools to control which users, roles, and teams can create, edit, final, discard, void, print, email, or import documents
Step 2: Configure Workflow Settings (Settings > Workflow Settings)
- Define approval routing rules (e.g., debit notes above RM 1,000 require Regional Controller approval)
- Set up workflow steps and authorized approvers
Step 3: Configure Default Settings (Settings > Default Settings)
- Set default currency, numbering format (e.g.,
ISDN-2024-00100), and other document defaults
Step 4: Configure Field Configuration (Settings > Field Configuration)
- Control which fields are mandatory, optional, or hidden during document creation
Step 5: Configure Knock-Off Settings (Settings > Knock-Off Settings)
- Define rules for how debit notes can be knocked off against other internal documents
Step 6: Configure Printable Format (Settings > Printable Format Settings)
- Customize the PDF export layout, company logo, header/footer text, and included fields
Step 7: Configure Email Templates (Settings > Email Template)
- Create templates that appear in the listing’s Email Template dropdown
- Select the printable format that should be attached when that template is used
- Write the email subject/code and message body users will send with SEND EMAIL
Step 8: Test the Full Flow
- Create a test debit note as an operations user
- Finalize it and verify the intercompany purchase debit note is generated at the destination branch
- Verify GL postings on both sides
- Send a test email from the listing and confirm the selected PDF format is attached
New to the system? Start with the basics:
- Operations staff: Create a test Sales Debit Note (Internal) in Draft mode and explore each tab
- Managers: Practice reviewing and finalizing a test document
- Admins: Review Configuration & Settings below for detailed setup guides
Document Lifecycle
Every Sales Debit Note (Internal) follows a predictable lifecycle:
| Status | What It Means | What Happens Next |
|---|---|---|
| Draft | Created but not yet finalized | Edit freely, add/remove lines. From here, users can SAVE, FINAL, or DISCARD. |
| Final | Locked and posted to the GL | Intercompany document generated; no further edits. If it was finalized in error, use VOID. |
| Void | Cancelled after finalization | Reversal GL entries posted; intercompany document also voided or updated. The record remains visible for audit. |
| Discarded | A draft that was abandoned before it was ever finalized | No GL impact and no intercompany posting. Use this when a draft was created in error and should not proceed. |
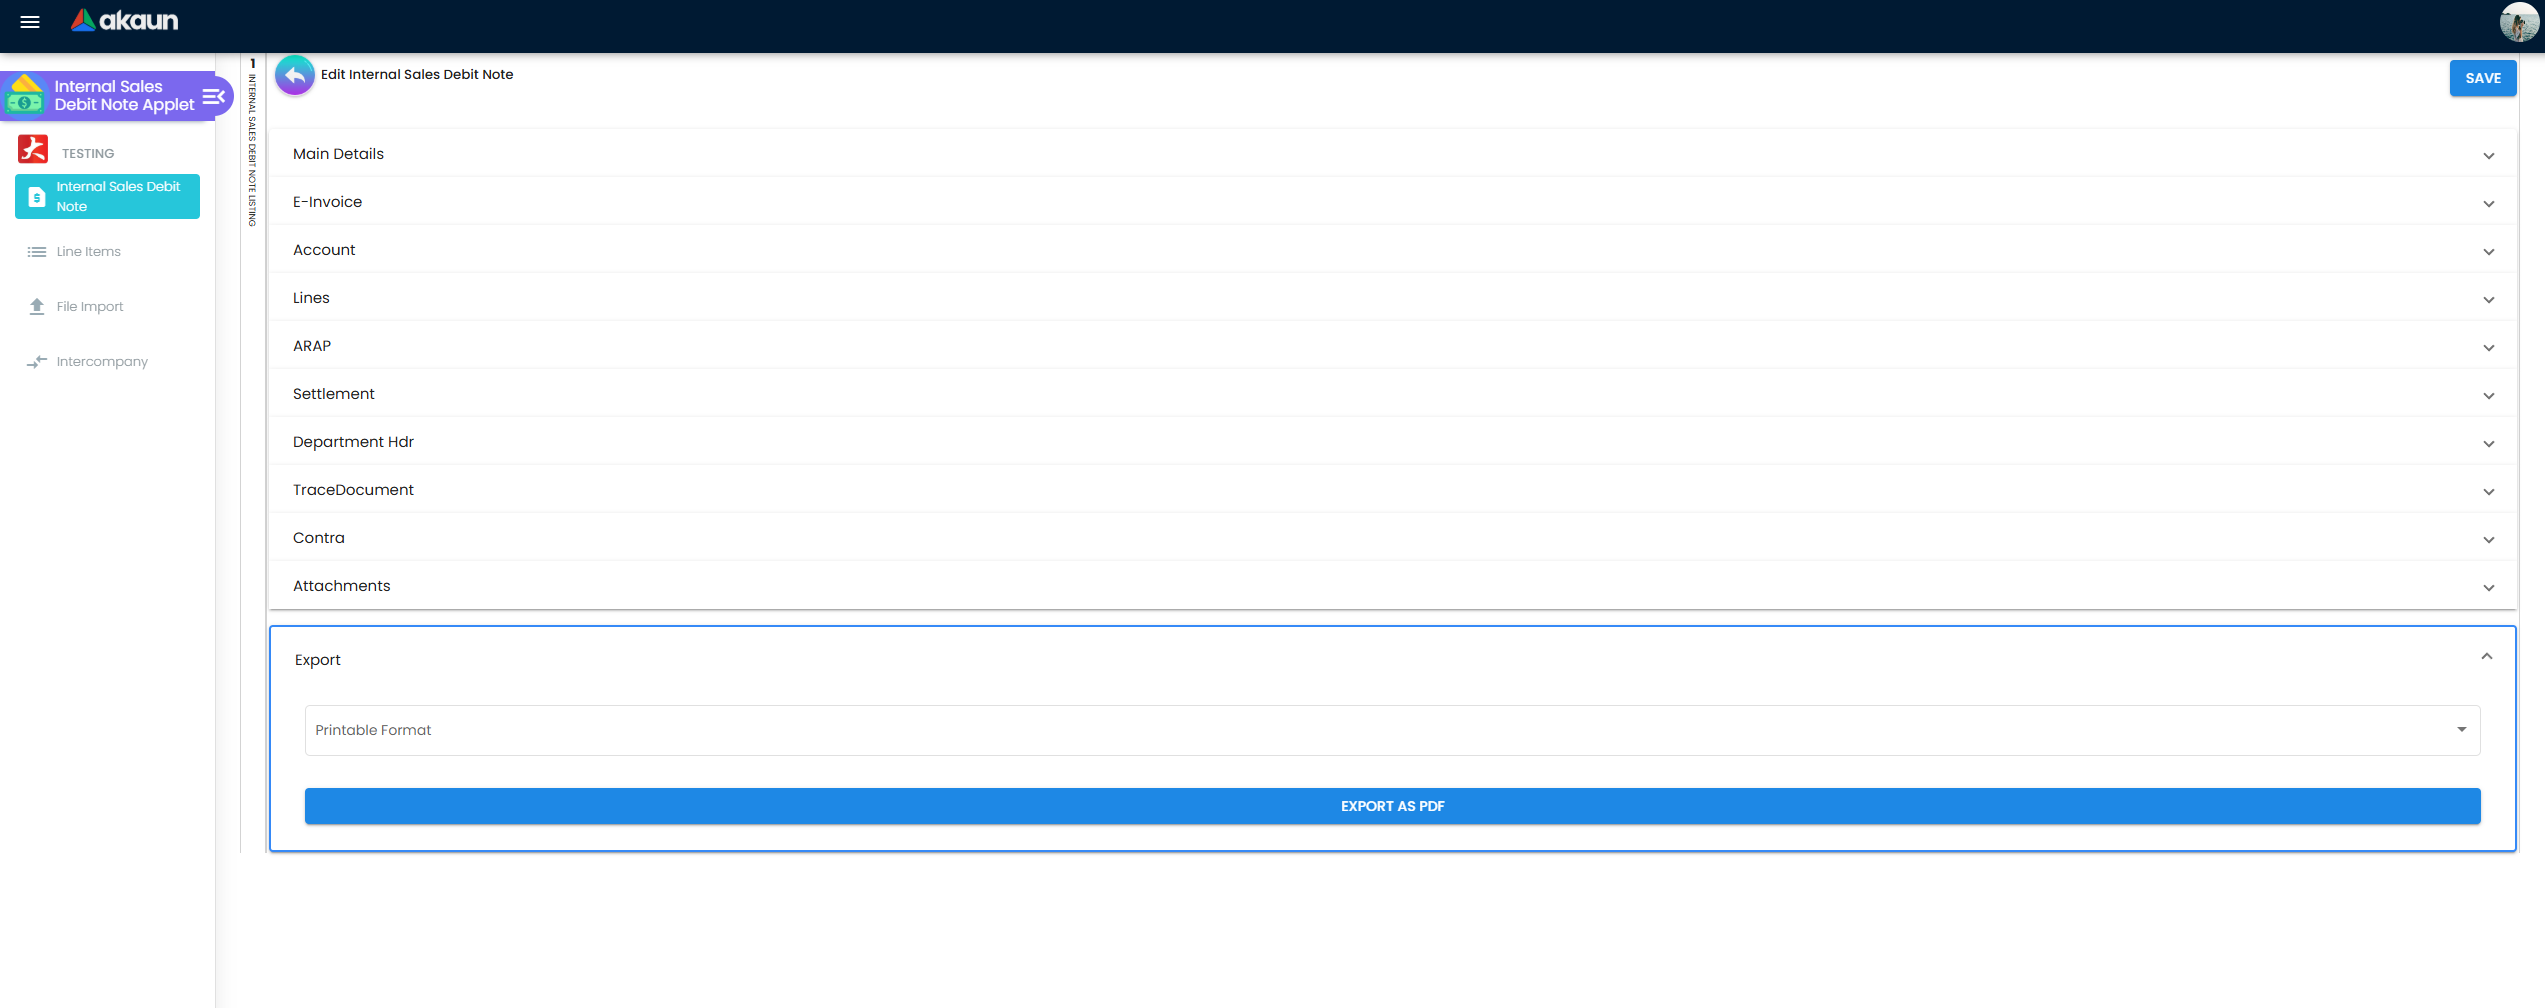
Document Tabs Overview
When creating or editing a debit note, the screen is organized into tabs. Here is a breakdown of what you do in each tab:
| Tab | What It Is For (In Simple Terms) |
|---|---|
| Main Details | The header. You pick the internal customer (e.g., Branch A) and state the basic details (date, currency, remarks). |
| Account | Where to send the bill. It has sub-tabs for Billing Address, Shipping Address, and the Intercompany Sync status. |
| Lines | The core of the debit note. This is where you actually add the “stuff” you are charging for (e.g., “Delivery Fee”, Qty: 1, Price: RM 200). It contains its own detailed sub-menus for things like Costing Details and Serial Numbers. |
| Settlement | How it’s being paid. For internal transactions, this is often left blank as it’s settled via contra, but if a specific intercompany payment method is used, it’s recorded here. |
| Department Hdr | The accounting tags. This is where you specify which exact internal department or project should receive credit for this revenue (e.g., tagging the “IT Support” cost center). |
| KO For (Knock-Off) | Linking against outstanding documents. If Branch A already owes you money from 5 different invoices, you can link (“knock-off”) this debit note against those specific balances to clean up the ledgers. |
| Contra | Offsetting balances. If you owe Branch A RM 500, and they owe you RM 500, you can “Contra” (cancel out) the debts against each other so no actual cash needs to transfer. |
| ARAP | A dashboard showing the current Accounts Receivable / Accounts Payable balances between the branches. A snapshot of “Who owes Who.” It shows exactly how much money the destination branch still owes you, and how much you might owe them at this moment. |
| Attachments | Upload supporting proof (PDFs, images) like the original purchase order or email correspondence. |
| Trace Document | A visual map showing how this document is connected to others (e.g., seeing the exact Internal Purchase document that was auto-generated at the destination branch). |
| E-Invoice | For tax compliance (if enabled for your region). This tab tracks the status of submitting the invoice to the government tax authority (e.g., LHDN in Malaysia). It shows if the submission was successful or if the government rejected it. |
| Export | Generate a printable PDF of the Debit Note. |
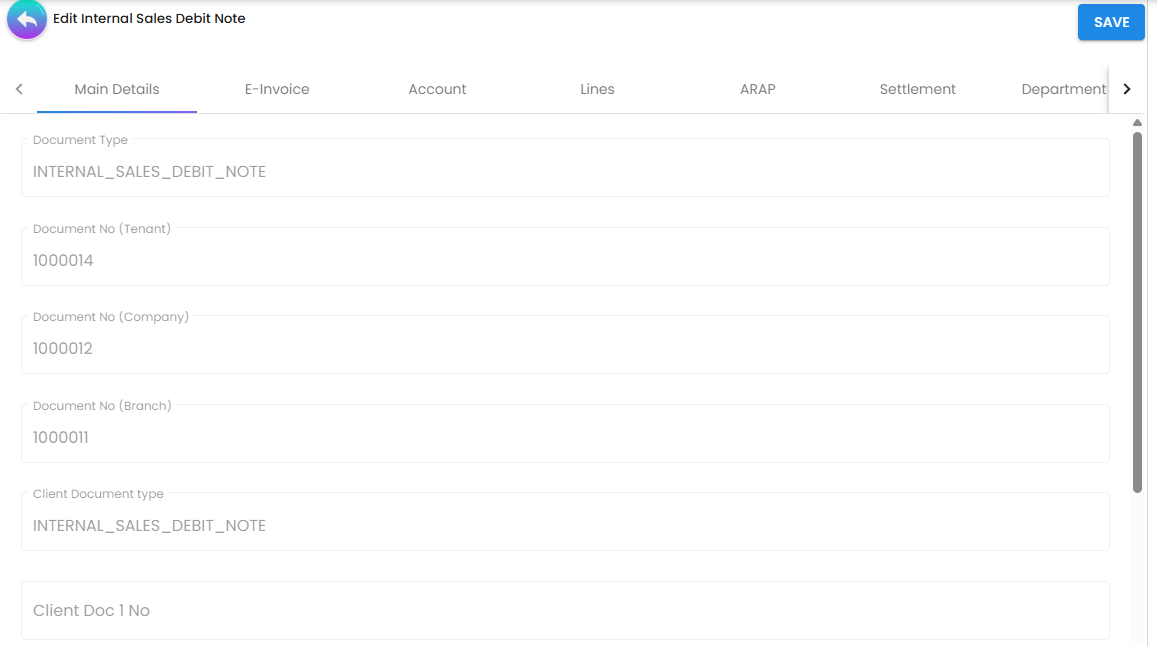
Deep Dive: Main Details Tab

This tab captures the fundamental information about the debit note. Beyond standard dates and currencies, it includes important tracking fields:
- Tracking ID & Client Documents (1-5): These optional fields are used to input reference numbers from external systems. For example, if you are issuing a debit note for extra freight costs, you would put the logistics provider’s tracking number in the “Tracking ID” field. If your branch uses a separate third-party system to generate repair requests, you would put that system’s ID into “Client Doc 1 No.” This cross-references the ERP internal debit note with outside physical shipments or external software.
- Debit Terms & Due Date: You select the agreed-upon payment terms (e.g., Net 30). The system will then automatically calculate and lock in the “Due Date.”
- Currency & Rates: Defines the transaction currency. If it differs from the Base Currency, the system integrates with a Forex data source to calculate the exact Exchange Rate at the time of the transaction.
Deep Dive: E-Invoice Tab
If the E-Invoice feature is enabled (e.g., for LHDN compliance in Malaysia), this tab manages the automated tax authority submission process. The form is broken down into several key sections:
1. Submission Details (Top Section) This section deals with how the document is sent to the tax authority.
- Submission Type: Determines how the tax authority analyzes the document.
- INDIVIDUAL: The most common setting for Business-to-Business (B2B) transactions. It submits this specific debit note directly to the tax authority as a standalone document. Note: You must have a complete Account and Billing Address selected first.
- CONSOLIDATED: Used when grouping many smaller transactions into a single aggregated submission for the tax authority (typically used for high-volume B2C retail where buyers don’t require their own individual tax invoice).
- SINGLE-GENERAL: A specific general submission format, used for distinct retail or standardized billing scenarios that don’t fit the individualized model. Note: You must have a complete Account and Billing Address selected first.
- Submission Type 2: An additional, optional clarification field sometimes required by specific tax authority regulations depending on the nature of the transaction.
- Skip E-Invoice Toggle: Can be used to explicitly exclude this document from government reporting (e.g., for certain purely internal adjustments that are exempt from tax reporting).
2. Tracking & Reference Fields (Auto-Populated)
Most fields in this section are locked (readonly) because they are strictly controlled by the system or rely on the government’s response.
- Document No & Document Type: Auto-filled based on the ERP system’s internal tracking (e.g.,
INTERNAL_SALES_DEBIT_NOTE). - Document Date: The date the transaction occurred, auto-filled from the “Main Details” tab.
- E-invoice Number & UUID (Universally Unique Identifier): These fields will start empty. When you successfully submit the E-Invoice, the government tax authority will generate an official UUID and an official E-Invoice Number. The system will automatically save them here as proof of registration.
3. Original E-Invoice Links (Crucial for Debit Notes)
- Original E-invoice Ref No & Ref UUID: Because a Debit Note adjusts a previous invoice, the tax authority strictly requires you to link this new adjustment back to the exact invoice it modifies. Clicking the arrow
>next to “Original E-invoice Ref No” allows you to search for and select the original finalized invoice, which will automatically fill in the UUID.
4. Billing Period (Middle Section) If this debit note is related to a recurring service or a specific block of time (like rent or subscription fees), you define the timeframe here.
- E-Invoice Billing Frequency: How often the billing occurs (e.g., Monthly, Annually, or Not Applicable).
- Billing Period Start / End Date: The specific date range the extra charge covers. This ensures the tax authority maps the revenue to the correct duration.
5. Buyer’s Info (Bottom Section) This section contains the tax identity of the destination branch.
- Buyer Info & Address: Automatically populated from the “Account” tab’s billing address. However, these fields can be manually overridden here specifically for the tax submission if the billing address differs from the official registered tax address.
- Tax Identifiers: Important fields like the Buyer’s ID No, Tax ID, and SST ID are verified here. The submission to the government will fail if these are incorrect.
- Validation URL: Once successfully submitted to and approved by the government tax authority, an official QR code and URL are generated at the very bottom of the page to prove the document’s legal validity.
Deep Dive: Account Tab
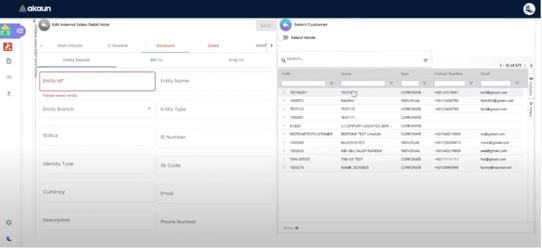
While most of this tab contains standard business information (who the internal customer is, and where to bill/ship), it contains one crucial sub-tab that powers this applet’s main feature:
- Entity Details, Bill To, Ship To: Standard fields to select the destination branch, and verify their exact Billing and Shipping addresses.
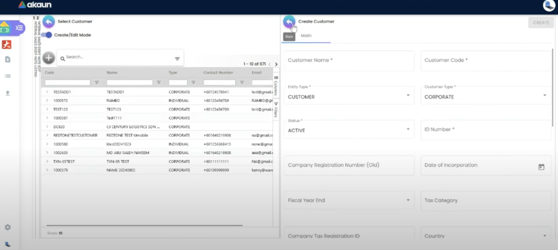
- Quick Create: If the customer you need is not available in the list, you don’t need to abruptly halt your workflow or open a separate customer management app. Simply toggle the switch at the top to Create and Edit mode, fill in the new customer details, and the system saves it instantly. Once created or if they already existed, use Select mode to pick them from the list.
- Intercompany Sub-Tab: This is the core engine of the applet. When you finalize this debit note, this sub-tab acts as a live monitor for the intercompany sync. It displays the Transaction Status and tracks the generation of the exact Purchase Debit Note (Internal) sent to the destination branch’s system. If there are any errors or delays in the sync between branches, the status is tracked here.
Deep Dive: Lines Tab
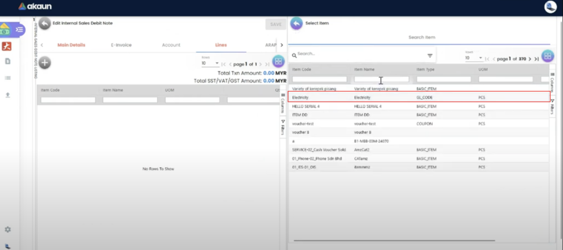
This is where you specify the exact charges. While adding internal items is standard, there are a few unique features available when you edit a line item:
- Costing & Pricing Details: You can view the exact cost metrics and markup for the item being billed to the destination branch.
- Delivery Details (From & To): A sub-tab to manage shipment-specific information including trip number, driver, vehicle details, job start/end dates, delivery status, recipient name, and quantities.
- Serial Number (Scan & Import): Two sub-tabs are available if the debit note involves moving tracked physical inventory. You can either manually “Scan” to add serials or “Import” a file to bulk-upload tracked serials and batches.
- Issue Link: A unique sub-tab that allows you to link this specific line item charge to an external ticketing system (like a Jira ticket or internal helpdesk issue) for traceability.
Deep Dive: Settlement Tab
How do you actually record a payment for an internal debit note? Often, internal transactions are left as “outstanding” so they can be bundled and handled via “Contra” later. However, if a branch settles the charge immediately:
- Navigate to the Settlement tab and click ADD.
- Select a Settlement Method (e.g., Cash, Points/Rebate Points, or Corporate Credit Card).
- Fill in the specific details. For credit cards, it supports standard entries like Card Type (VISA/MASTERCARD) and Card Expiry. For points, it displays the point currency conversion rate.
- Enter the exact monetary amount settled and any remarks.
Deep Dive: Department Hdr Tab
This tab is designed for extremely precise internal reporting. If HQ charges Branch A for something, you might want to know exactly which team in Branch A caused the charge. Instead of just billing the “General Branch,” it allows you to tag four specific accounting dimensions:
- Segment / G/L Dimension: Typically used to categorize revenue by broader business streams or legal entities (e.g., tagging this charge specifically to the ‘Retail Division’ vs ‘Wholesale Division’).
- Profit Centre: Allows you to attribute the transaction to a specific department (e.g., if you are charging Branch A for an IT software license, you can tag Branch A’s specific “IT Helpdesk” profit center so their budget takes the hit, not Branch A’s general fund).
- Project: If the debit note is related to a specific internal initiative (e.g., “Warehouse Relocation 2024”), you can link the cost directly to that project’s budget.
KO For (Knock-Off For) This tab also provides dedicated sub-tabs designed to organize and link related sales documents:
- Delivery Order: Lists delivery documents linked to the transaction for quick search.
- Job Sheet: Shows job-related documents easily locatable via branch and customer.
- Sales Order: Efficiently links directly to upstream sales order records.
Deep Dive: Contra Tab
The core concept: Why transfer real money back and forth between bank accounts if you can just call it even? The Contra tab is where you resolve debts without actually transferring cash.
Scenario: Let’s say HQ owes Branch A RM 1,000 for a previous shipment. Today, HQ issues this new Sales Debit Note (Internal), charging Branch A RM 500 for a marketing campaign. Instead of Branch A wiring RM 500 back to HQ (which is a waste of time and bank fees), HQ can use the Contra tab on this Debit Note. HQ selects the old RM 1,000 debt they owe and “knocks off” the RM 500 charge against it. The Result: The RM 500 marketing charge is considered fully paid, and HQ’s outstanding debt to Branch A is reduced to RM 500. No cash actually moved!
- How it works: When you create a Contra entry, the system automatically checks the AR/AP (who owes who) balances of both documents.
- Contra Amount & Dates: It calculates the exact amount of debt to be canceled out. Depending on your system settings, you can edit the specific Transaction Date of the contra to make sure it aligns with your monthly financial closings.
- Reversals: If a mistake is made, you can easily delete a finalized Contra entry using the “DELETE” button (which requires double-confirmation), automatically restoring the outstanding balances to both ledgers.
Deep Dive: ARAP Tab
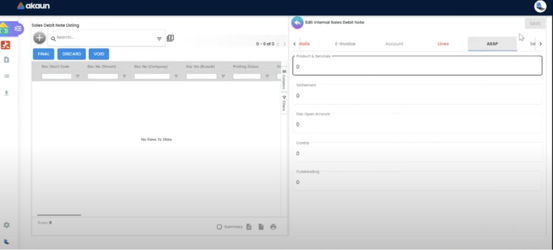
You can think of the ARAP (Accounts Receivable / Accounts Payable) tab as a Read-Only Financial Dashboard. It is not a status bar for the whole company; rather, it’s a specific summary of this exact document. It shows five locked fields:
- Product & Services: The total monetary value of all the line items you added.
- Settlement: How much of this document has already been paid for (via the Settlement tab).
- Doc Open Amount: The invoice value minus any initial settlements.
- Contra: How much of this debt was canceled out by offsetting it against another existing intercompany document.
- Outstanding: The final, real-time remaining balance that the destination branch still owes on this specific debit note.
Deep Dive: Trace Document Tab
Because this applet relies heavily on automation, the Trace Document tab exists to show you exactly what the system is doing behind the scenes once you finalize a debit note. It acts as an automated audit trail.
Instead of guessing if the transaction went through over to the other branch, this tab provides a visual map showing:
- Upstream Documents: The original Sales Invoice (Internal) that prompted this Debit Note in the first place.
- Downstream Documents: The exact Purchase Debit Note (Internal) that the system automatically generated and pushed into the destination branch’s system. The system even links the document ID here so you can trace it directly.
- General Ledger (GL) Postings: For the accountants, it breaks down the exact bookkeeping journal entries across five specific sub-tabs:
- Journal Txn: The core double-entry accounting (Debits and Credits) hitting your main Accounts Receivable and Revenue ledgers.
- Cashbook Txn: If any immediate payment was made via the “Settlement” tab, it shows exactly how that cash hit your bank ledger.
- Points Txn: If the settlement involved redeeming loyalty points or rebates, the point deduction is tracked here.
- Tax Txn: Shows strictly the tax portion (e.g., SST or VAT) separated out for government reporting.
- Inv Txn (Inventory): If this debit note involved returning or moving physical stock, it tracks the exact value of the inventory entering or leaving the warehouse.
Deep Dive: Attachments Tab
This tab acts exactly as your permanent filing cabinet for Proof. Because issuing a debit note means you are legally charging another branch extra money, auditors will want to see why. You use this tab to upload the “receipts”—such as PDF email approvals from the Branch Manager, scanned delivery invoices proving an extra charge, or screenshots of internal chat logs explicitly authorizing the difference.
Deep Dive: Export Tab
The Export tab provides options to reprint or save the active document. First, select the desired printable format from the dropdown menu (configured by your administrator). Once chosen, export the document as a PDF file by clicking Export as PDF. This serves as a formal printable representation for record-keeping or physical sign-offs.
Configuration & Settings
Fine-tune the applet behavior to match your organizational processes. Access all settings from the Settings menu in the sidebar. These application-wide options are controlled by admins and affect all users.
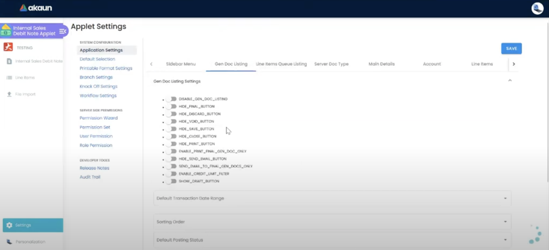
Applet Settings (Settings > Applet Settings)
Admins can choose which tabs to show or hide in the applet interface, helping to streamline the user experience by completely removing unused sections.
Common controls include:
- Show or hide document tabs and optional sections.
- Show or hide posting buttons such as FINAL, DISCARD, VOID, and SAVE.
- Show or hide listing controls such as File Import and SEND EMAIL.
- Configure default document orientation behavior through settings such as
DEFAULT_ORIENTATIONandVERTICAL_ORIENTATION.
Orientation and Panel Mode
The applet supports two presentation styles for document and file-import detail screens:
Horizontal mode displays major sections as tabs across the top of the working area.
Vertical mode displays the same sections as stacked expansion panels.
| Mode | What Users See | When It Helps |
|---|---|---|
| Horizontal / Tab mode | Sections appear as tabs across the top. | Best for wide screens and users who prefer jumping between tabs. |
| Vertical / Panel mode | Sections appear as stacked expansion panels. | Best for long forms, smaller screens, or users who prefer scrolling through sections in order. |
Admins can set the default orientation globally, while user/personal defaults can also control whether the applet opens in a single-column or multi-column working layout. In File Import, the same orientation logic affects the Main and Checking sections as well as the Checking subviews (Error and All).
Branch Settings (Settings > Branch Settings)
Configure branch-specific behaviors:
- Map internal customers and suppliers per branch
- Set default GL accounts for intercompany transactions
- Configure default settlement method, item category filters, pricing schemes, default printable format, and branch-specific printable images
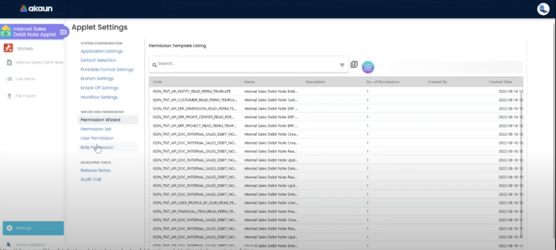
Permission Management
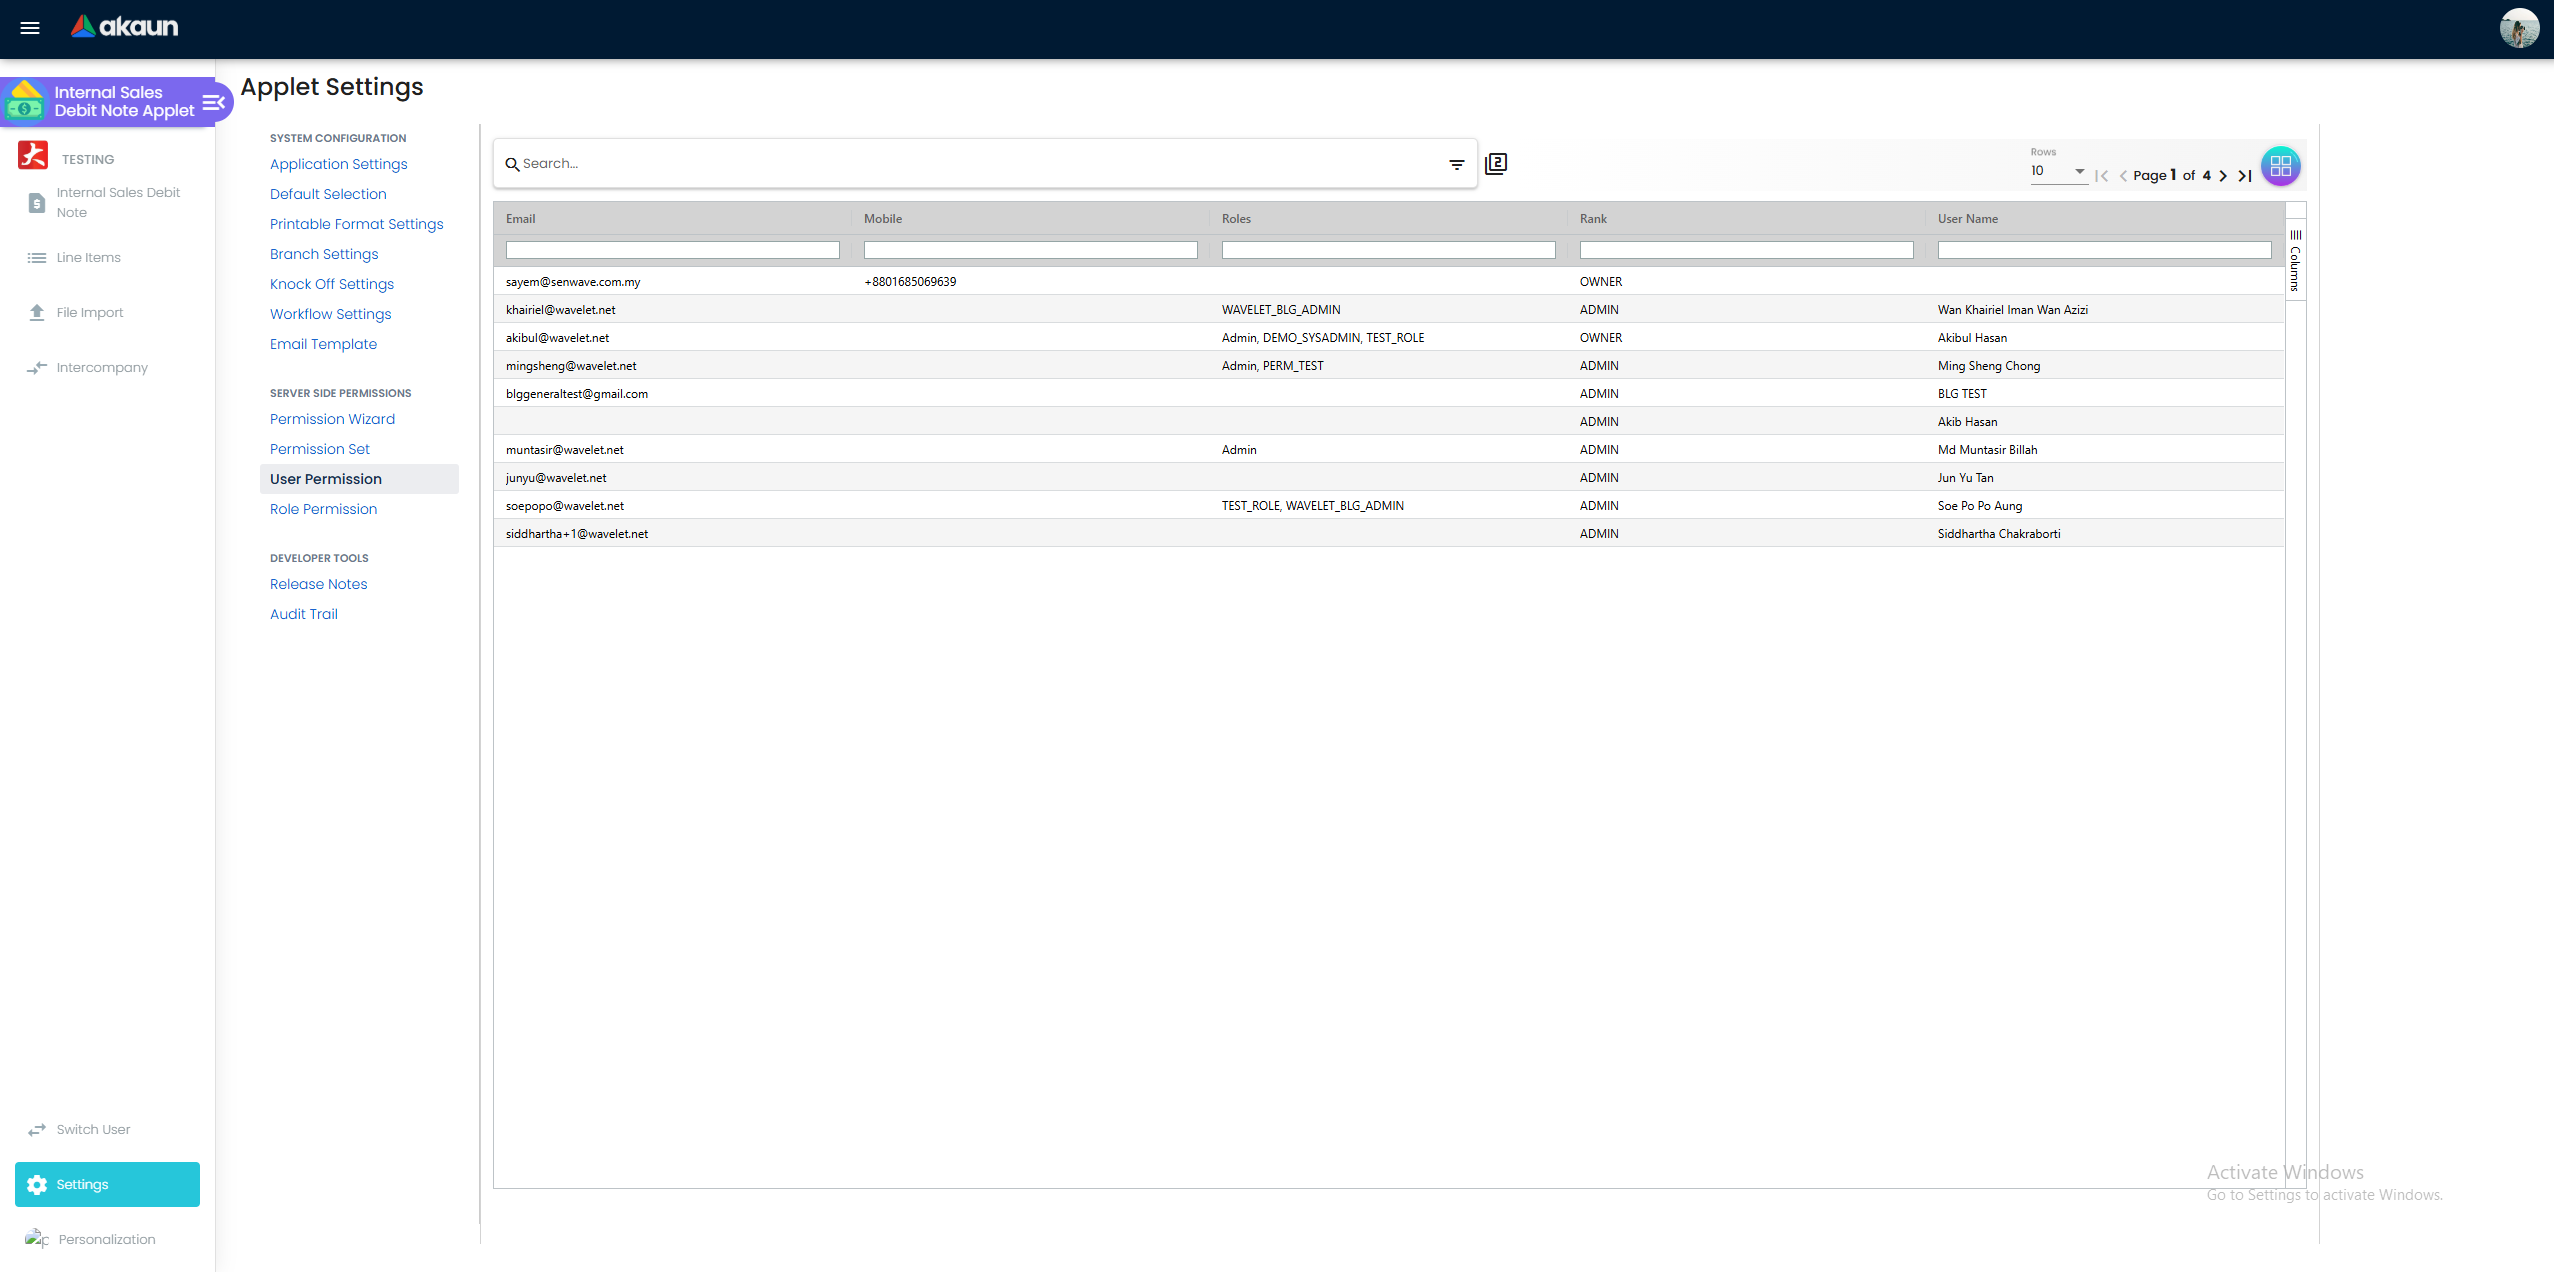
This applet uses the shared permission management system, not just a single branch setting. Admins can grant access by user, role, team, or predefined permission set.
| Permission Tool | What It Is For |
|---|---|
| Permission Wizard | Guided setup for granting common applet permissions without manually selecting every permission code. |
| Permission Sets | Reusable bundles of permissions, such as “Sales Debit Note Clerk” or “Finance Approver”. |
| Client-Side Permission Sets | Controls UI-level visibility such as showing File Import, FINAL, DISCARD, VOID, or other buttons. |
| User Permissions | Grants permissions directly to a specific user. Use this for exceptions or one-off access. |
| Role Permissions | Grants permissions to everyone assigned to a role. Use this for standard operational access. |
| Team Permissions | Grants permissions to members of a team where the tenant uses team-based access control. |
How admins typically grant access
- Create or choose a Permission Set that matches the job function.
- Assign that set through Role Permissions for normal users, or User Permissions for exceptions.
- Confirm client-side permissions for visible features such as SHOW_FILE_IMPORT_MENU, SHOW_GENDOC_FINAL_BUTTON, SHOW_GENDOC_DISCARD_BUTTON, and SHOW_GENDOC_VOID_BUTTON.
- Test with a non-admin account to confirm the sidebar menu, listing toolbar, and edit-screen buttons match the intended access.
Workflow Settings (Settings > Workflow Settings)
Control the approval flow:
- Multi-Level Approvals: Define sequential approval chains (e.g., Branch Manager → Regional Controller → Finance)
- Threshold-Based Routing: Auto-approve documents below a certain amount; require additional approvers above it
- Role-Based Access: Restrict who can create, edit, finalize, or void documents
Default Settings (Settings > Default Settings)
Set system-wide defaults:
- Default currency for new documents
- Running number format and sequence
- Default document date behavior
Field Configuration (Settings > Field Configuration)
Control field visibility and validation:
- Make specific fields mandatory or optional
- Hide unused fields to simplify the creation form
- Configure field-level validation rules
Knock-Off Settings (Settings > Knock-Off Settings)
Define knock-off behavior:
- Rules for matching debit notes against outstanding internal documents
- Auto-knock-off thresholds and tolerance settings
Printable Format Settings (Settings > Printable Format Settings)
Customize PDF exports:
- Company logo and branding
- Header/footer text
- Which fields to display on printed output
- Page size and orientation
Email Template (Settings > Email Template)
Create and manage the email templates that populate the SEND EMAIL dropdown on the Listing. Templates here are applet-local: a template you create in this applet does not appear in any other applet’s SEND EMAIL list, and the Email Template listing in other applets will look empty unless someone has set up templates there separately.
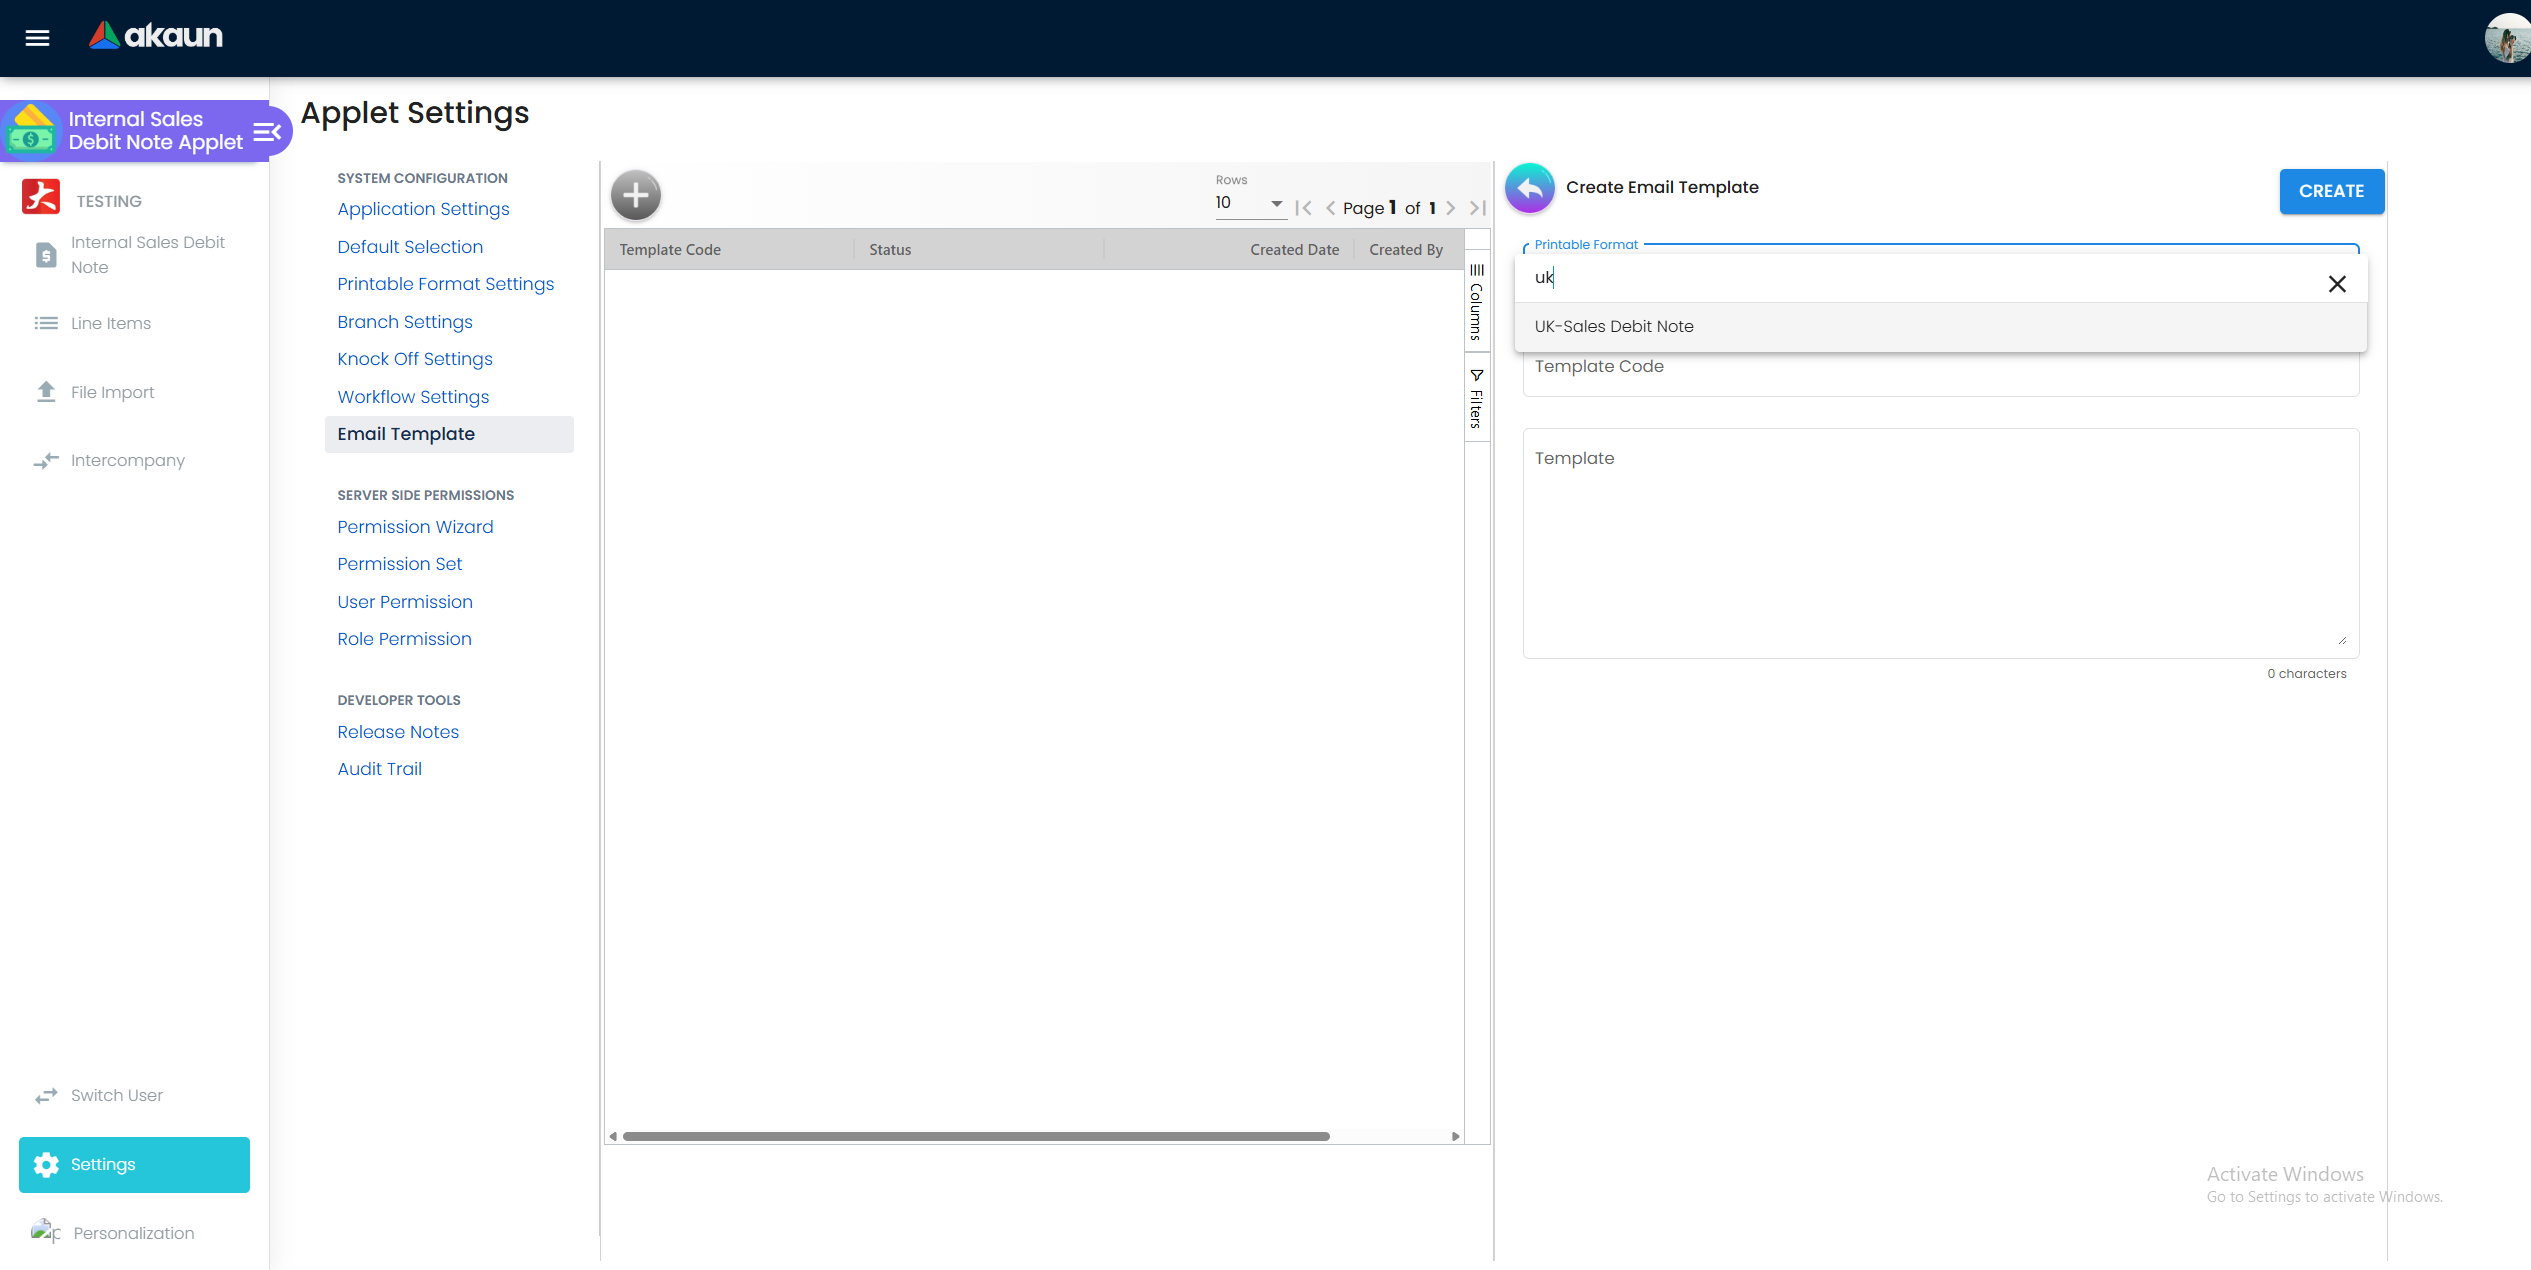
How to create a new template
Open Settings > Email Template.
| Field | What it controls | How to fill it in |
|---|---|---|
| Printable Format | Which Printable Format PDF gets attached to every email that uses this template. | Pick from the dropdown. The entries come from Settings > Printable Format Settings. If the dropdown is empty, set up at least one Printable Format first. |
| Template Code | Two things at once: (a) the label that shows in the SEND EMAIL dropdown on the Listing, and (b) the subject line of the email. | Use a short, descriptive code such as Debit Note Notice or Monthly Charge Reminder. |
| Template / Description | The body of the email. | Write the plain text message the recipient will read. |
The template is saved and immediately becomes available in the SEND EMAIL dropdown the next time the Listing is loaded.
Tips and gotchas
- The Template Code doubles as the email subject. Do not use internal-only codes like
EMAIL_TPL_01unless that is what recipients should see. - The Printable Format is mandatory for the email to send a usable PDF. Pick one before saving, or the SEND EMAIL action may fail with a missing-format error.
- A template you create here will not appear in Purchase Debit Note, Sales Invoice, or any other applet. Each applet’s SEND EMAIL pulls from its own list.
- If a template you expect to see is missing from the SEND EMAIL dropdown, check that it has status ACTIVE on this listing.
Audit Trail
Applet Log (Settings > Applet Log)
The Applet Log records every action taken within the applet—creates, updates, finalizations, voids, and more. This is your go-to tool for compliance, troubleshooting, and investigations.
What You Can See:
| Column | Description | Example |
|---|---|---|
| Table Name | Which data was affected | sales_debit_note_hdr, sales_debit_note_dtl |
| Action | Type of action | CREATE, UPDATE, FINAL, VOID |
| Action Date | When it occurred | 2024-03-15 10:30 AM |
| Action By | Who performed it | john.tan@company.com |
| Description | What changed | “Status changed from DRAFT to FINAL” |
Common Use Cases:
- Investigating a disputed adjustment: Filter by document number to see full history
- Month-end audit prep: Export all FINAL actions for the period
- Tracking who voided a document: Filter by Action = VOID for a specific date range
Export & Print
Use the Export tab on any document to generate PDF output using your configured printable format. Useful for:
- Sending formal debit note copies to the destination branch
- Archiving finalized documents for audit
- Printing physical copies for filing
Personalization
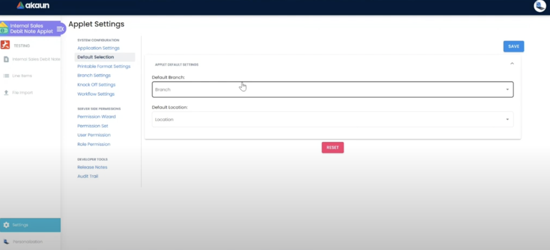
Personalization allows individual users to customize certain settings to fit their personal preferences, overriding the default application-wide configurations set by admins. For example, User A might set Branch A as their personal default location, while User B selects Branch B, tailoring the application to their individual role.
Personal Default Settings
Save your frequently used defaults to speed up document creation:
- Default branch and currency
- Default cost center and department
- Preferred listing filters and sort order
Access via Personalization > Personal Default Settings in the sidebar.
File Imports
The File Import page lets users create many Sales Debit Note rows by uploading a CSV file. It is useful for month-end adjustments, recurring internal charges, or cleanup exercises where entering each debit note manually would be slow and error-prone.
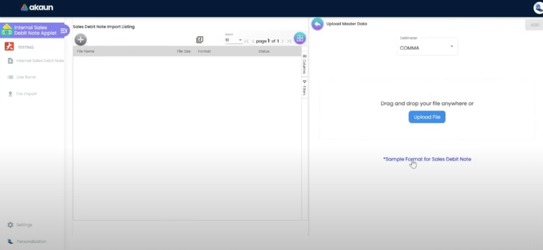
The end-to-end flow
- Open File Import from the sidebar.
- Choose the Delimiter that matches the file: COMMA or PIPE.
- Click Sample Format for Sales Debit Note. The applet opens a field picker and exports
MasterData_Upload_SalesDebitNote.csv. - Keep the required columns and add any optional fields needed for your business scenario.
- Fill in the CSV and save it.
- Drag the file into the upload area, or click Upload File and choose the CSV.
- Click ADD to upload and process the file.
- Open the created import record and review the Checking section before relying on the imported data.
CSV format reference
The sample format is configurable because the applet lets users choose optional columns. The required columns are:
- BRANCH_CODE: Branch that owns the document.
- LOCATION_CODE: Location used for the transaction.
- DOC_CURRENCY: Document currency.
- TXN_DATE: Transaction date.
- HDR_REF_NO: Header reference number.
- QTY: Quantity for the line.
- SETTLEMENT_OR_ITEM_CODE: Item or settlement method code used on the line.
- AMOUNT_INCL_TAX: Amount including tax.
Optional columns are grouped by business area:
| Area | Typical Columns |
|---|---|
| Sales and terms | SALES_AGENT, CREDIT_TERMS, CREDIT_LIMIT, HDR_DESCRIPTION, HDR_REMARKS, TRACKING_ID |
| Entity | ENTITY_CODE, ENTITY_NAME, ENTITY_TYPE, ENTITY_ARAP_TYPE, ENTITY_ID_NO, ENTITY_ID_TYPE, ENTITY_EMAIL, ENTITY_PHONE, ENTITY_UPSERT |
| Billing address | BILLING_NAME, BILLING_EMAIL, BILLING_PHONE, BILLING_ADDRESS_LINE_1 to BILLING_ADDRESS_LINE_5, BILLING_COUNTRY, BILLING_STATE, BILLING_CITY, BILLING_POSTCODE |
| Shipping address | SHIPPING_NAME, SHIPPING_EMAIL, SHIPPING_PHONE, SHIPPING_ADDRESS_LINE_1 to SHIPPING_ADDRESS_LINE_5, SHIPPING_COUNTRY, SHIPPING_STATE, SHIPPING_CITY, SHIPPING_POSTCODE |
| Line item | ITEM_NAME, ITEM_DESCRIPTION, LINE_ITEM_NAME, LINE_ITEM_REMARKS, ITEM_TXN_TYPE, ITEM_TXN_CLASS, ITEM_REF_NO, UOM, UNIT_PRICE_INCL_TAX, DISCOUNT_AMOUNT |
| Tax | TAX_CODE, TAX_AMOUNT, EINVOICE_ITEM_CLASSIFICATION_CODE, EINVOICE_ITEM_TAX_TYPE_CODE, EINVOICE_ITEM_UOM |
| Serial / batch tracking | ITEM_SERIAL_NO, ITEM_BATCH_NO, ITEM_TRACKING_ID |
| Posting and GL | POSTING_STATUS, GL_CODE, SEGMENT_CODE, GL_DIMENSION_CODE, PROFIT_CENTRE_CODE, PROJECT_CODE |
| E-Invoice buyer data | EINVOICE_SUBMISSION_TYPE, EINVOICE_BUYER_TIN_NO, EINVOICE_BUYER_ENTITY_ID_TYPE, EINVOICE_BUYER_ID_NO, EINVOICE_BUYER_SST_NO, EINVOICE_BUYER_NAME, EINVOICE_BUYER_EMAIL, EINVOICE_BUYER_PHONE, EINVOICE_BILLING_FREQUENCY, EINVOICE_BILLING_PERIOD_START, EINVOICE_BILLING_PERIOD_END |
| Client references | CLIENT_DOC_TYPE, CLIENT_DOC_1, CLIENT_DOC_2, CLIENT_DOC_3, CLIENT_DOC_4, CLIENT_DOC_5 |
POSTING_STATUS carefully. For normal imports, use DRAFT so users can review before posting. If your workflow allows direct posting, FINAL may be used, but that makes the import a posting action.The Checking section
After upload, open the import record and go to Checking. This area has two views:
| View | What It Shows | How To Use It |
|---|---|---|
| Error | Rows that failed validation. | Start here. Fix missing masters, invalid values, or malformed data before proceeding. |
| All | Every parsed CSV row, including both valid and invalid rows. | Use this to audit what the importer read from the file and compare it against the source CSV. |
Depending on orientation settings, Error and All appear either as tabs or as vertical expansion panels.
The Checking grid includes a Validation Error column plus field-specific error columns such as Branch Validation Error, Location Validation Error, Transaction Date Validation Error, Entity Validation Error, Quantity Validation Error, Posting Status Error, Amount Validation Error, Txn GST Validation Error, Txn WHT Validation Error, and Item Serial Number Validation Error.
Common validation problems include:
- Branch / Location / Entity / Item code not found: The code in the CSV does not exist in the relevant master data.
- Amount or Unit Price invalid: The value is blank, non-numeric, or not accepted by the importer.
- Posting Status Error: The value is not a valid status such as
DRAFT,FINAL,VOID, orDISCARDED. - Tax code not found: The tax code does not exist in the tax master.
- Serial or batch validation error: Serial, batch, or tracking values do not match the item tracking requirements.
File Import permissions
The File Import menu can be controlled by both applet settings and client-side permissions. If a user cannot see it, check whether HIDE_FILE_IMPORT_MENU is enabled and whether the user has the SHOW_FILE_IMPORT_MENU client-side permission.
FAQ
Q: Does finalizing an Sales Debit Note (Internal) immediately affect the General Ledger?
A: Yes. When you click FINAL, GL entries are posted immediately—increasing your branch’s receivable and, via intercompany sync, increasing the destination branch’s payable.
Q: Can I edit a debit note after finalizing it?
A: No. Once finalized, the document is locked because GL postings have been made. If you need to make corrections, void the document and create a new one, or issue an Internal Sales Credit Note to offset it.
Q: What is the difference between DISCARD and VOID?
A: DISCARD is for drafts that should never be posted. It has no GL impact. VOID is for finalized documents and posts reversal entries. Use DISCARD before finalization and VOID after finalization.
Q: What if I need to void a finalized debit note?
A: Click the VOID button on the edit screen (if you have permission). The system will post reversal GL entries and void the corresponding intercompany purchase debit note at the destination branch.
Q: Does the destination branch need to manually accept the auto-generated purchase debit note?
A: This depends on your intercompany configuration. It can be set to auto-finalize at the destination branch, or to arrive as a Draft requiring their finance team’s acknowledgment.
Q: Where can I find the corresponding Purchase Debit Note (Internal) created at the destination branch?
A: Open your finalized Sales Debit Note (Internal) and check the Trace Document tab. It shows all linked upstream and downstream documents, including the auto-generated purchase debit note.
Q: Can I link one debit note to multiple original internal invoices?
A: Yes. Add multiple line items, each referencing a different original Sales Invoice (Internal). This consolidates adjustments into a single document.
Q: How do I email selected Sales Debit Notes?
A: From the Listing, select one or more rows, choose an Email Template, choose Billing and Shipping Email, Billing Email Only, or Shipping Email Only, add optional CC recipients, and click SEND EMAIL. The applet validates that the required recipient email exists on each selected document.
Q: Why can’t I see File Import, SEND EMAIL, FINAL, DISCARD, or VOID?
A: These features can be hidden by applet settings and by client-side permissions. Ask an admin to check the relevant hide/show setting and your user, role, team, or permission-set assignment.
Q: How do I bulk-create debit notes or line items?
A: Use File Import. Download Sample Format for Sales Debit Note, choose the correct delimiter, fill in the required columns, upload the CSV, then review the Checking > Error and Checking > All views before proceeding.
Q: What does the “KO For” (Knock-Off) tab do?
A: It allows you to import and link outstanding documents to be knocked off against this debit note—useful for netting internal balances between branches.
Related Applets to Sales Debit Note (Internal)
The Sales Debit Note (Internal) Applet does not work in isolation; it operates within a broader system ecosystem. Understanding its connection with related applets is vital for accurate financial reporting.
Doc Item Maintenance Applet

Purpose: Manages the creation and editing of item codes used in various transactions.
Relation to Sales Debit Note: The items you select when creating a sales debit note (such as specific charges or fees) must be pre-configured here.
- The item’s Type must be set to “Account Type,” which deliberately links it to a General Ledger (GL) code rather than a physical product in a warehouse.
- You assign this item to specific company branches via the Company Linking tab, ensuring the system recognizes which branches are allowed to use it.
- When a GL Code is matched to an item here, you guarantee correct accounting classification downward into your sales debit notes.
Chart of Account Applet
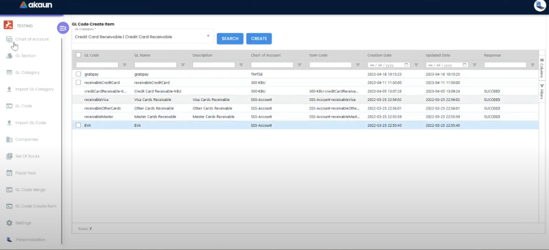
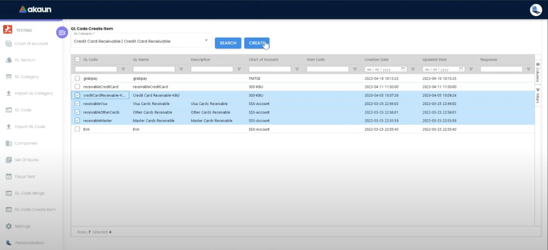
Purpose: The central applet for managing your organization’s financial accounts and GL codes.
Relation to Sales Debit Note: Before you can link an item in the Doc Item Maintenance applet, the underlying GL Code must physically exist. You create or verify these in the GL Code Create Item page.
Prerequisite Workflows:
- Create the GL Code (Chart of Accounts Applet)
- Create the Item & Link the GL Code (Doc Item Maintenance Applet)
- Use the Item (Sales Debit Note (Internal) Applet)
By ensuring these prerequisites are met, any Sales Debit Note (Internal) transaction you finalize will automatically and cleanly map revenue and expenses to the exact correct accounts.