Sales GRN (Internal)
Records, on paper, a customer returning goods from an internal sale (which items and quantities, with an optional settlement line) for when a signed acknowledgement of receipt is the whole requirement. It moves no stock, posts nothing to the ledger and never touches the cashbook, even with a settlement row: Sales Return puts the goods back and reverses the sale, and a credit note reduces what the customer owes. It cannot be voided.
Overview
Sales GRN (Internal) records a goods return note raised against an internal sale: which customer is returning, which items and quantities, and — where your process uses them — a settlement line and a contra link to the original document.
Before you plan anything around it, two facts decide whether this applet is the right place to spend your time.
It is a paper document, and nothing behind it moves. Its server document type is
INTERNAL_SALES_GOODS_RECEIVED_NOTE, whose quantity signum and amount signum are both 0, and the
type has no entry in the journal posting handler. Setting a GRN to FINAL changes its posting
status, stamps a finalisation timestamp, and moves nothing in stock or in the ledgers.
So if what you need is the goods back on the shelf and the sale reversed, this is the wrong document. Sales Return (Internal) does that on the selling side, and Purchase GRN on the buying side — those are the return workflows that carry stock and money. Reach for this one only where a signed acknowledgement of receipt is the entire requirement, and read What it will not do before you build a process on it. Whether the paper pair is still intended to ship is an open question for the product; this page describes what it does today and makes no recommendation either way.
Where it fits
| Document | What it does | |
|---|---|---|
| Upstream | Sales Invoice (Internal), Sales Order (Internal), Jobsheet (Internal) | The sale the return is raised against. Lines can be pulled from these — and from four purchase-side documents — on the Select Item panel. |
| This applet | Sales GRN (Internal) | Records the return on paper. No stock movement, no journal, no cashbook line. |
| Counterpart | Sales GIN (Internal) | The outbound twin, also 0/0, and likewise a paper document. |
| Where stock and money actually move | Sales Return (Internal), Sales Credit Note (Internal) | Sales Return brings goods back into stock and reverses the sale; the credit note reduces the receivable. |
The backend also defines INTERNAL_SALES_GRN_STOCK_IN (quantity signum +1, amount signum −1)
and INTERNAL_SALES_GIN_STOCK_OUT (quantity −1, amount +1) — the sales-side pair that would
move stock. The stock-out GIN has an applet of its own;
the stock-in GRN has none, and nothing in the product creates one automatically — no processor and no converter
— although its API route is registered. So the stock-moving twin of this document has never been released. That is the most plausible reason this paper document has no users:
without its stock-moving partner it cannot complete a return on its own.
Screens and menus
The applet’s left menu has three entries — there are no others:
| Menu item | Route | Worth knowing |
|---|---|---|
| Internal Sales GRN | internal-sales-grn | The listing and the create/edit panel. The whole listing behaviour is governed by one setting, DISABLE_GEN_DOC_LISTING. |
| Line Items | line-items | A cross-document listing of GRN lines with its own edit panel, so a line can be corrected without opening its document. |
| Audit Trail | audit-trail | The shared viewer. Every SAVE and every FINAL writes an old-data/new-data audit row from the backend, so this is where a disputed change is settled. |
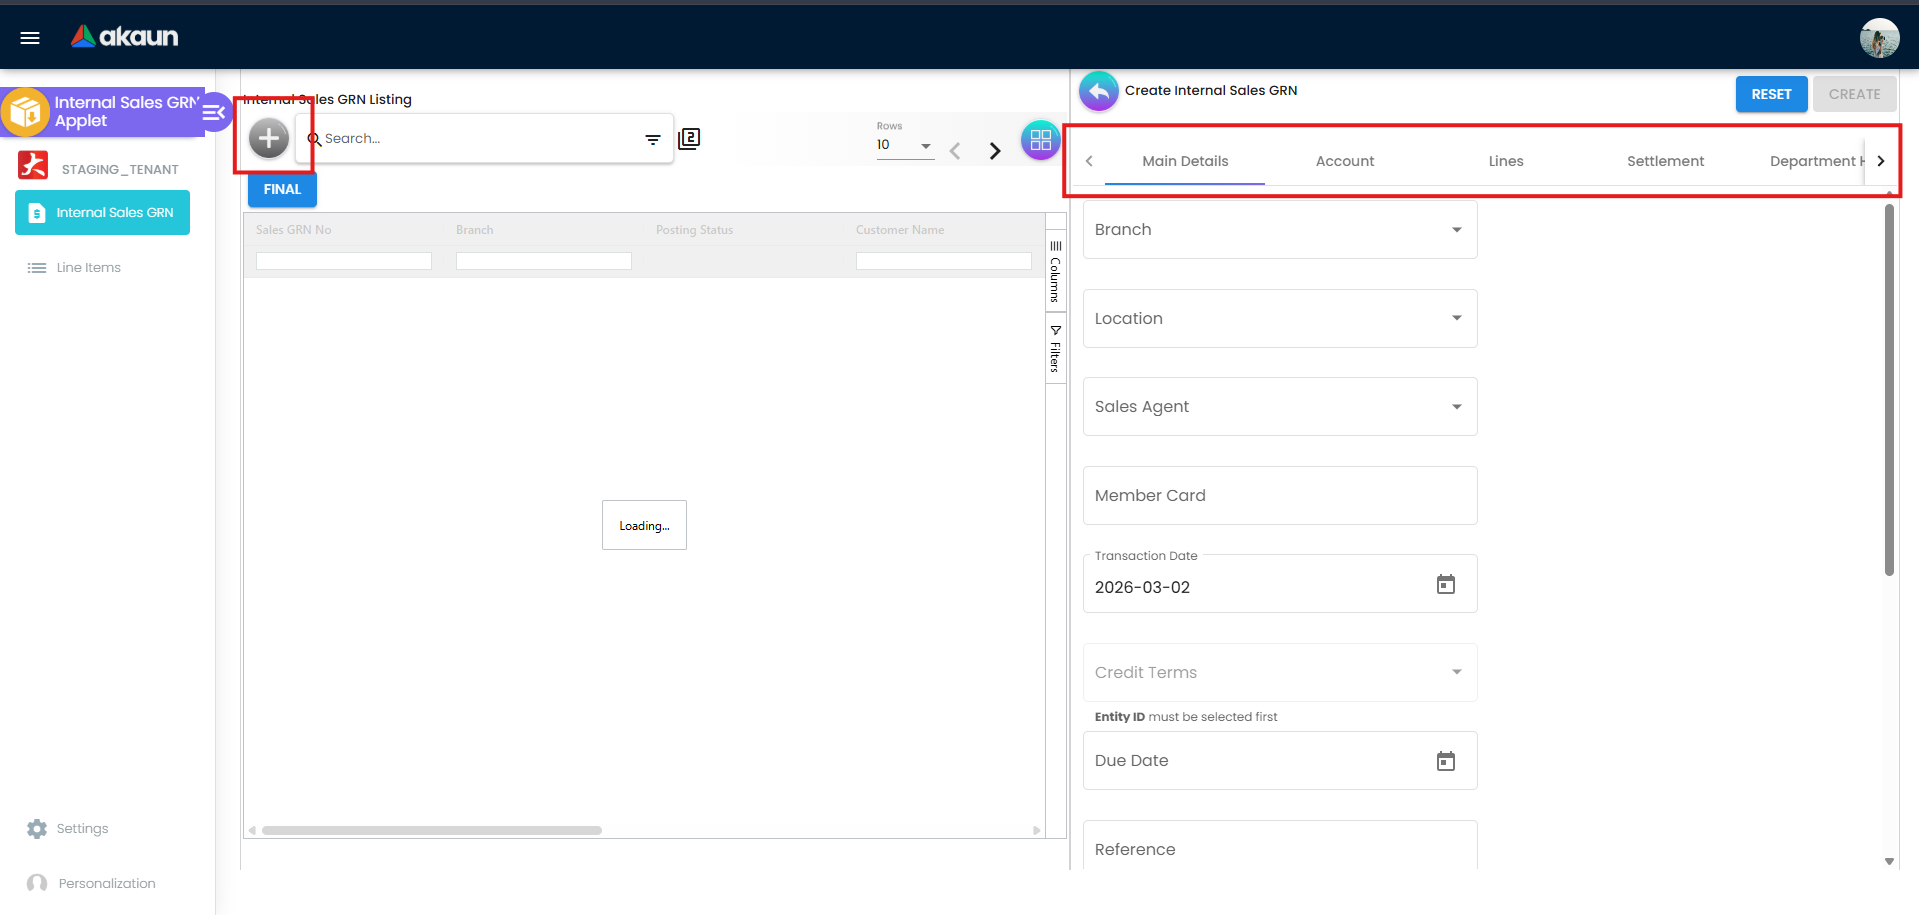
Listing columns: Sales GRN No, Branch, Posting Status (empty renders as DRAFT), Customer Name,
Sales Agent, Transaction Date, Created By, Created Date, Updated Date.
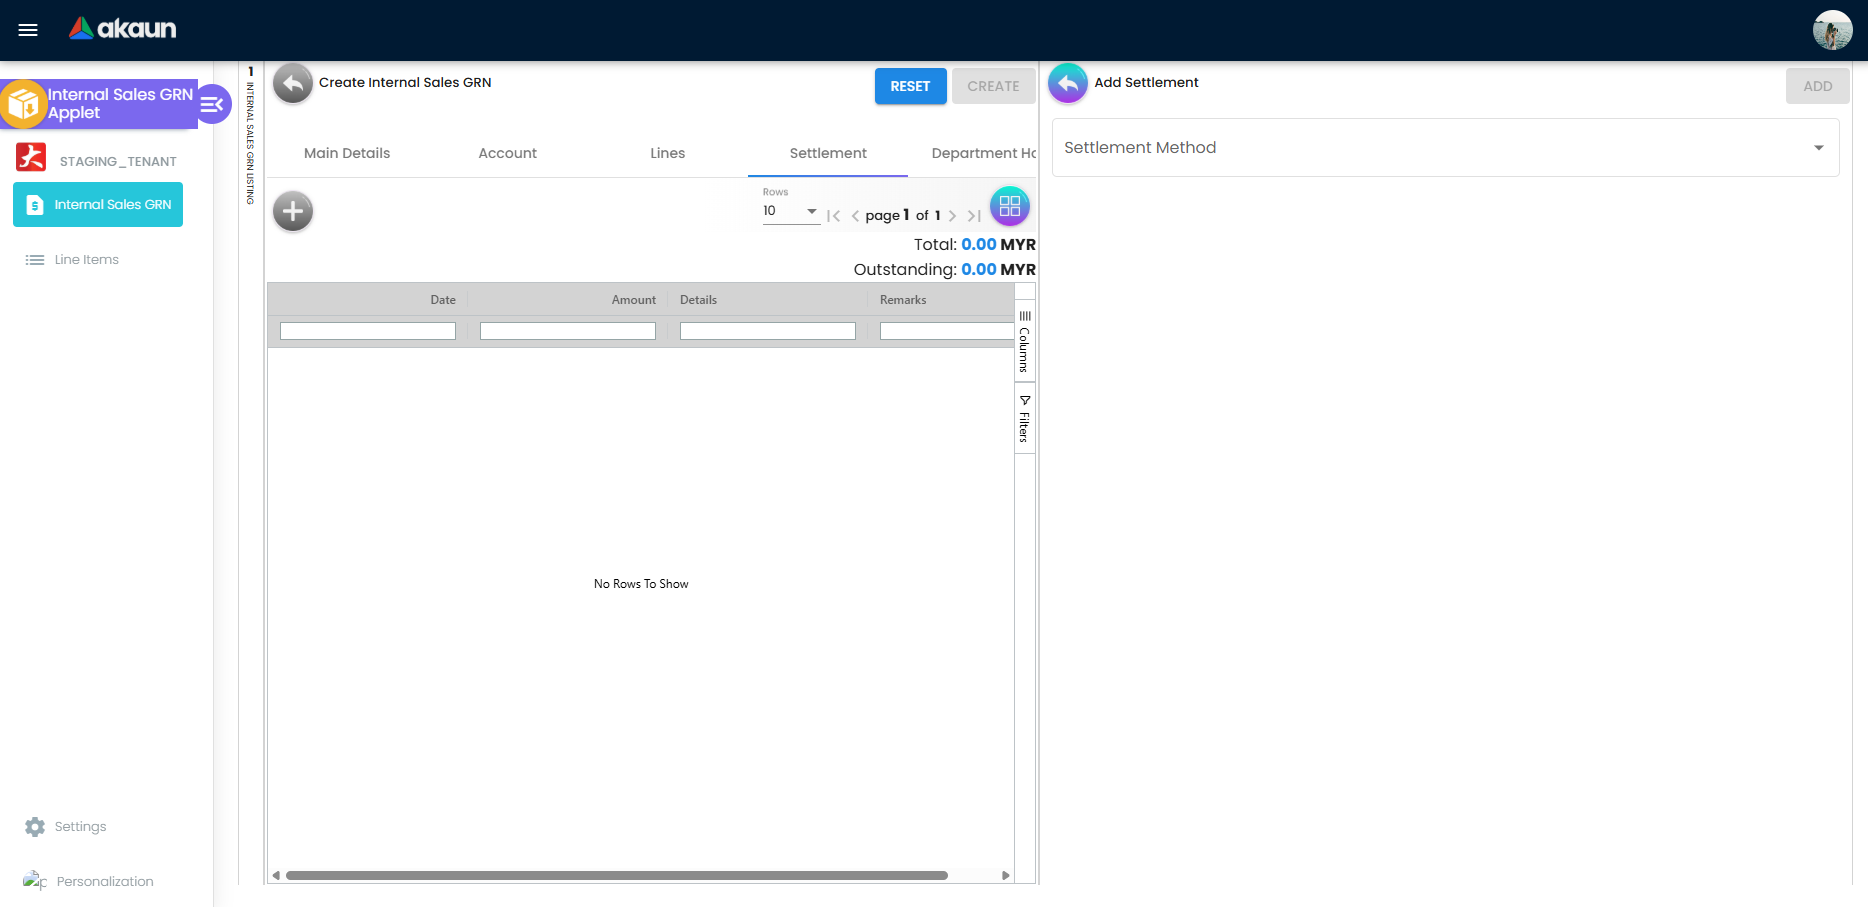
Create panel tabs: Main Details · Account · Lines · Settlement · Department.
Edit panel tabs: Main Details · Account · Lines · Settlement · Department Hdr · Contra · Doc Link · Attachments · Export.
Edit panel buttons: RESET, SAVE, FINAL, and — only when enabled — DELETE. DELETE is a two-click
action: the first click relabels the button CLICK AGAIN TO CONFIRM, and the confirmation lapses
after three seconds. DELETE disappears entirely once the document is FINAL.
Adding a line: eight sources, four of them on the purchase side
The Lines tab opens a Select Item panel with eight tabs, not three. Besides the item master, it pulls lines from a Sales Order, a Jobsheet, a Delivery Order — and from a Purchase Order, a Purchase Requisition, a Purchase Quotation and a Purchase Invoice. Each of the four purchase tabs injects that document’s own service from the shared library, so they are live listings of real purchase documents, not leftovers that return nothing.
This is worth knowing rather than worth reporting: the Sales GIN twin carries fifteen — the item search plus a KO by and a KO for tab for each of the same seven sources — so the panel is a family surface rather than anything specific to this applet.
The Sales Order tab’s knocked off figure does not count earlier sales GRNs. It adds up links of the
purchase-GRN type (ISO_IPGRN), which no sales document writes, so a sales-order line already received
back on one GRN shows as fully open on the next, and the server does not check either. Before receiving
goods back against an order, look at the order’s own Doc Link tab for a previous GRN (a known issue, reported to engineering). It is also a
genuine capability — a customer returning goods that you had bought in for them can have the line
pulled straight from the purchase invoice, with its description and item link intact, instead of
being keyed again.
Each line then has its own sub-tabs: Item Details · Serial Number · Batch Number · Bin Number ·
Costing Details · Pricing Details · Issue Link. Costing Details is additionally gated by the
SHOW_COSTING_DETAILS client-side permission.
What FINAL actually does
Both FINAL buttons — the one above the listing and the one on the edit panel — dispatch the same
action and call the same endpoint, PUT …/internal-sales-goods-received-notes/update-posting-status/{guid}
with a body of {"posting_status": "FINAL"} and nothing else. That is unusual and it is good news:
several document applets have two FINAL buttons that reach two different endpoints and write
different columns. This one does not.
What happens on the server, in order:
- An already-FINAL document is refused, with Generic Document has already been posted to FINAL and HTTP 403. The listing also filters FINAL rows out of a bulk selection before sending, and the edit panel shows This document has been posted instead of sending. Three guards, one outcome.
- The finalisation timestamp is always stamped. The applet sends no date, so the server uses the moment the request arrives. The transaction date is left alone.
- The e-Invoice skip flag is recomputed from the customer and written back on every FINAL, whatever it held before.
- The generic-document primary processor is queued, and the message-template processor with it.
- A membership-point event is queued if — and only if — the company carries a non-zero scheduled point assignment days. This is not filtered by document type: a Sales GRN going FINAL at such a company inserts a delayed point-reward event exactly as a sales invoice would. If your loyalty numbers move when a GRN is finalised, this is why.
- No webhook at FINAL, and no sales-contract processing. Both are queued at FINAL only for
INTERNAL_SALES_INVOICE. The document does raiseINTERNAL_SALES_GOODS_RECEIVED_NOTE_CREATEDwhen it is first saved and_DELETEDwhen a draft is deleted, so a subscriber hears of a new GRN as a draft and never hears that it went FINAL. - No cashbook line. The gen-doc-to-cashbook sync returns immediately unless the document already
carries a cashbook posting status of
POSTED, which nothing sets for this type — so a Settlement row on a GRN is a record on the document and never a bank movement. - No journal, and no stock. The document type has no entry in the journal posting handler at all, and with a quantity signum of 0 no inventory transaction line is written.
There is no VOID. The string does not appear anywhere in the applet, so a finalised GRN can only be left as it is; the reversal path other document types use is not wired here.
The four facts about the processors this page names
Shipped, registered, scheduled and running are four different things, and a page that blurs them sends a reader to wait for something that cannot happen.
| Processor | Shipped | Registered | Scheduled | Has it ever run for this document type |
|---|---|---|---|---|
| Generic document primary | Yes | Yes | No, and correctly not: it is queued at FINAL, not by a schedule | We found no evidence that it has — no finalised document of this type was found |
| Generic doc message template | Yes | Yes | Queued at FINAL; can also be scheduled | No, for the same reason |
The primary processor does not itself post anything. It reads the tenant’s enabled subscriber links and triggers the secondary processors that do, filtered by the company’s own include / exclude lists. So which secondaries run is a per-tenant configuration question, and for this document type it has never been exercised.
Integrations: use the same path the applet uses
The backend accepts this document type under two names. The applet uses the hyphenated one
(internal-sales-goods-received-notes); the other is not equivalent — it applies the document’s
permissions differently — and is recorded as a product finding. An integration should call the same
name the applet calls; the applet itself is unaffected.
Where the numbers on the screen come from
Location is filled from the branch, not from a setting. Choosing a branch patches the company and
the currency from that branch’s record, and then looks for a MAIN_LOCATION branch-extension row and
copies its value into Location. If a branch has no such row, Location stays empty and you must choose
one, because it is required.
Due Date is computed from the credit term, and not from the transaction date. Choosing Credit
Terms runs a calculation that reads the credit-term record’s own year, month and day fields as a
base date and then adds its addyear, addmonth and addday offsets. The transaction date is read
and then not used. That is a coherent design for terms anchored to a fixed billing date rather than to
the document — but it means a GRN raised today and one raised next month get the same due date from
the same term, and a credit term whose base date fields are blank produces an invalid date rather than
an error.
The computed due date is not part of the same save. The credit-terms control emits the form to the draft before it calculates, so the new due date sits in the form until the next Main Details change. Press SAVE immediately after choosing credit terms and the previously stored due date is what is kept. The Sales GIN twin behaves identically, so this is family behaviour rather than anything specific to this applet.
Nothing on a line has a cost or a value that the ledger will ever see. Costing Details and Pricing Details render and store on the line, and with both signums at 0 no moving-average calculation, no cost of sales and no stock valuation reads them.
Fields
Main Details
Six controls are required: Branch, Location, Sales Agent, Member Card, Customer and Credit Terms. The rest — Transaction Date, Reference, Remarks, Permit No, Currency, Tracking ID, and the read-only Doc Type and Tenant / Company / Branch Doc No boxes — are optional, and the four document-number boxes are filled by document numbering rather than by you.
The rows below are the ones where the screen does not tell you the whole story.
| Field | What the screen does not say |
|---|---|
| Member Card | Genuinely required, and it is a click-to-select field with no free-text fallback. A customer with no membership record cannot be given a GRN through the screen at all. This is a real constraint on a return process, not a formality — raise it if it is not what you expect. |
| Credit Terms | Starts disabled and is enabled only when the selected customer carries credit-terms rows. It is then required. Because a disabled control is excluded from validation, the required marker has no effect for a customer without terms — nothing blocks you, and nothing tells you why the box is grey. |
| Credit Terms (after switching customer) | Trap. The control is only ever enabled, never disabled again. Pick a customer who has credit terms, then switch to one who has none, and the drop-down stays open with the previous customer’s terms still listed and selectable — and choosing one silently rewrites the due date. It fails on its own terms — the control’s evident purpose is to offer this customer’s terms — which is why it is recorded as a defect rather than only as a difference. The Sales GIN twin does reset the list when the customer changes. |
| Sales Agent | Not disabled when the document is FINAL, unlike every other control on the panel. Editing it on a posted document is possible, and see the warning below for what that costs. |
| Remarks | Also not disabled on a FINAL document, and not restorable: an emptied Remarks box cannot be cleared on save. |
| Branch · Location · Reference · Transaction Date · Currency · Tracking ID · Due Date | None of these can be blanked. The screen keeps the stored value whenever the box is empty, so clearing the box and saving restores what was stored, with a success toast. To change one you must type a different value, not delete the old one. |
Editing a finalised GRN can blank three stored fields without saying so. When the document is FINAL every Main Details control is disabled except Sales Agent and Remarks — and a disabled control is dropped from what the screen sends. The customer block is rebuilt from what is sent, so touching Remarks or the Sales Agent and pressing SAVE writes back a block in which Credit Terms, Permit No and Tracking ID are empty. SAVE stays enabled on a FINAL document: its guard checks only that the form is valid and that at least one line exists, with no posting-status test.
The tracking id then disagrees with itself, because it is also stored in its own column and that column is written with the keep-the-old-value rule and survives.
Line sub-tabs
Item Details, Serial Number, Batch Number, Bin Number, Costing Details, Pricing Details and Issue
Link. Costing Details is additionally gated by the SHOW_COSTING_DETAILS client-side permission.
Configuration
Before you can use it
| Prerequisite | Where it is set | Why |
|---|---|---|
At least one branch, and a MAIN_LOCATION row on it | Organisation | Branch and Location are both required. Without the branch extension, Location is not pre-filled and must be chosen by hand every time. |
| Customer entities | Customer Maintenance | Customer is required, and Credit Terms stays disabled until the customer is chosen and carries terms. |
| A membership record for the customer | Customer Maintenance | Member Card is required and can only be picked from existing membership records. |
| A sales agent | Employee Maintenance | Sales Agent is required. |
| Items | Inventory Item Maintenance | The Select Item panel searches the item master. |
No default GL code, cashbook or settlement-method mapping is needed to save or finalise a GRN, because the document posts nothing.
Applet settings
Settings are rendered by the shared field-configuration screen from blg-shared-utilities — the
applet routes settings/field-settings straight to it. Background on how these keys are stored, who
can change them and how they interact with permissions is on the
settings and permissions concept page.
The applet also contains a local settings-container/field-configuration component, but nothing
imports or routes to it: it is dead code and its toggles never appear on any screen.
| Setting | What it actually does |
|---|---|
VERTICAL_ORIENTATION | Switches the create, edit and line-item panels from side-by-side columns to stacked expansion panels, and the applet then remembers which panel was open per document. It is read in six components, so this is a real layout mode rather than a cosmetic flag. |
DISABLE_GEN_DOC_LISTING | Read once, in the container component, and governs the whole listing behaviour. It is read only by applet screens, never by the backend. |
ENABLE_BRANCH_FILTER | Checks the customer you pick against the branch chosen on the document. Switch it on and every customer is still listed, but clicking one that is not linked to the document’s branch is refused with Customer not linked to branch — which reads as broken master data, not as a setting. Picking one of the customer’s contacts from its expanded row skips the check. |
ENABLE_ITEM_NAME_MAX_LIMIT with ITEM_NAME_MAX_LIMIT | Caps the edited line-item name with a hard maxlength and shows a character counter. The cap is silent: typing stops, with no message. Setting the flag without a positive limit hides the counter and caps nothing. |
SHOW_DOCUMENT_DELETE_BUTTON | The only key here with no control on the settings screen at all. The edit panel reads it directly from the applet’s own APPLET_SETTINGS extension record, and DELETE is invisible until an administrator sets it there. |
Declared, and not on the screen. The settings model also declares the account, lines, settlement, contra,
export and department-header hides, the tab-hiding and panel-expanding
pairs, PRINTABLE, DEFAULT_COMPANY, DEFAULT_ORIENTATION, DEFAULT_TOGGLE_COLUMN, the custom-status
family and the dimension-and-tax family. The shared screen does not offer those
controls for this applet, so none of them renders here. Do
not plan around them. The line-level column-hiding keys are the exception: they render, they work, and
their whole effect is visible on your screen within two seconds of flipping them, so they are not
listed one by one here.
Who can change what. The tenant-wide values above are set on the Application Settings screen and
apply to everyone. Twenty-one client-side permission codes exist for this applet and all twenty-one are checked by the
applet — an unusually clean match. Each one grants a line-item column or panel that the matching tenant-wide toggle hides, so
a permission overrides a hide toggle rather than being overridden by it: the column shows if the
permission grants it, even when the hide toggle is on. Server-side, the document type is governed by
the four TNT_API_DOC_INTERNAL_SALES_GOODS_RECEIVED_NOTE_* permissions.
Default Selection
Settings → System Configuration → Default Selection, and Personalization → Default Selection for the same three per user.
DEFAULT_BRANCH, DEFAULT_LOCATION and DEFAULT_COMPANY into the applet’s settings record, and no
component anywhere in the document create or edit path reads any of the three. A new GRN opens with Branch empty
whatever you set here, and Location is pre-filled from the chosen branch’s MAIN_LOCATION extension,
which is a different mechanism entirely. Default Language is the third control
and does select the resource bundle.Other settings routes present: Printable Format Settings, Custom Resource Bundle Configuration (translation), Webhook, Feature Visibility, and the five permission screens. Webhook and Feature Visibility are routed but are not listed in the settings menu — and, per What FINAL actually does above, FINAL fires no webhook for this document type; only first save and delete do.
What it will not do
- It will not move stock. Quantity signum 0. No inventory transaction line is written, ever.
- It will not post a journal. The document type is absent from the journal posting handler, so there is no receivable, no revenue reversal and no tax line.
- It will not touch the cashbook, even with a Settlement row, because the sync requires a cashbook posting status that nothing sets for this type.
- It will not raise a webhook at FINAL (first save and delete do raise one), and it will not run sales-contract processing.
- It cannot be voided. There is no VOID anywhere in the applet, and FINAL is refused a second time by the server.
- It cannot be deleted once FINAL — the DELETE button is hidden at that point.
- It will not complete a return on its own. The stock-moving sales-side counterparts are not released to any tenant.
Troubleshooting
| Symptom | Cause | What to do |
|---|---|---|
| CREATE stays greyed out | One of the six required Main Details fields is empty — most often Member Card, which a walk-in customer will not have | Fill all six. Credit Terms unlocks only after a customer with credit terms is chosen, and does not block you when it stays grey |
| Stock balance did not change after FINAL | Expected. Quantity signum 0 | Use Sales Return (Internal) if stock must move |
| No journal appeared after FINAL | Expected. The type is not in the journal posting handler | Raise a credit note if the receivable must be reduced |
| Credit terms from the wrong customer are offered | The drop-down is never re-disabled when the customer changes | Reload the panel before selecting terms after switching customer, and check the due date it produced |
| Permit No or Tracking ID went blank on a posted document | Remarks or Sales Agent was edited and saved while the document was FINAL | Do not save a FINAL document. If it has happened, the tracking id survives in its own column and the audit trail holds the old block |
| An emptied box comes back after saving | The header patch keeps the old value when the form sends an empty one | Type a replacement value instead of clearing the box |
| Default Branch is set and new documents still open with no branch | Expected. The key is stored and never read | Choose the branch on the document; set MAIN_LOCATION on each branch so Location fills itself |
| An integration gets 403 updating, or succeeds when it should not | The two URL slugs for this type gate read and update differently | Call internal-sales-goods-received-notes, the hyphenated slug the applet uses |
| The Contra / Settlement / Export hide toggles are missing from Application Settings | The shared screen does not offer them for this applet | The tabs themselves still work; only their hide toggles are unreachable |
Related applets
- Sales GIN (Internal) — the outbound twin, also 0/0, and the sibling whose code settles several of the findings above.
- Sales Return (Internal) — the document that does bring goods back into stock and reverse the sale.
- Sales Credit Note (Internal) — reduces what the customer owes after invoicing.
- Sales Invoice (Internal) and Sales Order (Internal) — upstream documents whose lines the Select Item panel can pull.