Sales Return (Internal)
Take back goods a customer returns after an invoice or cash bill. Finalising puts the quantity back into stock at moving-average cost, reverses the sale and reduces what the customer owes, and finance then settles the credit by refund or contra. If nothing physical comes back, use a Sales Credit Note instead.
Overview
The Sales Return (Internal) applet records goods a customer brings back after a Sales Invoice or POS cash bill. Sales or customer-service staff create it, the warehouse receives the goods against it, and finance settles it — by refund on the Payment tab, by contra against the customer’s open invoices, or by a separate Sales Refund Note. On FINAL the return puts the quantity back into stock at moving-average cost, reverses the sale to the Sales Return account and reduces what the customer owes. If nothing physical comes back, use Sales Credit Note (Internal) instead.
INTERNAL_SALES_RETURN. Amount signum −1, quantity signum +1 (stock in). The backend names it as the return document for both INTERNAL_SALES_INVOICE and INTERNAL_SALES_CASHBILL.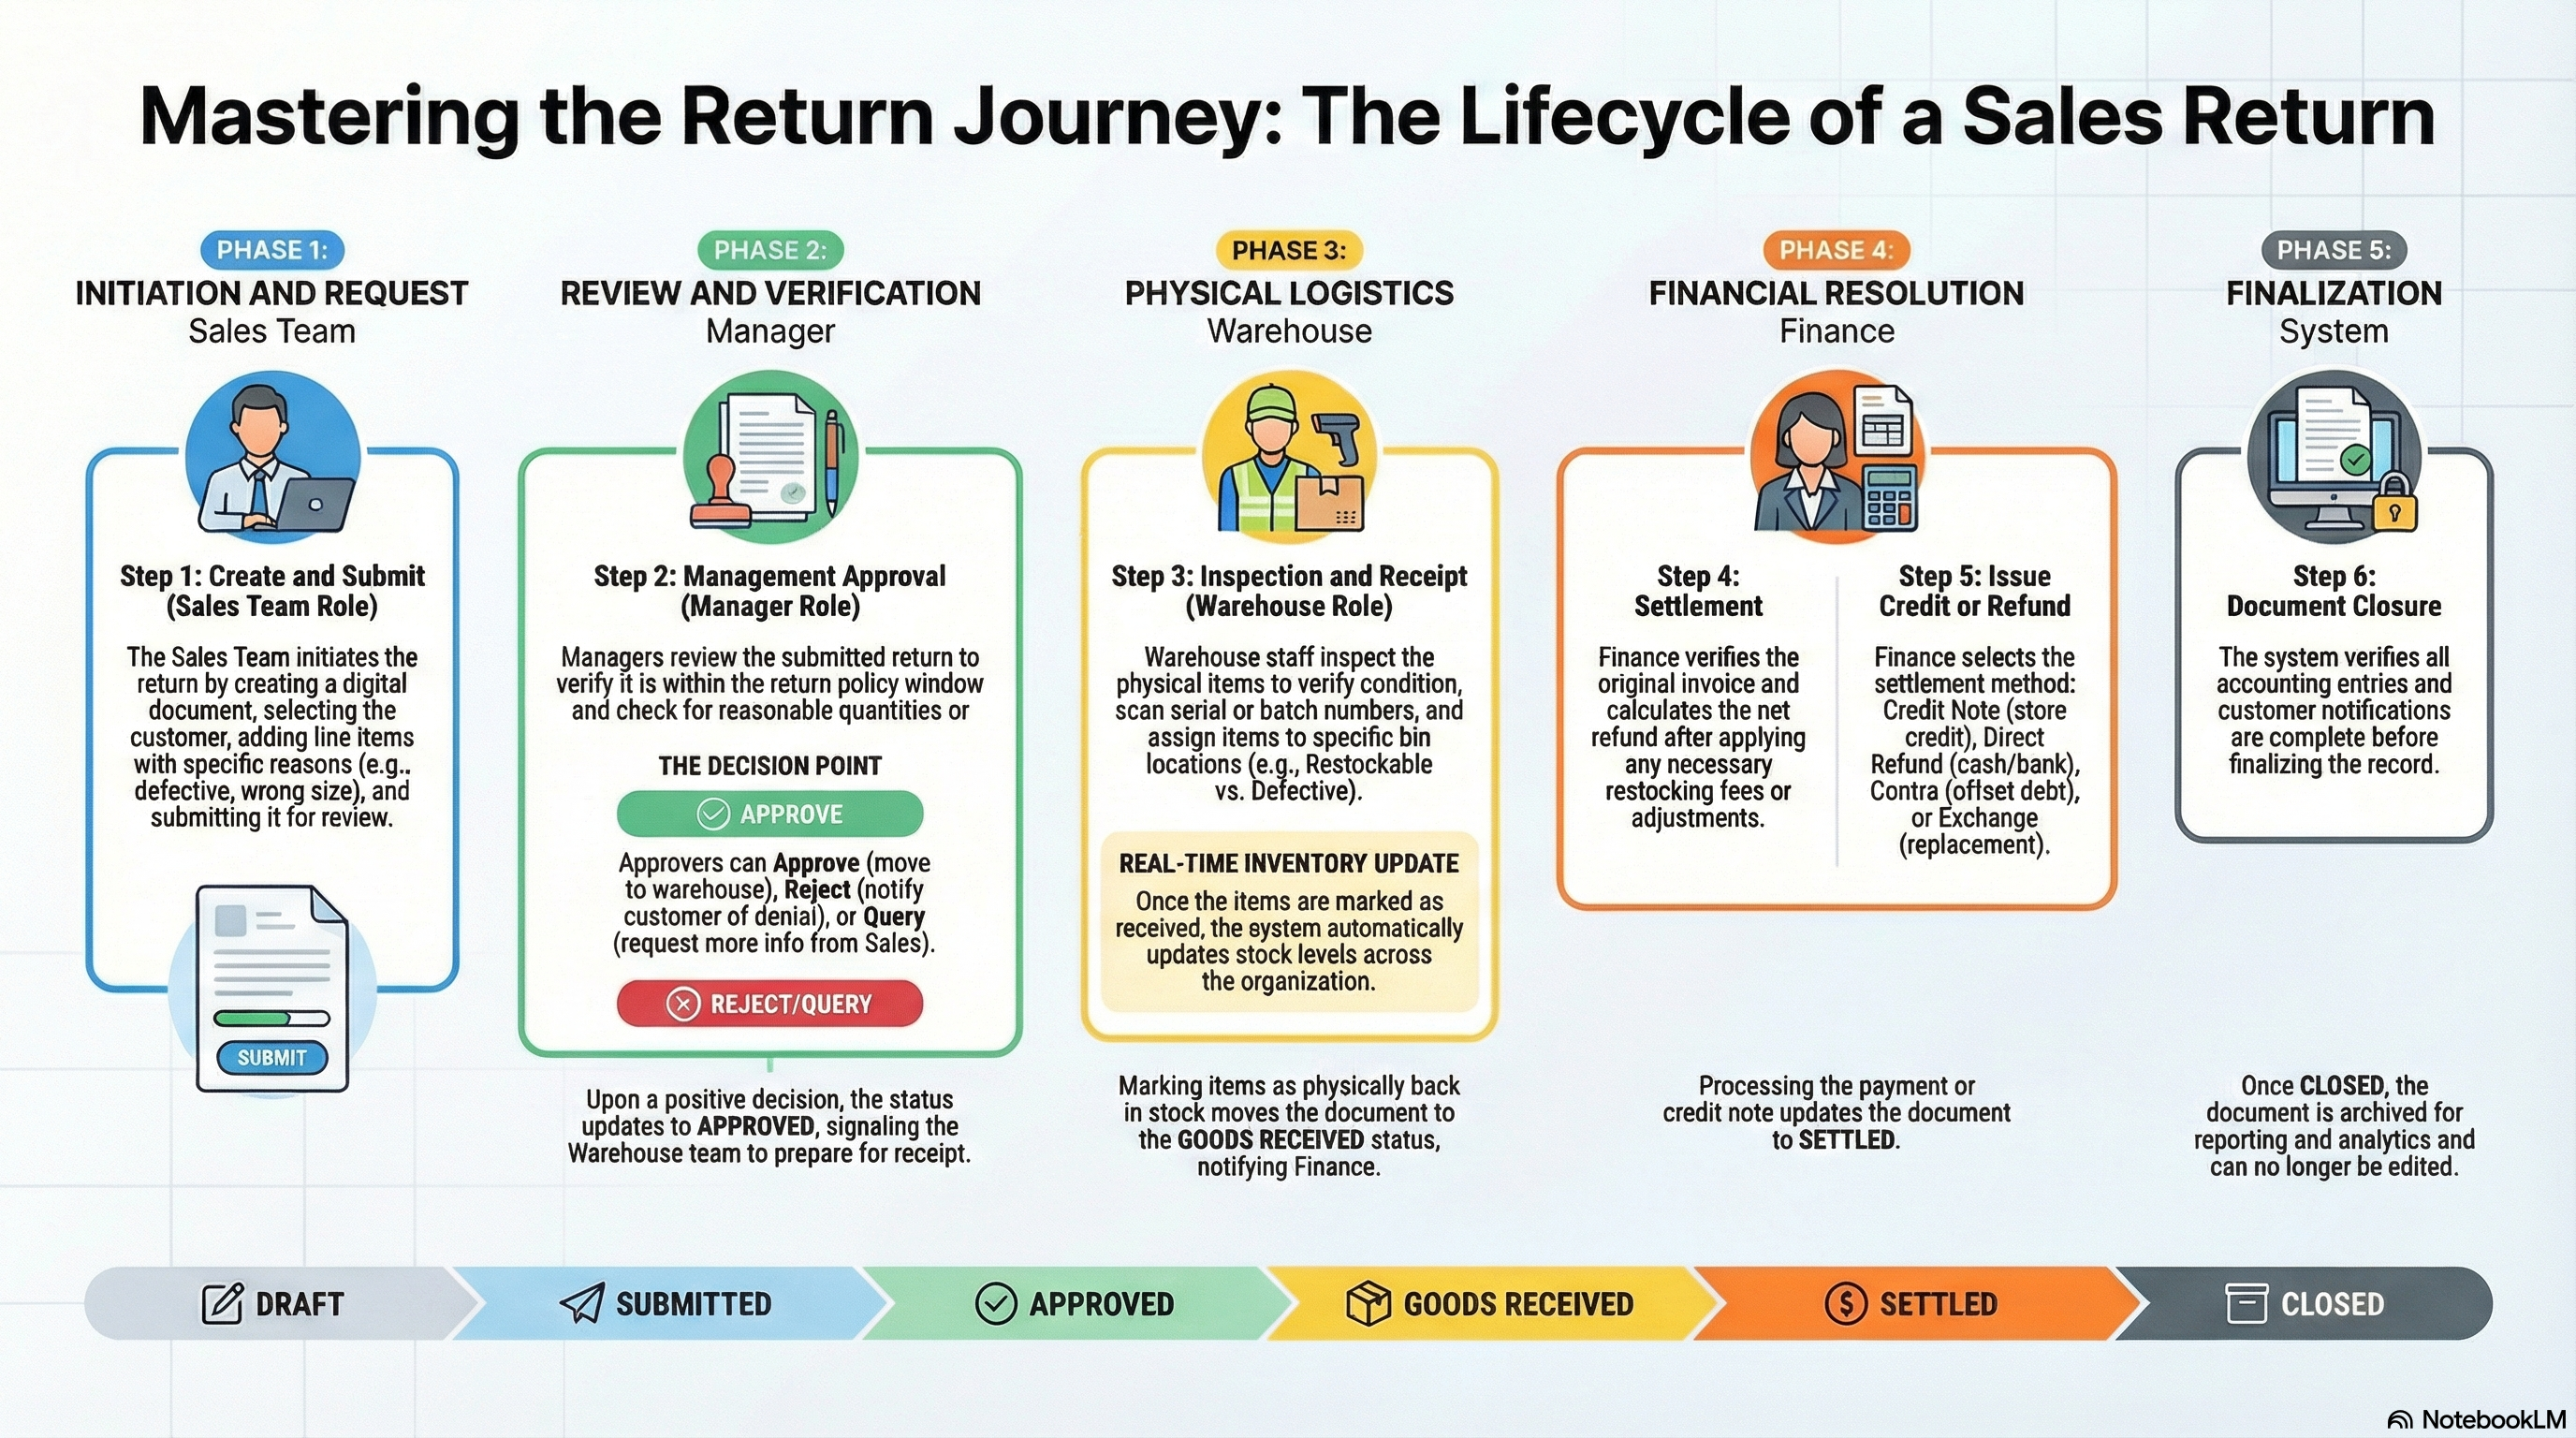
Where it fits
| Direction | Document / applet | How it connects |
|---|---|---|
| Upstream | Sales Invoice (Internal), POS General cash bills | Searched in the Search tab (by customer, invoice, cash bill or serial number); lines and customer copied in; the entity is then locked |
| Upstream | Customer, Chart of Account, Cashbook | Customer AR type, SALES_RETURN / DEBTOR / OUTPUT_TAX default GL codes, settlement methods |
| Downstream | Payment tab, Contra tab, Sales Refund Note (Internal), Receipt Voucher (Internal) | Refund, offset or later settlement of the credit balance |
| Downstream | My E-Invoice Portal, My E-Invoice Admin | Submission of the return against the original e-Invoice |
| Downstream | Stock Balance | Returned quantity is back at the location |
| Sibling | Purchase Return (Internal) | Intercompany mirror in the buying company |
Screens and menus
Route root: applets/tnt/wavelet/erp/internal-sales-return-applet/.
| Menu item | Route | What it shows |
|---|---|---|
| Internal Sales Return | internal-sales-return | Listing; create, edit, print, email, void |
| Line Items | line-items | One row per return line, with footer totals that follow the filter |
| Intercompany | intercompany | Intercompany queue (return → purchase return in another company) |
| File Export | file-export | Field-mapped exports |
| File Import | file-import | Bulk create returns from a delimited file |
| Swap Serial Number | swap-serial | Replace a serial number on a FINAL return without voiding |
| Settings / Personalization | settings/…, personalization/… | Configuration |
The create / edit form
Tabs, in the default order (re-orderable under Default Selection): Search, Main Details, E-Invoice, Account, Lines, ARAP, Delivery Details, Payment, Payment Adjustment, Department Hdr, TraceDocument, Contra, Doc Link, Attachments, Export. Search is available on create; E-Invoice, ARAP, Payment Adjustment, TraceDocument, Contra and Doc Link appear once the document is saved.
| Tab | Purpose |
|---|---|
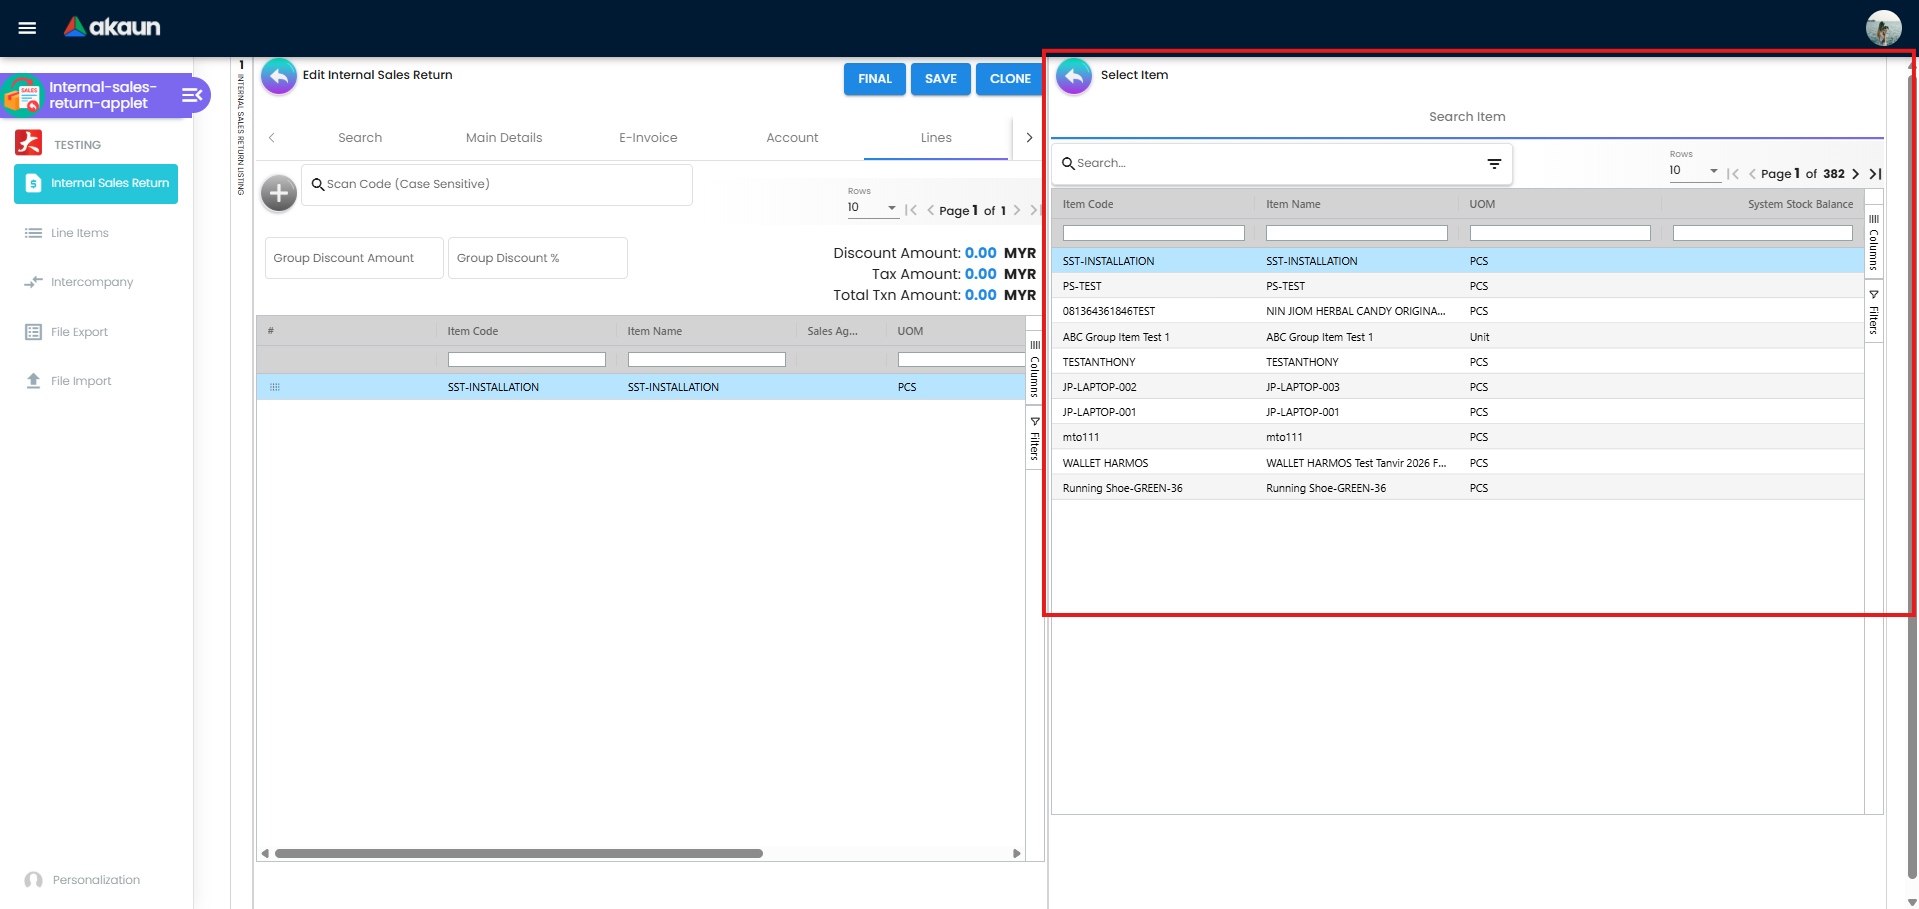
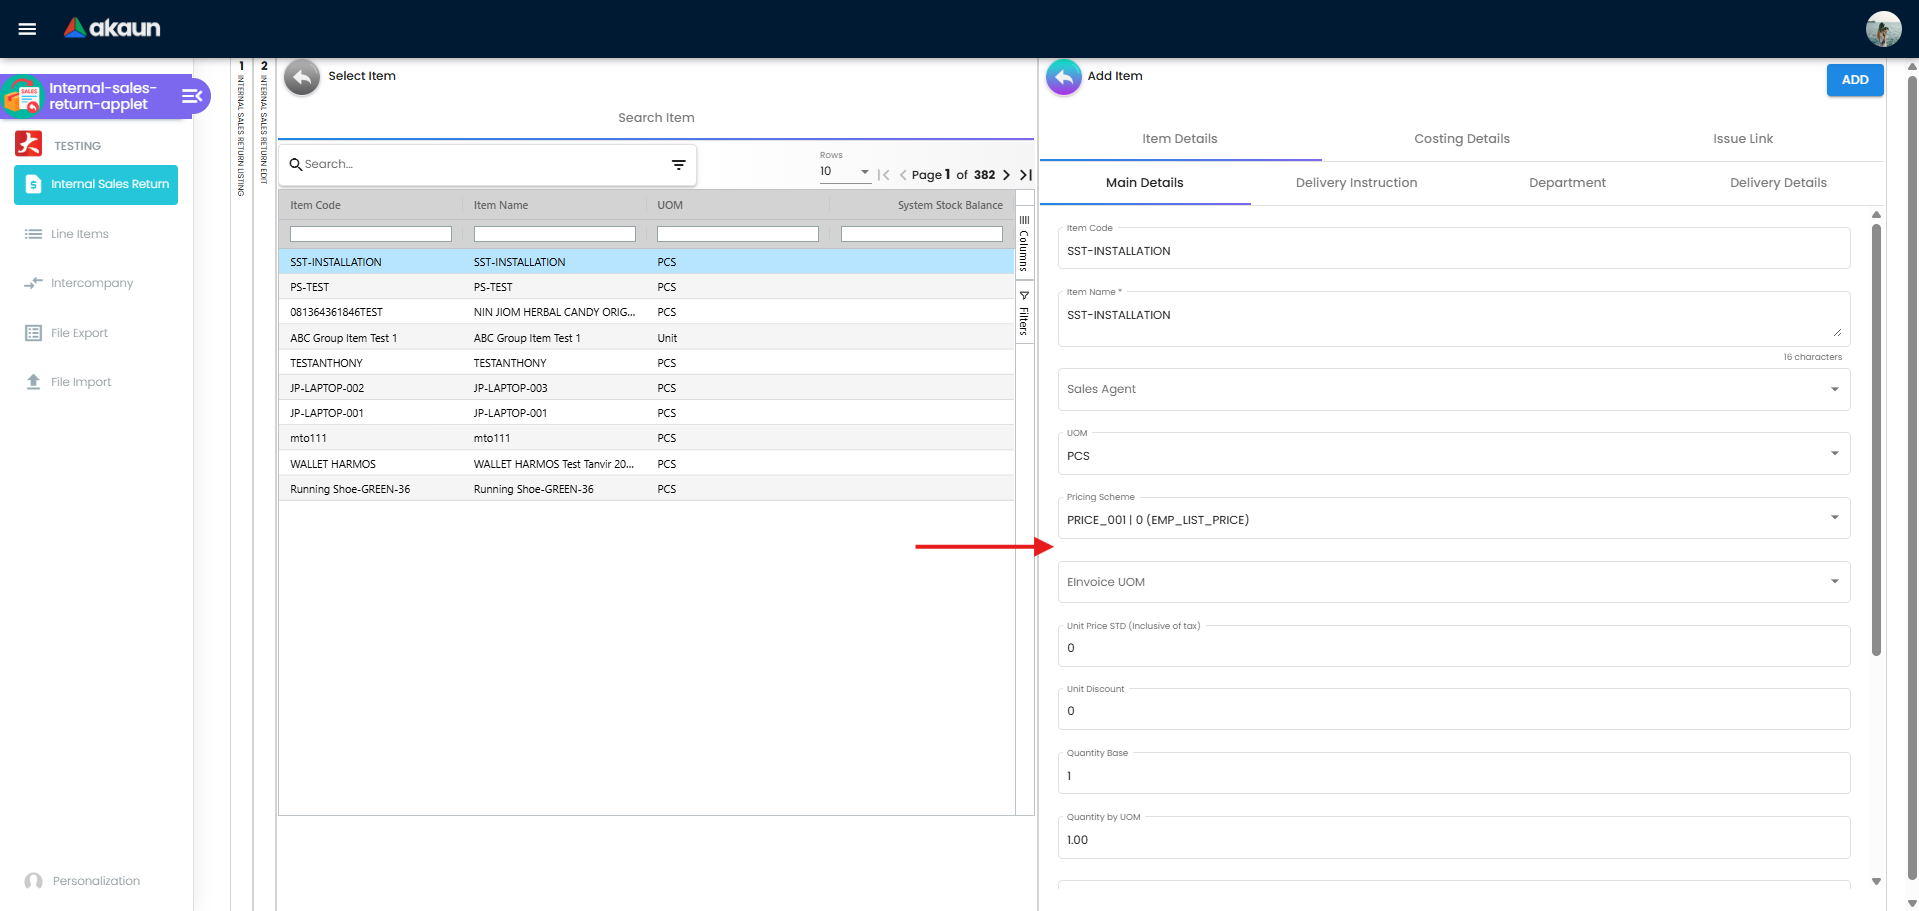
| Search | Search By Customer, Search By Invoice, Search By Cashbill, Search By Serial Number, Search Item. Add Selected / Add All copy the invoice lines with amounts apportioned to the returned quantity. Search By Invoice lists the invoice’s group-discount line as a row like any item, and Add All copies it: leave that row unticked, because a group-discount line on a return credits the customer twice the discount (see the warning under Lifecycle) |
| Main Details | Branch, location, delivery branch/location (warns when they differ from the header), transaction date, Reason (from Return Reasons settings), reference, remarks, currency and rate (an inverse-rate field is shown for foreign currency) |
| Account | Entity Details, Bill To, Ship To, Intercompany; the entity is locked once lines are linked to a sales invoice |
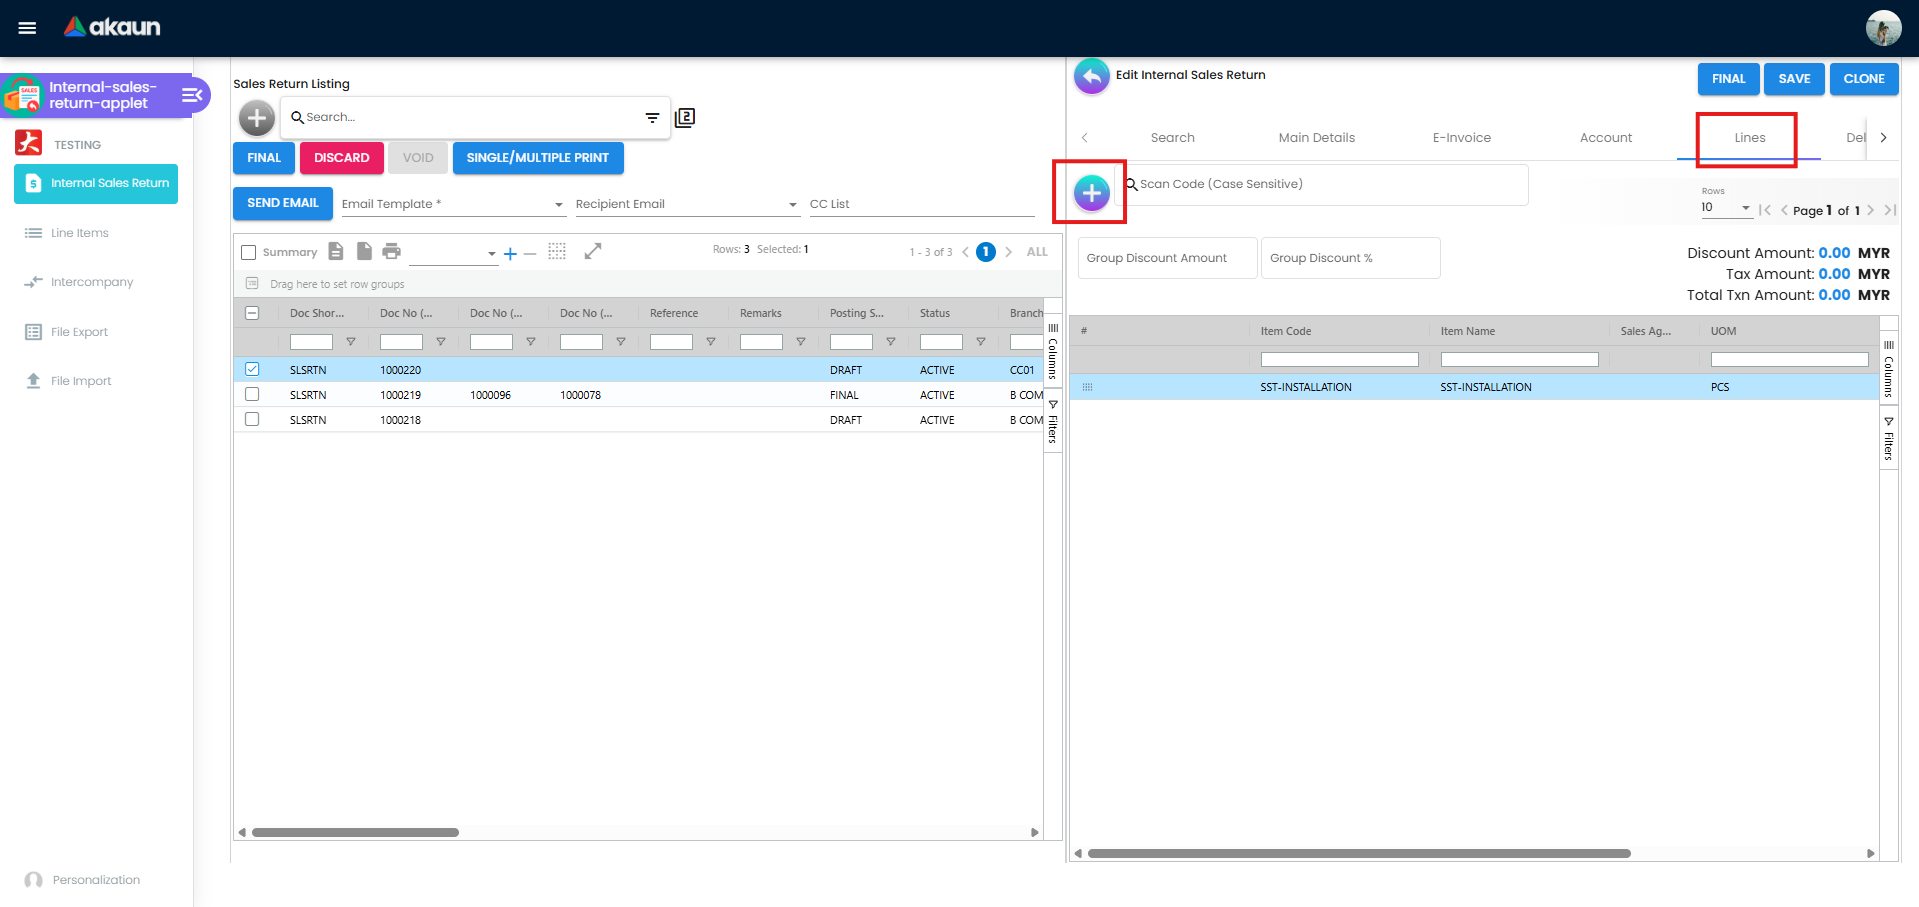
| Lines | Returned items, quantities, prices, tax, serial / batch / bin, costing, swap serial |
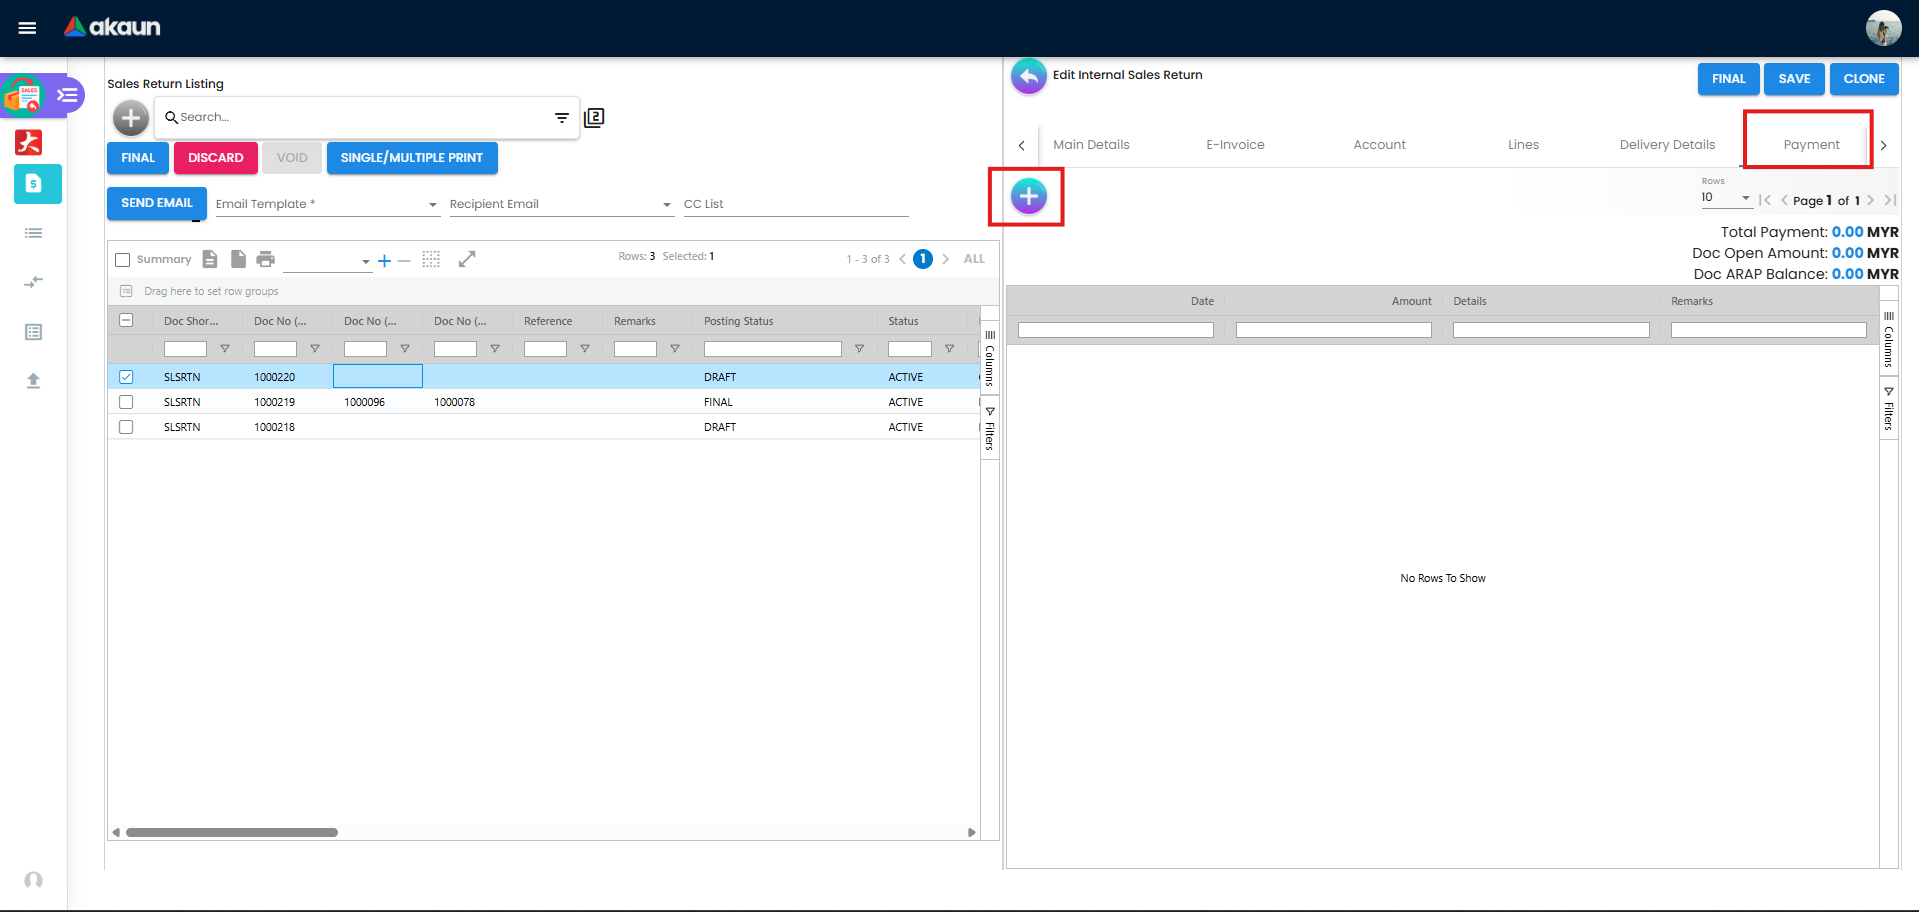
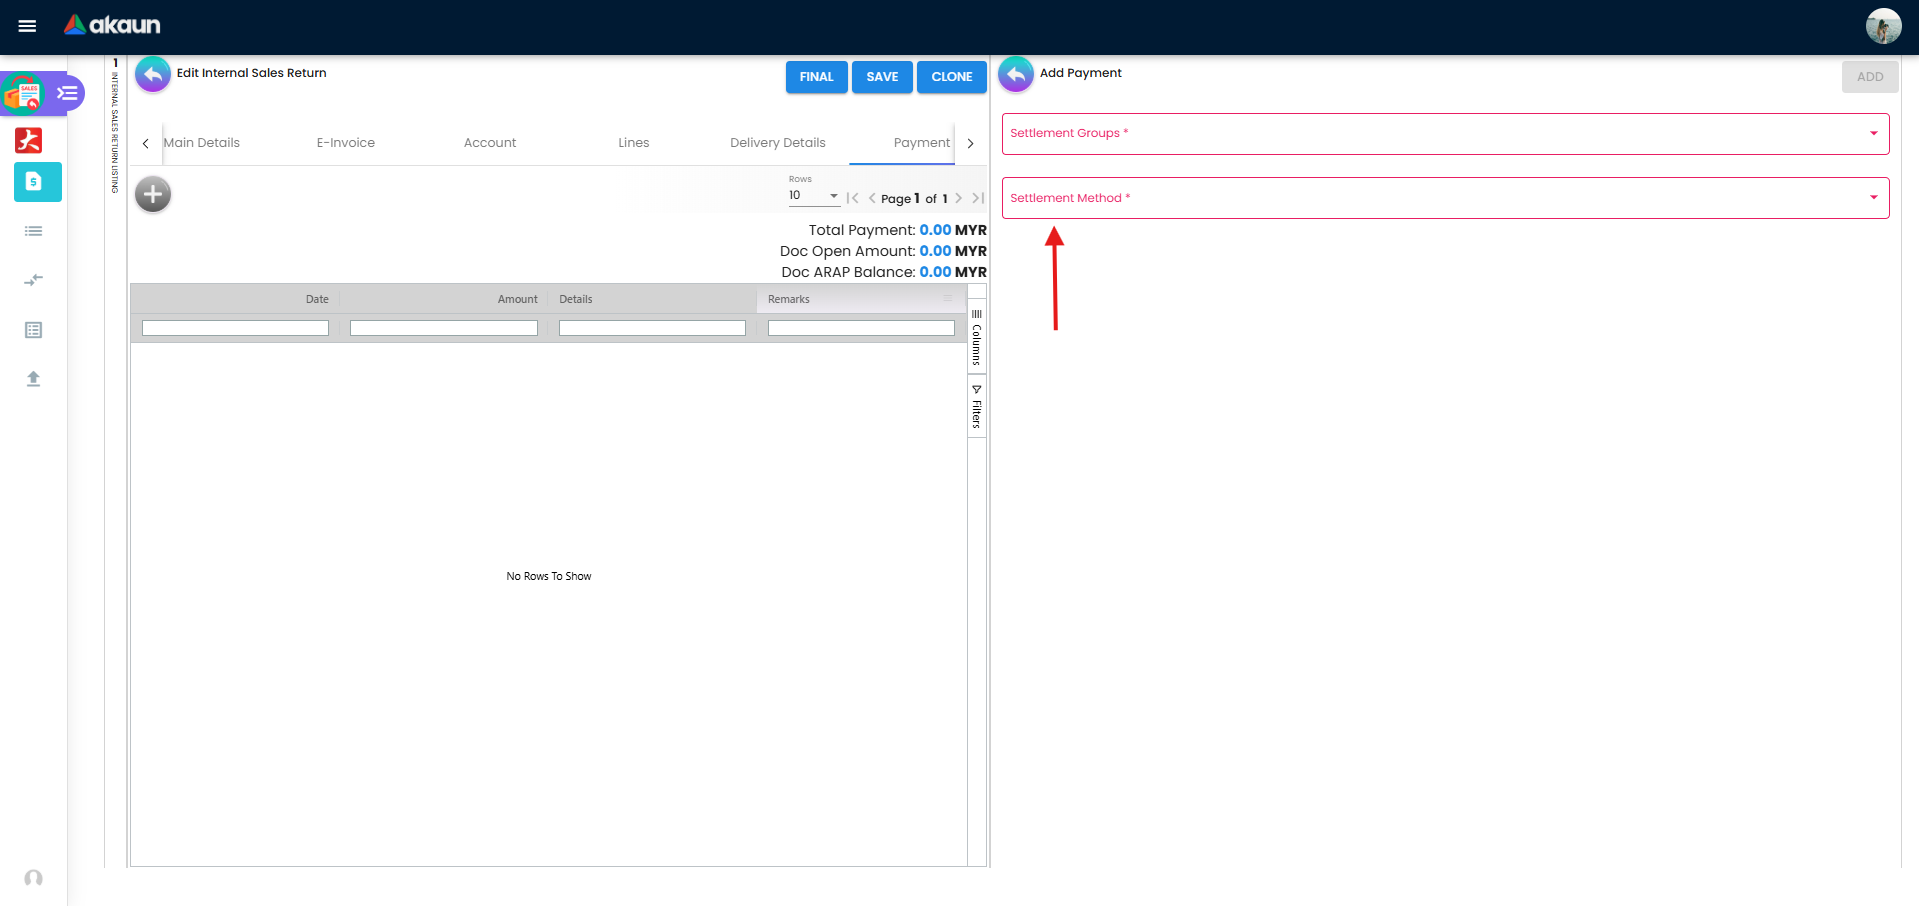
| Payment | Settlement lines (refund). Create is available only while the document is not FINAL, VOID or DISCARDED and not locked; ENABLE_EDIT_SETTLEMENT_FINAL plus the SHOW_EDIT_SETTLEMENT_FINAL permission allow edits after FINAL |
| Contra | Offsets this return’s credit against the customer’s open documents instead of refunding it. Normally you tick the rows to settle. When AUTO_SETTLE_CONTRA is on (no settings screen offers it — it is stored by support), a total-amount box and an Auto Settle button appear: Auto Settle takes the amount you type and fills the listed documents in the order the grid shows them, each up to its open balance, until the amount runs out — so sort the grid first if the oldest should be settled first. You cannot add more than the return’s open amount, and a row given no contra date of its own is dated today |
| E-Invoice | Submission, Progress, Notification, Cancellation; original e-Invoice reference and UUID picker; Skip E-Invoice |
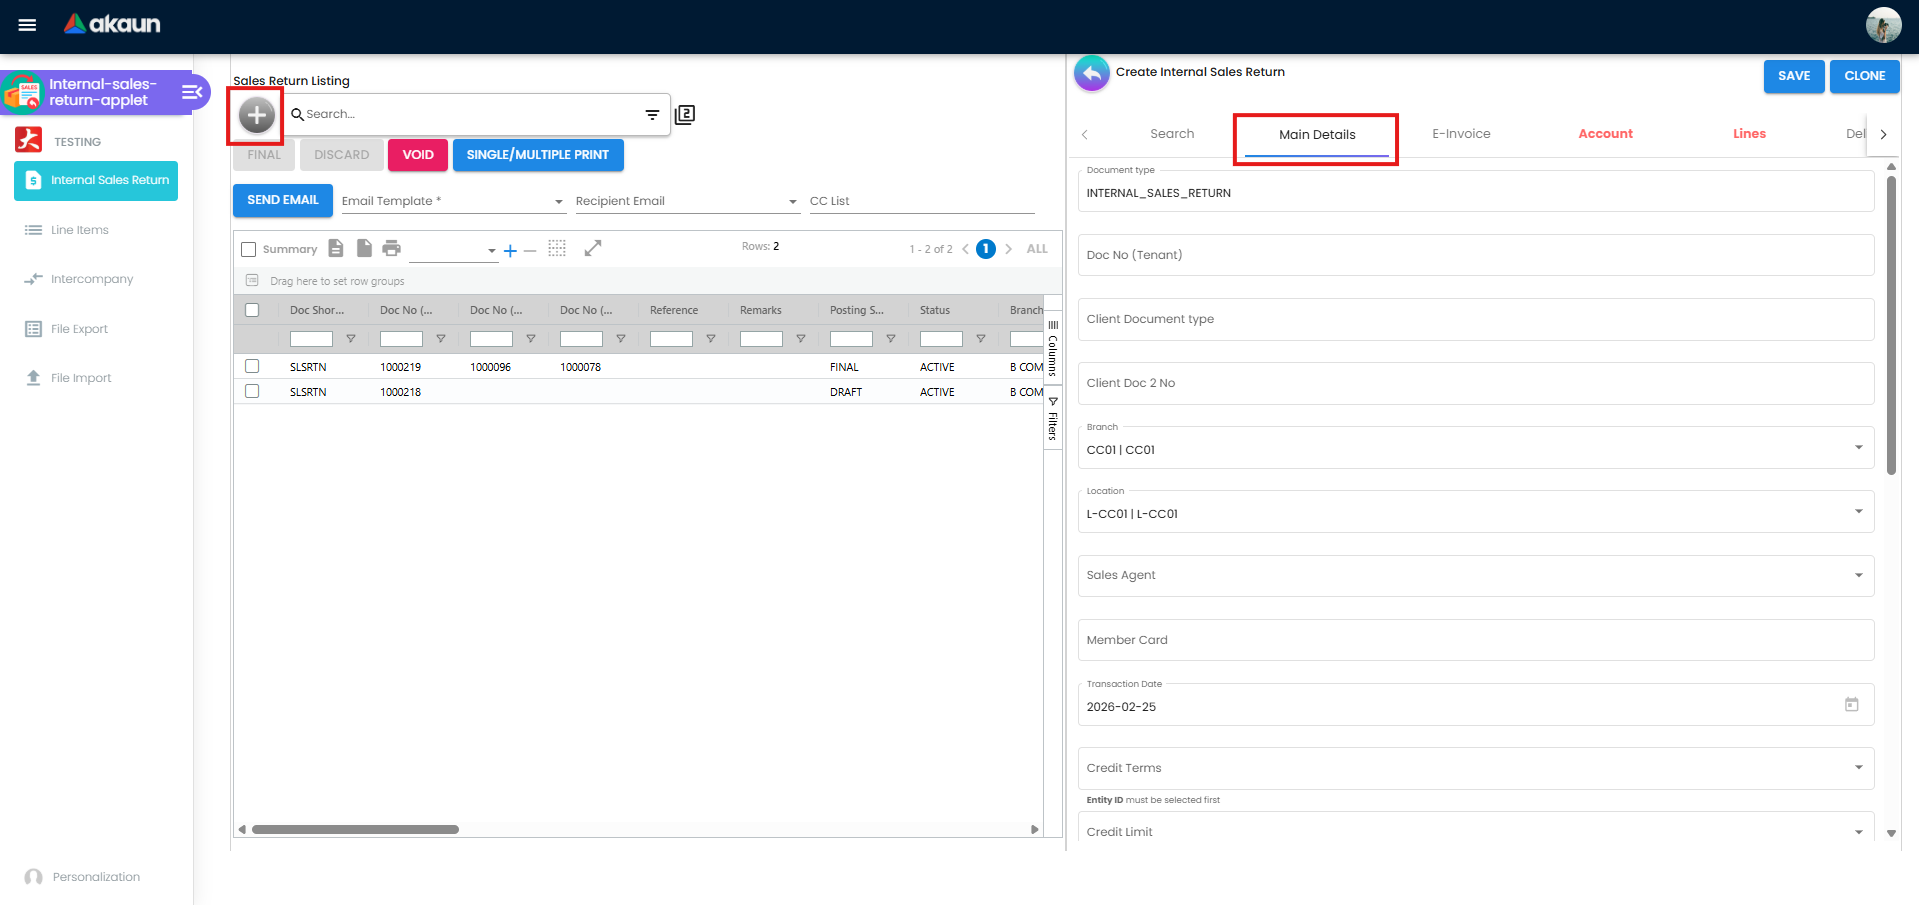
Screenshot withdrawn; a recapture from a demo tenant is on the list.
Settings menu
| Settings entry | Route | Purpose |
|---|---|---|
| Application Settings | settings/field-settings | The shared switch screen; the switches this applet reads are listed under Configuration below. One of them makes Reason mandatory — but only while Reason is not hidden, so hiding the field quietly lifts the requirement |
| Default Selection | settings/default-selection | Default branch, default location, tab order |
| Return Reasons | settings/return-reasons-settings | The Reason list on Main Details, shown as code | name in alphabetical order. It is one list for the whole tenant: the Purchase Return applet offers and maintains the same reasons, so renaming one here renames it there. A return stores which reason was chosen, not its wording, and the standard print service looks the name up at print time — rename a reason and a past return that prints its reason reprints with the new name |
| Printable Format Settings | settings/printable-format-settings | Printable formats for INTERNAL_SALES_RETURN |
| Branch Settings | settings/branch-settings | Per-branch header and footer, images, PIN and the branch’s default printable format, which a new return looks up when you pick the branch. Send Email does not use it — see Email Template |
| Workflow Settings | settings/workflow-settings | Makes a workflow process available to this applet for a company; by itself it attaches nothing to a return. A new return starts in the default status of the one process chosen in this applet’s settings — applet-wide, whatever the company — and the Status list then offers only the moves that process allows from where the return stands |
| Email Template | settings/email-template | Each template names a printable format, and Send Email renders the return in it — or in the applet’s default printable format when the template names none. It never falls back to the branch default |
| Custom Resource Bundle Configuration, Custom Field Placement | settings/translation-settings, settings/custom-field-placement | Relabel; place tenant custom fields |
| Webhook | settings/webhook | A sales return reaches subscribers once, when it is first saved — as a draft. Finalising or voiding it sends nothing more, so a subscriber that needs posted returns has to fetch them; deleting a draft does send a deletion notice |
The menu also carries Feature Visibility, the permission screens (listings, Client-Side Permission, Permission Wizard), Release Notes and the Applet Log, the shared screens every applet has.
Configuration
Before you can use it
| Prerequisite | Where | Why |
|---|---|---|
| Company, branch, location | Organisation | Header requires branch and location; goods go back to the header (or delivery) location |
Company default GL codes SALES_RETURN, DEBTOR / DEBTOR_NON_TRADE, OUTPUT_TAX, SALES_DISCOUNT, FOREX_GAIN, FOREX_LOSS | Chart of Account | The return uses the SALES posting handler but its goods lines are mapped to SALES_RETURN. A header group-discount line is not: it posts to SALES, on the wrong side (a known issue — see Troubleshooting). No COGS default is needed — the handler has no cost-of-goods-sold line; cost of goods sold is the month-end journal from Financial Report. A missing debtor code fails the journal job that runs after FINAL with MISSING_DEFAULT_GL_CODE: <code>; the return stays FINAL with no journal until it is mapped and the journal is built from Financial Report › Error Checking › Trace Document (Missing Journal → Resolve) |
| Return reasons | Settings → Return Reasons | The Reason dropdown is empty until you add codes |
| Customer with AR type | Customer | Decides DEBTOR vs DEBTOR_NON_TRADE |
| Settlement methods with cashbook and GL (for refunds on the Payment tab) | Cashbook | Otherwise MISSING_CASHBOOK / MISSING_GL_CODE: STL_MTHD [code] |
| Serial / batch / bin tracking on the items being returned | Inventory Item Maintenance | Tracked items need matching allocations at FINAL |
API permissions TNT_API_DOC_INTERNAL_SALES_RETURN_{CREATE,READ,UPDATE,DELETE}_TGT_GUID | Settings → permission listings | Branch targets scope the listing |
| E-Invoice profile (optional) | My E-Invoice Admin | skip_einvoice is copied from the customer at FINAL; the return references the original e-Invoice |
Applet settings
Default Selection (settings/default-selection)
| Setting | Key | What it controls | Default |
|---|---|---|---|
| Default Branch / Default Location | DEFAULT_BRANCH, DEFAULT_LOCATION | Pre-filled header | none |
| Details tab ordering | tab-order key | The order of the form tabs, by drag and drop. It is saved for the applet, so every user sees the same order; a tab added by a later release appears at the end. Reset clears the default branch, location and company but keeps the tab order | as listed above |
Application Settings (settings/field-settings) — behaviour toggles this applet reads (off unless stated):
| Section | Setting | Effect when on |
|---|---|---|
| Gen Doc Listing | DISABLE_GEN_DOC_LISTING, DEFAULT_TRANSACTION_DATE, DEFAULT_POSTING_STATUS, SORT_ORDER | Listing loads on search only; default date range, status filter and sort |
| Gen Doc Listing | SEND_EMAIL_TO_FINAL_GEN_DOCS_ONLY | Email refuses drafts |
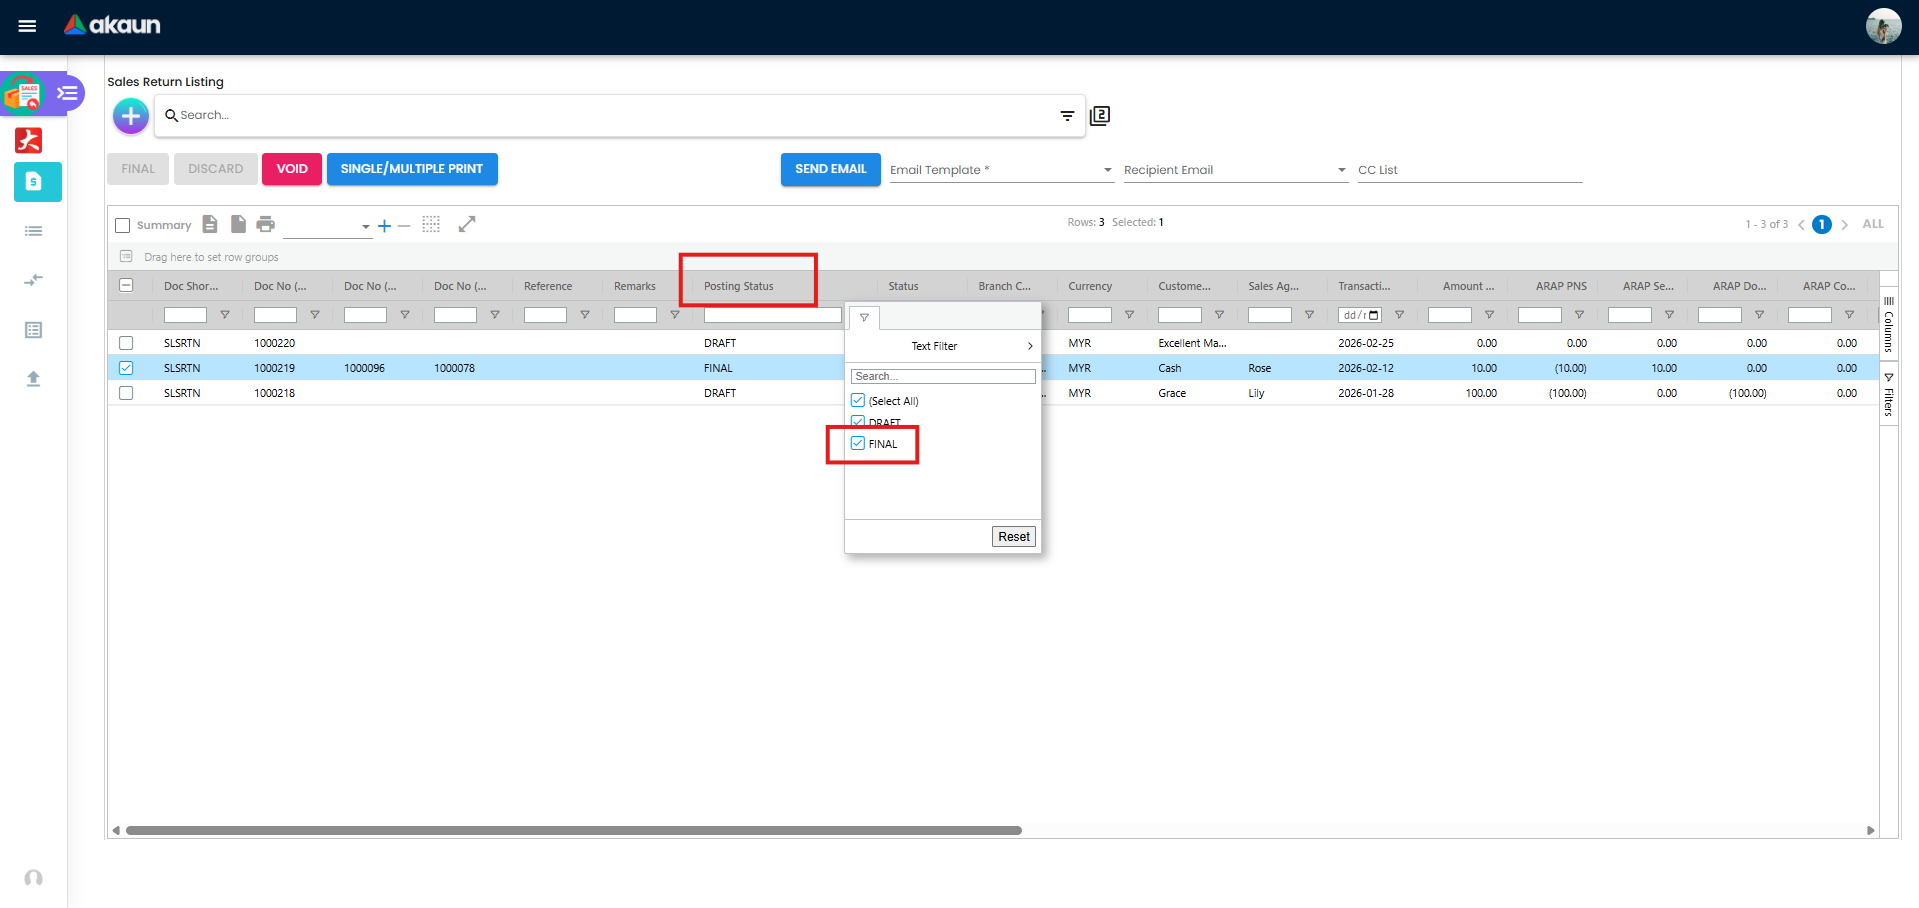
| Gen Doc Listing | SALES_RETURN_WITH_PAYMENT | A Final guard, not a layout change: Final from inside the document is refused until the return’s ARAP balance is zero — ARAP balance must be 0 for finalization — so record the refund or contra first. The refund you record on the Payment tab is that settlement leg: the applet writes it as a payment-voucher line with the opposite sign to the goods lines, and the return’s open amount is the signed sum of the two, so a fully refunded return opens at zero. The listing’s bulk Final does not make this check |
| Create & Print | ENABLE_AUTO_POPUP | Opens the printable after save |
| Selection Settings | WARN_EXCESS_RETURN_QUANTITY | Refuses, not warns: a line imported from an invoice whose return quantity, with what earlier returns already took, exceeds what the source line sold gets Total return quantity is greater that the invoice qty and is not added. Off, nothing is compared. Lines added by item search rather than from an invoice are never compared either way |
| Selection Settings | SHOW_INVOICES_FROM | Default date from filter of Search By Invoice / Cashbill |
| Doc Settings | ENABLE_SALES_AGENT_AUTOFILL, ENABLE_EMPLOYEE_LOGIN_AUTO_DETECTION, CANNOT_EDIT_CURRENCY_RATE, SHOW_FOREX_DATA_SOURCE | As in the Sales Invoice applet |
| Workflow Selection | WORKFLOW_PROCESS_GUID | The process every new return starts on, saved with that process’s Starting Status. A return keeps the process it was created with |
| Workflow Selection | FINAL_STATUS_GUID | Holds back the Final button inside the return: it shows only when the workflow status saved on the return equals this one, or when this is unset. Pressing Final sets no workflow status, and the listing’s Final, for returns you tick, does not consult it — see the one real gate |
| Entity Details | ENABLE_BRANCH_FILTER | Customer search scoped by branch |
| Lines | ENABLE_EDITING_UNIT_PRICE_STD, ENABLE_ITEM_NAME_MAX_LIMIT + ITEM_NAME_MAX_LIMIT | Line editing rules |
| Line Permission | WARN_ZERO_UNIT_PRICE_BEFORE_ADD, DISABLE_EDITING_AMOUNT_TXN | Zero-price prompt; locked transaction amount |
| Payment | ENABLE_EDIT_PAYMENT_DATE, ENABLE_EDIT_SETTLEMENT_FINAL | Settlement lines editable, including after FINAL (total unchanged). The edit settlement date switch other document applets get is not shown for this one |
| Contra | EDIT_CONTRA_TXN_DATE, CONTRA_DATE_SAME_AS_DOC_DATE_TXN | Contra date editable / forced to the return’s transaction date instead of the latest document date |
| Credit Card | MANDATORY_CARD_NO, MANDATORY_NAME, MANDATORY_CARD_ISSUER, MANDATORY_CARD_EXPIRY, MANDATORY_APPROVAL_CODE, MANDATORY_BATCH, MANDATORY_CARD_TYPE, MANDATORY_CVV | Card fields required on a card refund line |
| Menus | HIDE_INTERCOMPANY_MENU, HIDE_FILE_EXPORT_MENU | Remove the sidebar item unless the user holds SHOW_INTERCOMPANY_MENU / SHOW_FILE_EXPORT_MENU. The swap-serial-number menu hide is not shown for this applet and read by nothing in it |
Read with no control on any settings screen — these take effect only if support has stored the key in the applet’s settings JSON. Two of them move dates and money: AUTO_UPDATE_TXN_DATE_ON_FINAL re-dates the return to today with a save made before the Final is requested, so a refused Final leaves the draft re-dated; AUTO_SETTLE_CONTRA shows the Auto Settle control on the Contra tab. The rest: DEFAULT_CUST_TYPE, DEFAULT_COUNTRY, DEFAULT_CURRENCY pre-fill a customer created from the return (corporate when unset); ENABLE_DRAFT_LOCK_SERIAL_NUMBER_CHECKING asks the server, as a serial line is saved, whether another draft already holds it; SHOW_DOCUMENT_DELETE_BUTTON, HIDE_CLONE_BUTTON, HIDE_SEND_EMAIL_BUTTON, HIDE_SELECT_FROM_ANOTHER_CUSTOMER_BUTTON, DEFAULT_STATUS, FUZZY_SEARCH_COLUMNS, DISABLE_ITEM_LISTING and the four department hides (HIDE_SEGMENT, HIDE_DIMENSION, HIDE_PROFIT_CENTER, HIDE_PROJECT).
The other switches on Application Settings hide or expand a field, a column, a tab or a button. Each one’s whole effect is on your screen the moment you flip it, so they are not listed here.
Keys in the model with no control anywhere: ENABLE_CUSTOM_STATUS_*, department/tax INCLUDE_* / ENABLE_* flags. Five that look like that are not: DEFAULT_DELIVERY_BRANCH / DEFAULT_DELIVERY_LOCATION are set on Personalization → Default Selection and read by Main Details; DEFAULT_ORIENTATION / DEFAULT_TOGGLE_COLUMN are read by the split create and edit screens; PRINTABLE is the listing’s print default and the export tab’s fallback printable.
Document behaviour settings
| Area | How it is configured |
|---|---|
| Status flow | DRAFT → FINAL → VOID; Discard on a draft. |
| Posting at FINAL | Company posting_final_json include/exclude list via the Generic Document Primary Processor. |
| Workflow | Settings → Workflow Settings links a company to a process for INTERNAL_SALES_RETURN; the process a new return starts on and the Final status are chosen on Application Settings › Workflow Selection (above). |
| Printables | Settings → Printable Format Settings. |
Settings → Email Template; SEND_EMAIL_TO_FINAL_GEN_DOCS_ONLY. For intercompany returns the recipient billing/shipping email is filled from the target company. | |
| e-Invoice | INTERNAL_SALES_RETURN is an e-Invoice document type. On the saved return, E-Invoice → Submission holds Original E-invoice Ref No, Original E-invoice Ref UUID (picker Select E-invoice Main Doc Ref No) and Document Date; Skip E-Invoice is available. TIN validation follows the API response. Queues, validation and cancellation run in My E-Invoice Admin / Portal. |
| Intercompany | Intercompany menu; mapping INTERNAL_SALES_RETURN ↔ INTERNAL_PURCHASE_RETURN. |
Feature visibility / permissions
API: TNT_API_DOC_INTERNAL_SALES_RETURN_{CREATE,READ,UPDATE,DELETE}_TGT_GUID.
Client-side permissions registered for this applet (45):
| Group | Codes |
|---|---|
| Buttons | SHOW_GENDOC_FINAL_BUTTON, SHOW_GENDOC_VOID_BUTTON, SHOW_GENDOC_DISCARD_BUTTON, SHOW_EDIT_SETTLEMENT_FINAL (edit payment after FINAL), SHOW_SWAP_SERIAL_NUMBER (Swap Serial tab in the line listing) |
| Pricing and amounts | SHOW_UNIT_PRICE_STD_PRICING_SCHEME, SHOW_UNIT_PRICE_STD_INCL_TAX, SHOW_UNIT_PRICE_STD_EXCL_TAX, SHOW_UNIT_PRICE_STD_UOM_INCL_TAX, SHOW_UNIT_PRICE_STD_UOM_EXCL_TAX, SHOW_UNIT_PRICE_NET_EXCL_TAX, SHOW_UNIT_PRICE_NET_UOM_EXCL_TAX, SHOW_UNIT_PRICE_TXN, SHOW_UNIT_PRICE_TXN_UOM_INCL_TAX, SHOW_UNIT_DISCOUNT, SHOW_UNIT_DISCOUNT_UOM_EXCL_TAX, SHOW_AMOUNT_STD_EXCL_TAX, SHOW_DISCOUNT_AMOUNT_EXCL_TAX, SHOW_AMOUNT_NET_EXCL_TAX, SHOW_AMOUNT_TXN, SHOW_QTY_BASE, SHOW_QTY_UOM, SHOW_UOM_TO_BASE_RATIO, SHOW_TAX_CONFIG_SELECTION, SHOW_WHT_CONFIG_SELECTION, SHOW_COSTING_DETAILS, SALES_RETURN_DISPLAY_PRICING, SHOW_DISABLE_EDITING_AMOUNT_TXN_SETTING |
| ARAP columns | SHOW_ARAP_PNS, SHOW_ARAP_SETTLEMENT, SHOW_ARAP_DOC_OPEN, SHOW_ARAP_CONTRA, SHOW_ARAP_BAL |
| Document numbers | SHOW_DOC_NO_TENANT, SHOW_DOC_NO_COMPANY, SHOW_DOC_NO_BRANCH, SHOW_CLIENT_DOC_TYPE, SHOW_CLIENT_DOC_1…5, SHOW_DESCRIPTION, SHOW_TRANSACTION_DATE — the SHOW_DOC_NO_* codes reopen a number field that HIDE_SERVER_DOC_1..3 hid on Main Details; on the listing the hide settings are never applied, so the Doc No columns stay visible and these codes have nothing to reopen |
The app also reads SHOW_INTERCOMPANY_MENU and SHOW_FILE_EXPORT_MENU, which are not registered for this applet (see Troubleshooting).
Fields
Main Details
| Field | Meaning | Required | Notes |
|---|---|---|---|
| Company, Branch, Location | Receiving branch and stock location | Yes | Delivery Branch / Location shown when enabled; a warning appears if they differ from the header |
| Transaction Date | Return date | Yes | Locked-period check at FINAL |
| Reason | Why the goods came back | No, unless a setting requires it | Once chosen it can be changed but not cleared — saving it blank keeps the old reason. When intercompany creates a counterpart document from this return, the reason is copied onto it. Where the list comes from, and why a rename reaches old returns: Settings → Return Reasons above |
| Currency, Currency Rate, Inverse Rate | Document currency | Currency yes | Rate copied from the source invoice on knock-off; lockable |
| Sales Agent | Employee credited | No | Picking the customer fills it from the customer’s Default Sales Agent (a message says so), or, with sales-agent autofill on, from the customer’s account manager. Lines brought in through Search keep the original invoice line’s agent instead, so the header and the lines can name different people |
| Reference, Remarks, Credit Terms, Credit Limit, Due Date, Tracking ID, Permit No, Member Card | Header attributes | No | Use Reference for the original invoice number when Search is not used |
Account: Entity ID (required); billing and shipping contacts and addresses (edits persist on save); Intercompany. The entity cannot be changed once lines are linked to a sales invoice.
Lines (txn_type = PNS)
| Field | Meaning | Required | Notes |
|---|---|---|---|
| Item | Returned item | Yes | From the source invoice line or item search. A line added by item search starts with the header’s sales agent; a line brought in through Search carries the invoice line’s agent, delivery branch and location |
| Quantity, UOM | Returned quantity | Yes | Quantity signum +1 is filled by the backend; with WARN_EXCESS_RETURN_QUANTITY on, a line imported from an invoice is refused if it would exceed the sold quantity |
| Unit Price STD / Net, discount, Net Amount, Net Amount with Tax, Transaction Amount | Value credited | Net and transaction amounts required | A manually changed price is kept on edit (no longer reset to the pricing scheme) |
| Tax Code, Tax Amount | Tax reversal | From item or scheme | Posts to OUTPUT_TAX |
| Serial Number, Batch Number (batch no, qty, issue and expiry date), Bin Number (bin code, container measure / qty, qty) | Allocations for tracked items | Match line quantity at FINAL | Swap Serial available on FINAL documents |
| Costing Details | A grid of company, location, quantity and four unit costs | Read-only | Always empty on this applet — the grid is drawn with no data behind it, on create and on edit. The returned unit’s cost is real and stored; see Where the numbers on a return come from below for where to read it |
Payment: settlement group and method, date, amount (≥ 0.01), plus type-specific references and any card fields marked mandatory. Contra: select open receivable documents; contra date is the latest document date unless CONTRA_DATE_SAME_AS_DOC_DATE_TXN is on.
Lifecycle and effects
| Status | Meaning | Allowed next |
|---|---|---|
| DRAFT | Editable; no stock or GL effect | FINAL, Discard |
| FINAL | Numbered and locked. Stock, journal and receivable are written by background jobs a moment later, so a return can be FINAL with no journal (Troubleshooting, first row). Payment editable only with ENABLE_EDIT_SETTLEMENT_FINAL + permission | VOID |
| VOID | Reversed with a void reason | none |
FINAL validation (backend): exchange rate when currencies differ; serial, bin and batch quantities match the line quantity; transaction date and company present; date not in a locked fiscal period. (Blacklist and stock-balance checks do not apply — the movement is inbound.)
What FINAL does: generates running numbers; copies skip_einvoice from the customer; queues the primary processor (inventory, journal, AR, cashbook per company posting_final_json); queues the message-template (email) processor. Both Final buttons — in the document and on the listing — send only {posting_status: FINAL}, no stock, serial or date flag, so the server’s defaults apply; the transaction date stays as typed unless AUTO_UPDATE_TXN_DATE_ON_FINAL is stored (above).
Journal — SALES handler, amount signum −1, goods lines mapped to SALES_RETURN (a header group-discount line is the exception — see the warning below the table):
| Dr | Cr | Amount | GL code source |
|---|---|---|---|
Sales Return (SALES_RETURN), or the line’s own GL code | Net amount per line | Line glcode_guid → item-company GL link → company default | |
Output tax (OUTPUT_TAX) | Tax amount | Company default GL | |
Debtor (DEBTOR / DEBTOR_NON_TRADE) | Total including tax | Company default GL by customer AR type | |
| Debtor | Cashbook GL | Each Payment-tab (refund) line | Settlement method |
Stock: each PNS line writes an inventory transaction with quantity × +1 at the return’s branch and location; serial numbers and batches are re-activated at that location.
VOID sets the status and reason, queues the void primary processor (reverses stock, journal and AR) and removes the return from the e-Invoice queue. On a company enabled for e-invoicing the Void button refuses every sales return, submitted or not, with “Generic Document cannot be changed to VOID because e-invoice is enabled”. Cancelling the e-invoice first does not change that. The void that does work is a rejection request in My E-Invoice Admin approved with Void original document: it cancels at LHDN within the 72-hour window and then voids the return itself.
Worked example: a laptop comes back after three weeks
A corporate customer bought one ultraportable laptop at GS-KV-01 three weeks ago on a Sales Invoice for RM 3,800, on 30-day terms, and has not paid. The laptop comes back unused. Leave tax aside for the arithmetic; a tax line reverses the same way, to output tax. When the laptop was sold, the moving-average cost at the branch was RM 3,100. A cheaper batch has arrived since, and the average now stands at RM 2,950.
You create the return with Search By Invoice, take the one line, and Final it. A moment later the background jobs have run, and this is what changed:
| What | After the return | What it does not touch |
|---|---|---|
| Journal | Dr Sales Return 3,800, Cr the customer 3,800 | No cost-of-goods-sold line. Cost of goods sold is the month-end journal |
Stock at GS-KV-01 | One more laptop, valued at RM 2,950 — the average standing just before the return | Not RM 3,100, what it cost when it left, and not RM 3,800, what you credited. The average price itself does not move |
| The return’s own balance | −3,800: a credit the customer holds | Nothing is paid out unless you record a refund on the Payment tab |
| The original invoice | Still FINAL, still open at +3,800 | The return records which invoice line it came from (a quantity link, used by the excess-return check), but it does not reduce the invoice’s balance |
| E-invoice | Where your company is enabled for e-invoicing, the return is queued as its own e-invoice document after Final, carrying the original’s reference you pick on its E-Invoice tab | The original e-invoice stays valid at LHDN. Cancelling it is a different route, open only within 72 hours of validation — see My E-Invoice Admin |
How the credit meets the invoice. Until you join them, the customer’s account shows an invoice owing RM 3,800 and a return owed back RM 3,800. The total is right, but each document keeps its own balance, so the invoice goes on ageing as unpaid. Open the return’s Contra tab, tick the invoice and contra RM 3,800. Both balances fall to zero. A refund on the Payment tab is for a customer who has already paid: here it would hand back RM 3,800 against an invoice nobody settled.
Why the laptop comes back at today’s average, not at its old cost. A return line carries a selling price, not a cost. If the moving average absorbed it, every return would push the cost of everything else on the shelf towards the retail price. So BigLedger lets a sales return change the quantity but not the average. The RM 150 between RM 3,100 out and RM 2,950 back is not reversed by the return.
Where the numbers on a return come from
| Figure | Where it comes from | When it is fixed |
|---|---|---|
| Line price and amount, from Search By Invoice | Copied from the invoice line and apportioned to the quantity you return | Stored at the time you add the line. The return keeps its own copy, so a later change to the invoice does not reach it |
| Doc Open | The goods lines (negative) plus any refund lines on the Payment tab (positive) | Recomputed and stored every time the return is saved, on create and on edit |
| Balance | Doc Open plus every contra recorded against the return | Re-summed from all its contras each time one is added or deleted, so it stays right if a contra is removed later |
| Cost of the returned stock | The item’s moving-average price just before the return in the company’s stock history | Calculated by the inventory job after Final, then written back onto the return line. You read it as MA Price in Stock Balance — the line’s own Costing Details tab is always empty |
| Journal amounts | Built by the journal job from the return’s lines | Taken when the job runs after Final. Repost in Trace Document rebuilds it from the lines as they are then |
How you know a return went through
FINAL tells you the request was accepted, not that the background jobs succeeded. Spend 30 seconds on the saved return:
- Open the TraceDocument tab, then Journal Txn. You should see Sales Return (or the line’s own GL code) and output tax on the debit side, and the customer on the credit side, for the return’s total. An empty grid means the journal job failed — go to the first row of Troubleshooting.
- On the same tab, open Inv Txn. There is one row per returned line, with Qty Signum 1 — that is the stock coming in. If the grid is empty, the stock job has not run or failed, and Stock Balance will not have moved either.
- In Stock Balance, the item at the return’s location has gone up by the quantity you took back.
- On the listing, the return’s Balance is minus its total, or zero once a refund or contra covers it. After a contra, the original invoice’s Balance has fallen by the same amount.
- If your company is enabled for e-invoicing, the return shows in My E-Invoice Admin after Final, never after a mere save.
Related applets
- Sales Invoice (Internal), POS General — the documents being returned against.
- Sales Credit Note (Internal) — financial-only correction without stock.
- Sales Refund Note (Internal), Receipt Voucher (Internal) — settle the credit balance later.
- Purchase Return (Internal) — intercompany mirror.
- My E-Invoice Portal, My E-Invoice Admin — submission against the original e-Invoice; cancellation windows.
- Stock Balance — where the returned quantity reappears.
- Customer, Chart of Account, Cashbook, Workflow Design — master data and workflow.
Troubleshooting
| Symptom | Cause | Fix |
|---|---|---|
Return is FINAL but its Journal Txn grid is empty. The reason BigLedger support reads is MISSING_DEFAULT_GL_CODE: DEBTOR (or DEBTOR_NON_TRADE), or TOTAL_DEBITS_AND_TOTAL_CREDITS_NOT_BALANCES when SALES_RETURN / OUTPUT_TAX resolved no GL code and the customer has no AR/AP type; no screen shows it until you press Resolve | Company default GL codes missing — the journal job runs after FINAL and fails | Set them in Chart of Account, then Financial Report › Error Checking › Trace Document → Missing Journal → Resolve. Resolve, pressed while the cause is still there, posts nothing and shows the reason in the check’s message, so it doubles as the diagnosis |
| No error, but trade debtors no longer agrees with the debtor ageing, and sales returns or SST are short by the same amount | A line resolved no GL code and was left out of the journal; the customer’s line was built from the lines that remained, so it absorbed the amount and the journal posted. The return is FINAL with a journal, so Trace Document finds nothing, and the customer statement and ageing (built from documents) look right. Before go-live, check every code this return uses has a company default, or every item its own | Set them in Chart of Account. Then open each affected return in Error Checking › Trace Document and press Repost beside Posting Journal: it deletes the short journal and builds it again from the return, now with every line. Repost successful means it worked. A failed Repost shows nothing, and it has already deleted the old journal, so open the Journal Txn grid afterwards: if it is empty, press Resolve on the Missing Journal check, which posts the journal or shows why it cannot. Or post a correcting journal yourself |
| You took back RM 1,000 of goods less a RM 50 group discount and the screen says RM 950, but the journal shows Dr Sales Return 1,000, Dr Sales 50 and the customer credited RM 1,050 | The group-discount line is saved with the opposite sign to every other line and is not mapped to Sales Return, so it posts on the same side as the returned goods, and the customer line takes up the difference: twice the discount. A known issue, reported to engineering. Read from the code, not seen on any tenant | Take the discount off the line prices (unit discount) rather than using the Group Discount boxes. If a return already went through, correct it with a journal entry |
| Reason dropdown is empty | No return reasons configured | Settings → Return Reasons |
| Lines copied from Search By Invoice show zero amounts | The source invoice line was saved with a zero standard amount, or an older build did not apportion amounts | Fixed: Add Selected / Add All now copy and apportion amounts; check the source invoice line |
| Cannot select the invoice: entity or branch does not match | Search By Invoice checks that the invoice’s customer and branch match the return header | Set the header branch and customer to match, or start from Search |
| Entity ID cannot be changed | Lines are linked to a sales invoice | Remove the linked lines first, or create a new return |
| Edit line resets the price you typed | Older build bug | Fixed; upgrade |
| Customer name blank on the listing | Older build bug | Fixed |
| Contra date not what you expected | Contra uses the latest document date unless CONTRA_DATE_SAME_AS_DOC_DATE_TXN | Set the toggle, or EDIT_CONTRA_TXN_DATE |
| Cannot add a Payment line | Document is FINAL/VOID/DISCARDED or locked | Add settlement before FINAL, or enable ENABLE_EDIT_SETTLEMENT_FINAL and grant SHOW_EDIT_SETTLEMENT_FINAL |
| Final refused with ARAP balance must be 0 for finalization although the Payment tab shows the full refund — and on the Debtor Report the return’s Doc Open is exactly twice its value | The return was created by the API or an integration with its refund line typed as a sales return rather than a payment voucher. On create the backend signs every line by the type it arrived with, so the refund took the goods’ sign and added to the balance instead of cancelling it; the repair that re-types a settlement line runs on update only | Open the return and save it once: the save re-types and re-signs the refund line and the open amount drops to zero. Then Final. Have the integration send settlement lines typed as a payment voucher |
| Void refused: "…cannot be changed to VOID because e-invoice is enabled" | Your company is enabled for e-invoicing. The button refuses every sales return, whether or not it was submitted | Within 72 hours of validation, raise a rejection request in My E-Invoice Admin with Void original document; it cancels at LHDN and voids the return. Do not cancel first and come back to the button: it still refuses |
| Intercompany or File Export menu missing for one user | HIDE_*_MENU on and the SHOW_*_MENU codes are not registered for this applet | Turn the hide off or request the codes |
| Batch Issue / Expiry date required on the batch tab | Tenant does not track batch dates | Hide them with HIDE_BATCH_ISSUE_DATE / HIDE_BATCH_EXPIRY_DATE (added for this applet) |
| Returned quantity larger than sold | WARN_EXCESS_RETURN_QUANTITY off, or the line was added by item search rather than imported from the invoice | Turn it on and import lines from the invoice; with it on the excess line is refused, not warned about |
| A return built from an invoice is more negative than the goods by exactly the invoice’s group discount | The invoice’s group-discount row was copied with the items — Search By Invoice lists it like any line and Add All takes it — and a group-discount line on a return posts with the wrong sign (the warning under Lifecycle) | Remove the discount row before FINAL and take the discount off the line prices instead; if it already went through, correct the difference with a journal entry |