Chart of Accounts Setup Guide
You are setting up GadgetSphere’s chart of accounts in BigLedger for the first time, migrating from a previous accounting system. By the end of this guide, your first sales invoice will post without error and your opening trial balance will balance to the cent. Set aside about 45 minutes of focused time — that is enough to get the chart live, with room left to test a posting before lunch.
Meet GadgetSphere
GadgetSphere Sdn Bhd is a Malaysian consumer electronics retailer with 22 branches across the Klang Valley, Penang, Johor Bahru, Kota Kinabalu and Kuching. You are doing this setup for GadgetSphere Sdn Bhd (company code GS) — the main retail company. Two sister companies, GadgetSphere Online (GSO) and GadgetSphere Distribution (GSD), will be added later, but you are starting with the operating retailer. You have around 5,200 stock-keeping units (SKUs), 28 cashbooks across three banks, Sales and Service Tax (SST) registration at 6%, and a finance manager who wants the chart ready by Friday so the next month-end posts cleanly.
Three concepts to know first
The three-level filing system — GL Section, GL Category, GL Code. Every transaction lands in a GL Code (the account, e.g. CASH-PRI-KV01). Every code lives inside a GL Category (e.g. Cash and Bank). Every category is linked to a GL Section (e.g. CurrentAssets), which is the line on your financial statements.
The sections are BigLedger’s, not yours. BigLedger ships 18 GL Sections with fixed codes — CurrentAssets, CurrentLiabilities, SalesRevenue, GeneralExpenses and so on — and month-end closing decides what is profit-and-loss and what is balance-sheet by looking at those codes. You may change a section’s display name; you should never change its code or invent a section of your own. Step 2 lists them.
The system’s shortcuts — Default GL Codes. When you finalise a sales invoice, BigLedger does not ask “which account should this sale go to?” — it looks up the Default GL Codes mapping on the company record. You map each system role (trade debtors, sales, output SST, retained earnings and so on) to one of your GL Codes once, and the system uses it from then on.
The binder that holds your ledger — Set of Books. A Set of Books links one or more ledgers together for a reporting purpose, for example a statutory Set of Books for tax filing and a management one for internal profit and loss. Most single-entity setups start with one Set of Books containing one primary ledger.
Before you start
- The company GadgetSphere Sdn Bhd (code
GS, currency MYR) exists in the Organisation applet. Creating a company there requires a chart of accounts, so whoever createdGSeither picked an existing chart or clicked + to create one codedDEFAULT— you will check which in Step 1. - You know your fiscal year boundaries (1 January to 31 December for this example).
- You have your existing chart of accounts exported from the previous system as a spreadsheet, ready to convert to CSV.
- You have a one-page list of which GL Codes will play which system role (which one is trade debtors, which one is retained earnings, which one is output SST, and so on).
- The Chart of Account applet is installed for your user. There is no finer permission inside it — anyone who can open it can create codes, map Default GL Codes and change period locks — so it should be installed for the few people who own the books.
- You have agreed a GL Code naming convention with your finance manager. GadgetSphere uses mnemonic codes like
CASH-PRI-KV01,SALES-SMARTPHONE,EXPENSE-RENTALrather than numeric ranges. (Numeric codes work just as well — the 200 template codes you will meet in Step 1 use numbers.)
Step 1: Confirm the company and the chart it carries
Master Data > Chart of Account Applet > Companies
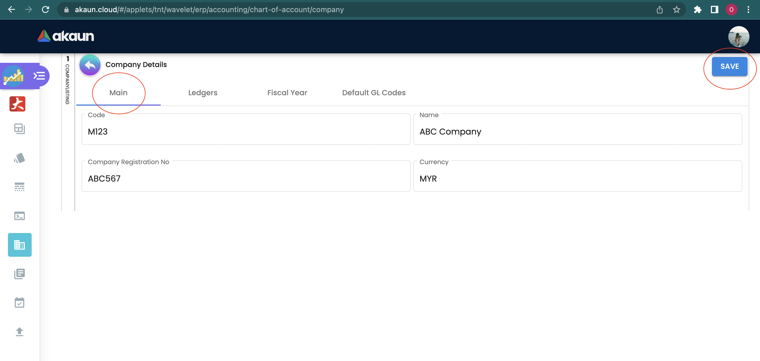
Open the Chart of Account applet and click Companies in the sidebar. Every active company in the tenant is listed here, with or without a chart. Click GadgetSphere Sdn Bhd to open its Main tab and check five fields: Company Code (GS — read-only, it was fixed when the company was created), Company Name, Company Registration No. (your SSM number), Currency (MYR) and Chart of Account.
The Chart of Account field decides two things: which codes this company can post to, and whether the Default GL Codes tab appears at all — it renders only once a chart is assigned. If the field already shows a chart (typically DEFAULT), keep it; that is the chart you will build GadgetSphere’s codes into. If it is empty, click Chart of Account in the sidebar, click New, enter COA Code COA-GS and COA Name GadgetSphere Chart of Accounts, save, then come back to the company’s Main tab, pick COA-GS and Save.
Either way, here is the thing nobody tells you: creating a chart is not creating an empty chart. BigLedger seeds every new chart with a built-in template — the 18 GL Sections, 53 categories under them, and 200 GL Codes with numeric account numbers (110101 Cash Drawers, 110401 Account Receivable, 210101 Account Payable, 410201 Purchases and so on). Open GL Code in the sidebar and you will see them; the whole template, section by section, is listed on the applet page under The built-in template. You have two honest choices: adopt the template codes and rename them to match your old chart, or build your own codes alongside and set the template codes you do not use to INACTIVE so they leave the GL Code listing and the journal-line drop-down (the GL Code picker on sales and purchase lines does not filter on status, so brief the Sales team on which codes are yours). GadgetSphere takes the second route, because 200 numeric codes do not match a mnemonic convention and a retailer with 28 bank accounts needs its own cash codes anyway.
Watch out: do not create a second chart “to start clean”. Each new chart seeds another 200 codes, and the sections are shared across charts anyway — the template reuses any section whose code already exists. One chart per company is the shape to keep.
Step 2: Learn the 18 GL Sections — and leave their codes alone
Master Data > Chart of Account Applet > GL Section
Click GL Section in the sidebar. The listing shows each section’s code, name, account number and status. The codes are what matter — and the categories and codes the template put under each of them are listed on the applet page under The built-in template, which is the quickest way to see what a section is meant to hold. Month-end closing looks at the section code of every balance and closes eleven of them to profit and loss; everything else is carried forward as a balance-sheet item. The opening-balance report you will use in Step 9 lays out its balance sheet and profit and loss by the same codes.
| Statement | Section codes (use exactly these) | What goes there for GadgetSphere |
|---|---|---|
| Balance sheet — assets | CurrentAssets, FixedAssets, FixedAssets-AccumulatedDepreciation, OtherAssets | Cash and bank, trade debtors, card receivables, inventory; shop fit-outs and equipment; their depreciation |
| Balance sheet — liabilities | CurrentLiabilities, LongTermLiabilities | Trade creditors, SST payable, accruals; bank loans |
| Balance sheet — equity | ShareCapital, RetainedEarnings, ProfitLoss | Paid-up capital; accumulated profits; the current year’s result |
| Profit and loss | SalesRevenue, SalesExpenses, CostOfGoodsSold, CostOfGoodsSold-Gains, CostOfGoodsSold-Expenses, GeneralExpenses, OtherRevenues, OtherExpenses, TaxExpenses, Dividend | Sales; discounts and commissions; purchases and inventory cost; purchase returns; freight and assembly; rent, wages, marketing, utilities; interest income; bank charges; tax |
One code in the table is not on your screen: Dividend is recognised by the reports as profit-and-loss but the template does not create it, which is why you count 18 sections and the table shows 19 codes. Leave it out unless you pay dividends; if you do, create a section with exactly that code. You may rename a section’s display name (click the row, change GL Section Name, UPDATE) if your finance manager prefers “Non-Current Assets” to “FixedAssets”. You should not create new sections, and you should not touch a code. If you feel the urge to add a section called Expenses because that is what the old system had, resist it: a category under a section code the reports do not know is treated as a balance-sheet item, so your rent and wages would never close to profit and loss.
The capture that sat here was withdrawn: it showed a staging tenant’s live rows carrying a staff e-mail address and a third-party company name, with a tenant identifier in the address bar. A recapture from a synthetic demo tenant is on the list.
Watch out: the section codes are case-sensitive and hyphenated exactly as shown. CurrentAssets is a section; Current Assets and CURRENTASSETS are not, and the category import in Step 3 will refuse them.
Step 3: Bulk import your GL Categories, each with its section
Master Data > Chart of Account Applet > Import GL Category
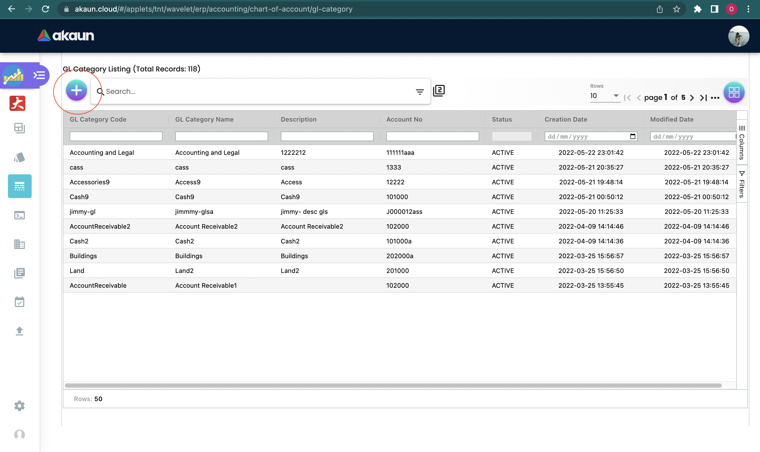
For a retailer of GadgetSphere’s size you will end up with 20 to 30 categories of your own on top of the template’s. Typing them one by one is slow — use the bulk import. Open Import GL Category and click the *Sample Format link to download the template. It has six columns: GL_CATEGORY_CODE, GL_CATEGORY_NAME, PARENT_CATEGORY, DESC, ACCOUNT_NO, SECTION_CODE. The last one is the link to Step 2 — every row must carry the exact code of the section the category belongs to. Fill it like this:
CAT-CASH-BANK,Cash and Bank, blank, blank, blank,CurrentAssetsCAT-TRADE-DEBTORS,Trade Receivables, blank, blank, blank,CurrentAssetsCAT-CARD-DEBTORS,Card Receivables, blank, blank, blank,CurrentAssetsCAT-INVENTORY,Inventory, blank, blank, blank,CurrentAssetsCAT-TRADE-CREDITORS,Trade Payables, blank, blank, blank,CurrentLiabilitiesCAT-TAX-LIAB,SST Payable, blank, blank, blank,CurrentLiabilitiesCAT-SALES-RETAIL,Retail Sales, blank, blank, blank,SalesRevenueCAT-COST-OF-SALES,Cost of Sales, blank, blank, blank,CostOfGoodsSoldCAT-OPEX-PREMISES,Rental and Utilities, blank, blank, blank,GeneralExpensesCAT-OPEX-STAFF,Wages and Salaries, blank, blank, blank,GeneralExpenses
… and so on for marketing, bank charges, depreciation, share capital (ShareCapital) and retained earnings (RetainedEarnings). Leave PARENT_CATEGORY blank unless you want a sub-category; if you fill it, it must be the code of a category that already exists. Save as CSV, drag it onto the upload area, review the row flags (green = ready, red = error, hover for the reason), then click ADD to commit. The category code cannot be changed after import — if you typo it you can only deactivate the category and create it again. If you have fewer than ten categories, create them by hand under GL Category > New and pick the section on the GL Section tab instead.
Watch out: a row whose SECTION_CODE matches no section is skipped with INVALID SECTION CODE written against the row — but the other rows still go in and the import finishes, so the status alone will not tell you. Check the row flags after every import and compare the count in the GL Category listing with the rows in your file. Copy the section codes from the GL Section listing rather than retyping them.
Step 4: Check the tree — every category under its section
Master Data > Chart of Account Applet > Chart of Account > (open the chart)
Open the Chart of Account tree view and expand each section. Every category you imported should be visible under the section you named in SECTION_CODE. If one is missing, it has no section link: open GL Category, click the category, switch to the GL Section tab, Add, pick the section, save. That is also how you fix a category that landed under the wrong section — delete the wrong link on the same tab and add the right one. Link each category to exactly one section.
Watch out: a category that is linked to no section is invisible to the statements and to month-end. It is the single most common reason a balance “disappears” from the trial balance while the GL Code listing still shows it.
Step 5: Bulk import your GL Codes
Master Data > Chart of Account Applet > Import GL Code
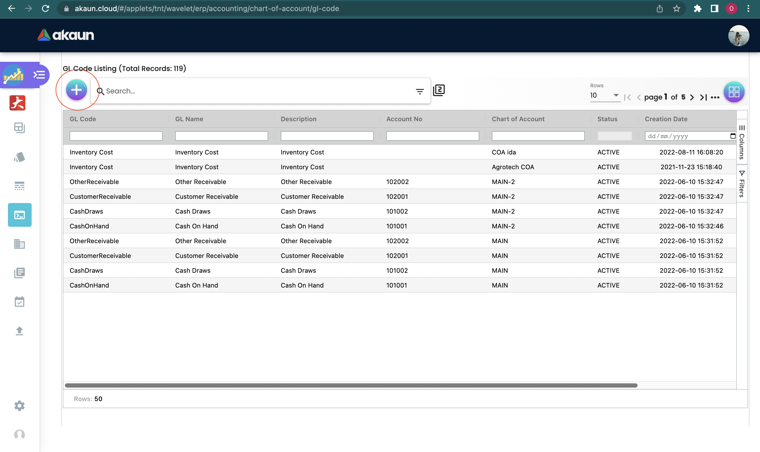
Open Import GL Code and download the *Sample Format CSV. The columns are CHART_OF_ACC, GL_CATEGORY, GL_CODE_1, GL_NAME, DESC, GL_CODE_3. CHART_OF_ACC is the chart’s code from Step 1 (DEFAULT or COA-GS); GL_CATEGORY is the category code from Step 3 (CAT-CASH-BANK, not “Cash and Bank”); GL_CODE_1 is the account code; GL_CODE_3 is an optional alternative number — leave it blank. Go back to your exported chart from the previous system, map each old code to its new GadgetSphere code, and paste into the template. A typical block looks like: DEFAULT, CAT-CASH-BANK, CASH-PRI-KV01, Cash - Primary Bank - KV Branch 01, blank, blank; the next row CASH-PRI-KV02; and so on for all 28 cashbooks. Then the inventory codes (INV-SMARTPHONE, INV-LAPTOP, INV-TABLET, INV-GAMING, INV-ACCESSORY), the sales codes (SALES-SMARTPHONE, SALES-LAPTOP, SALES-ACCESSORY), the cost-of-sales codes (COST-SMARTPHONE, COST-LAPTOP), the expenses (EXPENSE-RENTAL, EXPENSE-WAGES, EXPENSE-MARKETING, EXPENSE-UTILITIES, EXPENSE-BANK-CHARGES, EXPENSE-ROUNDING), the liabilities (LIAB-SST-OUTPUT, LIAB-SUPPLIER-TRADE, LIAB-GRIR), and equity (EQUITY-CAPITAL, EQUITY-RETAINED). Get one row right first, upload it, confirm it lands in the right category, then run the full file.
A note on branches, because a 22-branch retailer always asks: you do not need a sales code per branch. Every journal line BigLedger writes carries the branch from the document, and the Financial Report applet’s Profit Loss Report groups by branch (and by segment, profit centre, dimension or project) without any help from the code. Keep one SALES-SMARTPHONE; let the branch on the invoice do the splitting. Cash is different — each bank account is a real, separate asset, so one code per cashbook is right.
Watch out: a row whose GL_CATEGORY matches no category code is flagged GL Category is invalid — the usual cause is pasting the category name instead of its code. And a row whose GL_CODE_1 already exists in that chart does not fail: it updates that code’s name, category and description. That is handy for fixing names in bulk, and dangerous if a template code and one of yours share a code by accident. The code itself can never be renamed — for CASH-PRI-KVO1 (letter O) the only way out is to set it INACTIVE and import CASH-PRI-KV01 (zero).
Step 6: Create the primary ledger and Set of Books
Master Data > Chart of Account Applet > Companies > (open GS) > Ledgers tab, then sidebar > Set Of Books
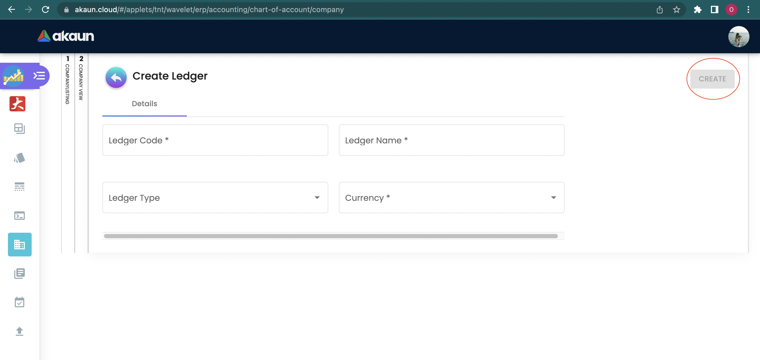
Open GadgetSphere Sdn Bhd in Companies and switch to the Ledgers tab. Click New and fill in: Ledger Code LED-GS-PRI, Ledger Name GadgetSphere Primary Ledger, Ledger Type PRIMARY, Currency MYR. Save. You need this before Step 7, because every Default GL Code you map creates a sub-ledger on the primary ledger. For now one primary ledger is enough — secondary or consolidated ledgers come later when you bring in GSO and GSD.
Next, sidebar > Set Of Books > New. Name it SOB-GS-MAIN (or Main Books FY2026 if your finance manager prefers a human name) and save. Open it, switch to the Ledgers tab, click Add, select LED-GS-PRI, save. This is the wiring that lets Month End Processing and the Trial Balance, Profit and Loss and Balance Sheet snapshots find your data. A Set of Books with no ledger fails month-end with Set of Books is missing primary ledger configuration — an easy hour-long wild goose chase to avoid.
Watch out: if you create the ledger as SECONDARY by mistake, the Opening Balance tab you need in Step 9 will not be there — it appears on primary ledgers only. Create a new PRIMARY ledger before you save any transactions.
Step 7: Map the Default GL Codes
Master Data > Chart of Account Applet > Companies > (open GS) > Default GL Codes tab
This is the step that prevents the biggest class of go-live failures. Open GadgetSphere in Companies and switch to the Default GL Codes tab (if you cannot see it, the company has no chart — go back to Step 1). Work through the sub-tabs and map every role that applies to a retailer, then click SAVE on the company header once — it writes every changed key together.
| Sub-tab | Role (plain English) | Map to |
|---|---|---|
| General | Retained earnings — where last year’s profit goes at year-end | EQUITY-RETAINED |
| General | Profit / loss — the current year’s result on the balance sheet | EQUITY-RETAINED |
| General | Rounding — the sen lost when a total is rounded | EXPENSE-ROUNDING |
| General | Settlement charges — card-acquirer and gateway fees | EXPENSE-BANK-CHARGES |
| Entity | Trade debtor — customers who owe you for sales | DEBTOR-TRADE-RETAIL |
| Entity | Trade creditor — suppliers you owe for stock | LIAB-SUPPLIER-TRADE |
| Entity | Non-trade debtor — money owed to you that is not a sale | DEBTOR-NON-TRADE |
| Entity | Non-trade creditor — money you owe that is not for stock | LIAB-NON-TRADE |
| Sales | Sales, Sales return, Sales discount | SALES-DEFAULT, SALES-RETURN, SALES-DISCOUNT |
| Sales | Output tax — SST you collected and owe the government | LIAB-SST-OUTPUT |
| Purchase | Purchase, Purchase return | EXPENSE-PURCHASES, EXPENSE-PURCHASE-RETURN |
| Purchase | Input tax — SST you paid and can claim | ASSET-SST-INPUT |
| Stock | Stock balance — the value of goods on the shelf | INV-STOCK-CONTROL |
| Stock | Cost of goods sold | COST-DEFAULT |
| Stock | Stock adjustment, Reset moving average (MA) — stock-take and cost corrections | EXPENSE-STOCK-ADJUSTMENT |
| Stock | Inventory not invoiced — goods received, invoice not yet received (GR/IR) | LIAB-GRIR |
On the Forex tab: only if GadgetSphere buys in USD from regional distributors — map forex gain and forex loss to your exchange-difference accounts. Skip the Consignment tab and the raw material / work-in-progress (WIP) / finished goods variants on the Stock tab — GadgetSphere is a retailer, not a manufacturer. The system names behind these labels (DEBTOR, OUTPUT_TAX, INVENTORY_NOT_INVOICED and the rest of the 41 keys) are listed on the applet page — you will see them in error messages, which is the only time you need them.
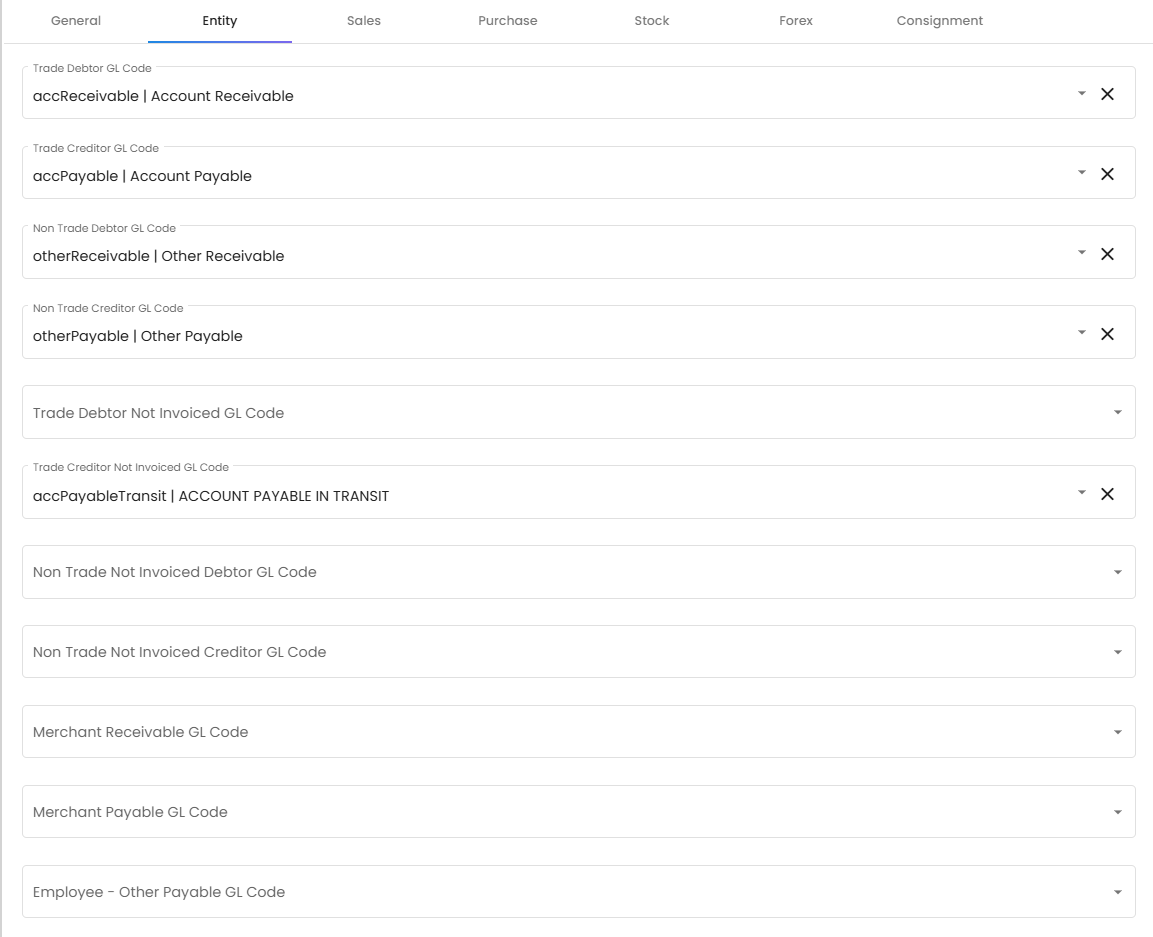
Watch out: a missing mapping does not fail here, and it does not stop a document going FINAL either — the invoice finalises, its background posting job fails, and no journal is written. Nobody in Sales sees a message; finance finds the hole at month-end, or sooner with Trace Document (Step 9). If you map Output Tax to an expense code by mistake (EXPENSE-SST instead of LIAB-SST-OUTPUT), nothing fails at all: the invoice posts, and your SST return shows negative output tax. Check that Output Tax points to a liability code and Input Tax to an asset code before you save.
Step 8: Open the fiscal year and set the period status
Master Data > Chart of Account Applet > Fiscal Year > New
Click Fiscal Year in the sidebar, then New. Select GadgetSphere Sdn Bhd as the Company, name the year FY 2026, set Start Date 1 January 2026 and End Date 31 December 2026, save. BigLedger generates the monthly periods from the date range. Open the new year and switch to the Fiscal Period tab: confirm all twelve periods exist and each shows Closing Status OPEN.
If your cutover is mid-year — say you go live on 1 April — click each of January, February and March, set the status to LOCK_TXN and save. That stops anyone back-dating an invoice into a month that was managed in the old system, while still letting you post opening-balance journals. The four statuses, in plain English: OPEN — anything goes; LOCK_GL — no manual journals, but documents still post (and their automatic journals with them); LOCK_TXN — no invoices, bills, payments or stock documents dated in the period, but manual journals still allowed; LOCK_ALL — both. Avoid LOCK_ALL during setup; that is the hard close after audit sign-off. Two things to know for a 22-branch retailer: stock transfers between branches ignore LOCK_TXN and LOCK_ALL and can still be finalised into a locked month, and any status can be set back to OPEN by anyone who can open this applet — there is no approval on it, so the discipline is in who has the applet.
The capture that sat here was withdrawn: it showed a staging tenant’s live rows carrying third-party company names. A recapture from a synthetic demo tenant is on the list.
Watch out: if FY 2025 already exists and you save a FY 2026 whose dates overlap it, BigLedger refuses with The date_start and date_end dates are overlapping with an existing fiscal period. Make the Start Date of FY 2026 exactly the day after the End Date of FY 2025.
Step 9: Enter opening balances and post one test invoice
Companies > (open GS) > Ledgers > LED-GS-PRI > Opening Balance, then Sales > Sales Invoice > New
Two checks, ten minutes. First, the migration balances. Open the GS company, Ledgers tab, click LED-GS-PRI, then the Opening Balance tab. Add GL Code for each account, key the debit or credit as at 31 December 2025 (the day before FY 2026 starts), and Save. BigLedger stores it as one opening-balance journal on the primary ledger and opens a Financial Report view of that journal — trial balance, profit and loss, balance sheet — from the same tab. For GadgetSphere the total typically runs RM 4–8 million: cash across 28 cashbooks, around RM 2 million of smartphones and laptops in INV-STOCK-CONTROL, trade and card debtors, shop fit-outs net of depreciation, supplier payables, SST payable, share capital, retained earnings. Total debits must equal total credits on that view — if they do not, something is missing, mis-keyed, or on the wrong side. Compare the list against the old system’s own trial balance, line by line; on a migration a wrong amount and a figure keyed as a debit instead of a credit are both commoner than an account left out. (The Opening Balance Migration page covers the stock, debtor, creditor and cashbook sequence; do the bank balances the way it says, or they will be posted twice.)
Second, one test sales invoice. Use a service item for the line — say an Installation service item at RM 1,000 — not a stock item: BigLedger refuses to finalise a sales invoice for a stock item with no stock at the branch (Not Enough Stock for item …), and on a fresh tenant nothing has stock yet. Customer = a test debtor, tax code = 6% SST, branch = GS-KV-01. Save, then set it to FINAL — the journal is written at FINAL, not at save. Open the Ledger and Journal applet and find the journal whose Document No is your test invoice. It should have exactly three lines: debit DEBTOR-TRADE-RETAIL RM 1,060, credit SALES-DEFAULT RM 1,000, credit LIAB-SST-OUTPUT RM 60. The sale credits your company default for Sales unless the item or the invoice line carries its own GL code — the branch does not pick the account, it only tags the line. There is no cost-of-goods line at FINAL; that is computed at month-end.
If the invoice is FINAL but no journal appears, a mapping is missing. FINAL itself succeeds — the journal is written a moment later by a background posting job, and it is that job that fails. Open the Financial Report applet > Error Checking > Trace Document, pick Sales Invoice (Internal), type the invoice number and TRACE: the Missing Journal check fails and the error names the gap — MISSING_DEFAULT_GL_CODE: DEBTOR means the Entity tab in Step 7 is unmapped; TOTAL_DEBITS_AND_TOTAL_CREDITS_NOT_BALANCES or NO_JOURNAL_CREATED means a Sales or Output Tax mapping is missing, so that line was dropped and the journal no longer balances. Map it, then click Resolve on the Trace Document screen to post the journal. Once both checks pass, Void the test invoice and you are live.
The capture that sat here was withdrawn: it showed a staging tenant’s live rows carrying a staff e-mail address and a third-party company name, with a tenant identifier in the address bar. A recapture from a synthetic demo tenant is on the list.
Watch out: do the test before you switch the company’s E-Invoice Status to ENABLED in the Organisation applet. Once it is on, every finalised invoice is queued for MyInvois; voiding pulls it out of the queue only if it has not been sent yet.
What success looks like
Open Companies > GS > Ledgers > LED-GS-PRI > Opening Balance and open its Financial Report view for 31 December 2025. The Total Debit and Total Credit at the bottom match to the cent and equal the totals from your old accounting system, and the balance sheet shows your cash, debtors and inventory under Current Assets, your creditors under Current Liabilities and your capital under Share Capital — which proves the section links in Steps 3 and 4 are right. Then open the Ledger and Journal applet and find the journal for the test invoice from Step 9: one debit row to your trade-debtor code and two credit rows — one to a sales code, one to your output SST code — summing to RM 1,060. If both are true, the chart is wired correctly and GadgetSphere can start invoicing. (The Financial Report applet’s own Trial Balance will show the same numbers once you have run Month End Processing for December 2025 and created a snapshot — see the Financial Reporting Guide.)
Common mistakes
| Symptom | Cause | Fix |
|---|---|---|
| Rent and wages never close to profit and loss; they sit on the balance sheet after month-end. | Their category is linked to a section whose code the reports do not recognise — usually a section someone created called Expenses or Operating Expenses. Only the built-in codes (GeneralExpenses and the other ten P&L codes) close to profit and loss. | Open each affected category, GL Section tab, delete the link to the custom section and Add GeneralExpenses (or the right built-in code). Set the custom section INACTIVE. Re-run Month End Processing for the affected months. |
| A category is missing from the Chart of Account tree and from every statement, though it shows in the GL Category listing. | The category has no section link — it was created by hand without one, or its import row failed on SECTION_CODE. | Open the category, GL Section tab, Add the section, save. |
A sales invoice is FINAL but has no journal; Trace Document reports Missing Journal with MISSING_DEFAULT_GL_CODE: DEBTOR, TOTAL_DEBITS_AND_TOTAL_CREDITS_NOT_BALANCES or NO_JOURNAL_CREATED. | A Default GL Code was left blank in Step 7. The entity roles (trade and non-trade debtor and creditor) are named in the message; a missing Sales, Output Tax or Input Tax mapping is not — its journal line is silently dropped and the balance check fails instead. | Open the GS company, Default GL Codes tab, map the missing role (Entity tab for debtor and creditor; Sales tab for Sales and Output Tax; Purchase tab for Purchase and Input Tax), SAVE. Then Resolve the document in Trace Document — every document finalised while the mapping was missing needs it. |
| The GL Code import flags every row GL Category is invalid, or the category import fails with INVALID SECTION CODE. | You pasted names where codes belong. GL_CATEGORY wants the category code (CAT-CASH-BANK); SECTION_CODE wants the section code (CurrentAssets), exactly as shown in the GL Section listing. | Replace the names with codes, copied from the listings, and re-upload. For a partly-imported category file, remove the rows that already went in. |
| The GL Code listing and the journal-line drop-down are cluttered with 200 numeric accounts you never created, and staff pick the wrong one. | Every new chart is seeded with BigLedger’s template chart — the full list is on the applet page. | Open GL Code, filter the template codes, set the ones you do not use to INACTIVE. Never create a second chart to escape them — it seeds another 200. The item-level GL picker on sales and purchase lines still lists inactive codes, and anything already posted to one stays in the reports; use GL Code Merge to move history you want out of the statements. |