Upload opening stock balances
Step 1 of the opening balance migration: bring each branch’s item quantities and cost values across from the legacy system, before go-live. It comes first because it establishes the stock ledger valuation that the inventory control account in the general ledger is reconciled against (why the sequence is mandatory). Read how the file import reads your file before you fill in the template.
- Stock balance upload: prepare, fill in and import the template, then verify it.
Stock balance upload
- Purpose: Import item quantities and cost values from the legacy system into BigLedger.
- Timing: Perform this process before go-live, after confirming physical stock counts.
- Preparation:
- Create a vendor named
ONE TIME SUPPLIERin the Supplier Applet. - Export the item balance report from the old system separately for each branch or warehouse location.
- Ensure item codes in your import CSV match the newly configured item codes in BigLedger exactly.
- For serialized items, prepare a single cell containing comma-separated serial numbers, matching the physical quantity.
- Create a vendor named
What to put in the stock upload template
Start from the Purchase Invoice (Internal) template and fill in these columns; delete the rest. The
separator, the header rules and the POSTING_STATUS behaviour are all described in
how the file import reads your file.
- One row per item per branch.
BRANCH_CODEis the destination branch — take it from the branch listing in the Organisation applet rather than from memory. The upload check only looks at the heading, so a wrong code gets through it and shows up later in the error column of the imported file, not at the top as a rejection. ENTITY_CODEisONE TIME SUPPLIER— the one-off vendor you created in preparation. Opening stock has to arrive from somebody, and this is the supplier the stock is “bought” from so the entry has a counterparty that will never appear in a real creditor report.TXN_DATEis your stock cutoff date, the same date on every row (2024-12-31in this guide).HDR_REF_NO— useOPENING BALANCE. It becomes the reference on the purchase invoice BigLedger creates, which is what makes the opening entry recognisable on a supplier ledger a year from now.SETTLEMENT_OR_ITEM_CODEis the BigLedger item code, andUOMthe unit of measure exactly as it is spelled in your item master.QTYis the counted quantity andUNIT_PRICE_INCL_TAXthe unit cost. Delete anyAMOUNT_INCL_TAXcolumn — if it carries a value it overrides quantity × unit cost and your stock valuation will be wrong while the quantity looks right.ITEM_SERIAL_NOonly for serialised items: one cell, serial numbers separated by commas, and as many of them as the quantity says.
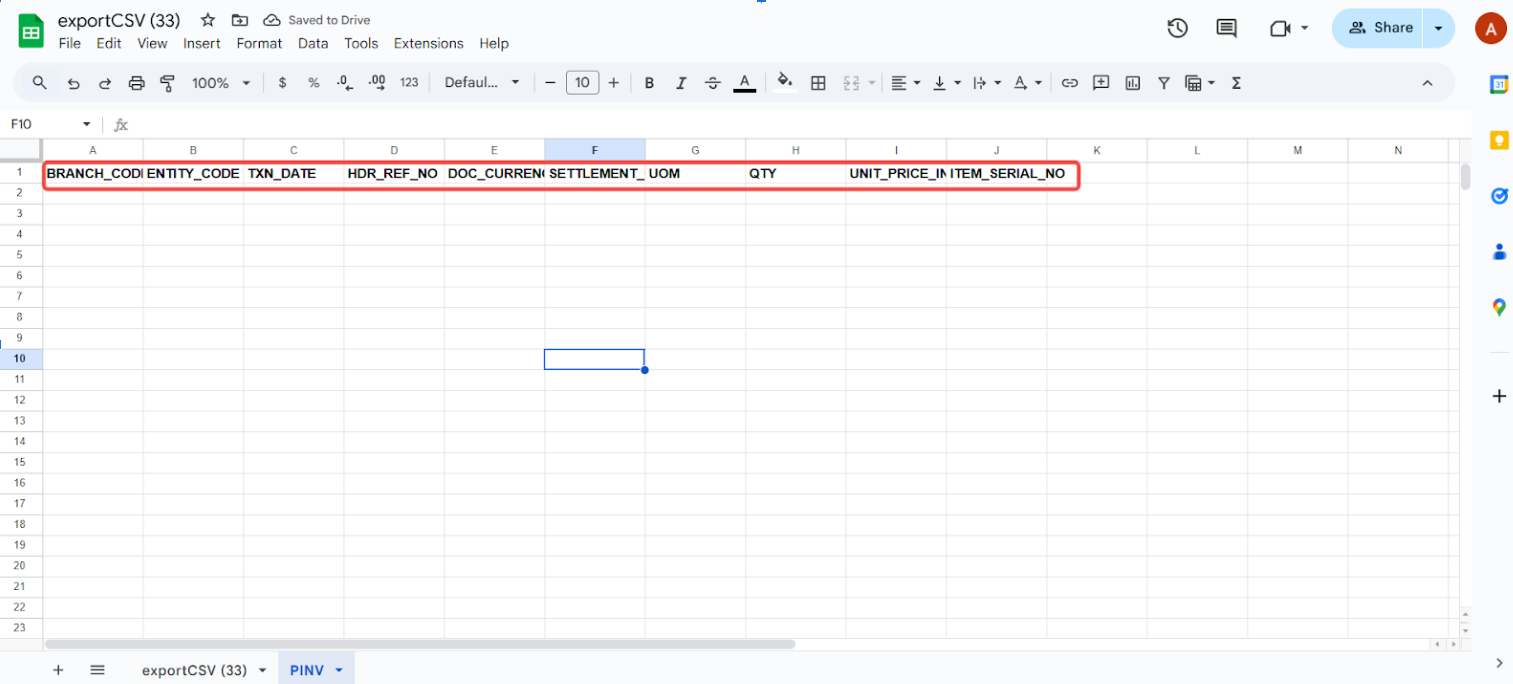
Updating the purchase invoice template
Branch code, transaction date, currency, HDR reference and entity code:
- Enter the branch code (check the correct branch code from the Organisation Applet branch listing).
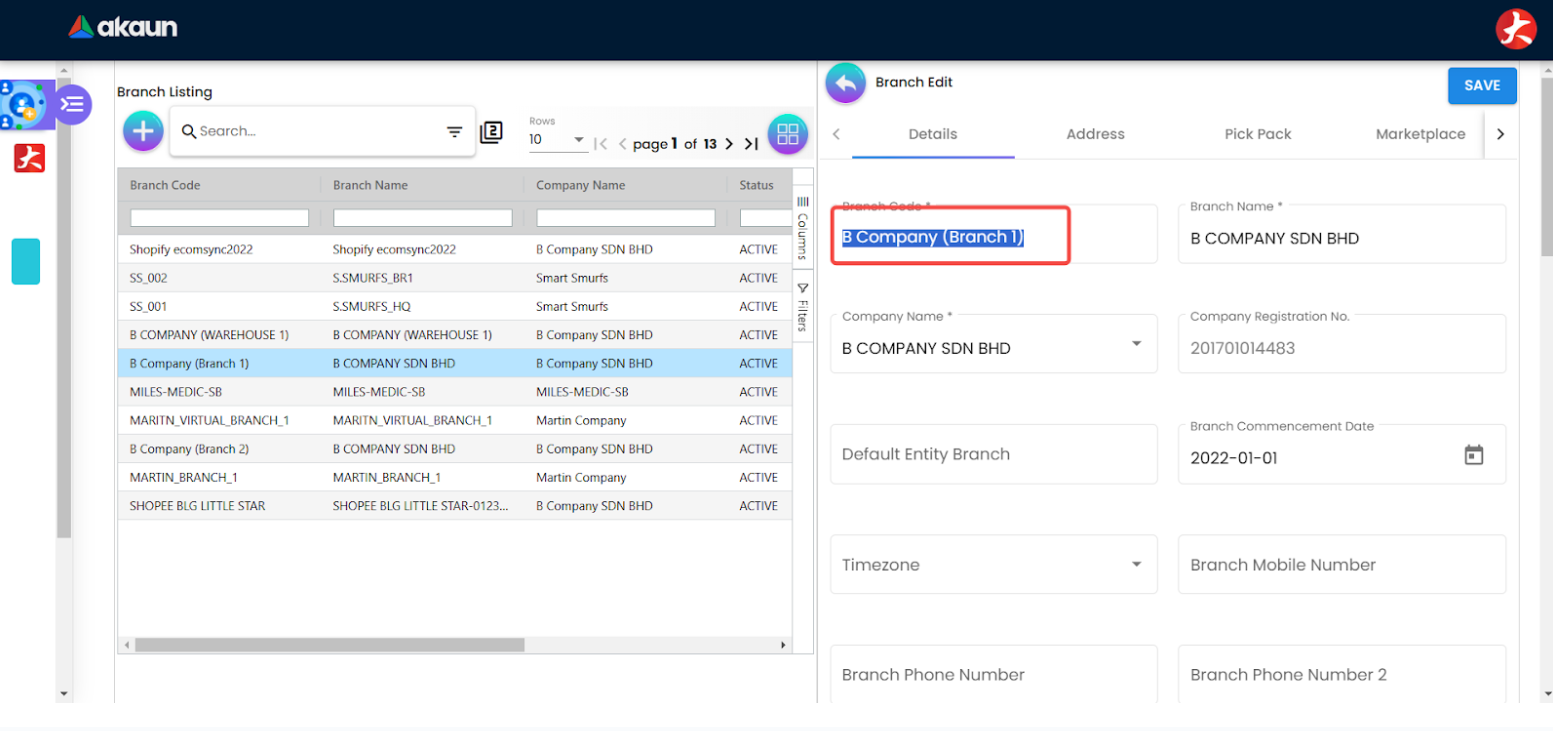
- Set the transaction date to
2024-12-31. - Enter
OPENING BALANCEfor the HDR Reference. - Enter
MYRfor the currency column. - Enter
ONE TIME SUPPLIERfor the Entity Code (ensure the supplier is created in the Supplier Applet first). - Enter the UOM based on your Item list in BigLedger (e.g.,
PCS,UNIT).
Screenshot withdrawn; a recapture from a demo tenant is on the list.
Item details:
- Update the following columns by copying from the legacy system reports to the Purchase Invoice template:
- Item Code
- Quantity
- Serial Number (use a comma
,to separate multiple serial numbers in one cell) - UNIT_PRICE_INCL_TAX
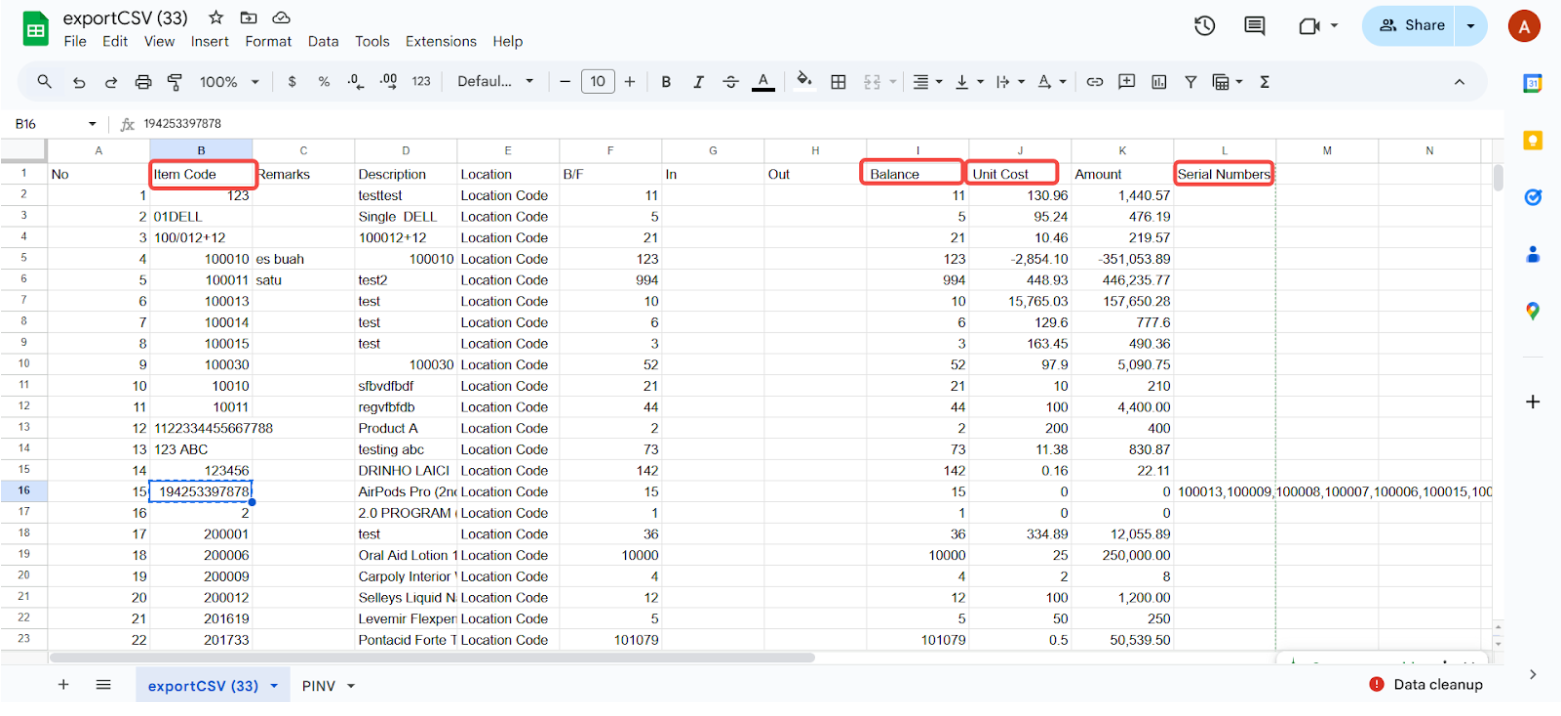
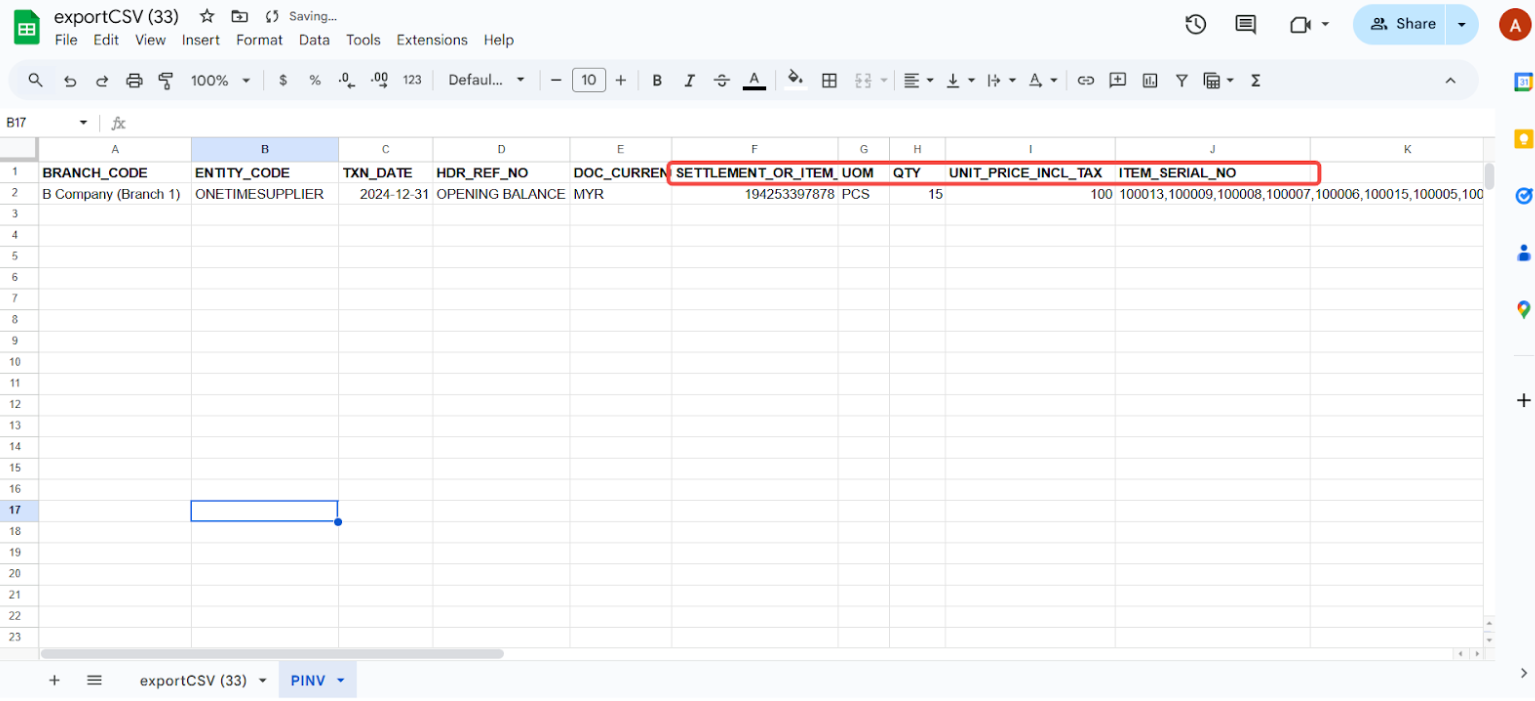
Finalizing the purchase invoice upload file
Validate data:
- Ensure all headers, quantities, costs, and serial numbers are accurate.
- Delete any extra or blank columns — an unnamed column left behind by a spreadsheet is reported as a wrong column and fails the whole file before any row is read.
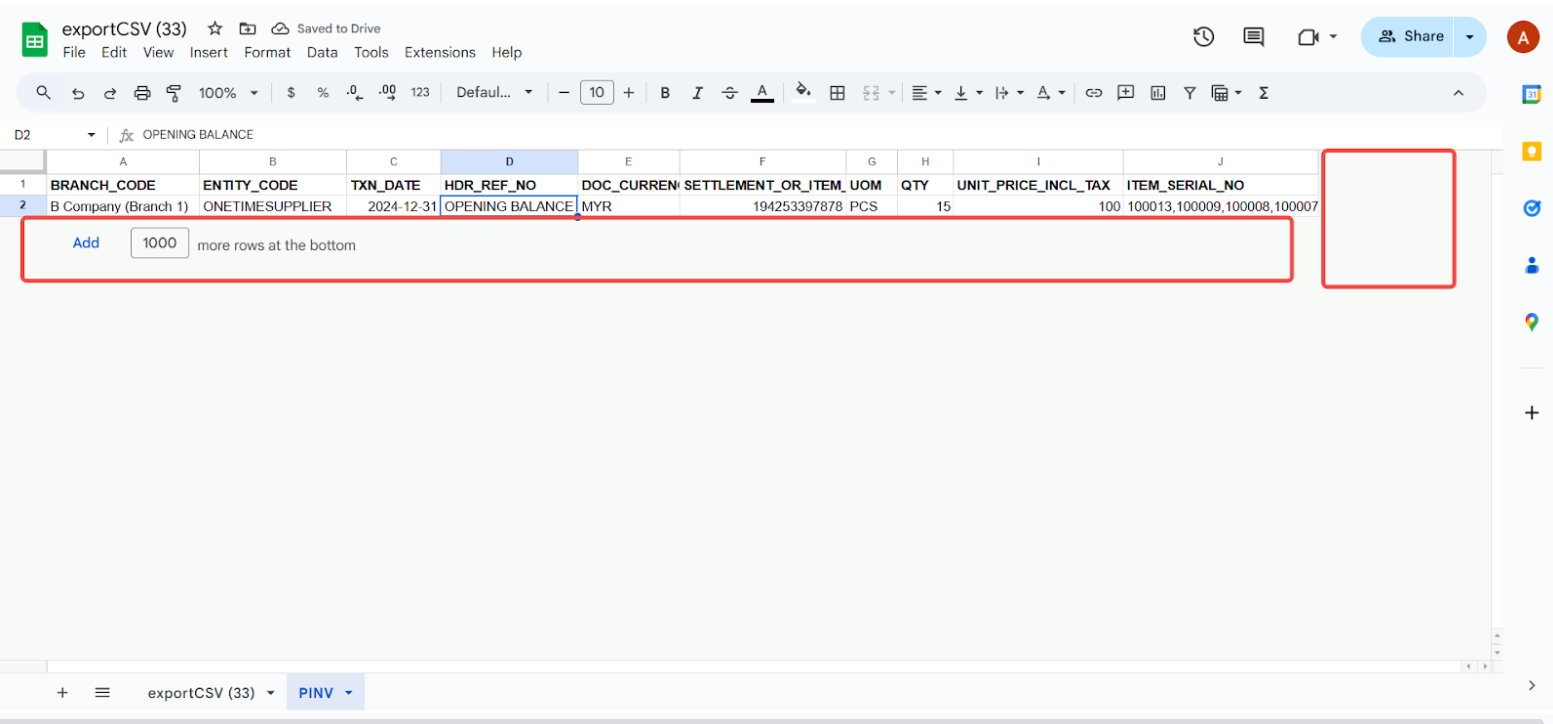
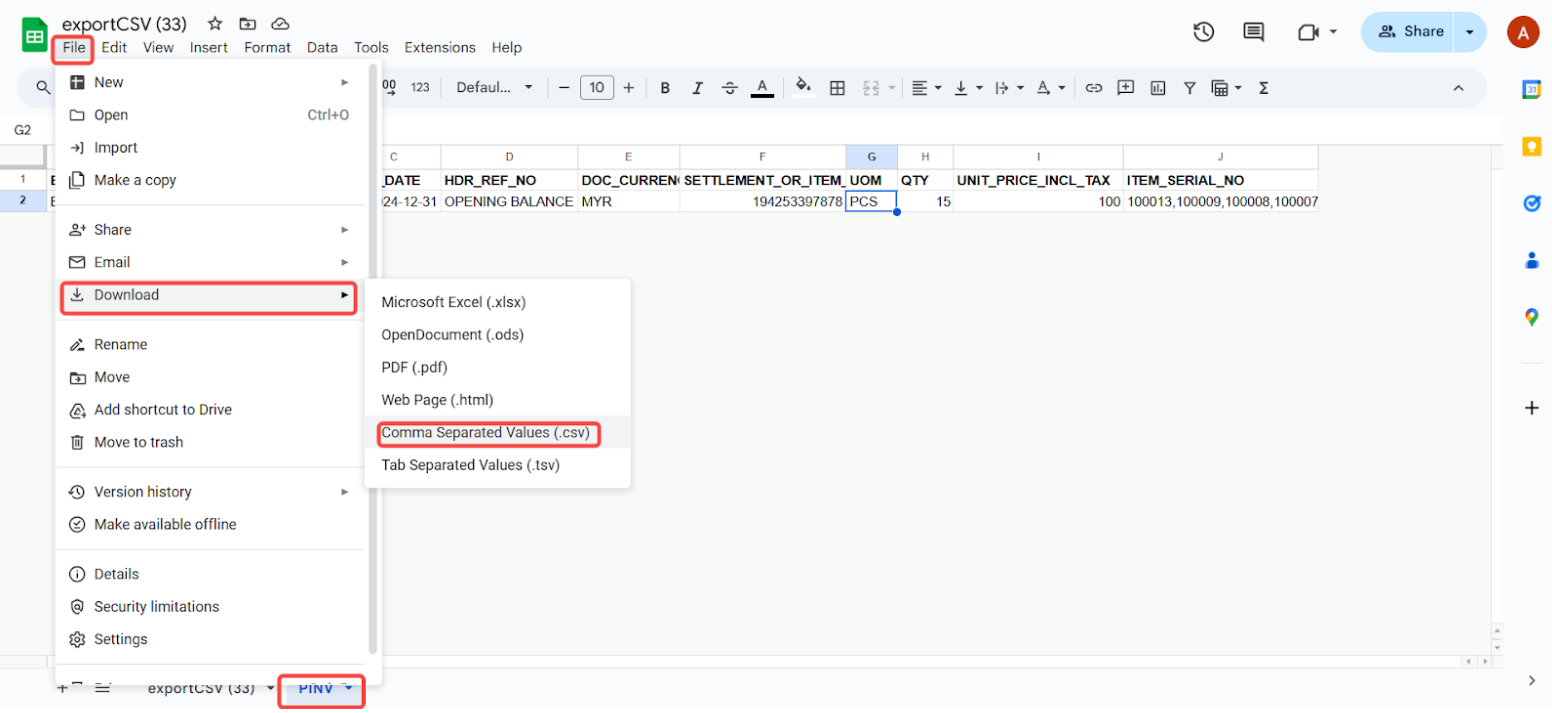
Export and import to BigLedger:
- Export as CSV: Download the updated template as a CSV file.
Executing the stock import
- Open the Purchase Invoice (Internal) Applet.
- Click Import File, click the + button, drag your prepared CSV file, and click submit.
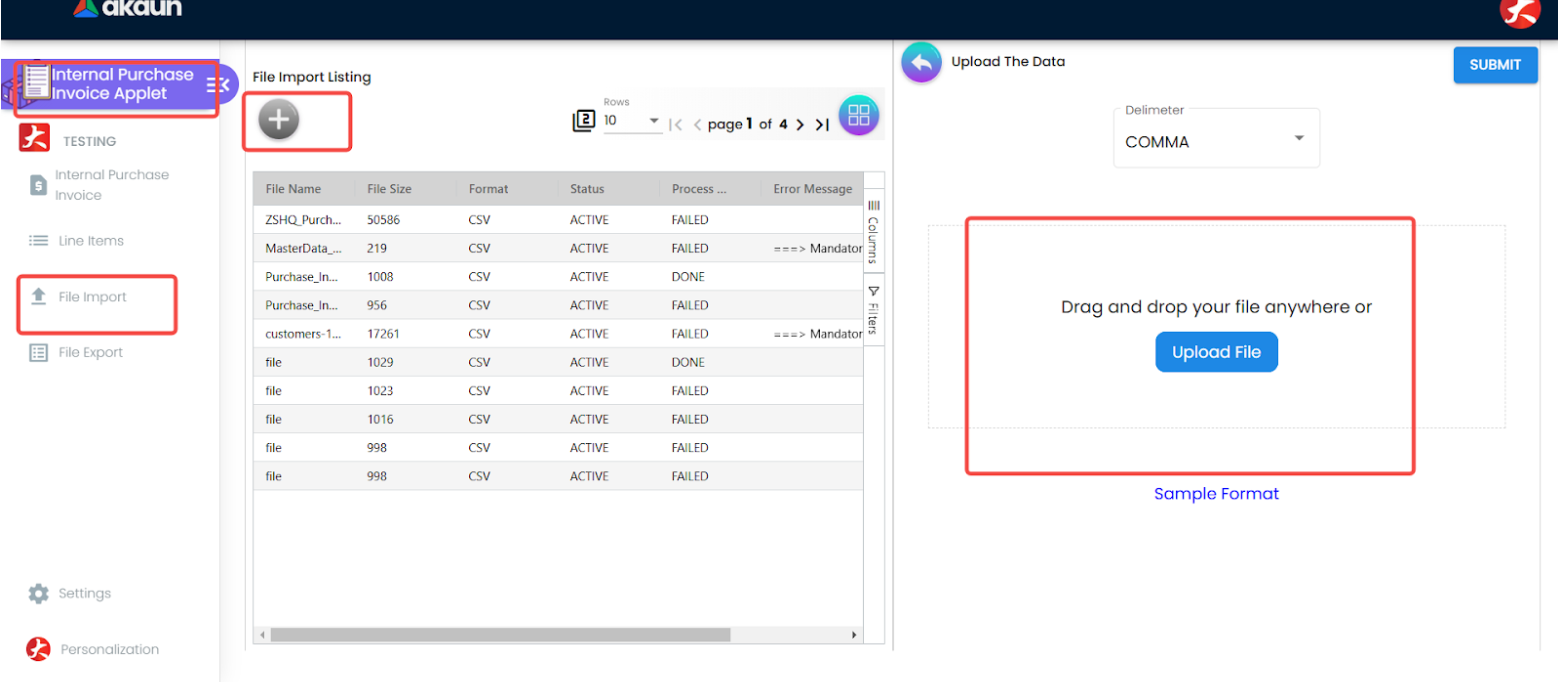
Upload the CSV file in the Purchase Invoice (Internal) Applet. - Check for errors by clicking into the imported file list. A status of
truemeans uploaded successfully;falseindicates errors. Scroll right to read the red error messages.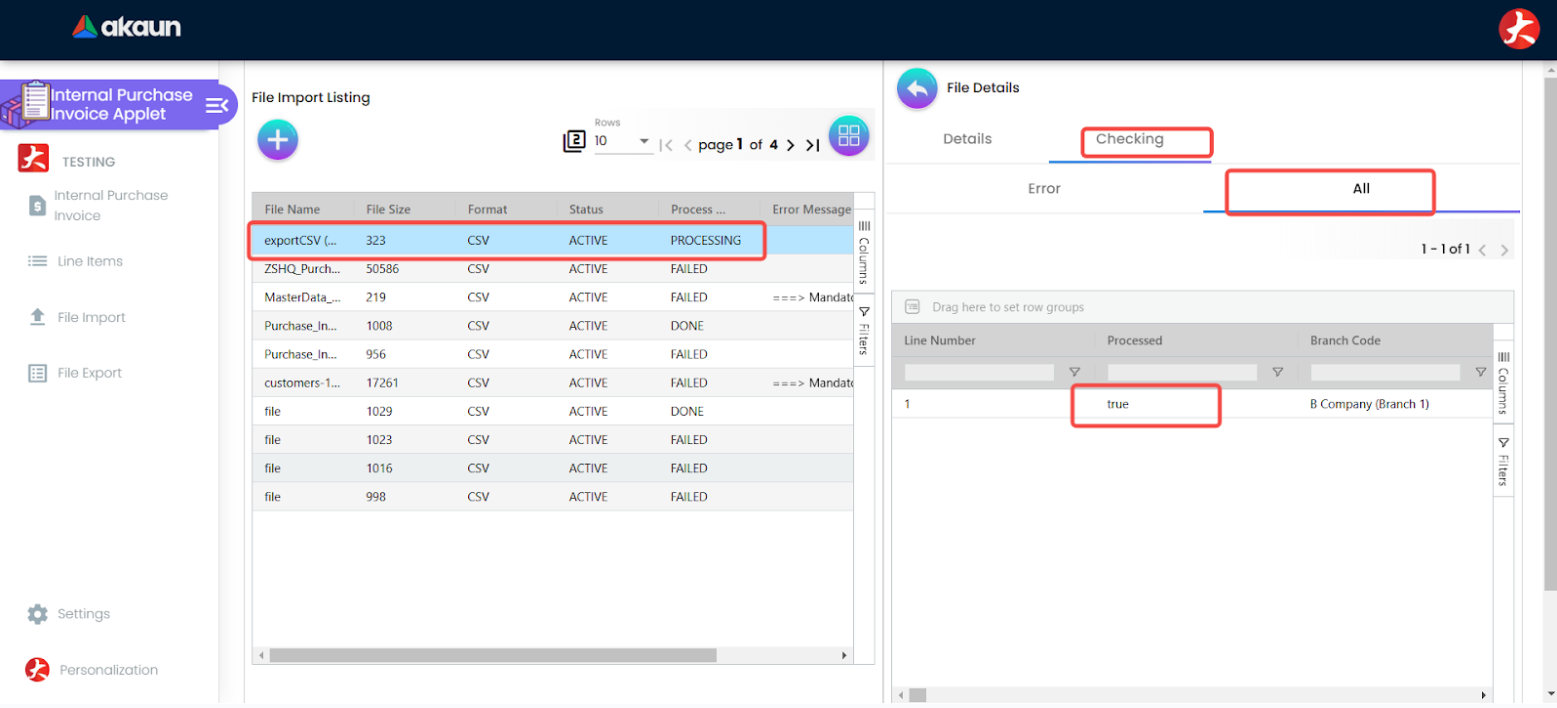
Check status and resolve errors in the import log. - Go to the Purchase Invoice (Internal) menu list. The imported data will be saved as
DRAFT. - Click into the draft document, verify line details, and click FINAL to post the stock opening balances.
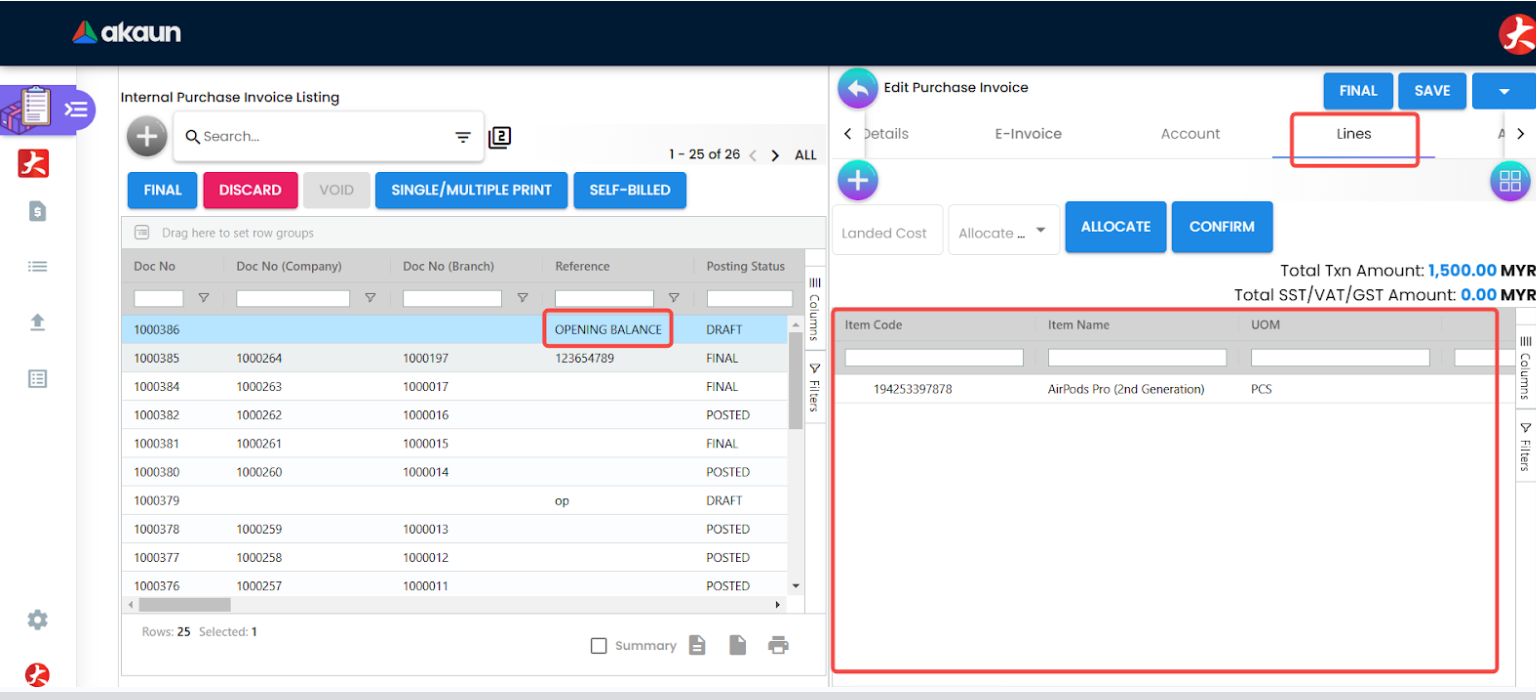
Review details and click Final to commit stock balances.
Post-upload verification
- Open the Stock Availability applet and filter by branch to verify that quantities and cost valuations match your legacy stock reports. The Purchase Invoice (Internal) is the document that books stock (quantity signum +1) — a plain Purchase GRN would record the receipt without moving stock, which is why this procedure uses the invoice.
Common mistakes
- A leftover
AMOUNT_INCL_TAXcolumn. The quantities are right, the valuation is not, and there is no error — the amount silently overrides quantity × unit cost. This is the one to check first when opening stock value does not agree with the legacy report but the quantities do. - Mismatched item codes. An item code that does not exist fails its row, not the file, so the import reports a partial success and you have to read the error column to find out which rows never arrived.
- Serial number count. The number of comma-separated serials in
ITEM_SERIAL_NOhas to equalQTYexactly. - Wrong UOM.
PCSandpcsare not the same string to your item master.
What success looks like for this part
The check under Post-upload verification above passes for every branch: quantities and cost valuations on Stock Availability match your legacy stock reports. When all five areas are loaded, run the whole migration’s success check.
Next: the customer and supplier balances.
Related documentation
- Opening Balance Migration Guide: the sequence, the import rules every template follows, and the whole migration’s success check.
- Purchase Invoice (Internal) Applet: the import that books opening stock.